XTab 79 QCI - Tablet WayteQ - Free user manual and instructions
Find the device manual for free XTab 79 QCI WayteQ in PDF.


| Product Type | Tablet |
| Brand | WayteQ |
| Model | XTab 79 QCI |
| Display | 7.9" IPS, 5-point capacitive touch, 1024x768 resolution |
| Processor | Rockchip 3188 Quad-core Cortex-A9 1.8 GHz |
| RAM | 1 GB |
| Internal Storage | 8 GB NAND Flash |
| Expandable Storage | microSD up to 32 GB |
| Operating System | Android 4.2.2 |
| Battery | Li-Polymer 3.7V, 4000 mAh, rechargeable |
| Camera | 0.3 MP front camera |
| Wi-Fi | 802.11 b/g/n |
| Bluetooth | Built-in |
| USB | USB OTG 2.0 |
| TV Output | Micro HDMI |
| Audio | Built-in speaker, microphone, 3.5mm headphone jack |
| Sensors | G-sensor, Light sensor |
| Dimensions | 201 x 135 x 8 mm |
| Weight | 344 g |
| Input | Capacitive touch screen, hardware keys (Power, Vol+, Vol-) |
| Power Adapter | 5V/2A AC adapter |
| Cleaning | Screen: soft lens cloth; Exterior: damp cloth |
| Safety Precautions | Avoid water, use only included adapter, unplug when not charging |
| Accessories Included | AC adapter, USB cable, OTG adapter, Quick Start Guide |
Frequently Asked Questions - XTab 79 QCI WayteQ
User questions about XTab 79 QCI WayteQ
0 question about this device. Answer the ones you know or ask your own.
Ask a new question about this device
Download the instructions for your Tablet in PDF format for free! Find your manual XTab 79 QCI - WayteQ and take your electronic device back in hand. On this page are published all the documents necessary for the use of your device. XTab 79 QCI by WayteQ.
USER MANUAL XTab 79 QCI WayteQ

TABLE OF CONTENTS
INTRODUCTION....3
I - GETTING STARTED....3
Important Safety Precautions ....3
Cleaning the Panel....3
Cleaning the Personal Touch Tablet ....3
Features....4
Buttons Overview 4
Accessories....5
What's in the Box 5
Charging the Battery 5
Power on/off and Unlock Personal Touch Tablet....5
II - FUNCTIONNING OF THE TABLET....6
Navigation 6
Home Screen 6
Application Launcher Screen....6
Status Bar 7
Onscreen Keyboard 7
III - SETTINGS....8
Set Up Wi-Fi Connection....8
Set Date and Time....9
Set Up Email 9
Set Up Calendar....10
Create Shortcuts or Widgets on Home Screen 11
Change Wallpapers....11
Use folders....11
IV - CONNECTIONS ....12
Wi-Fi....12
PC Connection....12
Connect to TV set....12
V - APPLICATIONS....13
Camera 13
Clock....14
Browser....15
Calculator....16
Downloads 16
Gallery....17
Music....18
Movie Player 19
VI - PRODUCT SPECIFICATION....20
INTRODUCTION
First of all, thank you very much for purchasing WayteQ product!
Please read this manual carefully before using this product.
This company will connue to provide new funcons for the development of the product, and there will be no separate change in the case of any change in the product's performance and funcons.
If the actual setup and the applicaon methods are not identical to those as set forth in this manual, please access to the latest product informaon of our web site.
I - GETTING STARTED
Important Safety Precautions
Always follow these basic safety precautions when using your Personal Touch Tablet. This will reduce the risk of re, electric shock and injury.
Warning: To reduce the risk of re of shock hazard, do not expose this product to rain or water.
Warning: To prevent the risk of electric shock, do not remove the cover. There are no user-serviceable parts inside. Opening will void your warranty.
- Unplug the Personal Touch Tablet before performing maintenance.
- Keep your Personal Touch Tablet out of direct sunlight and heat sources.
- Protect the power cord. Route power cords so that they are not likely to be walked on or pinched by items placed on or against them. Pay parcular aenon to the point where the power cord is aached to the Personal Touch Tablet.
- Only use the AC adapter included with the Personal Touch Tablet. Using any other power adapter will void your warranty.
- Unplug the power cord from the outlet when the unit is not in charging condion.
Cleaning the Panel
Treat the screen gently. The screen is made of glass and can be scratched or broken.
To clean ngerprints or dust from the screen, it is recommended to use a so, non-abrasive cloth such as a camera lens cloth to clean the screen.
If you use a commercial Cleaning Kit, do not apply the cleaning liquid directly to the screen. Clean the screen with cleaning cloth moistened with the liquid.
Cleaning the Personal Touch Tablet
Clean the outer surface of the Personal Touch Tablet (excluding the screen) with a so cloth dampened with water.
Features
Welcome to the Personal Touch Tablet! The Personal Touch Tablet includes these key features:
- Displays Alarm, Browser, Calculator, Calendar, Camera, Clock, Email, File Browser, Gallery, Music, Seng, Movie Player and etc
- Displays digital photos, Play Music and Video
- Wi-Fi funcon to connect with your AP router for internet browsing
- Micro Secure Digital™ (micro SD) slot for external storage
- Capacive touch screen for all user operaons
- 8 GB Internal Memory
- USB2.0 OTG for conneccon to the PC or USB ash drive
Buttons Overview
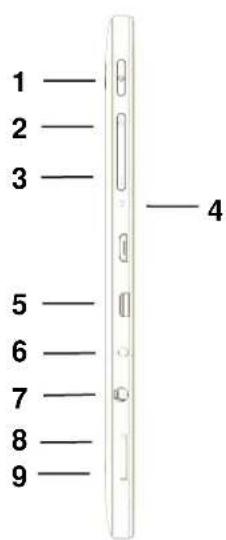
natural_image
Line drawing of a small electrical adapter with power outlet, coiled cable, and terminal plug (no text or symbols)Power Adapter
(depending on the regional requirement, the plug may look dierent)
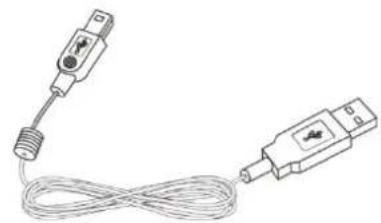
natural_image
Line drawing of two connected electrical probes with a coiled cable (no text or symbols)USB Cable
What's in the Box
WayteQ xTAB-79qci Personal Touch Tablet
AC Power Adapter (5V/2A)
USB Cable, OTG adapter
Quick Start Guide
Charging the Battery
Plug the AC power adapter into the Personal Touch Tablet and into a wall outlet.
Icon will turn to icon while the baery is charging.
* It is strongly recommended you fully charge the device for about 4-6 hours before use. * When charging
baery, the baery indicator for a fully charged baery is a steady blue baery icon on the nocaon bar.
icon means the baery is sll being charged, even when 100% has been displayed for baery level on the Sengs
→ About tablet→ Status screen.
Power on/off and Unlock Personal Touch Tablet
The Personal Touch Tablet is easy to set up. Just follow these steps:
- To power: Press and hold Power buon for 2 second.
- To unlock: Wait unl a screen with a lock icon shows up, gently tap the "Lock" icon and slide it toward the unlock icon.
- To power o: Press and hold the Power buon for 2 seconds until "Power o" window pops up on screen where you can choose OK upon to power o the device.
Note: The screen with the lock icon will me out in 10 seconds if you do not unlock it. In case it happens, the Power buon can be pressed briefly to make it show up again.
II - FUNCTIONNING OF THE TABLET
Navigation
Tablet has ve home screens by default. The rst me you turn on the tablet or aer having factory data reset, you will see a navigaon screen.
* To see all you applicaons, touch .
* You can put your favorite applicaons on Home screen.
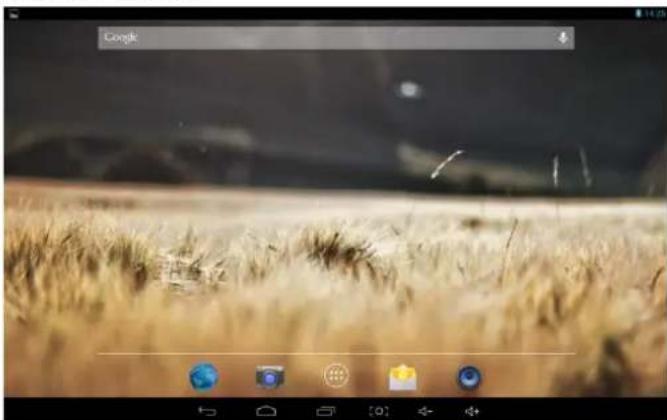
Home Screen
natural_image
Desktop screenshot showing a weathered field with a 'Google' window title and application icons (no readable text on main subject)A typical Home screen with wallpaper, status bar, and few applicaons at the boom.
* The background wallpaper may be dierent from model to model
◆ Google
- 10% 10% 10% 10% 10% 10% 10% 10% 10% 10% 10% 10% 10% 10% 10% 10% 10% 10% 10% 10% 10% 10% 10% 10% 10% 10
◆ shortcut to applicaon Launcher screen.
Application Launcher Screen
A typical applicaon Launcher screen is shown below. One icon represents one applicaon which can be run by tapping on the icon.
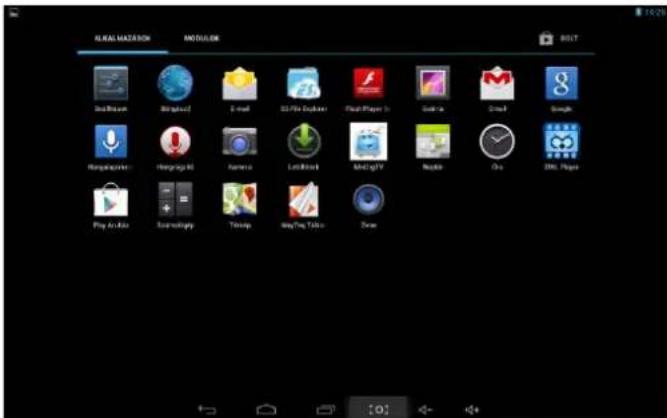
*The screen icon may be dierent from model to model
Status Bar
At the boom of the screen, the status bars mainly indicates Back icon, Home icon, Recent viewed applicaons icon, Current me, Wi-Fi status, 3G status, Bluetooth status and baery level, etc.

| Icon | Acon |
 | On any funconal screen, tap this icon to go back one screen or exit applicaon. |
 | On any funconal screen, tap this icon to go to Home screen |
 | Shows a list of thumbnail images of applicaons you’ve work with recently. To open an applicaon, touch it. To remove a thumbnail from the list, swipe it le or right. |
 | Screenshot |
 | Current me |
 | Wi-Fi conncon and signal strength |
 | Baery level. Will turn orange when baery is low and turn red when baery is very low. |
Onscreen Keyboard
The onscreen keyboard appears automatically anymore you tap on a text line for input. While entering text with the onscreen keyboard, each character will be entered into the posion pointed by a vercal cursor. You can change the cursor posion by tapping with your nger on the posion you want to enter the next character. To select dierent language keyboard, touch and hold icon A pop menu will show up to let you select the "Input Opons"
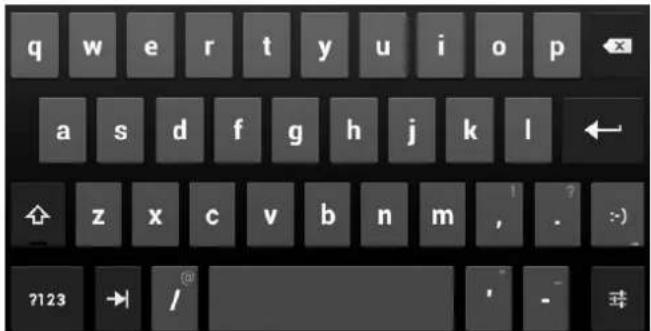
Input options
Input languages
Android keyboard settings
*Seng up an Internaonal keyboard: see "Install Third-Part Applicaon" secon.
III - SETTINGS
Set Up Wi-Fi Connection

Make Wi-Fi Connecon In Sengs → Wireless & networks → Wi-Fi, slide the Wi-Fi switch to the ON posion.
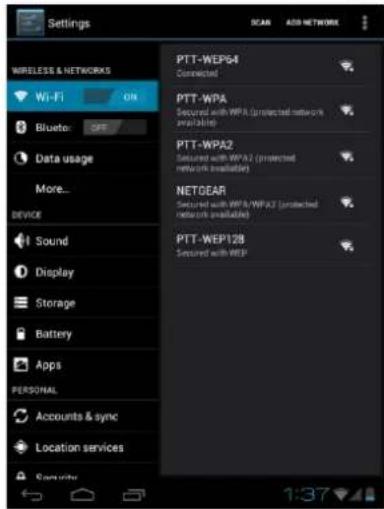
Normally, the device will automatically scan the available Wi-Fi Access Point (AP). If this does not happen, select Scan (upper right corner) to scan for the available Wi-Fi APs. Then, tap on the desired AP to make the conncon. If it is a secured AP, system will prompt you for the password. Enter it by tapping on the password entry line, and use the onscreen keyboard to enter the password. Then, tap on the Connect to start conncng to that AP.
When conncon is established, the Wi-Fi connected icon will show up on the status bar.
Set Date and Time

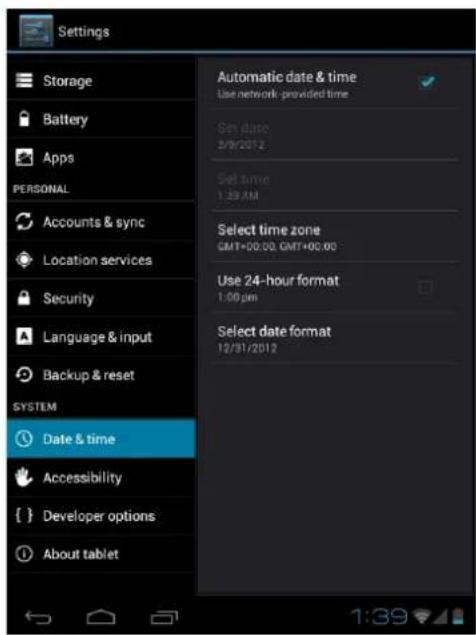
Use Sengs → Data & Time to open up the data/me seng screen as shown below. Select the correct me zone. If the Wi-Fi is connected to Internet, check on the Automac to have me set up automacally. If Wi-Fi is not connected to Internet, uncheck Automac date & me to temporarily set date and me. Then, check Automac again before leaving the screen. In the future, when the Wi-Fi is connected to internet, date and me will be automacally adjusted.
Set Up Email

You can congregate Email for most accounts in just a few steps. For many popular email services, tablet automacally enters most of the sengs for you.
- Make sure the Wi-Fi is connected.
- Open the Email applicaon and enter your Email address and password, then tap "Next"
- Give a name to your account then tap "Next". Mail messages will be downloaded automatically.
| Icon | Acon |
| Tap to enter E-mail compose interface | |
| Tap to enter search interface of Inbox | |
| Refresh | |
| Tap to enter Account sengs. To remove your account record in tablet, tap Remove account |
Set Up Calendar

Calendar makes you easy to stay on schedule. You can view your schedule in day/week/month/and agenda mode by touching icons at upper le corner. Swipe to scroll vercally or horizontally.
When using calendar for the rst me, there are some steps you shall follow:
- Tap Calendar icon into Gmail entering interface, then enter your Gmail account and password and tap Next.
- Change the Serve "gmail.com" for "m.google.com", then tap Next step.
- You can tap on the specific date to start using your personal calendar now.
Icons across the top:
| Icon | Acon | |
| TODAY, MONDAYFebruary 13, 2012 | Tap to see the viewing type: day/week/month/and agenda | |
| [TX8Y] | TODAY | Tap to view today's schedule |
| [DZDC] | Tap to show the creang events interface | |
 | Tap to show more opons: Refresh/Search/Sengs | |
Create Shortcuts or Widgets on Home Screen
In order to access to frequently used applicaons / widgets more quickly, you can create a short cut to an applicaon / widget and place it on the Home screen. Therefore, you don't need to spend to look for it among the many applicaons / widgets on the Launcher screen.
Shortcuts
Press the applicaon icon in the Launcher screen and hold unl the icon is enlarged and background has been changed to Home screen. Then drag the enlarged icon to an empty space on Home screen and release the nger.
Widgets
Widget is a small applicaon. Aer being installed, it shows up in the main Widgets screen.
To add widgets: Touch and hold a widget, drag it to an empty space on Home screen and release your nger.
To remove shortcut / widget: Tap and hold any icon / widget on Home screen, then drag it into the Remove icon.
* If there is not enough room to drop it, the icon / widget won't get added to the Home screen.
Change Wallpapers
Tap any blank space on Home screen and hold unl a Choose wallpaper from menu pops out. Then, you can select wallpaper from your Gallery / Live wallpapers / Wallpapers.
Choose wallpaper from

Gallery

Live Wallpaper

Wallpaper
Use folders
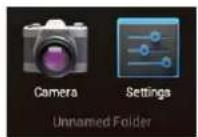
You can combine several applicaons' icon in a folder by dropping one icon over another on a Home screen.
From any Home screen, you can:
Open a folder by a slight touch.
Rename a folder by touching its name.
Move icons around your Home screens : Touch, hold, and then slide.
IV - CONNECTIONS
Wi-Fi
This tablet uses the 802.11b/g/n wireless specicaon to transmit and receive data. For more informaon, refer to "Set up Wi-Fi Connecon" on page 8.
PC Connection
Connect your tablet to a PC via USB cable. By connecng tablet to PC, you can synchronies les or transfer data directly.
- Plug one end of a USB cable to a tablet and plug the other end to a PC. Tap Turn on USB storage to connect to PC.
- For a beer use of your tablet, tap Turn o USB storage every me you unmount USB storage.
Connect to TV set
To display screen from the tablet to a TV or Monitor equipped with HDMI input
- Go to "Sengs" and look for "HDMI" in "Device" menu.
- Look for "Turn on HDMI" and check the checkbox then plug Tablet to TV or monitor.
To set resoluon go to "HDMI Resoluon" menu and set the screen size. You can zoom in with "Screen Zoom" funcon. Set the slider to the corresponding posion.
V - APPLICATIONS
Camera

To take picture
Make sure mode switch is set to , the photo mode.
Tap on the shuer buon to take a picture.
To record video
Make sure mode switch is set to , the video recording mode.
Tap on the Recording buon to start video recording. To stop recording tap .
On the preview of the camera, tap you can set scene mode (Auto or Night), Store locaon (On/O) and picture size. Tap adjust white balance.
Clock
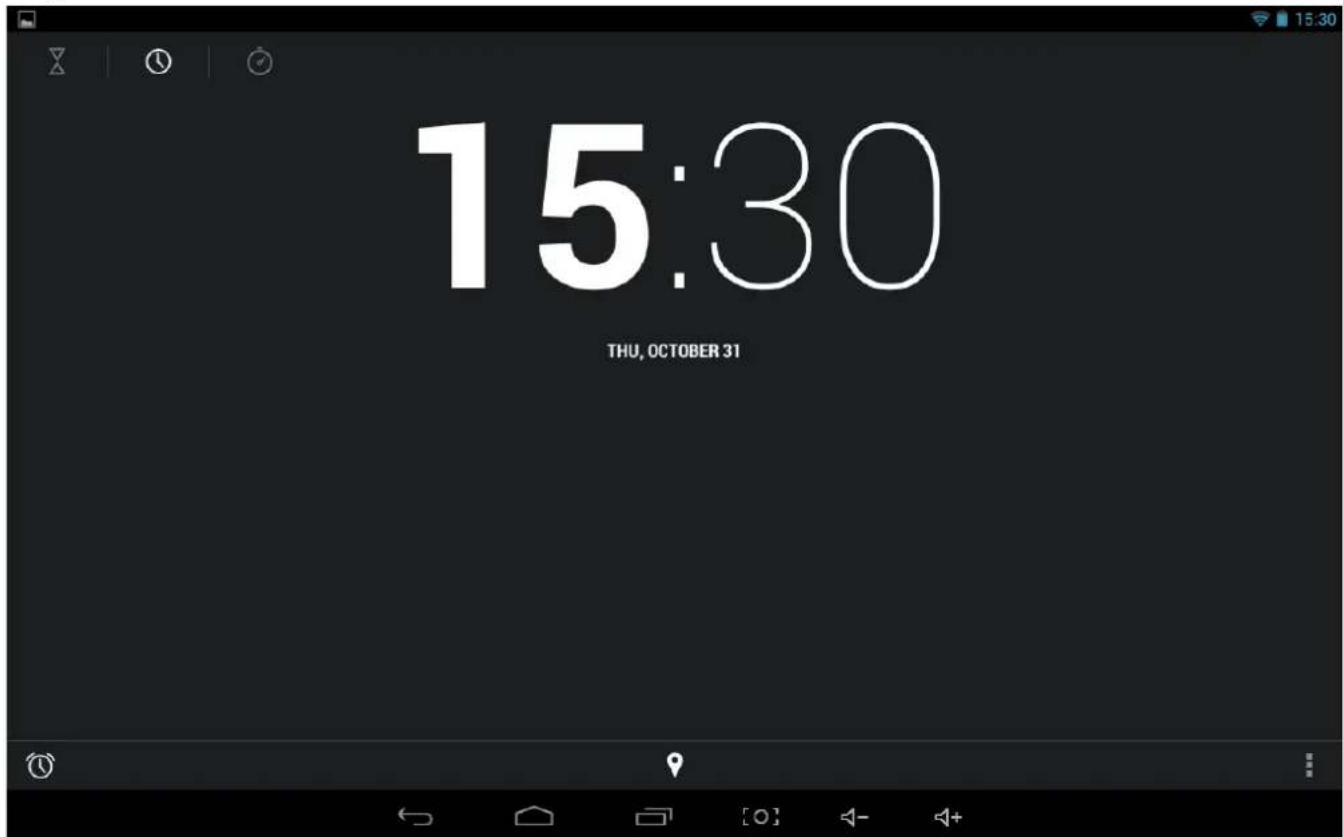
Aer tapping on clock icon in Launcher screen, the following screen will be shown. Tap on icon into alarm seng interface.
Browser

Browser is used for browsing the World Wide Web. With the web browser plug-ins, you could browse websites to watch videos, download contents, and listen to music etc.

Google Magyarors

8 Get the Google Search app, designed for the iPad
Unknown - Use precise location

- Tap the address eld (in the tle bar) to bring up the onscreen keyboard, enter website address, then tap Go.
- Similar website previously browsed or key work previous searched will appear beneath the address eld. You can tap them to go to the web site listed or search the key word.
- Double tap on screen to zoom in and zoom out. Moving ngers across the screen will pan the screen up, down, le or right.
Tap Menu buon is the right-upper corner to display additional funcons at the boom of the screen.
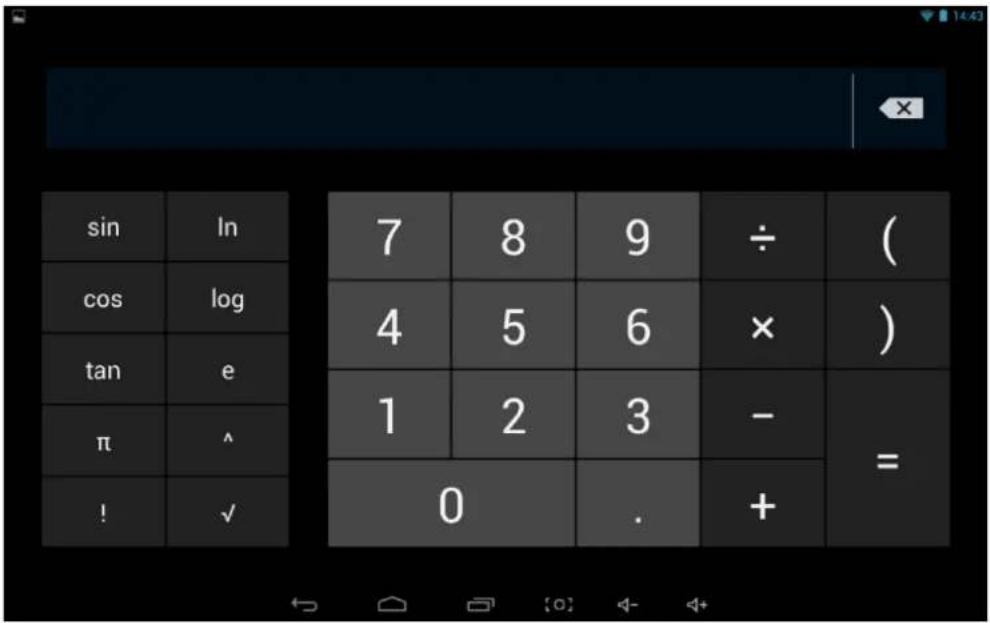
Calculator
To perform mathemacal calculaon directly on tablet by tap numbers and symbols.
Downloads

Files, applicaons and other items you download from Browser or Email will be stored in your micro SD card. Use the Downloads applicaon to view, reopen or delete what you've downloaded.
- Touch an item in Downloads can reopen it.
- Check items you want to share, and then tap icon to choose a sharing method from the list.
- Check items you want to delete; then tap delete icon. The item will be deleted from your micro SD card.
- In Downloads window → Tap Sort by size or Sort by date to switch back and forth.
Gallery
Tap on "Gallery" in Launcher screen to open the applicaon.
- The rst screen shows all photos and subfolders as albums.
- Tap on a picture or album into photo thumbnail mode. (Default view)
-
Tap a thumbnail into photo single view mode.
-
When in photo single view mode, tap anywhere on screen to show funcon bar on screen.
| Icon | Acon |
| Share photos by Google/Bluetooth/Email | |
| Go to more opons: Delete/Slideshow/Rotate le/ Rotate right/Crop photo/ Details/Set picture as |
Music

Tap "Music" in the applicaon launcher screen to get to the song screen as below:
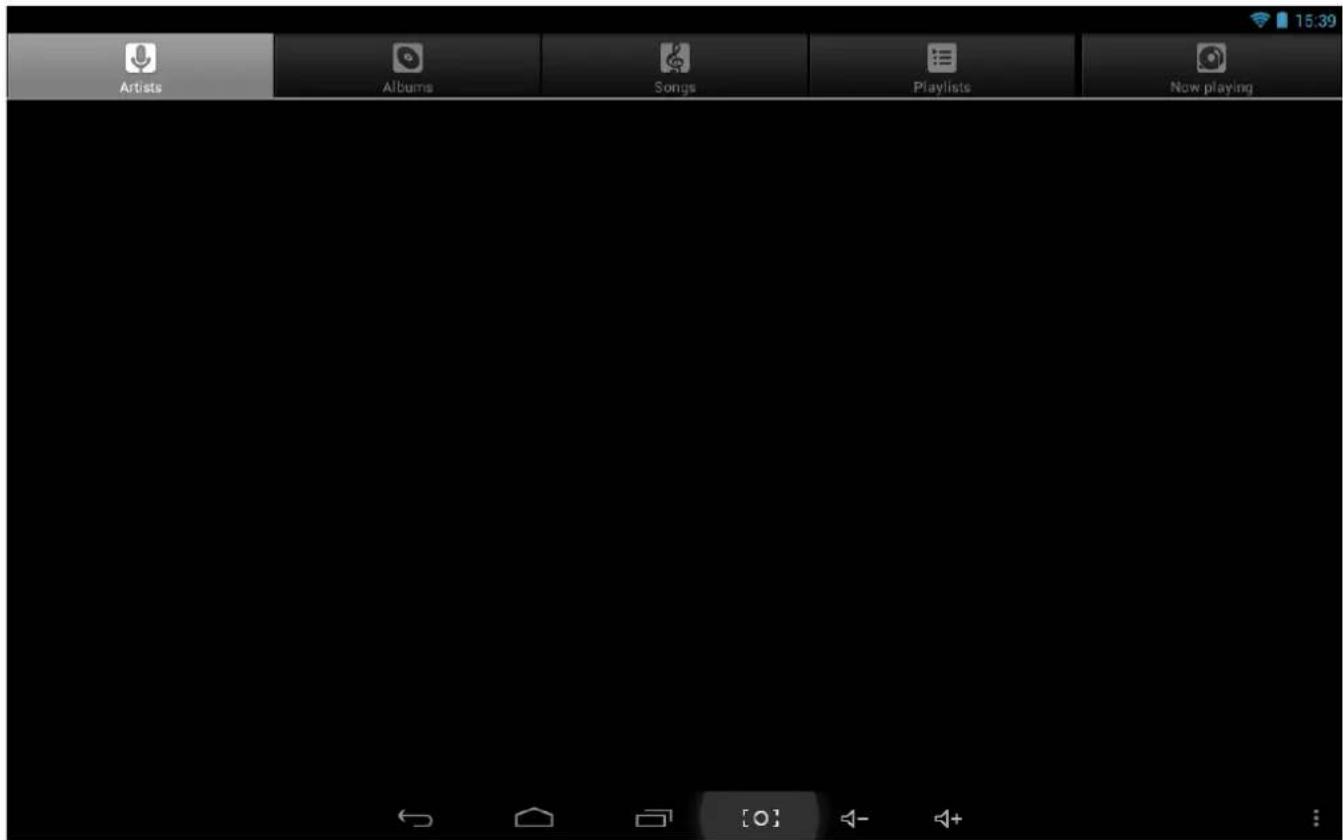
Select the Arsts/Albums/songs or playlists mode to play music. Use the onscreen icons to conjure how you want to play the songs.
| Icon | Acon |
| Show playing list | |
| Turn shue on/o funcon | |
| Repeang all songs, current song or O | |
| Previous song | |
| Pause/ Stop | |
| Next song |
Note: Song will keep playing as background music while you leave the music playback screen. This funcon allows you to browse les, view photos and surf Internet while listening to music. To stop playing songs, tap on Pause on the music playing screen followed by the Back buon.
Tap in status bar to select other funcons to play the song.
Movie Player
- Tap "Video Player" in the applicaon launcher screen.
- Browse the micro SD or internal memory to nd the video le to play.
- Tap video le to start playing video.
- While playing video le, tap anywhere on screen to display the control bar as below.
Drag the blue bar to fast forward or backward view video.

| Icon | Acon |
| Create bookmark | |
| Set brightness | |
| Previous video / Fast reverse | |
| Play/Pause | |
| Fast forward / Next video | |
| Set rao and video size | |
| User screen size, always on top | |
| Back | |
| More opons |
Tapping video playing appears in a separated window, which is always on top. To adjust video size tap and hold video and set the size with other nger. Video can be closed by tapping X on the middle of the video when tap and holding it.
More opons:
Delete Bookmark and Play from beginning
Delete Bookmark
Play mode: Single, Repeat one, Repeat all
Subtle select
Audio track select
Help
Return
VI - Product Specification
| General | |
| Panel Size/Type | 7,9" IPS, 5 points capacive touch panel |
| Aspect Rao | 4:3 |
| Resoluon | 124 x 768 |
| CPU | Rockchip 3188 Quad-core Cortex-A9 1,8 GHz |
| OS | Android 4.2.2 |
| Storage | |
| Internal memory | 1 GB |
| NAND Flash | 8 GB |
| External SD card | Micro SD up to 32GB |
| Connectivity | |
| WIFI | 802.11 b/g/n |
| Bluetooth | Built-in |
| Camera | 0.3 Mega pixel front |
| USB OTG | USB OTG 2.0 x 1 |
| TV-output | Micro HDMI |
| Stereo Speaker | Built-in |
| Microphone | Built-in |
| Earphone | 3.5mm Stereo Jack |
| Sensor | |
| G-sensor | Yes |
| Light | Yes |
| User Interface | |
| Hardware Keys | Power, Vol+, Vol- |
| Virtual | Full Touch Screen /Virtual keyboard |
| Dimension/Weight/Condion | |
| Dimension | 201 x 135 x 8 mm |
| Weight | 344g |
| Operaon Condion | 0°C~40°C |
| Storage Condion | -20°C~55°C |
| Power | |
| Baery | Li-Polymer Rechargeable 3,7V, 4000mAh |
| AC/DC Adapter | 100Vac~240Vac,0.5A, 50Hz-60Hz, 5V/2A |
- TABLE OF CONTENTS
- INTRODUCTION....3
- I - GETTING STARTED....3
- II - FUNCTIONNING OF THE TABLET....6
- III - SETTINGS....8
- IV - CONNECTIONS ....12
- V - APPLICATIONS....13
- VI - PRODUCT SPECIFICATION....20
- INTRODUCTION
- I - GETTING STARTED
- Important Safety Precautions
- Cleaning the Panel
- Cleaning the Personal Touch Tablet
- Features
- Buttons Overview
- What's in the Box
- Charging the Battery
- Power on/off and Unlock Personal Touch Tablet
- II - FUNCTIONNING OF THE TABLET
- Navigation
- Application Launcher Screen
- Status Bar
- Onscreen Keyboard
- III - SETTINGS
- Set Up Wi-Fi Connection
- Set Date and Time
- Set Up Email
- Set Up Calendar
- Create Shortcuts or Widgets on Home Screen
- Shortcuts
- Widgets
- Change Wallpapers
- Choose wallpaper from
- Use folders
- IV - CONNECTIONS
- Wi-Fi
- PC Connection
- Connect to TV set
- V - APPLICATIONS
- Camera
- To take picture
- To record video
- Clock
- Browser
- Google Magyarors
- Calculator
- Downloads
- Gallery
- Music
- Movie Player
Brand : WayteQ
Model : XTab 79 QCI
Category : Tablet