KIT-8VWTXPQ - Car stereo ALPINE - Free user manual and instructions
Find the device manual for free KIT-8VWTXPQ ALPINE in PDF.

| Brand | Alpine |
| Model | KIT-8VWTXPQ |
| Product Type | Car Stereo |
| Form Factor | Single DIN |
| Dimensions (W x H x D) | 7.0 x 2.0 x 6.5 inches (178 x 50 x 165 mm) |
| Weight | 3.3 lbs (1.5 kg) |
| Power Supply | 12V DC (negative ground) |
| Maximum Power Output | 4 x 50 Watts |
| RMS Power Output | 4 x 18 Watts |
| Playback Media | CD, CD-R/RW, MP3, WMA |
| Tuner Bands | FM, AM |
| Bluetooth | Built-in for hands-free calling and audio streaming |
| USB Input | Front USB port for iPod/iPhone and USB drives |
| Auxiliary Input | Front 3.5mm AUX input |
| Preamp Outputs | 3 sets (Front, Rear, Subwoofer) 2V output |
| Display | Multi-color LCD with customizable illumination |
| Equalizer | 9-band graphic equalizer with presets |
| Remote Control | Included wired remote control |
| Steering Wheel Control Compatible | Yes (requires adapter) |
| Safety Features | Detachable faceplate with security code |
| Clean and Care | Clean with soft dry cloth; avoid liquids |
| Spare Parts Availability | Contact Alpine customer service or authorized dealers |
| Repairability | Serviceable by qualified technicians; do not open |
| General Information | Designed for vehicles with standard DIN opening; installation kit included |
Frequently Asked Questions - KIT-8VWTXPQ ALPINE
User questions about KIT-8VWTXPQ ALPINE
0 question about this device. Answer the ones you know or ask your own.
Ask a new question about this device
Download the instructions for your Car stereo in PDF format for free! Find your manual KIT-8VWTXPQ - ALPINE and take your electronic device back in hand. On this page are published all the documents necessary for the use of your device. KIT-8VWTXPQ by ALPINE.
USER MANUAL KIT-8VWTXPQ ALPINE
Compatible with these Alpine navigation devices
INE-W928R
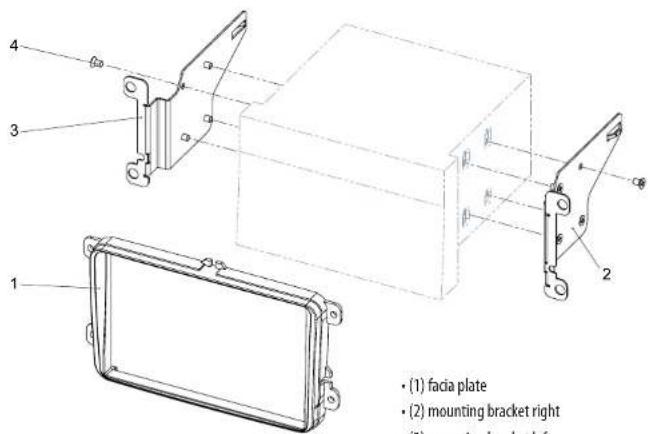
text_image
(1) facia plate (2) mounting bracket right (3) mounting bracket leftAll installation work must be performed by a qualified professional installer only.
The manufacturer / dealer is not liable for any kind of incidental or indirect damages.
Škoda Fabia II / Octavia II / Roomster / VW Caddy / Touran
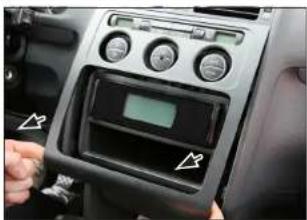
natural_image
Interior view of a car dashboard with control panel and indicator lights (no visible text or symbols)- Unclip and remove OEM panel (see arrows)
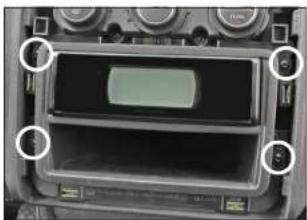
natural_image
Interior view of a vintage electronic device showing a display screen and control knobs (no visible text or symbols)- Remove 4 screws
Remove head unit

natural_image
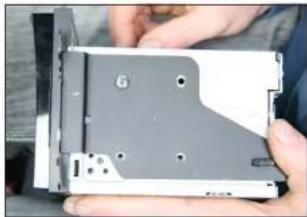
Close-up of hands holding a CD drive with visible slots and mounting holes (no text or symbols)- Attach mounting frames to Alpine INE-W928R
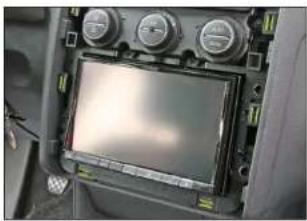
natural_image
Interior view of a vehicle dashboard with multiple gauges and a central touchscreen display (no visible text or symbols)- Connect all required circuit points
Place Alpine INE-W928R on dashboard
VW Tiguan
natural_image
Close-up of a mechanical component with no visible text or symbols- Connect all required circuit points Place Alpine INE-W928R on dashboard

natural_image
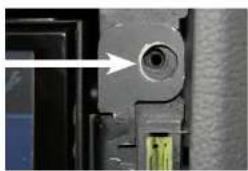
Close-up of a mechanical component with a highlighted circular feature and a green connector (no visible text or symbols)
text_image
Port Route Guide 70 m 0.00 Running Free Services: My City 00:32:01:458 2 4.35Place facia plate Put dome of facia plate exactly over the holes of mounting frames (see arrow above)
Install OEM panel to finish installation
VW Tiguan
natural_image
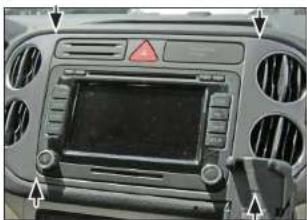
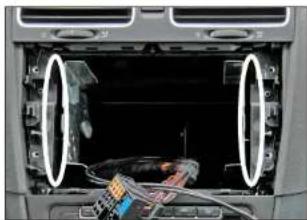
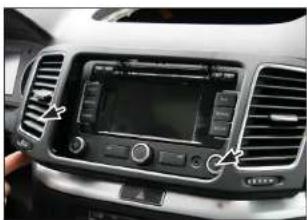
Front view of a car dashboard with ventilation grilles and a central touchscreen display (no visible text or symbols)- Unclip and remove OEM panel (see arrows)
Remove 4 screws of OEM head unit

natural_image
Interior view of a car showing the dashboard and airway compartment with visible wiring and control buttons (no text or symbols)- Remove 4 screws
Remove head unit
natural_image
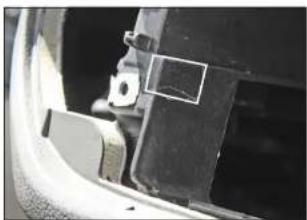
Close-up of a car's side panel showing a bracket and mounting bracket (no visible text or symbols)- Cut away plastic to clear space for Alpine INE-W928R
natural_image
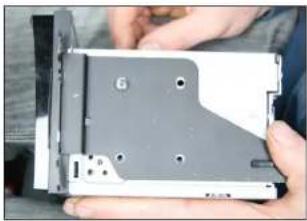
Close-up of hands holding a compact electronic drive chassis (no visible text or symbols)- Attach mounting frames to Alpine INE-W928R
Škoda Fabia II / Octavia II / Roomster / VW Caddy / Touran
natural_image
Interior view of a car dashboard showing exposed wiring and a cable inside (no visible text or symbols)- If necessary: Cut away plastic to clear space for Alpine INE-W928R

natural_image
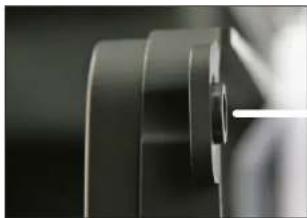
Close-up of a mechanical component with layered cylindrical parts (no visible text or symbols)- Place facia plate
natural_image
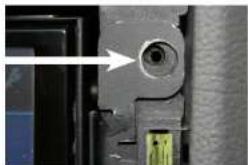
Close-up of a mechanical component with a circular hole and a green connector (no visible text or symbols)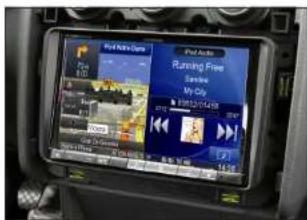
Put dome of facia plate exactly over the holes of mounting frames (see arrow above)
Fix facia plate with 4 screws
text_image
Port Micro-Case 90.00 A 11 2 3 4 5 6 7 8 9 10 11 12 13 14 15 16 17 18 19 20 21 22 23 24 25 26 27 28 29 30 31 32 33 34 35 36 37 38 39 40 41 42 43 44 45 46 47 48 49 50 51 52 53 54 55 56 57 58 59 60 61 62 63 64 65 66 67 68 69 70 71 72 73 74 75 76 77 78 79 80 81 82 83 84 85 86 87 88 89 90 91 92 93 94 95 96 97 98 99 100- Install OEM panel to finish installation
Seat Alhambra / VW Sharan Seat Alhambra / VW
natural_image
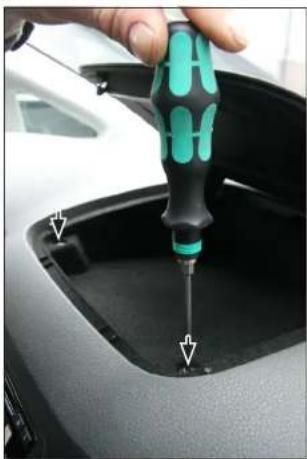
Close-up of a hand using a screwdriver to insert or install a car trunk component (no visible text or symbols)- Open top shelf
Remove 2 screws
natural_image
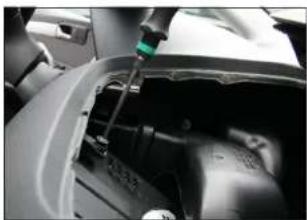
Close-up of a mechanical device with a green sensor or probe inserted, showing internal components (no visible text or symbols)- Remove top shelf inlay
Remove 2 screws on top
natural_image
Interior view of a car dashboard with air filters and a digital display (no visible text or symbols)- Remove OEM panel
n
natural_image
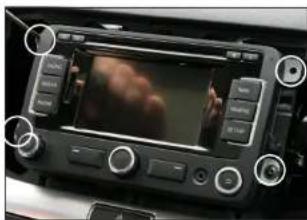
Interior view of a car dashboard with a digital display showing a red abstract image and control buttons (no readable text or symbols)- Remove 4 screws
Remove OEM head unit
If necessary:
Cut away plastic to clear space for Alpine INE-W928R
natural_image
Close-up of hands holding a computer drive casing with visible slots and mounting holes (no text or symbols)- Attach mounting frames to Alpine INE-W928R
natural_image
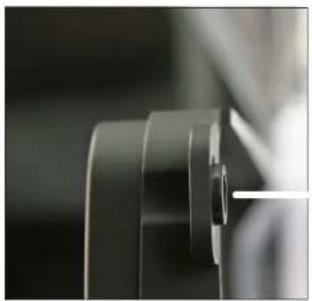
Close-up of a mechanical component with layered surfaces and a white line, no visible text or symbols- Place facia plate
natural_image
Close-up of a mechanical component with a circular feature and a green connector (no visible text or symbols)
text_image
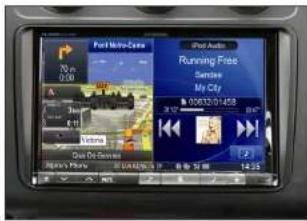
Port Motor-Drive 70 m 0:00 A Speed 6.15 Video Quick Die Cenance Albina's Phone i2.12.12.12.13.13 Running Free Service My City 2 14:25- Connect all required circuit points Place Alpine INE-W928R on dashboard
Fix facia plate with 4 screws Install everything in reverse order to finish installation