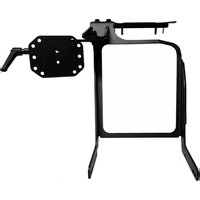
7160-0821-01 - Accessory Gamber-Johnson - Free user manual and instructions
Find the device manual for free 7160-0821-01 Gamber-Johnson in PDF.


| Product Type | Vehicle Mounting Bracket for Police Interceptor |
| Model Number | 7160-0821-01 |
| Brand | Gamber-Johnson |
| Compatible Vehicles | Ford Utility Police Interceptor |
| Compatible Console Box | Gamber-Johnson 7160-0412 |
| Primary Function | Close-to-dash mounting of equipment on console box |
| Installation Location | Driver-side dash area, outside airbag deployment zone |
| Hardware Included | 4x 1/4-20 x 7/8" socket button head screws, 3/8-16 x 3/4" hex bolts, flat washers, plastic clips |
| Dash Cover Panel | Metal replacement panel for plastic OEM cover |
| Tools Required | 8mm hex socket, wrenches for 1/4-20 and 3/8-16 fasteners |
| Safety Warning | Do not install in airbag deployment zone; deactivate airbag if necessary |
| Weight (estimated) | Approx. 2.5 lb (1.1 kg) |
| Dimensions (approx.) | 14" x 6" x 4" (350 x 150 x 100 mm) |
| Material | Steel with black powder coat finish |
| Maintenance | Periodically check fasteners for tightness; do not overtighten |
| Spare Parts Availability | Contact Gamber-Johnson for replacement hardware or bracket |
| Warranty | Contact manufacturer for details |
Frequently Asked Questions - 7160-0821-01 Gamber-Johnson
User questions about 7160-0821-01 Gamber-Johnson
0 question about this device. Answer the ones you know or ask your own.
Ask a new question about this device
Download the instructions for your Accessory in PDF format for free! Find your manual 7160-0821-01 - Gamber-Johnson and take your electronic device back in hand. On this page are published all the documents necessary for the use of your device. 7160-0821-01 by Gamber-Johnson.
USER MANUAL 7160-0821-01 Gamber-Johnson
INSTALLATION INSTRUCTIONS
Product Revision
7160-0821, 7160-0821-01
Ford Utility Police Interceptor Close-To-Dash Mount
Rev.D
Form
INST-715
Printing Spec: PS-004

WARNING

- You must read and follow all of these installation instructions. Failure to follow the installation instructions may result in serious bodily injury or death
- DO NOT install or use this assembly in the area in which the airbag on the vehicle may be deployed. The installer and user of this assembly are responsible for installing and using this assembly outside the area in which an airbag may be deployed. (See Product Mounting Disclaimer Below)
- If the installation of the equipment requires that the equipment (or any additional equipment that is added to the installation) be placed in front of an airbag, the airbag should be deactivated. In order to secure permission for deactivating the airbag you must contact the National Highway Traffic Safety Administration at 1-800-424-9393 to gain permission to do so. If you have any questions or need assistance, call Gamber-Johnson at 1-800-456-6868.
•High speed vehicle turns may cause parts fo the assembly to swivel, interfering with the driver or other equipment. - Keep these installation instructions with the product and readily available in the vehicle for future reference of other users of the product.
•Additional copies of the installation instruction can be obtained from Gamber-Johnson. If you need assistance or have any questions, go to www.gamberjohnson.com or call Gamber-Johnson at 1-800-456-6868. - DO NOT remove the warning label from the product under any circumstances.
The Ford Utility Police Interceptor Close-To-Dash mount is designed specifically to mount on a Gamber-Johnson vehicle specific console box (7160-0412) and to attach to the dash of the Ford Utility.
Installing the mount:
Step 1. Remove the dash cover panel using an 8mm hex socket.
Step 2. Remove the (4) plastic clips from the bottom side of the cover panel.
Step 3. Attach the (4) plastic clips (removed in step 2) to the new metal Dash cover panel.
Step 4. Attach the metal dash cover panel using the same bolt that was removed in step 1. Tighten bolt to a snug fit only. Over torquing will cause the U-Nut to strip.
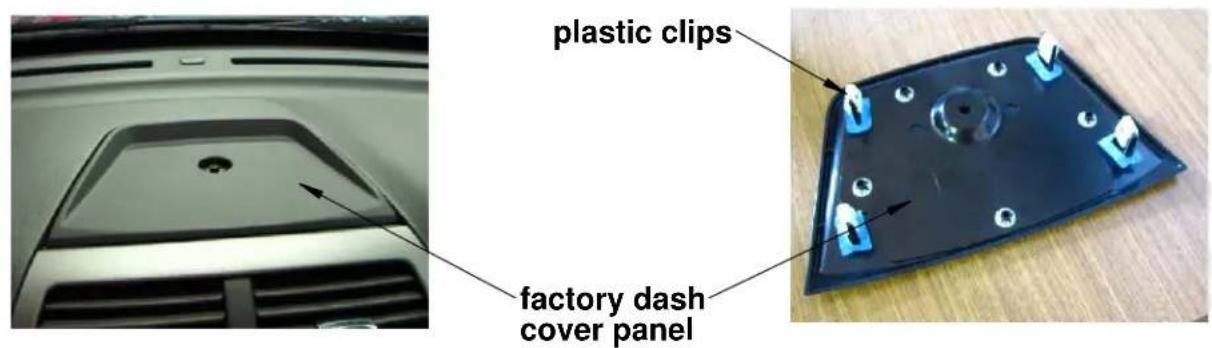
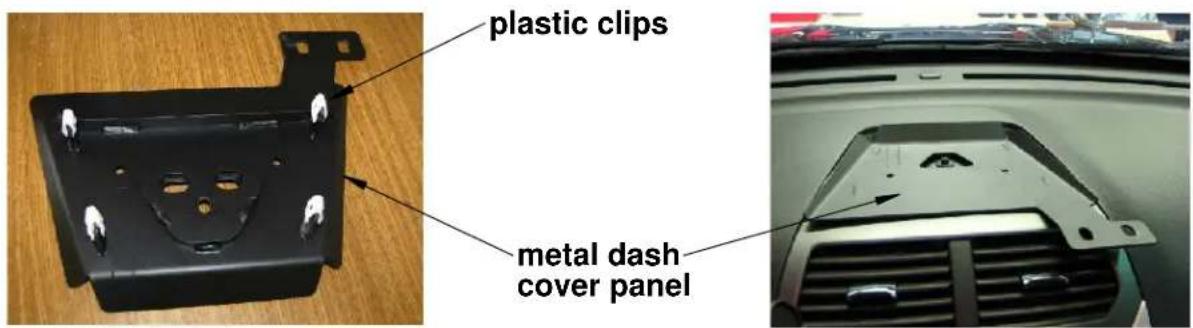
Step 5. Remove the (4) 1/4-20 x 1/2" long socket button head machine screws that hold the top plate on the vehicle specific console box.
Step 6. Attach the main bracket to the vehicle specific console box with the (4) 1/4-20 x 7/8" long socket button head machine screws provided in the hardware bag.

Step 7. Attach the main bracket to the dash cover plate with the 3/8-16 x 3/4" hex bolts and flat washers provided in the hardware bag.
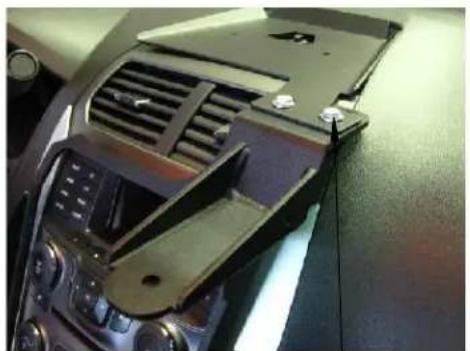
3/8-16 x 3/4" long hex bolts and flat washers

Clevis
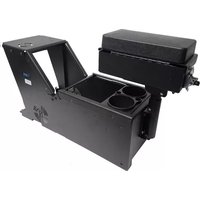

Brand : Gamber-Johnson
Model : 7160-0821-01
Category : Accessory