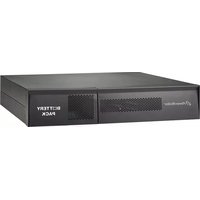
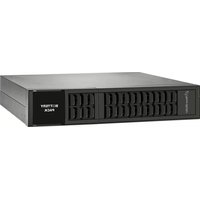
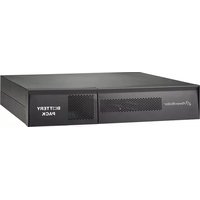
BPH A36RM-6 - Battery PowerPlus - Free user manual and instructions
Find the device manual for free BPH A36RM-6 PowerPlus in PDF.


| Product Type | Battery Pack |
| Brand | PowerPlus |
| Model | BPH A36RM-6 |
| Nominal Voltage | 36V |
| Capacity | 9Ah (3 x 12V 9Ah in series) |
| Battery Type | Sealed Lead Acid (SLA) |
| Operating Temperature | 0°C to 40°C |
| Storage Temperature | -25°C to 45°C |
| Humidity Range | 30% to 90% non-condensing |
| Charging Frequency (in storage) | Every 2-3 months |
| Charging Duration (in storage) | 1-2 hours |
| Battery Life | 3-5 years at 25°C ambient |
| Safety Features | Overheat protection, short circuit protection, reverse polarity protection |
| Installation | Requires trained personnel; use insulated tools, wear rubber gloves and boots |
| Maintenance | No user-serviceable parts; replace all batteries with same type and capacity |
| Disposal | Do not dispose in fire; recycle at designated facility |
| Warranty | Void if exposed to water, dust, corrosive environments, or if not recharged every 2-3 months |
Frequently Asked Questions - BPH A36RM-6 PowerPlus
User questions about BPH A36RM-6 PowerPlus
0 question about this device. Answer the ones you know or ask your own.
Ask a new question about this device
Download the instructions for your Battery in PDF format for free! Find your manual BPH A36RM-6 - PowerPlus and take your electronic device back in hand. On this page are published all the documents necessary for the use of your device. BPH A36RM-6 by PowerPlus.
USER MANUAL BPH A36RM-6 PowerPlus
User Manual Battery Pack
1. Important Safety Warnings
Please comply with all warnings and operating instructions in this instruction strictly. Read carefully the following instructions before installing the unit. Do not operate this unit before reading through all safety information and operating instructions carefully.
- Do not try to assemble or repair the unit yourself, contact your local supplier, seek for help of qualified technician
- To eliminate any overheating of the battery box, keep all ventilation openings free from obstruction and do not place any foreign objects on top of the battery bank. Keep the battery box 20 cm away from the wall.
- Make sure the battery box is installed within the proper environment as specified. (0-40°C and 30-90% non-condensing humidity)
- Do not install the battery box under direct sunlight. Your warranty will be void if the batteries fail due to overheating.
- This battery box is not designed for use in dusty, corrosive and salty environment.
- The warranty for this battery bank will be void if water or other liquid is spilled or poured directly onto the battery box. Similarly we do not warrant any damage to the battery box if foreign objects are deliberately or accidentally inserted into the battery box enclosure.
- The battery will discharge naturally if the system is unused for a period of time.
- It should be recharged every 2-3 months if unused. If this is not done, then the warranty will be null and void. During normal operation, the batteries will be automatically remained in charged condition.
- Servicing of batteries should be performed or supervised by trained personnel with knowledge of batteries and the required precautions.
- When replacing batteries, it is necessary to replace ALL batteries with the same quantity, type & capacity.
- CAUTION – Do not dispose of battery or batteries in a fire. The battery may explode.
- CAUTION – Do not open or mutilate the batteries. The electrolyte from the batteries is toxic and harmful to the skin and eyes.
- CAUTION – Risk of Electric Shock – Hazardous voltage may exist between battery terminals and ground. Test before touching with bare hands.
- CAUTION – A battery can present a risk of electrical shock and high short circuit current. The following precaution should be observed when working on batteries:
- Remove watches, rings, or other metal objects.
- Use tools with insulated handles.
- Wear rubber gloves and boots.
- Do not lay tools or metal parts on top of batteries.
- Disconnect charging source prior to connecting or disconnecting battery terminals.
- Do not plug or unplug the battery connector if UPS works in DC (discharging) mode.
Installation and Setup
NOTE: Before installation, please inspect the unit. Be sure that nothing inside the package is damaged. Please keep the original package in a safe place for future use
Storage & Maintenance
The unit contains no user-serviceable parts. If the battery service life (3\~5 years at 25°C ambient temperature) has been exceeded, the batteries must be replaced. In this case, please contact your dealer.
Be sure to deliver the spent battery to a recycling facility or ship it to your dealer in the replacement battery packing material.
Storage
Before storing, charge the unit 4 hours. Store the unit covered and upright in a cool, dry location. During storage, recharge the battery in accordance with the following table:
| Storage Temperature Recharge Frequency Charging Duration | |
| -25°C - 40°C Every 3 months 1-2 hours | |
| 40°C - 45°C Every 2 months 1-2 hours | |
SOP - How to assemble BP A36R-6x9Ah


natural_image
Close-up of a white mechanical device with two rectangular compartments and a green tag labeled '6' (no readable text or symbols beyond the label)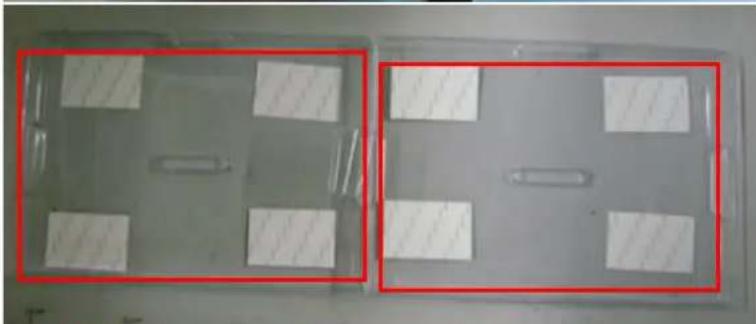
natural_image
Two transparent plastic panels with four white rectangular samples, each outlined in red (no text or symbols visible)
natural_image
Two black battery units with red connectors and white bases, placed on a green surface with wires (no visible text or symbols)
- As shown above: unscrew all screws on the battery isolation pad for separation.
Screw P/N: 38-000008-00G*6
Torque: 8KG.
-
As shown left: take out the plastic isolation tray for later assembly(44-040053-XXG)
-
As shown left: get 3 batteries and a False battery in serial connection (26-000003-XXG/45W、12V、9AH)
→ Please be noticed about the rubber protection on the red wire.
- As shown left: Put on the warning stick (37-000031-XXG) onto the battery (text facing up)
Notice:
- Check with correct battery spec.
- No short between positive and negative polar of batteries
- No reverse connection is allowed.
Tool:
Pliers

-
As shown left: take out the plastic isolation tray for later assembly(44-040053-XXG)
-
As shown left: get 3 batteries and a False battery in serial connection (26-000003-XXG/45W、12V、9AH) → Please be noticed about the rubber protection on the red wire.
-
As shown left: Put on the warning stick (37-000031-XXG) onto the battery (text facing up)
| Notice:1. No short for battery is allowed.2. Wires should be connected precisely. | Tool:Pliers |

-
As shown both of two: Push the assembled battery bank into the case following the instructed direction (the red arrow)
-
As shown bellow: screw the processed battery isolation pad onto the case M3*6 round-cross screw 38-000008-XXG*6, Torque: 8KGF-CM。
-
Check with no missed isolation sticks on the 4 battery terminals (44-040046-XXG)


natural_image
Close-up of a mechanical device with a blue label and number 6, no readable text or symbols beyond the label.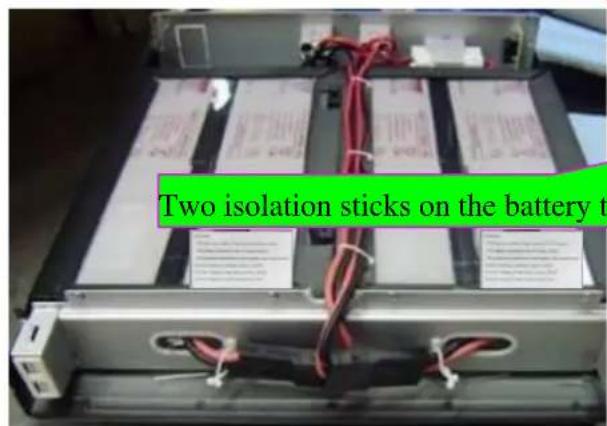


- As shown left, connect battery connectors to its housing correctly.
Notice:
- No reversed, incorrect, and missed isolation stick is allowed.
- No missed screwing is allowed,
Tools:
Electrical drill, cross screw bit

Brand : PowerPlus
Model : BPH A36RM-6
Category : Battery