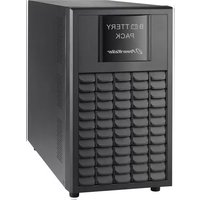
BPH A72T-18+3A - Battery PowerPlus - Free user manual and instructions
Find the device manual for free BPH A72T-18+3A PowerPlus in PDF.


| Product Type | Battery Pack |
| Brand | PowerPlus |
| Model | BPH A72T-18+3A |
| Number of Batteries | 18 |
| Battery Voltage (each) | 12 V |
| Total Voltage (series) | 216 V |
| Battery Capacity (per battery) | 7 Ah or 9 Ah (9 Ah default) |
| Total Energy (approx.) | 1944 Wh (with 9 Ah) |
| Charger Output Current | 3 A |
| Operating Temperature | 0 °C to 40 °C |
| Storage Temperature | -25 °C to 45 °C |
| Humidity (non-condensing) | 30 % to 90 % |
| Battery Type | Sealed Lead-Acid (SLA) |
| Safety Features | Short circuit protection, overheat protection |
| Maintenance | Recharge every 2-3 months when unused |
| Battery Life | 3 to 5 years at 25 °C |
| Installation Environment | Indoor, away from direct sunlight, dust, corrosive or salty conditions |
| Connection Method | Serial wiring with insulated tubes |
| Replacement Requirement | Replace all batteries with same quantity, type, and capacity |
| Disposal | Do not incinerate; recycle at appropriate facility |
Frequently Asked Questions - BPH A72T-18+3A PowerPlus
User questions about BPH A72T-18+3A PowerPlus
0 question about this device. Answer the ones you know or ask your own.
Ask a new question about this device
Download the instructions for your Battery in PDF format for free! Find your manual BPH A72T-18+3A - PowerPlus and take your electronic device back in hand. On this page are published all the documents necessary for the use of your device. BPH A72T-18+3A by PowerPlus.
USER MANUAL BPH A72T-18+3A PowerPlus
User Manual Battery Pack
1. Important Safety Warnings
Please comply with all warnings and operating instructions in this instruction strictly. Read carefully the following instructions before installing the unit. Do not operate this unit before reading through all safety information and operating instructions carefully.
- Do not try to assemble or repair the unit yourself, contact your local supplier, seek for help of qualified technician
- To eliminate any overheating of the battery box, keep all ventilation openings free from obstruction and do not place any foreign objects on top of the battery bank. Keep the battery box 20 cm away from the wall.
- Make sure the battery box is installed within the proper environment as specified. (0-40°C and 30-90% non-condensing humidity)
- Do not install the battery box under direct sunlight. Your warranty will be void if the batteries fail due to overheating.
- This battery box is not designed for use in dusty, corrosive and salty environment.
- The warranty for this battery bank will be void if water or other liquid is spilled or poured directly onto the battery box. Similarly we do not warrant any damage to the battery box if foreign objects are deliberately or accidentally inserted into the battery box enclosure.
- The battery will discharge naturally if the system is unused for a period of time.
- It should be recharged every 2-3 months if unused. If this is not done, then the warranty will be null and void. During normal operation, the batteries will be automatically remained in charged condition.
- Servicing of batteries should be performed or supervised by trained personnel with knowledge of batteries and the required precautions.
- When replacing batteries, it is necessary to replace ALL batteries with the same quantity, type & capacity.
- CAUTION – Do not dispose of battery or batteries in a fire. The battery may explode.
- CAUTION – Do not open or mutilate the batteries. The electrolyte from the batteries is toxic and harmful to the skin and eyes.
- CAUTION – Risk of Electric Shock – Hazardous voltage may exist between battery terminals and ground. Test before touching with bare hands.
- CAUTION – A battery can present a risk of electrical shock and high short circuit current. The following precaution should be observed when working on batteries:
- Remove watches, rings, or other metal objects.
- Use tools with insulated handles.
- Wear rubber gloves and boots.
- Do not lay tools or metal parts on top of batteries.
- Disconnect charging source prior to connecting or disconnecting battery terminals.
- Do not plug or unplug the battery connector if UPS works in DC (discharging) mode.
Installation and Setup
NOTE: Before installation, please inspect the unit. Be sure that nothing inside the package is damaged. Please keep the original package in a safe place for future use
Storage & Maintenance
The unit contains no user-serviceable parts. If the battery service life (3\~5 years at 25°C ambient temperature) has been exceeded, the batteries must be replaced. In this case, please contact your dealer.
Be sure to deliver the spent battery to a recycling facility or ship it to your dealer in the replacement battery packing material.
Storage
Before storing, charge the unit 4 hours. Store the unit covered and upright in a cool, dry location. During storage, recharge the battery in accordance with the following table:
| Storage Temperature Recharge Frequency Charging Duration | |
| -25°C - 40°C Every 3 months 1-2 hours | |
| 40°C - 45°C Every 2 months 1-2 hours | |
SOP – How to assemble Battery Pack with 18 batteries (BP A72T-18x9Ah+3A)
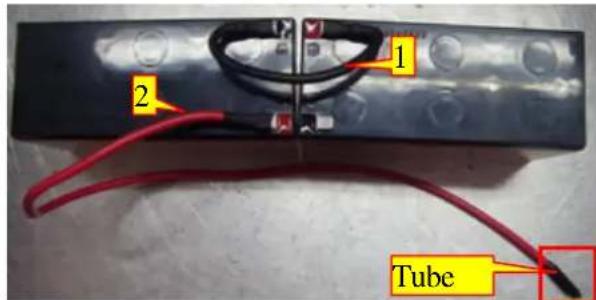
- As shown, please use all batteries (12V/7Ah or 12V/9Ah) with the same date code. (CAUTION: it's necessary to use tubes for red wires).
NOTE: This will prevent short circuit from direct contact of terminal.

-
As shown, serial connect batteries (12V/7Ah or 12V/9Ah) with wires one by one. (It's necessary to insert black wires into tubes)
-
As shown, serial connect two batteries as a set. Install one set on the right hand side with battery terminal facing front panel. (put the battery with red wire on the bottom and keep the terminal on the upwards; the top one with the terminal on the bottom side.)
-
Then install the other two sets (As shown on the left chart, install the left one set and then the middle one set)
-
As shown, connect black wire of the top battery in the middle set to the top battery on the right set. Put the black wire under the battery divider.


Tool: nipper.
CAUTION: 1. Use batteries with the same date code in the same UPS. 2. Do not direct connect battery terminal and metal to avoid short circuit. 3. Connect wires correctly and tightly. Do not miss tubes.

- As show, screw short dividers tightly to main column with 6 screws. M3*6 flat-head screws. Torque: 8KGF-CM
- Let two red and black wires pass through divider as shown.

- As shown, when black and red wires pass through divider, take off the tubes and plug black wire to P7 of small board. Plug red wire to P7 of small board located on the bottom.
- Use one long black wire to connect to P8 and one short black wire to connect to P9. Use one long red wire to connect to P2 and one short red wire to connect to P3 of small board located on the bottom.
Tool: electric screwdriver, crosshead screwdriver, nipper
CAUTION:1. All screws should be screwed tightly and do not missing. 2. Connect wires correctly and tightly.

-
As shown, connect batteries (12V7Ah or 12V9Ah) one by one.
-
Screw two battery dividers tightly to main column. (NOTE: there are two round-head screws located on the back panel) M3* 6 round-head screws Torque: 8KGF-CM
- Serial connection all batteries with wires one by one.

Tool: electric screwdriver, crosshead screwdriver, nipper CAUTION:
- Do NOT directly contact with battery terminal and metal during installation. Otherwise, it will cause short circuit.
- All screws should be screwed tightly and do not missing.
- Connect wires correctly and tightly.

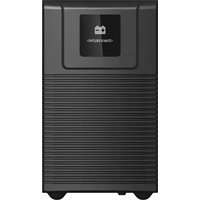
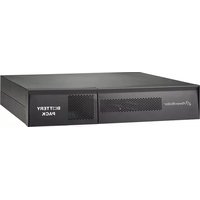
Brand : PowerPlus
Model : BPH A72T-18+3A
Category : Battery