
CP270 - Video projector BENQ - Free user manual and instructions
Find the device manual for free CP270 BENQ in PDF.


| Product Type | Video Projector |
| Model | BenQ CP270 |
| Resolution | 1024 x 768 XGA |
| Display System | 1-Chip DMD |
| Lens | F = 2.56 to 2.67, f = 21.36 to 23.45 mm |
| Lamp | 200 W, up to 3000 hours (Normal mode), up to 4500 hours (Economic mode) |
| Power Supply | AC 100–240 V, 50/60 Hz (Automatic) |
| Power Consumption | 285 W (Max) |
| Dimensions (W x H x D) | 190 mm x 77.5 mm x 205 mm |
| Weight | < 1.5 kg (3.3 lbs) |
| Input Terminals | RGB (D-Sub 15-pin), S-Video (Mini DIN 4-pin), Composite Video (RCA), Component Video (via RGB), RS-232 |
| Keystone Correction | Digital, vertical |
| Wall Color Correction | Presets for Light Yellow, Pink, Light Green, Blue, Blackboard |
| Picture Modes | Dynamic, Presentation, sRGB, Cinema, User 1/2 (PC); Dynamic, Standard, Cinema, User 1/2 (Video) |
| Password Protection | Power-on lock with 6-digit password |
| Presentation Timer | Count up/down, 1–240 minutes, on-screen display options |
| Operating Temperature | 0°C–40°C at sea level |
| Care and Cleaning | Use compressed air or lens cleaning paper for lens; soft cloth with mild detergent for case |
| Lamp Replacement | Allow 45 minutes cooling; replace with BenQ lamp; reset lamp timer after replacement |
| Safety Features | Auto power off, blank timer, panel key lock, high altitude mode |
Frequently Asked Questions - CP270 BENQ
User questions about CP270 BENQ
0 question about this device. Answer the ones you know or ask your own.
Ask a new question about this device
Download the instructions for your Video projector in PDF format for free! Find your manual CP270 - BENQ and take your electronic device back in hand. On this page are published all the documents necessary for the use of your device. CP270 by BENQ.
USER MANUAL CP270 BENQ
Important safety instructions ....3
Introduction......7
Projector features 7
Shipping contents...... 8
Projector exterior view...... 9
Controls and functions ...... 10
Positioning your projector......13
Choosing a location.... 13
Obtaining a preferred projected image size .... 14
Connection ......17
Connecting a computer 17
Connecting Video source devices..... 18
Operation ......22
Starting up the projector.... 22
Using the menus.... 23
Utilizing the password function ..... 24
Switching input signal.... 26
Adjusting the projected image ...... 26
Magnifying and searching for details 28
Selecting the aspect ratio.... 29
Optimizing the image.... 30
Setting the presentation timer ...... 34
Hiding the image 35
Locking control keys 35
Freezing the image.... 36
Utilizing FAQ function 36
Operating in a high altitude environment....37
Personalizing the projector menu display ....37
Shutting down the projector ....38
Menu operation ......39
Maintenance......45
Care of the projector....45
Lamp information......46
Troubleshooting ....52
Specifications ....53
Projector specifications....53
Dimensions....54
Timing chart....54
Warranty and Copyright information .....56
Regulation statements ....57
Important safety instructions
Your projector is designed and tested to meet the latest standards for safety of information technology equipment. However, to ensure safe use of this product, it is important that you follow the instructions mentioned in this manual and marked on the product.
Safety Instructions
- Please read this manual before you operate your projector. Save it for future reference.
natural_image
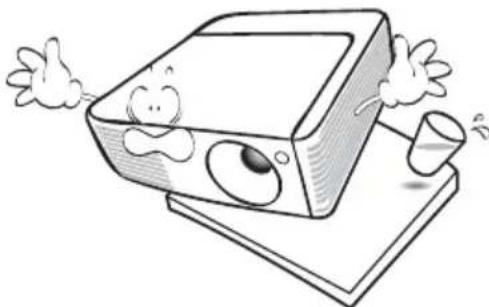
Cartoon illustration of a projector with a cup pouring liquid from its side (no text or symbols)- Do not look straight at the projector lens during operation. The intense light beam may damage your eyes.
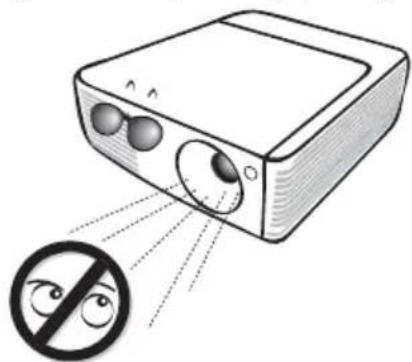
natural_image
Illustration of a projector with two lenses and a prohibition symbol (no text or labels)- Refer servicing to qualified service personnel.
natural_image
Cartoon illustration of a BenQ smartphone character with arms and facial features (no text or symbols)- Always open the lens shutter or remove the lens cap when the projector lamp is on.
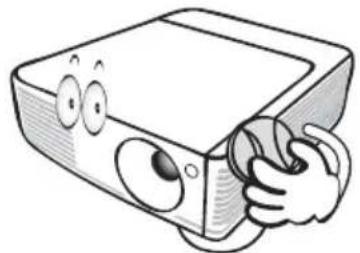
natural_image
Cartoon illustration of a projector with a hand holding the lens (no text or symbols)- In some countries, the line voltage is NOT stable. This projector is designed to operate safely within a mains voltage between 100 to 240 volts AC, but could fail if power cuts or surges of ±10 volts occur. In areas where the mains voltage may fluctuate or cut out, it is recommended that you connect your projector through a power stabilizer, surge protector or uninterruptible power supply (UPS).
natural_image
Cartoon illustration of a projector with a smiling face and connected to a cable (no text or symbols)- Do not block the projection lens with any objects when the projector is under operation as this could cause the objects to become heated and deformed or even cause a fire. To temporarily turn off the lamp, press BLANK on the projector or remote control.
Safety Instructions (Continued)
- The lamp becomes extremely hot during operation. Allow the projector to cool for approximately 45 minutes prior to removing the lamp assembly for replacement.
natural_image
Cartoon illustration of a smiling rectangular object resembling a projector with eyes and a fan, emitting steam (no text or symbols)- Do not operate lamps beyond the rated lamp life. Excessive operation of lamps beyond the rated life could cause them to break on rare occasions.
natural_image
Cartoon illustration of a computer monitor character with arms and legs, surrounded by expressive faces (no text or symbols)- Never replace the lamp assembly or any electronic components unless the projector is unplugged.
natural_image
Cartoon illustration of a computer monitor character with arms and legs, waving (no text or symbols)- Do not place this product on an unstable cart, stand, or table. The product may fall, sustaining serious damage.
natural_image
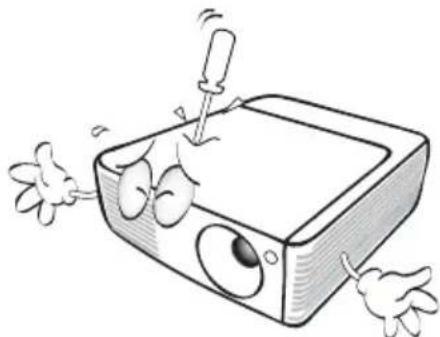
Cartoon illustration of a computer monitor with cartoon faces and speech bubbles, no text or symbols present- Do not attempt to disassemble this projector. There are dangerous high voltages inside which may cause death if you should come into contact with live parts. The only user serviceable part is the lamp which has its own removable cover. Under no circumstances should you ever undo or remove any other covers. Refer servicing only to suitably qualified professional service personnel.
natural_image
Cartoon illustration of a computer monitor with arms and legs, surrounded by flying shoes (no text or symbols)- When the projector is under operation, you may sense some heated air and odor from its ventilation grill. It is a normal phenomenon and not a product defect.
Safety Instructions (Continued)
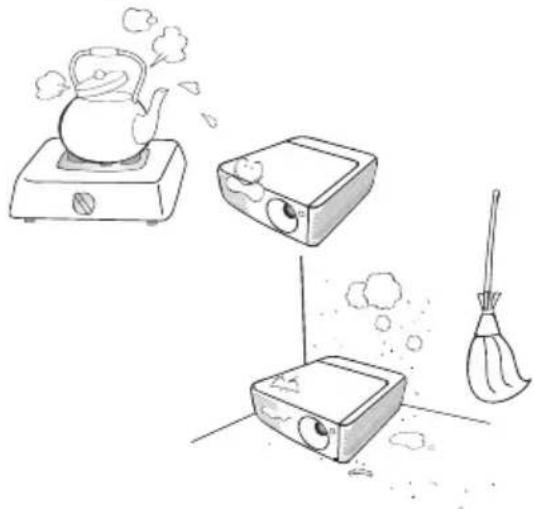
- Do not place this projector in any of the following environments.
- Space that is poorly ventilated or confined. Allow at least 50 cm clearance from walls and free flow of air around the projector.
- Locations where temperatures may become excessively high, such as the inside of a car with all windows rolled up.
- Locations where excessive humidity, dust, or cigarette smoke may contaminate optical components, shortening the projector's life span and darkening the image.
natural_image
Illustration of three kitchen appliances: a steaming pot, a rectangular stove, and a broom (no text or symbols)- Locations near fire alarms
- Locations with an ambient temperature above 40^ C / 104^ F
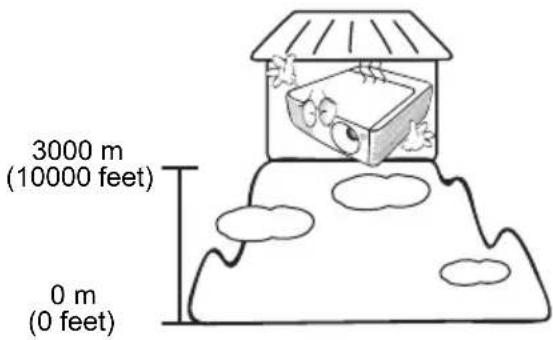
- Locations where the altitudes are higher than 3000 m (10000 feet).
- Do not block the ventilation holes.
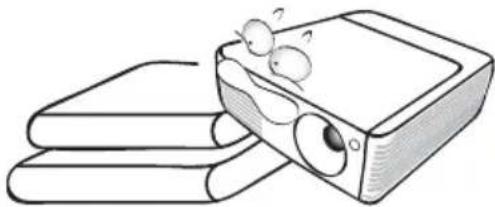
- Do not place this projector on a blanket, bedding or any other soft surface.
- Do not cover this projector with a cloth or any other item.
- Do not place inflammables near the projector.

natural_image
Cartoon illustration of a rolled-up document with steam rising (no text or symbols)If the ventilation holes are seriously obstructed, overheating inside the projector may result in a fire.
- Always place the projector on a level, horizontal surface during operation.
- Do not use if tilted at an angle of more than 10 degrees left to right, nor at angle of more than 15 degrees front to back. Using the projector when it is not fully horizontal may cause a malfunction of, or damage to, the lamp.
natural_image
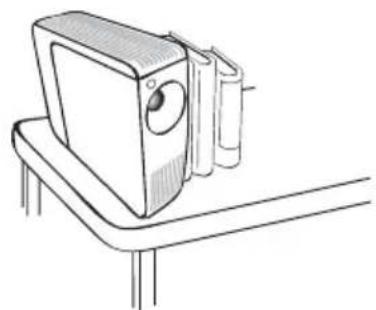
Illustration of a closed book with eyes and a pair of books stacked on top (no text or symbols)- Do not stand the projector on end vertically. Doing so may cause the projector to fall over, causing injury or resulting in damage to the projector.
natural_image
Line drawing of a camera mounted on a stand (no text or symbols)Safety Instructions (Continued)
- Do not step on the projector or place any objects upon it. Besides probable physical damage to the projector, doing so may result in accidents and possible injury.

natural_image
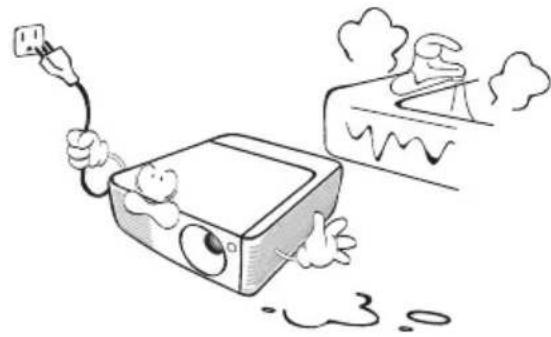
Cartoon illustration of a coffee machine with steam and bubbles, no text or symbols present- Do not place liquids near or on the projector. Liquids spilled into the projector may cause it to fail. If the projector does become wet, disconnect it from the power supply's wall socket and call BenQ to have the projector serviced.
natural_image
Cartoon illustration of a computer monitor with a plug and smoke, emitting exhaust smoke (no text or symbols)Warning
• THIS APPARATUS MUST BE EARTHED.
- When installing the unit, incorporate a readily accessible disconnect device in the fixed wiring, or connect the power plug to an easily accessible socket-outlet near the unit. If a fault should occur during operation of the unit, operate the disconnect device to switch the power supply off, or disconnect the power plug.
Introduction
Projector features
The projector integrates high-performance optical engine projection and a user-friendly design to deliver high reliability and ease of use.
The projector offers the following features.
- Compact size and light weight design enhancing portability and mobility
- Wall color correction allowing projection on surfaces of several predefined colors
- Quick auto search speeding up the signal detecting process
- Selectable password protected function
- Up to 11 sets of picture modes providing multiple choices for different projection purposes
• 3D color management allowing color adjustments to your liking - Selectable quick cooling function making the projector cool in a shorter time
- Presentation timer for better control of time during presentations
• One-key auto-adjustment to display the best picture quality
• Digital keystone correction to correct distorted images - Adjustable color balance control for data/video display
• High brightness projection lamp - Ability to display 16.7 million colors
- Multi-language On-Screen Display (OSD) menus
- Switchable normal and economic modes to reduce the power consumption
- Component HDTV compatibility (YP bPr)
• High quality manual zoom lens

- The apparent brightness of the projected image will vary depending on the ambient lighting conditions, selected input signal contrast/brightness settings, and is directly proportional to projection distance.
- The lamp brightness will decline over time and may vary within the lamp manufacturers specifications. This is normal and expected behavior.
Shipping contents
Carefully unpack and verify that you have all of the items shown below. If any of these items are missing, please contact your place of purchase.
Standard accessories

The supplied accessories will be suitable for your region, and may differ from those illustrated.
*The warranty card is only supplied in some specific regions. Please consult your dealer for detailed information.
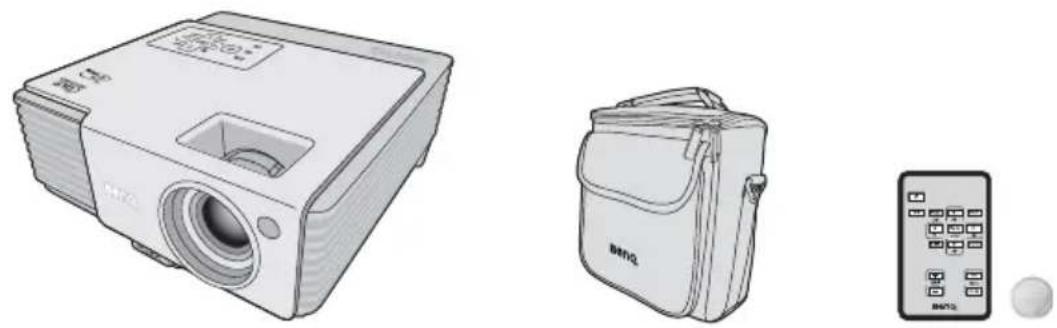
Projector Soft carry case Remote control
with battery

Quick start guide User manual CD Warranty card*
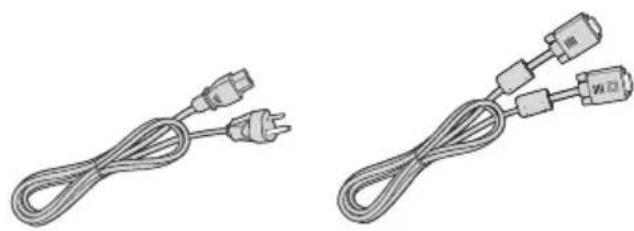
natural_image
Two identical cable types with connectors, no text or symbols visiblePower cord VGA cable
Pull the tab before using the remote control.
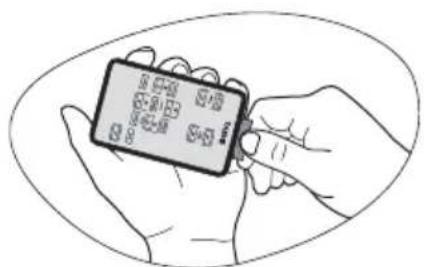
Optional accessories
- Spare lamp kit
-
Presentation Plus
-
RS-232 cable
Projector exterior view
Front/upper side
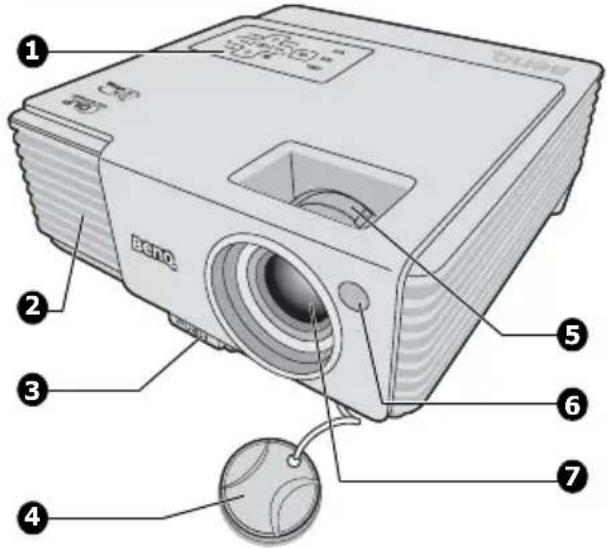
Rear/lower side
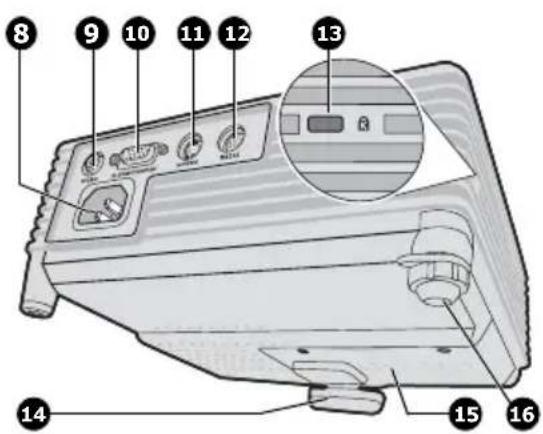
- External control panel (See "Projector" on page 10 for details.)
- Vent (heated air exhaust)
- Quick-release button
- Lens cover
- Focus ring and Zoom ring
- Front IR remote sensor
-
Projection lens
-
AC power cord inlet
- Video input socket
- RGB (PC)/Component video (YPbPr/ YCbCr) signal input socket
- S-Video input socket
- RS-232 control port
- Kensington anti-theft lock slot
- Quick-release foot
- Lamp cover
- Rear adjuster foot
Controls and functions
Projector
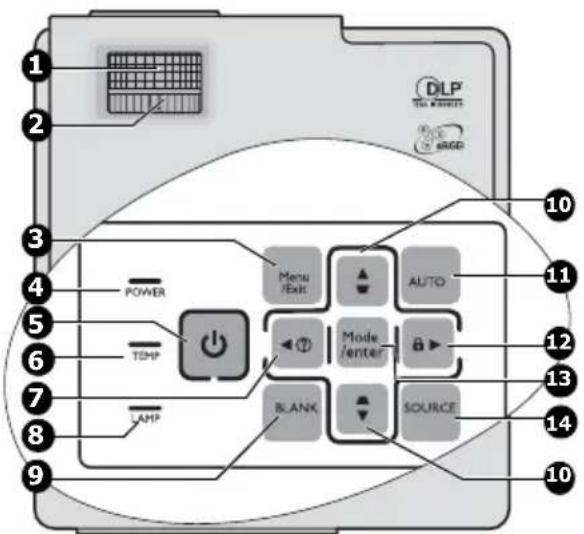
1. Focus ring
Adjusts the focus of the projected image.
See "Fine-tuning the image size and clarity" on page 27 for details.
2. Zoom ring
Adjusts the size of the image. See "Fine-tuning the image size and clarity" on page 27 for details.
3. Menu/Exit
Turns on the On-Screen Display (OSD) menu. Goes back to previous OSD menu, exits and saves menu settings. See "Using the menus" on page 23 for details.
4. POWER indicator light
Lights up or flashes when the projector is under operation. See "Indicators" on page 51 for details.
5. Power
Toggles the projector between standby mode and on. See "Starting up the projector" on page 22 and "Shutting down the projector" on page 38 for details.
6. TEMPerature indicator light
Lights up red if the projector's temperature becomes too high. See "Indicators" on page 51 for details.
7. Left/

Starts the FAQ function. See "Utilizing FAQ function" on page 36 for details.
8. LAMP indicator light
Indicates the status of the lamp. Lights up or flashes when the lamp has developed a problem. See "Indicators" on page 51 for details.
9. BLANK
Used to hide the screen picture. See "Hiding the image" on page 35 for details.
10. Keystone/Arrow keys (/ Up,

▼ Down)
Manually corrects distorted images resulting from an angled projection. See "Correcting keystone" on page 28 for details.
11. AUTO
Automatically determines the best picture timings for the displayed image. See "Auto-adjusting the image" on page 27 for details.
12. Right/

Activates panel key lock. See "Locking control keys" on page 35 for details.
When the On-Screen Display (OSD) menu is activated, the #7, #10, and #12 keys are used as directional arrows to select the desired menu items and to make adjustments. See "Using the menus" on page 23 for details.
13. Mode/Enter
Selects an available picture setup mode. See "Selecting a picture mode" on page 30 for details.
Enacts the selected On-Screen Display (OSD) menu item.
14. SOURCE
Displays the source selection bar. See "Switching input signal" on page 26 for details.
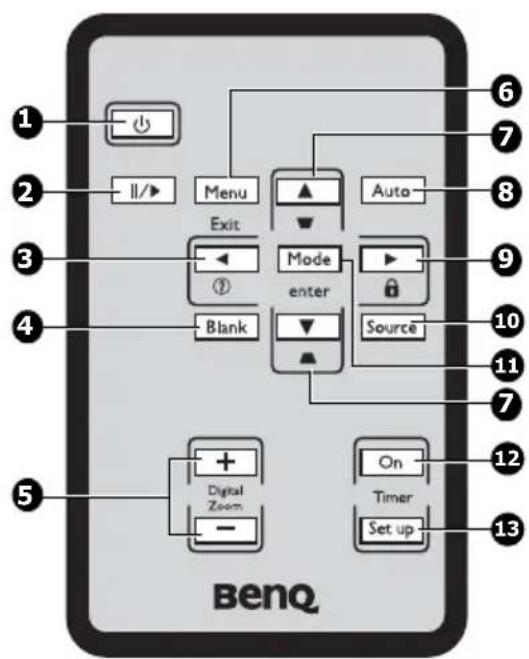
Remote control
flowchart
graph TD
    A["1"] --> B["+"]
    C["2"] --> D["||/►"] --> E["Menu"]
    F["3"] --> G["Exit"] --> H["Mode enter"]
    I["4"] --> J["Blank"] --> K["Source"]
    L["5"] --> M["Digital Zoom"] --> N["On Timer"]
    O["6"] --> P["Auto"]
    Q["7"] --> R["Auto"]
    S["8"] --> T["Auto"]
    U["9"] --> V["Auto"]
    W["10"] --> X["Auto"]
    Y["11"] --> Z["Auto"]
    AA["12"] --> AB["Auto"]
    AC["13"] --> AD["Auto"]
    AE["13"] --> AF["Auto"]
1. Power
Toggles the projector between standby mode and on. See "Starting up the projector" on page 22 and "Shutting down the projector" on page 38 for details.
2. Freez
Freezes the projected image. See "Freezing the image" on page 36 for details.
3. Left/ ?
Starts the FAQ function. See "Utilizing FAQ function" on page 36 for details.
4. BLANK
Used to hide the screen picture. See "Hiding the image" on page 35 for details.
5. Digital Zoom keys (+, -)
Magnifies or reduces the projected picture size. See "Magnifying and searching for details" on page 28 for details.
6. Menu/Exit
Turns on the On-Screen Display (OSD) menu. Goes back to previous OSD menu, exits and saves menu settings. See "Using the menus" on page 23 for details.
7. Keystone/Arrow keys (/Up, /▲

▼ Down)
Manually corrects distorted images resulting from an angled projection. See "Correcting keystone" on page 28 for details.
8. AUTO
Automatically determines the best picture timings for the displayed image. See "Auto-adjusting the image" on page 27 for details.
9. Right/

Activates panel key lock. See "Locking control keys" on page 35 for details.
When the On-Screen Display (OSD) menu is activated, the #3, #7 and #9 keys are used as directional arrows to select the desired menu items and to make adjustments. See "Using the menus" on page 23 for details.
10. SOURCE
Displays the source selection bar. See "Switching input signal" on page 26 for details.
11. Mode/Enter
Depending upon which input signal is selected, selects an available picture setup mode. See "Selecting a picture mode" on page 30 for details.
Enacts the selected On-Screen Display (OSD) menu item.
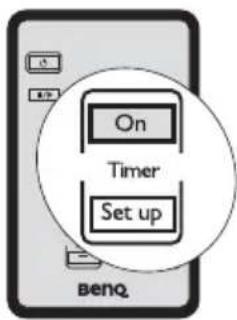
12. Timer On
Activates or displays an on-screen timer based on your own timer setting. See "Setting the presentation timer" on page 34 for details.
13. Timer Setup
Enters presentation timer setting directly. See "Setting the presentation timer" on page 34 for details.
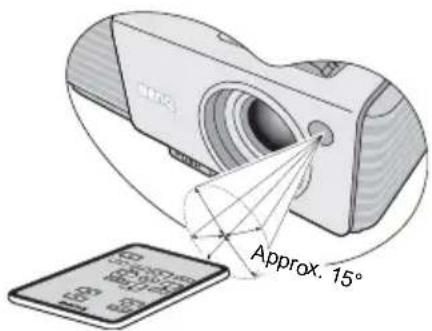
Remote control effective range
Infra-Red (IR) remote control sensor is located on the front of the projector. The remote control must be held at an angle within 30 degrees perpendicular to the projector's IR remote control sensor to function correctly. The distance between the remote control and the sensor should not exceed 8 meters (\~26 feet).
Make sure that there are no obstacles between the remote control and the IR sensor on the projector that might obstruct the infra-red beam.
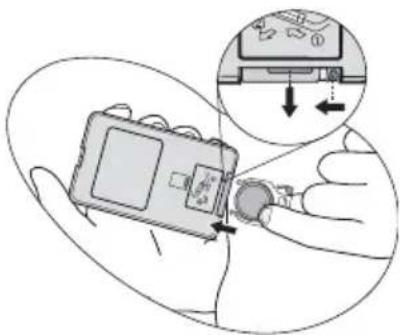
Replacing the remote control battery
- Pull out the battery holder.

Please follow the illustrated instructions. Push and hold the locking arm while pulling out the battery holder.
- Insert the new battery in the holder. Note the positive polarity should face outward.
- Push the holder into the remote control.

- Avoid excessive heat and humidity.
-
There may be battery damage if the battery is incorrectly replaced.
-
Replace only with the same or equivalent type recommended by the battery manufacturer.
- Dispose of the used battery according to the battery manufacturer's instructions.
- Never throw a battery into a fire. There may be danger of an explosion.
- If the battery is dead or if you will not be using the remote control for a long time, remove the battery to prevent damage to the remote control from possible battery leakage.
Positioning your projector Choosing a location
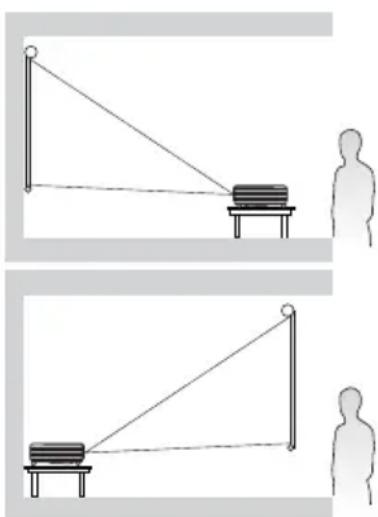
Your room layout or personal preference will dictate which installation location you select. Take into consideration the size and position of your screen, the location of a suitable power outlet, as well as the location and distance between the projector and the rest of your equipment.
Your projector is designed to be installed in one of the possible installation locations:
1. Front Table
Select this location with the projector placed near the floor in front of the screen. This is the most common way to position the projector for quick setup and portability.
2. Rear Table
Select this location with the projector placed near the floor behind the screen.
Note that a special rear projection screen is required.
Set Rear Table in the SYSTEM SETUP: Basic > Projector Position menu after you turn the projector on.
natural_image
Two diagrams showing a person projecting a target at a table, with no text or symbols present.Obtaining a preferred projected image size
The distance from the projector lens to the screen, the zoom setting (if available), and the video format each factors in the projected image size.
4:3 is the native aspect ratio of this projector. To be able to project a complete 16:9
(widescreen) aspect ratio image, the projector can resize and scale a widescreen image to the projector's native aspect width. This will result in a proportionally smaller height equivalent to 75% of the projector's native aspect height.
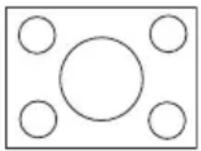
4:3 aspect image in a 4:3 aspect display area
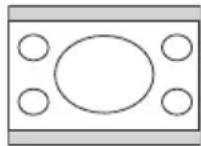
16:9 aspect image scaled to a 4:3 aspect display area
Thus, a 16:9 aspect image will not utilize 25% of the height of a 4:3 aspect image displayed by this projector. This will be seen as darkened (unlit) bars along the top and bottom (vertical 12.5% height respectively) of the 4:3 projection display area whenever displaying a scaled 16:9 aspect image in the vertical center of the 4:3 projection display area.
The projector should always be placed horizontally level (like flat on a table), and positioned directly perpendicular ( 90^ right-angle square) to the horizontal center of the screen. This prevents image distortion caused by angled projections (or projecting onto angled surfaces).
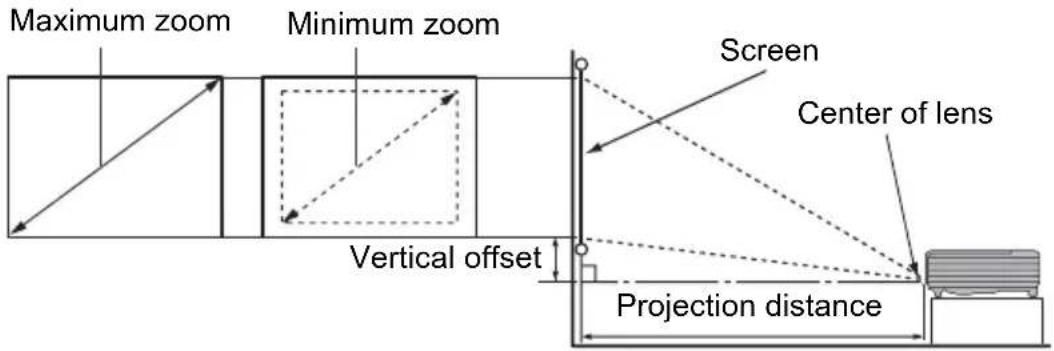
The modern digital projector does not project directly forward (like older style reel-to-reel film projectors did). Instead, digital projectors are designed to project at a slightly upward angle above the horizontal plane of the projector. This is so that they can be readily placed on a table and will project forward and upwards onto a screen positioned so that the bottom edge of the screen is above the level of the table (and everyone in the room can see the screen).
You can see from the diagram on page 16, that this type of projection causes the bottom edge of the projected image to be vertically offset from the horizontal plane of the projector.
If the projector is positioned further away from the screen, the projected image size increases, and the vertical offset also increases proportionately.
When determining the position of the screen and projector, you will need to account for both the projected image size and the vertical offset dimension, which are directly proportional to the projection distance.
BenQ has provided a table of 4:3-aspect-ratio screen sizes to assist you in determining the ideal location for your projector. There are two dimensions to consider, the perpendicular horizontal distance from the center of the screen (projection distance), and the vertical offset height of the projector from the horizontal edge of the screen (offset).
How to determine the position of the projector for a given screen size
- Select your screen size.
-
Refer to the table and find the closest match to your screen size in the left columns labelled "4:3 screen diagonal". Using this value, look across this row to the right to find the corresponding average distance from screen value in the column labelled "Average". This is the projection distance.
-
On that same row, look across to the right column and make note of the "Vertical offset in mm" value. This will determine the final vertical offset placement of the projector in relation to the edge of the screen.
-
The recommended position for the projector is aligned perpendicular to the horizontal center of the screen, at the distance from the screen determined in step 2 above, and offset by the value determined in step 3 above.
For example, if you are using a 120-inch screen, the average projection distance is 4755 mm and with a vertical offset of 183 mm.
If you place the projector in a different position (to that recommended), you will have to tilt it down or up to center the image on the screen. In these situations, some image distortion will occur. Use the Keystone function to correct the distortion. See "Correcting keystone" on page 28 for details.
How to determine the recommended screen size for a given distance
This method can be used for situations where you have purchased this projector and would like to know what screen size will fit in your room.
The maximum screen size is limited by the physical space available in your room.
- Measure the distance between the projector and where you want to position the screen. This is the projection distance.
- Refer to the table and find the closest match to your measurement in the average distance from screen column labelled "Average". If the min and max values are available on the table, check that your measured distance is between the min and max distances listed on either side of the average distance value.
- Using this value, look across that row to the left to find the corresponding screen diagonal listed in that row. That is the projected image size of the projector at that projection distance.
- On that same row, look across to the right column and make note of the "Vertical offset in mm" value. This will determine the final placement of the screen in relation to the horizontal plane of the projector.
For example, if your measured projection distance was 4.5 m (4500 mm), the closest match in the "Average" column is 4680 mm. Looking across this row shows that a 118-inch (3.0 m) screen is required.
Projection dimensions
Refer to "Dimensions" on page 54 for the center of lens dimensions of this projector before calculating the appropriate position.
| 4:3 screen diagonal Recommended projection distance from screen in mm | Vertical offset in mm | |||||
| Feet Inches mm Min length | Average Max length (with max. zoom) | (with min. zoom) | ||||
| 4 48 1219 1811 1902 1992 7359 1500 2228 2340 2451 905 60 1524 2264 2377 2491 916 72 1829 2717 2853 2989 11079 2000 2971 3120 3268 1207 84 2134 3170 3328 3487 1288 96 2438 3623 3804 3985 14698 2500 3714 3900 4086 1509 108 2743 4075 4279 4483 165118 3000 4457 4680 4903 18010 120 3048 4528 4755 4981 183138 3500 5200 5460 5720 21012 144 3658 5434 5706 5977 219157 4000 5943 6240 6537 24015 180 4572 6792 7132 7472 274197 5000 7428 7800 8171 30018 216 5486 8151 8558 8966 329236 6000 8914 9360 9805 36025 300 7620 | 457 | |||||

There is 3% tolerance among these numbers due to optical component variations. BenQ recommends that if you intend to permanently install the projector, you should physically test the projection size and distance using the actual projector in situ before you permanently install it, so as to make allowance for this projector's optical characteristics. This will help you determine the exact mounting position so that it best suits your installation location.
Connection
When connecting a signal source to the projector, be sure to:
- Turn all equipment off before making any connections.
- Use the correct signal cables for each source.
- Ensure the cables are firmly inserted.

In the connections shown below, some cables may not be included with the projector (see "Shipping contents" on page 8). They are commercially available from electronics stores.
Connecting a computer
The projector provides a VGA input socket that allows you to connect it to both IBM® compatibles and Macintosh® computers. A Mac adapter is needed if you are connecting legacy version Macintosh computers.
To connect the projector to a notebook or desktop computer:
- Take the supplied VGA cable and connect one end to the D-Sub output socket of the computer.
- Connect the other end of the VGA cable to the D-SUB/COMP. IN signal input socket on the projector.
The final connection path should be like that shown in the following diagram:
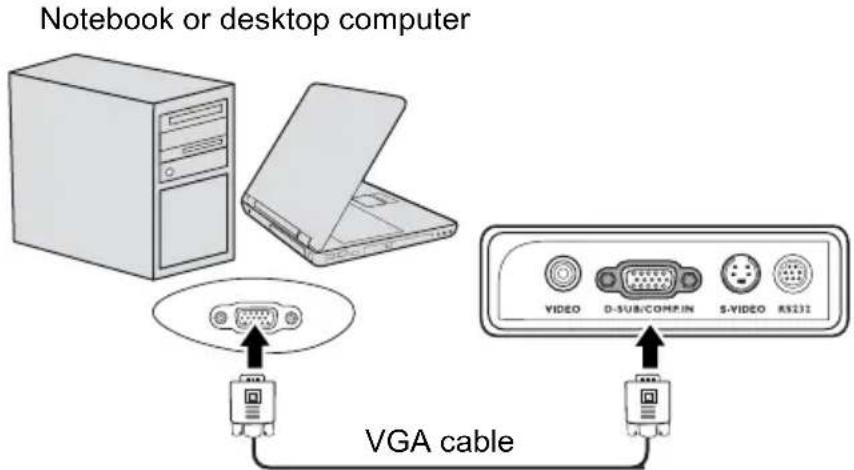

Many notebooks do not turn on their external video ports when connected to a projector. Usually a key combo like FN + F3 or CRT/LCD key turns the external display on/off. Locate a function key labeled CRT/LCD or a function key with a monitor symbol on the notebook. Press FN and the labeled function key simultaneously. Refer to your notebook's documentation to find your notebook's key combination.
Connecting Video source devices
You can connect your projector to various Video source devices that provide any one of the following output sockets:
- Component Video
• S - V i d e o
- Vide o ( composite)
You need only connect the projector to a Video source device using just one of the above connecting methods, however each provides a different level of video quality. The method you choose will most likely depend upon the availability of matching terminals on both the projector and the Video source device as described below:
Best video quality
The best available video connection method is Component Video (not to be confused with composite Video). Digital TV tuner and DVD players output Component Video natively, so if available on your devices, this should be your connection method of choice in preference to (composite) Video.
See "Connecting a Component Video source device" on page 19 for how to connect the projector to a component video device.
Better video quality
The S-Video method provides a better quality analog video than standard composite Video. If you have both composite Video and S-Video output terminals on your Video source device, you should elect to use the S-Video option.
See "Connecting an S-Video source device" on page 20 for how to connect the projector to an S-Video device.
Least video quality
Composite Video is an analog video and will result in a perfectly acceptable, but less than optimal result from your projector, being the least video quality of the available methods described here.
See "Connecting a composite Video source device" on page 21 for how to connect the projector to a composite Video device.
Connecting a Component Video source device
Examine your Video source device to determine if it has a set of unused Component Video output sockets available:
• If so, you can continue with this procedure.
- If not, you will need to reassess which method you can use to connect to the device.
To connect the projector to a Component Video source device:
- Take a Component Video to VGA (D-Sub) adaptor cable and connect the end with 3 RCA type connectors to the Component Video output sockets of the Video source device. Match the color of the plugs to the color of the sockets; green to green, blue to blue, and red to red.
- Connect the other end of the Component Video to VGA (D-Sub) adaptor cable (with a D-Sub type connector) to the D-SUB/COMP. IN socket on the projector.
The final connection path should be like that shown in the following diagram:
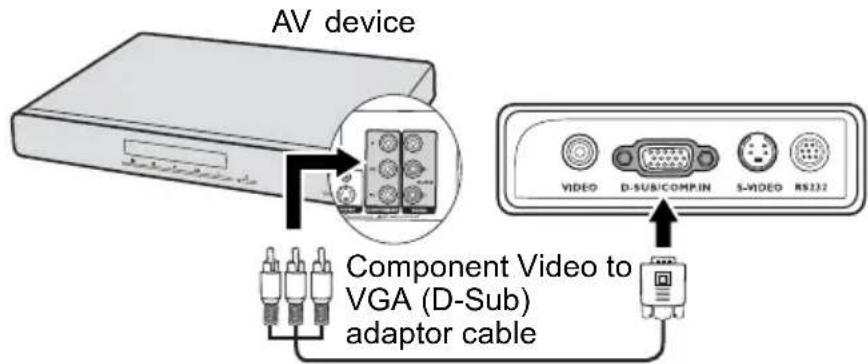

If the selected video image is not displayed after the projector is turned on and the correct video source has been selected, check that the Video source device is turned on and operating correctly. Also check that the signal cables have been connected correctly.
Connecting an S-Video source device
Examine your Video source device to determine if it has an unused S-Video output socket available:
• If so, you can continue with this procedure.
- If not, you will need to reassess which method you can use to connect to the device.
To connect the projector to an S-Video source device:
- Take an S-Video cable and connect one end to the S-Video output socket of the Video source device
- Connect the other end of the S-Video cable to the S-VIDEO socket on the projector. The final connection path should be like that shown in the following diagram:
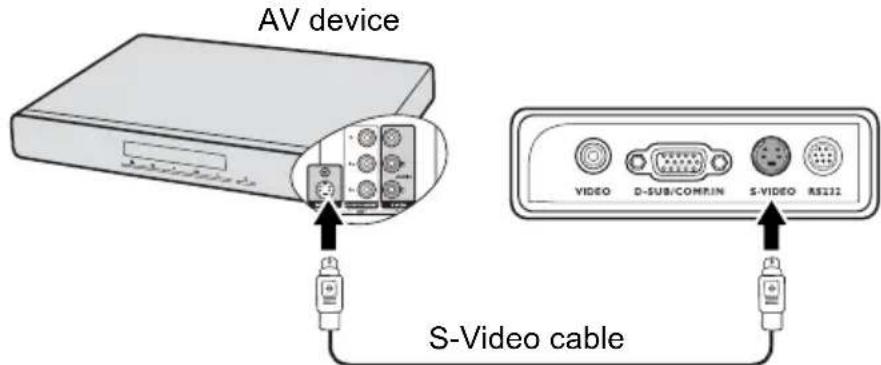

- If the selected video image is not displayed after the projector is turned on and the correct video source has been selected, check that the Video source device is turned on and operating correctly. Also check that the signal cables have been connected correctly.
- If you have already made a Component Video connection between the projector and this S-Video source device using Component Video connections, you need not connect to this device using an S-Video connection as this makes an unnecessary second connection of poorer picture quality. See "Connecting Video source devices" on page 18 for details.
Connecting a composite Video source device
Examine your Video source device to determine if it has a set of unused composite Video output sockets available:
• If so, you can continue with this procedure.
- If not, you will need to reassess which method you can use to connect to the device.
To connect the projector to a composite Video source device:
- Take a Video cable and connect one end to the composite Video output socket of the Video source device.
- Connect the other end of the Video cable to the VIDEO socket on the projector. The final connection path should be like that shown in the following diagram:
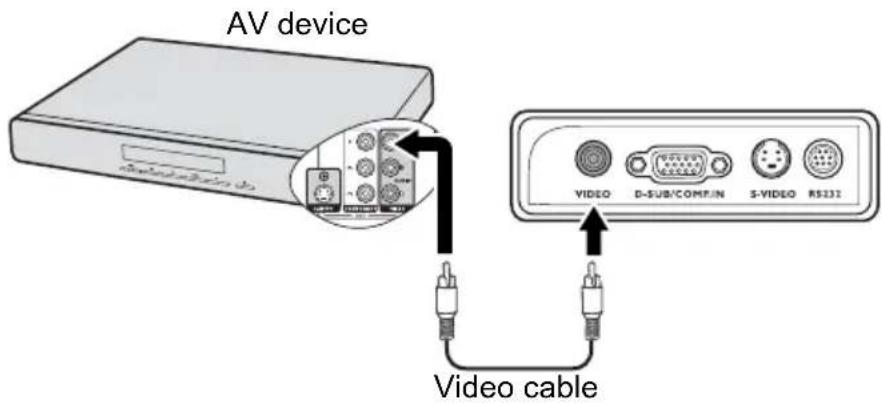

- If the selected video image is not displayed after the projector is turned on and the correct video source has been selected, check that the Video source device is turned on and operating correctly. Also check that the signal cables have been connected correctly.
- You need only connect to this device using a composite Video connection if Component Video and S-Video inputs are unavailable for use. See "Connecting Video source devices" on page 18 for details.
Operation
Starting up the projector
-
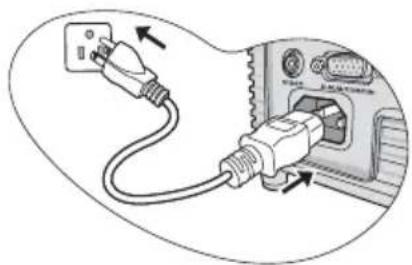
Plug the power cord into the projector and into a wall socket. Turn on the wall socket switch (where fitted). Check that the POWER indicator light on the projector lights orange after power has been applied.
-
Remove the lens cap. If it is closed, it could become deformed due to the heat produced by the projection lamp.
-
Press Power on the projector or remote control to start the projector. The POWER indicator light flashes green and stays green when the projector is on.
The start up procedure takes about 30 seconds. In the later stage of start up, a startup logo is projected.
(If necessary) Rotate the focus ring to adjust the image clearness.
natural_image
Diagram showing a plug inserted into an audio jack, with arrows indicating connection (no text or symbols present)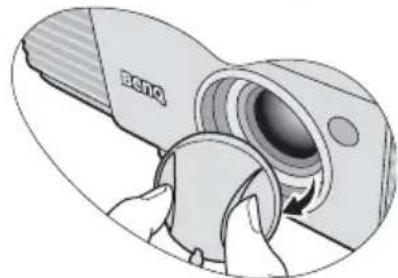
natural_image
Illustration of a camera lens being opened into a device, showing hands and a circular component (no text or symbols)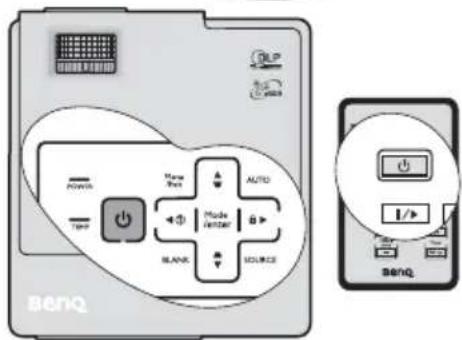

- If the projector is still hot from previous activity, it will run the cooling fan for approximately 90 seconds before energizing the lamp.
- To maintain the lamp life, once you turn the projector on, wait at least 5 minutes before turning it off.
-
If you are prompted for a password, press the arrow keys to enter a six-digit password. See "Utilizing the password function" on page 24 for details.
-
Switch all of the connected equipment on.
-
The projector will start to search for input signals. The current input signal being scanned displays in the upper left corner of the screen. If the projector doesn't detect a valid signal, the message 'No Signal' will continue displaying until an input signal is found.
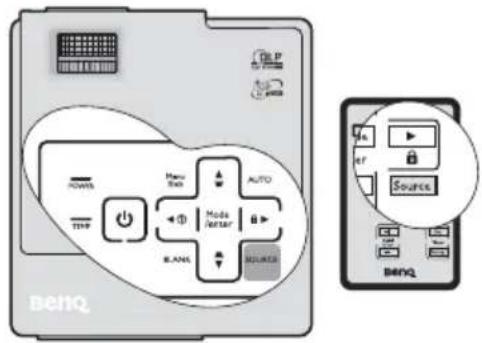
You can also press SOURCE on the projector or remote control to select your desired input signal. See "Switching input signal" on page 26 for details.

If the frequency/resolution of the input signal exceeds the projector's operating range, you will see the message 'Out of Range' displayed on a blank screen. Please change to an input signal which is compatible with the projector's resolution or set the input signal to a lower setting. See "Timing chart" on page 54 for details.
Using the menus
The projector is equipped with On-Screen Display (OSD) menus for making various adjustments and settings.
Below is the overview of the OSD menu.
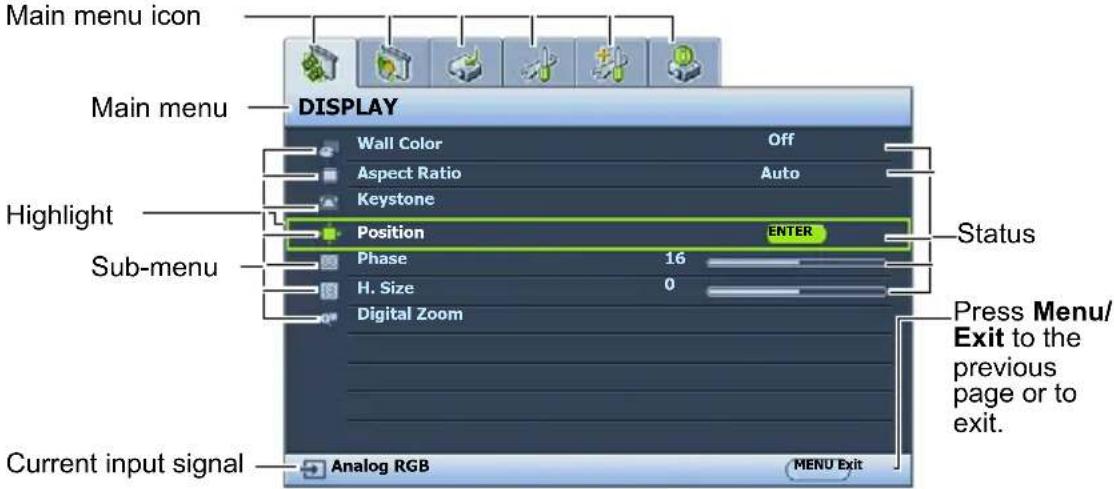
To use the OSD menus, please set them to your familiar language first.
- Press Menu/Exit on the projector or remote control to turn the OSD menu on.
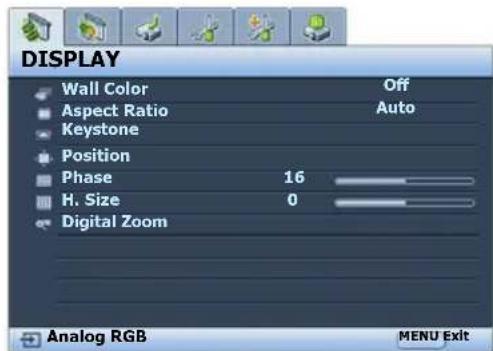
- Press ▼ to highlight Language and press 🔊to select a preferred language.
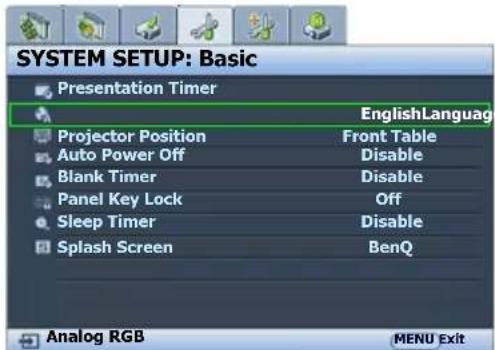
- Use / to highlight the SYSTEM SETUP: Basic menu.
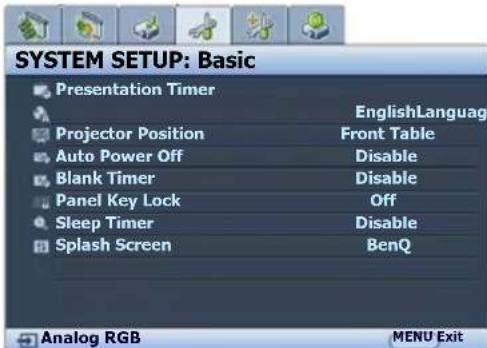
- Press Menu/Exit twice* on the projector or remote control to leave and save the settings.
*The first press leads you back to the main menu and the second press closes the OSD menu.
Utilizing the password function
For security purposes and to help prevent unauthorized use, the projector includes an option for setting up password security. The password can be set through the On-Screen Display (OSD) menu. For details of the OSD menu operation, please refer to "Using the menus" on page 23.

* You will be inconvenienced if you activate the power-on lock functionality and subsequently forget the password. Print out this manual (if necessary) and write the password you used in this manual, and keep the manual in a safe place for later recall.
Setting a password

Once a password has been set, the projector cannot be used unless the correct password is entered every time the projector is started.
- Open the OSD menu and go to the SYSTEM SETUP: Advanced > Security Settings menu. Press Mode/Enter. The Security Settings page displays.
- Highlight Power on lock and select On by pressing ◀/▶.
- As pictured to the right, the four arrow keys ( , ▲
▶, ▼) respectively represent 4 digits (1, 2,
3, 4). According to the password you desire to set, press the arrow keys to enter six digits for the password.
- Confirm the new password by re-entering the new password.
Once the password is set, the OSD menu returns to the Security Settings page.
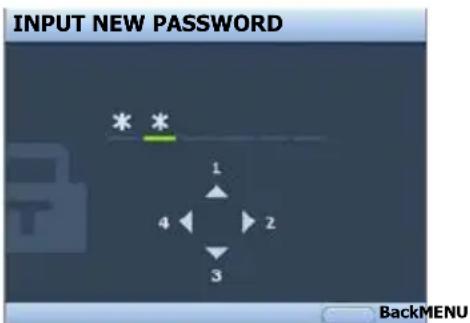

The digits being input will display as asterisks on-screen. Write your selected password down here in this manual in advance or right after the password is entered so that it is available to you should you ever forget it.
Password: ____ ____ ____
Keep this manual in a safe place.
- To leave the OSD menu, press Menu/Exit.
If you forget the password
If the password function is activated, you will be asked to enter the six-digit password every time you turn on the projector. If you enter the wrong password, the password error message as pictured to the right displays lasting for three seconds, and the message 'INPUT PASSWORD' follows. You can retry by entering another six-digit password, or if you did not record the
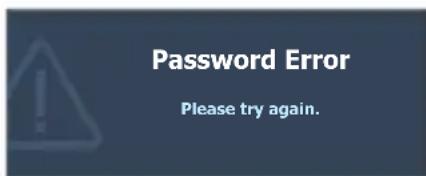
password in this manual, and you absolutely do not remember it, you can use the password recall procedure. See "Entering the password recall procedure" on page 25 for details.
If you enter an incorrect password 5 times in succession, the projector will automatically shut down in a short time.
Entering the password recall procedure
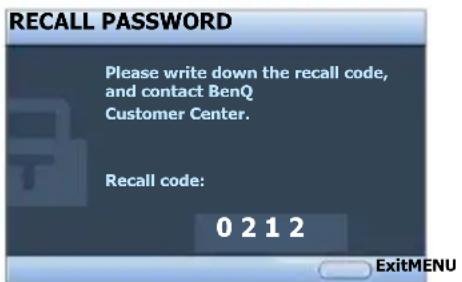
- Press and hold AUTO on the projector or remote control for 3 seconds. The projector will display a coded number on the screen.
- Write down the number and turn off your projector.
- Seek help from the local BenQ service center to decode the number. You may be required to provide proof of purchase documentation to verify that you are an authorized user of the projector.
Changing the password
- Open the OSD menu and go to the SYSTEM SETUP: Advanced > Security Settings > Change password menu.
- Press Mode/Enter. The message 'INPUT CURRENT PASSWORD' displays.
-
Enter the old password.
-
If the password is correct, another message 'INPUT NEW PASSWORD' displays.
-
If the password is incorrect, the password error message displays lasting for three seconds, and the message 'INPUT CURRENT PASSWORD' displays for your retry. You can press Menu/Exit to cancel the change or try another password.
-
Enter a new password.

The digits being input will display as asterisks on-screen. Write your selected password down here in this manual in advance or right after the password is entered so that it is available to you should you ever forget it.
Password: ____
Keep this manual in a safe place.
- Confirm the new password by re-entering the new password.
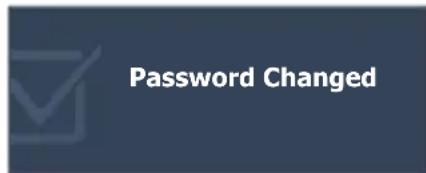
- You have successfully assigned a new password to the projector. Remember to enter the new password next time the projector is started.
- To leave the OSD menu, press Menu/Exit.
Disabling the password function
To disable password protection, go back to the SYSTEM SETUP: Advanced > Security Settings > Power on lock menu after opening the OSD menu system. Select Off by pressing
◀ /▶ . The message 'INPUT PASSWORD' displays. Enter the current password.
- If the password is correct, the OSD menu returns to the Security Settings page with 'Off' shown in the row of Power on lock. You will not have to enter the password next time you turn on the projector.
- If the password is incorrect, the password error message displays lasting for three seconds, and the message 'INPUT PASSWORD' displays for your retry. You can press Menu/Exit to cancel the change or try another password.

Though the password function is disabled, you need to keep the old password in hand should you ever need to re-activate the password function by entering the old password.
Switching input signal
The projector can be connected to multiple devices at the same time. However, it can only display one full screen at a time.
Be sure the Quick Auto Search function in the SOURCE menu is On (which is the default of this projector) if you want the projector to automatically search for the signals.
You can also manually cycle through the available input signals.
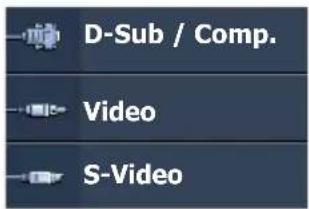
- Press SOURCE on the projector or remote control. A source selection bar displays.
- Press / u▲til▼our desired signal is selected and press Mode/Enter. Once detected, the selected source information will display on the screen for seconds. If there is multiple equipment connected to the projector, repeat steps 1-2 to search for another signal.

- The brightness level of the projected image will change accordingly when you switch between different input signals. Data (graphic) "PC" presentations using mostly static images are generally brighter than "Video" using mostly moving images (movies).
- The input signal type effects the options available for the Picture Mode. See "Selecting a picture mode" on page 30 for details.
- The native display resolution of this projector is in a 4:3 aspect ratio. For best display picture results, you should select and use an input signal which outputs at this resolution. Any other resolutions will be scaled by the projector depending upon the 'aspect ratio' setting, which may cause some image distortion or loss of picture clarity. See "Selecting the aspect ratio" on page 29 for details.
Adjusting the projected image
Adjusting the projection angle
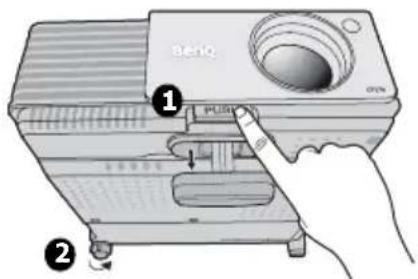
The projector is equipped with 1 quick-release adjuster foot and 1 rear adjuster foot. These adjusters change the image height and projection angle. To adjust the projector:
-
Press the quick-release button and lift the front of the projector. Once the image is positioned where you want it, release the quick-release button to lock the foot in position.
-
Screw the rear adjuster foot to fine tune the horizontal angle.
To retract the foot, hold up the projector while pressing the quick-release button, then slowly lower the projector. Screw the rear adjuster foot in a reverse direction.
If the projector is not placed on a flat surface or the screen and the projector are not perpendicular to each other, the projected image becomes trapezoidal. To correct this situation, see "Correcting keystone" on page 28 for details.

- Do not look into the lens while the lamp is on. The strong light from the lamp may cause damage to your eyes.
- Be careful when you press the adjuster button as it is close to the exhaust vent where hot air comes from.
Auto-adjusting the image
In some cases, you may need to optimize the picture quality. To do this, press AUTO on the projector or remote control. Within 3 seconds, the built-in Intelligent Auto Adjustment function will re-adjust the values of Frequency and Clock to provide the best picture quality.
The current source information will be displayed in the upper left corner of the screen for 3 seconds.
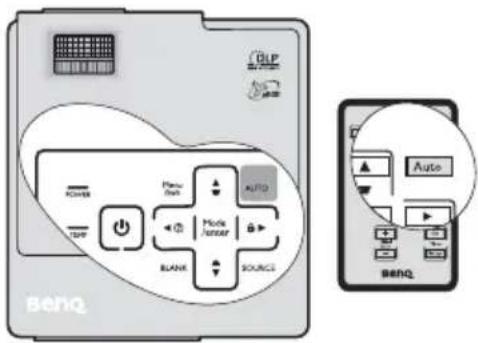

- The screen will be blank while AUTO is functioning.
- This function is only available when a PC signal (analog RGB) is selected.
Fine-tuning the image size and clarity
- Adjust the projected image to the size that you need using the zoom ring.
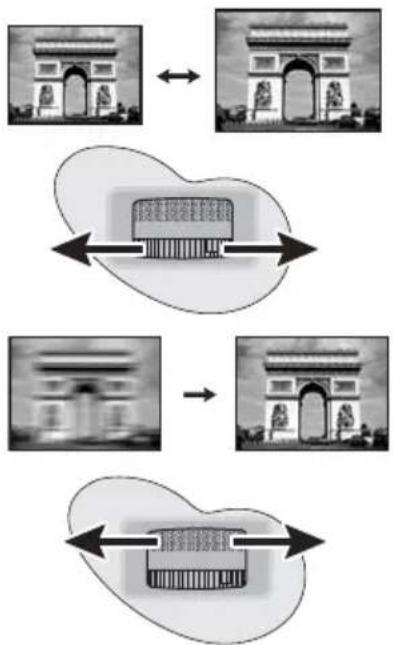
flowchart
graph TD
    A["Indian Empire Arch"] <--> B["Structure"]
    C["Indian Empire"] --> D["Structure"]
    E["Indian Empire"] --> F["Structure"]
    G["Indian Empire"] --> H["Structure"]
- Then sharpen the image by rotating the focus ring.
Correcting keystone
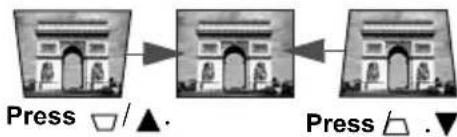
Keystoning refers to the situation where the projected image is noticeably wider at either the top or bottom. It occurs when the projector is not perpendicular to the screen.
To correct this, besides adjusting the height of the projector, you will need to manually correct it following one of these steps.
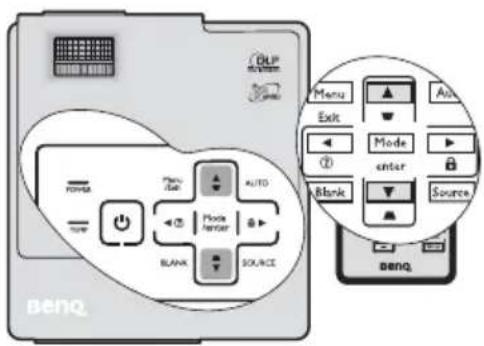
• Using the remote control
Press ☐ on the projector or remote control to display the Keystone correction page. Press ☐ to correct keystoning at the top of the image. Press ☐ to correct keystoning at the bottom of the image.
• Using the OSD menu
-
Press Menu/Exit and then press / until the DISPLAY menu is highlighted.
-
Press ▼ to highlight Keystone and press Mode/Enter. The Keystone correction page displays.
-
Press to correct keystoning at the top of the image or press to correct keystoning at the bottom of the image.
flowchart
graph LR
    A["Press"] --> B["Characterization"]
    B --> C["Printing"]
    C --> D["Printing"]
Magnifying and searching for details
If you need to find the details on the projected picture, magnify the picture. Use the direction arrow keys for navigating the picture.
• Using the remote control
-
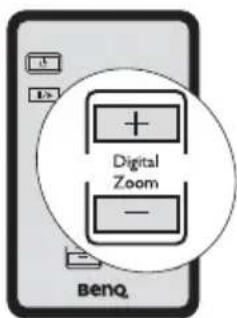
Press Digital Zoom +/- to display the Zoom bar.
-
Press Digital Zoom + to magnify the center of the picture. Press the key repeatedly until the picture size is suitable for your need.
-
Use the directional arrows ( , , , ▲ on ▶ ◀ ▶ the projector or remote control to navigate the picture.
-
To restore the picture to its original size, press AUTO. You can also press Digital Zoom -. When the key is pressed again, the picture is further reduced until it is restored to the original size.
• Using the OSD menu
-
Press Menu/Exit and then press ◀ /▶ until the DISPLAY menu is highlighted.
-
Press ▼ to highlight Digital Zoom and press Mode/Enter. The Zoom bar displays.
-
Repeat steps 2-4 in the section of "Using the remote control" above. Or if you are using the projector control panel, continue to the following steps.
-
Press on the projector repeatedly to magnify the picture to a desired size.
-
To navigate the picture, press Mode/Enter to switch to the paning mode and press the directional arrows (▲, ▼) to navigate the picture.
-
Use the directional arrows (, , ▲) on the projector or remote control to navigate the picture.
-
To reduce size of the picture, press Mode/Enter to switch back to the zoom in/out functionality, and press AUTO to restore the picture to its original size. You can also press ▼repeatedly until it is restored to the original size.

The picture can only be navigated after the picture is magnified. You can further magnify the picture while searching for details.
Selecting the aspect ratio
The 'aspect ratio' is the ratio of the image width to the image height. Most analog TV and computers are in 4:3 ratio, which is the default for this projector, and digital TV and DVDs are usually in 16:9 ratio.
With the advent of digital signal processing, digital display devices like this projector can dynamically stretch and scale the image output to a different aspect than that of the image input signal.
To change the projected image ratio (no matter what aspect the source is):
-
Press Menu/Exit and then press ◀ /▶ until the DISPLAY menu is highlighted.
-
Press ▼ to highlight Aspect Ratio.
-
Press / to select an aspect ratio to suit the format of the video signal and your display requirements.
About the aspect ratio

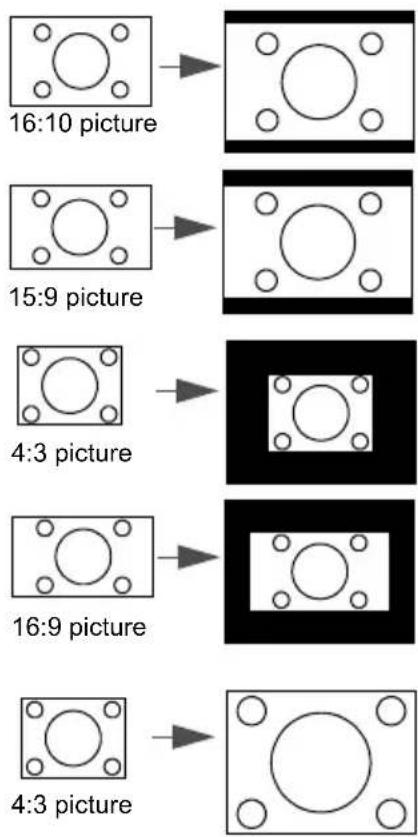
In the pictures below, the black portions are inactive areas and the white portions are active areas. OSD menus can be displayed on those unused black areas.
- Auto: Scales an image proportionally to fit the projector's native resolution in its horizontal width. This is suitable for the incoming image which is neither in 4:3 nor 16:9 and you want to make most use of the screen without altering the image's aspect ratio.
flowchart
graph TD
    A["16:10 picture"] --> B["15:9 picture"]
    B --> C["4:3 picture"]
    C --> D["16:9 picture"]
    D --> E["4:3 picture"]
-
Real: The image is projected as its original resolution, and resized to fit within the display area. For input signals with lower resolutions, the projected image will display smaller than if resized to full screen. You could adjust the zoom setting or move the projector towards the screen to increase the image size if necessary. You may also need to refocus the projector after making these adjustments.
-
4:3: Scales an image so that it is displayed in the center of the screen with a 4:3 aspect ratio. This is most suitable for 4:3 images like computer monitors, standard definition TV and 4:3 aspect DVD movies, as it displays them without aspect alteration.
-
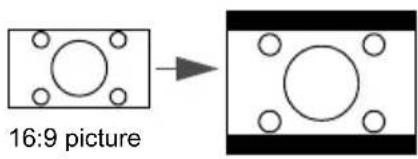
16:9: Scales an image so that it is displayed in the center of the screen with a 16:9 aspect ratio. This is most suitable for images which are already in a 16:9 aspect, like high definition TV, as it displays them without aspect alteration.
Optimizing the image
Selecting a picture mode
The projector is preset with several predefined picture modes so that you can choose one to suit your operating environment and input signal picture type.
To select an operation mode that suits your need, you can follow one of the following steps.
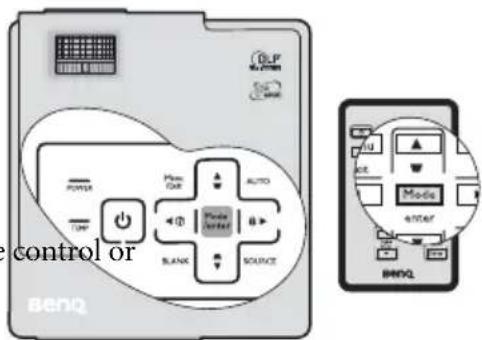
- Press Mode/Enter on the remote projector repeatedly until your desired mode is selected.
- Go to the PICTURE > Picture Mode menu and press 🔊 to select a desired mode.
Picture modes for different types of signals
The picture modes available for different types of signals are listed below.
PC input signals: D-Sub / Comp. (analog RGB)
- Dynamic mode (Default): Maximizes the brightness of the projected image. This mode is suitable for environments where extra-high brightness is required, such as using the projector in well lit rooms.
- Presentation mode: Is designed for presentations. The brightness is emphasized in this mode to match PC and notebook coloring.
- sRGB mode: Maximizes the purity of RGB colors to provide true-to-life images regardless of brightness setting. It is most suitable for viewing photos taken with an sRGB compatible and properly calibrated camera, and for viewing PC graphic and drawing applications such as AutoCAD.
- Cinema mode: Is appropriate for playing colorful movies, video clips from digital cameras or DVs through the PC input for best viewing in a blackened (little light) environment.
- User 1/User 2 mode: Recalls the settings customized based on the current available picture modes. See "Setting the User 1/User 2 mode" on page 31 for details.
Video input signals: S-Video, Video, D-Sub / Comp. (YPbPr)
- Dynamic mode: Is suitable for playing gamebox-based video games in a normal living room lighting level environment.
- Standard mode (Default): Is appropriate for viewing colorful movies, video clips from digital cameras or DVs.
- Cinema mode: Is suitable for enjoying dark movies or DVD movies best viewed in a blackened (little light) home cinema or lounge room environment.
- User 1/User 2 mode: Recalls the settings customized based on the current available picture modes. See "Setting the User 1/User 2 mode" on page 31 for details.
Setting the User 1/User 2 mode
There are two user-definable modes if the current available picture modes are not suitable for your need. You can use one of the picture modes (except the User 1/User 2) as a starting point and customize the settings.
- Press Menu/Exit to open the On-Screen Display (OSD) menu.
- Go to the PICTURE > Picture Mode menu.
- Press ◀/▶ to select User 1 to User 2.
- Press ▼ to highlight Reference Mode.

This function is only available when User 1 or User 2 mode is selected up in the Picture Mode sub-menu item.
-
Press / to select a picture mode that is closest to your need.
-
Press ▼ to select a sub-menu item to be changed and adjust the value with ◀/▶. See "Fine-tuning the image quality in user modes" below for details.
-
When all settings have been done, highlight Save Settings and press Mode/Enter to store the settings.
-
The confirmation message 'Setting Saved' displays.
Using Wall Color
In the situation where you are projecting onto a colored surface such as a painted wall which may not be white, the Wall Color feature can help correct the projected picture's color to prevent possible color difference between the source and projected pictures.
To use this function, go to the DISPLAY > Wall Color menu and press ◀/▶ to select a color which is the closest to the color of the projection surface. There are several precalibrated colors to choose from: Light Yellow, Pink, Light Green, Blue, and Blackboard.
Fine-tuning the image quality in user modes
According to the detected signal type, there are some user-definable functions available when User 1 or User 2 mode is selected. You can make adjustments to these functions based on your needs.
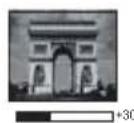
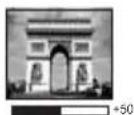
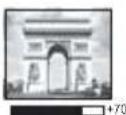
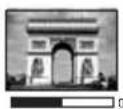
Adjusting Brightness
Highlight Brightness in the PICTURE menu and adjust the values by pressing ◀/▶ on the projector or remote control.
The higher the value, the brighter the image. And lower the setting, darker the image. Adjust this control so the black areas of the image appear just as black and that detail in the dark areas is visible.
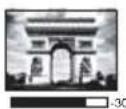
Adjusting Contrast
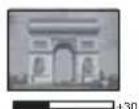
Highlight Contrast in the PICTURE menu and adjust the values by pressing ◀/▶ on the projector or remote control.
The higher the value, the greater the contrast. Use this to set the peak white level after you have previously adjusted the Brightness setting to suit your selected input and viewing environment.
Adjusting Color
Highlight Color in the PICTURE menu and adjust the values by pressing ◀/▶ on the projector or remote control.
Lower setting produces less saturated colors. If the setting is too high, colors on the image will be overpowering, which makes the image unrealistic.
Adjusting Tint
Highlight Tint in the PICTURE menu and adjust the values by pressing ◀/▶ on the projector or remote control.
The higher the value, the more reddish the picture becomes. The lower the value, the more greenish the picture becomes.
Adjusting Sharpness
Highlight Sharpness in the PICTURE menu and adjust the values by pressing ◀/▶ on the projector or remote control.
The higher the value, the sharper the picture becomes. The lower the value, the softer the picture becomes.
Adjusting Brilliant Color
Highlight Brilliant Color in the PICTURE menu and select by pressing ◀/▶ on the projector or remote control.
This feature utilizes a new color-processing algorithm and system level enhancements to enable higher brightness while providing truer, more vibrant colors in picture. It enables a greater than 50% brightness increase in mid-tone images, which are common in video and natural scenes, so the projector reproduces images in realistic and true colors. If you prefer images with that quality, select On. If you don't need it, select Off.
On is the default and recommended selection for this projector. When Off is selected, the Color Temperature function is not available.
Selecting a Color Temperature
Highlight Color Temperature in the PICTURE menu and adjust the values by pressing ◀ / ▶ on the projector or remote control.
The options available for color temperature* settings vary according to the signal type selected.
-
T1: With the highest color temperature, T1 makes the image appear the most bluish white than other settings.
-
T2: Makes images appear bluish white.
-
T3: Maintains normal colorings for white.
-
T4: Makes images appear reddish white.
\*About color temperatures:
There are many different shades that are considered to be "white" for various purposes. One of the common methods of representing white color is known as the "color temperature". A white color with a low color temperature appears to be reddish white. A white color with a high color temperature appears to have more blue in it.
3D Color Management
In most installation situations, color management will not be necessary, such as in classroom, meeting room, or lounge room situations where lights remain on, or where building external windows allow daylight into the room.
Only in permanent installations with controlled lighting levels such as boardrooms, lecture theaters, or home theaters, should color management be considered. Color management provides fine color control adjustment to allow for more accurate color reproduction, should you require it.
Proper color management can only be achieved under controlled and reproducible viewing conditions. You will need to use a colorimeter (color light meter), and provide a set of suitable source images to measure color reproduction. These tools are not provided with the projector, however, your projector supplier should be able to provide you with suitable guidance, or even an experienced professional installer.
The Color Management provides six sets (RGBCMY) of colors to be adjusted. When you select each color, you can independently adjust its range and saturation according to your preference.
If you have purchased a test disc which contains various color test patterns and can be used to test the color presentation on monitors, TVs, projectors, etc. You can project any image from the disc on the screen and enter the 3D Color Management menu to make adjustments.
To adjust the settings:
- Go to the PICTURE menu and highlight 3D Color Management.
- Press Mode/Enter and the 3D Color Management page displays.
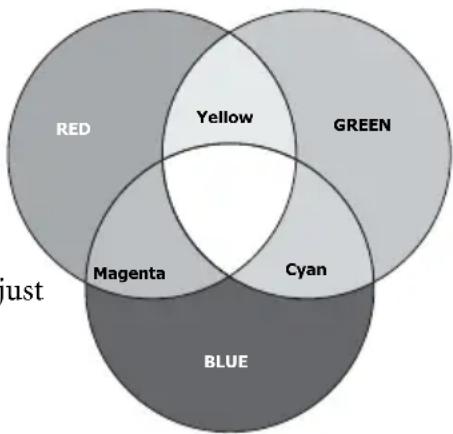
- Highlight Primary Color and press ◀/▶ to select a color from among Red, Yellow, Green, Cyan, Blue, or Magenta.
- Press ▼ to highlight Hue and press ◀/▶ to select its range. Increase in the range will include colors consisted of more proportions of its two adjacent colors.
Please refer to the illustration to the right for how the colors relate to each other.
For example, if you select Red and set its range at 0, only pure red in the projected picture will be selected. Increasing its range will include red close to yellow and red close to magenta.
other
| Region | Red | Green | Yellow | Cyan | Magenta | |---|---|---|---|---|---| | Left Only | 0 | 0 | 0 | 0 | 0 | | Left Intersection | 0 | 1 | 0 | 0 | 0 | | Right Only | 0 | 0 | 1 | 0 | 0 | | Right Intersection | 0 | 1 | 0 | 0 | 0 | | Bottom Left Only | 0 | 0 | 0 | 0 | 0 | | Bottom Intersection | 0 | 1 | 0 | 0 | 0 | | Bottom Right Only | 0 | 0 | 0 | 1 | 0 | | Bottom Bottom Left Only | 0 | 0 | 0 | 0 | 0 | | Bottom Bottom Intersection | 0 | 1 | 0 | 0 | 0 | | Bottom Right Intersection | 0 | 0 | 1 | 0 | 0 | | Bottom Bottom Right Only | 0 | 0 | 0 | 1 | 0 | | Bottom Left & Bottom Intersection | 0 | 0 | 1 | 0 | 0 | | Bottom Left & Bottom Intersection & Yellow only | 0 | 1 | 0 | 0 | 0 | | Bottom Left & Bottom Intersection & Blue only | 0 | 1 | 1 | 0 | 0 | | Bottom Left & Bottom Intersection & Magenta only | 0 | 1 | 1 | 1 | 1 | | Bottom Left & Bottom Intersection & Blue & Yellow & Magenta only | 0 | 1 | 1 | 1 | 1 | | Bottom Left & Bottom Intersection & Blue & Blue & Magenta & Blue & Yellow & Blue & Blue & Blue & Blue & Blue & Blue & Blue & Blue & Blue & Blue & Blue & Blue & Blue & Blue & Blue & Blue & Blue & Blue & Blue & Blue & Blue & Blue & Blue & Blue & Blue & Blue & Blue & Blue & Blue & Blue & Blue & Blue & Blue & Blue & Blue & Blue & Blue & Blue & Blue & Blue & Blue & Blue & Blue & Blue & Blue & Blue & Blue & Blue & Blue & Blue & Green & Green & Green & Green & Green & Green & Green & Green & Green & Green & Green & Green & Green & Green & Green & Green & Green & Green & Green & Green & Green & Green & Green & Green & Green & Green & Green & Green & Green & Green & Green & Green & Green & Green & Green & Green & Green & Green & Green & Green & Green & Green & Green & Green & Green & Green & Green & Green & Green & Green & Blue & Blue & Blue & Blue & Blue & Blue & Blue & Blue & Blue & Blue & Blue & Blue & Blue & Blue & Blue & Blue & Blue & Blue & Blue & Blue & Blue & Blue & Blue & Blue & Blue & Blue & Blue & Blue & Blue & Blue & Blue & Blue & Blue & Blue (Red) <--> ... <--> Yellow (Green) <--> Cyan (Blue) <--> Magenta (Green) <--> Magenta (Blue) <--> Yellow (Green) <--> Cyan (Blue) <--> Magenta (Blue) <--> Magenta (Green) <--> Cyan (Blue) <--> Magenta (Blue) <--> Yellow (Green) <--> Cyan (Blue) <--> Magenta (Blue) <--> Magenta (Green) <--> Cyan (Blue) <--> Magenta (Blue) <--> Magenta (Green) <--> Cyan (Blue) <--> Magenta (Blue) <--> Magenta (Green) <--> Cyan (Blue) <--> Magenta (Blue) <--> Magenta (Green) <--> Cyan (Blue) <--> Magenta (Blue) <--> Magenta (Green) <--> Cyan (Blue) <--> Magenta (Blue) <--> Magagenta (Blue) <--> Cyan (Blue) <--> Magenta (Blue) <--> Magenta (Green) <--> Cyan (Blue) <--> Magenta (Blue) <--> Magenta (Green) <--> Cyan (Blue) <--> Magenta (Blue) <--> Magenta (Green) <--> Cyan (Blue) <--> Magenta (Blue) <--> Magenta (Green) <--> Cyan (Blue) <--> Magenta (Blue) <--> Magenta (Blue) <--> Magenta (Green) <--> Cyan (Blue) <--> Magenta (Blue) <--> Magenta (Green) <--> Cyan (Blue) <--> Magenta (Blue) <--> Magenta (Green) <--> Cyan (Blue) <--> Magenta (Blue) <--> Magenta (Green) <--> Cyan (Blue) <--> Magenta (Blue) <--> Magenta (Green) <--> cyan (Blue) <--> magenta (Blue) <--> magenta (Green) <--> cyan (Blue) <--> magenta (Blue) <--> magenta (Green) <--> cyan (Blue) <--> magenta (Blue) <--> magenta (Green) <--> cyan (Blue) <--> magenta (Blue) <--> magenta (Green) <--> cyan (Blue) <--> magenta (Blue) <--> magenta (Green) <--> cyan (Blue) <--> magenta (Blue) <--> Magenta (Green) <--> cyan (Blue) <--> magenta (Blue) <--> magenta (Green) <--> cyan (Blue) <--> magenta (Blue) <--> magenta (Green) <--> cyan (Blue) <--> magenta (Blue) <--> magenta (Green) <--> cyan (Blue) <--> magenta (Blue) <--> magenta (Green) <--> cyan (Blue) <--> Magenta (Blue) <--> magenta (Green) <--> cyan (Blue) <--> magenta (Blue) <--> magenta (Green)- Press ▼ to highlight Saturation and adjust
its values to your preference by pressing ▶. Every adjustment made will reflect to the image immediately.
For example, if you select Red and set its value at 0, only the saturation of pure red will be affected.
-
Press ▼ to highlight Gain and adjust its values to your preference by pressing ◀/▶. The contrast level of the primary color you select will be affected. Every adjustment made will reflect to the image immediately.
-
Repeat steps 3 to 6 for other color adjustments.
- Make sure you have made all of the desired adjustments.
- Press Menu/Exit to exit and save the settings.

Saturation is the amount of that color in a video picture. Lower settings produce less saturated colors; a setting of "0" removes that color from the image entirely. If the saturation is too high, that color will be overpowering and unrealistic.
Setting the presentation timer
The presentation timer can indicate the presentation time on the screen to help you achieve better time management when giving presentations. Follow these steps to utilize this function:
-
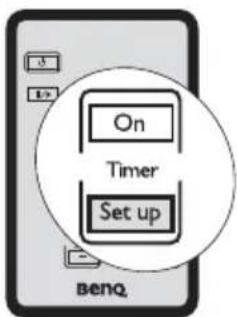
Press Timer Setup on the remote control or go to the SYSTEM SETUP: Basic > Presentation Timer menu and press Mode/Enter to display the Presentation Timer page.
-
Press ▼ to highlight Timer period and decide
the timer period by pressing ⚠ The length of time can be set from 1 to 5 minutes in 1-minute increments and 5 to 240 minutes in 5-minute increments.
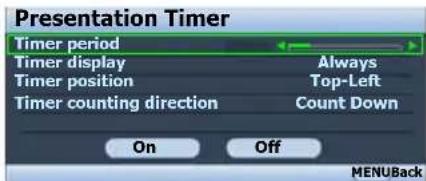

If the timer is already on, the timer will restart whenever the Timer period is reset.
- Press ▼ to highlight Timer display and choose if you want the timer to show up on the screen by pressing ◀ ▶
| Selection Description |
| Always Displays the timer on screen throughout the presentation time. |
| 1 min/2 min/3 min Displays the timer on screen in the last 1/2/3 minute(s). |
| Never Hides the timer throughout the presentation time. |
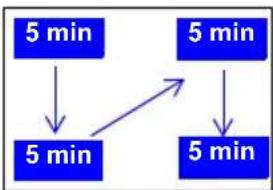
- Press ▼ to highlight Timer position and set the timer position by pressing ◀ ▶.
Top-Left Bottom-Left Top→ Right Bottom-Right
flowchart
graph TD
    A["5 min"] --> B["5 min"]
    C["5 min"] --> D["5 min"]
    B --> D
- Press ▼ to highlight Timer counting direction and select your desired counting direction by pressing ◀ ▶
| Selection Description |
| Count Up Increases from 0 to the preset time. |
| Count Down Decrease from the preset time to 0. |
-
To activate the presentation timer, press and press ◀/▶ to select On and press Mode/Enter.
-
A confirmation message displays. Highlight Yes and press Mode/Enter to confirm. You will see the message "Timer is On" displaying on the screen. The timer starts counting at the time the timer is on.
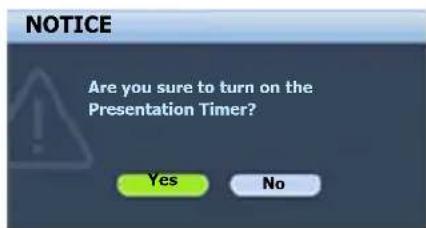
To cancel the timer, perform the following steps.
- Go back to the Presentation Timer page.
- Press ▼ and press ◀/▶ to highlight Off and press Mode/Enter. A confirmation message displays.
- Highlight Yes and press Mode/Enter to confirm. You will see the message "Timer is Off" displaying on the screen.
How to use the Timer On key?
Timer On is a multi-functional key.
- If the presentation timer is off, pressing this key displays a confirmation message. You can decide whether to activate the timer or not by following the on-screen instruction.
- If the timer is already on, pressing this key displays a confirmation message. You can decide whether to restart, continue or turn off the timer by following the on-screen instruction.
Hiding the image
In order to draw the audience's full attention to the presenter, you can use BLANK on the projector or remote control to hide the screen image. Press any key on the projector or remote control to restore the image. The word 'BLANK' appears at the lower right corner of the screen while the image is hidden.
You can set the blank time in the SYSTEM SETUP: Basic > Blank Timer menu to let the projector return the image automatically after a period of time when there is no action taken on the blank screen.
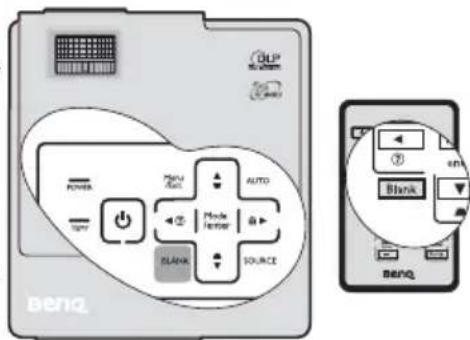

Once BLANK is pressed, the projector enters Economic mode automatically.

Do not block the projection lens from projecting as this could cause the blocking object to become heated and deformed or even cause a fire.
Locking control keys
With the control keys on the projector locked, you can prevent your projector settings from being changed accidentally (by children, for example). When the Panel Key Lock is on, no control keys on the projector will operate except Power.
-
Press / ▶ on the projector or remote control or go to the SYSTEM SETUP: Basic > Panel Key Lock menu, and select On by pressing ▶ on the projector or remote control.
-
A confirmation message displays. Select Yes to confirm.
To release panel key lock, press and hold ▶ / 🔒 for 3 seconds on the projector or remote control.
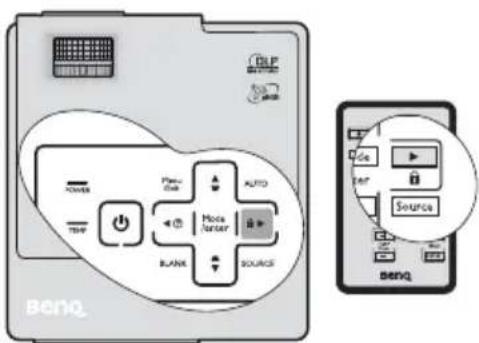
You can also use the remote control to enter the SYSTEM SETUP: Basic > Panel Key Lock and press ↗to select Off.

- Keys on the remote control are still in use when panel key lock is enabled.
- If you press Power to turn off the projector without disabling panel key lock, the projector will still be in locked status the next time it is turned on.
Freezing the image
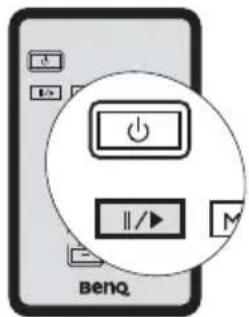
Press ||on the remote control to freeze the image. The word 'FREEZE' will display in the upper left corner of the screen. To release the function, press any key on the projector or remote control.
Even if an image is frozen on the screen, the pictures are running on the video or other device. If the connected devices have active audio output, you will still hear the audio even though the image is frozen on screen.
Utilizing FAQ function
The INFORMATION menu contains possible solutions to problems encountered by users regarding image quality, installation, special feature operation and service information.
To get the FAQ information:
-
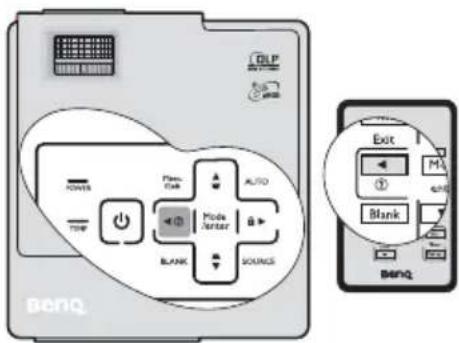
Press / or the projector or remote control or press Menu/Exit to open the OSD menu and press ▶ to highlight the INFORMATION menu.
-
Press ▼ to highlight FAQ-Image and Installation or FAQ-Features and Service based on the information you want to know.
-
Press Mode/Enter.
-
Press / to select a problem and press Mode/Enter for possible solutions.
-
Press Menu/Exit to exit the OSD.
Operating in a high altitude environment
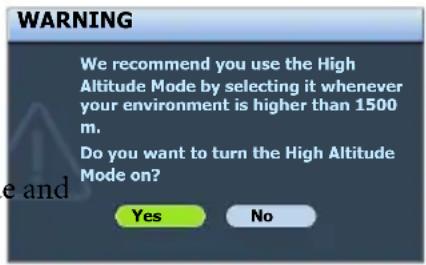
We recommend you use the High Altitude Mode when your environment is between 1500 m –3000 m above sea level, and temperature is between 0^ C– 35^ C.

Do not use the High Altitude Mode if your altitude is between 0 m and 1500 m and temperature is between 0°C and 35°C. The projector will be over cooled, if you turn the mode on under such a condition.
To activate the High Altitude Mode:
- Press Menu/Exit and then press / until the SYSTEM SETUP: Advanced menu is highlighted.
- Press ▼ to highlight High A press ↗ to select On. A confirmation message displays.
- Highlight Yes and press Mode/Enter.
Operation under "High Altitude Mode" may cause a higher decibel operating noise level because of increased fan speed necessary to improve overall system cooling and performance.
If you use this projector under other extreme conditions excluding the above, it may display auto shut-down symptoms, which is designed to protect your projector from over-heating. In cases like this, you should switch to High Altitude Mode to solve these symptoms. However, this is not to state that this projector can operate under any and all harsh or extreme conditions.
Personalizing the projector menu display
The On-Screen Display (OSD) menus can be set according to your preferences. The following settings do not affect the projection settings, operation, or performance.
- Menu display time in the SYSTEM SETUP: Advanced > Menu Settings menu sets the length of time the OSD will remain active after your last key press. The time length ranges from 5 to 30 seconds in 5-second increments. Use ⚠️ to select a suitable time frame.
- Menu position in the SYSTEM SETUP: Advanced >Menu Settings menu sets the OSD position in five locations. Use ↕ to select a preferred position.
- Language in the SYSTEM SETUP: Basic menu sets your familiar language for the OSD menus. Use to select your language.
- Splash Screen in the SYSTEM SETUP: Basic menu sets a preferred logo screen to be displayed during projector start-up. Use 🔊 to select a screen.
Shutting down the projector
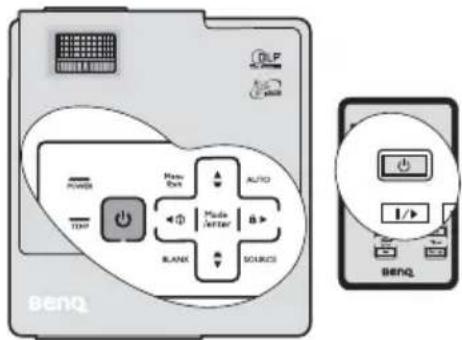
- Press Power and a confirmation message displays prompting you. If you don't respond in a few seconds, the message will disappear.
- Press ⬤ Power a second time. The POWER indicator light flashes orange, the projection lamp shuts down, and the fans will continue to run for approximately 90 seconds to cool down the projector.
- Once the cooling process finishes, the POWER indicator light is a steady orange and fans stop.
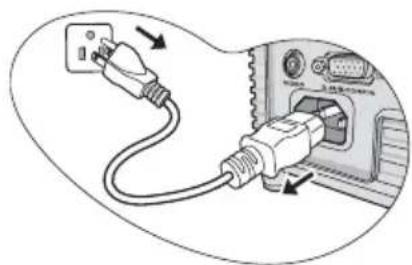
- Disconnect the power cord from the wall socket if the projector will not be used in an extended period of time.

• To protect the lamp, the projector will not respond to any commands during the cooling process.
natural_image
Diagram showing a plug connected to an VGA socket, with arrows indicating cable routing (no text or symbols present)- To shorten the cooling time, you can also activate the Quick Cooling function. See "Quick Cooling" on page 43 for details.
- Do not unplug the power cord before the projector shutdown sequence is complete or during the 90-second cooling down process.
- If the projector is not properly shut down, to protect the lamp, when you attempt to re-start the projector, the fans will run for a few minutes to cool down. Press Power again to start the projector after the fans stop and the POWER indicator light turns orange.
Menu operation
Menu system
Please note that the on-screen display (OSD) menus vary according to the signal type selected.
| Main menu Sub-menu Options | ||
| 1. DISPLAY | Wall Color | Off/Light Yellow/Pink/Light Green/Blue/Blackboard |
| Aspect Ratio | Auto/Real/4:3/16:9 | |
| Keystone | ||
| Position | ||
| Phase | ||
| H. Size | ||
| Digital Zoom | ||
| 2. PICTURE | Picture Mode | PC source: Dynamic/Presentation/sRGB/Cinema/User 1/User 2Video source: Dynamic/Standard/Cinema/User 1/User 2 |
| Reference Mode | PC source: Dynamic/Presentation/sRGB/Cinema Video source: Dynamic/Standard/Cinema | |
| Brightness | ||
| Contrast | ||
| Color | ||
| Tint | ||
| Sharpness | ||
| Brilliant Color On/Off | ||
| Color Temperature | T1/T2/T3/T4 | |
| 3D Color Management | Primary Color R/G/B/Y/C/M | |
| Hue | ||
| Saturation | ||
| Gain | ||
| Save Settings | ||
| 3. SOURCE Quick Auto Search On/Off | ||
| FAQ-Image and Installation | |||
| FAQ-Features and Service | |||
| 6. INFORMATION | Current System Status | • Source• Picture Mode• Resolution• Color System• Equivalent Lamp Hour | |
| 4. SYSTEM SETUP: Basic | Presentation Timer | Timer period 1~240 minutes | |
| Timer display Always/1 min/2 min/3 min/Never | |||
| Timer position | Top-Left/Bottom-Left/Top-Right/Bottom-Right | ||
| Timer counting direction | Count Down/Count Up | ||
| On/Off | |||
| Language | ENGLISH/ FRANÇAIS/DEUTSCH/ ITALIANO/ESPAÑOL/РУССКИЙ/繁體中文/简体中文/日本語/한국어/Svenska/Nederlands/Türkçe/Čeština/Português/Толаина/Polski | ||
| Projector Position Front Table/Rear Table | |||
| Auto Power Off | Disable/5 min/10 min/15 min/20 min/25 min/30 min | ||
| Blank Timer | Disable/5 min/10 min/15 min/20 min/25 min/30 min | ||
| Panel Key Lock On/Off | |||
| Sleep Timer | Disable/30 min/1 hr/2 hr/3 hr/4 hr/8 hr/12 hr | ||
| Splash Screen Black/Blue/BenQ | |||
| 5. SYSTEM SETUP: Advanced | Quick Cooling On/Off | ||
| High Altitude Mode On/Off | |||
| Menu Settings | Menu display time | 5 sec/10 sec/15 sec/20 sec/25 sec/30 sec | |
| Menu position | Center/Top-left/Top-right/Bottom-right/Bottom-left | ||
| Lamp Settings | Lamp mode Normal/Economic | ||
| Reset lamp timer | |||
| Equivalent lamp hour | |||
| Security Settings | Change password | ||
| Power on lock On/Off | |||
| Baud Rate | 2400/4800/9600/14400/19200/38400/57600/115200 | ||
| Reset All Settings | |||
Note that the menu items are available when the projector detects at least one valid signal. If there is no equipment connected to the projector or no signal detected, limited menu items are accessible.
Description of each menu
| FUNCTION (default setting/ value) | DESCRIPTION (default setting/value) | |
| 1. DISPLAY menu | Wall Color (Off) | Corrects the projected picture's color when the projection surface is not white. See "Using Wall Color" on page 31 for details. |
| Aspect Ratio (Auto) | There are four options to set the image's aspect ratio depending on your input signal source. See "Selecting the aspect ratio" on page 29 for details. | |
| Keystone (0) | Corrects any keystoning of the image. See "Correcting keystone" on page 28 for details. | |
| Position (0) | Displays the position adjustment page. To move the projected image, use the directional arrow keys. The values shown on the lower position of the page change with every key press you made until they reach their maximum or minimum. | |
| Phase (depends on the selected input signal) | Adjusts the clock phase to reduce image distortion.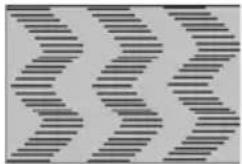 | |
| H. Size (0) | Adjusts the horizontal width of the image. | |
| Digital Zoom (1.0X) | Magnifies or reduces the projected image. See "Magnifying and searching for details" on page 28 for details. | |
| 2. PICTURE menu | Picture Mode (PC source: Dynamic; Video source: Standard) | Pre-defined picture modes are provided so you can optimize your projector image set-up to suit your program type. See "Selecting a picture mode" on page 30 for details. |
| Reference Mode (Dynamic) | Selects a picture mode that most suits your need for the image quality and further fine-tune the image based on the selections listed on the same page below. See "Setting the User 1/User 2 mode" on page 31 for details. | |
| Brightness (50) | Adjusts the brightness of the image. See "Adjusting Brightness" on page 31 for details. | |
| Contrast (0) | Adjusts the degree of difference between dark and light in the image. See "Adjusting Contrast" on page 31 for details. | |
| Color (0) | Adjusts the color saturation level -- the amount of each color in a video image. See "Adjusting Color" on page 32 for details. | |
| 2. PICTURE menu | Tint(0) | Adjusts the red and green color tones of the image. See "Adjusting Tint" on page 32 for details.The function is only available when Video or S-Video with NTSC system is selected. |
| Sharpness(15) | Adjusts the image to make it look sharper or softer. See "Adjusting Sharpness" on page 32 for details. | |
| Brilliant Color(On) | Adjusts white peaking while maintaining correct color presentation. See "Adjusting Brilliant Color" on page 32 for details. | |
| Color Temperature(T1) | See "Selecting a Color Temperature" on page 32 for details. | |
| 3D Color Management | See "3D Color Management" on page 32 for details. | |
| Save Settings | Saves the settings made for User 1 or User 2 mode. | |
| 3. SOURCE menu | Quick Auto Search(On) | See "Switching input signal" on page 26 for details. |
| 4. SYSTEM SETUP: Basic menu | Presentation Timer(Off) | Reminds the presenter to finish the presentation within a certain time frame. See "Setting the presentation timer" on page 34 for details. |
| Language(English) | Sets the language for the On-Screen Display (OSD) menus. See "Using the menus" on page 23 for details. | |
| Projector Position(Front Table) | See "Choosing a location" on page 13 for details. | |
| Auto Power Off(Disable) | Allows the projector to turn off automatically if no input signal is detected after a set period of time. See "Setting Auto Power Off" on page 46 for details. | |
| 4. SYSTEM SETUP: Basic menu | Blank Timer (Disable) | Sets the image blank time when the Blank feature is activated, once elapsed the image will return to the screen. See "Hiding the image" on page 35 for details. |
| Panel Key Lock (Off) | Disables or enables all panel key functions except Power on the projector and keys on the remote control. See "Locking control keys" on page 35 for details. | |
| Sleep Timer (Disable) | Sets the auto-shutdown timer. The timer can be set to a value between 30 minutes and 12 hours. | |
| Splash Screen (BenQ logo) | Allows you to select which logo screen will display during projector start-up. Three options are available: BenQ logo, Black screen, or Blue screen. | |
| 5. SYSTEM SETUP: Advanced menu | Quick Cooling (On) | Selecting On enables the function and the projector cooling time will be shortened to a few seconds.If you attempt to restart the projector right after the quick cooling process, it may not be turned on successfully and will rerun its cooling fans. |
| High Altitude Mode (Off) | A mode for operation in high altitude areas. See "Operating in a high altitude environment" on page 37 for details. | |
| Menu Settings | Menu display time (15 sec)Sets the length of time the OSD will remain active after your last key press. The range is from 5 to 30 seconds in 5-second increments.Menu position (Center)Sets the On-Screen Display (OSD) menu position. | |
| Lamp Settings | Lamp mode (Normal)See "Setting Lamp mode as Economic" on page 46 for details.Reset lamp timerSee "Resetting the lamp timer" on page 50 for details.Equivalent lamp hourSee "Getting to know the lamp hour" on page 46 for details on how the total lamp hour is calculated. | |
| Security Settings | Change passwordYou will be asked to enter the current password before changing to a new one.Power on lock (Off)See "Utilizing the password function" on page 24 for details. | |
| 5. SYSTEM SETUP: Advanced menu | Baud Rate (115200) | Selects a baud rate that is identical with your computer's so that you can connect the projector using a suitable RS-232 cable and update or download the projector's firmware. This function is intended for qualified service personnel. |
| Reset All Settings | Returns all settings to the factory preset values.The following settings will still remain: Position, Phase, H. Size, User 1, User 2, Language, Projector Position, High Altitude Mode, Security Settings, Baud Rate. | |
| 6. INFORMATION menu | FAQ-Image and Installation | Displays possible solutions to problems you may encounter. |
| FAQ-Features and Service | ||
| Current System Status | SourceShows the current signal source.Picture ModeShows the selected mode in the PICTURE menu.ResolutionShows the native resolution of the input signal.Color SystemShows input system format, NTSC, PAL, SECAM, or RGB.Equivalent Lamp HourDisplays the number of hours the lamp has been used. | |
Maintenance
Care of the projector
Your projector needs little maintenance. The only thing you need to do on a regular basis is to keep the lens clean.
Never remove any parts of the projector except the lamp. Contact your dealer if other parts need replacing.
Cleaning the lens
Clean the lens whenever you notice dirt or dust on the surface.
- Use a canister of compressed air to remove dust.
- If there is dirt or smears, use lens-cleaning paper or moisten a soft cloth with lens cleaner and gently wipe the lens surface.

Never rub the lens with abrasive materials.
Cleaning the projector case
Before you clean the case, turn the projector off using the proper shutdown procedure as described in "Shutting down the projector" on page 38 and unplug the power cord.
- To remove dirt or dust, wipe the case with a soft, lint-free cloth.
- To remove stubborn dirt or stains, moisten a soft cloth with water and a neutral pH detergent. Then wipe the case.

Never use wax, alcohol, benzene, thinner or other chemical detergents. These can damage the case.
Storing the projector
If you need to store the projector for an extended time, please follow the instructions below:
- Make sure the temperature and humidity of the storage area are within the recommended range for the projector. Please refer to "Specifications" on page 53 or consult your dealer about the range.
- Retract the adjuster feet.
- Remove the battery from the remote control.
- Pack the projector in its original packing or equivalent.
Transporting the projector
It is recommended that you ship the projector with its original packing or equivalent.
Lamp information
Getting to know the lamp hour
When the projector is in operation, the duration (in hours) of lamp usage is automatically calculated by the built-in timer. The method of calculating the equivalent lamp hour is as follows:
Total (equivalent) lamp hour
= 1 (hours used in Economic mode) + 3/2 (hours used in Normal mode)

See "Setting Lamp mode as Economic" below for more information on Economic mode.
The lamp hour in Economic mode is calculated as 2/3 of that in Normal mode. That is, using the projector in Economic mode helps to extend the lamp hour by 1/2.
To obtain the lamp hour information:
- Press Menu/Exit and then press ◀/▶ until the SYSTEM SETUP: Advanced menu is highlighted.
- Press ▼ to highlight Lamp Settings and press Mode/Enter. The Lamp Settings page displays.
- You will see the Equivalent lamp hour information displaying on the menu.
- To leave the menu, press Menu/Exit.
You can also get the lamp hour information on the INFORMATION menu.
Extending lamp life
The projection lamp is a consumable item that normally can last up to 2000-3000 hours with proper usage. To keep the lamp life as long as possible, you can do the following settings via the OSD menu.
Setting Lamp mode as Economic
Using Economic mode reduces system noise and power consumption by 20%. If the Economic mode is selected, the light output will be reduced and result in darker projected pictures.
Setting the projector in Economic mode also extends the lamp operation life. To set Economic mode, go into the SYSTEM SETUP: Advanced > Lamp Settings > Lamp mode menu and press ◀ ▶
Setting Auto Power Off
This function allows the projector to turn off automatically if no input source is detected after a set period of time to prevent unnecessary waste of lamp life.
To set Auto Power Off, go into the SYSTEM SETUP: Basic > Auto Power Off menu and press 🔍. The time period can be set from 5 to 30 minutes in 5-minute increments. If the preset time lengths are not suitable for your presentation, select Disable. The projector will not automatically shut down in a certain time period.
Timing of replacing the lamp
When the lamp indicator lights up red or a message appears suggesting it is time to replace the lamp, please install a new lamp or consult your dealer. An old lamp may cause a malfunction in the projector and in some instances the lamp may explode.

The LAMP indicator light and TEMperature indicator light will light up if the lamp becomes too hot. Turn the power off and let the projector cool for 45 minutes. If the Lamp or LAMP indicator light still lights up after turning the power back on, please contact your dealer. See "Indicators" on page 51 for details.
The following lamp warning displays will remind you to change the lamp.
| Status Message | |
| The lamp has been in operation for 2000 hours. Install a new lamp for optimal performance. If the projector is normally run with Economic selected (See "Setting Lamp mode as Economic" on page 46), you may continue to operate the projector until the 2950 hour lamp warning appears. | 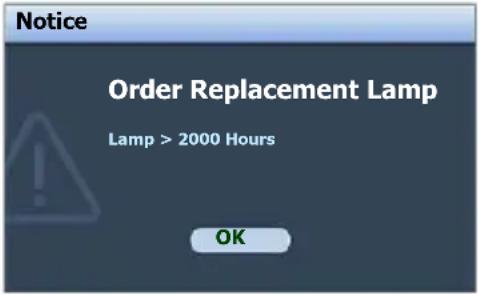 |
| The lamp has been in operation for 2950 hours. A new lamp should be fitted to avoid the inconvenience when the projector runs out of lamp time. | 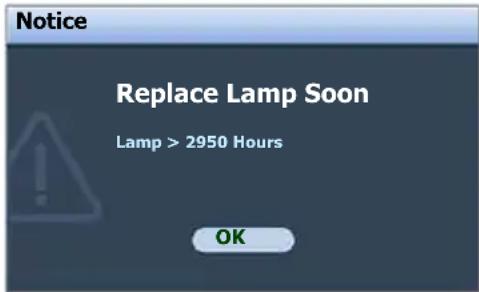 |
| The lamp has been in operation for 3000 hours. It is strongly recommended that you replace the lamp at this age. The lamp is a consumable item. The lamp brightness diminishes with use. This is normal lamp behavior. You can replace the lamp whenever you notice that the brightness level has significantly diminished. If the lamp is not replaced beforehand, it must be replaced after 3000 hours usage. | 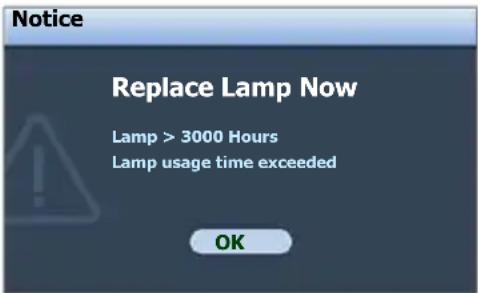 |
| The lamp MUST be replaced before the projector will operate normally. | 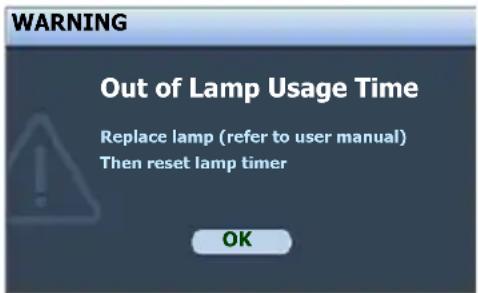 |
Replacing the lamp

- To reduce the risk of electrical shock, always turn the projector off and disconnect the power cord before changing the lamp.
• To reduce the risk of severe burns, allow the projector to cool for at least 45 minutes before replacing the lamp.
• To reduce the risk of injuries to fingers and damage to internal components, use caution when removing lamp glass that has shattered into sharp pieces.
• To reduce the risk of injuries to fingers and/or compromising image quality by touching the lens, do not touch the empty lamp compartment when the lamp is removed. -
This lamp contains mercury. Consult your local hazardous waste regulations to dispose of this lamp in a proper manner.
• To assure optimal performance from the projector, it is recommended that you purchase a BenQ projector lamp for lamp replacement. -
Turn the power off and disconnect the projector from the wall socket. If the lamp is hot, avoid burns by waiting for approximately 45 minutes until the lamp has cooled.
- Turn the projector over. Then loosen the screws on the lamp cover.
- Remove the lamp cover from the projector.

- Do not turn the power on with the lamp cover removed.
- Do not insert your fingers between the lamp and the projector. The sharp edges inside the projector may cause injuries.
- Loosen the screw that secures the lamp.
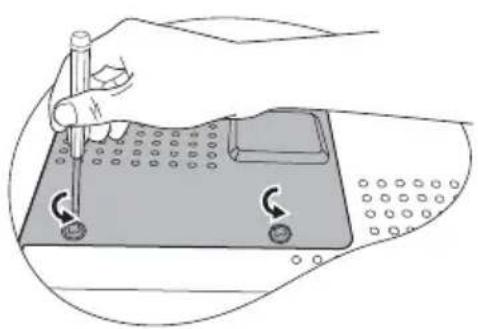
natural_image
Diagram of a hand operating a tool on a perforated plate with circular holes, showing rotational movement (no text or symbols)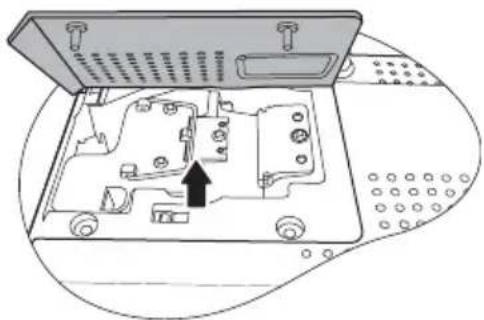
natural_image
Diagram of a computer case with an open lid and internal components, no text or symbols present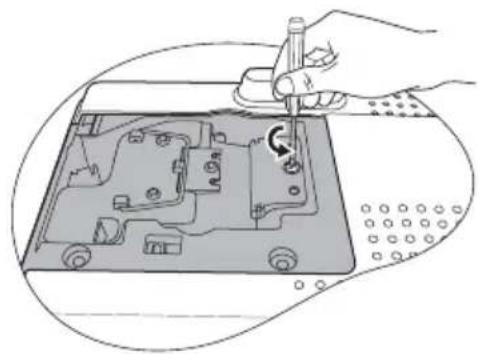
natural_image
Illustration of a hand using a screwdriver to adjust or install electronic components on a device (no text or symbols visible)- Lift the handle so that it stands up. Use the handle to slowly pull the lamp out of the projector.

- Pulling it too quickly may cause the lamp to break and scatter broken glass in the projector.
- Do not place the lamp in locations where water might splash on it, children can reach it, or near flammable materials.
- Do not insert your hands into the projector after the lamp is removed. If you touch the optical components inside, it could cause color unevenness and distortion of the projected images.
- As shown in the figure, lower the new lamp into the lamp compartment while aligning the lamp with the holes in the lamp compartment. Make sure it fits in the projector.
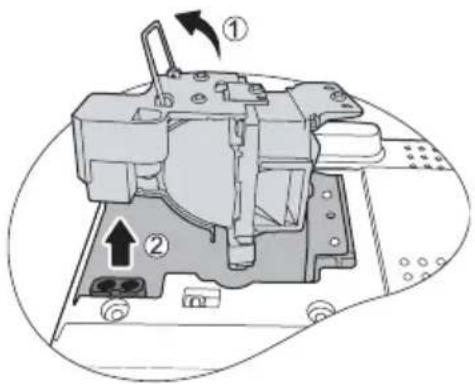
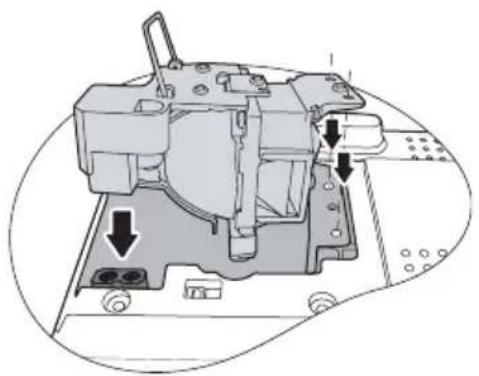
natural_image
Mechanical assembly diagram showing internal components with arrows indicating movement or force (no text or symbols present)- Tighten the screw that secures the lamp.

- Loose screw may cause a bad connection, which could result in malfunction.
- Do not over tighten the screw.
- Ensure the handle is fully laid flat and locked in place.
- As shown in the figure, replace the lamp cover on the projector.
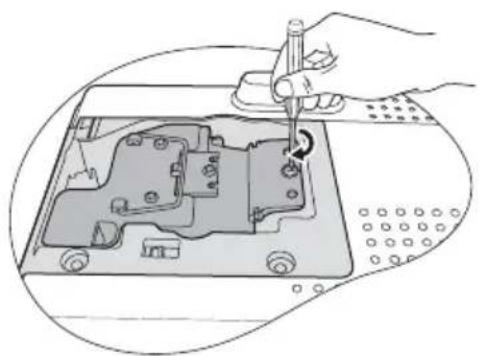
natural_image
Illustration of a hand using a screwdriver to adjust internal components on a device (no text or symbols visible)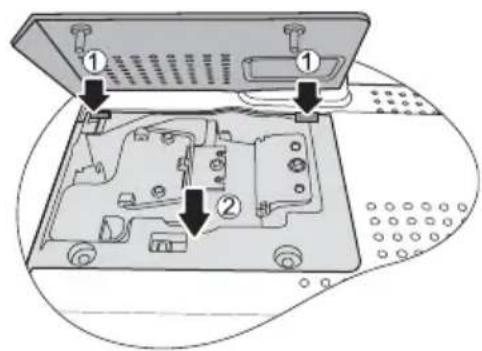
- Tighten the screws that secure the lamp cover.

- Loose screw may cause a bad connection, which could result in malfunction.
- Do not over tighten the screws.
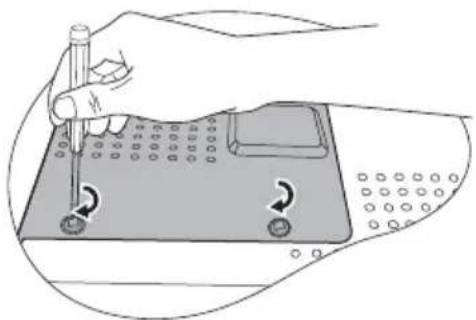
natural_image
Illustration of a hand using a screwdriver to press down a mechanical component (no text or symbols visible)- Restart the projector.

Do not turn the power on with the lamp cover removed.
Resetting the lamp timer
- After the startup logo, open the On-Screen Display (OSD) menu. Go to the SYSTEM SETUP: Advanced > Lamp Settings menu. Press Mode/Enter. The Lamp Settings page displays. Press ▼o highlight Reset lamp timer and press Mode/Enter. A warning
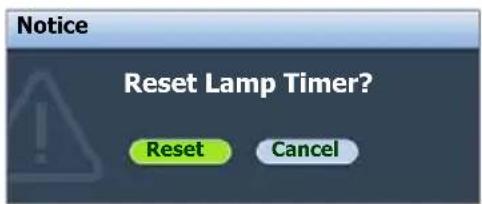
message displays asking if you want to reset the lamp timer. Highlight Reset and press Mode/Enter. The lamp time will be reset to '0'.

Do not reset if the lamp is not new or replaced as this could cause damage.
Indicators
| Light Status & Description | |||
| Power Temp Lamp | |||
| Power events | |||
| Orange Off Off | Stand-by mode | ||
| Green Flashing | Off Off | Powering up | |
| Green Off Off | Normal operation | ||
| Orange Flashing | Off Off | The projector needs 90 seconds to cool down as it was abnormally shut down without the normal cooling down process.The projector needs to cool for 90 seconds after the power is turned off. | |
| Orange Flashing | Off Off | The projector has shutdown automatically. If you try to re-start the projector, it will shutdown again. Please contact your dealer for assistance. | |
| Lamp events | |||
| Orange Flashing | Off Red | The projector has shutdown automatically. If you try to re-start the projector, it will shutdown again. Please contact your dealer for assistance. | |
| Off Off | Red | The projector needs 90 seconds to cool down.Please contact your dealer for assistance. | |
| Thermal events | |||
| Off Red Off | The projector has shutdown automatically. If you try to re-start the projector, it will shutdown again. Please contact your dealer for assistance. | ||
| Off Red Red | |||
| Off Red Green | |||
| Red | Red Red | ||
| Red | Red Green | ||
| Green | Red Red | ||
| Green | Red Green | ||
| Orange | Red Red | ||
| Orange | Red Green | ||
| Off Green Red | |||
| Off Green Green | |||
Troubleshooting
⑦ The projector does not turn on.
| Cause Remedy | |
| There is no power from the power cable. | Plug the power cord into the AC inlet on the projector, and plug the power cord into the power outlet. If the power outlet has a switch, make sure that it is switched on. |
| Attempting to turn the projector on again during the cooling process. | Wait until the cooling down process has completed. |
⑦ No picture
| Cause Remedy | |
| The video source is not turned on or connected correctly. | Turn the video source on and check that the signal cable is connected correctly. |
| The projector is not correctly connected to the input signal device. | Check the connection. |
| The input signal has not been correctly selected. | Select the correct input signal with the SOURCE key on the projector or remote control. |
| The lens cover is still closed. Open the lens cover. | |
⑦ Blurred image
| Cause Remedy | |
| The projection lens is not correctly focused. | Adjust the focus of the lens using the focus ring. |
| The projector and the screen are not aligned properly. | Adjust the projection angle and direction as well as the height of the unit if necessary. |
| The lens cover is still closed. Open the lens cover. | |
⑦ Remote control does not work
| Cause Remedy | |
| The battery is out of power. Replace the battery with a new one. | |
| There is an obstacle between the remote control and the projector. | Remove the obstacle. |
| You are too far away from the projector. | Stand within 8 meters (26 feet) of the projector. |
⑦ The password is incorrect
| Cause Remedy | |
| You do not remember the password. | Please see "Entering the password recall procedure" on page 25 for details. |
Specifications
Projector specifications

All specifications are subject to change without notice.
| General | |
| Product name Digital Projector | |
| Model name CP270 | |
| Optical | |
| Resolution 1024 x 768 XGA | |
| Display system 1-CHIP DMD | |
| Lens F/Number F = 2.56 to 2.67, f = 21.36 to 23.45 mm | |
| Lamp 200 W lamp | |
| Electrical | |
| Power supply AC100–240V, 3 A, 50/60 Hz (Automatic) | |
| Power consumption 285 W (Max) | |
| Mechanical | |
| Dimensions | 190 mm (W) x 77.5 mm (H) x 205 mm (D) |
| Weight < 3.3 lbs (< 1.5 Kg) | |
| Input terminal | |
| Computer input | |
| RGB input D-Sub 15-pin (female) x 1 | |
| Video signal input | |
| S-VIDEO Mini DIN 4-pin port x 1 | |
| VIDEO RCA jack x 1 | |
| SD/HDTV signal input | Analog – D-Sub <-> Component RCA jack x 3(through RGB input) |
| Control terminal | |
| RS-232 serial control | 8 pin x 1 |
| Environmental Requirements | |
| Operating temperature | 0°C–40°C at sea level |
| Operating relative humidity | 10%–90% (without condensation) |
| Operating altitude | 0–1499 m at 0°C–35°C1500–3000 m at 0°C–30°C (with High Altitude Mode on) |
Dimensions
190 mm (W) × 77.5 mm (H) × 205 mm (D)
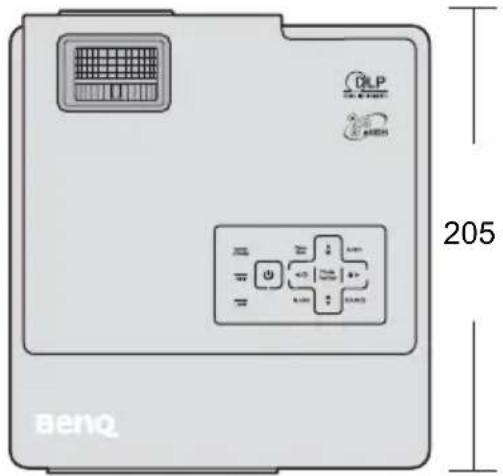
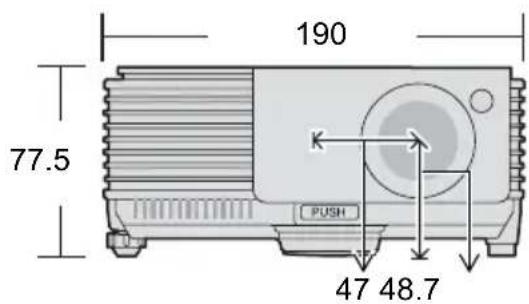
Timing chart
Supported timing for PC input
| Resolution Mode | Refresh rate (Hz) | Horizontal frequency (kHz) | Clock (MHz) | |
| 720 x 400 | 720 x 400_70 | 70.087 | 31.469 | 28.3221 |
| 640 x 480 | VGA_60 59.940 31.469 25.175 | |||
| VGA_72 72.809 37.861 31.500 | ||||
| VGA_75 75.000 37.500 31.500 | ||||
| VGA_85 85.008 43.269 36.000 | ||||
| 800 x 600 | SVGA_60 60.317 37.879 40.000 | |||
| SVGA_72 72.188 48.077 50.000 | ||||
| SVGA_75 75.000 46.875 49.500 | ||||
| SVGA_85 85.061 53.674 56.250 | ||||
| 1024 x 768 | XGA_60 60.004 48.363 65.000 | |||
| XGA_70 70.069 56.476 75.000 | ||||
| XGA_75 75.029 60.023 78.750 | ||||
| XGA_85 84.997 68.667 94.500 | ||||
| 1280 x 1024 SXGA3_60 60.020 63.981 108.00 | ||||
| 1280 x 800 WXGA_60 59.810 49.702 83.500 | ||||
| 1280 x 960 | 1280 x 960_60 | 60.000 | 60.000 | 108.00 |
| 640 x 480@67Hz MAC13 66.667 35.000 30.240 | ||||
| 832 x 624@75Hz MAC16 74.546 49.722 57.280 | ||||
| 1024 x 768@75Hz | MAC19 | 75.020 | 60.241 | 80.000 |
| 1152 x 870@75Hz | MAC21 | 75.06 | 68.68 | 100.00 |
Supported timing for Component-YPbPr input
| Signal Format Horizontal Frequency (kHz) Vertical Frequency (Hz) | |
| 480i(525i)@60Hz 15.73 59.94 | |
| 480p(525p)@60Hz 31.47 59.94 | |
| 576i(625i)@50Hz 15.63 50.00 | |
| 576p(625p)@50Hz 31.25 50.00 | |
| 720p(750p)@60Hz 45.00 60.00 | |
| 720p(750p)@50Hz 37.50 50.00 | |
| 1080i(1125i)@60Hz 33.75 60.00 | |
| 1080i(1125i)@50Hz 28.13 50.00 | |

Displaying a 1080i(1125i)@60Hz or 1080i(1125i)@50Hz signal may result in slight image vibration.
Supported timing for Video and S-Video inputs
| Video mode | Horizontal Frequency (kHz) | Vertical Frequency (Hz) | Color sub-carrier Frequency (MHz) |
| NTSC 15.73 60 | 3.58 | ||
| PAL 15.63 50 | 4.43 | ||
| SECAM 15.63 50 | 4.25 or 4.41 | ||
| PAL-M | 15.73 60 3.58 | ||
| PAL-N | 15.63 50 3.58 | ||
| PAL-60 | 15.73 60 4.43 | ||
| NTSC4.43 | 15.73 60 4.43 |
Warranty and Copyright information
Limited warranty
BenQ warrants this product against any defects in material and workmanship, under normal usage and storage.
Proof of purchase date will be required with any warranty claim. In the event this product is found to be defective within the warranty period, BenQ's only obligation and your exclusive remedy shall be replacement of any defective parts (labor included). To obtain warranty service, immediately notify the dealer from which you purchased the product of any defects.
Important: The above warranty shall be void if the customer fails to operate the product in accordance with BenQ's written instructions, especially the ambient humidity must be in-between 10% and 90%, temperature in-between 0°C and 35°C, altitude lower than 4920 feet, and avoiding to operate the projector in a dusty environment. This warranty gives you specific legal rights, and you may have other rights which vary from country to country.
For other information, please visit www.BenQ.com.
Copyright
Copyright 2008 by BenQ Corporation. All rights reserved. No part of this publication may be reproduced, transmitted, transcribed, stored in a retrieval system or translated into any language or computer language, in any form or by any means, electronic, mechanical, magnetic, optical, chemical, manual or otherwise, without the prior written permission of BenQ Corporation.
Disclaimer
BenQ Corporation makes no representations or warranties, either expressed or implied, with respect to the contents hereof and specifically disclaims any warranties, merchantability or fitness for any particular purpose. Further, BenQ Corporation reserves the right to revise this publication and to make changes from time to time in the contents hereof without obligation to notify any person of such revision or changes.
* DLP, Digital Micromirror Device and DMD are trademarks of Texas Instruments. Others are copyrights of their respective companies or organizations.
Regulation statements
FCC statement
CLASS B: This equipment generates, uses and can radiate radio frequency energy and, if not installed and used in accordance with the instructions, may cause harmful interference to radio communications. However, there is no guarantee that interference will not occur in a particular installation. If this equipment does cause harmful interference to radio or television reception, which can be determined by turning the equipment off and on, the user is encouraged to try to correct the interference by one or more of the following measures:
— Reorient or relocate the receiving antenna.
— Increase the distance between the equipment and receiver.
— Connect the equipment into an outlet on a circuit different from that to which the receiver is connected.
— Consult the dealer or an experienced radio/TV technician for help.
EEC statement
This machine was tested against the 89/336/EEC (European Economic Community) for EMC (Electronic Magnetic Compatibility) and fulfills these requirements.
WEEE directive
Disposal of Waste Electrical and Electronic Equipment by users in private households in the European Union.
This symbol on the product or on the packaging indicates that this can not be disposed of as household waste. You must dispose of your waste equipment by handling it over to the applicable take-back scheme for the recycling of electrical and electronic equipment. For more information about recycling of this equipment, please contact your city office, the shop where you purchased the equipment or your household waste disposal service. The recycling of materials will help to conserve natural resources and ensure that it is recycled in a manner that protects human health and environment.
- Important safety instructions ....3
- Introduction......7
- Positioning your projector......13
- Connection ......17
- Operation ......22
- Maintenance......45
- Troubleshooting ....52
- Specifications ....53
- Warranty and Copyright information .....56
- Regulation statements ....57
- Important safety instructions
- Safety Instructions
- Safety Instructions (Continued)
- Warning
- Introduction
- Projector features
- Shipping contents
- Standard accessories
- Optional accessories
- Projector exterior view
- Controls and functions
- Projector
- Focus ring
- Zoom ring
- Menu/Exit
- POWER indicator light
- Power
- TEMPerature indicator light
- Left/
- LAMP indicator light
- BLANK
- Keystone/Arrow keys (/ Up,
- ▼ Down)
- AUTO
- Right/
- Mode/Enter
- SOURCE
- Remote control
- Power
- Freez
- Left/ ?
- BLANK
- Digital Zoom keys (+, -)
- Menu/Exit
- Keystone/Arrow keys (/Up, /▲
- AUTO
- Right/
- SOURCE
- Mode/Enter
- Timer On
- Timer Setup
- Remote control effective range
- Replacing the remote control battery
- Positioning your projector Choosing a location
- Front Table
- Rear Table
- Obtaining a preferred projected image size
- How to determine the position of the projector for a given screen size
- How to determine the recommended screen size for a given distance
- Projection dimensions
- Connection
- Connecting a computer
- Connecting Video source devices
- Best video quality
- Better video quality
- Least video quality
- Connecting a Component Video source device
- To connect the projector to a Component Video source device:
- Connecting an S-Video source device
- To connect the projector to an S-Video source device:
- Connecting a composite Video source device
- To connect the projector to a composite Video source device:
- Operation
- Starting up the projector
- Using the menus
- Utilizing the password function
- Setting a password
- If you forget the password
- Entering the password recall procedure
- Changing the password
- Disabling the password function
- Switching input signal
- Adjusting the projected image
- Adjusting the projection angle
- Auto-adjusting the image
- Fine-tuning the image size and clarity
- Correcting keystone
- Magnifying and searching for details
- Selecting the aspect ratio
- About the aspect ratio
- Optimizing the image
- Selecting a picture mode
- Picture modes for different types of signals
- PC input signals: D-Sub / Comp. (analog RGB)
- Video input signals: S-Video, Video, D-Sub / Comp. (YPbPr)
- Setting the User 1/User 2 mode
- Using Wall Color
- Fine-tuning the image quality in user modes
- Adjusting Brightness
- Adjusting Contrast
- Adjusting Color
- Adjusting Tint
- Adjusting Sharpness
- Adjusting Brilliant Color
- Selecting a Color Temperature
- \*About color temperatures:
- 3D Color Management
- To adjust the settings:
- Setting the presentation timer
- Hiding the image
- Locking control keys
- Freezing the image
- Utilizing FAQ function
- Operating in a high altitude environment
- Personalizing the projector menu display
- Shutting down the projector
- Menu operation
- Menu system
- Description of each menu
- Maintenance
- Care of the projector
- Cleaning the lens
- Cleaning the projector case
- Storing the projector
- Transporting the projector
- Lamp information
- Getting to know the lamp hour
- Extending lamp life
- Setting Lamp mode as Economic
- Setting Auto Power Off
- Timing of replacing the lamp
- Replacing the lamp
- Troubleshooting
- Specifications
- Projector specifications
- Dimensions
- Timing chart
- Warranty and Copyright information
- Limited warranty
- Copyright
- Disclaimer
- Regulation statements
- FCC statement
- EEC statement
- WEEE directive
Brand : BENQ
Model : CP270
Category : Video projector