
SMPS2050 - Mp3 player SYLVANIA - Free user manual and instructions
Find the device manual for free SMPS2050 SYLVANIA in PDF.


| Product Type | Digital Audio Player (MP3 Player) |
| Brand | Sylvania |
| Model | SMPS2050 |
| Dimensions (W x H x D) | 32 mm x 93 mm x 24 mm |
| Weight | 20 g (without battery) |
| Power Supply | 1 x AAA 1.5V battery |
| Internal Memory Capacity | 128 MB / 256 MB / 512 MB / 1 GB / 2 GB (depending on version) |
| Supported Audio Formats | MP3 (32-320 kbps), WMA (32-192 kbps) |
| Display | 128 x 32 pixels, 28-pin LCD |
| Interface | USB 2.0 (Host) |
| Signal-to-Noise Ratio | 85 dB |
| Earphone Output Power | 8 mW x 2 (32 ohms) |
| Total Harmonic Distortion + Noise | < 0.6% |
| Crosstalk | > 50 dB |
| Operating Systems Supported | Windows 98/2000/XP/Vista |
| Audio Playback Features | Play/Pause, Next/Previous, Fast Forward/Rewind, Repeat Modes (Normal, One, Folder, Repeat Folder, Repeat All, Random, Intro), EQ Modes (Natural, Rock, Pop, Classic, Soft, Jazz, DBB), Lyrics Display |
| Recording Features | Voice Recording (ACT/WAV format), Voice Playback, Delete recorded files |
| Settings | Language selection (12 languages), Clock setting, Auto Power Off, Memory info |
| Battery Life | Not specified; uses 1x AAA alkaline battery |
| Cleaning and Maintenance | Clean with a soft, dry cloth. Do not use liquids or solvents. |
| Disposal | Do not dispose with household waste. Follow local regulations for WEEE (Waste Electrical and Electronic Equipment). |
| Accessories Included | Earphones, USB Cable, CD-ROM with driver (for Windows 98), 1x AAA battery, Quick Start Guide |
Frequently Asked Questions - SMPS2050 SYLVANIA
User questions about SMPS2050 SYLVANIA
0 question about this device. Answer the ones you know or ask your own.
Ask a new question about this device
Download the instructions for your Mp3 player in PDF format for free! Find your manual SMPS2050 - SYLVANIA and take your electronic device back in hand. On this page are published all the documents necessary for the use of your device. SMPS2050 by SYLVANIA.
USER MANUAL SMPS2050 SYLVANIA
Digital Audio Player
Your Pocket Guide

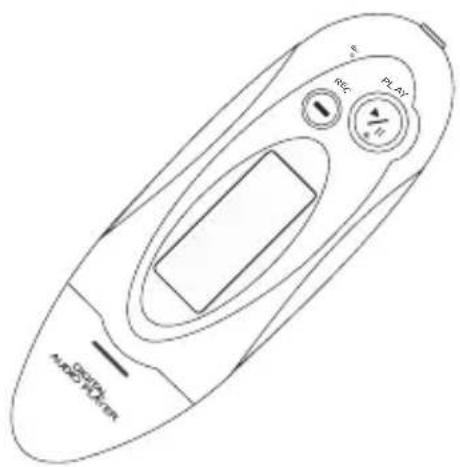
SMPS2050
1
Get Connected
2
Transfer Music
3
Plug Your Ears & Enjoy
SMPS2050
Content
What's in the box? 2
System Requirement 3
Synchronize songs to the player 4 - 6
Transfer 7
Know Your Player Well 8 - 9
Music Playback 10
Edit Lyrics 11
Repeat Mode & EQ Mode 12
Record & Voice Playback 13
Settings 14 - 15
Technical Data 16
Trouble Shooting 17
What's in the box?
What's in the box?
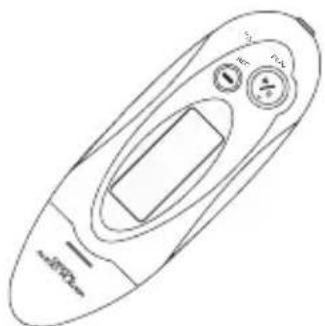
natural_image
Line drawing of a remote control device with buttons and a central screen (no text or symbols)Digital Audio Player
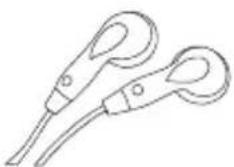
natural_image
Line drawing of two earphones with clips and handles (no text or symbols)Earphone
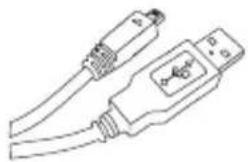
natural_image
Line drawing of two USB connectors with cable (no text or symbols)USB Cable
CD-ROM containing: Media player driver for Windows® 98
1 x AAA 1.5V Battery
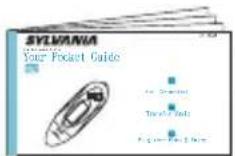
Your Pocket Guide
You'll need a computer with:
natural_image
Blue icon of a laptop computer with blank screen (no text or symbols)Windows® 98/2000/XP/Vista
Pentium Class or faster Processor
CD-ROM Drive
64MB RAM
30MB free hard disk space
USB Port
For Windows® 98 users, please install the driver in the CD-ROM before downloading any files to your player.
Synchronize songs to the player
You can use Windows Media Player 10 on Windows® XP SP2
to synchronize music which are downloaded from Internet legally and validly with license to the player.
If the song is downloaded illegally without license, it cannot be synchronized.
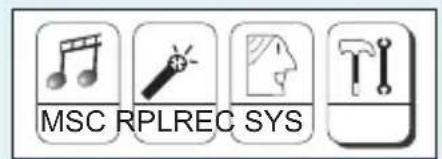
Step 1: Set the Online Device of the player as Media Device before plugging it to your PC.
Push the MODE button leftwards / rightwards to select SYS on the main menu, then press the MODE button to enter its sub-menu.
Push the MODE button rightwards to select Online Device and press the MODE button to enter its options list.
Then push the MODE button leftwards / rightwards to select Media Device, and press the MODE button to confirm.
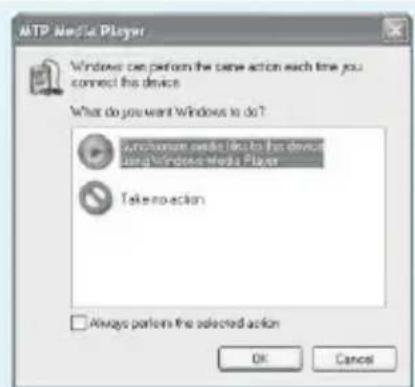
Step 2: Plug the player to the USB port of your PC. A dialog box will appear, choose Synchronize media files to this device using Windows Media Player, and click OK proceed.
Synchronize songs to the player
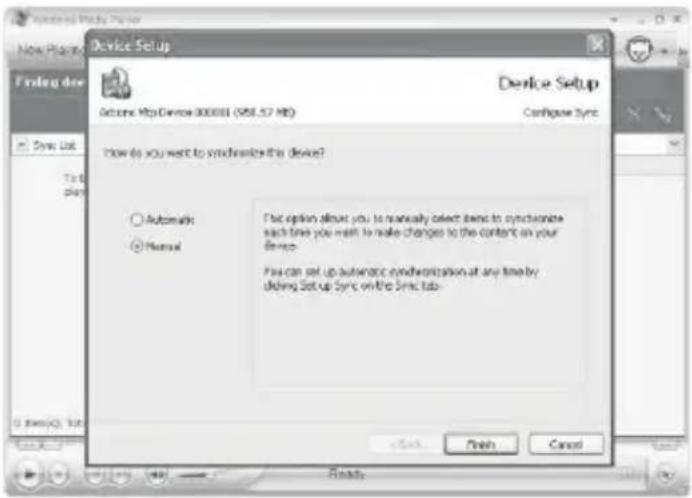
Step 3: Windows Media Player will find device automatically. And after a while, a dialog box of DvilieSetup choose MandelldFinish
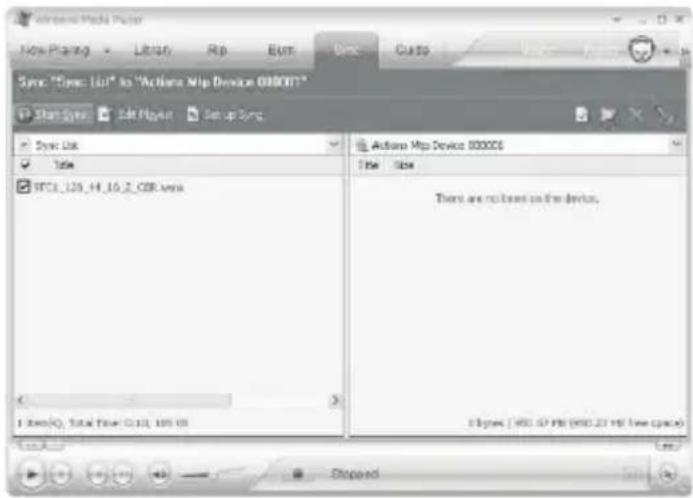
Step 4: Windows Media Player will be operating. Drag and drop your downloaded songs into its Sync List, and press Stane Sync songs will be synchronized to the player.
Synchronize songs to the player
Synchronize songs to the player
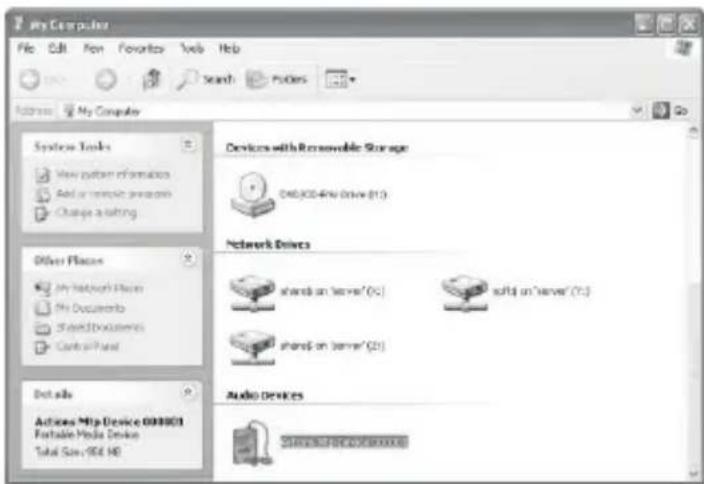
Step 5: The synchronized music can be found in the player. Click into My Computer, and you can see an Audio Device named as Actions Mtp Device 000001 click into it to view your synchronized songs.
Step 6: If you want to remove the MTP device, you can just unplug the player from your PC. Then you will see AdisappeMtp Device 000001
When you successfully synchronize music to the player, the current time shown on your PC will be synchronized to the player, too.
You can select to go into DRM Time (on the sub-menu of SYS check it.
Transfer
Get Your Player Connected & Transfer
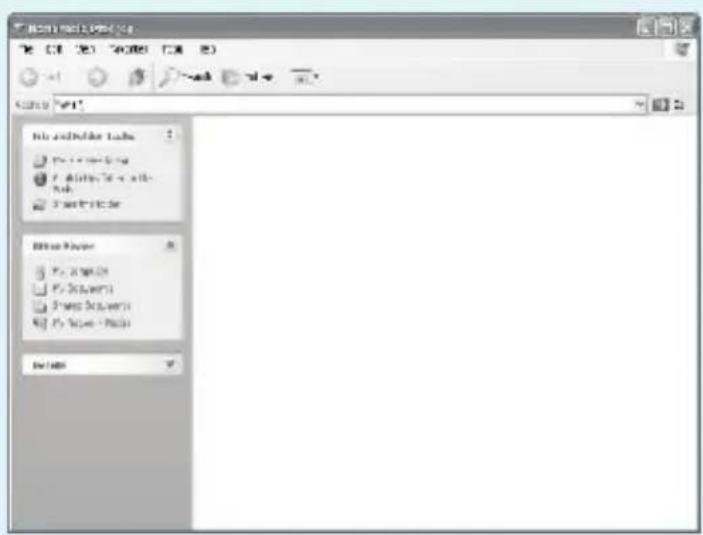
Step 1:
Set the Online Device of the player as USB Disk (Refer to Page 4).
Then plug this player to the USB port of your PC. Once the connection is successfully made, the RainbowbleUdstop up.
Try re-connecting the player if it doesn't appear.
Step 2:
Drag and drop your audio files into the removable disk.
You can create any folder or directory in the removable disk.
Close the removable disk window and disconnect the player from your PC after the data transfer.
Know Your Player Well
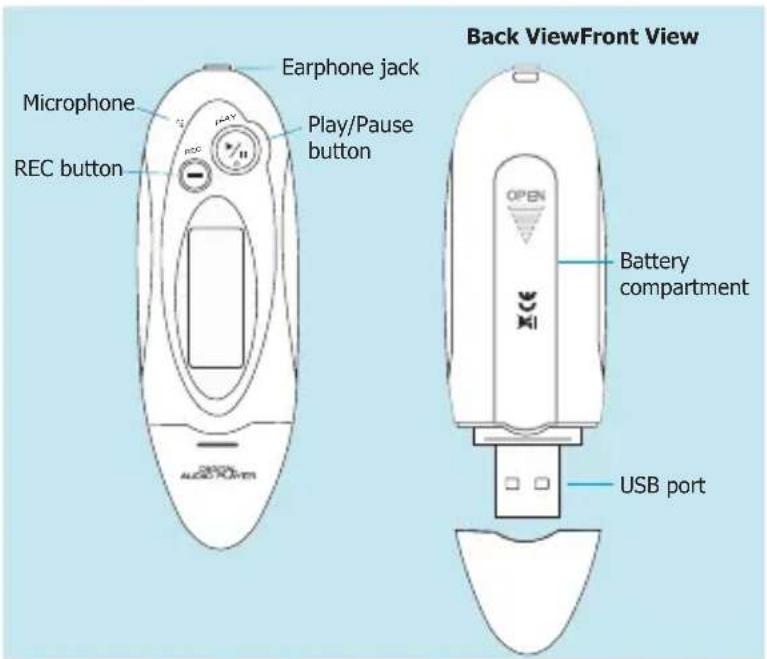
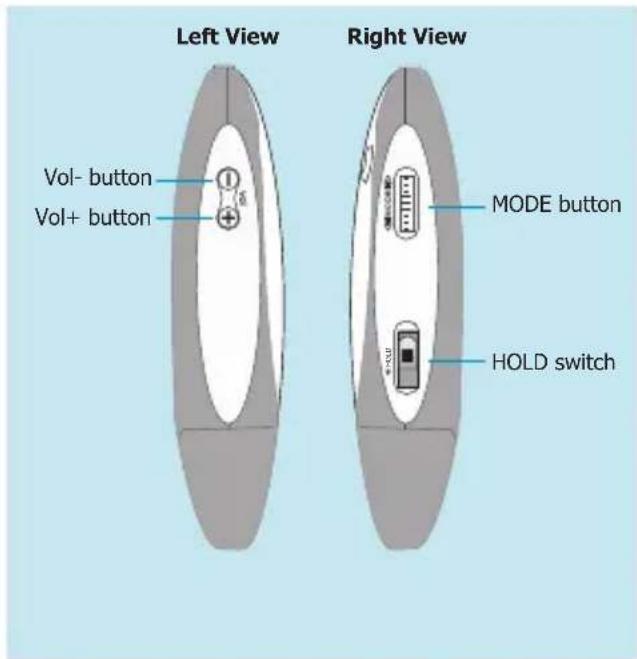
Buttons Operation
| To | Press | |
| General | Turn On/Off | Hold the Play/Pause button |
| Scroll through lists | Push the MODE button leftwards / rightwards | |
| Select Option | MODE | |
| Return to Main Menu | Hold the MODE button | |
| Have the device hold / unhold | Switch the HOLD switch | |
| Start recording | REC | |
| Music | Play/Pause songs | Play/Pause |
| Jump to next song | Push the MODE button rightwards | |
| Fast Forward | Hold the MODE button rightwards | |
| Move back to previous song | Push the MODE button leftwards | |
| Fast Backward | Hold the MODE button leftwards | |
| Display lyrics | Hold the MODE button for 2 seconds | |
| Stop lyrics display | MODE | |
| Volume up | Vol+ | |
| Volume down | Vol- |
Have the player hold / unhold:
If you want to have your player locked while enjoying music,
you can slide the HOLD switch, then all operations on buttons will be invalid.
And you can unlock your player by switching it back.
Music Playback
Music Playback
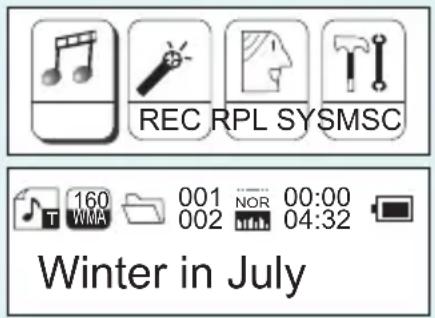
Select M&Othe main menu and press the MODE button to enter the music mode, then you can select different songs by pushing the MODE button leftwards / rightwards, and press the Play/Pause button to start playing the song you select.
Display Lyrics
Many roads are ahead of us
While enjoying music, you can press the Play/Pause button to pause or continue the music; Push the MODE button leftwards / rightwards to move back to the previous song or jump to the next song; Hold the MODE button leftwards / rightwards to move your song forward or rewind it. If you want to adjust the volume, please press Vol- / Vol+ buttons.
The edited lyrics will be displayed synchronously if you press the MODE button for 2 seconds while playing music. And you can press the MODE button to quit the lyrics display screen.
Edit Lyrics
![[Editor-in-1977] [1] [Harsh original] [2] [1] [offer: 500] [3] [20, 30] [4] [20, 30] [5] [20, 30] [6] [20, 30] [7] [20, 30] [8] [20, 30] [9] [20, 30] [10] [20, 30] [11] [20, 30] [12] [20, 30] [13] [20, 30] [14] [20, 30] [15] [20, 30] [16] [20, 30] [17] [20, 30] [18] [20, 30] [19] [20, 30] [20] [20, 30] [21] [20, 30] [22] [20, 30] [23] [20, 30] [24] [20, 30] [25] [20, 30] [26] [20, 30] [27] [20, 30] [28] [20, 30] [29] [20, 30] [30] [20, 30] [31] [20, 30] [32] [20, 30] [33] [20, 30] [34] [20, 30] [35] [20, 30] [36] [20, 30] [37] [20, 30] [38] [20, 30] [39] [20, 30] [40] [20, 30] [41] [20, 30] [42] [20, 30] [43] [20, 30] [44] [20, 30] [45] [20, 30] [46] [20, 30] [47] [20, 30] [48] [20, 30] [49] [20, 30] [50] [20, 30] [51] [20, 30] [52] [20, 30] [53] [20, 30] [54] [20, 30] [55] [20, 30] [56] [20, 30] [57] [20, 30] [58] [20, 30] [59] [20, 30] [60] [20, 30] [61] [20, 30] [62] [20, 30] [63] [20, 30] [64] [20, 30] [65] [20, 30] [66] [20, 30] [67] [20, 30] [68] [20, 30] [69] [20, 30] [70] [20, 30] [71] [20, 30] [72] [20, 30] [73] [20, 30] [74] [20, 30] [75] [20, 30] [76] [20, 30] [77] [20, 30] [78] [20, 30] [79] [20, 30] [80] [20, 30] [81] [20, 30] [82] [20, 30] [83] [20, 30] [84] [20, 30] [85] [20, 30] [86] [20, 30] [87] [20, 30] [88] [20, 30] [89] [20, 30] [90] [20, 30] [91] [20, 30] [92] [20, 30] [93] [20, 30] [94] [20, 30] [95] [20, 30] [96] [20, 30] [97] [20, 30] [98] [20, 30] [99] [20, 30]](/content/2026/06/1195434/images/32d18b748d4cba62e0963983ea20b4313f26c1569cba3eb5cac8cca503f8eb50.jpg)
Edit Lyrics
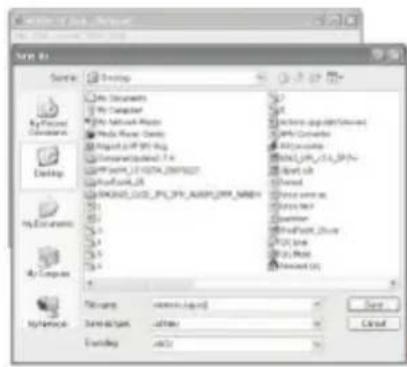
You can copy the synchronous lyrics from internet, and create a new Text Document on your PC, paste them, and then select to save this document in the extension of .LRC shown as below.
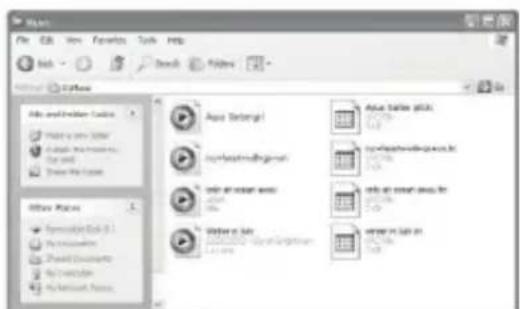
Then put both .LRC and .MP3 (or .WMA) files of the same song into the same folder in the removable disk. Your lyrics would be shown when you play that song.
![Enter Activity Help File Edit Now New Help Yes C4HN Class... C360 Save C445 Help... Page Shop... Hold... Clear Add and wonder why we a 11th this's never satisfied sorts troubled me for a way that we can never find to be ahead of us lost to no side [00:51.52] kue! If's e just one of the games we play [00:59.62] there to no special way [01:04.11] Make the best of what S given you [01:09.47] everything with I'm sure in Time [01:14.45] why deny yourself! [01:20.73] don't just let life pass you by [01:21.10] like winner. In July. [01:01.58] [02:05.30][01:20.21] [01:28.33] future dreams can never 'last'](/content/2026/06/1195434/images/4a8255ea54f090d3c7b7ddae67dc958060ec29814faa42b6fcf155d80f905ae3.jpg)
2
3
4
Repeat Mode & EQ Mode
Repeat Mode
Procedure:
while playing music, press the MODE button to enter the selection menu screen. Choose Repeatless the MODE button again to enter the Repeatscreen.
You can push the MODE button leftwards / rightwards to select your desired repeat mode, and press the MODE button to confirm your setting.
EQ Mode
Procedure:
while playing music, press the MODE button to enter the selection menu screen. Push the MODE button rightwards to select Equalpress the MODE button to enter the Equalizscreen.
You can push the MODE button leftwards / rightwards to select your desired EQ mode, and press the MODE button to confirm your setting.
7 Repeat Modes are available:
Normal, Repeat One, Folder, Repeat Folder, Repeat All, Random, Intro.
Normal
All music files will be played one by one and stopped at the last music until you disable this function.
Repeat One
The currently played song will be played repeatedly until this function is disabled.
Folder
All music in the selected folder would be played once until this function is disabled.
Repeat Folder
All music in the selected folder would be played from the beginning to the last one repeatedly until this function is disabled.
Repeat All
All music would be played from the beginning to the last one repeatedly until this function is disabled.
Random
All music would be played randomly until this function is disabled.
Intro
All music would be played for 10 seconds from the beginning until this function is disabled.
7 EQ Modes are available: Natural, Rock, Pop, Classic, Soft, Jazz, DBB.
Record & Voice Playback
Voice Recording
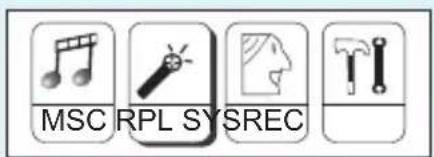
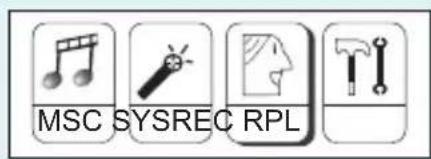
Push the MODE button leftwards / rightwards to select REC the Main Menu. Then press the MODE button to enter the voice recording mode. You can press the Play/Pause button to start recording, and save the recorded voice by holding the MODE button.
You can have a quick access to the Voice Recording Mode: In the STOP mode, press the REC button to enter the Voice Recording Mode and start recording.
Voice Playback
Push the MODE button leftwards / rightwards to select RPL on the Main Menu. Press the MODE button to enter the Voice Playback Mode. You can push the MODE button leftwards / rightwards to select a recorded voice file, and then press the Play/Pause button to start voice playing.
If you want to delete the selected voice file, you can press the MODE button to enter the sub-menu. Push the MODE button rightwards to select Delete press the MODE button to confirm. Then a dialog box of "Delete Leftdown. Push the MODE button leftwards / rightwards to choose YES and press the MODE button to confirm.
Settings
Setting Language
Step 1:
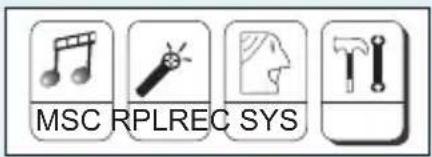
Push the MODE button leftwards / rightwards
to select She Main Menu, then press
the MODE button to enter its sub-menu.
Step 2:
Push the MODE button rightwards to select Language then press the MODE button to confirm.
Step 3:
You can select your preferred language by pushing the MODE button leftwards / rightwards, and then press the MODE button to confirm your setting.
12 languages are available:
| Simple Chinese | German |
| English | Italian |
| Trad Chinese | Dutch |
| Japanese | Portuguese |
| Korean | Spanish |
| French | Polish |
Setting Clock
Step 1: Select ClockSxb-menu of, and press the MODE button to enter the clock setting screen.
Step 2: You can press Vol- / Vol+ buttons to move among
And push the MODE button leftwards / rightwards to adjust them.
Step 3: At last, press the MODE button to confirm your setting.
After finishing system settings, push the MODE button rightwards to looking for Exit the sub-menu of ,and then press the MODE button to quit the SYS screen.
Auto-Power Off Setup
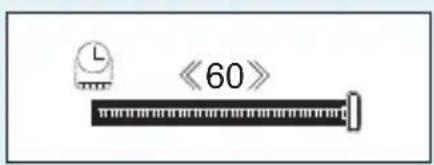
Step 1: Push the MODE button rightwards to select Power off the sub-menu of S and press the MODE button to enter its sub-menu. Select Q and press the MODE button to confirm.
Step 2: You can adjust the off time by pushing the MODE button leftwards / rightwards, and then press the MODE button to confirm your setting.
In the IDLE mode (no button is pressed), the player will be turned off automatically based on the duration you set. You may set it as "0" to disable this function.
Checking Memory Status
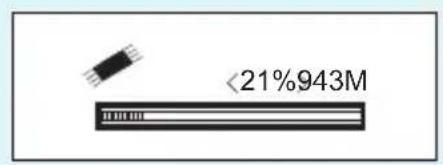
Push the MODE button rightwards to select Memory info on the sub-menu of SYSd press the MODE button to confirm.
Then the used memory status can be shown.
Technical Data
| General Information | Audio Playback | ||
| Power Supply | 1 x AAA 1.5V Battery | Compression Formats | .M P3 (32kbps ~ 320kbps).WMA (32kbps ~ 192kbps) |
| Dimensions | 32mm x 93mm x 24mm | ||
| Weight | 20g | S/N ratio | 85dB |
| Display | 128 x 32 28PIN | Earphone Output Power | 8mWx, 32ohm |
| Capacity | 128MB/256MB/512MB/1GB/2GBinternal flash memory | THD+N | <0.6 |
| Operating System | Windows® 98/2000/XP/Vista | Crosstalk | >50dB |
| Interface | USB HOST 2.0 | Voice Recording | |
| Operating Voltage | 1.5V | Supported File Types | .ACT and .WAV files |
What should I do if·
Q: I cannot put any file into the removable disk for the first usage, it prompts that the disk is full.
A: You can format the disk at first, then put files into it again.
Q: I've put the audio files into the player, but when I select to play music, it still prompts "Empty Disk".
A: Maybe the battery is of low power. You may replace it with a new battery, and try playing music again.
Q: I cannot enter the MUSIC mode after using the player for a period of time.
A: You should format the memory of the player under connection to PC. (Be sure you remember to backup the data in your player before performing the above action.)
More
Disposal of your old product
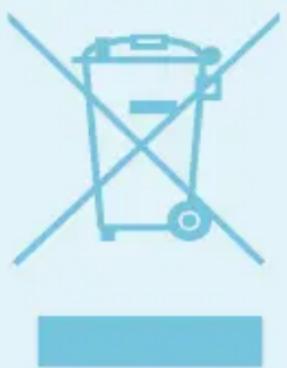
Electrical and electronic equipment (EEE) contains materials, parts and substances which can be dangerous to the environment and harmful to human health if wastes of electrical and electronic equipment (WEEE) are not disposed correctly.
Equipments which are marked with the WEEE logo (as shown on the right), should not be thrown away with your household waste. Contact your local Authority Waste Disposal Department as they will be able to provide details of the recycling options available in your area.
natural_image
Light blue icon of a trash bin with two crossed lines and a blank rectangular base (no text or symbols)
natural_image
A plain light blue horizontal bar with no text, symbols, or markings.
natural_image
A plain horizontal light blue bar with no text, symbols, or markings.
natural_image
A plain light blue horizontal bar with no text, symbols, or markings.MP901AC2091D
Version1.0
Specifications are subject to change without notice. No part of this document may be reproduced or transmitted in any form or by any mean, electronic or mechanical, including photocopying and recording or translated to another language for any purpose without the prior written consent of the manufacturer. All brand names, logos and registered trademarks mentioned are property of their respective owners. 007 © Sysbay International Technology Ltd. All right reserved

Printed in China
- Your Pocket Guide
- Content
- What's in the box?
- You'll need a computer with:
- Synchronize songs to the player
- Transfer
- Get Your Player Connected & Transfer
- Know Your Player Well
- Music Playback
- Display Lyrics
- Edit Lyrics
- Repeat Mode & EQ Mode
- Repeat Mode
- EQ Mode
- Record & Voice Playback
- Voice Recording
- Voice Playback
- Settings
- Setting Language
- Setting Clock
- Auto-Power Off Setup
- Checking Memory Status
- Technical Data
- What should I do if·
- More
- Disposal of your old product
Brand : SYLVANIA
Model : SMPS2050
Category : Mp3 player