Gator Plus 2 - Smartphone Plum - Free user manual and instructions
Find the device manual for free Gator Plus 2 Plum in PDF.

User questions about Gator Plus 2 Plum
0 question about this device. Answer the ones you know or ask your own.
Ask a new question about this device
Download the instructions for your Smartphone in PDF format for free! Find your manual Gator Plus 2 - Plum and take your electronic device back in hand. On this page are published all the documents necessary for the use of your device. Gator Plus 2 by Plum.
USER MANUAL Gator Plus 2 Plum
4.5 Airplane Mode....30
4.6 Audio Profiles....30.
4.7 Display....31
4.8 Storage....31.
4.9 Battery....32
4.10 Application....32..
4.11 Security....32
4.12 Backup and Reset....33.
4.13 Date and Time....33.
4.14 Schedule Power On/Off....33.
5 Common Problems & Solutions....33
1 Basic Knowledge
1.1 Brief Introduction
Thank you for purchasing this digital mobile phone. This instruction manual special used to guide you understand the functions and features.
In addition to common call functions and records, this phone also provides you a variety of useful features and services. It will bring you more convenience and pleasure for your work and life.
Some of the services and functions described in this manual depend on the network and reservation service. The refo re, the menu items in the phone may not be available, various menus and functions of the phone may have different shortcut number.
Our company reserves the right to modify the contents of this manual without prior notice.
1.2 General Considerations/ Warning
Never attempt to disassemble your phone. You alone are responsible for how you use your phone and any consequences of its use.
As a general rule, al way s sw it ch off your phone wherever the use of a phone is prohibited. Use of your phone is subject to safety measures designed to protect users and their environment.
Do not u se y our phone in dam p areas (bat hro om, swimmi ng p ool ...). Protect it from liquids and other moisture.
Do not expose your phone to extreme temperatures.
The physicochemical processes created by chargers impose temperature limits when charging the battery. Your phone automatically protects the batteries in extreme temperatures.
Do not leave your phone within the reach of children (certain removable parts may be accidentally ingested).
Electrical safety: Only use the chargers listed in the manufacturer's catalogue. Using any other charger may be dangerous; it would also invalidate your warranty. Line voltage must be exactly the one indicated on the charger's serial plate.
Aircraft safety: When traveling by plane, you will need to switch your phone off when so instructed by the cabin crew or the warning signs.
Using a mobile phone may be dangerous to the operation of the aircraft and may disrupt the phone network.
Its use is illegal and you could be prosecuted or banned from using cellular networks in the future if you do not abide by these regulations.
Explosive materials: Please comply with warning signs at petrol station asking you to switch your phone off. You will need to comply with radio equipment usage restrictions in places such as chemical plants, fuel depots and at any location where blasting operations are under way.
Electronic equipment: To avoid the risk of demagnetization, do not let electronic devices close to your phone for a long time.
Electronic medical equipment: Your phone is a radio transmitter which may interfere with electronic medical equipment or implants, such as hearing aids, pacemakers, insulin pumps, etc. It is recommended that a minimum separation of 15 cm be maintained between the phone and an implant. Your doctor or the manufacturers of such equipment will be able to give you any advice you may need in this area.
Ho sp it al s: A l w ay s m a k e s u r e t h a t y o u r p h o n e is switched off in hospitals when so instructed by warning signs or by medical staff.
Road safety: Do not use your phone when driving. In order to give your full attention to driving, stop and park safely before making a call. You must comply with any current legislation.
Distance of operation: This phone model has been tested and meets radiofrequency exposure guidelines when used as follows:
- Against the ear: Place or receive a phone call and hold the phone as you would a wire line telephone.
- Body worn: When transmitting, place the phone in a carry accessory that contains no metal and positions the phone a minimum of 2.5 cm form your body. Use of other accessories may not ensure compliance with
radiofrequency exposure guidelines. If you do not use a body worn accessory and are not holding the phone at the ear, position the phone a minimum of 2.5 cm from your body,
- Data operation: When using a data feature, position the phone a minimum of 2.5cm from your body for the whole duration of the data transmission.
Other Warning:
Any Changes or modifications not expressly approved by the party responsible for compliance could void the user's authority to operate the equipment.
This device complies with part 15 of the FCC Rules. Operation is subject to the following two conditions:
(1) This device may not cause harmful interference, and
(2) This device must accept any interference received, including interference that may cause unknown desired operation.
Note: This equipment has been tested and found to comply with the limits for a Class B digit I device, pursuant to part 15 of the FCC Rules. These limits are designed to provide reasonable protection against harmful interference in a residential installation. This equipment generates, uses and can radiate radio frequency energy and, if not installed and used in accordance with the instructions, may cause harmful interference to radio communications.
However, there is no guarantee that interference will not
occur in a particular installation. If this equipment does cause harmful interference to radio or television reception, which can be determined by turning the equipment off and on, the user is encouraged to try to correct the interference by one or more of the following measures:
—Reorient or relocate the receiving antenna.
—Increase the separation between the equipment and receiver.
—Connect the equipment into an outlet on a circuit different from that to which the receiver is connected.
—Consult the dealer or an experienced radio/TV technician for help.
SAR tests are conducted using standard operating positions accepted by the FCC with the phone transmitting at its highest certified power level in all tested frequency bands, although the SAR is determined at the highest certified power level, the actual SAR level of the phone while operating can be well below the maximum value, in general, the closer you are to a wireless base station antenna, the lower the power output.
Before a new model phone is available for sale to the public, it must be tested and certified to the FCC that it does not exceed the exposure limit established by the FCC. Tests for each phone are performed in positions and locations (e.g. at the ear and worn on the body) as required by the FCC.
For body worn operation, this model phone has been
tested and meets the FCC RF exposure guidelines when used with an accessory designated for this product or when used with an accessory that Contains no metal and that positions the handset a minimum of 1.0 cm from the body.
Non-compliance with the above restrictions may result in violation of RF exposure guidelines.
1.3 Charge Mobile Phone
When the phone is connected with the charger, charging icon will show on the top right on the screen; if the phone is turned off, charging icon will appear in the middle on the screen. If the phone battery is low, the low power icon will appear.
When the battery icon show full and no longer flashing, that mean the charging is completed. Please disconnect the AC power outlet which h con nects the phone a nd charger after the charging is complete.
2 Introduction
2.1 Icons
In the standby interface, may appear small ICONS, details are as follows:
| Icons | Instructions |
 | Time Display |
 | Alarm clock has been set and activated |
 | Show battery level |
 | Vertical bars indicate the signal strength of the network signal |
 | Connect to the wireless network |
 | Activate BT |
 | Receives new message |
 | Missed Call |
 | Meeting Mode |
 | Flight Mode |
 | Mute Mode |
 | Activate USB |
 | Access Restricted |
2.2 Phone Layout
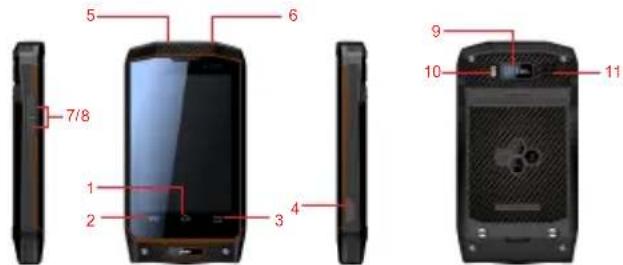
| Keys Instructions | |
| 1. Home Key Click for back to home screen | |
| 2. Menu Key Click this button to Option Menu | |
| 3. Return Key Click to return | |
| 4.USB The USB jack | |
| 5. Power Key Long press this key to turn off/on.Short press this key to lock the phone or light the screen. | |
| 6. Headphone Jack | Headphone Jack |
| 7. Volume Key + | Press to increase volume |
| 8. Volume Key - | Press to decrease volume |
| 9. Camera Back Camera | |
| 10. Flash Flashlight | |
| 11.Louds peaker | Loudspeaker |
2.3 Boot Using
2.3.1 Insert and Remove SIM Card
You need to remove the back cover before you can install the SIM card and battery. Also, make sure to always turn off the power before installing or replacing the SIM card and battery.
2.3.2 Power On/Off
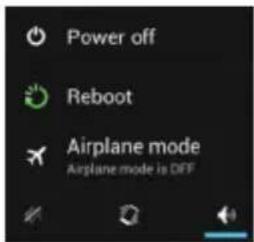
To turn on the phone, please long press the Power key until it is power on.
To turn off the phone, please long press the power key. The following message box will pops up, select "Power Off". You can also choose to reboot the phone or select the phone into different mode.
2.3.3 Unlock Screen
In order to preven t unauth orized u se, you c an set screen lock for your phone. Once it is selected, you must draw your unlock pattern every time when you light up the screen, so that you can unlock it and use the phone functions.
3 Basic Functions
3.1 Dial
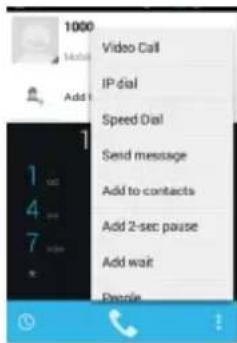
In the main screen, click into the dial-up interface to make a call. If you need to change the phone number, please click to delete characters, then press to dial the number. Press the Menu key to pop-up menu options as shown.
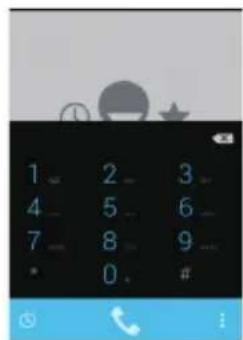
You can also touch at the bottom left of the screen to enter the Call History. Or click at the bottom right, then click "People" on the pops up screen to enter the Contact Interface.
The below image is the interface after a call is connected.
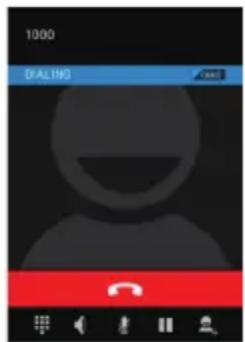
Click to open the dial pad.
Click to open the speaker.
Click to mute the phone call
Click to pause the current call or restore it when it is held.
Click to go to the contact and add the call.
Click to end the current call.
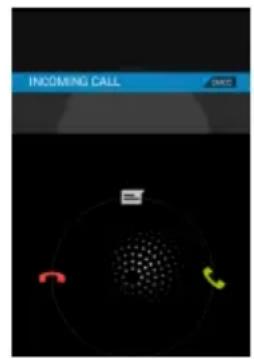
When there is a call coming in, the interface will show as below, slide 📋icon to 📋 for answer the phone or slide to
for reject a call and to send SMS.

3.2 Contacts
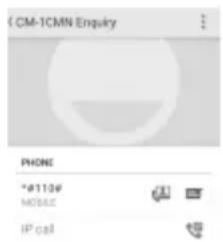
You can directly open the "Cont acts" on the main screen, or open it in "Dial" app. Enter the contact interface as shown, click on a contact to view the contact information stored, click on to call the contact, click on to send SMS to the contact. Press the Menu key to modify, share and delete the contact.

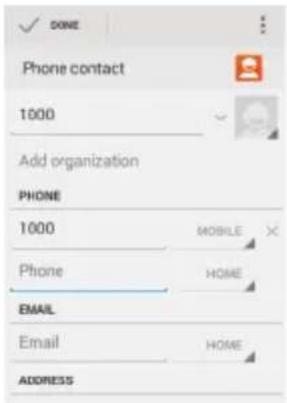
In the contact interface, click to quickly search contacts or click to add a new contact. You can choose to save the newly added contacts to the phone or the SIM card as below:
3.3 Messages
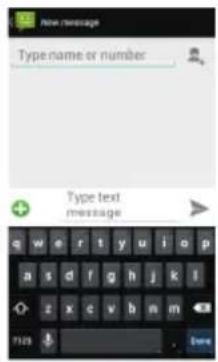
Click on the home screen to enter the message interface. Click to enter the written message interface. In the "input names and numbers" area, input the number, or click on the contact icon, select a number from your contacts. Edit message content in the "input the text message" area. Touch to send a message after completion.
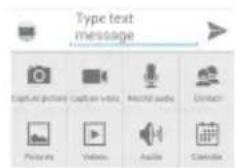
Click ✪ on the screen and choose to insert images, video, audio and other files, SMS will be automatically converted into MMS.
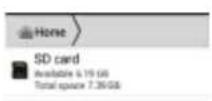
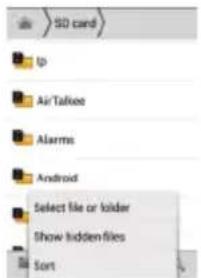
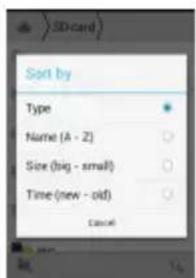
3.4 File Management
You can view and management the files which is stored on the phone or SD card. You can copy the files, paste, rename, delete, etc.
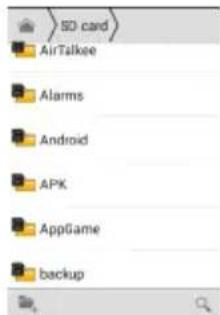

Long press file or click on menu key, you can select one or more files or folders to share, copy, delete, cut, rename and other operations. You can also reordered folder by name, size or date.
3.5 Camera
Tab to enter the camera interface. You can choose various camera mode at the top of the icon and choose the flashlight or switch camera mode at the bottom right on the screen. Touch the preview area can be adjusted to focus.
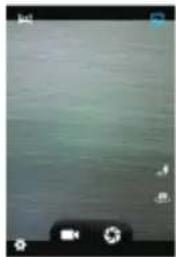
natural_image
Grayscale image with no discernible text, symbols, or identifiable objectsClick to enter the camera setting and you can change the setting to match your needs.
Click to take a picture, click to convert video interface shown as below:
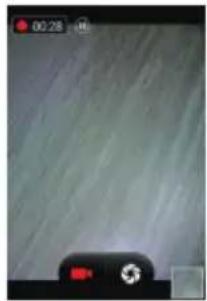
natural_image
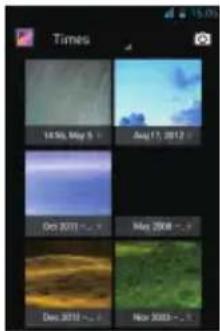
Smartphone displaying a camera with a red button and a clock, against a plain background (no readable text or symbols)3.6 Images
Click for view all the pictures and video files that saved in the phone and SD card
3.7 Video Player
Tab■ to enter the video list. Click on the menu key you can delete, sort, and other operations. Select a video to play, click ✗ to full-screen playback. Click time progress bar to forward and reverse operation. Click to send video to message, BT, E-mail to share.

3.8 Music Player
Click 📁 to enter the music player.
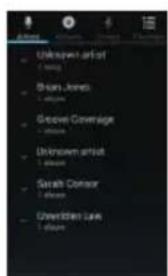
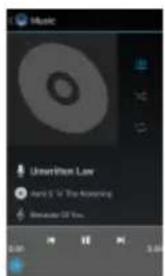
Inside the Music Interface, You can sort up your audio files by Artists, Albums on the top of the screen.
Pause the audio file
Continue playing.
Switch to previous song, long press to rewind.
indicates switch to next song, long press to forward.
Slide the bar to jump to any position in the audio.
on/off the shuffle.
■on/off repeat all songs.
Repeat current song.
Go to music list.
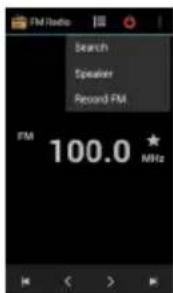
3.9 FM Radio
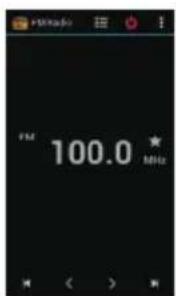
Click to enter the radio. You must plug in the earphone otherwise it may not run, Click to enter the channel list; clicking to switch On/Off the radio and click to open the Pop up screen as below:
3.10 Recorder
You can record audio files by using


Start recording: Tap
End recoding: Tap
Pause recording: Tap
List of recording: Tap
Click ☐ to view the recording or playback recording which automatically save to your phone.
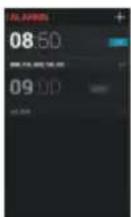
3.11 Clock
Tab to enter the clock. You can see the date and time. Click to view and set the alarm; click for the stopwatch function; click to select night mode, Setting, etc.

3.12 Calendar
Click☐b to access the calendar.
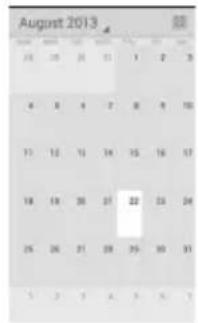
Into the calendar interface, slide up and down, you can view the previous month and next month's calendar, click the menu key to select the new activity, refresh, search, etc. Settings can be set calendar view and reminder.
3.13 Calculator
Click to access the calculator. Your phone provides you a calculator with the basic functions, allowing you to perform simple arithmetic.
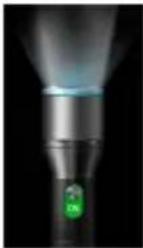
3.14 Flashlight
Click to enter the flashlight. Click the "off" to open flashlight, click "on" to close flashlight

3.15 E-mail
Tab to enter the e-mail. You can send email to anyone with email address.
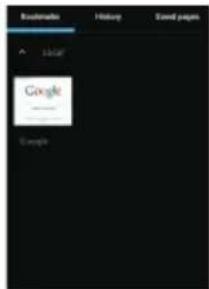
3.16 Browser
Click to enter the browser. You can create a bookmark on your phone and sync bookmarks with your computer. Also, you could setup a shortcut on the main screen to quickly access for your favorite sites.

Touch the screen, the screen display URL above, display the menu below:
Click to go to the previous page; Click to enter next page; Click to view the pages you have open and you can select a page to enter; clicking to view your bookmarks, history, and saved web page:
3.17 Searching
Click to enter the search interface

Enter the words you want to search, click the Searching key, select the type of search you want, such as web pages, contacts, etc.
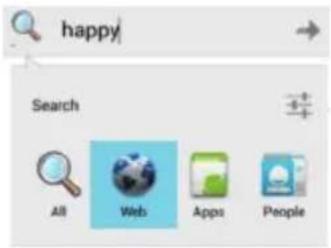
Click →, enter the search results:

3.18 Download
Click to enter the download interface. You can view the content which have been downloaded or being
download. On download content interface, press the Menu key can be sorted by size or time of operation.
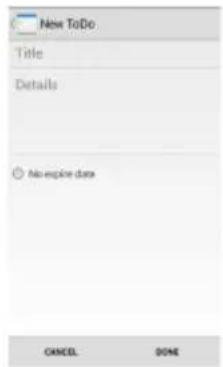
3.19 ToDo
Click ☐ to enter the ToDo interface. You can view the ToDo list and completed item on the interface. Or you can click icon on the screen bottom to add item. On the Add Item interface, you can enter title, description. You can also set the deadline according to your needs.

3.20 Play Store
Click ☐ to enter the Play Store. When you first enter the Play Store, you will need to login your Google account. When you access the Play store home page, you can see a variety of APP, you can choose to install needed app to your phone. Also you can slide the screen to different category.

In the Play Store screen, click an icon on your favorite software, enter the installation interface:


Click to install the selected software, application permissions in the popup choose to accept, the phone automatically starts to download the software, if you want to cancel the download, click next to the download progress bar.
In the Play Store homepage, click the menu key to bring up the following menu:
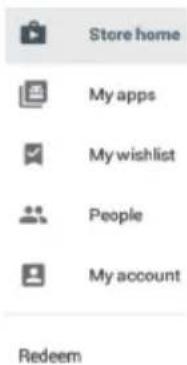
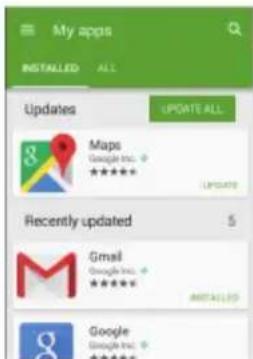
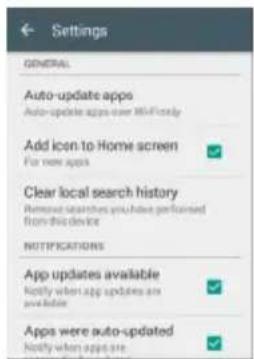
Select "Myapps", you can view your "Install application" and "All Applications", you can also reset accounts, notifications, auto-updating applications, password, etc.
4 Settings
Click to enter the settings, you can personalize phone settings according to your needs.
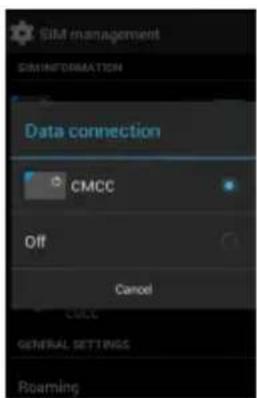
4.1 SIM Card Management
Set the SIM card for voice calls, video calls, messages, data connections and other settings.
4.2 WLAN
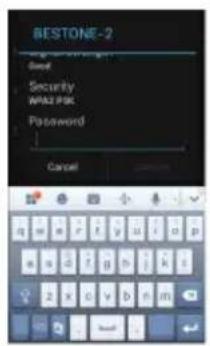
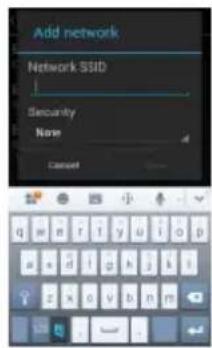
Click WLAN, then slide to switch the WLAN on at the top right of the screen, your phone will automatically search for wireless networks within range.
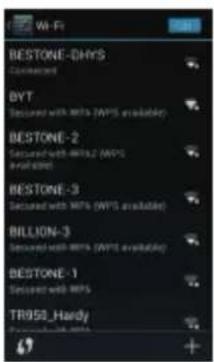
Click to refresh the network list, choose one of the WLAN that you got the license, input the password (at least 8 characters) and click "Connect" to access the WLAN you choose. You can also click on the screen in the lower right corner to add a network manually:
4.3 BT
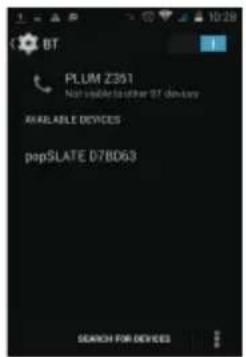
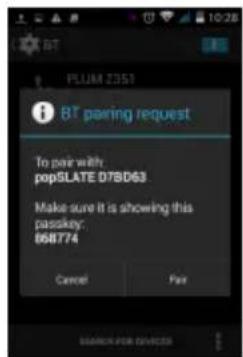
The phone will search for BT devices visible around when you activate the BT, you can click on any visible device to pair them for the file transfer or other usage.
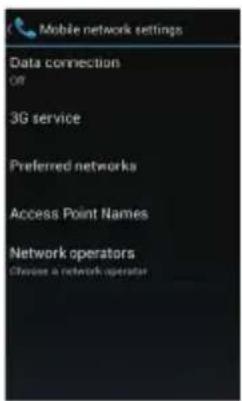
4.4 Mobile Network
In this menu you can turn on or off the data connection, enabling 3G services, network operators and other options:
4.5 Airplane Mode
When the Airplane mode activate, it will disable all wir ele ss c onn e ctions , ca l ls a nd m ess a ges wil l not available until it had been switch off.
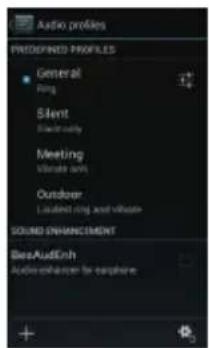
4.6 Audio Profiles
The fol lo wing mo des can be set up on the phone: General, Silent, Meeting, Outdoor; You can also click on the bottom left corner to add a new mode, click on the lower right corner to reset.
4.7 Display
For the phone brightness, scene, wallpaper, themes and automatically rotate the screen, etc.
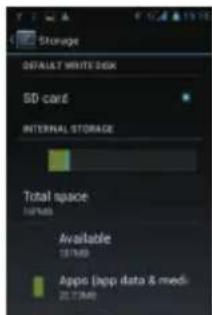
4.8 Storage
You can view the phone and SD card total capacity, free space, also you can choose the preferred installation location and format the phone memory.
4.9 Battery
You can set the display of the battery percentage and see remaining battery power and time.
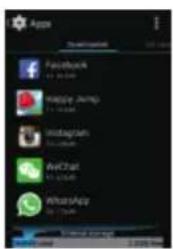
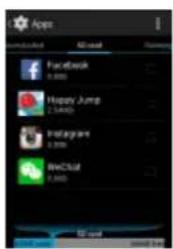
4.10 Application
You can view downloaded applications in this interface. Also you can click on the menu key to reorder these programs by size:
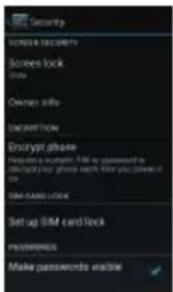
4.11 Security
You can set the screen security, SIM card lock, etc. in this interface.
4.12 Backup and Reset
You can back up your data or restore the factory settings. Remember, once you selected the factory reset, all the data stored inside the device will be deleted.
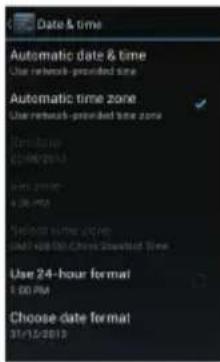
4.13 Date and Time
You can change your date and time setting inside this interface. Also you can choose to adjust the time and date manually or using the network data to adjust automatically.
4.14 Schedule Power On/Off
You can set the time to power on/off your phone in this interface.
5 Common Problems & Solutions
If an exception occurs while using your phone, please refer to the following table to troubleshoot
| Common problems | The causes The solutions | |
| Poor signal Using the mobile phone in poor reception area, such as nearby buildings or basement, the radio waves cannot effectively communicate; | Please move to strong signal place and retry | |
| Associated with the launch of the base station network built near and far | ||
| Echo or noise | Due to poor network trunk, is a regional problem | Hang up and redial. |
| Some regional bad line | ||
| Some regional bad line | Standby time is related to the network system setting | Turn off the mobile phone in the poor reception area. |
| Unable to boot | The battery power is exhausted. | Check the battery power Or charge it. |
| SIM card error | SIM card is damaged | Contact your network service supplier. |
| SIM card metal surface have dirt | Use clean cloth to brush the SIM card metal contact point | |
| Unable to connect the network | Beyond the GSM or 3G network service area. | Ask your network service supplier the service area. |
| The signal is weak P | lease move to the strong signal place to retry | |
| Calls unable to call | Set up the call barring function | cancel the call barring function |
| Set up the fixed dial function | cancel the fixed dial function. | |
| PIN error Input | incorrect PIN Code in three times | contact your network service supplier. |
| Unable to charge | Battery or charger damaged | need to replace new battery or charger |
| Charge in lower than -10°C or higher than 55°C environment | change the charging environment | |
| Bad contact check whether the plug connection well | ||
| Unable to add phonebook record | Phonebook memory is full | delete some of phonebook record. |
| unable to set up some function | Network provider does not support this feature, or you did not apply for this function | contact your network provider. |