
DWS860X - Wine cellar DE DIETRICH - Free user manual and instructions
Find the device manual for free DWS860X DE DIETRICH in PDF.

| Product type | Wine cellar |
| Brand | De Dietrich |
| Model | DWS860X |
| Capacity | 52 bottles of 75 cl |
| Temperature range | 5 °C to 15 °C |
| Default temperature | 12 °C (red wine) |
| Preset settings | Red wine (12 °C), White wine (7 °C), Custom |
| Interior lighting | Yes, manual activation with automatic shut-off after 1 hour |
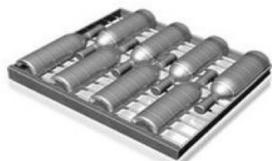
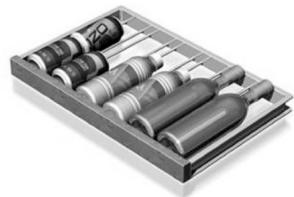
| Sliding drawers | 5 upper drawers (8 bottles each) + 2 lower drawers (6 bottles each) |
| Defrosting | Automatic |
| Power supply | 220-240 V ~ 50 Hz, earthed mains socket |
| Lamp power | 15 W |
| Maintenance | Exterior cleaning with soapy water or mild alcohol; interior with warm soapy water |
| Condenser cleaning | Once a year, dust off |
| Climate classes | N (normal): +16 °C to +32 °C; ST (subtropical): +16 °C to +38 °C |
| Refrigerant | Isobutane (R600a), flammable |
| Door gasket | Cleanable with soapy water, apply paraffin or petroleum jelly after cleaning |
| Reversible door hinge | Possible by a qualified technician |
| After-sales service | 0800 02 88 04 (toll-free number) or by mail: Service Consommateurs DE DIETRICH, BP 9526, 95069 CERGY PONTOISE CEDEX |
Frequently Asked Questions - DWS860X DE DIETRICH
User questions about DWS860X DE DIETRICH
0 question about this device. Answer the ones you know or ask your own.
Ask a new question about this device
Download the instructions for your Wine cellar in PDF format for free! Find your manual DWS860X - DE DIETRICH and take your electronic device back in hand. On this page are published all the documents necessary for the use of your device. DWS860X by DE DIETRICH.
USER MANUAL DWS860X DE DIETRICH
Chere CLIENT, Cher Client
- RELATIONS CONSOMMATEURS
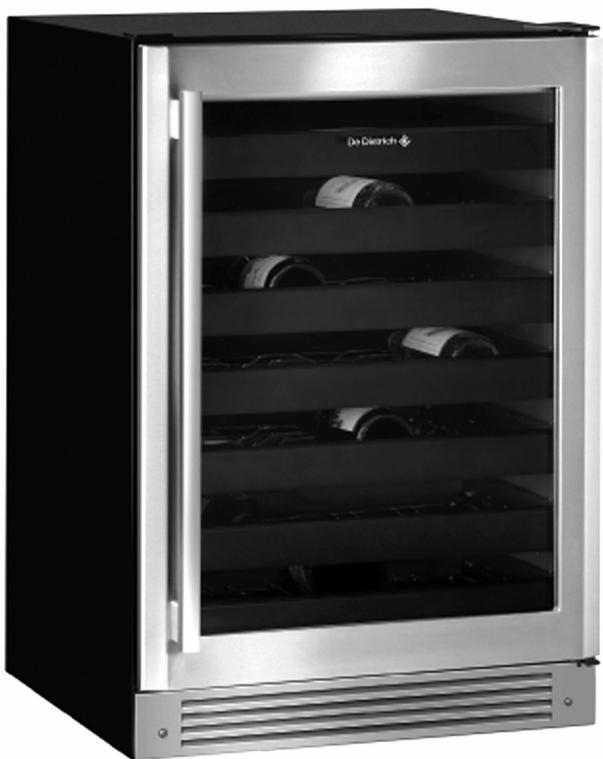
The confidence you have shown in our products by purchasing the WINE COOLER by the company DE DIETRICH is greatly appreciated.
The new generation of appliances is a result of extensive knowledge, experience, and efforts of our experts who, bearing our customers in mind, developed a line of products that are extraordinary for their quality, aesthetics, features, and technological equipment.
Your new WINE COOLER by the company DE DIETRICH will harmoniously blend with other furniture and appliances in your kitchen and deliver the performance that your expect with regard to storing your wine, while keeping its operation plain and simple. It was our mission to offer you an excellent product.
The array of products by the company DE DIETRICH also includes a wide choice of ovens, microwave ovens, kitchen ranges, kitchen hoods, dishwashers, and built-in refrigerators that can be matched to your new DE DIETRICH WINE COOLER.
In order to accommodate your requirements with regard to our products, we make our customer assistance constantly available, providing you with answers to your questions and suggestions (please find the relevant addresses and other information at the end of this booklet).
Please visit our website at www.dedietrich-electromenager.com where you will find our most recent innovations, as well as useful further information.
DE DIETRICH
New top quality products
Figure of the Appliance. 12
Before Putting Into Use. 12
Energy Saving Tips 13
Important 13
Placing and Installation 14
Operation Control. 14
Maintenance and Cleaning 16
Trouble-Shooting Guide. 17
The appliance can be equipped with various accessories, depending on the model of the appliance.
Consistently with our policy of constant improvement, we reserve the right to change the technical, functional, or aesthetical features, related to product development.
Important: Before using the appliance for the first time, please read these instructions for installation and use carefully; this is the fastest way to familiarize yourself with the appliance's operation.
The rating plate of the appliance, with information specific to the model you purchased is located in the interior of the appliance.
Before Putting Into Use
Remove packaging
We Care for the Environment
Disposal of Old Appliances
Before connecting the appliance to the mains supply, leave it stand for about 2 hours, which will reduce a possibility of malfunctions in the cooling system due to transport handling.
- Clean the appliance, and be thorough, especially in the interior (See Cleaning and Maintenance).
-
These instructions for use are intended for the user. They describe the appliance and its correct and safe use. They were prepared for various types/models of refrigerators therefore you might find in it description of some functions and of accessories that your appliance does not have.
-
Remove corner blocks and foam drawer stops.
- Remove all packing material and tape. Before using, be sure all packing materials and tape have been removed.
-
If you are discarding an old refrigerating-freezing appliance, remove the doors to reduce the danger of children being trapped inside.
-
Our products use environmentally friendly packaging, which can be either recycled or disposed of in an environmentally friendly manner. To this end, individual packaging materials are clearly marked.
- These instructions are printed either on recycled paper or chlorine free bleached paper.
- When your appliance finally wears out, please try not to burden the environment with it; call your nearest authorised service agent. (See Disposing of the Worn Out Appliance).
- Once your appliance becomes obsolete, dispose of it immediately. If the appliance is equipped with a door lock mechanism, please make sure the lock is broken and /or permanently disabled, to prevent suffocation for children accidentally locked inside during play.
Attention
- The appliance contains refrigerating agent and insulation materials requiring specific decomposition procedure. Consult your local organization, authorized to deal with such materials, or call your dealer. Be careful not to damage the piping on the rear panel of the appliance.
Connect power
- Plug the power cord into the correctly earthed wall outlet which must never be located directly behind the appliance.
- Check to make sure power is on by opening the door to see if interior light turns on.
Slide product into the cutout
- Carefully, slide the appliance into the opening. Be careful not to entangle power cord. Note: The door should protrude 2.5cm beyond the surrounding cabinets.
Set temperature controls
The temperature controls are preset. Allow 24 hours for temperature to stabilize.
Energy Saving Tips
- Try not to open the door too often, especially during hot and humid weather.
- Check periodically if the appliance is sufficiently ventilated (adequate air circulation behind the appliance).
- If the door gasket is damaged and/or not sealing properly, energy consumption will be substantially higher. To restore efficiency, replace the door gasket.
- The condenser grill located on the (exterior) rear wall should always be kept clean, free of dust and dirt accumulated from kitchen fumes (see Cleaning the Appliance).
- Always follow strictly the instructions described in sections Positioning and Energy Saving Tips, otherwise the consumption of energy is increased.
Important
This appliance must be properly connected to the electrical power supply (see: Connecting to the Power Supply).
Always disconnect the appliance from power supply before replacing the light bulb, cleaning and/or attempting any repairs.
When disconnecting the appliance from the wall outlet always hold the plug with your hand, and never pull the cord.
- For the sake of the environmental protection be careful not to damage the rear wall of the appliance or any part of the sealed refrigerating system when moving the appliance.
- The refrigerating system on this appliance is filled with refrigerant and oil. If the appliance is damaged, handle it with care and dispose of it in accordance with environmental protection requirements. (See Our Care for the Environment).
- If the power cord is damaged it may be replaced by the manufacturer, his service personnel or other qualified personnel only in order to avoid possible injuries.
- Changing the direction of door opening may also be performed by the after-sale service personnel only!
- Do not store flammable, vaporizing or explosive materials in the cooler, like for example explosives or sprays containing flammable substances like propane, butane, pentane, etc. Such sprays are clearly marked with adequate symbols for danger on the exterior of the package.
- Bottles with high alcohol content must be tightly sealed and stored in upright position.
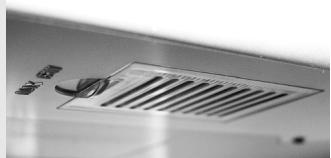
- Warning: Ventilation slots on the appliance or built-in element should always be kept clean and unobstructed.
- Warning: Do not use any mechanical accessories when thawing the refrigerator, except for those explicitly recommended by the manufacturer.
- Warning: To prevent any pollution be careful not to damage the insulation or refrigeration tubes at the rear wall during the installation, cleaning and disposal of the appliance.
- Warning: Do not use any electrical devices inside the appliance, except for those explicitly recommended by the manufacturer.
The symbol on the product or on its packaging indicates that this product may not be treated as household waste. Instead it shall be handed over to the applicable collection point for the recycling of electrical and electronic equipment. By ensuring this product is disposed of correctly, you
will help prevent potential negative consequences for the environment and human health, which could otherwise be caused by inappropriate waste handling of thisproduct. For more detailed information about recycling of this product, please contact your local city office, your household waste disposal service or the shop where you purchased the product.
Danger:
This appliance is not intended for use by persons (including chil-dren) with reduced physical, sensory or mental capabilities, or lack of experience and knowledge, unless they have been givensupervision or instruction concerning use of the appliance by aperson responsible for their safety. Children should be supervised to ensure that they do not playwith the appliance.
Placing and Installation
Choosing the Right Place
Place the appliance in a dry and regularly ventilated room. Allowed ambient temperature depends on the model (class) of the appliance and is indicated on the rating plate of the appliance.
| Class | Ambient temperature |
| N (normal) | from + 16°C to + 32°C |
| ST (sub-tropical) | from + 16°C to + 38°C |
Placing the Self-standing Appliance
Never place the appliance near heat radiating devices and do not expose it to direct sunlight. In case the distance to the heat emitting device is too short, it may require the installation of an insulation panel.
Place the appliance firmly on a solid base. The appliances have adjustable legs. Use them to level the appliance.
Level
- Use a 2.5 open-end wrench to turn the leveling legs and raise or lower the product.
- Adjust carefully, the appliance should be level and plumb with cabinetry, and should align with adjacent toekick height.
Placing the Built-in Appliance
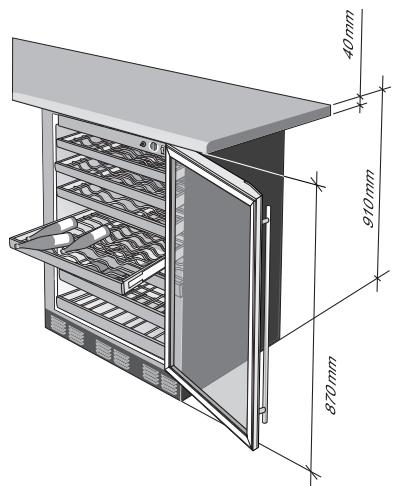
Connection to Power Supply
- The door should protrude 2.5cm beyond the surrounding cabinets.
- After the installation, the appliance mains plug should be accessible!
Connect the appliance with the cable and plug to the power supply socket outlet with a ground terminal (safety socket).
Required nominal voltage and frequency are indicated on the rating plate.
The connection to the mains supply and earthing have to be made according to current standards and regulations. The appliance resists temporary voltage tolerance up to -6 to +6% .
Operation Control
Temperature control
The temperature range of the wine reserve is from 5^ to 15^ . Do not install the wine reserve where the temperature will go below 10^ or above 32^ .
De Dietrich
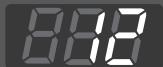

The temperature display shows the actual temperature of the wine reserve. The actual temperature may vary slightly from the set temperature based on factors such as door openings, amount of wine and room temperature.
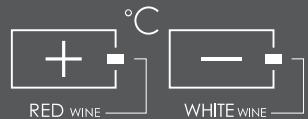
After making adjustments, allow 12 to 24 hours for the wine reserve to reach the temperature you have set and before making any further adjustments. The factory setting is the RED WINE setting (12^) .
The RED WINE setting will provide a storage temperature of approximately 12^ , which is optimum for the storage of red wine. Press the RED WINE pad to display 12^ . Several seconds after the RED WINE pad is pressed, the actual temperature will be displayed while the wine reserve temperature moves toward 12^ .
The WHITE WINE setting will provide a storage temperature of approximately 7^ , which is optimum for white wine. Press the WHITE WINE pad to display 7^ . Several seconds after the WHITE WINE pad is pressed, the actual temperature will be displayed while the wine reserve temperature moves toward 7^ .
The CUSTOM setting will provide a storage temperature range of 5^ to 15^ . This setting provides the ability to customize the temperature to the optimum setting for the particular wine. To change the temperature setting, press and hold the CUSTOM pad until the display begins to flash the set temperature. Then press the RED WINE or WHITE WINE pads until you reach the desired set temperature. After several seconds, the display will return to the actual temperature. The actual temperature will be displayed while the wine reserve moves toward the set temperature.
In general, temperatures at the bottom of the cabinet will be cooler than temperatures at the top of the cabinet. Position your wine inventory accordingly (i.e., white wines in the cooler zones and red wines in the warmer zones). Note: On all three temperature selections, the light beside the pad will remain lit, indicating the selection made.
Interior light and light pad
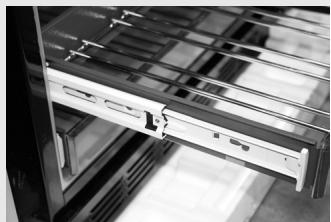
Pull-out drawers
Insert wine bottles
Loading tips and suggestions
Wood drawer fronts
The interior light makes it easy to view your wine labels and enhances the display of your collection. When the light pad is pressed and the word ON is displayed, the light will remain on for one hour before automatically turning off. When the light pad is pressed and the word OFF is displayed, the light will come on only when the door is opened. For best viewing, do not store a bottle on the top shelf directly under the light. Remember to turn off the light when it is no longer needed.
All of the drawers pull out so bottles can be more easily added or removed.
8 necked bottles can be loaded into each of the five top drawers, provided that the necks are alternatively turned to the front and vice versa.
6 necked bottles with necks turned to the rear side of the appliance can be loaded into each of the two bottom drawers.
Altogether, you can load 52 bottles (0.75 l).
Tall bottles should not be loaded on the bottom drawer because they may prevent the door from closing.
- The bottles on the top drawer, directly under the light, will be exposed to a slightly higher temperature when the light is on. Position your wines accordingly and remember to turn off the light when it is no longer needed.
- Keep wines that you plan to use for everyday drinking and entertaining on the front half of the drawers where labels are completely visible. Place wines for aging or longer term storage in the rear.
- Do not allow children to climb, stand or hang on the appliance drawers. They could seriously injure themselves and possibly cause damage to the appliance.
The drawer fronts on the wine store are unfinished wood. Wooden parts are protected with a foil which is to be removed. During use, oil from hands may accumulate and stain the wood.
Natural wood may vary slightly in grain and color.
Maintenance and Cleaning
Automatic Defrosting
There is no need to defrost the refrigerator, because ice depositing on the inner back wall is defrosted automatically. Ice is depositing on the inner back wall during the compressor operation; later on, when the compressor is not operating ice is defrosting and water drops collect and drain through the outlet in the inner back wall into the drain pan situated above the compressor, from where it evaporates.
Cleaning the Appliance
Disconnect the power supply before cleaning the appliance.
Do not use coarse or aggressive cleaning agents as you can damage the surface.
Cabinet
The painted cabinet can be washed with mild soap and water.
Rinse thoroughly with clear water. Never use abrasive scouring powders.
Varnished surfaces are cleaned with soft cloth and an alcohol based cleaning agent (for example glass cleaners).
You may also use alcohol (ethanol or isopropylic alcohol). The application of abrasive and specially aggressive cleaners, such as the stainless steel cleaners, is not appropriate for the cleaning of plastic and coated parts.
After cleaning connect the appliances to the mains supply, turn it on and replace the beverages again.
Interior
Wash the inside with mild soap and water or baking soda and water. Do not use an abrasive powder, solvent, polish cleaner or undiluted detergent.
Glass door
Use a glass cleaner or mild soap and water and a soft cloth to clean the glass door.
Do not use any abrasive powders.
Door gasket
The vinyl gasket may be cleaned with mild soap and water, a baking soda solution or a mild scouring powder. Rinse well.
After cleaning the door gasket, apply a thin layer of paraffin wax or petroleum jelly to the door gasket at the hinge side. This helps keep the gasket from sticking and bending out of shape.
Light bulb replacement
Unplug the appliance before replacing the light bulb.
To remove the light shield, push in the tab on the left side of the shield and lower it.
Replace with a 15 watt appliance bulb.
In the event of a power failure
If the power fails, open the door as infrequently as possible to maintain the temperature. A gradual rise in temperature should not have any adverse effect on the beverages.
If it is extremely hot, you may want to move the beverages to the coolest location you can find until power is restored.
Do not store or use gasoline or other flammable vapors and liquids in the vicinity of this or any other appliance.
Sometimes you may come across a minor problem during the operation of the appliance.
Please refer to the troubleshooting guide below to assist you in identifying some of the possible causes which in most cases does not require a service call.
| Trouble | Check |
| The Appliance Fails to Operate After Connecting it to the Power Supply: | ·Check if the socket is powered and make sure the appliance is switched on. (thermostat knob in operating position). |
| Continuous Operation of the Cooling System: | ·The door is frequently opened or left open for long periods of time. ·The door is not properly closed possibly an alien particle between the doors, sagging door, door gasket damaged, etc.). ·Excessive quantity of warm beverages inserted at once. ·The reason may be inadequate ventilation of the compressor and condenser (check the air circulation behind the appliance and clean the condenser). |
| Water is Leaking From the Appliance: | Water usually leaks from the appliance if the drain outlet is blocked, or if the defrost water drips past the collecting groove. ·Clean the blocked outlet with a plastic straw. |
Useful Tips
Noise Related Problems
Temperature within the appliance is not cool enough:
- Is the temperature setting adequate (see Operation and Control)?
- Does the thermometer indicate correctly?
Is the ventilation system operating properly?
Is the appliance located too close to a heat source?
Cooling of the refrigerating and freezing appliances is provided by the cooling system, which incorporates a compressor and a fan – these devices produce certain noise. The level of noise emitted largely depends on the location and proper use of the appliance:
- During the operation of the compressor, certain noise of liquid flow may be detected, and during idle periods the circulation of refrigeration liquid is heard. This is a normal condition and has no impact on the life cycle of the appliance.
- Immediately after starting the appliance, the operation of the compressor and the flow of refrigerant may be louder than usual. This is not a sign of any malfunction, and has no impact on the life cycle of the appliance. Gradually the noise will be reduced.
Sometimes unusual and stronger noises may be detected, which are rather unusual for the appliance. Such noises are often the result of the inappropriate installation:
- The appliance must be perfectly horizontal and installed on a solid floor.
It should not touch the walls or adjacent cupboards.
THE MANUFACTURER RESERVES THE RIGHT TO ALTER THE SPECIFICATIONS WITH NO IMPACT TO THE FUNCTIONAL OPERATION OF THE APPLIANCE.
- REPAIRS
Any repairs on your appliance should be carried out by an expert, authorized for our brand. When contacting the service representative, please be ready to submit the information on your appliance (model, type, serial number); this information is indicated on the data plate. Our trained staff are available to advise or book a service call with one of our authorized service agents.
Service line: tel: 0870 90 99 100
ORIGINAL SPARE PARTS

When maintenance is performed on your appliance, please request only original spare parts.
- CONTACT WITH USERS
If you wish to find out more on the products of our brand, i.e. if you are looking for information, tips, locations of retail outlets where our appliances can be purchased, authorized service representatives, etc.
-or if you wish to submit to us any messages:
we shall consider any notes, initiatives, suggestions, to which we shall also personally respond.
> We can be contacted at the following address:
Brandt UK
Intec 4
Wade Road
Basingstoke
Rg4 8NE
Tel: 01256 308000
Www.dedietrich.co.uk
www.Brandtuk.com
Gentile cliente!