
DME330WE1 - Heating DE DIETRICH - Free user manual and instructions
Find the device manual for free DME330WE1 DE DIETRICH in PDF.


| Product type | Combination microwave oven (grill, convection) |
| Brand | DE DIETRICH |
| Model | DME330WE1 |
| Power supply | 230 V ~ 50 Hz, thermal protection 16 A |
| Microwave power | 1000 W delivered |
| Microwave power levels | 6 levels: 150 W (defrost), 250 W, 350 W, 500 W, 700 W, 1000 W |
| Grill function | 3 levels: low grill, medium grill, high grill |
| Convection function | Adjustable temperature from 50 °C to 250 °C in steps of 5 °C |
| Combined functions | Grill + microwave, convection + microwave |
| Program chain | 2 successive programs (e.g., defrost then cook) |
| Delayed start | Yes, programmable up to 23 h 59 min |
| Program memory | 3 customizable programs (M button) |
| Defrost | Automatic at 150 W |
| Turntable | Glass, diameter approx. 31 cm, can be stopped |
| Cleaning | Damp soapy sponge, water + vinegar or lemon for odors, do not use steam cleaner |
| Safety | Child safety lock (Stop turntable + Defrost buttons 5 s), damaged door = emergency stop |
| Installation | Freestanding or built-in, minimum distance: 5 cm side, 14 cm above, 10 cm rear, height ≥ 85 cm from floor |
Frequently Asked Questions - DME330WE1 DE DIETRICH
User questions about DME330WE1 DE DIETRICH
0 question about this device. Answer the ones you know or ask your own.
Ask a new question about this device
Download the instructions for your Heating in PDF format for free! Find your manual DME330WE1 - DE DIETRICH and take your electronic device back in hand. On this page are published all the documents necessary for the use of your device. DME330WE1 by DE DIETRICH.
USER MANUAL DME330WE1 DE DIETRICH
(F) Notice d'utilisation et d'installation Micro-ondes
GB Operating and installing instructions Microwave Oven
⑭ Gebrauchs- und Installationsanweisungen Mikrowellenherde
P Manual de Instruções e de Instalação do Microondas
E Instrucciones de uso e instalación Microondas
NL Gebruiks- en installatiehandleiding Magnetronoven
(DK) Betjenings- og installationsvejledning for Mikrobølgeovn
SOMMAIRE Ⓕ
AFFICHEUR & SELECTEUR
chemical
Simple diagram showing a reaction or charge state with temperature and polarity indicatorsF
PROGRAMMATION EXPRESS
La clayette 2 positions
natural_image
Pure diagram of an oval-shaped structure with diagonal lines and internal components, no text or symbols present.natural_image
Simple line drawing of two hands holding a circular object, no text or symbols presentPlease read this user manual carefully. It contains important instructions concerning installation, use and security measures.
Installation 23
Important instructions .....24
General description .....25
Control panel 26
The display & the selector knob . . . . . . . . . . . . . . . . . . . . . . . . . . . 27
Setting the clock / Microwave power settings . . . . . . . . . . . .28
Setting a microwave programme/ Express programme .29
The grilling racks . . . . . . . . . . . . . . . . . . . . . . . . . . . . . . . . . . . . . . . . . . . . . . . 30
The grill function / Programming the grill function . . . .31
The microwave + grill function / Programming
the microwave + grill function .....32
The fan functions . . . . . . . . . . . . . . . . . . . . . . . . . . . . . . . . . . . . . . . . . . 33
Programming the fan function .....34
Programming the fan + microwave function . . . . . . . . . 35
Memory key 36
Linked programs . . . . . . . . . . . . . . . . . . . . . . . . . . . . . . . . . . . . . . . . . . . . . . . . 37
Preprogramming START 38
Troubleshooting guide 39
Care & cleaning 40
Pointers / After-sales service .....41
INSTALLATION
BEFORE CONNECTION
- Check whether your oven has suffered any damage during transport (deformed door or door seal, etc.). If you see any signs of damage, contact your dealer before use.
- Verify the power voltage. If there is a PERMANENT undervoltage (200-210 volts), consult your electrical installer.
LOCATION
- The oven must be set on a work surface at least 85 cm above floor level.
- Place the oven on a flat and horizontal surface, away from any source of heat or steam. To ensure the stability of the microwave oven, the front left foot is adjustable (5 positions). Turn it to raise or lower the appliance.
- Make sure that air may circulate freely around the oven.
Leave sufficient space around the oven :
- 5 cm between the sides of the oven and any walls or objects
- 14 cm above the oven
- 10 cm behind the oven.
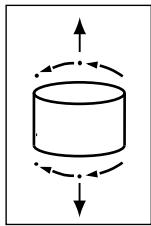
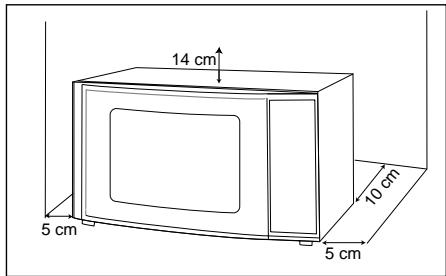
- Make sure that nothing obstructs the ventilation louvers at the back of the appliance.
- Some ovens are designed for flush-fitting. To obtain the corresponding kit, consult your dealer.
- Make sure the electrical plug will be accessible after installation.
- Do not use your appliance immediately (wait approx. 1-2 hours) after transfer from a cold place to a warm place as condensation may cause a malfunction.
ELECTRICAL CONNECTION
- Your installation must be protected by a 16 Amp thermal fuse.
- It is mandatory to use a power point with a ground terminal, connected in accordance with current safety regulations.
- In your electrical installation, provide a device that is accessible to the installer, capable of separating the appliance from the mains power and whose contact opening is at least 3 mm at all of the poles.
- If the supply cord is damaged, it must be replaced by the manufacturer, its service agent or similarly qualified persons in order to avoid a hazard.
IMPORTANT INSTRUCTIONS
- Your appliance is designed exclusively for the domestic purposes of defrosting, heating or cooking foods. The manufacturer bears no responsibility in the case of improper usage.
- Only use ustensils that are suitable for use in microwave ovens.
- To avoid deterioration of your microwave oven, never operate it empty or without the turntable.
- Never tamper with the lock mechanism of your microwave oven; you could cause damage requiring repair by an authorised technician.
- When heating food in plastic or paper containers, keep an eye on the oven due to the possibility of ignition.
- It is not advisable to use metal recipients, forks, spoons, knives, metal ties or staples for deep-freeze bags.
- The contents of feeding bottles are baby food jars shall be stirred or shaken and the temperature checked before consumption in order to avoid burns.
- WARNING : Only allow children to use the oven without supervision when adequate instructions have been given so that the child is able to use the oven in a safe way and understands the hazards of improper use.
- WARNING : Liquids and other foods must not be heated in sealed containers they are liable to explode.
- Eggs in their shell and whole hard-boiled eggs should not be heated in microwave ovens since they may explode, even after microwave heating has ended.
- Microwave heating of beverages can result in delayed eruptive boiling, therefore care must be taken when handling the container.
- For small amounts (one sausage, a single croissant, etc.), place a glass of water alongside the food item.
- Time settings that are too long may dry out and burn the food. To avoid such incidents, never use the same cooking times as those recommended for traditional ovens.
- If smoke is observed, switch off or unplug the appliance and keep the door closed in order to stifle any flames.
GENERAL DESCRIPTION
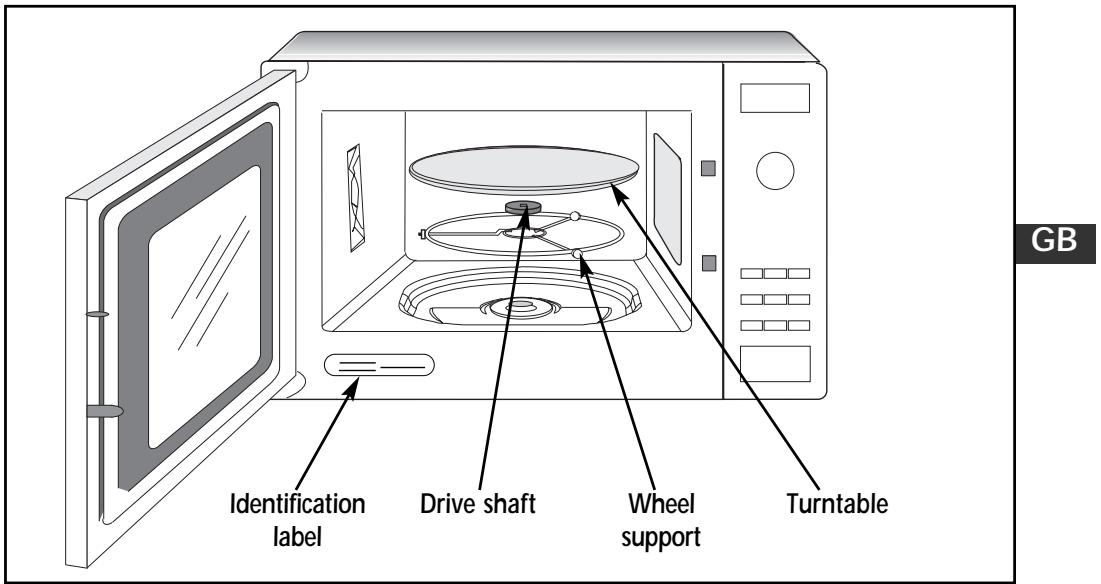
- THE TURNTABLE :
ensures equal cooking of food throughout with no need to intervene.
- It may be used as a cooking dish.
- Rotation is controlled by the drive shaft and the wheel support.
- The turntable rotates in both directions.
- If it does not turn, verify that all components are properly positioned.
- TURNTABLE OFF ∅ :
stops the turntable from revolving in order to use platters which require the entire oven space. When stopped, remember to stir the contents or turn the dish midway through the programme.
• THE WHEEL SUPPORT :
Do not try to rotate the roller ring manually, as you could damage the drive system. If it does not turn smoothly, make sure that there is nothing in the well beneath the turntable.
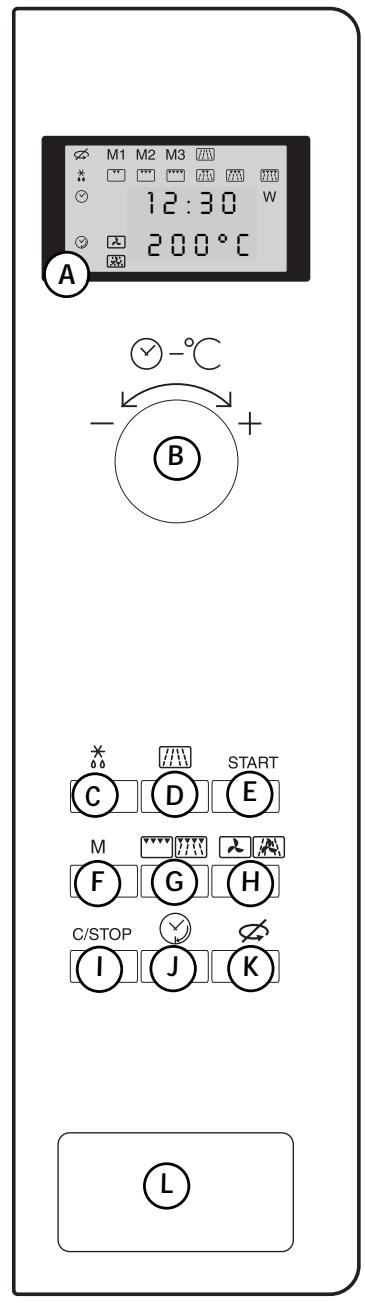
CONTROL PANEL
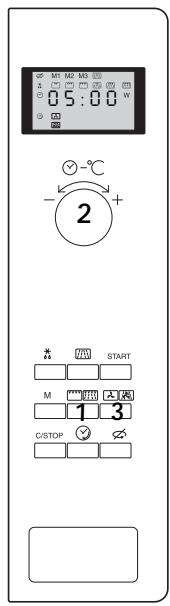
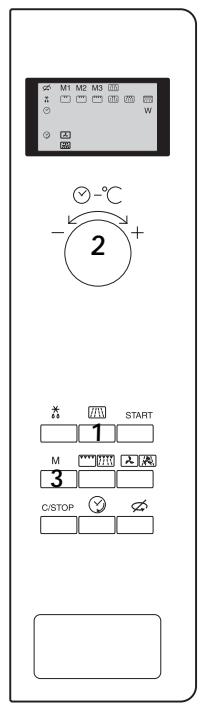
A Display window :
to simplify programming, the display indicates : the time of day, the programme length, the functions or cooking temperature programmed.
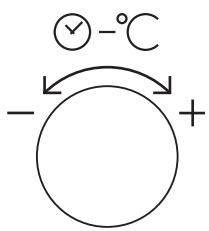
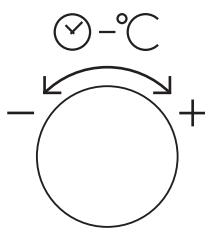
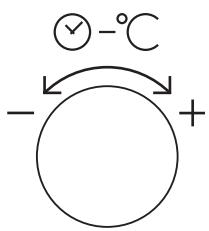
B Selector knob :
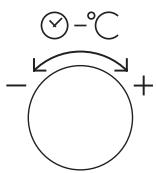
to set the clock, the programme length or the end-time of a programme and the temperature for the fan heat functions.
C Defrost key \* :
to defrost all frozen food.
D Microwave key :
to set the microwave power level.
E START key :
to start all programmes.
F Memory key M :
for rapid access to 3 preprogrammed operations.
G Grill 📋 / Grill + Microwave key 📋 :
to select the desired level of grill and grill + microwave functions.
H Fan heat fan heat + microwave key :
to cook as if with a traditional oven or combined with microwave power for speedy results.
I CLEAR/STOP key C/STOP :
to interrupt (press once) or cancel a programme (press twice).
J Clock key ⏻ :
to set the clock or preprogramme START.
K Stop-Turntable key ↗ :
to stop the turntable from revolving.
L Door open button :
to open the door or stop the oven.
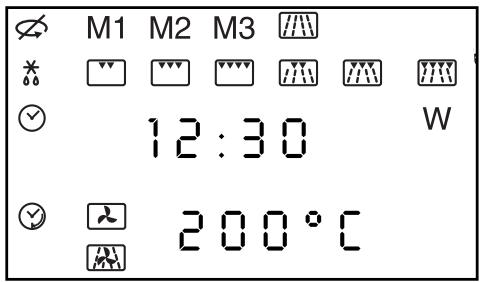
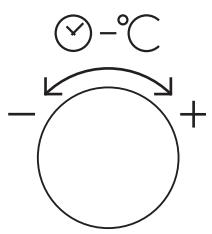
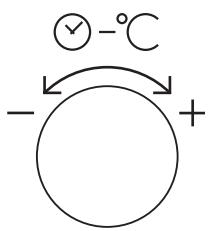
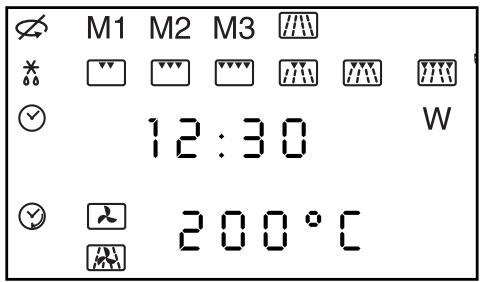
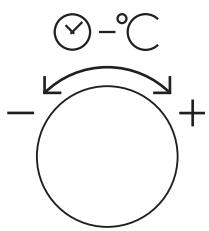
THE DISPLAY & THE SELECTOR KNOB
chemical
Simple diagram showing a circle with temperature and polarity labels, including a circled symbol indicating -°C.GB
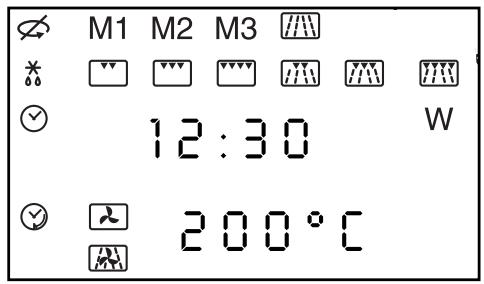
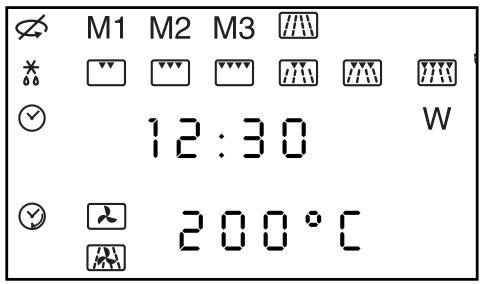
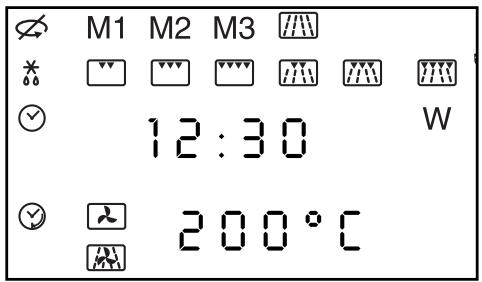
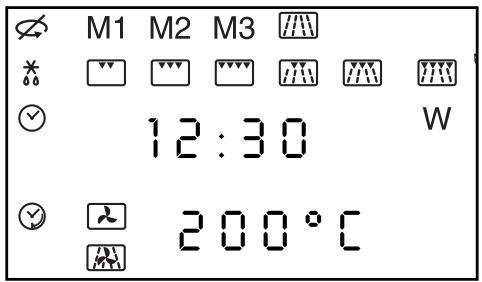
The display and the selector knobs guide you in your choice of :
turntable option :

STOP TURNTABLE
memorized programme settings :
M1
M2
M3
functions :
Microwave power levels

DEFROST
VERY LOW COOK / LOW COOK / SIMMER /
REHEAT / HIGH COOK
Grill levels

LOW GRILL

MEDIUM GRILL

HIGH GRILL
Microwave + grill levels

LOW GRILL
+MICROWAVE

MEDIUM GRILL
+MICROWAVE

HIGH GRILL
+MICROWAVE
Fan functions

FAN

FAN +MICROWAVE
the programme length, clock or preprogrammed start time

12:00

the temperature for fan heat
200°C
SETTING THE CLOCK
After first plugging in your microwave oven or after a power outage, the clock ⏻ appears in the display and 00:00 flashes, inviting you to set the time.

00:00
To set the clock :
- Press the CLOCK key ⏻ for 5 seconds.
- Turn the time selector knob ☑ to the correct time (ex. twelve o'clock).
- Validate by pressing the CLOCK key Ⓨ. Your clock is set.
12:00
MICROWAVE POWER SETTINGS
| POWER SETTING | APPLICATION | |
 | DEFROST 150W | To defrost meat, fish, fruit, bread or delicate dishes. |
 | VERY LOW COOK 250W | To top off cooking of delicate dishes or to cook very slowly. |
| [7330] | LOW COOK 350W | To finish programmes begun with the HIGH COOK power setting which might otherwise over cook on the outside, for instance veal or pork roast. |
| [HX50] | SIMMER 500W | To cook fish and poultry. To finish programmes begun with the HIGH COOK power setting such as beans, lentils or milk-based dishes. |
| [SHYT] | REHEAT 700W | To reheat all fresh or frozen pre-cooked dishes and frozen vegetables. |
| [A$ZX] | HIGH COOK 1000W | To cook fresh vegetables and soup. To heat up all liquids. |
| MICROWAVE OUTPUT POWER : 1000W | ||
SETTING A MICROWAVE PROGRAMME
Your microwave oven is now plugged in and the clock is set.
Open the door, set the dish inside, close the door. If the door is nor properly shut, the appliance will not operate.
If the dish is too large to turn freely inside the oven, press the STOP TURNTABLE key ✦ before or during the programme.
6 microwave power levels are available :
(150 [defrost] - 250 - 350 - 500 - 700 - 1000 W).
Example : Set a microwave programme at the HIGH COOK power level (1000 W).
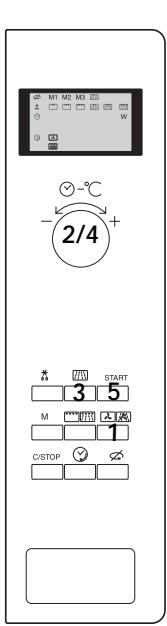
① Press the MICROWAVE POWER KEY to select 1000W :
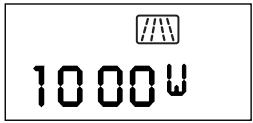
is displayed.
② Set the programme time with the selector knob, ex. five minutes :
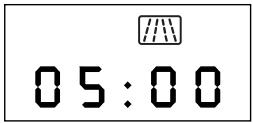
is displayed.
③ Press START.
The programme begins: the turntable revolves, the oven light comes on. 3 beeps announce the end of a programme. The beeps are repeated every minute for 10 minutes until you open the door.
To defrost, proceed similarly, using the defrost key ✱ to select the 150W power level. If there is an error in the programming, press the CLEAR/STOP key twice.
EXPRESS PROGRAMME
① Set the programme time with the selector knob, ex. three minutes :
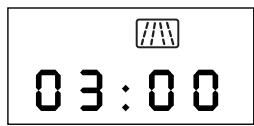
is displayed.
② Press START.
The HIGH COOK programme begins automatically : the turntable revolves, the oven light comes on.
THE GRILLING RACK
Make sure that the rack is always well centered on the turntable.
Never use any metal dish with the rack with the microwave, grill + microwave or fan + microwave functions.
Nevertheless you may heat up food in an aluminium tray if you place a plate between the tray and the rack.
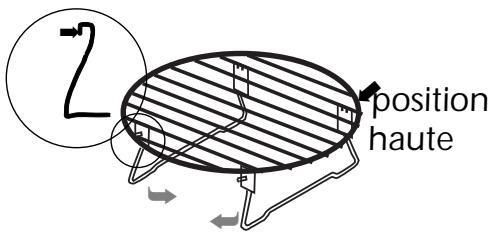
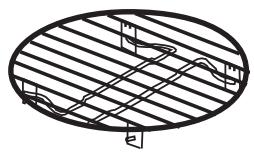
The folding rack :
To fold down the rack :
push in on the protruding hooks and fold in the stands
with the Grill or Grill + Microwave functions : choose the rack level according to the dish you wish to grill
- high position to brown dishes which are rather flat
- low position as required for other dishes.
always set your dishes on the rack folded down to the low position.
The 2 level rack
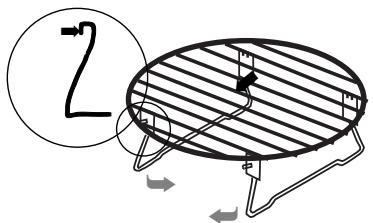
high position
low position (folded)
THE GRILL FUNCTION

This function enables you to grill meat and brown dishes such as gratins. It may be used before or after cooking, as called for in the recipe.
- WARNING : Accessible parts may become hot when the grill is in use. Children should be kept away.
- WARNING: When the appliance is operated in the combination mode, children should only use the oven under adult supervision due to the temperatures generated.
- Three grill levels are available : LOW GRILL 📌 (press the GRILL key once), MEDIUM GRILL 📌 (press the GRILL key twice), and HIGH GRILL 📌 (press the GRILL key 3 times).
As a general rule, use the HIGH GRILL level for the grill function, for example to grill meat and fish. The HIGH, MEDIUM & LOW GRILL levels are used with the combined microwave + grill function.
PROGRAMMING THE GRILL FUNCTION
Example : Use the grill key to set a programme using the HIGH GRILL level.
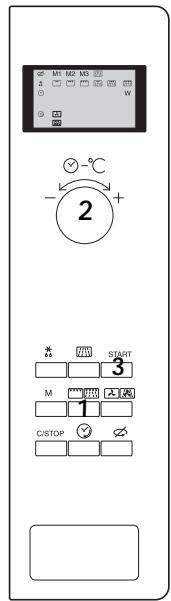
① Press the GRILL/GRILL + MICROWAVE key 3 times,
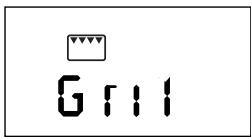
is displayed.
② Set the programme time with the selector knob, ex. ten minutes :
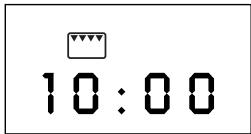
is displayed.
③ Press START.
The programme begins: the turntable revolves, the oven light comes on, the timer counts down.
THE MICROWAVE + GRILL FUNCTIONS
This function enables you to use the microwaves and grill simultaneously, for rapid cooking.
- You may combine each of the 3 grill levels (LOW-MEDIUM-HIGH) with any of the 5 microwave power settings (150-350-500-700-1000 W), allowing you to tailor a programme to your specific cooking needs.
▶ Sample programmes to obtain best results :
- beef & lamb : high grill + 150W microwave level
- turkey / pork / veal : high grill + 350W
- poultry : high grill + 500W
- fish : medium grill + 500W
- potatoes au gratin : medium grill + 1000W
- lasagna : low grill + 1000W
PROGRAMMING THE MICROWAVE + GRILL FUNCTION
Example : use the grill key + microwave key to set a microwave + grill programme using the MEDIUM GRILL level + LOW COOK microwave power setting.
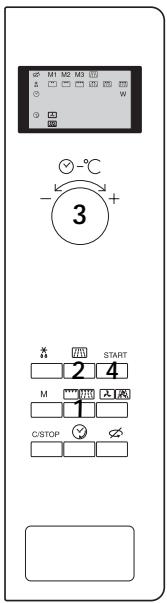
① Press the the GRILL/GRILL + MICROWAVE key 5 times,
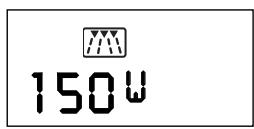
is displayed.
② Set the microwave power level with the microwave key 📄, ex. press once for LOW COOK, 350W :
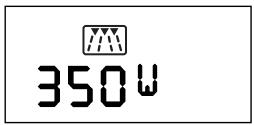
is displayed.
③ Set the programme time with the selector knob, ex. ten minutes :
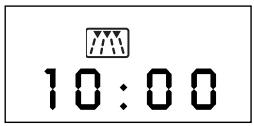
is displayed.
④ Press START.
The programme begins : the turntable revolves, the oven
THE FAN FUNCTIONS
2 convection cooking functions are available :
the fan function

• to cook and brown food just as in a traditional convection oven
the fan + microwave function
- to combine microwave power with fan cooking, for considerable time savings.
GB
Pointers
- The cooking temperature may be set from 50^ - 250^ C by 5^ steps.
- Cooking time may be set from 0 - 90 by 1 minute steps.
- It is always preferable to set a minimal cooktime and extend if necessary; check the browning of your dishes to avoid overcooking.
- Remember to always place your dishes on the rack in the low position when using the fan function 📁 or fan + microwave function 🌐. This will ensure even heat distribution thereby providing optimal cooking results.
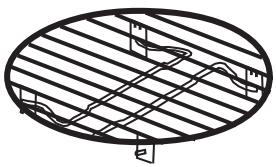
natural_image
Pure diagram of an oval-shaped structure with diagonal lines and corner brackets, no text or symbols present.Folded-down rack
- Use only heat-resistant ovenware.
- Never use metal dishes when cooking with the fan + microwave function 📂.
• Always use an oven mitt to remove your dish as it may become quite hot.
PROGRAMMING THE FAN FUNCTION
Remember to set your ovenware on the rack in the low position.
Example : baking at 250^ C for forty minutes.
① Press the FAN / FAN + MICROWAVE key
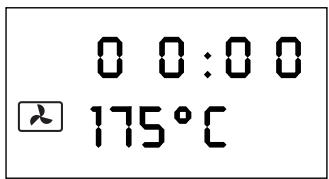
is displayed.
② 175°C flashes, to prompt you to set the desired temperature, ex. 250°C, with the selector knob (within 5 seconds)
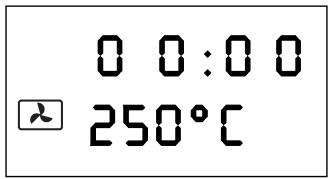
is displayed
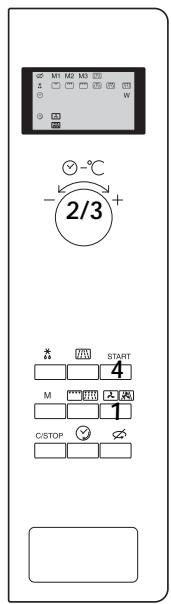
③ When 00:00 flashes, set the programme time, ex. 40 min, with the selector knob
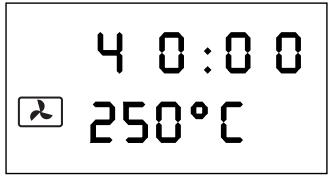
is displayed
④ Press START.
The programme begins: the turntable revolves, the oven light comes on, the timer counts down.
➢ Two tones announce that the selected temperature (ex. 250°C) has been reached.
At the end of the cooking time, remember to use an oven mitt to remove the dish.
PROGRAMMING THE FAN + MICROWAVE FUNCTION
Remember to set your ovenware on the rack in the low position.
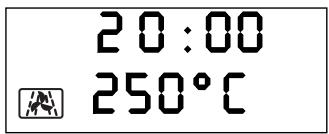
Example : cooking with fan at 250^ C + 500W microwave power for 20 minutes.
① Press the FAN/FAN + MICROWAVE key twice to select the fan + microwave function.
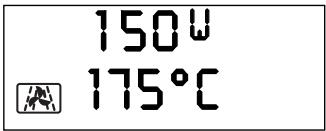
is displayed.
② The microwave power levels 150-250-350-500 may be associated with the fan function.
150W flashes to prompt you to set the desired level with the microwave key (within 5 seconds), ex. press 3 times for SIMMER level, 500W
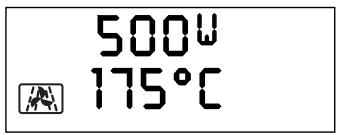
is displayed.
③ Set the desired temperature, ex. 250^ C, with the selector knob (within 5 s)
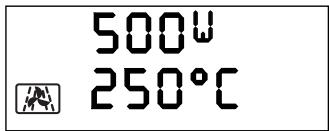
is displayed.
GB
④ When 00:00 flashes, set the programme time with the selector knob, ex. twenty minutes :
is displayed.
⑤ Press START.
The programme begins: the turntable revolves, the oven light comes on, the timer counts down.
➢ Two tones announce that the selected temperature (ex. 250°) has been reached.
➢ At the end of the cooktime, remember to use an oven mitt to remove the dish.
MEMORY KEY M
The Memory function allows you to store 3 frequently used programmes which you can then access simply by pressing M. You may memorize any programme you wish.
Example : Use the Memory key to preprogramme heating up a plate of food.
Proceed as if setting the programme for immediate use :
① Press the microwave power key to select REHEAT (700W)
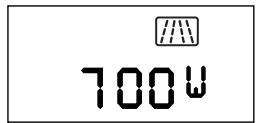
is displayed.
② Set the programme time with the selector knob, ex. 2 minutes :
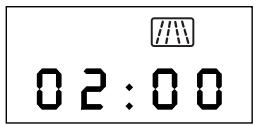
is displayed.
③ Instead of START, press the MEMORY key M ; after several seconds you will hear a tone confirming that the personalized programme has been memorized.
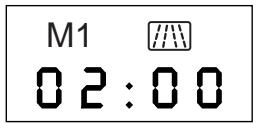
is displayed.
You may memorize two more programmes by pressing the Memory
key two or three times.
To call up a programme, press once/twice/three times; the preprogrammed information is displayed.
Press START, the memorized programme begins.
LINKED PROGRAMMES
You may link 2 different programmes, combining any of the available functions amongst: defrost / microwave / grill / microwave + grill / fan / fan + microwave.
Example : Using linked programming to defrost ten minutes followed by simmer level microwave + medium grill programme for 20 minutes
GB
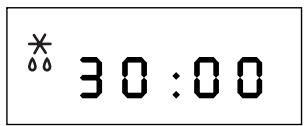
① Proceed as if setting only a defrost programme :
- press the defrost key ✱
- set the programme time (ex. 10 min).
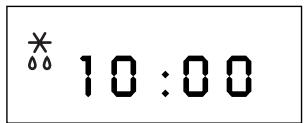
is displayed.
② Instead of pressing START, programme the next operation :
- press the microwave + grill key to select microwave + medium grill
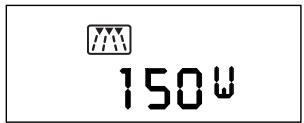
is displayed.
③ Set the microwave level, ex. SIMMER
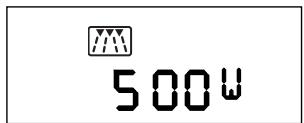
is displayed.
- set the programme length (ex. 20 min), adding it to the defrost time.
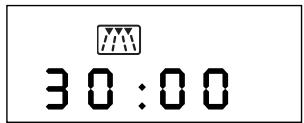
is displayed.
④ Press START.
is displayed.
The linked microwave + grill programme will automatically begin at the end of the defrost programme.
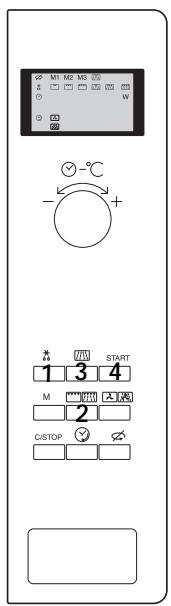
PREPROGRAMMING START
Before programming, check that the clock is set to the correct time. Example : 16:00
① Proceed as if setting the desired programme for immediate use : select your function and programme length (ex. fan air 45 minutes).
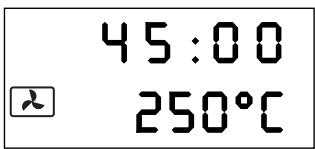
is displayed.
② Instead of START, press the CLOCK key 🕒
The programme length (45 min) is automatically added to the clocktime (16:00) and this hour flashes in the display, together with the clock symbol and the selected function.
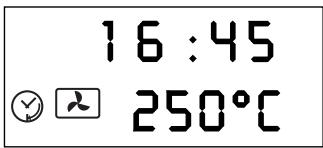
is displayed.
③ Set the hour at which you wish the programme to finish with the time selector knob, ex. you would like the dish to be ready at 20:00.
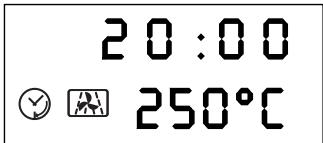
is displayed,
20:00 flashes
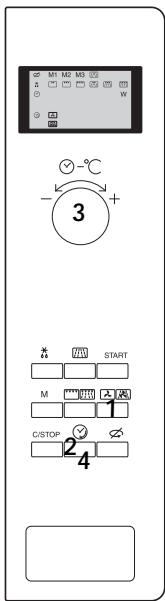
④ Press the clock key 🕒 again. The clock symbol and the preprogrammed end of the cooking time are displayed.
You may preprogramme START with whichever functions you like except for defrosting; you may even preprogramme the start of 2 linked programmes.
➢ A minimum programme length of 1 minute is required to preprogramme START.
TROUBLESHOOTING GUIDE
Problem
The time counts down, but the appliance does not function (the turntable does not rotate, the light does not come on and the food is not heated).
▼ The microwave oven is noisy when operating.
▼ Condensation forms on the door glass.
▼ The grill element smokes when heating up.
▼ The turntable does not revolve correctly.
▼ The microwave programmes do not produce the desired results.
▼ The appliance produces sparks.
Suggestion
▲ Press the TURNTABLE OFF key ✅ and the DEFROST ✕ key for 5seconds.
▲ Adjust the front left foot. Clean the wheels and the well area beneath the turntable.
▲ Wipe the water off with the help of a cloth in order to avoid.
▲ Clean all cooking residue from the grill element.
▲ Clean the wheels and the well beneath the turntable.
▲ Clean the vents under the appliance. Make sure that you use only containers which are suitable for microwave cooking.
▲ Check whether the wheel support is correctly positioned.
Thoroughly clean the appliance : remove any greasy deposits, cooking residue, etc...
Move any metal objects away from the oven walls.
Never use metallic containers with a rack.
CARE & CLEANING
- WARNING : It is recommended to clear the oven regularly and to take any food deposit inside and outside the appliance. Use a soapy and wet cloth. If the appliance is not kept clean, its surface could deteriorate and adversely affect its life and possibly result in a hazardous situation. If the door or door seals are damaged, the oven must not be operated until it has been repaired by a competent person.
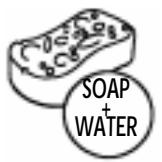
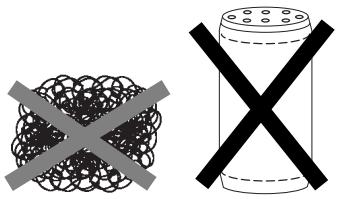
- A steam cleaner is not to be used.
- Do not use abrasives, alcohol or solvents as they are liable to damage the oven.
- In the event of unsavory odors or caked-on dirt, boil water containing lemon juice or vinegar in a cup for 2 minutes and clean the walls with a little dishwashing liquid.
- For those ovens with grill or convection heat functions, the top and rear air vents become very hot. Do not touch these parts after use; wait till the appliance has cooled down in order to clean it. Use a fine steel wool pad on the metal parts.
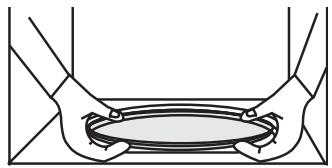
- The turntable can be removed for cleaning. Wells are provided on both sides for easy access. If you remove the drive shaft, do not allow water to enter the motor shaft hole.
natural_image
Simple line drawing of two hands holding a circular object (no text or symbols)Be sure to put the turntable, the drive shaft and the wheel support back in their proper place.
POINTERS
- You may stop or start the turntable revolving during a programme by pressing the TURNTABLE STOP key ↗.
- To change a programme, press the c/STOP key twice and programme again.
- If you open the door before the end of the programme, shut the door and press the START key to continue the programme.
- When using the defrost function (150W) turn the food midway through the programme to obtain the best results. Close the door and press the START key to continue the second half of the programme.
- If you remove a dish before the end of the programme, press the C/STOP key twice to erase the programme.
GB
AFTER SALES SERVICE
- If the equipment has sustained any damage :
- Check that the door is not deformed.
- If the oven does not operate, before calling the repairman :
- Check the electrical supply.
- Check that the door is properly closed.
- Check your programming.
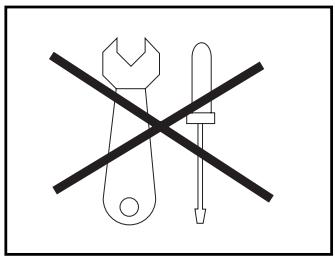
CAUTION : never attempt to repair your oven yourself.
natural_image
Diagram showing crossed wrench and screwdriver crossed by a diagonal line (no text or symbols)WARNING : it is dangerous for anyone other than qualified personnel to make any repairs requiring removal of the cover providing protection from exposure to microwave energy.
Only a specially trained technician is qualified to repair your microwave oven.
You can ring us at the following number :

INHALT D
chemical
Simple diagram showing a reaction or charge state with temperature and polarity indicatorsD
natural_image
Pure diagram of an oval-shaped structure with diagonal lines and internal components, no text or symbols present.natural_image
Simple line drawing of two hands holding a circular object, no text or symbols present
O VISOR & O SELECTOR
chemical
Simple diagram showing a reaction or charge state with temperature and polarity indicatorsP
natural_image
Pure diagram of an oval-shaped structure with diagonal lines and internal components, no text or symbols present.natural_image
Simple line drawing of two hands holding a circular object with a horizontal bar (no text or symbols)
LA PANTALLA Y EL SELECTOR
chemical
Simple diagram showing a reaction or charge state with temperature and polarity indicatorsE
natural_image
Pure diagram of an oval-shaped structure with diagonal lines and internal components, no text or symbols present.natural_image
Simple line drawing of two hands holding a circular object (no text or symbols)DISPLAY & INSTELKNOP
chemical
Simple diagram showing a reaction or charge state with temperature and polarity indicatorsNL
natural_image
Pure diagram of an oval-shaped structure with internal diagonal lines and corner brackets, no text or symbols present.Ovenrooster in lage stand
natural_image
Simple line drawing of two hands holding a circular object (no text or symbols)DISPLAY OG VALG KNAP
chemical
Simple diagram showing a reaction or charge state with temperature and polarity indicatorsDK
natural_image
Pure diagram of an oval-shaped structure with internal diagonal lines and supports, no text or symbols present.Risten i lav position
HVAD G∅R JEG, HVIS...?
Problemer
natural_image
Simple line drawing of two hands holding a circular object, no text or symbols present- SOMMAIRE Ⓕ
- AFFICHEUR & SELECTEUR
- PROGRAMMATION EXPRESS
- La clayette 2 positions
- INSTALLATION
- BEFORE CONNECTION
- LOCATION
- ELECTRICAL CONNECTION
- IMPORTANT INSTRUCTIONS
- GENERAL DESCRIPTION
- - THE TURNTABLE :
- - TURNTABLE OFF ∅ :
- • THE WHEEL SUPPORT :
- CONTROL PANEL
- A Display window :
- B Selector knob :
- C Defrost key \* :
- D Microwave key :
- E START key :
- F Memory key M :
- G Grill 📋 / Grill + Microwave key 📋 :
- H Fan heat fan heat + microwave key :
- I CLEAR/STOP key C/STOP :
- J Clock key ⏻ :
- K Stop-Turntable key ↗ :
- L Door open button :
- THE DISPLAY & THE SELECTOR KNOB
- SETTING THE CLOCK
- To set the clock :
- MICROWAVE POWER SETTINGS
- SETTING A MICROWAVE PROGRAMME
- EXPRESS PROGRAMME
- THE GRILLING RACK
- The folding rack :
- The 2 level rack
- THE GRILL FUNCTION
- PROGRAMMING THE GRILL FUNCTION
- THE MICROWAVE + GRILL FUNCTIONS
- PROGRAMMING THE MICROWAVE + GRILL FUNCTION
- THE FAN FUNCTIONS
- convection cooking functions are available :
- the fan function
- the fan + microwave function
- Pointers
- PROGRAMMING THE FAN FUNCTION
- PROGRAMMING THE FAN + MICROWAVE FUNCTION
- MEMORY KEY M
- LINKED PROGRAMMES
- PREPROGRAMMING START
- TROUBLESHOOTING GUIDE
- Problem
- Suggestion
- CARE & CLEANING
- AFTER SALES SERVICE
- INHALT D
- O VISOR & O SELECTOR
- LA PANTALLA Y EL SELECTOR
- DISPLAY & INSTELKNOP
- DISPLAY OG VALG KNAP
- HVAD G∅R JEG, HVIS...?
- Problemer
Brand : DE DIETRICH
Model : DME330WE1
Category : Heating