RU-C75K - Washing machine Rasonic - Free user manual and instructions
Find the device manual for free RU-C75K Rasonic in PDF.


| Product Type | Split Air Conditioner Outdoor Unit |
| Model | RU-C75K |
| Brand | Rasonic |
| Outdoor Unit Dimensions (approx.) | 800 x 550 x 320 mm (W x H x D) |
| Weight (approx.) | 35 kg |
| Power Supply | 220-240 V ~ 50 Hz |
| Cooling Capacity (approx.) | 2.5 kW (7,000 BTU/h) |
| Refrigerant | R410A |
| Operation Modes | Auto, Cool, Soft Dry (Dehumidify), Fan |
| Fan Speeds | Low, Medium, High, Auto |
| Timer | On/Off Timer with 24-hour setting |
| Sleep Mode | Yes, 8-hour operation with temperature shift |
| Economy Mode | Yes, reduces power consumption |
| Powerful Mode | Yes, rapid cooling for 15 minutes |
| Air Purifying Filter | Catechin Air Purifying Filter (replace every 3 months) |
| Removable Front Panel | Yes, washable |
| Auto Restart After Power Failure | Yes, within 3-5.5 minutes |
| Remote Control | Yes, with LCD display and clock |
| Safety Features | Overload protection, compressor delay (3 min) |
| Warranty | Standard 1 year (check local dealer) |
Frequently Asked Questions - RU-C75K Rasonic
User questions about RU-C75K Rasonic
0 question about this device. Answer the ones you know or ask your own.
Ask a new question about this device
Download the instructions for your Washing machine in PDF format for free! Find your manual RU-C75K - Rasonic and take your electronic device back in hand. On this page are published all the documents necessary for the use of your device. RU-C75K by Rasonic.
USER MANUAL RU-C75K Rasonic
Room Air Conditioner
OPERATING INSTRUCTIONS
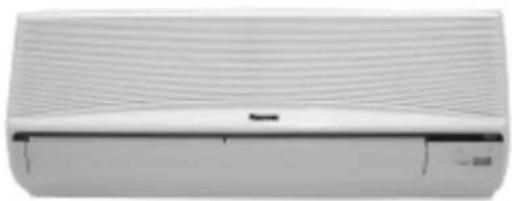
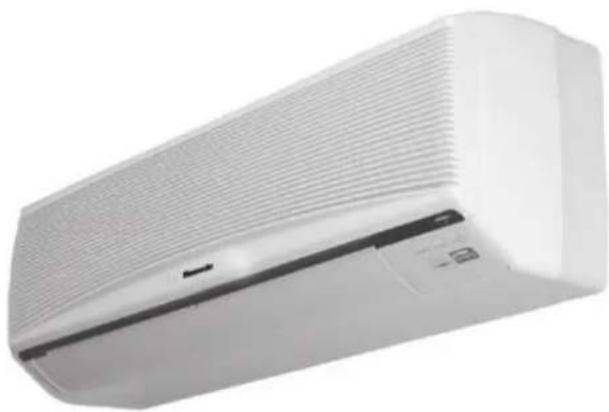
Indoor Outdoor
Model RS-C75K Model RU-C75K
RS-C95K RU-C95K
RS-C125K RU-C125K
Before using your air-conditioner, please read this operating instructions carefully and keep it for future reference.
▶ SAFETY PRECAUTIONS.... 4 – 6
●Installation Precautions
●Operation Precautions
▶ SAFETY PRECAUTIONS
●Installation Precautions
●Operation Precautions
▶ NAME OF EACH PART 7 – 10
●Indoor Unit
■When the front panel is opened
●Outdoor Unit
●Accessories
●Remote Control
■When the remote control is opened
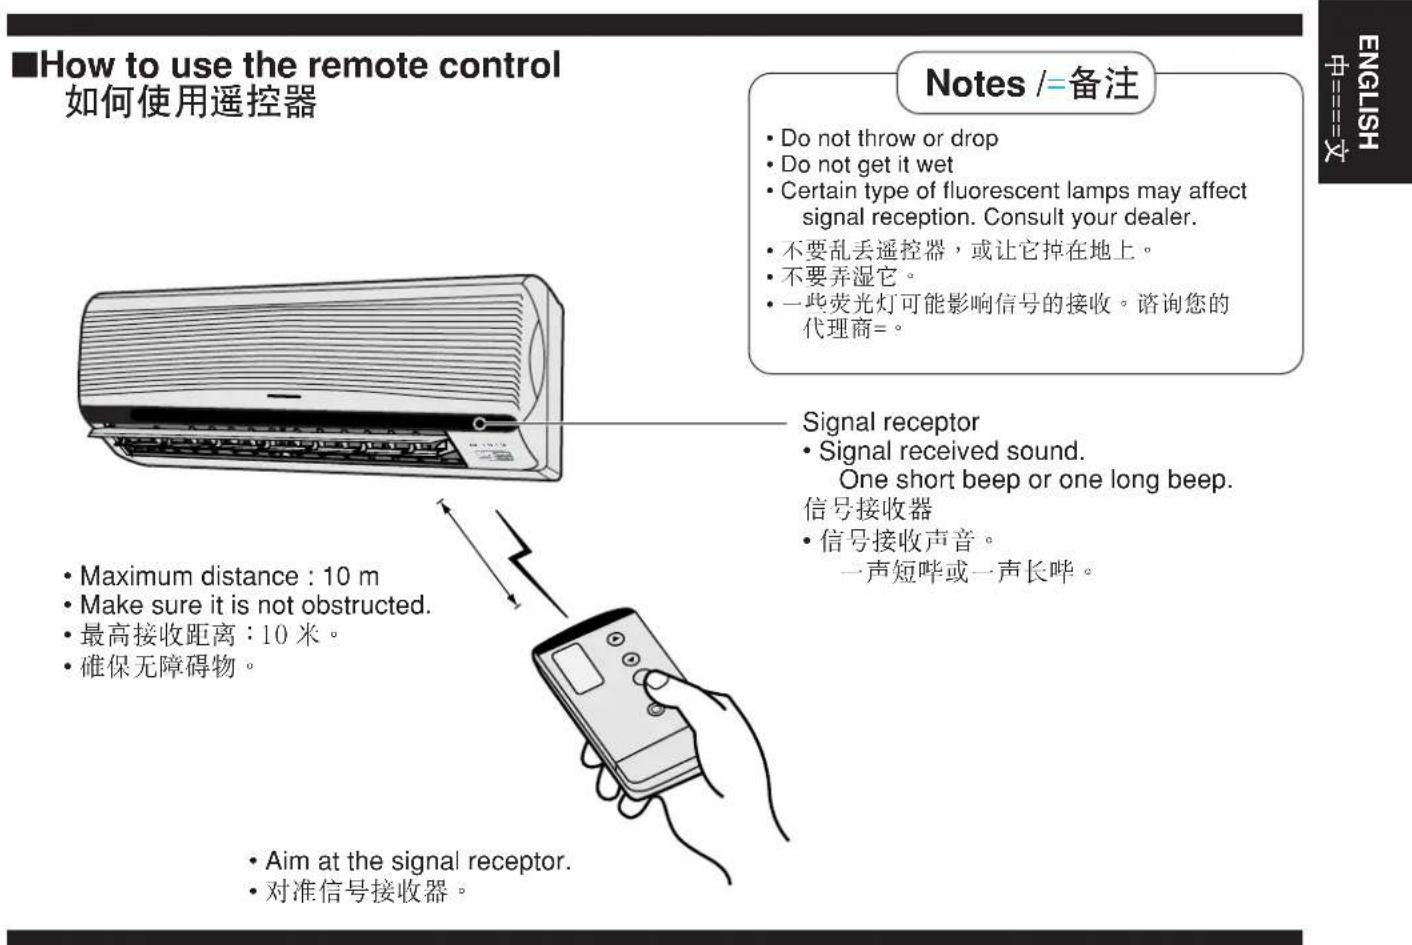
■How to use the remote control
■When the back cover is opened
▶ Names of Parts
●Indoor Unit
■When the front panel is opened
●Outdoor Unit
●Accessories
●Remote Control
■When the remote control is opened
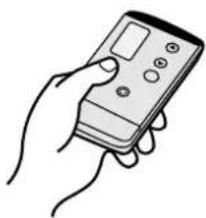
■How to use the remote control
Open the back cover of the remote control.
▶ PREPARATION BEFORE OPERATION ..... 11 – 12
●Indoor Unit
●Remote Control
■Inserting batteries
■Setting the clock
■About the batteries
▶ Preparation before use
●Indoor unit
●Remote control
■Installing batteries
■Setting the time
■About the batteries
2 How to use
HOW TO OPERATE 13 – 14
● Automatic • Cooling • Soft Dry • Fan
■ Operation details
● Adjusting Airflow Direction and Fan Speed
■ Operation details
▶ How to operate
- Automatic • Cooling • Soft Dry • Fan
■ Operation details
● Adjusting Airflow Direction and Fan Speed
■ Operation details
▶ SETTING THE TIMER 15 – 16
● Recommended Setting of Timer
▶ Setting the timer
● Recommended setting of timer
| ▶ CONVENIENCE OPERATION ...... 17 – 18 |
| ●Sleep Mode■Operation details |
| ●Economy or Powerful Mode■Operation details |
| ▶方便的运转 |
| ●睡眠方式■操作细节 |
| ●节电或强劲方式■操作细节 |
3 If necessary
▶ CARE AND MAINTENANCE ...... 19 – 22
● Cleaning the Indoor Unit and Remote Control ● Cleaning the Air Filter ● Cleaning the Front Panel
■ Removing the front panel ■ Fixing the front panel ■ Cleaning the front panel
● Replacing the Air Purifying Filters
■ Removing the air purifying filters ■ Reinstalling the air purifying filters
● Pre-season Inspection ● When the Air Conditioner is Not Used for an Extended Period of Time ● Recommended Inspection
▶ Maintenance and Care
TROUBLESHOOTING 23 – 24
● Normal Operation ● Abnormal Operation ● Call the Dealer Immediately
▶ Troubleshooting
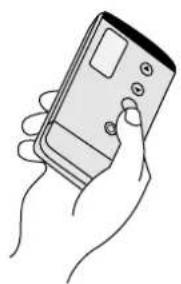
For your convenience to operate in the dark.
(Refer page 9)
● Self-illuminating button
For your convenience to operate the unit in the dark.
(Refer to page 9)
Prevent the room from getting too hot or too cold while you are sleeping.
(Refer page 17)
● SLEEP MODE
Prevents the room from becoming too hot or too cold while you sleep.
(Refer page 17)
● ECONOMY MODE
To reduce electrical power consumption.
(Refer page 18)
● ECONOMY MODE
Reduces power consumption.
(Refer page 18)
● POWERFUL MODE
Reaches the desired room temperature quickly.
(Refer page 18)
● POWERFUL MODE
Quickly reaches the desired room temperature.
(Refer page 18)
●REMOVABLE FRONT PANEL
For quick and easy cleaning (washable).
(Refer page 20)
●REMOVABLE FRONT PANEL
For quick and easy cleaning (washable).
(Refer page 20)
●CATECHIN AIR PURIFYING FILTER
Filter that can trap dust, tobacco smoke and tiny particles in the room. It can also prevent the growth of bacteria and viruses trapped in this filter.
(Refer page 21)
●CATECHIN AIR PURIFYING FILTER
Automatically restart the unit after power failure.
(Refer page 25)
●AUTO RESTART
Automatically restarts the air conditioner after a power interruption.
(Refer to page 25)
Thank you for purchasing a Rasonic Room Air Conditioner.
Thank you for purchasing a Rasonic Room Air Conditioner.
Note:
Before using your air-conditioner, please read this operating instructions carefully and keep it for future reference.
Note:
Before operating, please read the following "Safety Precautions" carefully.
To prevent personal injury, injury to others and property damage, the following instructions must be followed.
■ Incorrect operation due to failure to follow instructions will cause harm or damage, the seriousness of which is classified as follows:

Warning
■ The instructions to be followed are classified by the following symbols:

This symbol (with a white background) denotes an action that is PROHIBITED.


These symbols (with a black background) denote actions that are COMPULSORY.
● Installation Precautions

Warning
Do not install, remove and reinstall the unit yourself.
Improper installation will cause leakage, electric shock or fire. Please consult an authorized dealer or specialist for the installation work.
Ensure that the drainage piping is connected properly.
Ensure that the drainage piping is connected properly.

Otherwise, water will leak out. Otherwise, water will leak out.
Do not install the unit in a place where there may be explosive gas leaks.
Do not install the air conditioner in a place where gas may leak easily.

Gas leaks near the unit could cause fires. Gas leaks near the unit could cause fires.
This sign warns of death or serious injury.
Do not insert plug to operate the unit. Do not pull out plug to stop the unit.

Do not operate with wet hands. Do not operate with wet hands.

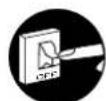
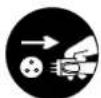
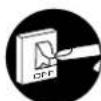
If abnormal condition (burnt smell, etc) occurs, switch off and unplug the power supply.

Do not expose directly to cool air for a long period.
Do not expose directly to cool air for a long period.
Do not insert finger or other objects into the indoor or outdoor units.
Do not insert fingers or other objects into the indoor or outdoor unit.
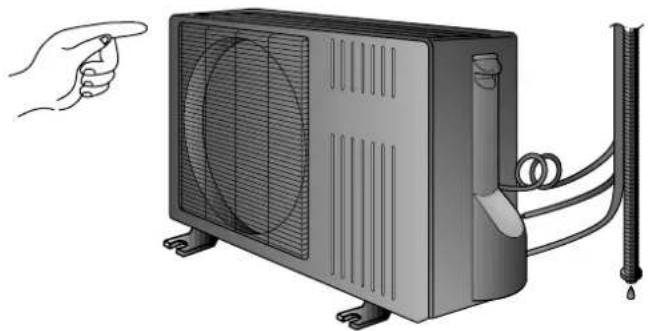
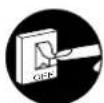
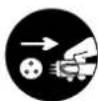
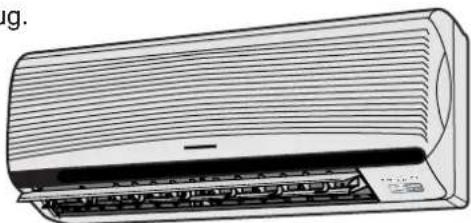
Switch off the power supply if the unit is not used for a long period.
This sign warns of injury.
This item indicates a possibility
of injury.

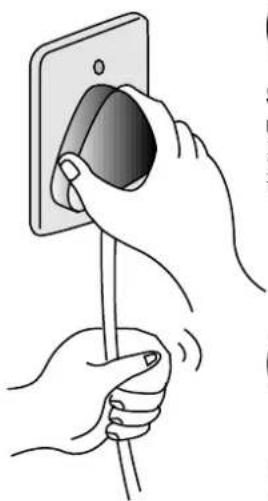
Do not pull the cord to disconnect the plug.
Do not pull the cord to disconnect the plug.

Switch off the power supply before cleaning it.
Switch off the power supply before cleaning the air conditioner.

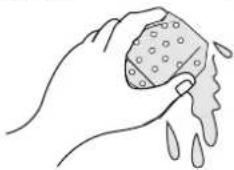
Do not wash the unit with water.
Do not wash the air conditioner with water.

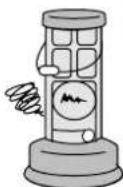
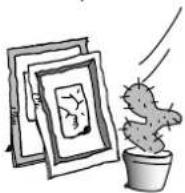
Do not use for other purposes such as preservation, etc.
Do not use for other purposes, such as storage.

Do not use any combustible equipment in the airflow direction.
Do not place a combustion container under the airflow of the air conditioner.
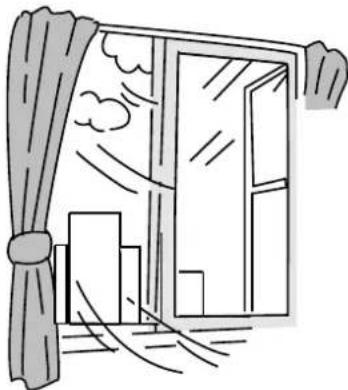

Ventilate the room regularly.
Ventilate the room regularly.

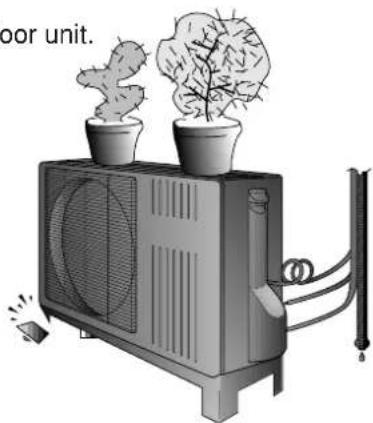
Do not sit or place anything on the outdoor unit.
Do not sit or place anything on the outdoor unit.

Pay attention as to whether the installation rack is damaged due to long period of usage.
Pay attention as to whether the installation rack is damaged due to long period of usage.
NAME OF EACH PART
NAME OF EACH PART
●Indoor Unit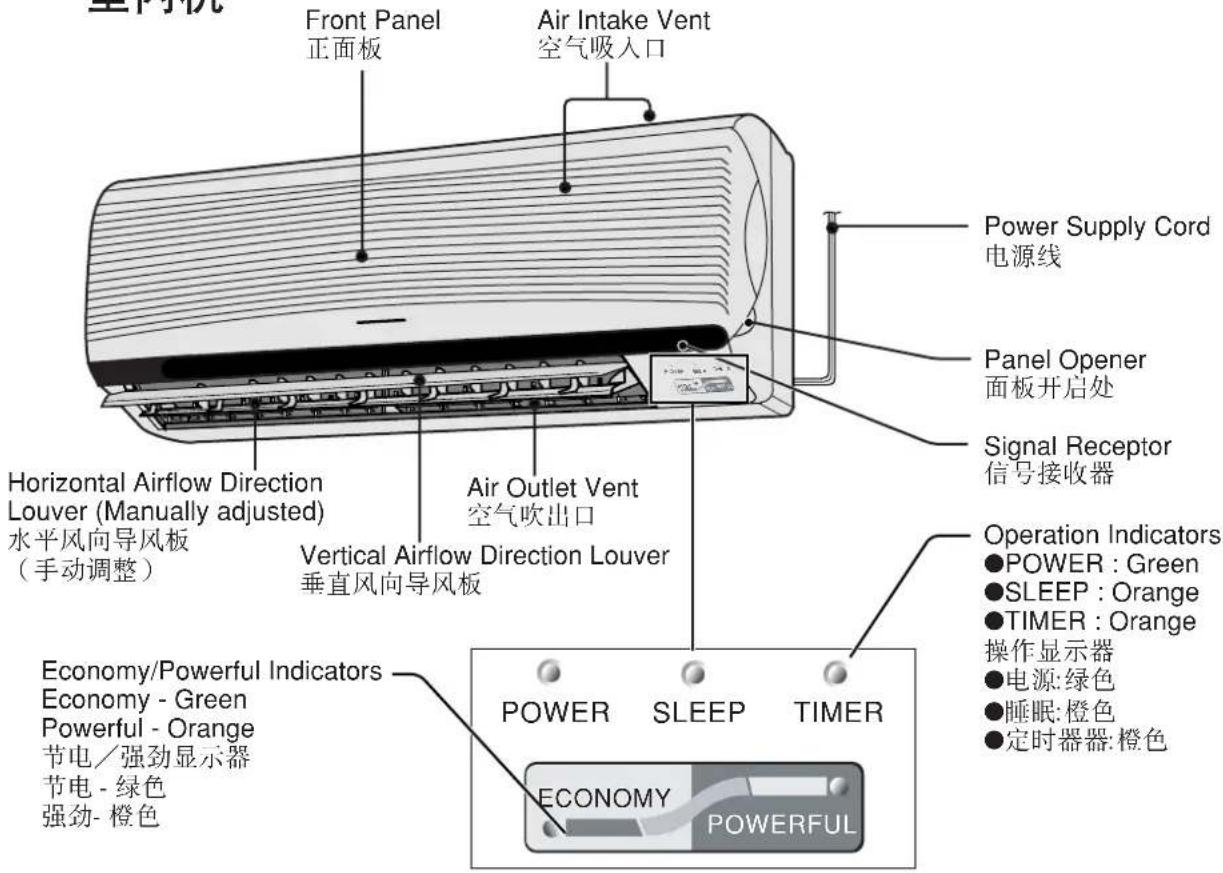
■When the front panel is opened
When the front panel is opened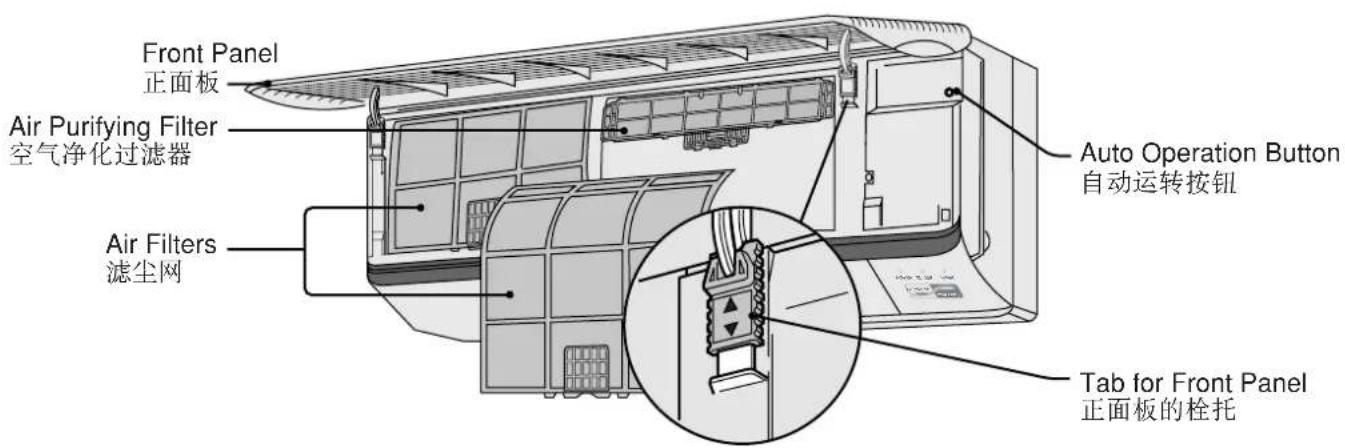
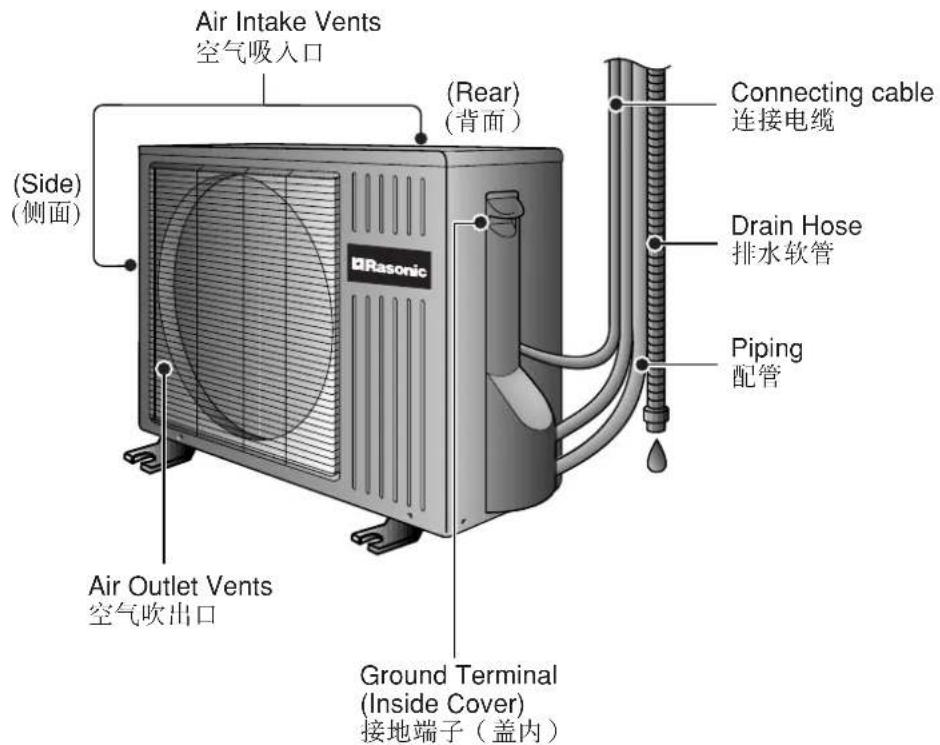
●Outdoor Unit
Remote Control
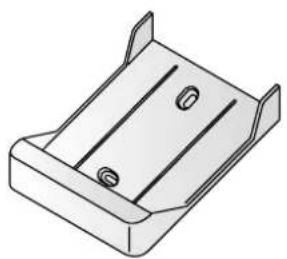
Remote Control Holder
Two RO3 dry-cell batteries or equivalent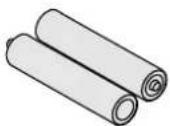
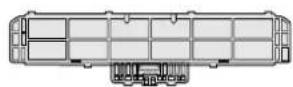
Air Purifying Filters (Catechin Air Purifying Filter)
空气净化过滤器 (CATECHIN 空气净化过滤器) 两个 R03 干电池或同等电池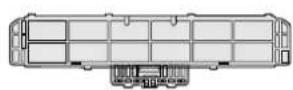
- Remote Control
遥控器
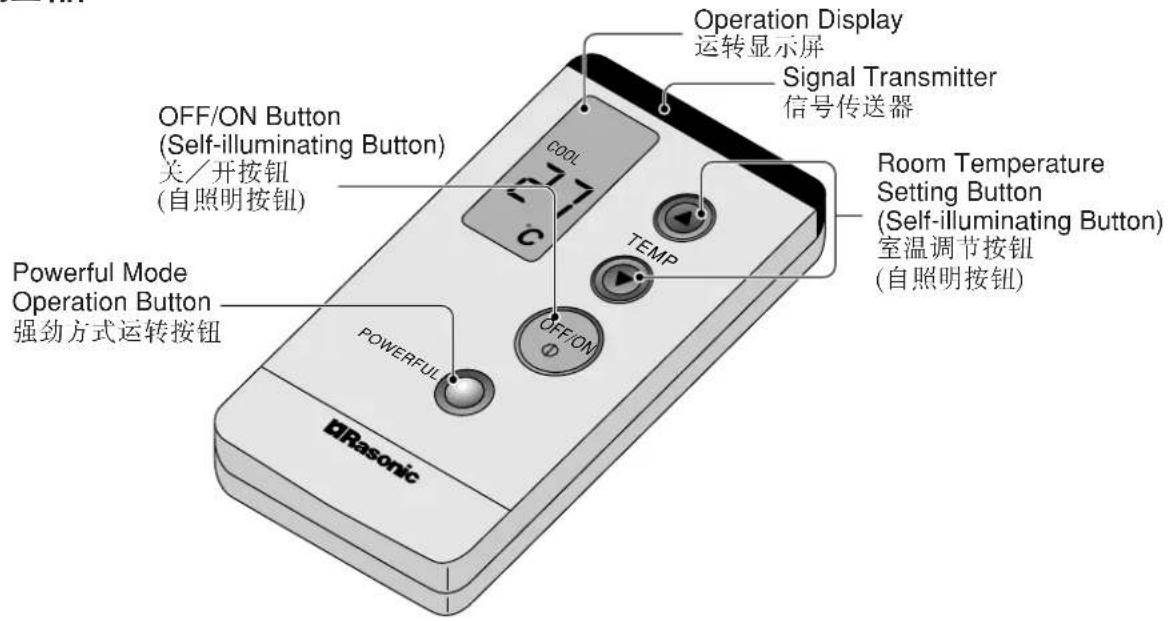
■ When the remote control cover is opened
打开遥控器前盖时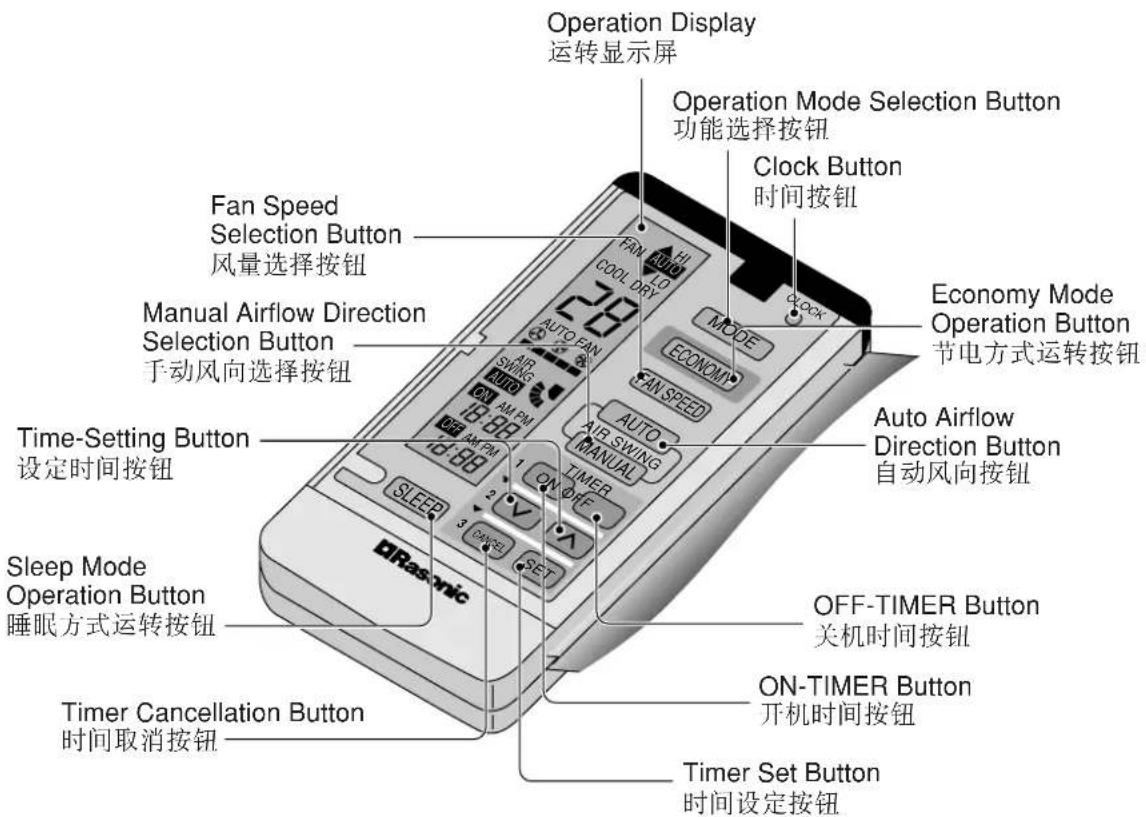
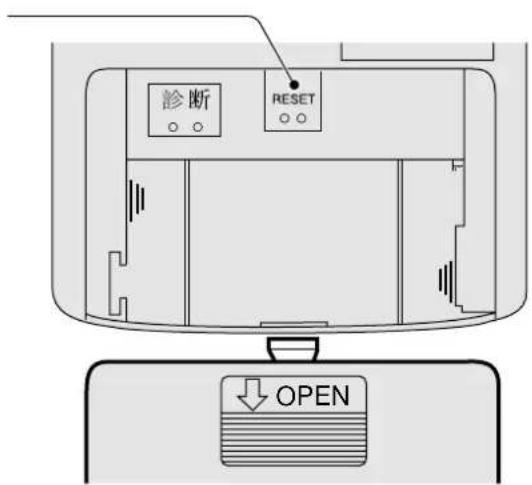
■When the back cover is opened 打开遥控器背盖时
Reset points
- short to clear the memory.
重新设定点
- 清除记忆。
- If the unit is not going to be used for an extended period of time, turn off the power supply. If it is left at the ON position, approximately 2.5 W of electricity will be used even if the indoor unit has been turned off with the remote control.
- If operation is stopped, then restarted immediately, the unit will resume operation only after 3 minutes.
- If you do not plan to use the air conditioner for a long time, turn off the power. If it is left in the ON position, even if the main unit is turned off with the remote control, it will still consume about 2.5 W of current.
- If operation is stopped and then restarted immediately, the unit will only resume operation after 3 minutes.
| Use under the following conditions (Unit in °C)在以下情况使用(单位:°C) | ||||
| DBT: Dry Bulb Temp干球温度 | Indoor室内 | Outdoor室外 | ||
| DBT | WBT | DBT | WBT | |
| Maximum Temperature最高温度 | 32 | 23 | 43 | 26 |
| Minimum Temperature最低温度 | 16 | 11 | 16 | 11 |
●Remote Control
Remote Control
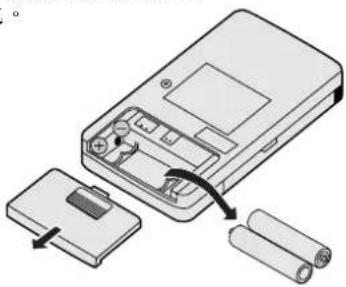
■Inserting batteries
Install the batteries
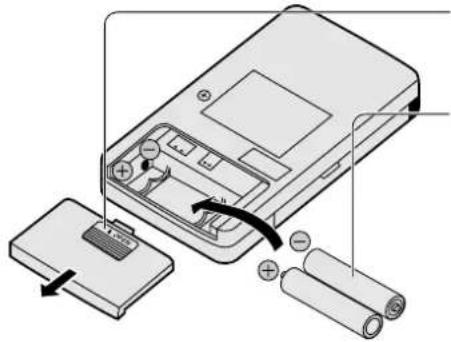


Slide the cover to open
Press to open the battery compartment cover

Be sure the directions are correct
Make sure the polarity is correct
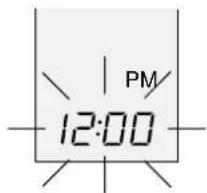
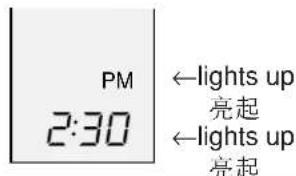
- Open the remote control cover and confirm the display 12:00 PM is flashing.
- Open the remote control cover and confirm the display is flashing "12:00 PM".
※ Set the current time (Clock) immediately to prevent battery exhaustion. ※ Set the current time (Clock) immediately to prevent battery drain.
Press the clock button
Press the time button
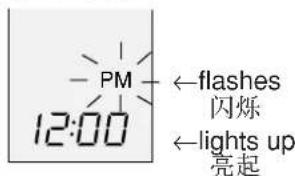

Press to set the current time
Press to set the current time
Press continuously for fast forwarding. Press continuously for fast reversing.

Press the clock button
Press the time button
About the batteries
About the batteries
- Can be used for approximately one year. Battery life is approximately one year.
Observe the following when replacing the batteries
- Replace with new batteries of the same type.
- Do not use rechargeable batteries (Ni-Cd).
- Remove the batteries if the unit is not going to be used for a long period.
When replacing the batteries, observe the following
Automatic, Cooling, Soft Dry, Fan
Automatic, Cooling, Soft Dry, Fan
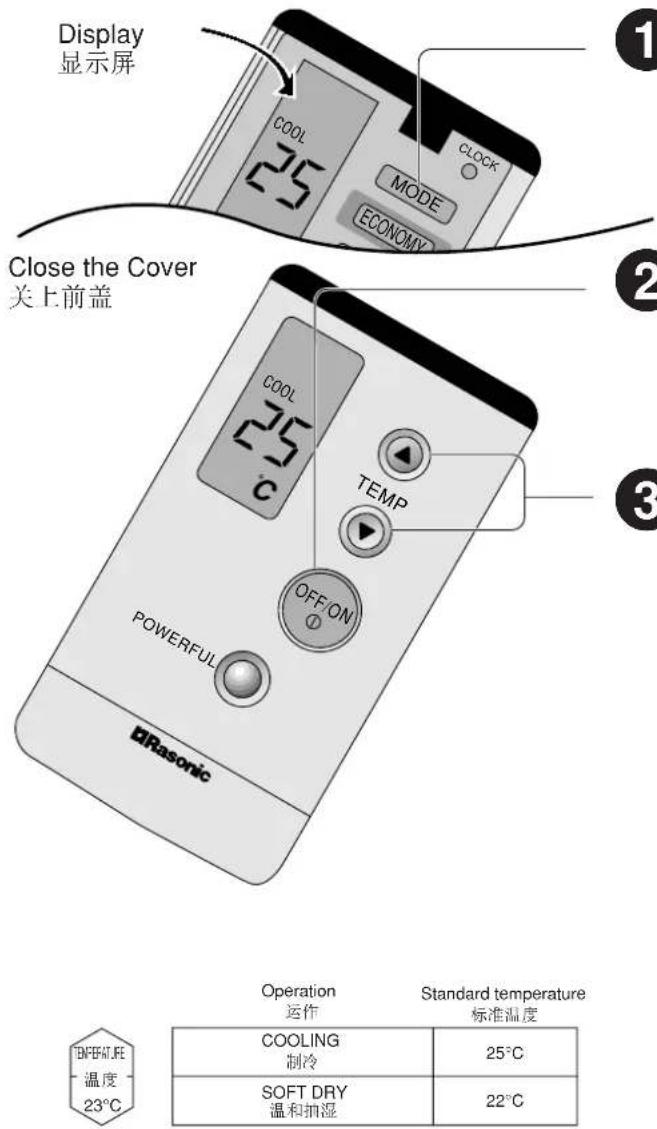

Press to select the desired operation mode
When pressed, the display changes in this order.
Press to select the desired operation mode
When pressed, the display changes in this order.


Press to start the operation
POWER indicator LED (Green) on indoor unit will light up.
Press once more to stop operation.
Press to start operation.
The power indicator LED (green) on the indoor unit will light up.
Press once more to stop operation.

Press to select room temperature.
Press to select the room temperature.
Press to increase the temperature by 1°C.
Press to decrease the temperature by 1°C.
- The temperature can be set between 16°C and 30°C.
- Recommended temperature: For Cooling: 26°C - 28°C
For Soft Dry: 1°C - 2°C lower than room
temperature.
1°C to 2°C lower than room temperature.
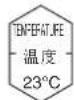
| Operation 运作 | Standard temperature 标准温度 |
| COOLING 制冷 | 25°C |
| SOFT DRY 温和扣湿 | 22°C |
■ Operation details
COOL - Cooling Operation
- To set room temperature to your preference of cooling comfort.
- Set the room temperature to your desired cooling comfort.
AUTO – Automatic Operation
- At the start of the automatic operation, Heating, Cooling or Soft Dry is automatically selected according to the indoor temperature.
- The operation mode changes every hour, when necessary. • Temperature is not displayed on remote control during Auto mode operation.
- At the start of automatic operation, Heating, Cooling or Soft Dry is automatically selected based on the indoor temperature.
- If necessary, the operation mode switches every hour. • !"#\$%&'()*+,-./0
DRY - Soft Dry Operation
• A very gentle Cooling Operation. Consisting primarily of dehumidifying. It does not lower the room temperature. - During Soft Dry operation, the indoor fan operates at Low fan speed. - This is a very gentle cooling operation, mainly for dehumidifying. It does not lower the room temperature. - During Soft Dry operation, the indoor fan runs at low speed.
![graph LR A["Setting temperature 设定温度"] --> B["Cooling Operation 制冷运转"] B --> C["Soft Dry operation airflow with 10 mins. ON and 6 mins. OFF alternately. 温和抽湿运转风量交替地 10 分钟开启及 6 分钟关闭。"]](/content/2026/06/1192350/images/871d289558f50ceceaab4c59d9761725c818660f717e7dc1504118bcd127c9e3.jpg)
Switch to Soft Dry when setting temperature is reached. When the set temperature is reached, switch to Soft Dry.
●Adjusting Airflow Direction And Fan Speed
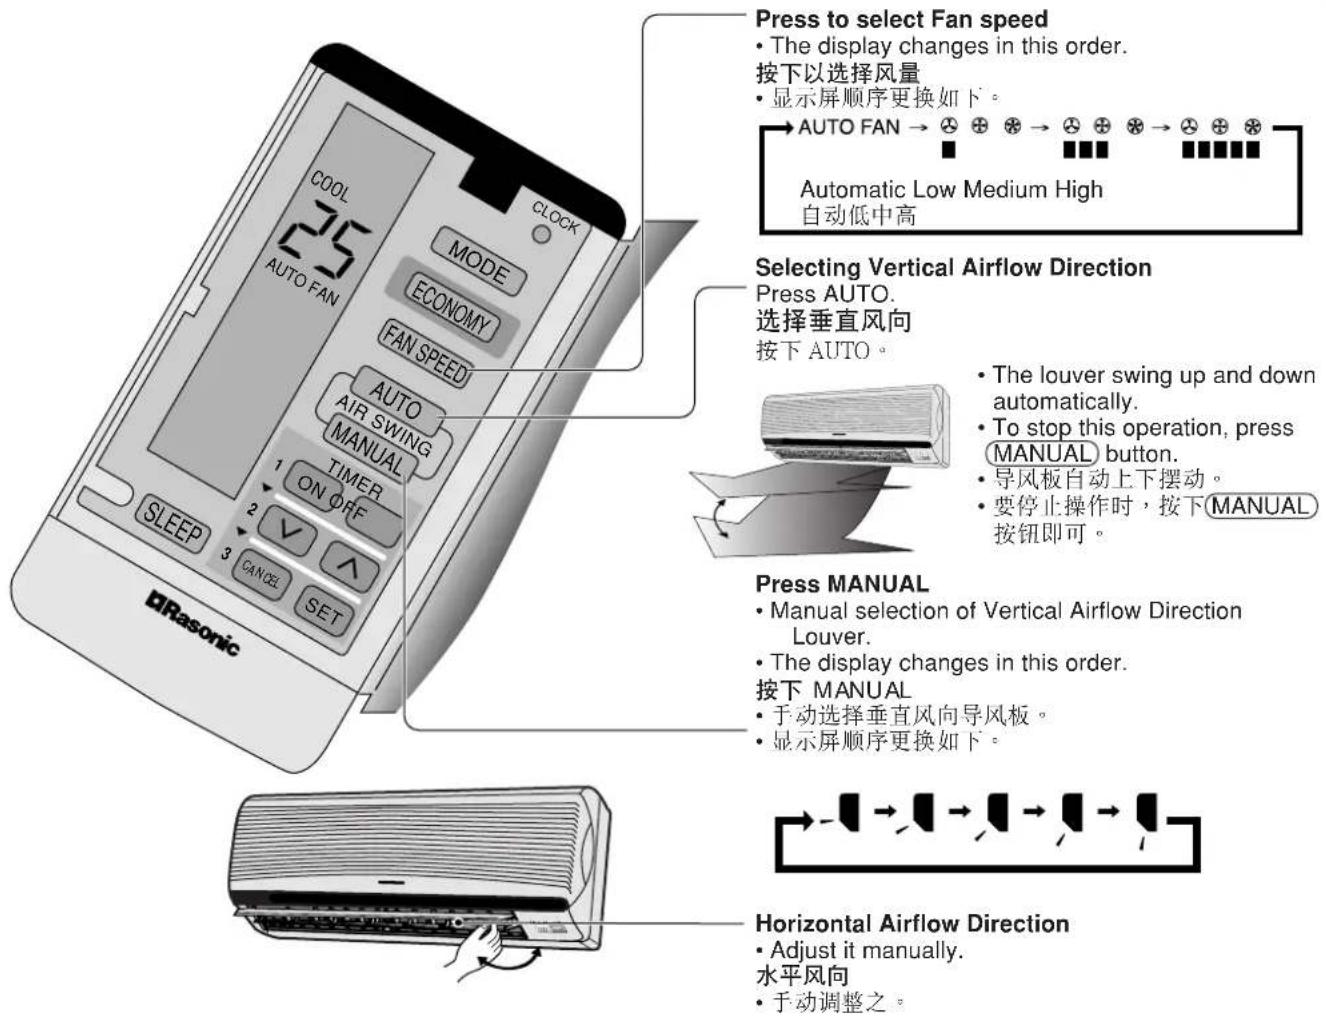
■Operation details
FAN – Air Circulation Operation
- When the room temperature reaches the setting temperature, operation commences at Low airflow volume. It stops when the room temperature drops to 2°C below the setting temperature. (It is useful when using a heater.)
Automatic Airflow Volume
- The speed of the indoor fan is adjusted automatically according to the operation. The indoor fan stops occasionally during cooling operation.
FAN—Air Circulation Operation
* Five stages of adjustments can be made in this range.
* Five stages of adjustments can be made in this range.
SETTING THE TIMER
Setting the Timer
Ensure that the current time is correct before setting the timer. The timer cannot be set if the time display is flashing.
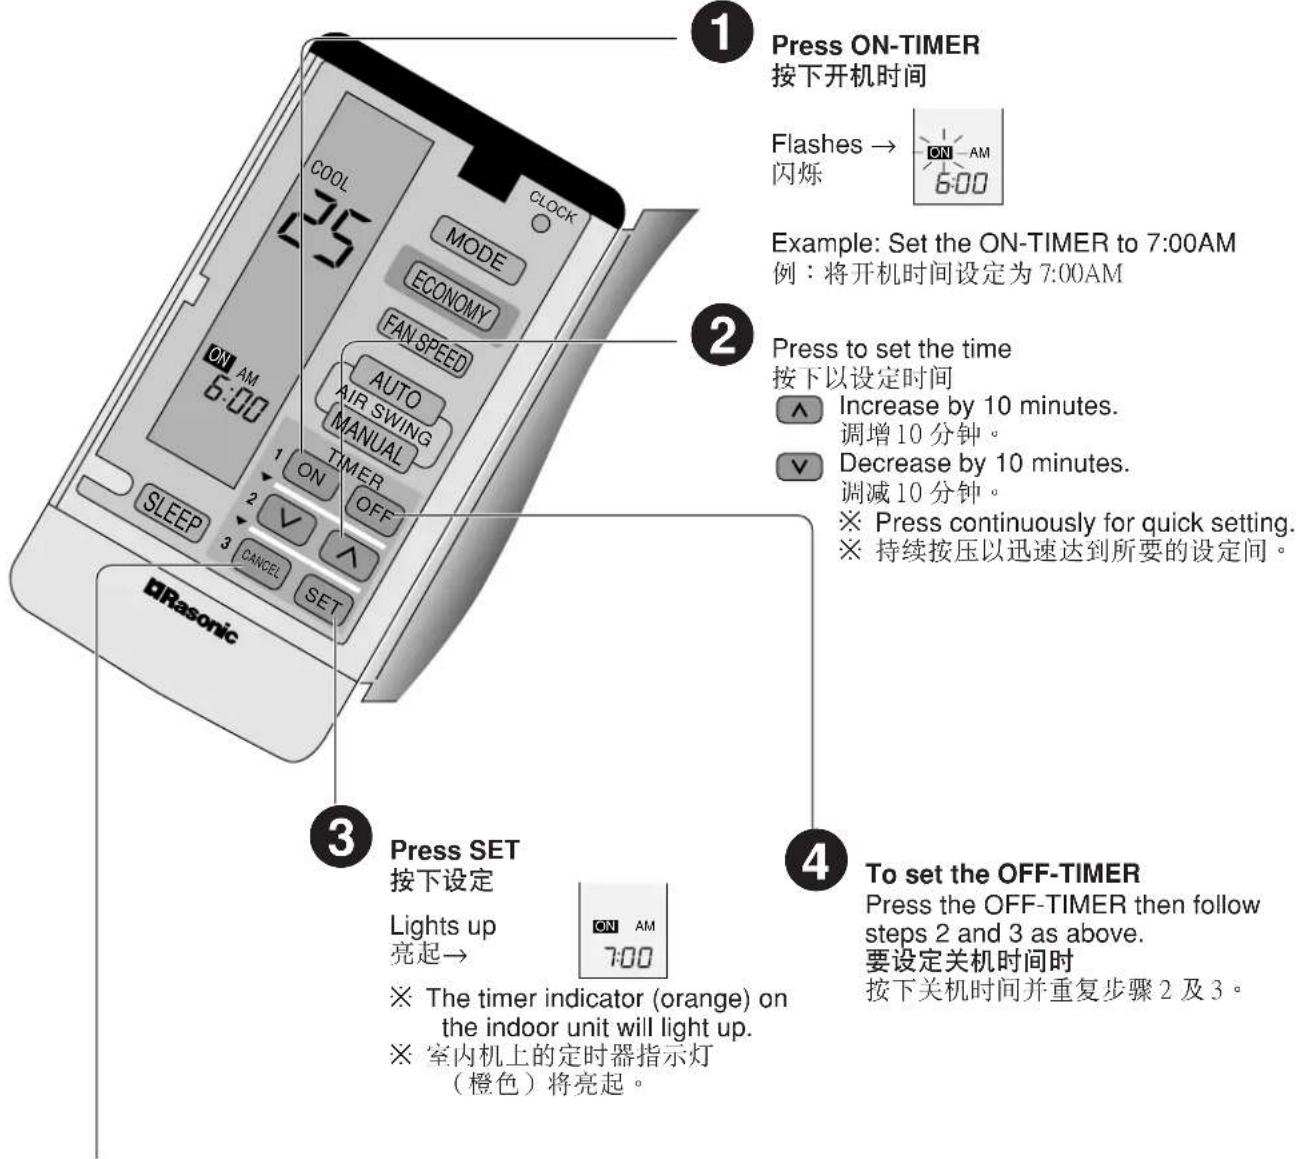
■ Timer Cancellation Button
(To cancel the Timer)
Press the ON-TIMER or OFF-TIMER then press CANCEL.
* The timer indicator on the indoor unit will go off.
Timer Cancellation Button (To cancel the Timer)
■ To change the setting time, follow the above steps.
To change the setting time, follow the above steps.
Timer details
Timer details
- When the ON-Timer is set, operation will start before the actual set time. This is to allow the room temperature to reach the setting temperature by the setting time (maximum of 15 minutes in advance).
- Once the ON-Timer is set, operation will start at the setting time everyday.
- When the ON-Timer is set, operation will start before the actual set time. This is to allow the room temperature to reach the setting temperature by the setting time (maximum of 15 minutes in advance).
- Once the ON-Timer is set, operation will start at the setting time everyday.
●Recommended Setting of Timer
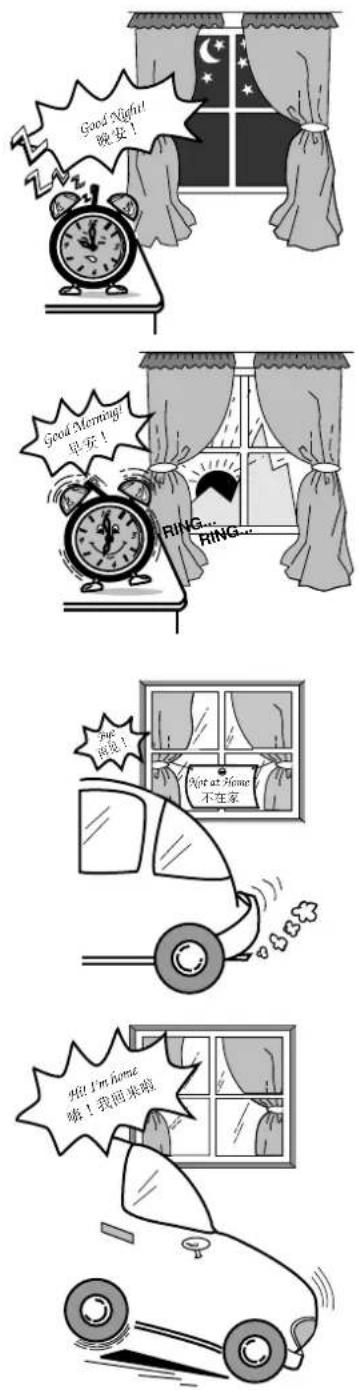
■When you sleep
- Set the time at which you will go to sleep with the OFF-TIMER. This prevents wastage of electricity.
■When you sleep
- Set the time at which you will wake up with the ON-TIMER. You can start the new day at a comfortable temperature.
■When you wake up
(The above is an example of how you can use the OFF-TIMER and ON-TIMER modes. However, it is recommended to use the sleep mode function for sleeping.)
- Set the time at which you will go out with the OFF-TIMER. Set the time at which you will come back with the ON-TIMER.
- This will prevent the air conditioner from being left on while you are out, and the temperature will be pleasant when you return.
■When going out
- Set the time at which you will return with the ON-TIMER.
- This will make the temperature pleasant when you return, and it will prevent the air conditioner from being left on.
■When returning home
This is to obtain a comfortable room temperature while sleeping. It helps you get a comfortable room temperature while you sleep.
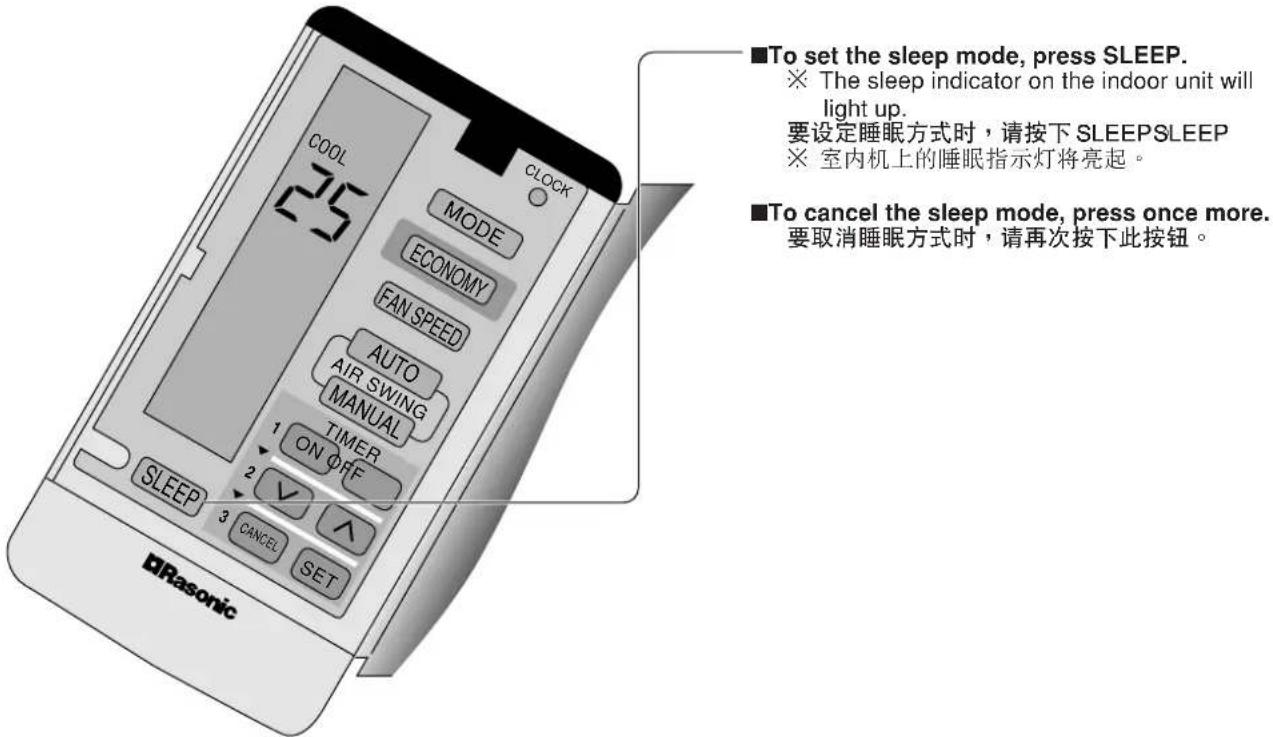
■Operation details
- When the room temperature reaches the setting temperature, the airflow volume will automatically change to low.
- Sleep Mode Operation time is 8 hours.
- When used together with the timer, the timer has priority. • Cooling or Soft Dry Operation for sleep mode movement will start to avoid overcooling.
- When the room temperature reaches the set temperature, the airflow volume will automatically switch to low.
- Sleep mode operation time is 8 hours.
- When used together with the timer, the timer takes priority.
- During sleep mode operation, cooling or gentle dehumidifying operation will start to prevent overcooling.
![graph TD A["Setting temperature 设定的温度"] --> B["0-1 hour / 0-1 小时"] B --> C["Sleep operation button is pressed 按下睡眠运转钮"] C --> D["Approx. 0.5°C increase 大约升高 0.5°C"] D --> E["1 hour / 1 小时"] E --> F["Approx. 8 hours after sleep shift operation start, stops automatically 睡眠运转起动约8个小时之后,自动停止"] F --> G["…](/content/2026/06/1192350/images/7695c1f450c1fccc04f4ed0fc033e88d5e5d1e6db8f16f011ff7f2bb8c081c33.jpg)
● Economy or Powerful Mode
Economy and Powerful operation cannot be selected simultaneously.
Economy and Powerful operation cannot be selected simultaneously.
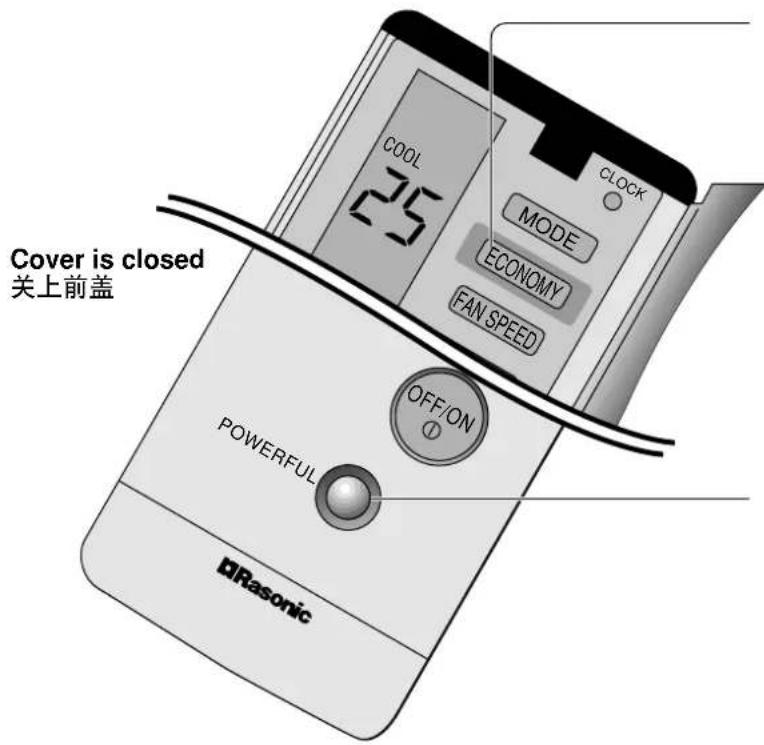
Economy Mode
To save electrical power consumption.
However, please use this mode when the room has
reached your desired temperature.
- Press ECONOMY
※ Economy indicator (Green) on indoor unit lights up.
- Press once more to cancel this operation.
Economy Mode
To save electrical power consumption.
To obtain the setting temperature quickly.
- Press POWERFUL
※ Powerful indicator (Orange) on indoor unit lights up. ※ Powerful mode will operate for 15 minutes only. • To cancel this operation, press once more.
Powerful mode
To quickly reach the set temperature.
※ • The changes of the temperature and airflow volume are automatic.
• The remote control display remains unchanged. • If sleep button or operation mode button is pressed, economy or powerful operation is cancelled. - During FAN -Air circulation operation, the powerful and economy operation are not available. • During Economy mode, indoor fan operates on and off at Low speed.
※ · The changes of temperature and airflow volume are automatic.
● Cleaning the Indoor Unit and Remote Control
- Wipe gently with a soft, dry cloth.
- Do not clean with water hotter than 40°C or with polishing fluids.
- The front panel can be removed and cleaned with water. · Wipe gently with a soft, dry cloth.
- Do not use water hotter than 40°C or polishing fluids to clean.
- The front panel can be removed and cleaned with water.

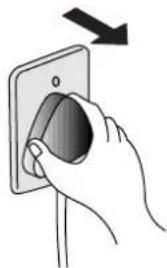
Caution
Switch OFF and unplug the power cord before cleaning the air conditioner.
Before cleaning the air conditioner, please switch off the power and unplug it.
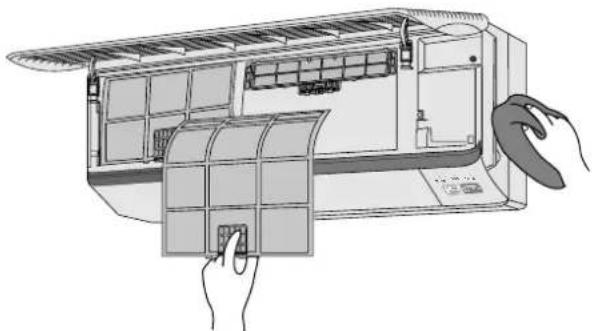
Cleaning the Air Filter
Clean the air filter.
(Recommendation: If the unit is operated in a dusty environment, clean the filters every two weeks. Continuous use of dirty filters will reduce cooling efficiency.)
Open the front grille and remove the two air filters. Hold the tab, lift up slightly, then pull down.
Wash the back of the air filter with water.
Wash the back of the air filter with water.


If badly soiled, wash it with soap or a mild household detergent.

Let it dry and reinstall it.
Be sure the "FRONT" mark is facing you.
Let it dry and then reinstall it.
Make sure the "FRONT" mark is facing you.
Damaged air filter.
Consult the nearest authorized dealer. Part No.: CWD00240.
Damaged air filter.
Consult your nearest authorized dealer.
Part number: CWD00240.
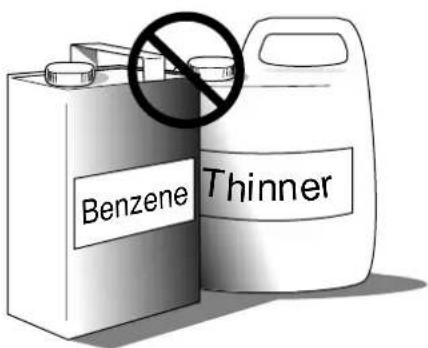
- Do not clean using benzene, thinner, scouring powder or cloths soaked in caustic chemicals.
- Do not clean the filter with gasoline, thinner, scouring powder, or cloths soaked in caustic chemicals.
● Cleaning the Front Panel
(Must be removed before washing)

Caution
- Stand on a level surface when removing the front panel.
- When removing the front panel, stand on a flat surface.
- Do not touch the metal parts in the indoor unit after removing the front panel.
- After removing the front panel, do not touch the metal parts of the indoor unit.
- Do not leave water on the panel after cleaning. Dry thoroughly to prevent electric shock.
- After cleaning, do not leave water stains on the front panel. Dry it completely to avoid electric shock.
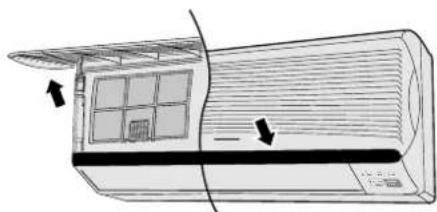
Removing the front panel

Raise the front panel to its full extent.
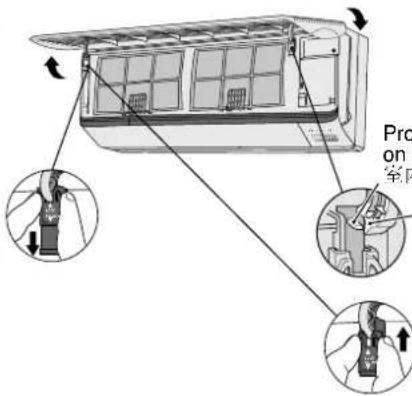
Protruding portion on indoor unit

Slide the two tabs (left and right) to the UNLOCK position.
Fixing the front panel

Raise the front panel horizontally, match the protruding portion on the indoor unit to the fulcrum and push into place.
Slide the two tabs up to the Lock position. (Click sound)
Note: If the tabs are left in the UNLOCK position, the front panel will not close.
If the panel does not close completely, check the tabs positions and try again.
Raise the front panel to a position slightly higher than horizontal and pull to remove.
Cleaning the front panel
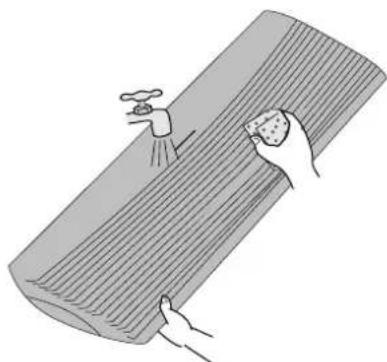
Cleaning the front panel
• Gently wash with water and a sponge. (Do not use a scrubbing brush or other hard cleaning aids.) - Do not press the front panel too hard when washing. (Excess pressure may damage the panel.) - When cleaning with kitchen cleaning fluids (neutral detergents), rinse thoroughly. (Do not use non-neutral detergents.) - Do not dry the front panel in direct sunlight. (Exposure to direct sunlight may discolor or deform the panel.)
Replacing the Air Purifying Filters
(once every 3 months)
- Do not reuse dirty filters. Consult the nearest authorized dealer. (Air Purifying filter No. CZ-SF51N) • These filters function effectively for not more than three months.
- If the air conditioner operates with dirty filters:
- Air is not purified.
- Cooling capacity decreases.
- Foul odours are emitted.
- Note: Catechin is natural brown element. The filter is coated with catechin in order to prevent the growth of bacteria and viruses.
(Once every three months)
1 Raise the front panel to its full extent. Lift the front panel to its full extent. 2 Remove the air filters (left and right). • Lift up slightly then pull down Remove the air filters (left and right). • Lift up slightly then pull down. 3 Hold the tabs of the air purifying filters and pull. Hold the tabs of the air purifying filters and pull.

Caution - Be careful not to hurt your hands on metal parts. Caution - Be careful not to hurt your hands on metal parts.
■Reinstalling the air purifying filters Reinstalling the air purifying filters
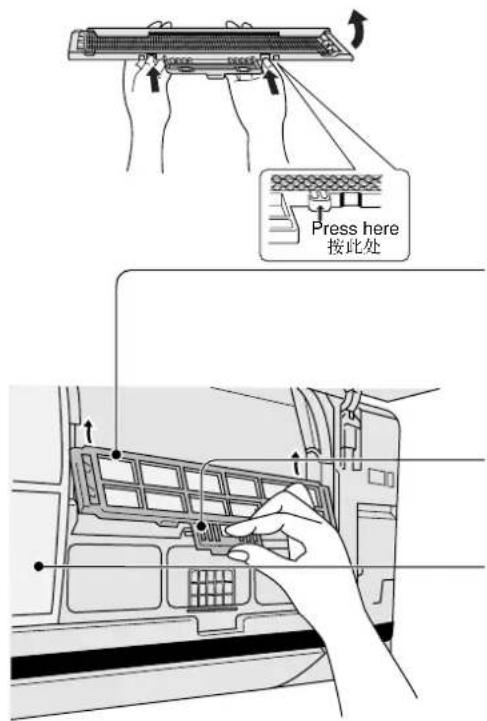
1 Open the filter frame to insert the new filters. Open the filter frame to insert the new filters. 2 Insert the new air purifying filter. (Be sure the "FRONT" mark is facing you.) Insert the new air purifying filter. (Be sure the "FRONT" mark is facing you.) 3 Push until you hear a click. Push until you hear a click. 4 Reinsert the air filters. Reinsert the air filters. 5 Close the front panel. Close the front panel.
●Pre-season Inspection
Pre-season inspection
• Is the discharge air cold?
Operation is normal if 15 minutes after the start of operation, the difference between the air intake and outlet vents temperatures is 8°C or above for cooling.
Is the air being discharged cold?
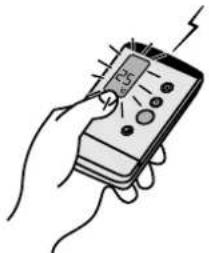
Are the air intake or outlet vents of the indoor or outdoor units obstructed?
Are the remote control batteries weak?
If the remote control display appears weak, replace the batteries (page 12).
Are the remote control batteries exhausted?
When the Air Conditioner is Not Used For an Extended Period of Time
When the air conditioner is not used for an extended period of time
1
To dry the internal parts of the indoor unit, operate the unit for 2 - 3 hours using FAN operation.
Turn off the power switch and remove the power supply plug.
Note: If the unit is not switched off by the remote control, it will start operating when you plug in (because a Auto Restart Control is provided).
Turn off the power switch and unplug the power plug.
Recommended Inspection
Inspection recommendations
The unit will become dirty after use over several seasons, reducing performance. Depending on the operation condition, a dirty unit may produce foul odours and dust may pollute the dehumidifying drainage. Seasonal inspection is recommended, in addition to regular cleaning. Consult an authorized dealer.
Q - Is it okay? A - This is the answer.
Q - Is it normal? A - This is the explanation.
Q - Air conditioner has been restarted, but does not operate for 3 minutes. A - This is to protect the air conditioner. Wait until the air conditioner begins operating. Q - It has been started for 3 minutes but the air conditioner does not operate. A - This is the protective mechanism inside the unit. Please wait until the air conditioner starts operating.
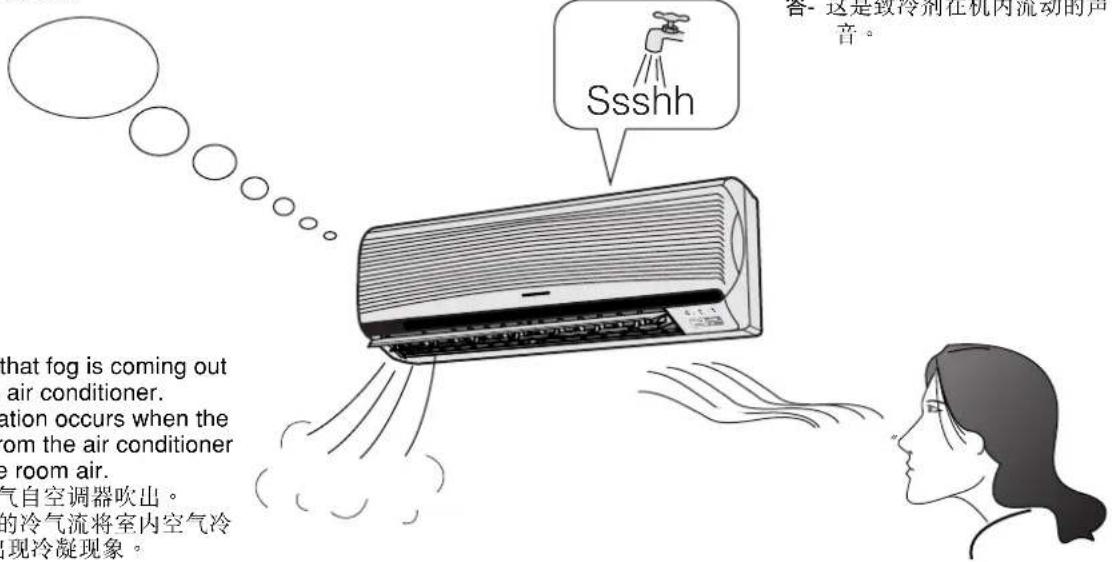
Q - It seems that fog is coming out from the air conditioner. A - Condensation occurs when the airflow from the air conditioner cools the room air. Q - It seems that fog is blowing out from the air conditioner. A - Condensation occurs when the cold airflow from the unit cools the room air.
Q - The room has a peculiar odour. A - This may be a damp smell emitted by the walls, carpet, furniture or clothing in the room. Q - The room has an unusual smell. A - This may be a damp smell coming from the walls, carpet, furniture, or clothing in the room.
DRY
Q - During soft dry mode operation the air conditioner stops. A - Soft Dry Mode operation is a very gentle cooling operation consisting primarily of dehumidifying. The air conditioner may stop for approximately 6 minutes in order to prevent overcooling. If the room temperature rises again, the operation will recommence. Q - During gentle dehumidifying operation, the air conditioner stops. A - Gentle dehumidifying operation is a light cooling operation mainly for dehumidifying. If the temperature becomes too cold, the air conditioner will stop for about 6 minutes to prevent overcooling. When the room temperature rises, the air conditioner will resume operation.
AUTO FAN
Q - During Automatic Airflow Volume setting, Indoor fan stops occasionally. A - This is to remove the smell emitted by the surroundings. Q - During automatic airflow setting, the indoor fan stops occasionally. A - This is to eliminate odors from the surroundings.
●Abnormal Operation
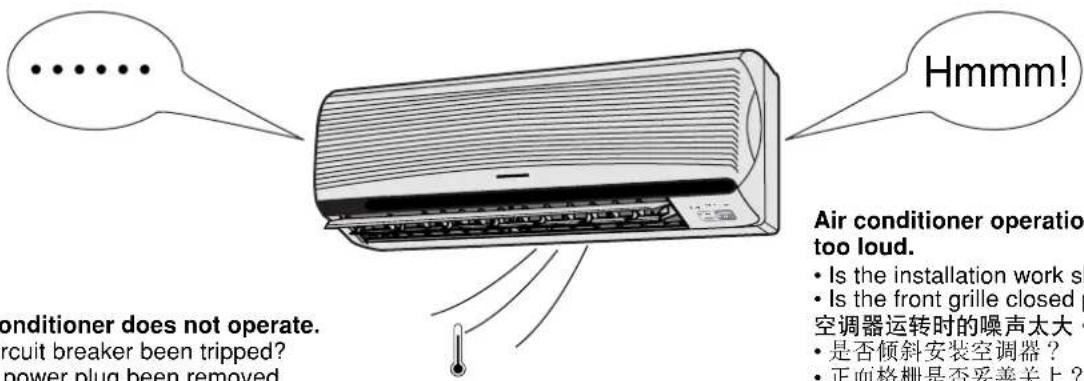
The air conditioner does not operate.
- Has a circuit breaker been tripped?
- Has the power plug been removed from the wall outlet? • Is the timer being used correctly? The air conditioner does not operate.
- Has the circuit breaker tripped?
- Is the power plug pulled out from the wall outlet?
- Is the timer set correctly?
The air conditioner does not cool effectively.
- Has the temperature been set incorrectly?
- Are the filters dirty?
- Are the intake or outlet vents of the outdoor unit obstructed?
- Are all windows and doors closed?
The air conditioner does not cool effectively.
Call the Dealer Immediately
If the following conditions occur, immediately turn off the main power supply and unplug.
• Abnormal noise is heard during operation.
• Water or foreign material gets into the remote control by mistake.
• Water leaks from the indoor unit.
- Switches or buttons do not operate properly.
- Switches or buttons do not operate properly.
• The circuit breaker switches off frequently.
• Power supply cord and plug become unusually warm.
HELPFUL INFORMATION
HELPFUL INFORMATION
Auto Operation Button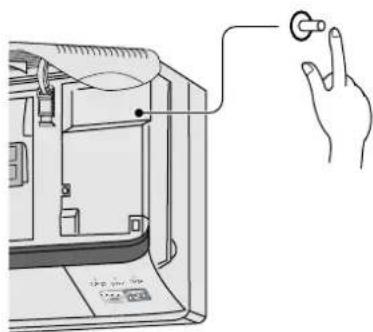
■ Automatic Operation
- If the remote control fails to function or is misplaced, press the Auto Operation button for automatic operation. However, the temperature cannot be adjusted in this operation.
- The power LED on the indoor unit blinks until the operation mode is selected automatically. • To cancel this operation, press once more.
■ Automatic Operation
■ Remote Control Signal Receiving Sound
• To switch off the beep (signal receiving sound), press this Auto Operation button for 10 seconds continuously or longer. - Repeat this if you want to switch on the beep sound.
■ Remote Control Signal Receiving Sound
※ Note: If you press this button continuously for between 5 to 10 seconds, a Test Run operation will be performed.
(This is for servicing purposes only)
- If power is resumed after a power failure, the operation will restart automatically after 3 to 5 minutes.
- Operation will be automatically restarted under the previous operation mode and airflow direction when power is resumed, as the operation is not stopped by remote control.
Automatic restart control
Thunder and Lightning
- This air conditioner is equipped with a built-in surge protective device. However, in order to further protect your air conditioner from being damaged by abnormally strong lightning activity, you may switch off the main power supply and unplug from power socket.
Thunder and Lightning
This appliance must be earthed.

CAUTION
Remove power plug or disconnect from the mains before servicing the appliance.
IMPORTANT
The wires in this mains lead are coloured in accordance with the following code:
Green-and-yellow: Earth
Blue: Neutral
Brown: Live
As the colours of the wires in the mains lead of this appliance may not correspond with the coloured markings identifying the terminals in your plug, proceed as follows:
The wire which is coloured green-and-yellow must be connected to the terminal in the plug which is marked with the letter E or by the earth symbol ⊕ or coloured green or green-and-yellow.
The wire which is coloured blue must be connected to the terminal which is marked with the letter N or coloured black.
The wire which is coloured brown must be connected to the terminal which is marked with the letter L or coloured red.
NOTE
If the supply cord of this appliance is damaged, it must only be replaced by a repair shop appointed by the manufacturer, because special purpose tools are required.
Disconnect the mains plug from the supply socket when not in use, where supply connection is via mains plug.
This appliance must be grounded.
Please remember to record the following / Please record the following data:
- ROOM AIR CONDITIONER
- OPERATING INSTRUCTIONS
- 2 HOW TO USE
- 3 IF NECESSARY
- CARE AND MAINTENANCE ...... 19 – 22
- MAINTENANCE AND CARE
- TROUBLESHOOTING 23 – 24
- TROUBLESHOOTING
- ● SELF-ILLUMINATING BUTTON
- ● SLEEP MODE
- ● ECONOMY MODE
- ● POWERFUL MODE
- ●REMOVABLE FRONT PANEL
- ●CATECHIN AIR PURIFYING FILTER
- ●AUTO RESTART
- THANK YOU FOR PURCHASING A RASONIC ROOM AIR CONDITIONER
- NOTE
- WARNING
- ● INSTALLATION PRECAUTIONS
- NAME OF EACH PART
- ●OUTDOOR UNIT
- WHEN THE BACK COVER IS OPENED 打开遥控器背盖时
- RESET POINTS
- ●REMOTE CONTROL
- REMOTE CONTROL
- INSERTING BATTERIES
- INSTALL THE BATTERIES
- BE SURE THE DIRECTIONS ARE CORRECT
- MAKE SURE THE POLARITY IS CORRECT
- PRESS THE CLOCK BUTTON
- PRESS THE TIME BUTTON
- PRESS TO SET THE CURRENT TIME
- ABOUT THE BATTERIES
- AUTOMATIC, COOLING, SOFT DRY, FAN
- PRESS TO SELECT THE DESIRED OPERATION MODE
- PRESS TO START THE OPERATION
- PRESS TO SELECT ROOM TEMPERATURE
- OPERATION DETAILS
- COOL - COOLING OPERATION
- AUTO – AUTOMATIC OPERATION
- DRY - SOFT DRY OPERATION
- ●ADJUSTING AIRFLOW DIRECTION AND FAN SPEED
- FAN – AIR CIRCULATION OPERATION
- AUTOMATIC AIRFLOW VOLUME
- FAN—AIR CIRCULATION OPERATION
- SETTING THE TIMER
- TIMER CANCELLATION BUTTON
- TO CHANGE THE SETTING TIME, FOLLOW THE ABOVE STEPS
- TIMER DETAILS
- ●RECOMMENDED SETTING OF TIMER
- WHEN YOU SLEEP
- WHEN YOU WAKE UP
- WHEN GOING OUT
- WHEN RETURNING HOME
- ● ECONOMY OR POWERFUL MODE
- ECONOMY MODE
- POWERFUL MODE
- ● CLEANING THE INDOOR UNIT AND REMOTE CONTROL
- CAUTION
- CLEANING THE AIR FILTER
- CLEAN THE AIR FILTER
- ● CLEANING THE FRONT PANEL
- REMOVING THE FRONT PANEL
- FIXING THE FRONT PANEL
- CLEANING THE FRONT PANEL
- REPLACING THE AIR PURIFYING FILTERS
- REINSTALLING THE AIR PURIFYING FILTERS REINSTALLING THE AIR PURIFYING FILTERS
- ●PRE-SEASON INSPECTION
- PRE-SEASON INSPECTION
- WHEN THE AIR CONDITIONER IS NOT USED FOR AN EXTENDED PERIOD OF TIME
- RECOMMENDED INSPECTION
- INSPECTION RECOMMENDATIONS
- DRY
- AUTO FAN
- ●ABNORMAL OPERATION
- THE AIR CONDITIONER DOES NOT OPERATE
- THE AIR CONDITIONER DOES NOT COOL EFFECTIVELY
- CALL THE DEALER IMMEDIATELY
- HELPFUL INFORMATION
- AUTOMATIC OPERATION
- REMOTE CONTROL SIGNAL RECEIVING SOUND
- AUTOMATIC RESTART CONTROL
- THUNDER AND LIGHTNING
- IMPORTANT
Brand : Rasonic
Model : RU-C75K
Category : Washing machine