
SE6553B - Simulator PHILIPS - Free user manual and instructions
Find the device manual for free SE6553B PHILIPS in PDF.


| Type of Product | DECT Cordless Telephone with Answering Machine |
| Model | Philips SE6553B |
| Display | Color LCD with backlight, selectable wallpaper and color theme |
| Phonebook Capacity | 200 entries |
| Redial List Capacity | 10 entries |
| Call Log Capacity | 50 entries |
| Battery Type | 2 x AAA Ni-MH rechargeable, 600 mAh |
| Talk Time | Up to 12 hours |
| Standby Time | Up to 150 hours |
| Range (Indoor/Outdoor) | Up to 50 m / 300 m |
| Frequency Band | 1880 - 1900 MHz |
| Maximum Output Power | 250 mW |
| Base Station Power Supply | AC 100-240V, 50/60Hz; Output DC 6V/0.5A |
| Charger Power Supply (multipack) | AC 100-240V, 50/60Hz; Output DC 6V/0.21A |
| Base Dimensions (H x D x W) | 77 x 115 x 131 mm |
| Base Weight | 189.5 g |
| Handset Dimensions (H x D x W) | 162 x 31.5 x 48 mm |
| Handset Weight | 128.5 g |
| Key Features | Caller ID, Handsfree, Intercom, Conference, SMS, Call Barring, Alarm, Answering Machine with Remote Access |
| Compliance | GAP standard, DECT, WEEE |
| Operating Temperature | 0 to 35°C (32 to 95°F) |
| Storage Temperature | -20 to 70°C (-4 to 158°F) |
| Maintenance | Clean with a soft, dry cloth; avoid alcohol, ammonia, or abrasives |
| Warranty | Refer to user manual for details |
Frequently Asked Questions - SE6553B PHILIPS
User questions about SE6553B PHILIPS
0 question about this device. Answer the ones you know or ask your own.
Ask a new question about this device
Download the instructions for your Simulator in PDF format for free! Find your manual SE6553B - PHILIPS and take your electronic device back in hand. On this page are published all the documents necessary for the use of your device. SE6553B by PHILIPS.
USER MANUAL SE6553B PHILIPS
Register your product and get support at www.philips.com/welcome

natural_image
Black Philips 3.0 phone with a digital display and control panel (no visible text or symbols on the device body)SE655
GB Telephone Answering Machine

Warning
Use only rechargeable batteries. Charge the handset for 24 hours before use.
Table of contents
1 l m p
1.1 Power requirements 5
1.2 Conformity 6
1.3 Using GAP standard compliance 6
1.4 Recycling and disposal 6
1.5 Electric, Magnetic and Electromagnetic Fields (“EMF”) 7
2 Your phone 8
2.1 What's in the box 8
2.2 Overview of your phone 9
2.3 Display icons and Messages 11
2.4 Overview of the base station 13
3 G e t
3.1 Connect the base station 14
3.2 Wall mounting the base 14
3.3 Install your phone 15
3.3.1 Install battery 15
3.3.2 Charge battery 16
3.4 Welcome mode 16
3.5 Using multipacks 17
3.6 Menu structure 18
4 Using your phone 25
4.1 Make a call 25
4.1.1 Predialling 25
4.1.2 Direct dialling 25
4.1.3 Call from redial list 25
4.1.4 Call from the call log 25
4.1.5 Call from the phonebook 25
4.1.6 Call from the phonebook while already on the phone 25
4.1.7 Call using Direct Access Memory 26
4.1.8 Enter a Dialing Pause 26
4.2 Answer a call 26
4.2.1 Handsfree answering 26
4.3 End a call 26
5 U s e your phone 27
5.1 Switch the handset off/on 27
5.2 Keypad lock/unlock 27
5.3 Text or number entry 27
5.4 Call in progress 27
5.4.1 Adjust earpiece or speaker volume 27
5.4.2 iMute/Unmute microphone 27
5.4.3 Activate/Deactivate loudspeaker mode 28
5.5 Chain dialing 28
5.6 Using your Phonebook 28
5.6.1 Store a contact in the phonebook 28
5.6.2 Access phonebook 28
5.6.3 Modify a phonebook entry 29
5.6.4 Select phonebook melody 29
5.6.5 Delete a phonebook entry 30
5.6.6 Delete all phonebook entries 30
5.6.7 Direct Access Memory 30
5.7 Using the Redial list 31
5.7.1 Access Redial list 31
5.7.2 View redial number details 31
n
m
s
5.7.3 Save a redial number into the phonebook 31
5.7.4 Delete a redial number 32
5.7.5 Delete all redial numbers 32
5.8 Call waiting 32
5.9 Using the Call log 32
5.9.1 Access the Call log 32
5.9.2 Save call list entry into the phonebook 33
5.9.3 Delete a call list entry 33
5.9.4 Delete all call list entries 33
5.10 Using the Intercom 33
5.10.1 Intercom another handset 34
5.10.2 Transfer an external call to another handset 34
5.10.3 Answer an external call during intercom 34
5.10.4 Switch between an internal and external call 34
5.10.5 Establish a three-party conference call 34
5.11 Paging 35
5.12 Clock and Alarm settings 35
5.12.1 Set Date and Time 35
5.12.2 Set Time and Date Format 35
5.12.3 Set Alarm 36
5.12.4 Set Alarm Tone 36
6 Personal settings 37
6.1 Change the Handset Name 37
6.2 Handset Tones 37
6.2.1 Set the Ring Volume 37
6.2.2 Set the Ring Tones 37
6.2.3 Activate/Deactivate Key Beep 38
6.3 Change the Display Language 38
6.4 Select the Display Wallpaper 38
6.5 Select the Color Theme 38
6.6 Set the Display Contrast 38
6.7 Set the Backlight Time 39
6.8 Deactivate/Activate Auto Hang-Up 39
7 Advanced settings 39
7.1 Easy Call 39
7.1.1 Set Easy Call to On or Off 39
7.1.2 Set Easy Call number 40
7.2 Auto Conference 40
7.3 Call Barring 40
7.3.1 Set Call Barring Mode 40
7.3.2 Set a Call Barring number 41
7.4 XHD Sound 41
7.5 Change PIN 41
7.6 Registration 42
7.6.1 Easy registration 43
7.7 Unregister 43
7.8 Country Selection 43
7.9 Reset Unit 43
7.10 Set Auto Prefix 44
7.11 Change Recall time 44
7.12 Change the Dial Mode (country-dependent) 45
7.13 Set First Ring Detection 45
7.14 Default Settings 45
8 Network Services 46
8.1 Call Forward 46
8.1.1 Change Call Forward Activation Codes 47
8.1.2 Change Call Forward Deactivation Code 47
8.2 Call Forward when Busy 47
8.2.1 Change Call Forward when Busy Activation Codes 48
8.2.2 Change Call Forward when Busy Deactivation Code 48
8.3 Call Forward when Unanswered 48
8.3.1 Change Call Forward when Unanswered Activation Codes 49
8.3.2 Change Call Forward when Unanswered Deactivation Code 49
8.4 Voice Mail 50
8.4.1 Access Voice Mail 50
8.4.2 Set Voice Mail Number 50
8.5 Voice Mail 2 50
8.6 Information Service 50
8.6.1 Access Info Service 50
8.6.2 Set Info Service Number 50
8.7 Information Service 2 51
8.8 Call Return 51
8.8.1 Access the Call Return Service 51
8.8.2 Set Call Return Service Number 51
8.9 Cancel Call Back 51
8.9.1 Call the Cancel Call Back Number 51
8.9.2 Set the Cancel Call Back Number 51
8.10 Withhold ID 52
8.10.1 Activating Withhold ID 52
8.10.2 Set the Withhold ID Code 52
9 Short Message Service (SMS) 52
9.1 Write and Send an SMS 53
9.2 Inbox 53
9.2.1 Read SMS Messages (Check Inbox) 54
9.2.2 Reply to an SMS Message 54
9.2.3 Forward an SMS Message 54
9.2.4 Save the Number of an SMS Message 54
9.2.5 Delete an SMS Message 55
9.2.6 Delete all SMS Messages 55
9.3 Drafts 55
9.3.1 Open a Draft 55
9.3.2 Send a Draft 55
9.3.3 Edit a Draft 55
9.3.4 Delete a Draft 56
9.3.5 Delete all Drafts 56
9.4 Settings 56
9.4.1 SMS Reception 56
9.4.2 SMS Centre 57
9.4.3 Default Centre 57
10 Telephone answering machine (TAM) 57
10.1 Playing Messages 58
10.1.1 Playback of messages via handset 58
10.1.2 Functions available during playback 58
10.2 Delete all messages 58
10.3 Turn the Answering Machine On/Off 59
10.4 Play, Record, or Delete an Outgoing Message 59
10.5 Set the Answer mode 59
10.6 Answering Machine Settings 60
10.6.1 Ring Delay 60
10.6.2 Remote Access 60
10.6.3 Handset Screening 61
10.6.4 Setting the Outgoing Message Language 61
11 Technical data 62
12 Frequently asked questions 62
12.1 Connection 63
12.2 Set-up 63
12.3 Sound 63
12.4 Product behaviour 64
13 INDEX 66
1 l m p o r
Take time to read this user manual before you use your phone. It contains important information and notes regarding your phone.
1.1 Power requirements
- This product requires an electrical supply of 100-240 volts AC. In case of power failure, communication can be lost.
- The Electrical network is classified as hazardous. The only way to power down the charger is to unplug the power supply from the electrical outlet. Ensure that the electrical outlet is always easily accessible.
- The voltage on the network is classified as TNV-3 (Telecommunication Network Voltages), as defined in the standard EN 60-950.

Warning
To avoid damage or malfunction:
- Do not allow the charging contacts or the battery to come into contact with metal objects.
- Do not open your product as you could be exposed to high voltages.
- Do not allow the charger to come into contact with liquids.
- Never use any other battery than the one delivered with the product or recommended by Philips: risk of explosion.
• Always use the cables provided with the product
- Handsfree activation could suddenly increase the volume in the earpiece to a very high level: make sure the handset is not too close to your ear.
- This equipment is not designed to make emergency calls when the power fails. An alternative has to be made available to allow emergency calls.
- Do not expose the phone to excessive heat caused by heating equipment or direct sunlight.
- Do not drop your phone or allow objects to fall on your phone.
- Do not use any cleaning agents containing alcohol, ammonia, benzene, or abrasives as these may harm the set.
- Do not use the product in places where there are explosive hazards.
- Do not let small metal objects come into contact with the product. This can deteriorate audio quality and damage the product.
• Active mobile phones in the vicinity may cause interference.
- Use only with provided batteries.
- Rechargeable batteries information Ni-MH battery, AAA × 2, 1.2V, 600mAh
- Use only with provided power supply.
• Power supply information for base station
Input: AC100-240V/0.3A, 50Hz/60Hz
Output: DC6V/0.5A
JOD-SWR-07342
JODEN
• Power supply information for charger (multihandset pack only) Input: AC100-240V/0.3A, 50Hz/60Hz Output: DC6V/0.21A JOD-SWR-07343 JODEN
- Risk of explosion if battery is replaced by an incorrect type. Dispose of used batteries according to the instructions.
About operating and storage temperatures:
- Operate in a place where temperature is always between 0 and 35^ (32 to 95^ ).
- Store in a place where temperature is always between -20 and 70°C (-4 to 158°F).
- Battery life may be shortened in low temperature conditions.
1.2 Conformity
We, Philips, declare that the product is in compliance with the essential requirements and other relevant provisions of Directive 1999/5/EC. This product can only be connected to the analogue telephone networks of the countries mentioned on the packaging. You can find the Declaration of Conformity on www.p4c.philips.com.
1.3 Using GAP standard compliance
The GAP standard guarantees that all DECT ^™ GAP handsets and base stations comply with a minimum operating
standard irrespective of their make. Your handset and base station are GAP compliant, which means the minimum guaranteed functions are: register a handset, take the line, receive a call and dial. The advanced features may not be available if you use a handset other than a SE650/655 with your base station. To register and use your SE650/655 handset with a GAP standard base station of a different make, first follow the procedure described in the manufacturer's instructions, then follow the procedure described in section 7.6. To register a handset of another make to the SE650/655 base station, place the base station into registration mode, then follow the procedure in the manufacturer's instructions.
1.4 Recycling and disposal
Disposal instructions for old products: The WEEE directive (Waste Electrical and Electronic Equipment Directive; 2002/96/EC) has been put in place to ensure that products are recycled using the best available treatment, recovery and recycling techniques to ensure human health and high environmental protection. Your product is designed and manufactured with high quality materials and components that can be recycled and reused.
Do not dispose of your old product in your general household waste bin. Inform yourself about the local separate collection system for electrical and
electronic products marked by this symbol.

natural_image
Simple line drawing of a trash bin crossed with diagonal lines, no text or symbols presentUse one of the following disposal options:
- Dispose of the complete product (including its cables, plugs and accessories) in the designated WEEE collection facilities.
- If you purchase a replacement product, hand your complete old product back to the retailer. He should accept it as required by the WEEE directive.
Disposal instructions for batteries:
Batteries should not be disposed of with general household waste.

Packaging information:
Philips has marked the packaging with standard symbols designed to promote the recycling and appropriate disposal of your eventual waste.

A financial contribution has been paid to the associated national recovery & recycling system.

The labeled packaging material is recyclable.
1.5 Electric, Magnetic and Electromagnetic Fields (“EMF”)
-
Philips Royal Electronics manufactures and sells many consumer oriented products which usually, as with any electronic apparatus, have the ability to emit and receive electro magnetic signals.
-
One of Philips' leading Business Principles is to take all necessary health and safety precautions for our products, to comply with all applicable legal requirements and to stay well within the EMF standards applicable at the time of producing the products.
-
Philips is committed to develop, produce and market products that cause no adverse health effects.
-
Philips confirms that if its products are handled properly for their intended use, they are safe to use according to scientific evidence available today.
-
Philips plays an active role in the development of international EMF and safety standards, enabling Philips to anticipate further developments in standardisation for early integration in its products.
2 Your phone
Congratulations on your purchase and welcome to Philips!
To fully benefit from the support that Philips offers, register your product at www.philips.com/welcome.
2.1 What's in the box

Handset Base Station
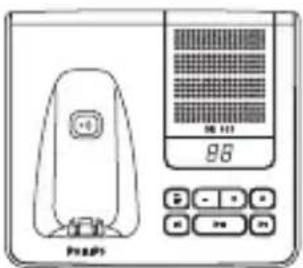
with bracket

Battery door
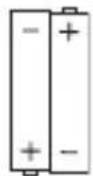
2 AAA rechargeable batteries
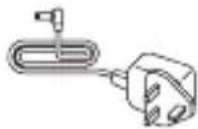
Power supply Line cord*


User manual Guarantee

Quick Start Guide

Note
* You may find in the box the line adaptor delivered separately from the line cable. In this case, you have to connect the line adaptor to the line cord first before plugging the line cord to the line socket.
In multihandset packs, you will find one or more additional handsets, chargers with power supply units and additional rechargeable batteries.
2.2 Overview of your phone

P Call transfer key & Intercom key int
In idle mode: Initiate an internal call. During a call: Short press to hold the line and page another handset. Long press to set up a conference between an external call and two handsets.Q Microphone
R Loudspeaker
Warning
Handsfree activation can suddenly increase the volume of the earpiece to a very high level. Make sure the handset is not too close to your ear. S B a t t e r y d o o2.3 Display icons and Messages
  Indicates that the battery is fully charged. This icon blinks during charge and when the battery is low.  When the Icon is empty the battery is practically discharged. Note
If Warning Batt flashes together with a blinking battery icon, batteries of the wrong type are installed in the handset. Replace with batteries of the correct type. Blinks when there is an incoming call. Steady ON during a call.  Blinks when there is new voice mail or SMS messages in the SMS box. Steady ON when there are old received SMS messages in the SMS box.  Indicates new and missed calls in the call log records. Blinks when there are missed calls.  Appears when the alarm clock is activated. Blinks when the alarm time comes.  Appears when the loudspeaker is activated.  Appears when the ringer is off.  Steady on when the answering machine is on. Blinks when messages have been received by the answering machine; blinks rapidly when answering machine memory is full.  Indicates that the handset is registered and within range of the base station. Icon blinks when the handset is out of range or is searching for a base.  Select appears when in menu mode. Press the key directly below to move to the next menu level or to confirm a selection.  OK appears to request confirmation of an operation. Press the key directly below to confirm. Indicates that more options are available in a scroll list, or that you can adjust the volume. Back/ Back appears when in menu Clear mode. Press the key directly below to return to the previous menu level. Clear appears when making an entry. Press the key directly below to clear (delete) a character or number when making an entry. Long press to clear all.2.4 Overview of the base station
A P a g i n g k e y
Page handset. Long press to start registration procedure.B S p e a k e r
C Message counter
Steady ON: shows the number of old messages. Blinking: Shows the number of new messages only. Two horizontal bars “--” blinking: Indicates that the answering machine memory is full. Also shows the base volume level when adjusting the volume.D O n / O f f k e y
Short press to switch the answering machine on/off.E V o l u m e k e
Increase or decrease the speaker volume. There are 5 volume levels during playback. There are 5 volume levels plus OFF during idle mode and call screening.F•Delete key x
Short press to delete the current message during message playback. Long press (2 seconds) when in idle mode to delete all old messages. (New messages will not be deleted.)G Previous key
Go to previous message if pressed within 1 second of current message playback. Replay current message if pressed after 1 second of current message playback.H Next key
Skip to the next message during message playback.I Play/Stop key
Play phone messages (the first recorded will be played first). There will be a short beep between messages and a double beep when all messages have been played. Stop message playback.3 Getting started
3.1 Connect the base station
1 Place the base station in a central location near the telephone line socket and electricity socket. 2 Connect the line cord and the power cable to their corresponding connectors at the back of the base station. natural_image
Technical line drawing of a mechanical component with no visible text or symbolsNote
The line adaptor may not be attached to the line cord. In this case, you have to connect the line adaptor to the line cord first before plugging the line cord to the line socket.Warning
Avoid placing the base station too close to large metal objects such as filing cabinets, radiators or electrical appliances. This can impair the range and sound quality. Buildings with thick internal and external walls may impair transmission of signals to and from the base.Warning
Power is applied when the power adaptor is plugged into the unit and connected to the electricity socket. The only way to power down the unit is to unplug the power adaptor from the electricity socket. Therefore, ensure that the electricity socket is easily accessible. The power adaptor and telephone line cord have to be connected correctly, as incorrect connection could damage the unit. Always use the telephone line cord supplied with the unit. Otherwise, you may not get a dial tone.3.2 Wall mounting the base
The base is designed to support wall mounting. To wall mount the base, follow the instructions below. 1 Remove the bracket from the back of the base station by ① pressing the two latches on the inside of the bracket and ② rotating the bracket outward.  2 Turn the bracket around. natural_image
Simple line drawing of a rectangular electronic component with circular arrows indicating rotation or cycle (no text or symbols)natural_image
Technical line drawing of an electrical contactor with a magnified inset showing internal components (no text or symbols)3.3 Install your phone
Before using the handset, the batteries have to be installed and fully charged.Warning
When the batteries are inserted for the first time, the unit will not be able to start normally due to the low battery. You must charge the batteries on the base station before you can use the handset.3.3.1 Install battery
Warning
Always use AAA rechargeable batteries supplied with your unit. If alkaline batteries are used instead of rechargeable batteries, “Warning Batt” will show on the display and the battery icon will blink quickly. 1 Slide out the battery cover. natural_image
Diagram of a connector with a square slot and a rectangular body, showing internal structure (no text or symbols)3.3.2 Charge battery
Warning
The handset must be charged for at least 24 hours before using it for the first time. When the battery level becomes low, the low battery sensor warns you by blinking the battery icon. If this occurs during a conversation, an alert tone sounds to inform you that the battery is low. If the battery level becomes exceedingly low, the phone automatically switches off shortly after the icon starts blinking and any function in progress will not be saved. 1 Place the handset on the charging cradle of the base station. A beep is emitted if the handset is placed correctly. 2 The battery icon on the display blinks during charge. 3 The battery icon becomes steady when the handset is fully charged. Note
Optimal battery life is reached after 3 cycles of complete charging (over 15 hours) and discharging, allowing approximately 12 hours of talk-time and 150 hours of stand-by time. The indoor and outdoor range of the phone is up to 50 metres and 300 metres respectively. When the handset moves beyond the operation range, the antenna icon will blink. Tip
When you reach the range limit the conversation may become crackly. Move closer to the base.3.4 Welcome mode
Before you first use your handset, you need to configure it according to the country of use. After charging it for a few minutes, Welcome appears in various languages. Follow these steps to configure your phone: 1 Press OK to display a list of countries. 2 Scroll Ⓞ to find your country. 3 Press OK to confirm your selection. (Waiting... will be displayed while the default line settings and menu language for the selected country are automatically configured.) 4 Set each digit of the date and time using the numeric keys. See section 5.12.1 - "Set Date and Time". Note
The date format and time format are initially determined by the country selection. 5 Press OK to confirm. \- A validation tone is emitted. At the same time the handset switches to idle mode. In case of you have several handsets, the setting is automatically done for all handsets. Tip
You may change your country settings (see section 7.8) and time format (see section 5.12.2) anytime after the first configuration.3.5 Using multipacks
If you have purchased a multipack you will have additional handsets, chargers, power adaptors and AAA rechargeable batteries. 1 Plug the chargers into a power socket. 2 Install the batteries supplied into the handsets. 3 Place the handsets on the chargers to charge the batteries.3.6 Menu structure
The SE655 has seven menus as shown in the following table.| Menu Name Icon | ||
| 1 Phonebook |  | |
| 2 Personal Settings |  | |
| 3 Clock and Alarm |  | |
| 4 Advanced Settings |  | |
| 5 Network Services |  | |
| 6 SMS |  | |
| 7 Answer Machine |  | |
Phonebook
flowchart
graph TD
    A["Phonebook New"] --> B["Entry Enter Name: Enter Number:"]
    B --> C["List"]
    B --> D["Edit"]
    B --> E["Select"]
    E --> F["Entry list displayed"]
    F --> G["Entry list displayed"]
    G --> H["Melody details List of melodies for selected entry"]
    H --> I["Delete?"]
    A --> J["Delete All Delete All?"]
    A --> K["Direct Memory"]
    K --> L["Key list and status"]
    L --> M["Edit"]
    L --> N["Delete"]
flowchart
graph TD
    A["Personal Set Handset Name"] --> B["Enter name"]
    C["Handset Tones Ring"] --> D["Volume No bar (off)"]
    D --> E["One ... Five Progressive"]
    F["Ring Tones Name of tones 1"] --> G["Language"]
    F --> H["Wallpaper"]
    I["Name of tones 15"] --> J["Key"]
    K["Color Theme"] --> L["Color 1"]
    M["Color 4"] --> N["Level 1"]
    O["Contrast"] --> P["20 Seconds"]
    Q["Level 5"] --> R["Backlight Time"]
    S["Auto Hang-up"] --> T["On"]
    U["List of languages"] --> V["Wallpaper 1"]
    W["Wallpaper 2"] --> X["Wallpaper off"]
    Y["Wallpaper 3"] --> Z["Wallpaper off"]
    AA["..."] --> AB["..."]
    AC["Off"] --> AD["Beep"]
flowchart
graph TD
    A["Clock & Alarm Set Date/Time Enter date & time"] --> B["Set Format Time Format 12 Hours"]
    B --> C["Date Format DD/MM"]
    C --> D["Alarm"]
    D --> E["On Once"]
    D --> F["On Daily"]
    D --> G["Alarm Tone Melody 1"]
    G --> H["Melody 2"]
    C --> I["Off"]
    I --> J["MM/DD"]
    C --> K["24"]
Advanced Settings
flowchart
graph TD
    A["Advanced Set"] --> B["Easy Call Mode On"]
    B --> C["Enter Number:"]
    C --> D["Off(by default)"]
    C --> E["Number"]
    E --> F["Enter number"]
    G["Off (by default)"] --> H["Conference"]
    H --> I["On"]
    H --> J[" "]
    G --> K["Call"]
    K --> L["Barring"]
    L --> M["Enter PIN"]
    M --> N["Mode"]
    M --> O["Off(by default)"]
    M --> P["Number"]
    P --> Q["... Number"]
    R["XHD"] --> S["(by default)"]
    S --> T["Off"]
    U["Change PIN"] --> V["Register"]
    W["Unregister"] --> X["Country"]
    X --> Y["List of countries"]
    Z["Reset"] --> AA["Reset?"]
    AB["Auto Prefix"] --> AC["Detect Digit:"]
    AC --> AD["Prefix"]
    AE["Recall Time"] --> AF["Short"]
    AG["Dial Mode"] --> AH["Tone"]
    AI["First Ring"] --> AJ["Pulse"]
    AK["Off"] --> AL["On"]
    AK --> AM["Off"]
flowchart
graph TD
    A["Netw. Services"] --> B["Deactivate"]
    B --> C["Call Forward Activate"]
    C --> D["Enter Number:"]
    D --> E["Change"]
    E --> F["Code"]
    F --> G["Prefix (enter code) Activation"]
    F --> H["Suffix (enter code)"]
    F --> I["Deactivation"]
    I --> J["Change"]
    J --> K["Call Fwd Busy Deactivate"]
    K --> L["Activate Enter Number:"]
    L --> M["Change"]
    M --> N["Code"]
    N --> O["Prefix (enter code) Activation"]
    N --> P["Suffix (enter code)"]
    N --> Q["Deactivation"]
    Q --> R["Change"]
    R --> S["Call Fwd Unans Activate Enter Number:"]
    S --> T["Change"]
    T --> U["Code"]
    U --> V["Prefix (enter code) Activation"]
    U --> W["Suffix (enter code)"]
    U --> X["Deactivation"]
    X --> Y["Change"]
    Y --> Z["Voicemail Call"]
    Z --> AA["Settings"]
    AA --> AB["Enter Number"]
    AB --> AC["Info"]
    AC --> AD["Settings"]
    AD --> AE["Info 2"]
    AE --> AF["Call"]
    AF --> AG["Settings"]
    AG --> AH["Enter"]
    AH --> AI["Call Return"]
    AI --> AJ["Settings"]
    AJ --> AK["Cancel Call BK"]
    AK --> AL["Settings Withhold ID"]
    AL --> AM["Activate"]
    AM --> AN["Settings"]
    AN --> AO["Enter"]
flowchart
graph TD
    A["SMS Write SMS"] --> B["Inbox"]
    B --> C["Read"]
    C --> D["Reply"]
    D --> E["Forward"]
    D --> F["Delete"]
    A --> G["Save Number"]
    A --> H["Delete all"]
    H --> I["Drafts"]
    I --> J["Read"]
    J --> K["Send"]
    K --> L["Edit"]
    K --> M["Delete"]
    A --> N["Delete all"]
    N --> O["Settings SMS Reception On (by default)"]
    O --> P["Off"]
    O --> Q["Change Box Nr"]
    P --> R["SMS Centre SMS Centre 1 Enter Incoming"]
    R --> S["SMS Centre 2 & outgoing"]
    R --> T["SMS Centre 3 numbers"]
    O --> U["Default Centre SMS Centre 1"]
    U --> V["SMS Centre 2"]
    U --> W["SMS Centre 3"]
flowchart
graph TD
    A["Answer Machine Play Repeat"] --> B["Next"]
    A --> C["Previous"]
    A --> D["Delete"]
    E["Delete All"] --> F["Off"]
    G["Answer On/Off On"] --> H["Off"]
    I["Record OGM Answer & Rec. Play"] --> J["Answer"]
    K["Answer Mode Answer & Rec."] --> L["Answer Only"]
    M["Settings Ring Delay 3 Rings"] --> N["Remote Access"]
    M --> O["HS"]
    M --> P["Voice"]
    Q["Off (by default)"] --> R["Deactivate (by default)"]
    Q --> S["Screening"]
    Q --> T["Language"]
    U["Record"] --> V["Only"]
    W["Delete"] --> X["Record"]
    Y["Record"] --> Z["Only"]
    AA["Delete"] --> AB["Record"]
    AC["Record"] --> AD["Only"]
    AE["Deactivate"] --> AF["RS"]
    AG["RS"] --> AH["Ring"]
    AI["RS"] --> AJ["Ring"]
    AK["RS"] --> AL["Ring"]
    AM["RS"] --> AN["Ring"]
    AO["Economy"] --> AP["4"]
    AQ["4"] --> AR["Ring"]
    AS["5"] --> AT["Ring"]
    AU["6"] --> AV["Ring"]
    AW["7"] --> AX["Ring"]
    AY["1"] --> AZ["Ring"]
    BA["2"] --> BB["Ring"]
    BC["3"] --> BD["Ring"]
    BE["4"] --> BF["Ring"]
    BG["5"] --> BH["Ring"]
    BI["6"] --> BJ["Ring"]
    BK["7"] --> BL["Ring"]
    BM["8"] --> BN["Ring"]
    BO["Active"] --> BP["Aktiva"]
    BQ["On"] --> BR["Language"]
4 Using your phone
4.1 Make a call
4.1.1 Predialling
1 Enter the number. (A maximum of 24 digits including \* and # are allowed. Press 📄 Clear to delete the last digit.) Or long press to delete all. 2 Press R. \- The call is initiated.4.1.2 Direct dialling
1 Pick up the handset and press 📄. (Or press 🔒 to start a call in speaker mode.) 2 Dial the number. \- The call is initiated.4.1.3 Call from redial list
1 Press redial in idle mode. 2 Scroll ⏻ to an entry in the redial list. 3 Press R. - The call is initiated.Note
- In multihandset packs, each handset has its own redial list. - You can also press 📄 first and then press 📋 Redial to enter the redial list. Then scroll 🔒 to select a number in the list and press 📋 Select. The number is dialed automatically.4.1.4 Call from the call log
Note
- In multihandset packs, the call log is shared between all handsets. - You need to subscribe to Caller Line Identification service to be able to see the caller's number or name in the call log. See section 5.9.1 - "Access the Call log". 1 Press ▲ in idle mode, then scroll ⏻ to an entry in the call list.Note
If the list is empty, then "List Empty" is displayed. 2 Press R. \- The call is initiated.4.1.5 Call from the phonebook
1 Press ▼ in idle mode. 2 Scroll ⓤ to a phonebook entry. 3 Press R. \- The call is initiated.Tip
Instead of scrolling Ⓐ to browse the phonebook entries, you can press the numeric key corresponding to the first letter of the entry you wish to locate. For example, pressing 2 _abc will show the entries starting with A. Pressing 2 _abc again will show the entries starting with B, etc.4.1.6 Call from the phonebook while already on the phone
1 While on the phone, press Option and then ☐ Select to enter the phonebook name list. 1 Scroll ⏻ to a phonebook entry. 1 Press Select. - The call is initiated.4.1.7 Call using Direct Access Memory
Press a number key 3_def to 9_wxyz for more than 2 seconds to dial a stored direct access memory number. Note
- In multihandset packs, each handset has its own direct access memories. • See section 5.6.7 for instructions on how to store, edit, and delete direct access memory numbers.4.1.8 Enter a Dialing Pause
Long press \# to enter a pause in the dialling sequence. The pause is indicated by a P.4.2 Answer a call
Danger
When the handset rings during an incoming call, please do not hold the handset too close to your ear as the volume of the ringing tone may damage your hearing. When the phone rings, press the key. • The call is established. Note
\- Incoming call has priority over other events. Whenever there is an incoming call, other status in progress such as phone setting, menu navigation, etc will be aborted. Tip
You can mute the ring tone of an incoming call before answering by pressing on 📄 Silent.4.2.1 Handsfree answering
Danger
Handsfree activation can suddenly increase the volume in the earpiece to a very high level. Make sure the handset is not too close to your ear. When the phone rings, press ▪. \- The handset loudspeaker is activated.4.3 End a call
To end a conversation, press exit. \- The call ends. Tip
When auto hang-up is on, you can simply place the handset back to its base station or charger to end the call. This feature is activated by default. Note
The call duration (MM:SS) will be displayed on the handset screen for about 5 seconds.5 Use more of your phone
5.1 Switch the handset off/on
To switch the handset off, press and hold in idle mode for at least 5 seconds. To switch it on, press and hold for at least one second.5.2 Keypad lock/unlock
Press and hold ☐ for 3 seconds to lock/unlock the keypad in idle mode.5.3 Text or number entry
When you select a field in which you can enter text, you can enter the letters that are printed on the keys by pressing the relevant key once or several times. For example, to enter the name “PAUL”: 1 Press 7pqrs once: P 2 Press 2_abc once: PA 3 Press 8 _tuv twice: PAU 4 Press 5_jkl three times: PAUL The table below gives you the character assignment during text or number entry:| Keys Assigned characters | |
| 0 | . 0 , / : ; “ ‘ ! i ? i * + - % \ ^ ~ | |
| 1 | SPACE 1 @ _ # = < > ( ) & € £ $ ¥ [ ] { } ☐ § ... |
| 2abc | a b c 2 à æ ä å |
| 3def | d e f 3 è é Δ Φ |
| 4ghi | g h i 4 i Γ |
| 5jkl | j k l 5 Λ |
| Keys Assigned characters | |
| 6mno | m n o 6 ñ ò ò |
| 7pqrs | p q r s 7 β Π Θ Σ |
| 8tuv | t u v 8 ù ü |
| 9wxyz | w x y z 9 ø Ω Ξ Ψ |
\* Tip
- Press 📄 Clear to delete the last digit or character entered or long press to delete all. - Short press \# to shift between lowercase and uppercase. - Long press \# to insert a pa5.4 Call in progress
Some options are available to you during a call. The available options are :5.4.1 Adjust earpiece or speaker volume
During a call, press ⏻ to select from level 1 to level 5.5.4.2 Mute/Unmute microphone
When the microphone is muted, your correspondent cannot hear you. 1 During a call, press 🖱️ to turn off the microphone. 2 Press 🚙 again to turn on the microphone.5.4.3 Activate/Deactivate loudspeaker mode
Danger
Handsfree activation can suddenly increase the volume in the earpiece to a very high level. Make sure the handset is not too close to your ear. 1 During a call, press ☐ to activate the loudspeaker mode. 2 Press ▪ again to deactivate the loudspeaker mode.5.5 Chain dialing
This feature allows you to dial an extension to a number already saved in the phonebook during a call. 1 Press 📄 or 🕒 on the handset to take the line. Then, press 🖌 Option and then 🏠 Select to enter the phonebook name list. 2 Scroll Ⓞ to a phonebook entry. 3 Press ☐ Select. • The first part is dialed. 4 Enter the extension.5.6 Using your Phonebook
Your phone can store up to 200 phonebook memories. Each phonebook entry can have a maximum of 24 digits for the phone number and 14 characters for the name. All names and numbers in the phonebook must be unique. Note
If you have multiple handsets, the phonebook can only be accessed by one handset at a time.5.6.1 Store a contact in the phonebook
1 Press menu in idle mode. Phonebook is highlighted; press Select. 2 New Entry is highlighted; press Select. 3 Enter Name is displayed. Enter the name of the contact (maximum 14 characters) and press OK. 4 Enter Number is displayed. Enter the number (maximum 24 digits) and press ☐ OK. • A validation tone is emitted. Note
\- Press 📄 Clear to delete the last digit or character entered or long press to delete all. • To return to the previous menu, press Back. Tip
You cannot store a new phonebook entry when the memory is full. In this case, you have to delete existing entries to make space for new entries.5.6.2 Access phonebook
1 Press ▼ in idle mode and scroll Ⓗ to browse the phonebook. (You can also access the phonebook through the menu mode. □ menu → Phonebook → List) • The phonebook entries will be listed in alphabetical order. 2 To view the details, press View. Tip
Instead of scrolling Ⓐ to browse the phonebook entries, you can press the numeric key corresponding to the first letter of the entry you wish to locate. For example, pressing 2 _abc will show the entries starting with A. Pressing 2 _abc again will show the entries starting with B, etc. 3 Press ☐ to dial the number. (Press ☐ to return to idle mode.)5.6.3 Modify a phonebook entry
1 Press menu in idle mode. Phonebook is highlighted; press Select. 2 Scroll ⏻ to Edit Entry and press Select. 3 Scroll ⏻ to select an entry to edit. 4 Press ☐ Select to display the name. 5 Press 📄 Clear to erase the letters one by one. 6 Edit the name and press OK to confirm. 7 Edit the number and press OK to confirm. • A validation tone is emitted. Note
While editing, press 📄 Clear to delete the last digit or character entered or long press to delete all.5.6.4 Select phonebook melody
With this function you can personalize the melody played when someone in the phonebook calls you. Note
You need to subscribe to Caller Line Identification service to be able to benefit from this feature. 1 Press menu in idle mode. Phonebook is highlighted; press Select. 2 Scroll ⏻ to Select Melody and press — Select. 3 Scroll ⏻ to the entry you want to select a melody for, then press View. 4 The screen shows the melody currently selected for that entry. Press ▼ Change to change the melody. 5 Scroll ⏻ the list of melodies. (There are 15 melodies plus No Melody to choose from. The melodies play as you scroll through them.) 6 Press ☐ Select to select the melody you prefer. \- A validation tone is emitted and the screen returns to the Phonebook menu. Note
When first ring detection is set On, a normal tone sounds first, and then it changes to the personalized phonebook melody. When it is set Off, the personalized phonebook melody plays from the start. See Section 7.13 for how to set first ring detection On or Off.5.6.5 Delete a phonebook entry
1 Press menu in idle mode. Phonebook is highlighted; press Select. 2 Scroll ⏻ to Delete and press Select. 3 Scroll Ⓜ to select an entry to delete and press — Select. 4 Delete? is displayed on the screen. Press ☐ OK to confirm deletion. • A validation tone is emitted.Note
Press 📄 Back to discard the deletion. The screen returns to the phonebook list.5.6.6 Delete all phonebook entries
1 Press menu in idle mode. Phonebook is highlighted; press Select. 2 Scroll ⏻ to Delete All and press Select. 3 Delete All? is displayed on the screen. Press OK to confirm deletion. • A validation tone is emitted.5.6.7 Direct Access Memory
There are 7 direct access memories (Keys 3 _def to 9 _wxyz ) included in the phonebook memory. A long press on the keys in idle mode will automatically dial the stored phone number.Note
Depending on your country, keys 1 and 2 are reserved for use with Voic email 2 and Info 2 in the network services menu. If you subscribe to these services, this allows you to dial your voice mail access number and/or information service access number using key 1 and/or key 2.5.6.7.1 Add/Edit Direct Access Memory
1 Press menu in idle mode. Phonebook is highlighted; press Select. 2 Scroll 📁 to Direct Memory and press ☐ Select. - The current number stored in the direct access memory location will be displayed. If no number is stored, No number will be displayed. 3 Scroll ⏻ to the key you wish to edit (Key 3 to Key 9) and press → Menu. 4 Scroll ⏻ to Edit and press Select. 5 The Phonebook list will be displayed. Scroll 📁 to the Phonebook entry you wish to store in the selected direct access memory number and press ☐ Select. 6 Press ☐ OK to confirm. \- A validation tone is emitted and the screen returns to the previous menu.Note
Each handset has its own direct access memories.5.6.7.2 Delete Direct Access Memory
1 Press menu in idle mode. Phonebook is highlighted; press Select. 2 Scroll 🔒 to Direct Memory and press ☐ Select. 3 Scroll Ⓜ to the key you wish to delete the memory from and press → Menu. 4 Scroll 🔒 to Delete and press Select. \- A validation tone is emitted and the screen returns to the previous menu.5.7 Using the Redial list
The redial list stores the last 10 numbers dialed. A maximum of 32 digits can be displayed for each entry.5.7.1 Access Redial list
1 Press redial to go to the redial list and scroll 🔊 to browse the redial list. \- The last number dialed will appear first in the redial list. If the redial number matches a phonebook entry, the name will be displayed instead. 2 To open the redial list options, press Menu. Note
Press 📄 Back to return to the previous menu.5.7.2 View redial number details
1 Press redial in idle mode, scroll to select an entry and press — Menu. 2 View is highlighted on the screen; press Select to display information about the number dialed. 3 Press Next to display further information. Afterward, you can press Prev. to return to the former screen. After viewing, press Back to return to previous menu levels.5.7.3 Save a redial number into the phonebook
1 Press redial in idle mode, scroll to select an entry and press — Menu 2 View is highlighted on the screen. Scroll 🔒 to Save Number and press ☐ Select. 3 Enter Name is displayed. Enter the name of the contact (maximum 14 characters) and press OK. 4 Enter Number is displayed and the selected number from the redial list appears in the number field. At this time you can edit the number if you wish to. 5 Press OK. The screen returns to the redial list.Note
Press 📄 Clear to delete the last digit or character entered. Long press 📄 Clear to clear the entire entry.5.7.4 Delete a redial number
1 Press redial in idle mode, scroll to select an entry and press — Menu. 2 Scroll ⏻ to Delete and press Select. 3 Delete? is displayed on the screen. 4 Press OK to confirm deletion. • A validation tone is emitted.Note
Press 📄 Back to discard the deletion. The screen returns to the previous menu.5.7.5 Delete all redial numbers
1 Press redial in idle mode, and press Menu. 2 Scroll ⏻ to Delete All and press Select. 3 Delete All? is displayed on the screen. 4 Press ☐ OK to confirm deletion. • A validation tone is emitted.5.8 Call waiting
If you have subscribed to Call Waiting services, the earpiece will emit a beep tone to inform you that there is a second incoming call. The number or name of the second caller will also be displayed if you have subscribed to Caller Line Identification service (CLI). Please contact your network provider for more information on this service. Press and 2_abc to answer the call. \- The first call is put on hold, and you are now connected to the second call.OR
Press 📄 and 📋 to end the current call and answer the second call.5.9 Using the Call log
The call log stores the last 50 external calls and any new voice mail received. In idle mode, the icon flashes on the display for new and unanswered calls. If you have subscribed to Caller Line Identification (CLI), and provided the identity of the caller is not withheld, the name (or number) of the caller will be displayed.Note
If the identity of the caller is withheld or the network does not provide the date and time information, then the information will not be displayed in the call log. If you have not subscribed to Caller Line Identification service, there will not be any caller information displayed in the call log.5.9.1 Access the Call log
1 Press ⚠ in idle mode, press 📋 Select to select Call List, and scroll 🔒 to browse the call log. • The calls (missed and received) are displayed in chronological order with the most recent call at the top of the list. If the call is unviewed and unanswered, New appears on the display. After you view the message, New disappears. - Press 📄 to dial out the number of the selected call log entry. 2 To view the call details, press ☐ Menu and then press ☐ Select. The display shows the caller information. - Press 📄 Back at any time to return to the previous menu.5.9.2 Save call list entry into the phonebook
1 Press ▲ in idle mode, press — Select to select Call List, then scroll 🔒 to select an entry and press — Menu. 2 Scroll 📁 to Save Number and press — Select. 3 Enter Name is displayed on the screen. Enter the name of the contact (maximum 14 characters) and press OK. 4 Enter Number is displayed and the selected number from the call list appears in the number field. At this time you can edit the number if you wish to. 5 Press OK. • A confirmation tone sounds and the screen returns to call log.Note
Press 📄 Clear to delete the last digit or character entered or long press to delete all.5.9.3 Delete a call list entry
1 Press ▲ in idle mode, press Select to select Call List, then scroll ⏻ to select an entry and select — Menu. 2 Scroll ⏻ to Delete and press Select. 3 Delete? is displayed on the screen. 4 Press OK to confirm deletion. • A validation tone is emitted, the call list entry is deleted, and the display goes to the next entry in the call list.Note
Press 📄 Back to discard the deletion. The screen returns to the Call List menu.5.9.4 Delete all call list entries
1 Press ▲ in idle mode, press ☐ Select to select Call List, and then press ☐ Menu. 2 Scroll ⏻ to Delete All and press Select. 3 Delete All? is displayed on the screen. Press OK to confirm deletion. \- A validation tone is emitted. The display shows List Empty for 2 seconds and returns to the idle mode.5.10 Using the Intercom
Warning
Intercom and call transfer is only possible when you have at least 2 handsets registered to the same base station. It allows you to make free internal calls, transfer external calls from one handset to another and use the conference option.5.10.1 Intercom another handset
Note
If the handset does not belong to SE650/655 range, this function may not be available. 1 Press int in idle mode. • Intercom is established immediately if there are only 2 registered handsets. 2 If there are more than 2 registered handsets, scroll 🔒 to select the handset to call and press OK. \- Once the intercom call is initiated the icon is displayed on the handset. 3 Press 📄 on the called handset. • The intercom is established.Note
Pressing 📄 on any handset will exit intercom mode and return other handsets to idle mode. If an external call arrives during intercom mode and you want to accept this call, you must first exit intercom mode.5.10.2 Transfer an external call to another handset
1 During the call, press int to put the external call on hold (the caller can no longer hear you). \- The display shows the numbers of the handsets registered to the base. 2 Scroll ⏻ to the handset number you wish to transfer your external call to and press ☐ Select. 3 Press 📄 on the called handset to answer the internal call, where both internal callers can talk. • Intercom is established. 4 Press 📄 on the first handset to transfer the external call to the called handset. • The external call is transferred.Note
If there is no answer from the called handset, press int to resume the external call.5.10.3 Answer an external call during intercom
1 During intercom, a new call tone is emitted when there is an incoming external call. 2 Press exit to exit intercom mode. 3 Press 📄 to pick up the external call.5.10.4 Switch between an internal and external call
During the call, press int to switch between an internal or external call.5.10.5 Establish a three-party conference call
The conference call feature allows one external call to be shared with two handsets (in intercom). The three parties can share the conversation and no network subscription is required. 1 During the call, press int to put the external call on hold (the caller can no longer hear you). \- The display shows the numbers of the handsets registered to the base. 2 Scroll 📁 to the number of the handset you wish to establish the conference call with and press Select. 3 Press 📄 on the called handset to answer the internal call, where both internal callers can talk. • Intercom is established. 4 Press Conf. or long press int on the first handset to start the three-party conference. \- Conference will be displayed on the screen once the conference call is established.5.11 Paging
The paging feature enables you to locate a missing handset if the handset is in range and contains charged batteries. 1 Press ⬙) on the base station. \- All the registered handsets start to ring. \- Once a handset is found, press Silent on a handset to stop its ringing. 2 Press ●) again to end the paging.Note
If there are no key presses within 30 seconds, the handset will automatically return to idle mode.5.12 Clock and Alarm settings
This feature allows you to set the date, time and alarm settings for your phone.5.12.1 Set Date and Time
1 Press menu in idle mode, scroll to Clock & Alarm, and press Select. 2 Set Date/Time is highlighted. Press ☐ Select. 3 The last stored date and time are displayed. Enter the current time and current date (HH:MM DD/MM/YY). Press ▲ to move the cursor left, or press ▼ to move it right. If using the 12 hour format, just after setting the minutes, use \* to switch between AM and PM. 4 Press OK. \- A validation tone is emitted and the screen returns to the idle mode.Note
The date format and time format are initially determined by the country selection. However, you can change the format as shown in the next section.5.12.2 Set Time and Date Format
5.12.2.1 Set Time Format
1 Press menu in idle mode, scroll to Clock & Alarm, and press Select. 2 Scroll ⏻ to Set Format and press Select. 3 Time Format is highlighted in the display. Press ☐ Select, then scroll 🔒 to select 12hours or 24hours. 4 Press ☐ Select to select the option. \- A validation tone is emitted and the screen returns to the Set Format menu.5.12.2.2 Set Date Format
1 Press menu in idle mode, scroll to Clock & Alarm, and press Select. 2 Scroll Ⓐ to Set Format and press Select. 3 Scroll ⏻ to Date Format and press — Select. 4 Scroll 📄 to select DD/MM or MM/DD and press ☐ Select to select the option. \- A validation tone is emitted and the screen returns to the Set Format menu.5.12.3 Set Alarm
1 Press menu in idle mode, scroll to Clock & Alarm, and press Select. 2 Scroll to Alarm and press Select. 3 Scroll ☑ to Off, On Once, or On Daily and press ☐ Select. 4 If you select On Once or On Daily, enter the time (HH-MM) for the alarm. (If using the 12 hour format, you can switch between AM and PM by pressing ☐.) Press ☐ OK to confirm. \- A validation tone is emitted and the screen returns to the Alarm menu. And the alarm icon is displayed. \- If you select Off, a validation tone is emitted and the screen returns to the Clock & Alarm menu.Note
The alarm tone and alarm icon will sound/blink for 1 minute when the alarm time is reached. To mute the alarm tone, simply press any key on the handset.5.12.4 Set Alarm Tone
1 Press menu in idle mode, scroll to Clock & Alarm, and press Select. 2 Scroll ☐ to Alarm Tone and press Select. 3 Scroll 🔒 to select the tone. (Three tones are available. The tones sound as you scroll.) Press ☑ Select to confirm your selection. \- A validation tone is emitted and the screen returns to the Clock & Alarm menu.6 Personal settings
6.1 Change the Handset Name
You can name the handset and display the handset name in idle mode. The default handset name of your handset is Philips. 1 Press menu in idle mode, scroll to Personal Set and press Select. 2 Handset Name is highlighted; press ☐ Select. 3 The last stored name is displayed. Press 📄 Clear to delete the characters one by one or a long press to delete all. 4 Enter the new name and press OK to confirm. \- A validation tone is emitted and the screen returns to the Personal Set menu.6.2 Handset Tones
6.2.1 Set the Ring Volume
Danger
When the handset rings during an incoming call, please do not hold the handset too close to your ear as the volume of the ringing tone may damage your hearing. In multihandset packs, you can set the ring volume independently on each registered handset. There are 5 ringer volume levels plus progressive and off. The default is level 3. 1 Press menu in idle mode, scroll to Person al Set, and press Select. 2 Scroll ⏻ to Handset Tones and press — Select. Ring Volume is highlighted; press — Select. 3 Scroll ⏻ to your desired volume level. The ring tone sounds at each level. 4 Press OK to confirm. \- A validation tone is emitted and the screen returns to the Handset Tones menu. Note
If ring volume is set to off, the icon will be displayed on the screen. If ring volume is set to progressive, the ringer will start at level 1 and go up one level volume every ring.6.2.2 Set the Ring Tones
There are 15 ring tones available on your handset. 1 Press menu in idle mode, scroll to Person al Set, and press Select. 2 Scroll 🔒 to Handset Tones and press 📄 Select. Then scroll 🔒 to Ring Tones and press 📄 Select. 3 Scroll ⏻ to your desired melody. The melodies will play as you scroll them. 4 Press Select to set the ring tone. \- A validation tone is emitted and the screen returns to the Handset Tones menu.6.2.3 Activate/Deactivate Key Beep
A single beep tone is emitted when a key is pressed. You can enable or disable the key beep. 1 Press menu in idle mode, scroll to Personal Set, and press Select. 2 Scroll ⏻ to Handset Tones and press 📋 Select. Then scroll ⏻ to Key Beep and press 📋 Select. 3 Scroll 🔒 to select On or Off and press ☐ Select to confirm. \- A validation tone is emitted and the screen returns to the Handset Tones menu.6.3 Change the Display Language
Your handset can support different display languages. 1 Press menu in idle mode, scroll to Personal Set, and press Select. 2 Scroll 🔒 to Language and press Select. 3 Scroll ⏻ to your desired language and press — Select to confirm. \- A validation tone is emitted and the screen returns to the Personal Set menu.Note
Once the display language is set, the option menus on the handset will immediately switch to display in the selected language.6.4 Select the Display Wallpaper
There are 3 wallpaper images available on your handset as well as an option to set it off. 1 Press menu in idle mode, scroll to Personal Set, and press Select. 2 Scroll ⏻ to Wallpaper and press Select. 3 Scroll Ⓜ to your desired wallpaper. The image on the display will change as you scroll. 4 Press ☐ Select to confirm. • A validation tone is emitted and the screen returns to the Personal Set menu.6.5 Select the Color Theme
There are 4 color themes available on your handset. 1 Press menu in idle mode, scroll to Personal Set, and press Select. 2 Scroll 🔒 to Color Theme and press — Select. 3 Scroll Ⓐ to your desired color theme. The color theme used on the display will change as you scroll. 4 Press ☐ Select to confirm. • A validation tone is emitted and the screen returns to the Personal Set menu.6.6 Set the Display Contrast
You can change the contrast of the text on the display. There are 5 contrast levels available on your handset. The default is level 3. 1 Press menu in idle mode, scroll to Personal Set, and press Select. 2 Scroll ⏻ to Contrast and press Select. 3 Scroll 🔒 to the desired display contrast, and press — Select to confirm. - A validation tone is emitted and the screen returns to the Personal Set menu.6.7 Set the Backlight Time
You can change the backlight timing for the display. There are 3 options available - 20, 40, or 60 seconds. 1 Press menu in idle mode, scroll to Personal Set, and press Select. 2 Scroll 🔒 to Backlight Time and press — Select. 3 Scroll Ⓜ to the desired backlight time, and press ☐ Select to confirm. \- A validation tone is emitted and the screen returns to the Personal Set menu.6.8 Deactivate/Activate Auto Hang-Up
If auto hang-up is set to On, it will automatically release the line when the phone is put back on the cradle. If auto Hang-up is set to Off, putting the handset back on the cradle while in talk mode will switch the handset to hands free talk mode. This allows you to charge the handset during calls. The default setting for auto hang up is On. 1 Press menu in idle mode, scroll to Personal Set, and press Select. 2 Scroll 🔒 to Auto Hang-up and press — Select. 3 Scroll ⏻ to On or Off and press Select to confirm. \- A validation tone is emitted and the screen returns to the Personal Set menu.7 Advanced settings
7.1 Easy Call
When activated, this feature allows you to dial a preset number by pressing any key on the handset (except 📄) Cancel). This feature is useful for fast access to emergency services.7.1.1 Set Easy Call to On or Off
Follow this procedure to switch Easy Call on. To switch Easy Call off, see the Note at the end of this section. 1 Press menu in idle mode, scroll to Advanced Set and press Select. 2 Easy Call is highlighted. Press Select to enter the Easy Call menu. 3 Mode is highlighted in the display. Press ☐ Select again to select Mode, then scroll ⏻ to On. 4 Press Select to confirm the selection. - If an Easy Call number has not been set, you will be prompted to input the Easy Call number. - If an Easy call number has already been set, the screen returns to idle mode. If you want to edit the number, press Cancel and scroll to Number and press Select, edit the new number and press OK.Note
When you switch Easy Call on, Easy Call On will be displayed on your screen in standby mode. You can still answer any incoming call as normal. To switch Easy Call off from idle mode, press Cancel. Mode is highlighted in the display. Press Select again to select Mode, and then scroll to Off. Press Select to confirm.7.1.2 Set Easy Call number
1 Press menu in idle mode, scroll to Advanced Set and press Select. 2 Easy Call is highlighted in the display. Press ☐ Select to enter the Easy Call menu. 3 Mode is highlighted in the display. Scroll ⏻ to Number and press Select. 4 Input the Easy Call number. 5 Press OK to confirm. \- A validation tone is emitted and the screen returns to the Easy Call menu.7.2 Auto Conference
If activated, this feature allows another handset to join a conversation with an external call by simply pressing 📄. The default setting is Off. 1 Press menu in idle mode, scroll to Advanced Set and press Select. 2 Scroll ⏻ to Conference and press Select. 3 Scroll ⏻ to select On or Off and press ☐ Select to confirm. • A validation tone is emitted and the screen returns to the Advanced Set menu.7.3 Call Barring
If activated, this function prevents dialing out to numbers beginning with designated barring numbers. This is useful for preventing outgoing long distance calls or calls to specific prefixes. You can store up to four numbers, each with up to 4 digits.Note
If you switch call barring on, Call Barr On is displayed on the screen in idle mode. By default call barring is off.7.3.1 Set Call Barring Mode
By default, Call Barring is OFF. 1 Press menu in idle mode, scroll to Advanced Set and press Select. 2 Scroll ⏻ to Call Barring and press — Select. 3 Enter the PIN number. \- If you enter and incorrect PIN number, an error tone will sound and “Wrong PIN!” will be displayed. Then, the display will return to idle screen. 4 Mode is highlighted in the display. Press ☐ Select. 5 Scroll 🔒 to select On or Off and press ☐ Select to confirm. \- If a Call Barring number has not been set, you will be prompted to input a Call Barring number.Note
To switch Call Barring mode off again from idle mode, press Cancel and enter the PIN number. Mode is highlighted in the display. Press Select to select Mode, then scroll to Off and press Select.7.3.2 Set a Call Barring number
1 Press menu in idle mode, scroll to Advanced Set and press Select. 2 Scroll 📁 to Call Barring and press — Select. 3 Enter the PIN number. 4 Mode is highlighted in the display. Scroll ▼ to Number and press 📄 Select. 5 Scroll ⏻ to select a call barring number location, and press 📋 Select to confirm. 6 Input the call barring number (up to 4 digits) and press OK. \- A validation tone is emitted and the screen returns to the Call Barring menu.7.4 XHD Sound
XHD (extra high definition) Sound can increase voice quality when On. The default setting is On. To turn it off: 1 Press menu in idle mode, scroll to Advanced Set and press Select. 2 Scroll 🔒 to XHD Sound and press — Select. 3 Scroll ⏻ to select On or Off and press — Select to confirm. \- A validation tone is emitted and the screen returns to the Advanced Set menu.7.5 Change PIN
The PIN is used for setting call barring numbers and registration/unregistration of handsets. The default PIN number is 0000. This PIN is also used to protect the settings of your handset. Your handset will prompt you whenever the PIN is required.Note
The default PIN code is preset to 0000. If you change this PIN code, keep the PIN details in a safe place where you have easy access to them. Do not lose the PIN code. 1 Press menu in idle mode, scroll to Advanced Set and press Select. 2 Scroll 🔒 to Change PIN and press — Select. 3 Old PIN: will be displayed. Enter the current PIN and press OK. - The PIN entered will be shown as asterisks (\*) on the screen. - If you enter an incorrect PIN number, an error tone will sound and “Wrong PIN!” will be displayed. Then, you will be prompted to enter the current PIN again. 4 New PIN: will be displayed. Enter the new PIN and press OK. 5 Confirm PIN: will be displayed. Enter the new PIN again and press OK to confirm PIN change. • A validation tone is emitted, Saved! is displayed and the screen returns to the Advanced Set menu.\* Tip
If you forget your PIN, you will need to reset your phone to its default settings. For more details, see section 7.9 - "Reset Unit."7.6 Registration
If you wish to register an additional handset or if you have inadvertently unregistered your phone's handset and want to re-register it, follow the procedure described below. This is the procedure for registering SE65 handsets. Procedures may vary for other types of handsets. In this case, please refer to the manufacturer of the handset. Additional handsets must be registered to the base station before you can use them. Up to 5 handsets can be registered to one base station. The PIN is required before you can register or unregister handsets.Note
By default, the PIN is 0000. 1 On the base station, press and hold ⏻ for 3 seconds. A beep sounds to indicate that the base is ready to accept registration.Note
If no action is taken on the handset within 90 seconds, the registration procedure will be aborted. If this happens, repeat from Step 1. 2 On the handset, press menu, scroll to Advanced Set and press Select. 3 Scroll ⏻ to Register and press Select. 4 Enter the PIN when prompted and press ⏚ OK to confirm. Registering... is displayed on the screen. \- Upon successful registration, a validation tone is emitted and the handset number (1 to 5) will be assigned by the base automatically.7.6.1 Easy registration
1 Insert the unregistered handset in the base station to automatically begin registration. 2 Registering... is displayed on the screen. \- Upon successful registration, a validation tone is emitted and the handset number (1 to 5) will be assigned by the base automatically. Note
The easy registration is possible only when PIN has not been changed and is still the default PIN 0000.7.7 Unregister
1 Press menu in idle mode, scroll to Advanced Set and press Select. 2 Scroll to Unregister and press Select. 3 Enter the PIN when prompted and press ☐ OK to confirm. 4 Scroll ⏻ to select the handset number to unregister and press ☐ Select. Press ☐ OK to confirm. \- A validation tone is emitted to indicate successful unregistration. Note
You can only use a SE650/655 handset to unregister a handset that does not belong to the SE650/655 range.7.8 Country Selection
The availability of this menu is dependent on your country. You can select another country different from the one chosen during theWelcome Mode.
Note
Once the country is selected, the default line settings for the selected country will be applied to the phone automatically (e.g. Recall time, Dial mode, Language, etc). 1 Press menu in idle mode, scroll to Advanced Set and press Select. 2 Scroll ⬆ to Country and press Select. 3 Scroll ⏻ to the country of your choice and press OK. \- A validation tone is emitted and the screen returns to standby mode.7.9 Reset Unit
You can reset your phone to its default settings with this feature. (see 7.14 "Default Settings") Warning
Upon reset, all your personal settings, call log and redial list entries will be deleted and the phone will return to its default settings. However, your phonebook will remain unchanged after reset. Note
You may have to configure your phone once again. In this case the welcome mode will appear again after master reset. (See section 3.4.) 1 Press menu in idle mode, scroll to Advanced Set and press Select. 2 Scroll ⏻ to Reset and press Select. 3 Reset? is displayed on the screen. Press ☐ OK to confirm. • A validation tone is emitted. - The unit is reset to its default settings. (See section 7.14 below.)7.10 Set Auto Prefix
This feature allows you to define a prefix number to be added to the beginning of a number during predialling (see "Predialling" - section 4.1.1). You may also use this feature to add a detect string to match and replace the first few digits of the number during predialing. You can enter up to a maximum of 5 digits for the detect string and 10 digits for the auto prefix number. 1 Press menu in idle mode, scroll to Advanced Set and press Select. 2 Scroll ⏻ to Auto Prefix and press Select. 3 Detect Digit: is displayed on the screen. Enter a detect string number (maximum 5 digits) and press OK to confirm. 4 Prefix: is displayed on the screen. Enter the prefix number (maximum 10 digits) and press OK to confirm. \- A validation tone is emitted and the screen returns to the Advanced Set menu.Note
If no detect string (blank) is entered, the prefix number will be automatically added to the predial number after 📄 is pressed. For numbers starting with \*, # or P, the prefix number will not be added to the predial number after 📄 is pressed.7.11 Change Recall time
Recall time is the time delay by which the line will be disconnected after you press the 📄 key. It can be set to short or long. The default value of recall time that is preset in your handset should be the best suited for your country network and therefore you should not need to change it. 1 Press menu in idle mode, scroll to Advanced Set, and press Select. 2 Scroll 🔒 to Recall Time. and press — Select. 3 Scroll 🔒 to Short or Long and press — Select to confirm. \- A validation tone is emitted and the screen returns to the Advanced Set menu.Note
The use of your SE655 cannot be guaranteed on all PABX.7.12 Change the Dial Mode (country-dependent)
The default value for dial mode that is preset in your handset should be the best suited for your country network and therefore you should not need to change it. 1 Press menu in idle mode, scroll to Advanced Set, and press Select. 2 Scroll ⏻ to Dial Mode and press Select. 3 Scroll ⏻ to Tone or Pulse and press — Select to confirm. \- A validation tone is emitted and the screen returns to the Advanced Set menu.7.13 Set First Ring Detection
First ring detection allows the phone to ring upon reception of the first ring signal. It is recommended that you set first ring detection Off if you subscribe to caller line identification service. (When using personalized phonebook melodies, this will prevent a normal ring tone from sounding before a melody starts playing.) If you do not subscribe to caller line identification service, it is recommended that you set first ring detection On. (See Section 5.6.4.) 1 Press menu in idle mode, scroll to Advanced Set, and press Select. 2 Scroll ⏻ to First Ring and press Select. 3 Scroll ⏻ to On or Off and press Select to confirm. \- A validation tone is emitted and the screen returns to the Advanced Set menu.Note
The default setting for first ring detection is country dependent. In countries where the default setting is On, the setting automatically switches to Off when you receive a call containing caller line identification. However, this occurs only if you do not first manually change the setting. (It does not change automatically if you manually change the first ring setting even once.) 7.14 Default Settings| Parameter | Default Value |
| Ring Volume | Level 3 |
| Ring Tone Ring | 1 |
| EarpieceVolume | Level 3 |
| SpeakerVolume | Level 3 |
| Key Beep On | |
| DisplayLanguage | Country groupdependent |
| Wallpaper Wallpaper | 1 |
| ColorTheme | Color 1 |
| DisplayContrast | Level 3 |
| BacklightTime | 20 Seconds |
| Auto Hang-Up | On |
| HandsetName | Philips |
| Time/Date Format | Country dependent |
| Time/Date 00: | 00 01/01/2008 |
| Set Alarm Off | |
| Alarm Tone Bell 2 | |
| Dial Mode Country group dependent | |
| Recall Time Country group dependent | |
| PIN Code 0000 | |
| Call Barring Off | |
| Call Barring Number | Cleared |
| XHD Sound On | |
| Easy Call Off | |
| Easy Call Number | Cleared |
| Auto Prefix | Cleared |
| Set First Ring | Country group dependent |
| Phonebook Memory | After a reset, phonebook is maintained as it was just before the reset |
| Redial Memory | Cleared |
| CLI Memory | Cleared |
| Network Service | Country group dependent |
| Auto Conference | Off |
8 Network Services
The network service functions provide a convenient way for you to access some network provider services. Subscriptions are required in order to benefit from these services. Contact your network provider for details. Depending on your network operator and the country where you live, some of the services and menus described in this chapter may not be available in your SE655.Note
The Call Forward, Call Forward when Busy, and Call Forward when Unanswered functions require activation codes (prefix and suffix) and a deactivation code. You must get these codes from your service provider.8.1 Call Forward
You can use Call Forward to forward incoming calls to another number. This can be useful if you want calls to go to another number overnight or when traveling. You can activate or deactivate Call Forward as follows: 1 Press menu in idle mode, scroll to Netw. Services, and press Select. 2 Scroll ⏻ to Call Forward and press — Select. 3 To activate Call Forward, scroll to Activate and press Select. To deactivate Call Forward, scroll to Deactivate and press ☐ Select. 4 If you selected Activate, you will be prompted to enter the number for call forward. Enter the number (maximum 24 digits) and press OK. 5 The Call forward codes and the number are dialed. Press exit and return to idle mode.8.1.1 Change Call Forward Activation Codes
There are two parts to the Call Forward activation code - a prefix and a suffix. 1 Press menu in idle mode, scroll to Netw. Services, and press Select. 2 Scroll 📋 to Call Forward and press — Select. 3 Scroll 🔒 to Change Code and press — Select. 4 Scroll ⏻ to Activation and press Select. 5 You are now at the Activation screen. Scroll 🔒 to Prefix or Suffix, then press 📋 Select. 6 You will be prompted to enter the prefix/suffix code. Enter the number (maximum 14 digits) and press OK. \- A confirmation tone will sound and the display will return to the Activation screen.Note
Press 📄 Clear to delete entered numbers. Long press 📄 Clear to clear the entire entry. 7 Repeat from step 5 until you are finished inputting both the prefix and suffix codes.8.1.2 Change Call Forward Deactivation Code
You must get the deactivation code from your service provider. 1 Press menu in idle mode, scroll to Netw. Services, and press Select. 2 Scroll ⏻ to Call Forward and press — Select. 3 Scroll ⏻ to Change Code and press — Select. 4 Scroll ⚠️ to Deactivation and press — Select. 5 Enter the deactivation code (maximum 14 digits) and press OK. \- A confirmation tone will sound and the display will return to the Call Forward screen.Note
Press 📄 Clear to delete entered numbers. Long press 📄 Clear to clear the entire entry.8.2 Call Forward when Busy
This function will forward incoming calls to another number if the line is busy. You can activate or deactivate Call Forward when Busy as follows: 1 Press menu in idle mode, scroll to Netw. Services, and press Select. 2 Scroll 📋 to Call Fwd Busy and press — Select. 3 To activate Call Fwd Busy, scroll to Activate and press Select. To deactivate Call Fwd Busy, scroll to Deactivate and press Select. 4 If you selected Activate, you will be prompted to enter the number for call forward when busy. Enter the number (maximum 24 digits) and press OK. 5 The Call forward when busy codes and the number are dialed. Press exit and return to idle mode.8.2.1 Change Call Forward when Busy Activation Codes
There are two parts to the Call Forward when Busy activation code - a prefix and a suffix. 1 Press menu in idle mode, scroll to Netw. Services, and press Select. 2 Scroll 📁 to Call Fwd Busy and press — Select. 3 Scroll ⏻ to Change Code and press — Select. 4 Scroll ⏻ to Activation and press Select. 5 You are now at the Activation screen. Scroll 📁 to Prefix or Suffix, then press ☐ Select. 6 You will be prompted to enter the prefix/suffix code. Enter the number (maximum 14 digits) and press OK. \- A confirmation tone will sound and the display will return to the Activation screen.Note
Press 📄 Clear to delete entered numbers. Long press 📄 Clear to clear the entire entry. 7 Repeat from step 5 until you are finished inputting both the prefix and suffix codes.8.2.2 Change Call Forward when Busy Deactivation Code
1 Press menu in idle mode, scroll to Netw. Services, and press Select. 2 Scroll 🔒 to Call Fwd Busy and press — Select. 3 Scroll ⏻ to Change Code and press — Select. 4 Scroll ⏻ to Deactivation and press — Select. 5 Enter the deactivation code (maximum 14 digits) and press OK. \- A confirmation tone will sound and the display will return to the Call Fwd Busy screen.Note
Press 📄 Clear to delete entered numbers. Long press 📄 Clear to clear the entire entry.8.3 Call Forward when Unanswered
This function will forward unanswered calls to another number. You can activate or deactivate Call Forward when Unanswered as follows: 1 Press menu in idle mode, scroll to Netw. Services, and press Select. 2 Scroll 📁 to Call Fwd Unans and press — Select. 3 To activate Call Fwd Unans, scroll to Activate and press Select. To deactivate Call Fwd Unans, scroll to Deactivate and press Select. 4 If you selected Activate, you will be prompted to enter the number for call forward when unanswered. Enter the number (maximum 24 digits) and press OK. 5 The Call forward when unanswered codes and the number are dialed. Press 📄 and return to idle mode.8.3.1 Change Call Forward when Unanswered Activation Codes
There are two parts to the Call Forward when Unanswered activation code - a prefix and a suffix. 1 Press menu in idle mode, scroll to Netw. Services, and press Select. 2 Scroll 🤿 to Call Fwd Unans and press — Select. 3 Scroll 📤 to Change Code and press — Select. 4 Scroll ⏻ to Activation and press Select. 5 You are now at the Activation screen. Scroll 🔒 to Prefix or Suffix, then press 📋 Select. 6 You will be prompted to enter the prefix/suffix code. Enter the number (maximum 14 digits) and press OK. \- A confirmation tone will sound and the display will return to the Activation screen.Note
Press 📄 Clear to delete entered numbers. Long press 📄 Clear to clear the entire entry. 7 Repeat from step 5 until you are finished inputting both the prefix and suffix codes.8.3.2 Change Call Forward when Unanswered Deactivation Code
1 Press menu in idle mode, scroll to Netw. Services, and press Select. 2 Scroll 🔊 to Call Fwd Unans and press — Select. 3 Scroll ⏻ to Change Code and press — Select. 4 Scroll ⏻ to Deactivation and press — Select. 5 Enter the deactivation code (maximum 14 digits) and press OK. \- A confirmation tone will sound and the display will return to the Call Fwd Unans screen. Note
Press ☐ Clear to delete entered numbers. Long press ☐ Clear to clear the entire entry.8.4 Voice Mail
Use this function to access your voice mail account.8.4.1 Access Voice Mail
1 Press menu in idle mode, scroll to Netw. Services, and press Select. 2 Scroll ⬆ to Voicemail and press Select. 3 You are now at the Voicemail menu and Call is highlighted. Press Select to connect to the voice mail account number.8.4.2 Set Voice Mail Number
1 Press menu in idle mode, scroll to Netw. Services, and press Select. 2 Scroll 🔒 to Voicemail and press Select. 3 Scroll ⏻ to Settings and press Select. 4 Enter the voice mail account number (maximum 14 digits) and press OK. - A confirmation tone will sound and the display will return to the Voicemail screen.8.5 Voice Mail 2
Use this function to access an alternate voice mail account. Access and setting procedure is same as for Voice Mail.8.6 Information Service
Use this function to access your information service account.8.6.1 Access Info Service
1 Press menu in idle mode, scroll to Netw. Services, and press Select. 2 Scroll ⏻ to Info and press Select. 3 You are now at the Info menu and Call is highlighted. Press Select to connect to the information service account number.8.6.2 Set Info Service Number
1 Press menu in idle mode, scroll to Netw. Services, and press Select. 2 Scroll ⏻ to Info and press Select. 3 Scroll 🔒 to Settings and press Select. 4 Enter the information service account number (maximum 14 digits) and press OK. • A confirmation tone will sound and the display will return to the Info screen.8.7 Information Service 2
Use this function to access a second information service account. Access and setting procedure is same as for Info Service.8.8 Call Return
This function allows you to get information on who called you last.8.8.1 Access the Call Return Service
1 Press menu in idle mode, scroll to Netw. Services, and press Select. 2 Scroll ⏻ to Call Return and press Select. 3 You are now at the Call Return menu and Call is highlighted. Press Select to connect to the call return account number.8.8.2 Set Call Return Service Number
1 Press menu in idle mode, scroll to Netw. Services, and press Select. 2 Scroll 🔒 to Call Return and press Select. 3 Scroll ⏻ to Settings and press Select. 4 Enter the call return service number (maximum 14 digits) and press OK. \- A confirmation tone will sound and the display will return to the Call Return screen.8.9 Cancel Call Back
When calling a busy line, some operators prompt you to press a key to activate a call back option. By activating the call back option, you will receive a call from the network as soon as your correspondent's line is free. When responding to this call, the network will automatically connect you to that correspondent. Your answering machine will not answer to this call and your call log will not record this call either. The Cancel call back feature enables you to deactivate the call back feature when you have activated it.8.9.1 Call the Cancel Call Back Number
1 Press menu in idle mode, scroll to Netw. Services, and press Select. 2 Scroll ⏻ to Cancel Call BK and press ▼ Select. 3 You are now at the Cancel Call BK menu and Call is highlighted. Press ☐ Select to connect to the Cancel Call Back number.8.9.2 Set the Cancel Call Back Number
Get the cancel call back number from your service provider. 1 Press menu in idle mode, scroll to Netw. Services, and press Select. 2 Scroll 🔒 to Cancel Call BK and press — Select. 3 Scroll 🔒 to Settings and press Select. 4 Enter the cancel call back number (maximum 14 digits) and press OK. - A confirmation tone will sound and the display will return to the Cancel Call BK screen.8.10 Withhold ID
Use this function to make a call without sending your ID.8.10.1 Activating Withhold ID
1 Press menu in idle mode, scroll to Netw. Services, and press Select. 2 Scroll Ⓜ to Withhold ID and press — Select. 3 You are now at the Withhold ID menu and Activate is highlighted. Press ☐ Select to activate the withhold ID function.8.10.2 Set the Withhold ID Code
When withhold ID is active (see above), this code is appended before the number you dial to tell the handset to withhold ID information. Get this code from your service provider. 1 Press menu in idle mode, scroll to Netw. Services, and press Select. 2 Scroll ⏻ to Withhold ID and press — Select. 3 Scroll ⏻ to Settings and press Select. 4 Enter the withhold ID code and press OK. - A confirmation tone will sound and the display will return to the Withhold ID screen.9 S h o r t M Service (SMS)
SMS stands for Short Message Service. To benefit from this service, you must subscribe to Caller Line Identification Service (CLI) together with SMS service from your network provider. SMS messages can be exchanged with a phone (mobile or compatible fixed lines), provided the receiver has also subscribed to CLI and SMS services. The factory settings on your handset correspond to the main national operator. If you wish to send or receive SMS messages through another service provider, you must set the corresponding numbers (see section 9.4.2). Your handset can store up to 50 SMS messages and the maximum length of each message is 160 characters. Note
See 5.3 text or number entry for characters usable with Short Message Service.9.1 Write and Send an SMS
1 Press menu in idle mode, scroll 🔒 to SMS, and press — Select. 2 Write SMS will be selected in the display. Press ☐ Select. 3 The Write SMS screen will display. Enter your message (maximum 160 characters) and press OK. 4 The display will show Send to:, prompting you to enter the number that you want to send the message to. 5 You can input the number directly. Or Press ☐ Menu and then ☐ Select to open the phonebook. Scroll Ⓜ to the phonebook contact you want and press 📋 Select. Note
Press ☐ Clear to delete entered numbers. Long press ☐ Clear to clear the entire entry and go to the phonebook to select another number. 6 Press OK. \- At this point you may be requested to enter a box number. (This is country dependent) If so, enter the box number and press OK. (See the note below). 7 At this point you have the options to send the message or save it as a draft. To send the message: Press Select. To save a draft: Scroll down ▼ to Save as Draft and press 📄 Select. \- If the message is successfully sent, “SMS Sent!” will display and then the handset will return to the idle mode. - If the message is not sent, “SMS not Sent!” will display. The message will be saved as a draft and then the handset will return to the idle mode. Note
The purpose of the destination box number is to make sure that the SMS will be well received on the destination phone. It is country dependent. If not needed for your country, the product won't ask for the destination box number when sending an SMS. The default box number is programmable (country dependent) and you can change it in the SMS settings menu under “SMS” → “Settings” → “SMS Reception” → “Change Box Nr”.9.2 Inbox
The Inbox is where you read your SMS messages. A submenu allows you to Reply messages, Forward messages, Save Numbers of messages, Delete messages, and Delete all messages.9.2.1 Read SMS Messages (Check Inbox)
1 Press menu in idle mode, scroll to SMS, and press Select. 2 Scroll 📋 to Inbox and press Select to open the SMS inbox. 3 Scroll ⏻ to scroll through the messages. \- If a message is from the number of someone in your phonebook, the phonebook information will be displayed. 4 Press View to open an SMS message. - When you have finished reading a message, press 📄 Back to return to the SMS inbox.Note
If the inbox is empty, "No Message" will display for 2 seconds and the handset will return to idle mode.9.2.2 Reply to an SMS Message
1 Open an SMS message. (See 9.2.1 above.) 2 Press ☐ Option to open the inbox submenu. Reply is highlighted; press ☐ Select. 3 The Write SMS screen will display. Enter your message. The procedure then is similar to the normal procedure for writing an SMS message. (See 9.1 above.)9.2.3 Forward an SMS Message
1 Open an SMS message. (See 9.2.1 above.) 2 Press ☐ Option to open the inbox submenu, then scroll 🔒 to Forward and press ☐ Select. 3 The Write SMS screen will display with the message you are forwarding already input. You can modify the message at this time. 4 When you are finished editing the message press OK. 5 The display will show Send to:, prompting you to enter the number that you want to send the message to. The procedure then is similar to the normal procedure for writing an SMS message. (See 9.1 above.)9.2.4 Save the Number of an SMS Message
This saves the SMS sender's number in your phonebook. 1 Open an SMS message. (See 9.2.1 above.) 2 Press ☐ Option to open the inbox submenu, then scroll 🔊 to Save Number and press ☐ Select. 3 Enter Name is displayed. Enter the name of the contact (maximum 14 characters) and press OK. 4 Enter Number is displayed. The number of the message you received is already input. You can edit it before saving. Press OK when you are finished. \- Saved! is displayed for 2 seconds and the display returns to the SMS inbox.9.2.5 Delete an SMS Message
1 Open an SMS message. (See 9.2.1 above.) 2 Press ☐ Option to open the inbox submenu, then scroll 🔒 to Delete and press ☐ Select. 3 Delete? is displayed. Press OK to delete the message. (Press Back to return to the SMS submenu.) \- Deleted! is displayed for 2 seconds and the display returns to the SMS inbox.9.2.6 Delete all SMS Messages
1 Open an SMS message. (See 9.2.1 above.) 2 Press ☐ Option to open the inbox submenu, then scroll 🔒 to Delete All and press ☐ Select. 3 Delete All? is displayed. Press OK to delete all your SMS messages. (Press Back to return to the SMS submenu.) \- Waiting... is displayed for a moment then Deleted! is displayed briefly, and the display returns to the SMS menu.9.3 Drafts
The drafts box is where you can keep SMS messages.9.3.1 Open a Draft
1 Press menu in idle mode, scroll 🔒 to SMS, and press 📋 Select. 2 Scroll ⏻ to Drafts and press Select to open the drafts box. 3 Scroll ⏻ through the draft messages. \- If a message is from the number of someone in your phonebook, the phonebook information will be displayed. 4 Press View to open an SMS message. \- When you have finished, press - Back to return to the drafts box.Note
If the drafts box is empty, "No Message" will display for 2 seconds and the handset will return to idle mode.9.3.2 Send a Draft
1 Open a draft message. (See 9.3.1 above.) 2 Press ☐ Option to open the drafts submenu. Send is highlighted; press ☐ Select. 3 The display will show Send to:, prompting you to enter the number that you want to send the message to. The procedure then is similar to the normal procedure for sending an SMS message. (See 9.1 above.)9.3.3 Edit a Draft
1 Open a draft message. (See 9.3.1 above.) 2 Press ☐ Option to open the drafts submenu, then scroll ⏻ to Edit and press ☐ Select. 3 The Write SMS screen will display with the draft message ready to edit. 4 When you are finished editing the message press ☐ OK. The procedure then is similar to the normal procedure for sending an SMS message. (See 9.1 above.)9.3.4 Delete a Draft
1 Open a draft message. (See 9.3.1 above.) 2 Press ☐ Option to open the drafts submenu, then scroll ⏻ to Delete and press ☐ Select. 3 Delete? is displayed. Press OK to delete the message. (Press Back to return to the drafts submenu.) \- Deleted! is displayed for 2 seconds and the display returns to the SMS inbox.9.3.5 Delete all Drafts
1 Open a draft message. (See 9.3.1 above.) 2 Press ☐ Option to open the drafts submenu, then scroll 🔒 to Delete All and press ☐ Select. 3 Delete All? is displayed. Press OK to delete all draft messages. (Press Back to return to the drafts submenu.) \- Waiting... is displayed for a moment then Deleted! is displayed briefly, and the display returns to the SMS menu.9.4 Settings
9.4.1 SMS Reception
Use this menu to turn SMS reception ON (the default) or OFF. Also use it to change the SMS box number (country dependent).9.4.1.1 Turn SMS Reception ON/OFF
1 Press menu in idle mode, scroll 🔒 to SMS, and press 7 Select. 2 Scroll Ⓐ to Settings and press ☐ Select; press ☐ Select again to open the SMS Reception menu. 3 Scroll 🔒 to select On or Off and press — Select. \- A confirmation tone will sound and the display will return to the SMS Settings menu.9.4.1.2 Change the SMS Box Number (Country dependent)
1 Follow steps 1 and 2 above. Then, scroll 🔒 to Change Box Nr and press ☑ Select. 2 Edit the box number and press OK. \- A confirmation tone will sound and the display will return to the SMS Settings menu.9.4.2 SMS Centre
Use this menu to set the incoming and outgoing numbers for up to three SMS centres. 1 Press menu in idle mode, scroll to SMS, and press Select. 2 Scroll 🔒 to Settings and press ☐ Select. Scroll 🔒 to SMS Centre and ☐ Select. 3 Scroll Ⓜ to select SMS Centre 1, SMS Centre 2, or SMS Centre 3 and press ☐ Select. 4 Scroll 🔒 to select Outgoing Nr or Incoming Nr and press Select. 5 Input the number and press OK. \- A confirmation tone will sound and the display will return to the previous screen so you can input the other number. \- When you have finished inputting both outgoing and incoming numbers, press 📄 Back to return to the SMS Centre menu.9.4.3 Default Centre
Use this menu to select the default SMS center. 1 Press menu in idle mode, scroll to SMS, and press Select. 2 Scroll 🔒 to Settings and press → Select. Scroll 🔒 to Default Centre and → Select. 3 Scroll ⏻ to select SMS Centre 1, SMS Centre 2, or SMS Centre 3 and press ☐ Select. \- A confirmation tone will sound and the display will return to the SMS Settings menu.10 Telephone
answering machine (TAM)
Your phone features an answering machine that records unanswered calls when it is activated. The answering machine can store up to 59 messages. The maximum recording time is 3 minutes per message, or 30 minutes for all messages. The maximum length of an outgoing message is 1 minute. You can use the control keys on the base station to perform the basic functions of the answering machine such as message playback, deleting messages and adjustment of volume on the base station. For a description of each function of the control keys on the base station, please see “Overview of the base station” (section 2.4) for more details. You can also use the answering machine menu on the handset to access the answering machine functions. Those procedures are covered below. There is also a menu to set the answering machine options. The telephone answering machine is ON by default. To switch the answering machine between on and off, press on your base station. Alternatively, you may switch the answering machine on and off via your handset (see section 10.6.2).10.1 Playing Messages
10.1.1 Playback of messages via handset
The answering machine message counter blinks when there are new messages and display the number of new messages. The first recorded message is played first via the loudspeaker. When all new messages have been played, the answering machine will stop and the message counter will stop blinking. 1 Press the menu key in idle mode, scroll to Answer Machine, and press Select. 2 Play is highlighted. Press Select to start playing new messages. \- The handset displays New and the number of new messages in the format 01/04, where 01 is the number of the message being played and 04 is the number of new messages. \- If there are no new messages, the handset displays the number of old messages in the same format (however 'New' is not displayed.) and plays the old messages.10.1.2 Functions available during playback
During playback, you can enable the following functions by pressing ☐ Menu. Use ⏻ to scroll between the functions and press ☐ Select to confirm.| Repeat Replay | the current message |
| Next Listen to | the next message. |
| Previous Listen | to the previous message. |
| Delete Delete | the message currently playing. |
10.2 Delete all messages
Warning
Deleted messages cannot be recovered. Note
Unplayed messages will not be deleted. 1 Press the menu key in idle mode, scroll 🔒 to Answer Machine, and press — Select. 2 Scroll 🔒 to Delete All and press Select. 3 Delete All? is displayed on the screen. Press OK to confirm deletion of all your messages. \- Waiting... is displayed while the messages are deleted; then, Deleted is displayed for 2 seconds, and the display returns to the Answer Machine menu.10.3 Turn the Answering Machine On/Off
You can turn the answering machine on or off from the handset as follows. 1 Press the menu key in idle mode, scroll to Answer Machine, and press Select. 2 Scroll 📤 to Answer On/Off and press — Select. 3 Scroll 🔒 to select On or Off and press ▼ Select. - A validation tone is emitted and the screen returns to Answer Machine menu.10.4 Play, Record, or Delete an Outgoing Message
You can record a personalized message to be played when the answering machine picks up an incoming call. Note
The maximum length of an outgoing message is 1 minute. 1 Press the menu key in idle mode, scroll to Answer Machine, and press Select. 2 Scroll ⏻ to Record OGM and press — Select. 3 Scroll ⏻ to select Answer & Rec. or Answer Only and press 📋 Select. 4 Scroll 📂 to select Play, Record Message, or Delete and press Select. - If Play is selected, the current outgoing message is played. - If Record Message is selected, a beep sounds and the handset starts automatically recording a message. - If Delete is selected and a personal outgoing message was previously recorded, Deleted is displayed. The predefined OGM is reinstated automatically.10.5 Set the Answer mode
There are 2 answer modes available: Answer Only and Answer & Record. By default, the answer mode is Answer & Record, which lets your caller leave a message on the answering machine. This can be changed to Answer Only mode, which does not allow your caller to leave any messages on the answering machine. 1 Press the menu key in idle mode, scroll to Answer Machine, and press Select. 2 Scroll ⏻ to Answer Mode and press — Select. 3 Scroll 🔒 to select Answer & Rec. or Answer Only and press 📋 Select. \- A validation tone is emitted and the screen returns to Answer Machine menu. Note
Depending on the answer mode you have selected, the appropriate default outgoing message is played once the answering machine picks up an incoming call. Tip
You can set the answering machine to play a personalized outgoing message. See 10.4 above.10.6 Answering Machine Settings
10.6.1 Ring Delay
This is the number of rings before the answering machine answers and starts playing your greeting message. You can set the answering machine to start playing your greeting message after 3 to 8 rings or the “Economy” option. The default ring delay is Economy. 1 Press the menu key in idle mode, scroll to Answer Machine, and press Select. 2 Scroll ⏻ to Settings and press Select. 3 Ring Delay is highlighted. Press Select, then scroll 🔒 to select from 3 to 8 or Economy. 4 Press Select to confirm. \- A validation tone is emitted and the display returns to the Settings menu. Note
If Economy is selected, the ring delay depends on the answering machine's condition. - If there are new messages in the answering machine, it will pick up the line after 2 rings. - If there are no new messages in the answering machine, it will pick up the line after 4 rings. \- Hence, if you want to check if you have any messages without incurring call charges, you can hang up the call after the 3rd ring.10.6.2 Remote Access
You can check the messages on your answering machine by calling in from an outside line and entering the remote access code\*. The keypad on the phone you use to dial in acts like the functions on your answering machine. Note
This feature is deactivated by default. \* The remote access code (which is the same as your PIN code) prevents any unauthorised remote access of your answering machine.10.6.2.1 Activate/Deactivate Remote Access
1 Press the menu key in idle mode, scroll to Answer Machine, and press Select. 2 Scroll ⏻ to Settings and press Select. Then, scroll ⏻ to Remote Access and press Select. 3 Scroll ⏻ to select Activate or Deactivate and press ☐ Select. • A validation tone is emitted and the screen returns to Settings menu.10.6.2.2 Controlling the Answering Machine from an external call
1 From your external phone, dial home. \- The answering machine answers and starts playing your greeting message. 2 Press # key and enter the remote access code (same as your PIN code). \- If the access code is incorrect, an error tone will be emitted. Then enter the PIN code again. If the PIN code is still incorrect, the answering machine will drop the line immediately. \- If there remote correct, a short validation tone will be heard.Note
Operation is cancelled if the PIN code is not entered within 8 seconds. If the answering machine is off, the phone will enter into the remote access mode after 10 rings. A beep will then sound, prompting you to enter the PIN code. Enter the PIN (default is 0000) to activate the remote access feature. You can then turn ON the answering machine and play the recorded messages. The following table indicates how to access the functions of the answering machine using the telephone keypad.| Key | Action |
| 1 Go to previous message. | |
| 2 Play the message. | |
| 3 Skip to the next message. | |
| Key | Action |
| 6 Delete the playing message. | |
| 7 Turn on the answering machine. | |
| 8 Stop message playback. | |
| 9 Turn off the answering machine. | |
10.6.3 Handset Screening
When Handset call screening is set to On, you can press 📄 Screen to start call screening for incoming messages. If you decide to pick up the call, press 📃. Once you pick up, the recording will stop automatically.Note
If you have multiple handsets, only one handset can enable handset to all screening for each call. 1 Press the menu key in idle mode, scroll to Answer Machine, and press Select. 2 Scroll ⏻ to Settings and press ─ Select. Then, scroll ⏻ to HS Screening and press ┌ Select. 3 Scroll ⏻ to select On or Off and press — Select. \- A validation tone is emitted and the screen returns to Settings menu.10.6.4 Setting the Outgoing Message Language
The language of the default outgoing messages corresponds to the country selected. However you can change the language of the default outgoing messages as follows. 1 Press the menu key in idle mode, scroll 🔒 to Answer Machine, and press — Select. 2 Scroll ⏻ to Settings and press Select. Then, scroll ⏻ to Voice Language and press Select. 3 Scroll ⏻ to select the language and press □ Select. - A validation tone is emitted and the screen returns to Settings menu.11 Technical data
Display
• Color LCD with backlight - Selectable wallpaper - Selectable colour themeGeneral telephone features
- Caller name & number identification - 5 standard + 10 polyphonic ringer melodies - Wideband synthesis for receiver and loudspeakerPhonebook list, Redial list and Call log
• Phonebook list with 200 entries • Redial list with 10 entries - Call log with 50 entriesBattery
\- 2 × AAA, 600mAh batteriesRadio specifications
• Frequency Band: 1880 - 1900Mhz • Maximum output power: 250mWWeight and dimensions
Base: • 189.5 grams - 77mm × 115mm × 131mm (H × D × W) Handset: • 128.5 grams - 162mm × 31.5mm × 48mm (H × D × W)Temperature range
• Operation: Between 0 and 35°C (32 to 95°F). - Storage: Between -20 and 70°C (-4 to 158°F).Relative humidity
• Operation: Up to 95% at 40°C • Storage: Up to 95% at 40°C12 Frequently asked questions
www.philips.com/support In this chapter, you will find the most frequently asked questions and answers about your phone.12.1 Connection
The handset does not switch on!
- Charge the batteries: Put the handset on the base station to charge. After a few moments, the phone will switch on. - You may have accidentally switched off the handset. In this case, press and hold 📄 for at least 1 second to switch it on again (see section 5.1 - "Switch the handset off/on").The handset does not charge!
\- Check charger connections.icon is not blinking during charge!
- Battery is full: There is no need to charge the battery. - Bad battery contact: Adjust the handset slightly. - Dirty contact: Clean the batteries contact with a cloth moistened with alcohol.Communication is lost during a call!
- Charge the battery - Move closer to the base station.The phone is "Out of range"!
\- Move closer to the base station.12.2 Set-up
Searching... is displayed on handset and icon is blinking!
\- Move closer to the base station. - Make sure that your base station is on. - Reset your unit and restart handset registration.12.3 Sound
Handset does not ring!
Check that the Ring Volume is not set to no bars (Ringer Off), and make sure the icon is not displayed on the screen (see section 6.2.1 - "Set the Ring Volume").Caller does not hear me!
Microphone may be muted: During a call, press 🖱️.There's no dialling tone!
- No power: Check the connections. - Batteries are empty: Charge the batteries. - Move closer to the base station. - Wrong line cable used: Use the line cable provided. - Line adaptor is required: Connect the line adaptor to the line cord.Caller does not hear me clearly!
- Move closer to the base station. - Move the base station at least one metre away from any electronic appliances.Frequent noise interference on my radio or television!
\- Move the base station as far away as possible from the electrical appliances.12.4 Product behaviour
Keypad does not work!
\- Unlock your keypad: Long press in idle mode.The handset warms up when making a long call and when it is on the base station!
\- This is a normal behavior. The handset consumes energy while calling and charging.The handset cannot be registered to the base station!
• Maximum number of handsets (5) has been reached. To register a new handset, unregister an existing handset. - Remove and replace the handset batteries. - Try again by disconnecting and connecting the base station power supply and follow the procedure to register a handset (see section 7.6).Caller number is not displayed!
\- Service is not activated: Check your subscription with your network operator.I cannot change the settings of my voice mail!
\- Operator voice mail is managed by your operator and not the phone itself. Please contact your operator should you want to change the settings.My handset keeps going into idle mode!
\- If there are no key presses for 30 seconds, the handset will automatically return to idle mode. It will also return to idle mode automatically when you place the handset back on the base station (if auto hang-up feature is on).Phonebook entry cannot be stored and Memory Full is displayed!
\- Delete an entry to free memory before saving your contact again.The PIN code is wrong!
• The default PIN is 0000. - Reset the handset to revert to the default PIN code if it has been changed before (see “Reset Unit” - Section 7.9).The answering machine does not record calls.
- Make sure the answering machine is connected to the power adaptor, and the power adaptor is plugged into mains supply which is switched on. - Check if the answer machine is off, or Answer only mode is selected. - Check to see if the answering machine is memory full. If so, delete some or all messages. - Try switching off the power at the mains socket, and then turn it on again after 1 minute.Unable to perform remote operation
- Make sure the remote access is on (see Section 10.6.2). - Make sure you entered the correct remote access code. - Use a touch-tone phone. Note
If the above solutions do not help, remove the power from both the handset and the base. Wait for 1 minute and try again.Cannot receive new SMS
- Check if SMS storage space is full, and delete old SMS. - Make sure that your SMS settings are correct (see Section 9.4). - In order to use SMS, you must subscribe to both SMS and Caller Line Identification (CLI) service. Contact your provider for more information.Cannot send or receive new SMS
- Make sure that your SMS settings are correct (see Section 9.4). - In order to use SMS, you must subscribe to both SMS and Caller Line Identification (CLI) service. Contact your provider for more information. - Check whether another SMS-enabled phone is also on your line. If so, deactivate SMS reception on one of the devices. - There may be a problem of compatibility between operators. Contact your provider for more information. \- Check whether your identity is withheld. If so, deactivate Withhold ID (see Section 8.10).13 INDEX
A
Access Info Service 50 Access phonebook 28 Access Redial list 31 Access the Call log 32 Access the Call Return Service 51 Activate/Deactivate loudspeaker mode 28 Activate/Deactivate Remote Access 60 Activating Withhold ID 52 Adjust earpiece or speaker volume 27 Advanced settings 39 Advanced Settings menu tree 21 Answer a call 26 Answer an external call during intercom 34 Answer Machine menu tree 24 Answering Machine Settings 60 Auto Conference 40 Auto hang-up 39 Auto Prefix 44B
Backlight timing 39 Base station 13 Batteries 15C
Call Barring 40 Call Forward 46 Call Forward when Busy 47 Call Forward when Unanswered 48 Call from redial list 25 Call from the call log 25 Call from the phonebook 25 Call Return 51 Call the Cancel Call Back Number 51 Call using Direct Access Memory 26 Cancel Call Back 51 Change Call Forward Activation Codes 47 Change Call Forward Deactivation Code 47 Change Call Forward when Busy Activation Codes 48 Change Call Forward when Busy Deactivation Code 48 Change Call Forward when Unanswered Activation Codes 49 Change Call Forward when Unanswered Deactivation Code 49 Change PIN 41 Change Recall time 44 Change the Dial Mode 45 Change the Display Language 38 Change the Handset Name 37 Change the SMS Box Number 56 Charge battery 16 Clock and Alarm menu tree 20 Clock and Alarm settings 35 Color themes 38 Connect the base station 14 Contrast 38 Country Selection 43D
Deactivate/Activate Auto Hang-Up 39 Default Centre 57 Default PIN code 41 Default settings 45 Delete a call list entry 33 Delete a Draft 56 Delete a phonebook entry 30 Delete a redial number 32 Delete all call list entries 33 Delete all Drafts 56 Delete all messages 58 Delete all phonebook entries 30 Delete all redial numbers 32 Delete all SMS Messages 55 Delete an SMS Message 55 Delete Direct Access Memory 31 Dial mode 45 Direct Access Memory 30 Direct dialling 25 Display icons and Messages 11 Display languages 38 Drafts 55E
Easy Call 39 Edit a Draft 55 End a call 26 Establish a three-party conference call 34F
Forward an SMS Message 54 Frequently asked questions 62 Functions available during playback 58G
Getting started 14H
Handset name 37 Handset Screening 61 Handset Tones 37 Handsfree answering 26I
Inbox 53 Information Service 1 50 Install battery 15 Install your phone 15 Intercom 34K
Key Beep 38 Keypad lock/unlock 27M
Make a call 25 Menu structure 18 Modify a phonebook entry 29 Mute/Unmute microphone 27N
Network Services 46 Network Services menu tree 22O
Open a Draft 55 Overview of the base station 13 Overview of your phone 9P
Paging 35 Personal settings 37 Personal Settings menu tree 19 Personalized message 59 Phonebook menu tree 18 PIN 41 Play, Record, or Delete an Outgoing Message 59 Playback of messages via handset 58 Playing Messages 58 Power requirements 5 Predialling 25R
Read SMS Messages 54 Recall time 44 Registration 42 Remote Access 60 Reply to an SMS Message 54 Reset Unit 43 Ring Delay 60 Ring tones 37 Ring Volume 37s
Save a redial number 31 Save call list entry 33 Save the Number of an SMS Message 54 Select phonebook melody 29 Select the Color Theme 38 Select the Display Wallpaper 38 Send a Draft 55 Set a Call Barring number 41 Set Alarm 36 Set Alarm Tone 36 Set Auto Prefix 44 Set Call Barring Mode 40 Set Call Return Service Number 51 Set Date and Time 35 Set Date Format 36 Set Easy Call number 40 Set Easy Call to On or Off 39 Set First Ring Detection 45 Set Info Service Number 50 Set the Answer mode 59 Set the Backlight Time 39 Set the Cancel Call Back Number 51 Set the Display Contrast 38 Set the Ring Tones 37 Set the Ring Volume 37 Set the Withhold ID Code 52 Set Time Format 35 Set Voice Mail Number 50 Setting the Outgoing Message Language 61 Short Message Service 52 SMS 52 SMS box number 56 SMS Centre 57 SMS Drafts 55 SMS Inbox 53 SMS menu tree 23 SMS Reception 56 SMS Settings 56 Store a contact in the phonebook 28 Switch between an internal and external call 34 Switch the handset off/on 27T
Technical data 62 Telephone answering machine 57 Text or number entry 27 The call log 32 Transfer an external call 34 Turn the Answering Machine On/Off 59U
Unregister 43 Using the Call log 32 Using the Intercom 33 Using the Redial list 31 Using your phone 25 Using your Phonebook 28V
Voice Mail 50W
Wallpaper images 38 Welcome mode 16 What's in the box 8 Withhold ID 52 Write and Send an SMS 53  XHD Sound 41  Your phone 8 UCZZ01937AZ(1)  ©2008 Koninklijke Philips Electronics N.V. All rights reserved Reproduction in whole or in part is prohibited without the written consent of the copyright owner Document order number: 3111 285 47011 (GB)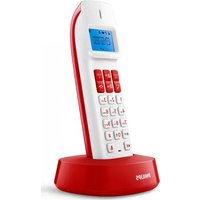
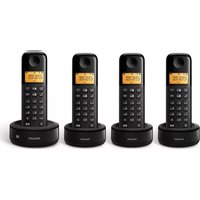
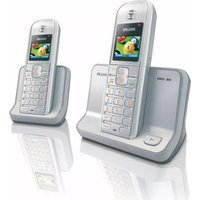
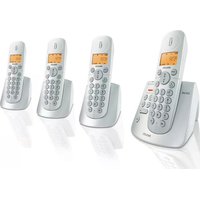

- Register your product and get support at www.philips.com/welcome
- Warning
- Table of contents
- l m p
- Your phone 8
- G e t
- Using your phone 25
- Make a call 25
- U s e your phone 27
- Personal settings 37
- Advanced settings 39
- Network Services 46
- Call Forward when Unanswered 48
- Voice Mail 50
- Voice Mail 2 50
- Information Service 2 51
- Call Return 51
- Cancel Call Back 51
- Withhold ID 52
- Short Message Service (SMS) 52
- Telephone answering machine (TAM) 57
- Frequently asked questions 62
- INDEX 66
- l m p o r
- Power requirements
- Conformity
- Using GAP standard compliance
- Recycling and disposal
- Electric, Magnetic and Electromagnetic Fields (“EMF”)
- Your phone
- What's in the box
- AAA rechargeable batteries
- Note
- Overview of your phone
- A E v e n t L E D
- B E a r p i e c e
- C D i s p l a y
- D Select key
- E B a c k / C l e a r
- F Navigation keys
- G Talk key
- H Hang-up key exit
- L Number keys
- P Call transfer key & Intercom key int
- Q Microphone
- R Loudspeaker
- Display icons and Messages
- Overview of the base station
- A P a g i n g k e y
- B S p e a k e r
- C Message counter
- D O n / O f f k e y
- E V o l u m e k e
- F•Delete key x
- G Previous key
- H Next key
- I Play/Stop key
- Getting started
- Connect the base station
- Wall mounting the base
- Install your phone
- Install battery
- Charge battery
- Tip
- Welcome mode
- Using multipacks
- Menu structure
- Phonebook
- Advanced Settings
- Using your phone
- Make a call
- Predialling
- Direct dialling
- Call from redial list
- Call from the call log
- Call from the phonebook
- Call from the phonebook while already on the phone
- Call using Direct Access Memory
- Enter a Dialing Pause
- Answer a call
- Danger
- Handsfree answering
- End a call
- Use more of your phone
- Switch the handset off/on
- Keypad lock/unlock
- Text or number entry
- \* Tip
- Call in progress
- Adjust earpiece or speaker volume
- Mute/Unmute microphone
- Activate/Deactivate loudspeaker mode
- Chain dialing
- Using your Phonebook
- Store a contact in the phonebook
- Access phonebook
- Modify a phonebook entry
- Select phonebook melody
- Delete a phonebook entry
- Delete all phonebook entries
- Direct Access Memory
- Add/Edit Direct Access Memory
- Delete Direct Access Memory
- Using the Redial list
- Access Redial list
- View redial number details
- Save a redial number into the phonebook
- Delete a redial number
- Delete all redial numbers
- Call waiting
- OR
- Using the Call log
- Access the Call log
- Save call list entry into the phonebook
- Delete a call list entry
- Delete all call list entries
- Using the Intercom
- Intercom another handset
- Transfer an external call to another handset
- Answer an external call during intercom
- Switch between an internal and external call
- Establish a three-party conference call
- Paging
- Clock and Alarm settings
- Set Date and Time
- Set Time and Date Format
- Set Time Format
- Set Date Format
- Set Alarm
- Set Alarm Tone
- Personal settings
- Change the Handset Name
- Handset Tones
- Set the Ring Volume
- Set the Ring Tones
- Activate/Deactivate Key Beep
- Change the Display Language
- Select the Display Wallpaper
- Select the Color Theme
- Set the Display Contrast
- Set the Backlight Time
- Deactivate/Activate Auto Hang-Up
- Advanced settings
- Easy Call
- Set Easy Call to On or Off
- Set Easy Call number
- Auto Conference
- Call Barring
- Set Call Barring Mode
- Set a Call Barring number
- XHD Sound
- Change PIN
- Registration
- Easy registration
- Unregister
- Country Selection
- Welcome Mode.
- Reset Unit
- Set Auto Prefix
- Change Recall time
- Change the Dial Mode (country-dependent)
- Set First Ring Detection
- Network Services
- Call Forward
- Change Call Forward Activation Codes
- Change Call Forward Deactivation Code
- Call Forward when Busy
- Change Call Forward when Busy Activation Codes
- Change Call Forward when Busy Deactivation Code
- Call Forward when Unanswered
- Change Call Forward when Unanswered Activation Codes
- Change Call Forward when Unanswered Deactivation Code
- Voice Mail
- Access Voice Mail
- Set Voice Mail Number
- Voice Mail 2
- Information Service
- Access Info Service
- Set Info Service Number
- Information Service 2
- Call Return
- Access the Call Return Service
- Set Call Return Service Number
- Cancel Call Back
- Call the Cancel Call Back Number
- Set the Cancel Call Back Number
- Withhold ID
- Activating Withhold ID
- Set the Withhold ID Code
- S h o r t M Service (SMS)
- Write and Send an SMS
- Inbox
- Read SMS Messages (Check Inbox)
- Reply to an SMS Message
- Forward an SMS Message
- Save the Number of an SMS Message
- Delete an SMS Message
- Delete all SMS Messages
- Drafts
- Open a Draft
- Send a Draft
- Edit a Draft
- Delete a Draft
- Delete all Drafts
- Settings
- SMS Reception
- Turn SMS Reception ON/OFF
- Change the SMS Box Number (Country dependent)
- SMS Centre
- Default Centre
- Telephone
- answering machine (TAM)
- Playing Messages
- Playback of messages via handset
- Functions available during playback
- Delete all messages
- Turn the Answering Machine On/Off
- Play, Record, or Delete an Outgoing Message
- Set the Answer mode
- Answering Machine Settings
- Ring Delay
- Remote Access
- Activate/Deactivate Remote Access
- Controlling the Answering Machine from an external call
- Handset Screening
- Setting the Outgoing Message Language
- Technical data
- Display
- General telephone features
- Phonebook list, Redial list and Call log
- Battery
- Radio specifications
- Weight and dimensions
- Temperature range
- Relative humidity
- Frequently asked questions
- Connection
- The handset does not switch on!
- The handset does not charge!
- icon is not blinking during charge!
- Communication is lost during a call!
- The phone is "Out of range"!
- Set-up
- Searching... is displayed on handset and icon is blinking!
- Sound
- Handset does not ring!
- Caller does not hear me!
- There's no dialling tone!
- Caller does not hear me clearly!
- Frequent noise interference on my radio or television!
- Product behaviour
- Keypad does not work!
- The handset warms up when making a long call and when it is on the base station!
- The handset cannot be registered to the base station!
- Caller number is not displayed!
- I cannot change the settings of my voice mail!
- My handset keeps going into idle mode!
- Phonebook entry cannot be stored and Memory Full is displayed!
- The PIN code is wrong!
- The answering machine does not record calls.
- Unable to perform remote operation
- Cannot receive new SMS
- Cannot send or receive new SMS
- INDEX
- A
- B
- C
- D
- E
- F
- G
- H
- I
- K
- M
- N
- O
- P
- R
- s
- T
- U
- V
- W
Brand : PHILIPS
Model : SE6553B
Category : Simulator