MFAI 250 - Coffee maker Meireles - Free user manual and instructions
Find the device manual for free MFAI 250 Meireles in PDF.

User questions about MFAI 250 Meireles
0 question about this device. Answer the ones you know or ask your own.
Ask a new question about this device
Download the instructions for your Coffee maker in PDF format for free! Find your manual MFAI 250 - Meireles and take your electronic device back in hand. On this page are published all the documents necessary for the use of your device. MFAI 250 by Meireles.
USER MANUAL MFAI 250 Meireles
natural_image
Simple line drawing of a rectangular box with a vertical line on top (no text or symbols)Índice
ANTES DE UTILIZAR EL APARATO....2
natural_image
Illustration of three hands performing a welding or cutting process with a tool, showing different angles and motion (no text or symbols)
natural_image
Symbol of a trash bin crossed with no text or labels, representing waste sorting or disposal (no text present)
natural_image
Cartoon illustration of an electric plug with a sad face and plug, emitting exhaust smoke (no text or symbols)natural_image
Cartoon illustration of a distressed container with arms and a sad face, holding a box labeled 'KG' (no text or symbols beyond the label)natural_image
Simple line drawing of a hand holding a smiling emoji-shaped object (no text or symbols)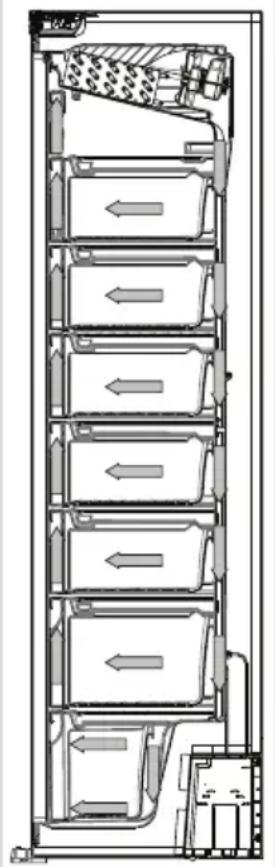
natural_image
Technical line drawing of a multi-level industrial or storage unit with directional arrows indicating flow or movement (no text or symbols present)text_image
Technical diagram of an oven with labeled components and a numbered inset showing part 6
text_image
8 7natural_image
Simple line drawing of a window with two circular windows and red arrows indicating airflow or motion (no text or symbols)Nota:
natural_image
Cartoon illustration of a smiling refrigerator with thumbs up and a mortar, next to a bowl of food (no text or symbols)natural_image
Simple line drawing of a hand holding a smiling face inside a square (no text or symbols)
natural_image
Simple line drawing of a hand holding a small object near a container (no text or symbols)
natural_image
Cartoon illustration of a smiling refrigerator with a cup beside it (no text or symbols)
natural_image
Simple line drawing of a refrigerator with a red X mark on the door (no text or symbols)
natural_image
Cartoon illustration of a smiling rectangular character with arms and legs, accompanied by two small figures (no text or symbols)

natural_image
Simple line drawing of two children holding a large rectangular object (no text or symbols)natural_image
Line drawing of a rectangular device with two vertical sensors above it, labeled Figura D (no text or symbols on the device itself)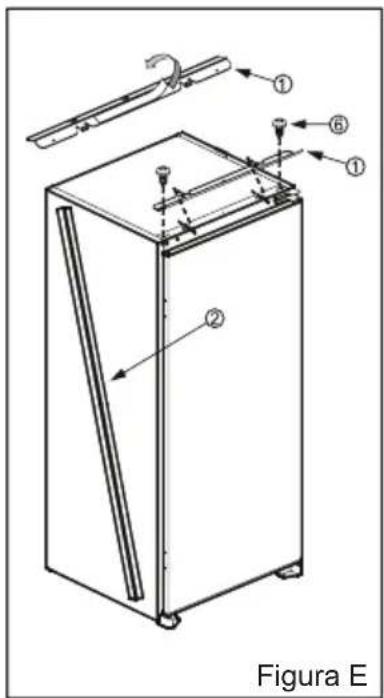
text_image
① ② ⑥ ① Figura E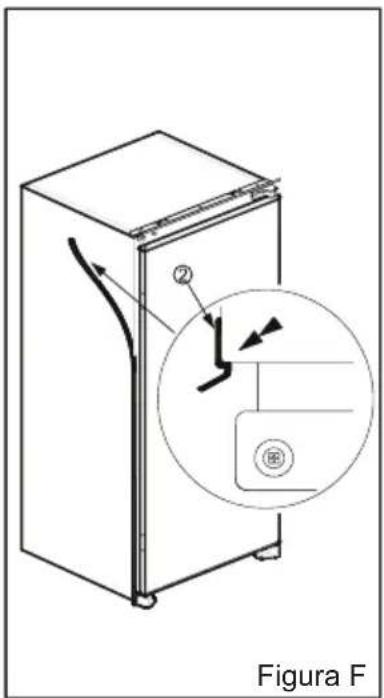
text_image
Figura Ftext_image
Technical diagram of a refrigerator with labeled parts and an inset close-up showing internal components.Figure G

natural_image
Pure architectural line drawing of a roof structure with hanging fixtures and arrows indicating direction (no text or symbols)Figure H1

text_image
Technical diagram of a cabinet with numbered components and close-up insets showing internal components and assembly.Figure II

text_image
14 Figure J
text_image
Figure K 17 15 a 16 c 18 b 14natural_image
Symbol of a trash bin crossed with no text or labels
natural_image
Simple line drawing of an electric plug with a smiling face and plug, emitting exhaust smoke (no text or symbols)
natural_image
Cartoon illustration of a character with arms and legs emerging from a door (no text or symbols)
natural_image
Simple line drawing of a hand holding a smiling face, a crossed-out nozzle, and a square with a smile (no text or symbols)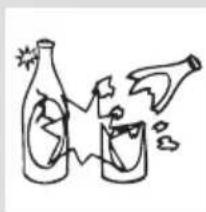
natural_image
Simple line drawing of two bottles and a container with an arrow pointing to it (no text or symbols)
natural_image
Illustration showing three different techniques for connecting wires, with no text or symbols present.natural_image
Cartoon illustration of a sad, anthropomorphic container with arms and legs, showing distress (no text or symbols)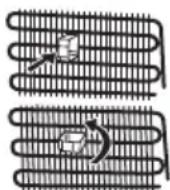

natural_image
Simple line drawing of a hand holding a smiling square emoji (no text or symbols)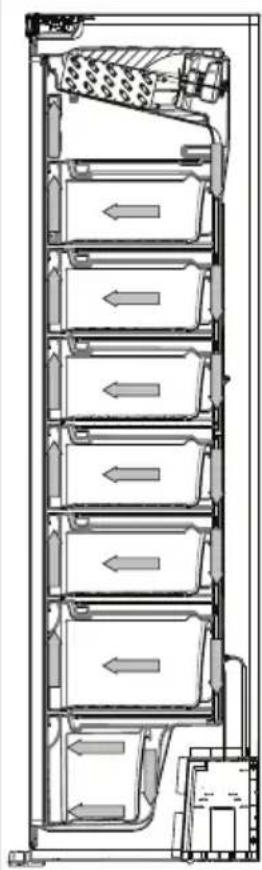
natural_image
Technical line drawing of a multi-level storage or processing unit with directional arrows indicating flow or movement (no text or symbols present)natural_image
Line drawing of a container being poured into a grid-patterned tray (no text or symbols)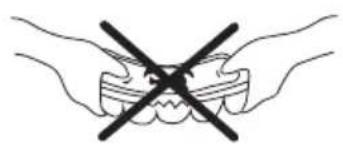
natural_image
Illustration of two hands holding a tooth with a black X symbol indicating a crossed-out or incorrect condition (no text or symbols present)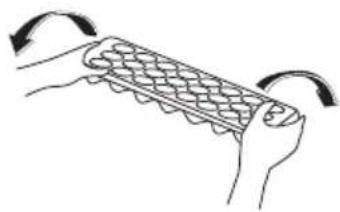
natural_image
Illustration of hands holding a grid-like object with curved arrows indicating rotation (no text or symbols)natural_image
Simple line drawing of a room with two circular windows and red arrows indicating airflow or movement (no text or symbols)Nota:
natural_image
Pure technical diagram of a mechanical component with two circular ports and directional arrows indicating motion (no text or symbols)natural_image
Cartoon illustration of a smiling refrigerator with sunglasses and a bowl of food (no text or symbols)natural_image
Simple line drawing of a hand holding a smiling emoji inside a rounded square (no text or symbols)
natural_image
Simple line drawing of a hand using a tool to clean or store items (no text or symbols)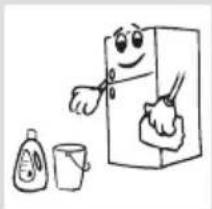
natural_image
Cartoon illustration of a smiling refrigerator with cleaning tools nearby (no text or symbols)
natural_image
Simple line drawing of a refrigerator with a red X symbol crossed out (no text or symbols present)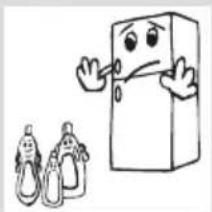
natural_image
Cartoon illustration of a smiling rectangular character with arms and facial expression, next to two baby dolls (no text or symbols)

natural_image
Technical line drawing of a mechanical assembly with grid and bracket components (no text or symbols)natural_image
Simple line drawing of two children holding a large rectangular object (no text or symbols)natural_image
Line drawing of a rectangular device with two vertical sensors above it, labeled Figura D (no text or symbols on the device itself)
text_image
① ⑥ ① ② Figura E
text_image
Figura F

text_image
Figure 1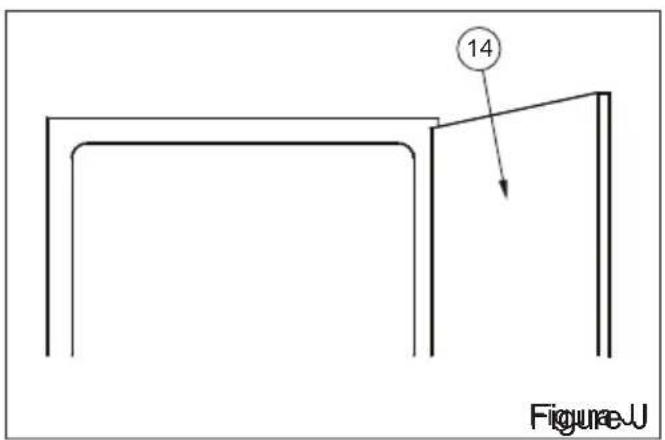
text_image
14 Figure J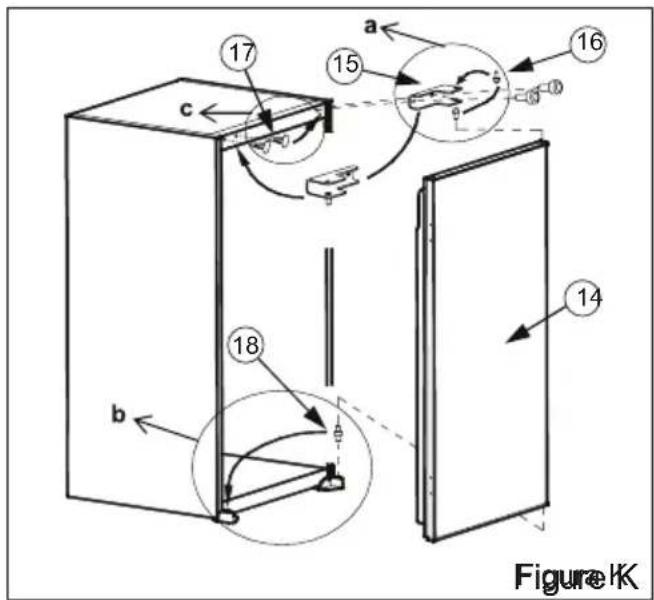
text_image
Figure 1K 17 15 a 16 c 18 b 14Inversão da porta
Installing and operating your freezer 53
Before using your freezer 54
Information on No-Frost technology 55
THE PARTS OF THE APPLIANCE AND THE COMPARTMENTS ....56
USAGE INFORMATION......57
Control panel 57
Freezer partition temperature setting button....57
Alarm light....57
Super freezer mode 57
Freezer temperature settings....58
Warnings about temperature adjustments....58
Accessories 59
Making ice cubes 59
ARRANGING FOOD IN THE APPLIANCE......60
CLEANING AND MAINTENANCE....62
Defrosting 62
Replacing the LED strip....63
SHIPMENT AND REPOSITIONING 64
BEFORE CALLING YOUR AFTER SALES SERVICE...65
Tips for saving energy 66
INSTALLATION INSTRUCTIONS AND DOOR REVERSIBILITY....67
Installation instructions 67
Door reversing 70
General warnings
WARNING: Keep ventilation openings, in the appliance enclosure or in the built-in structure, clear of obstruction.
WARNING: Do not use mechanical devices or other means to accelerate the defrosting process, other than those recommended by the manufacturer.
WARNING: Do not use electrical appliances inside the food storage compartments of the appliance, unless they are of the type recommended by the manufacturer.
WARNING: Do not damage the refrigerant circuit.
WARNING: In order to avoid any hazards resulting from the instability of the appliance, it must be fixed in accordance with the following instructions:
- If your appliance uses R600a as a refrigerant (this information will be provided on the label of the cooler) you should take care during transportation and installation to prevent the cooler elements from being damaged. R600a is an environmentally friendly and natural gas, but it is explosive. In the event of a leak due to damage of the cooler elements, move your freezer away from open flames or heat sources and ventilate the room where the appliance is located for a few minutes.
- While carrying and positioning the freezer, do not damage the cooler gas circuit.
- Do not store explosive substances such as aerosol cans with a flammable propellant in this appliance.
- This appliance is intended to be used in household and domestic applications such as:
- staff kitchen areas in shops, offices and other working environments.
- farm houses and by clients in hotels, motels and other residential type environments.
- bed and breakfast type environments;
-
catering and similar non-retail applications.
-
If the socket does not match the freezer plug, it must be replaced by the manufacturer, a service agent or similarly qualified persons in order to avoid a hazard.
- A specially grounded plug has been connected to the power cable of your freezer. This plug should be used with a specially grounded socket of 16 amperes. If there is no such socket in your house, please have one installed by an authorised electrician.
- This appliance can be used by children aged from 8 years and above and persons with reduced physical, sensory or mental capabilities or lack of experience and knowledge if they have been given supervision or instruction concerning use of the appliance in a safe way and understand the hazards involved. Children shall not play with the appliance. Cleaning and user maintenance shall not be made by children without supervision.
- If the supply cord is damaged, it must be replaced by the manufacturer, an authorised service agent or similar qualified persons, in order to avoid a hazard.
- This appliance is not intended for use at altitudes exceeding 2000 m.

natural_image
Symbol of a trash bin with crossed lines indicating no waste or discharge (no text or labels)Old and out-of-order fridges or freezers
- If your old fridge or freezer has a lock, break or remove the lock before discarding it, because children may get trapped inside it and may cause an accident. - Old fridges and freezers may contain isolation material and refrigerant with CFC or HFC. Therefore, take care not to harm environment when you are discarding your old fridges or freezers.
Please ask your municipal authority about the disposal of the WEEE reuse, recycle and recovery purposes.
Notes:
- Please read the instruction manual carefully before installing and using your appliance. We are not responsible for the damage occurred due to misuse.
- Follow all instructions on your appliance and instruction manual, and keep this manual in a safe place to resolve the problems that may occur in the future.
- This appliance is produced to be used in homes and it can only be used in domestic environments and for the specified purposes. It is not suitable for commercial or common use. Such use will cause the guarantee of the appliance to be cancelled and our company will not be responsible for losses incurred.
- This appliance is produced to be used in houses and it is only suitable for cooling / storing food. It is not suitable for commercial or common use and/or for storing substances except for food. Our company is not responsible for losses to be incurred in the contrary case.
natural_image
Cartoon illustration of an angry plug with a lightning bolt, no text or symbols presentSafety warnings
- Do not connect your Freezer to the mains electricity supply using an extension lead.
- Do not plug in damaged, torn or old plugs.
- Do not pull, bend or damage the cord.
natural_image
Cartoon illustration of a character peeking out of a door (no text or symbols)
natural_image
Illustration of three hands holding wires, showing different techniques for connecting or disconnection (no text or symbols present)
- This appliance is designed for use by adults, do not allow children to play with the appliance or let them hang off the door.
-
Never touch the power cord/plug with wet hands as this could cause a short circuit or electric shock.
-
Do not place glass bottles or beverage cans in the ice-making compartment as they can burst as the contents freeze.
- Do not place explosive or flammable material in your freezer. Place drinks with high alcohol content vertically in the freezer compartment and make sure that their tops are tightly closed.
- When removing ice from the ice-making compartment, do not touch it. Ice may cause frost burns and/or cuts.
- Do not touch frozen goods with wet hands! Do not eat ice-cream and ice cubes immediately after you have taken them out of the freezer!
- Do not touch frozen goods with wet hands. Do not eat ice-cream or ice cubes immediately after you have taken them out of the ice-making compartment.
- Do not cover the body or top of freezer with lace. This affects the performance of your freezer.
- Secure any accessories in the freezer during transportation to prevent damage to the accessories.
Installing and operating your freezer
Before starting to use your freezer, you should pay attention to the following points:
- The operating voltage for your freezer is 220-240 V at 50Hz.
- The plug must be accessible after installation.
- Your freezer may have a smell when it is operated for the first time. This is normal and the smell will fade away when your freezer starts to cool.
- Before connecting your freezer, ensure that the information on the data plate (voltage and connected load) matches that of the mains electricity supply. If in doubt, consult a qualified electrician.
- Insert the plug into a socket with an efficient ground connection. If the socket has no ground contact or the plug does not match, we recommend that you consult a qualified electrician for assistance.
- The appliance must be connected with a properly installed fused socket. Power supply (AC) and voltage at the operating point must match with the details on the name plate of the appliance (name plate is located on the inside left of the appliance).
- We do not accept responsibility for any damages that occur due to ungrounded usage.
- Place your freezer where it will not be exposed to direct sunlight.
- Your freezer should never be used outdoors or exposed to rain.
- Your appliance should be at least 50 cm away from stoves, gas


BEFORE USING THE APPLIANCE
natural_image
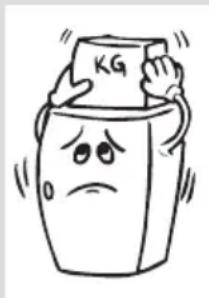
Cartoon illustration of a sad, anthropomorphic container with arms and legs, holding a box labeled 'KG' (no text or symbols beyond label)
natural_image
Diagram of a coiled structure with two parallel strips and a small circular component inside, no text or symbols present.
natural_image
Simple line drawing of a hand holding a smiling emoji-shaped object (no text or symbols)ovens and heater cores, and at least 5 cm away from electrical ovens.
- When your freezer is placed next to a deep freezer, there should be at least 2 cm between them to prevent humidity forming on the outer surface.
- Do not place heavy items on the appliance.
- Clean the appliance thoroughly, especially the interior, before use (see Cleaning and Maintenance).
- The installation procedure into the kitchen unit is given in the Installation Manual. This product is intended to be used in proper kitchen units only.
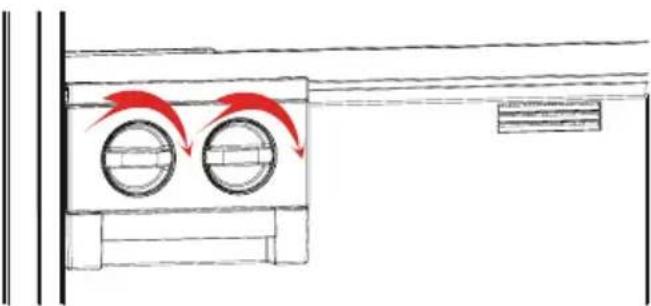
- Use the adjustable front legs to make sure your appliance is level and stable. You can adjust the legs by turning them in either direction. This should be done before placing food in the freezer.
- Before using your freezer, wipe all parts with a solution of warm water and a teaspoon of sodium bicarbonate, then rinse with clean water and dry. Place all parts in the freezer after cleaning.
- Install the plastic distance guide (the part with black vanes at the rear) by turning it 90° (as shown in the figure) to prevent the condenser from touching the wall.
- The freezer should be placed against a wall with a free space not exceeding 75 mm.
Before using your freezer
- When using your freezer for the first time, or after transportation, keep it in an upright position for at least 3 hours before plugging into the mains. This allows efficient operation and prevents damage to the compressor.
- Your freezer may have a smell when it is operated for the first time. This is normal and the smell will fade away when your freezer starts to cool.
Information on No-Frost technology
No-frost freezers differ from other static freezers in their operating principle.
In normal freezers, the humidity entering the freezer due to opening the door and the humidity inherent in the food causes freezing in the freezer compartment. To defrost the frost and ice in the freezer compartment, you are periodically required to turn off the freezer, place the food that needs to be kept frozen in a separately cooled container and remove the ice gathered in the freezer compartment.
The situation is completely different in no-frost freezers. Dry and cold air is blown into the fridge and freezer compartments homogeneously and evenly from several points via a blower fan. Cold air dispersed homogeneously and evenly between the shelves cools all of your food equally and uniformly, thus preventing humidity and freezing.
Therefore your no-frost freezer allows you ease of use, in addition to its huge capacity and stylish appearance.
natural_image
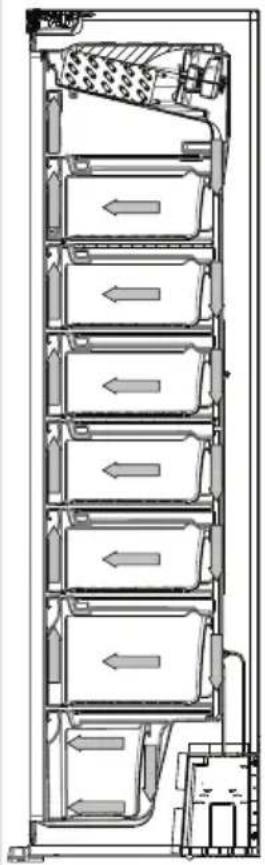
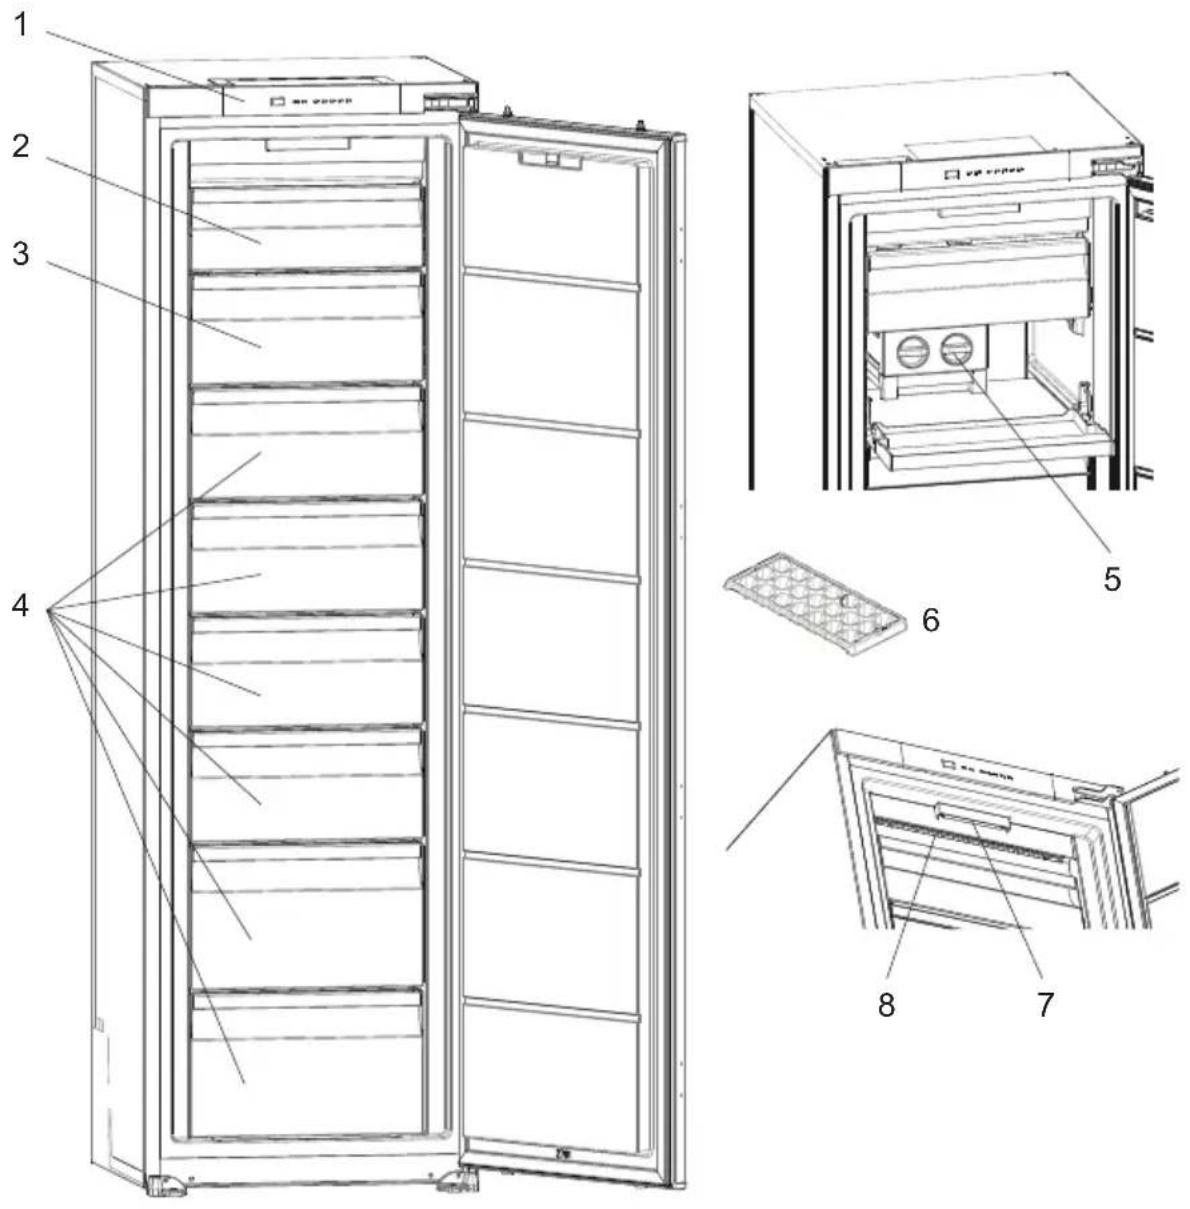
Cross-sectional diagram of a multi-level industrial or storage unit with internal compartments and piping (no text or labels)THE PARTS OF THE APPLIANCE AND THE COMPARTMENTS
This presentation is only for information about the parts of the appliance. Parts may vary according to the appliance model.
- Control panel
- Freezer upper room cover
- Freezer compartment drawers / freezer room cover *
- Freezer compartment drawers
- Ice matic *
- Ice tray *
- Freezer LED strip *
- No Frost air circulation system
Control panel
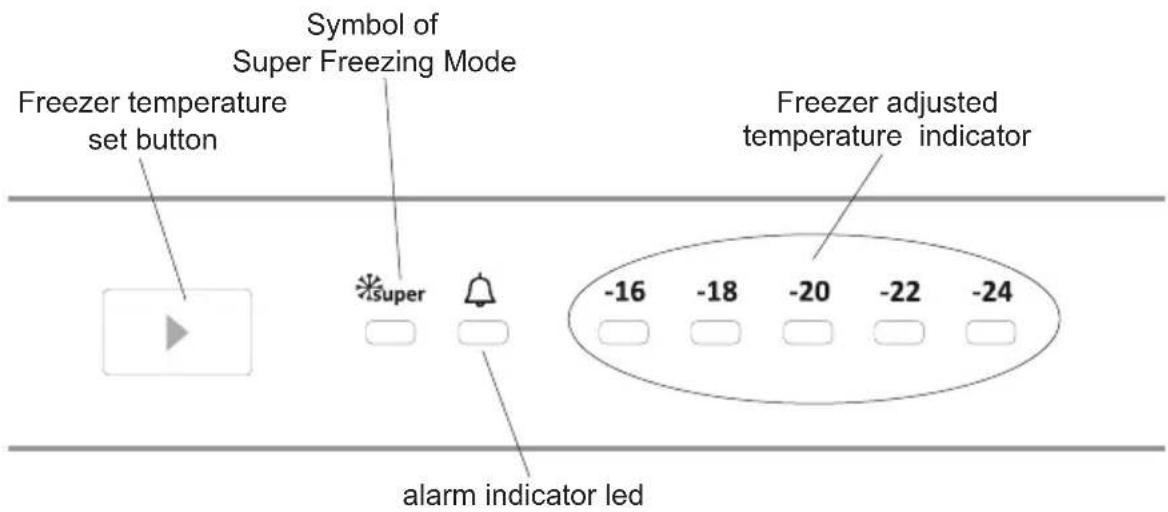
text_image
Freezer temperature set button Symbol of Super Freezing Mode super Freezer adjusted temperature indicator -16 -18 -20 -22 -24 alarm indicator ledFreezer partition temperature setting button
This button allows setting temperature of the freezer. In order to set values for freezer partition, press this button. Use this button also to activate SF mode.
Alarm light
In case of a problem within the freezer, the alarm led will release red light
Super freezer mode
When would it be used?
• To freeze huge quantities of food.
• To freeze fast food.
• To freeze food quickly.
• To store seasonal food for a long time.
How to use?
- Press temperature set button until super freezing light comes on.
• Super freezing led will light during this mode. - Maximum amount of fresh food (in kilograms) to be frozen within 24 hours is shown on the appliance label.
- For optimal appliance performance in maximum freezer capacity, set the appliance to active SF mode 24 hours before you put the fresh food into the freezer.
During this mode:
If you press temperature set button, the mode will be cancelled and the setting will be restored from -16.
Note: "Super Freezer" mode will be automatically cancelled after 24 hours or when freezer sensor temperature drops beneath -32^ .
Freezer temperature settings
- The initial temperature of the Setting Display is -18^ .
- Press freezer setting button once.
- Every time you press the button, the setting temperature will decrease. (-16°C, -18°C, -20°C,... super freezing)
- If you press freezer setting button until super freezer symbol is displayed on Freezer
Settings Display and you do not press any button within the following 3 seconds, Super Freezing will blink.
- If you keep on pressing, it will restart from last value.
Warnings about temperature adjustments
- Your temperature adjustments will not be deleted when an energy breakdown occurs.
- Do not pass to another adjustment before completing an adjustment
- Temperature adjustments should be made according to the frequency of door openings, the quantity of food kept inside the freezer and ambient temperature of the place of your freezer.
- Your freezer should be operated up to 24 hours according to the ambient temperature without interruption after being plugged in to be completely cooled.
- Do not open doors of your freezer frequently and do not place much food inside it in this period.
- A 5 minute delaying function is applied to prevent damage to the compressor of your freezer, when you take the plug off and then plug it on again to operate it or when an energy breakdown occurs. Your freezer will start to operate normally after 5 minutes.
- Your freezer is designed to operate in the ambient temperature intervals stated in the standards, according to the climate class stated in the information label. We do not recommend operating your freezer out of stated temperatures value limits in terms of cooling effectiveness.
- This appliance is designed for use at an ambient temperature within the 10°C - 43°C range.
| Climate class | Abbient temperature ( °C) |
| T Between 16 and 43 ( °C) | |
| ST Between 16 and 38 ( °C) | |
| N Between 16 and 32 ( °C) | |
| SN Between 10 and 32 ( °C) | |
Accessories
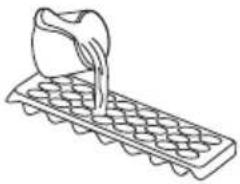
Making ice cubes
Ice tray (In some models)
- Fill the ice tray with water and place in the freezer compartment.
• After the water has completely turned into ice, you can twist the tray as shown below to remove the ice cubes.
natural_image
Line drawing of a container pouring liquid into a grid-patterned tray (no text or symbols)
natural_image
Illustration of two hands crossed out of a tooth with a black X symbol (no text or labels)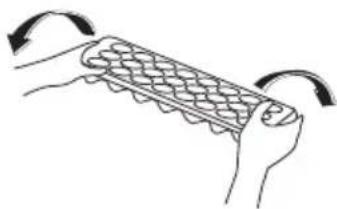
natural_image
Illustration of hands holding a grid-like object with curved arrows indicating rotation (no text or symbols)Icematic (In some models)
• Take out the ice making tray
• Fill the water to the line.
- Place the ice making tray in its original position
- When ice cubes are formed, twist the lever to drop ice cubes into the icebox.
natural_image
Diagram showing airflow around two circular chambers with red arrows indicating direction (no text or symbols)Note:
- Do not fill the icebox with water to make ice. This may damage it.
- The movement of the ice maker may be difficult while the freezer is running. In such a case it should be cleaned by removing the glass shelves.
Removing the Ice maker
- Remove the freezer glass shelves
- Remove the icemaker by pulling left or right on the shelf.

natural_image
Simple line drawing of a device with two circular ports and directional arrows indicating flow or movement (no text or symbols)You can remove the icemaker to increase the available volume in the freezer compartment.
Visual and text descriptions on the accessories section may vary according to the model of your appliance.
ARRANGING FOOD IN THE APPLIANCE
- Use your freezer to keep frozen food for a long time and to produce ice.
- Do not place food you want to freeze next to frozen food.
- You should freeze your food (meat, minced meat, fish etc) in portions that allow consuming in a time.
- Do not put fresh and warm food with frozen food side by side as it can thaw the frozen food.
- While freezing fresh food (i.e. meat, fish and mincemeat) divide them in parts in order to use in one time.
- For storing the frozen food; the instructions shown on frozen food packages should always be followed carefully and if no information is provided, food should not be stored for more than 3 months from the purchased date.
- Maximum load; if you want to load large quantities and use the maximum net capacity, you can remove the drawers (Except the bottom one). You can store bulky items directly on the shelves.
- When buying frozen food ensure that these have been frozen at suitable temperatures and that the packing is intact.
- Frozen food should be transported in appropriate containers to maintain the quality of the food and should be returned to the freezing surfaces of the unit in the shortest possible time.
- If a package of frozen food shows the sign of humidity and abnormal swelling it is probable that it has been previously stored at an unsuitable temperature and that the contents have deteriorated.
- The storage life of frozen food depends on the room temperature, thermostat setting, how often the door is opened, the type of food and the length of time required to transport the product from the shop to your home. Always follow the instructions printed on the package and never exceed the maximum storage life indicated.
- If you would freeze about 3 kg food in your freezer:
- You can place your food without touching other frozen food and activate “Fast Freezing” mode. You can put your food next to other frozen food after they are frozen (after minimum 24 hours).
- Do not re-freeze the frozen goods after being melted. This may cause health issues like food poisoning.
- Do not place hot food to the freezer before cooling them. This may cause the spoiling of food frozen before in the freezer.
- When you are buying frozen food, make sure that they frozen in proper conditions and the package is undamaged.
- Follow the instructions for storing conditions on the package of the frozen food while storing them. If there is no explanation, food must be consumed in a short time.
ARRANGING FOOD IN THE APPLIANCE
EN 61
- If the package of frozen food is humid and smells bad, it may be stored under inappropriate conditions and spoiled. Do not buy this kind of food!
- Storing time for frozen food may differ according to the ambient temperature, frequency of door openings, thermostat adjustments, type of food and the time between the buying of the food and placing of the food in the freezer. Always follow instructions on the package and do not exceed storing period.

natural_image
Simple line drawing of a hand holding a smiling emoji on a rounded square (no text or symbols)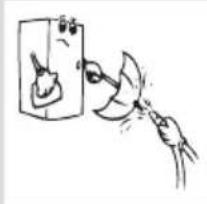
natural_image
Simple line drawing of a hand holding a tool near a device (no text or symbols)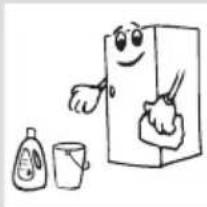
natural_image
Cartoon illustration of a smiling refrigerator with a hand cleaning it, accompanied by a small bottle and a cup (no text or symbols)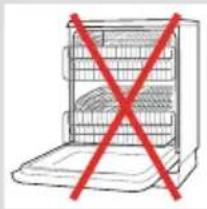
natural_image
Simple line drawing of a refrigerator with a red X symbol indicating the quantity (no text or symbols present)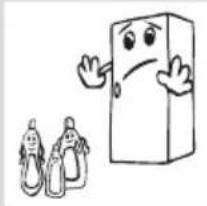
natural_image
Cartoon illustration of a smiling rectangular character and two small figures (no text or symbols)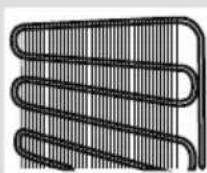
- Disconnect the unit from the power supply before cleaning.
- Do not clean the appliance by pouring water.
• Make sure that no water enters the lamp housing and other electrical components.
- The freezer should be cleaned periodically using a solution of bicarbonate of soda and lukewarm water.
- Clean the accessories separately with soap and water Do not clean them in the dishwasher.

natural_image
Cartoon illustration of a smiling refrigerator with sunglasses and a bowl of medication (no text or symbols)- Do not use abrasive products, detergents or soaps. After washing, rinse with clean water and dry carefully. When you have finished cleaning, reconnect the plugto the mains supply with dry hands.
- Clean the condenser with a broom at least twice a year. This will help you to save on energy costs and increase productivity.
THE POWER SUPPLY MUST BE DISCONNECTED.

text_image
Evaporating trayDefrosting
Your freezer defrosts automatically. Water produced by defrosting flows to evaporating container passing through water collecting groove, and vaporizes here by itself.
Replacing the LED strip
1 led strip in freezer is used to illuminate your appliance. Please call the service man.
Note: Numbers and location of led strips may be changed according to the model.
!!! Some versions may be without illumination.

text_image
50 50069 led strip
natural_image
Simple line drawing of two children holding a large rectangular object (no text or symbols)Transportation and changing of installation position
- The original packages and foamed polystyrene (PS) can be retained if required.
- During transportation, the appliance should be secured with a wide string or a strong rope. The instructions written on the corrugated box must be followed while transporting.
- Before transporting or changing the installation position, all the moving objects (ie, drawer, Ice trays, ...) should be taken out or fixed with bands in order to prevent them from getting damaged.
Carry your freezer in the upright position.
| Alarm indicator led is turning on | ERROR TYPE | WHY WHAT TO DO | |
 | "Failure Warning" | There is/are some part(s) Out of order or there is a failure in cooling process | Check the door is open or not. If the door is not open, call service for assistance as soon as possible. |
If your freezer is not working properly, it may be a minor problem, therefore check the following, before calling an electrician to save time and money.
What to do if your appliance does not operate;
Check that;
- There is no power,
- The general switch in your home is disconnected,
- The socket is not sufficient. To check this, plug in another appliance that you know which is working into the same socket.
What to do if your appliance performs poorly;
Check that;
- You have not overloaded the appliance,
• The freezer temperature set to -16.
• The doors are closed perfectly, - There is no dust on the condenser,
- There is enough place at the rear and side walls.
If your freezer is operating too loudly;
Normal Noises
Cracking (Ice cracking) Noise:
- During automatic defrosting.
- When the appliance is cooled or warmed (due to expansion of appliance material).
Short cracking: Heard when the thermostat switches the compressor on/off.
Compressor noise: Normal motor noise. This noise means that the compressor operates normally Compressor may cause more noise for a short time when it is activated.
Bubbling noise and splash: This noise is caused by the flow of the refrigerant in the tubes of the system.
Water flow noise: Normal flow noise of water flowing to the evaporation container during defrosting. This noise can be heard during defrosting.
Air Blow Noise: Normal fan noise. This noise can be heard in No-Frost freezer during normal operation of the system due to the circulation of air.
If the edges of freezer cabinet that the door joint contact are warm;
Especially in summer (hot weather), the surfaces that the joint contact may get warmer during the operation of the compressor, this is normal.
If humidity builds up inside the freezer;
- Are all food packed properly? Are the containers dried before placing them in the freezer?
- Is the freezers door opened frequently? Humidity of the room gets in the freezer when the doors are opened. Humidity build up will be faster when you open the doors more frequently, especially if the humidity of the room is high.
If the door is not opened and closed properly;
- Do the food packages prevent closing of the door?
- Are the drawers placed properly?
- Are door joints broken or torn?
• Is your freezer on a level surface?
Recommendations
- To stop the appliance completely, unplug from main socket (for cleaning and when the door is left open)
Tips for saving energy
- Install the appliance in a cool, well ventilated room, but not in direct sunlight and not near a heat source (radiator, cooker.. etc). Otherwise use an insulating plate.
- Allow warm food and drinks to cool down outside the appliance.
- Cover drinks or other liquids when placing them in the appliance Otherwise humidity increases in the appliance. Therefore, the working time gets longer. Also covering drinks and other liquids helps to preserve smell and taste.
- Try to avoid keeping the doors open for long periods or opening the doors too frequently as warm air will enter the cabinet and cause the compressor to switch on unnecessarily often.
- Keep the covers of the different temperature compartments (crisper, chiller ...etc) closed
- Door gasket must be clean and pliable. Replace gaskets if worn.
INSTALLATION INSTRUCTIONS AND DOOR REVERSIBILITY
Installation instructions
! Before installation, read the instructions carefully.
! Fit the refrigerator/freezer in stable kitchen units only.
! If necessary, reverse the door according to instructions.
- See fig.A for the necessary attachment components.
- Unscrew two screws at the top surface. (fig.D)
- Peel the double sided tape at the bottom surface of trim flap (1). Insert trim flap(1) into slot and screw by 2 screws(6) to left / right side. (fig.E)
IMPORTANT NOTICE: Do not screw any screw to the middle.
- Pass the power cord through ventilation shaft and position it so that the appliance could be easily plugged in once it has been installed. (fig.B - fig.C)
- Take out the trim gasket ^4 located on the side panel of the appliance and stick it on reverse side of the door hinges of the appliance. (fig.E - fig.F)
- Raise the appliance and slide into the kitchen unit.
- Push the appliance to the reverse side of the door hinges providing that the trim gasket ^2 covers the space between the appliance and the kitchen unit.
- Align the front feet with front surface of the kitchen unit. (fig.G)
-
Screw the front feet by using screws ^5 . (fig.G)
-
Screw trim flap ^1 to kitchen unit using screws ^5 . (fig.H)
- Screw guides ^3 to appliance door with screws ^6 . (fig.1)
- Lean appliance door to unit door as it is opened at right angle.
- Slide rails ^4 into guides ^3 aligning the groove. (fig.1)
- Screw the rails ^4 to the unit door with screws ^5 . (fig.1)
- Set 1\~2 mm gap on handle side between unit itself and unit door by adjusting guides ^3 . That is vital for appliance performance. (fig.1)
INSTALLATION INSTRUCTIONS AND DOOR REVERSIBILITY

text_image
① ② ④ ③ ⑤ Ø4x17 ⑥ Ø M4x17Figure A
text_image
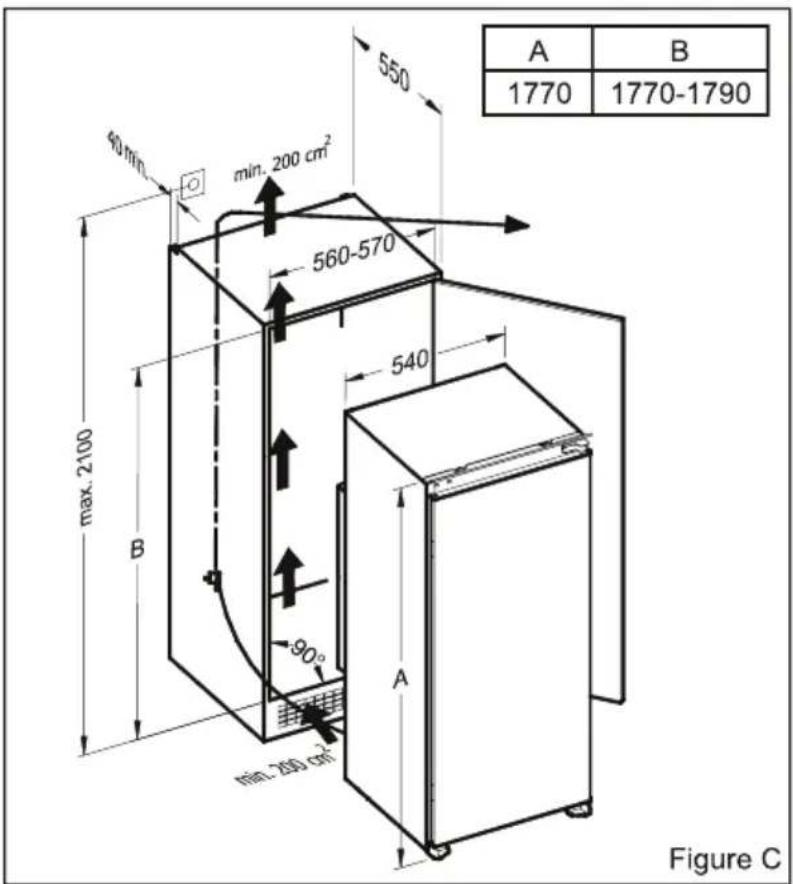
550 min. 200 cm² 560-570 540 max. 2100 B 90° min. 200 cm² A Figure C A B 1770 1770-1790
text_image
min. 200 cm² Figure B min. 200 cm²
natural_image
Line drawing of a rectangular device with two vertical sensors above it, labeled Figure D (no text or symbols on the device itself)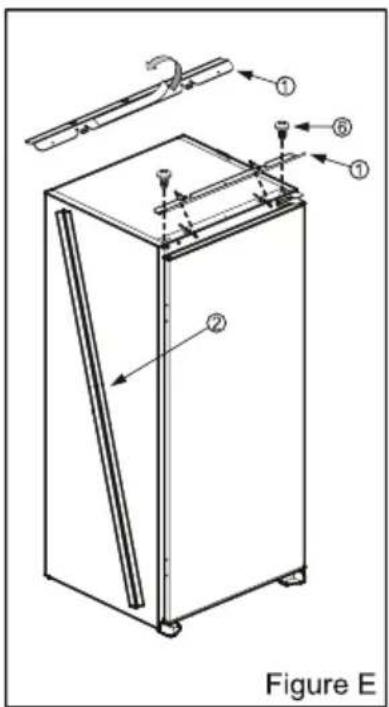
text_image
Figure E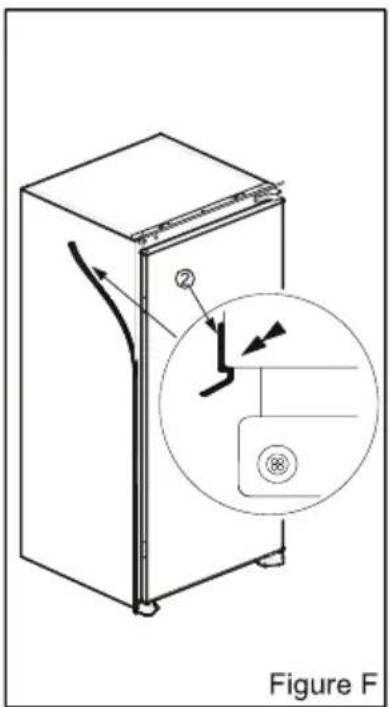
text_image
Figure FINSTALLATION INSTRUCTIONS AND DOOR REVERSIBILITY

text_image
⑤ Figure G
text_image
Figure H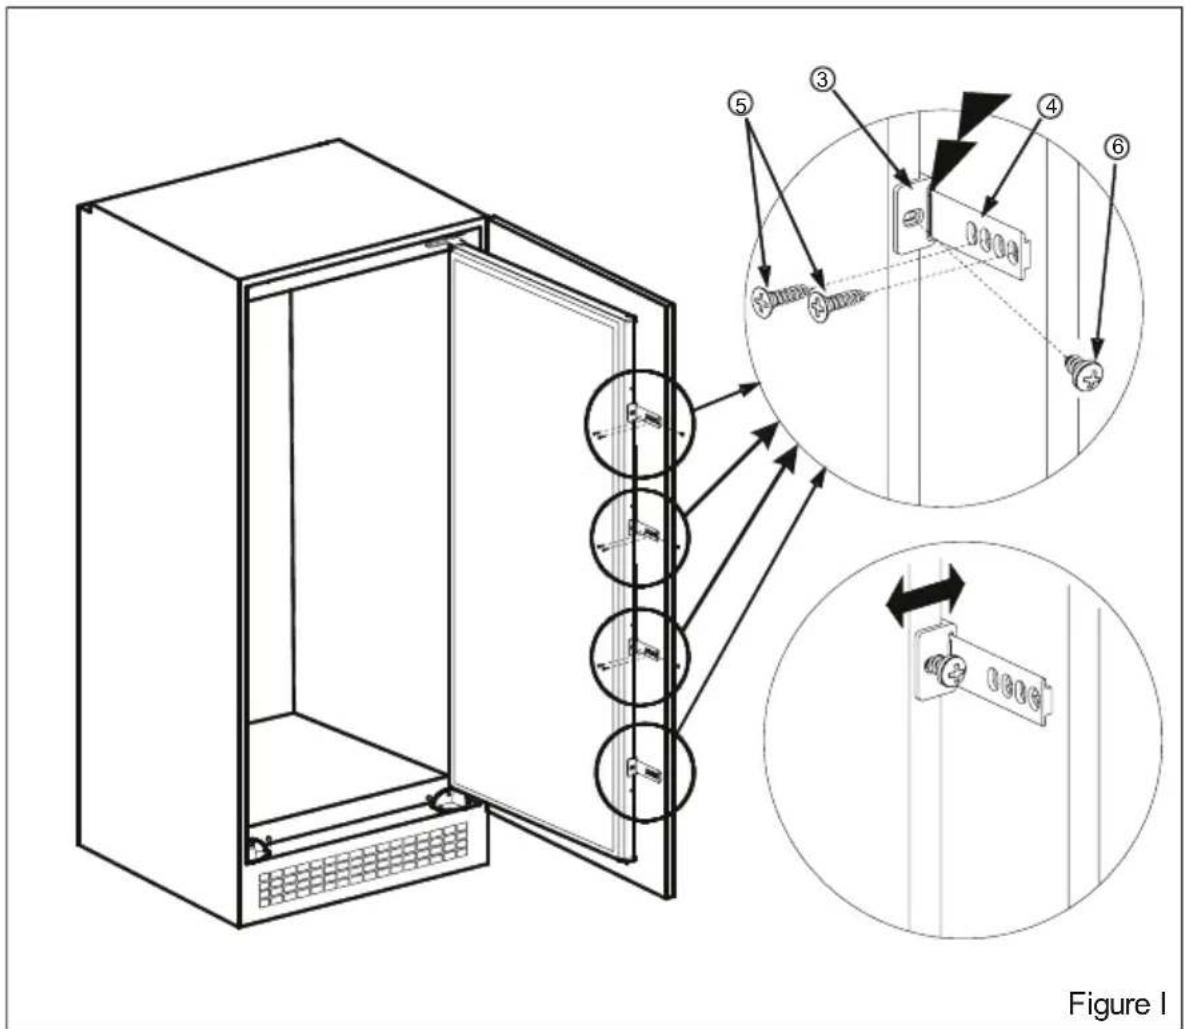
text_image
Figure 1INSTALLATION INSTRUCTIONS AND DOOR REVERSIBILITY

text_image
14 Figure J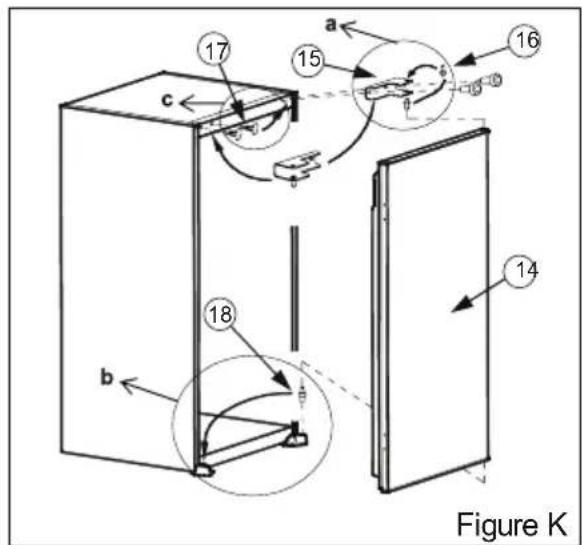
text_image
17 15 a 16 c 18 b 14 Figure KDoor reversing
- Open appliance door ^14 . (fig.J)
- Disassemble door hinge ^15 and take appliance door ^14 to safe place. (fig.K)
- Unscrew door hinge pin ^16 and screw it to opposite side firmly and take to safe place. (fig.K.a)
- Take door lower pin ^18 to opposite side. (fig.K.b)
- Take hole plugs ^17 to opposite side. (fig.K.c)
- Place appliance door ^14 over door lower pin18 and insert door hinge pin ^16 into hinge hole on appliance door ^14 and then screw door hinge ^15 firmly onto opposite side of original position. (fig.K)
CE