KVC1610 - Vacuum Cleaner Karuizawa - Free user manual and instructions
Find the device manual for free KVC1610 Karuizawa in PDF.

User questions about KVC1610 Karuizawa
0 question about this device. Answer the ones you know or ask your own.
Ask a new question about this device
Download the instructions for your Vacuum Cleaner in PDF format for free! Find your manual KVC1610 - Karuizawa and take your electronic device back in hand. On this page are published all the documents necessary for the use of your device. KVC1610 by Karuizawa.
USER MANUAL KVC1610 Karuizawa
natural_image
Line drawing of a vacuum cleaner with coiled hose and base mount (no text or symbols)Model No.: KVC1610
*Before operating the unit, please read this manual thoroughly, and retain it for future reference.
目錄
頁
-
安全注意事項 3
-
主要零部件介紹 4
III. 安全警告 5
IV. 吸塵機的組裝方法 6
v. 吸塵機的操作 8
VI. 產品技術參數 11
VII. 保養 12
1. 安全注意事項
text_image
Labeled diagram of a vacuum cleaner with numbered parts for identificationnatural_image
Line drawing of a vacuum cleaner next to a box with a handle (no text or symbols)text_image
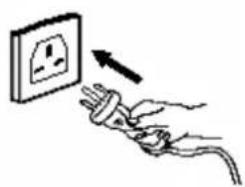
Diagram showing a hand holding an electrical socket connected to a power plug, with an arrow indicating the direction of insertion.natural_image
Line drawing of a hand using a tool to press or install a component on a base (no text or symbols)- 拔插頭時不要拔電線。
natural_image
Hand holding a plug with an open electrical outlet, showing power line direction (no text or symbols)IV. 吸塵機的組裝方法
1. 軟管的安装和拆卸
natural_image
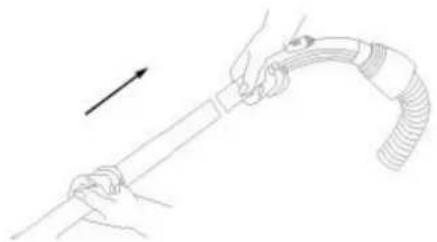
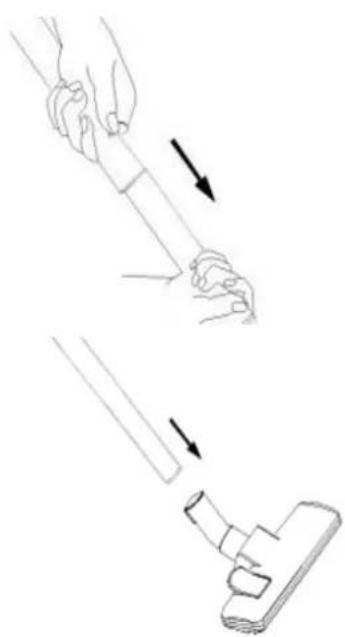
Line drawing of a vacuum cleaner with handle and ventilation slots (no text or symbols)2. 組裝伸縮管和附件
2.1 從把手上放進膠管。
natural_image
Line drawing of a hand holding a flexible hose with an arrow indicating direction (no text or symbols)natural_image
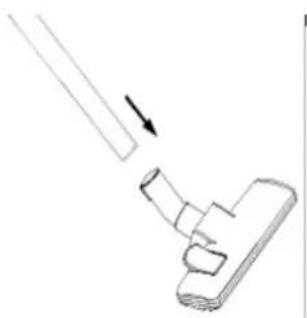
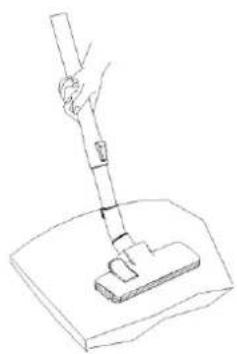
Line drawing of two hands holding a cylindrical object with an arrow indicating direction (no text or symbols)2.3 將地板用吸嘴裝進膠管。
2.4 適用於地毯和地板的日常清潔。

natural_image
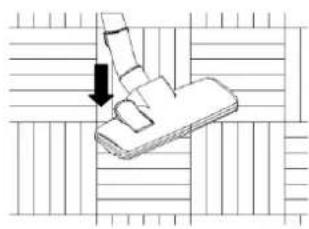
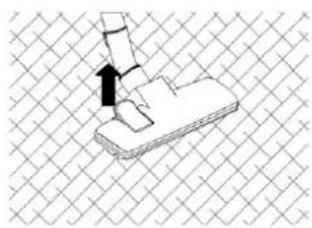
Isometric view of a mechanical component with a black arrow indicating force direction (no text or symbols)提起按鈕,清潔地板
natural_image
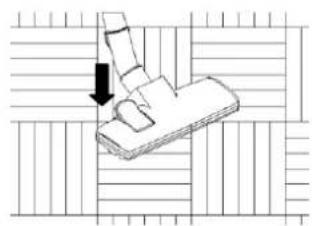
Diagram showing a mechanical component with an arrow indicating direction, set against a grid background (no text or symbols)按下按鈕,清潔地毯
natural_image
Diagram of a mechanical component with an arrow indicating direction (no text or symbols)縫隙吸嘴
小型吸咀
natural_image
Technical line drawing of a mechanical component with labeled parts A and E (no text or symbols beyond labels)v. 吸塵機的操作
開始運作
natural_image
Line drawing of a hand holding a small electrical outlet connected to a vacuum cleaner (no text or symbols present)natural_image
Line drawing of a hand connecting a small appliance to a wall-mounted power outlet (no text or symbols)怎樣維護吸塵機
natural_image
Technical line drawing of a mechanical device with directional arrows indicating movement (no text or symbols)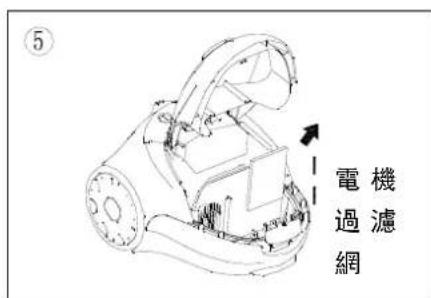
natural_image
Technical line drawing of a mechanical device with no visible text or symbols調節吸入功率
natural_image
Diagram showing solar panels under sunlight and a faucet, with no text or symbols present.VI. 產品技術參數
I. Safety Warning 14
II. Main Parts Description 15
III. Prevention 16
iv. Assembling vacuum cleaner 17
v. Operation 19
vi. Product Specification 22
vii. Warranty 23
Content
1. Safety Warning
WARNING-To reduce the risk of fire, electric shock, or injury, please read below warnings before using your vacuum cleaner:
- Do not leave vacuum cleaner when plugged in. Unplug from outlet when no use and before servicing.
- To reduce the risk of electric shock, do not use outdoors or on wet surfaces
- Use only as described in this manual. Use only manufacturer's recommend attachments.
- Do not use with damaged cord or plug. If vacuum cleaner is not working as it has been dropped, damaged, left outdoors, or dropped into water, take it to a service center for repair.
- Do not pull or carry on cord, use cord as a handle, close door on cord, or pull cord around sharp edges or corners. Do not run vacuum cleaner over extended. Keep cord away from heated surfaces.
- Do not handle plug or vacuum cleaner with wet hands.
- Do not put any object into openings. Do not use with any opening blocked. Keep free of dust, lint, hair and anything that may reduce airflow.
- Keep hair, clothing, fingers and all parts of body away from inlet or outlet of vacuum cleaner.
- Turn all controls off before unplugging. Do not unplug by pulling on cord, to unplug, grasp the plug, not the cord.
- Extra care when use cleaning on stairs.
- Do not use to pick up flammable or combustible liquids, such as gasoline, or use in areas where they may be present
- Hold plug when rewinding onto cord reel. Do not allow plug to whip when rewinding.
- Unplug before connecting the hose
- Do not pick up anything that is burning or smoking, such as cigarettes, matches, or hot ashes
- Do not use without dust bag and/or filter in place.
- If the supply cord is damaged, it must be replaced by the manufacturer, its service agent or similarly qualified persons in order to avoid a hazard.
ATTENTION!
- This appliance is not intended for use by persons (including children) with reduced physical, sensory or mental capabilities, or lack of experience and knowledge, unless they have been given supervision or instruction concerning use of the appliance by a person responsible for their safety. Children should be supervised to ensure that they do not play with the appliance.
● The appliance hold only be used by adults and only for vacuuming in a domestic environment. Make sure the vacuum cleaner is stored in a dry place.
II. Main Parts Description
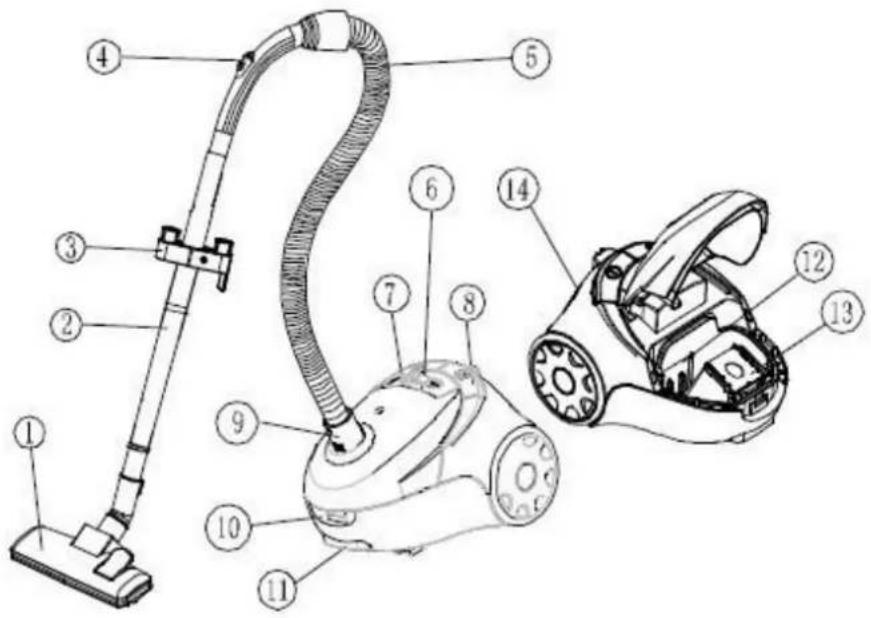
text_image
Labeled diagram of a vacuum cleaner with numbered parts for identification- Floor Nozzle
- Plastic Tube
- Nozzle Rest
- Air Slide
- Soft Hose
- Speed Selector
- On/off Switch
- Automatic Cord Rewind
- Hose Connection
- Bag Cover Latch
- Carrying Handle
- Motor Filter
- Disposable Dust Bag
- Micron Filter Outlet
III. PREVENTION
Switch off the vacuum cleaner immediately if the air intakes, the floor nozzle or the Plastic tubes becomes blocked. Before starting the vacuum cleaner up again remove the substance causing the blockage:
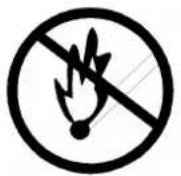
a) Never use the vacuum cleaner in the immediate near hot bodies and do not suck up hot objects such as cigarette ends or ashes.

natural_image
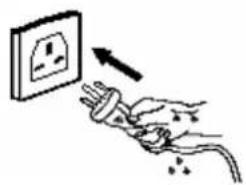
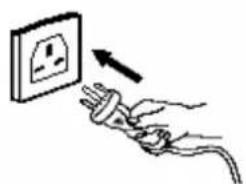
Line drawing of a vacuum cleaner next to a mounted device (no text or symbols)b) Only place the plug in the socket when your hands are dry. Do not use vacuum cleaner and hold the plug with wet hand.
text_image
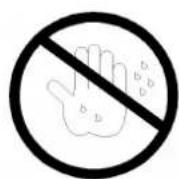
Diagram showing a hand holding an electrical socket connected to a plug, with an arrow indicating direction of electrical power or current.c) Please remove large of sharp objects from the floor before using the vacuum cleaner to avoid any possible damage to it.
natural_image
Line drawing of a hand using a tool to press or install a component on a base (no text or symbols)d) Do not pull by the mains cable when pulling out the plug.
natural_image
Illustration of a hand holding an electrical socket connected to a plug, with an arrow indicating direction (no text or symbols)IV. ASSEMBLING THE VACUUM CLEANER
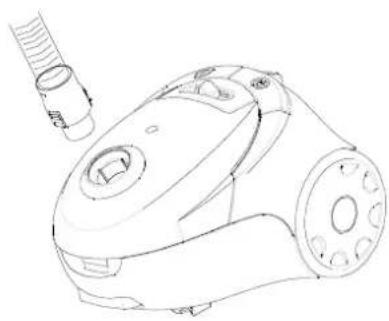
1. Assembly and disassembly of the tube
- Fabricate:
Insert the hose connection in the air intake opening.
Push the hose connection in until it locks in place
- Disassembly:
Take the tube from the air intake after disconnecting from the mains socket.
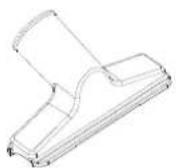
natural_image
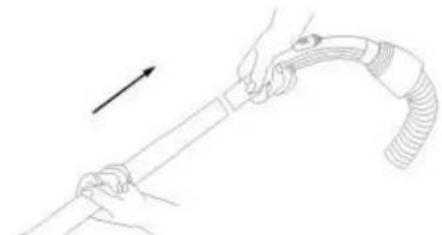
Line drawing of a vacuum cleaner with handle and mounting holes (no text or symbols)2. Assembling the telescope tube and accessories
2.1: Put the plastic tube to the hand grip.
natural_image
Line drawing of hands holding a flexible hose with an arrow indicating direction (no text or symbols)2.2: connect two plastic tubes.
natural_image
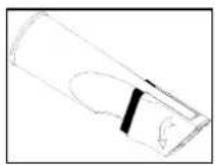
Illustration of two steps of a hand holding a small object, showing motion direction (no text or symbols)2.3: Fix the floor nozzle to the plastic tube.
2.4: Suitable for everyday cleaning of the carpet and of wooden floors.
natural_image
Isometric view of a mechanical component with a black arrow indicating direction, set against a grid background (no text or symbols)Lift up the button, clean the carpet
natural_image
Diagram showing a mechanical component with an arrow indicating force or movement, surrounded by grid lines (no text or symbols)Press the button, clean wooden floor
Crevice Nozzle

Small Nozzle
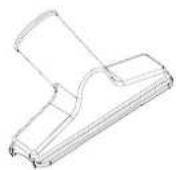
Floor nozzle settings for carpets and tiled, wood-block or similar floors:
A: Hard floors = brush bar extended
B: Carpets = brush bar retracted
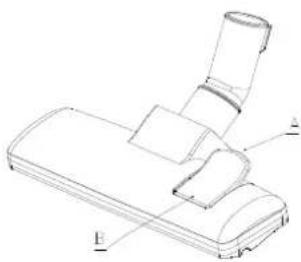
natural_image
Technical line drawing of a mechanical component with labeled parts A and B (no text or symbols beyond labels)v. Operation
Start to Operate
- Before using the device first roll out a sufficient length of electric flex cable and plug into the mains socket. The yellow mark on the electric flex cable is the maximum length that must not be exceeded.
To switch on the device press the foot pedal button ⏻ on the casing with your foot
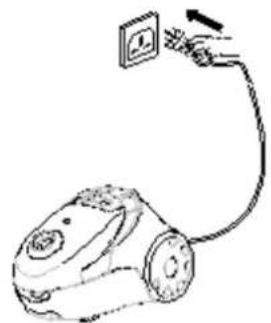
natural_image
Line drawing of a hand holding a small electrical outlet connected to a vacuum cleaner (no text or symbols present)- To rewind the power cable, press the button With one hand and guide the cable with the other hand to ensure that the sudden whipping do not cause any damage.
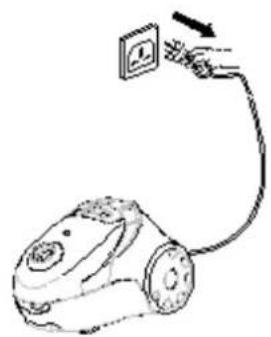
natural_image
Line drawing of a hand connecting a small appliance to a wall-mounted power outlet (no text or symbols)HOW TO MAINTAIN
The instructions given in this booklet serve as a guide to routine maintenance and checking. To avoid unnecessary service calls, check the hose, bag and filter often.
Clear a clogged hose with the blower, change the bag if it is full, and clean the motor filter when it is dirty.
Disposable Dust Bags and Filters
The dust bag and motor filter play a very important roll in the efficiency of the vacuum cleaner. The purpose of the dust bag is to trap dirt, but at the same time, the paper bag must be porous enough to allow air to pass through. If the bag or the motor filter become clogged, no air can pass through the cleaner and no cleaning can take place regardless of how powerful the unit is. To keep the cleaner operating at maximum efficiency, change the dust bag frequently and clean the filter as needed. Some fine particles can restrict airflow very quickly and will decrease performance even before the bag appears to be full. For that reason, when vacuuming carpet fresheners or cleaners, powder, plaster dust, or similar fine substances, the bag and filter may need to be changed more often.
How to Replace Dust Bag
NOTE: Turn off vacuum cleaner and unplug the electrical cord before changing dust bag or cleaning motor filter. Never operate the vacuum cleaner without the dust bag or filter.
-
Turn off and unplug cleaner.
-
Open bag cover by pushing latch up with fingers and lifting bag cover.
-
Locate dust bag frame handle. Raise dust bag out of dust bag compartment.
-
Remove dust bag from dust bag frame and replace a new dust bag.
-
Remove motor filter and clean it by rinsing under warm water, if it is heavily soiled. Let the filter completely dry before reinstalling.
-
Place dust bag frame inside dust bag compartment and place the dust bag frame into the guides at the very front of the dust
-
Swing bag cover lid closed and push to latch.
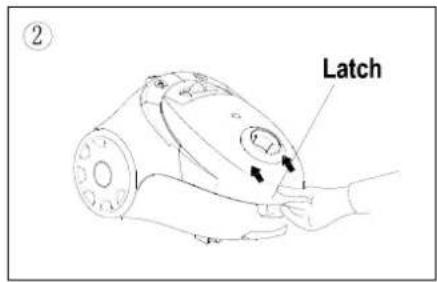
text_image
Latch ②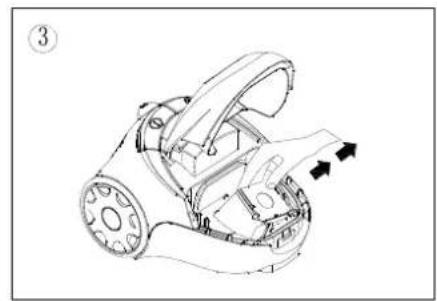
natural_image
Technical line drawing of a robotic car with motion arrows indicating movement (no text or symbols)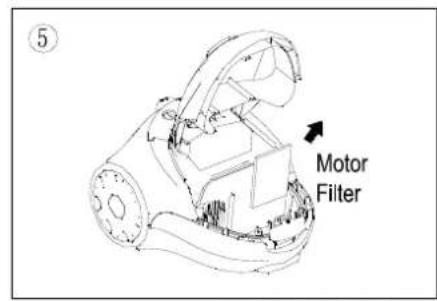
text_image
Motor Filter
natural_image
Technical line drawing of a mechanical device with directional arrows indicating movement or force (no text or symbols present)Select the suction power
You can set the suction power on the device individually as your require it using the suction regulator. We recommend using minimum suction power for delicate materials.
Select medium suction power for mattresses, upholstered furniture and carpets. Select maximum suction power for tiled, wood and other robust floors.
Cleaning the exhaust air filter
The exhaust air filter cleans the air a final process before it leaves the vacuum cleaner. You can clean the exhaust air filter as follows:
- Switch off the vacuum cleaner and disconnect the plug from the mains. To do this, always pull on the plug and not on the cable.
- Open the exhaust air grill.
- The exhaust air filter is visible when the grill has been opened.
- Rinse the filter under cold running water and allow dry.
- Put the exhaust air filter back into place (or replace with a new one)
- Close the exhaust air filter grill.
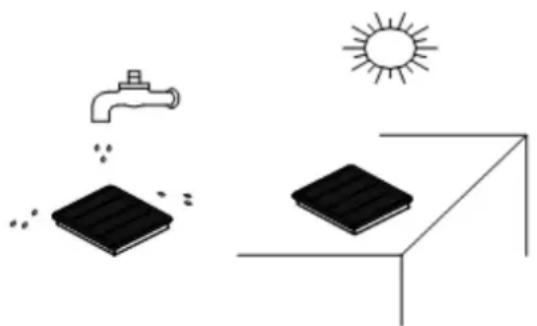
natural_image
Illustration of solar panels under sunlight, showing a faucet spraying water and a solar panel on a surface (no text or symbols)vi. Product Specification
| Model | KVC1610 |
| Product Name | Vacuum Cleaner |
| Rated Power | 1600W |
| Rated Input Voltage | AC 220-240V, 50HZ |
vii. Warranty
- The product has 1 year warranty from the date of purchase.
- The warranty shall not apply:
A. to any Product subjected to accident, misuse, neglect, alteration, Acts of God, improper handling, improper transport, improper use, improper testing or unauthorized repair;
B. to cosmetic problems or defects which result from normal wear and tear under ordinary use, and do not affect the performance or use of the product. All warranties are void if the product is opened, altered, and/or damaged; C. to any packing, transportation, export / import tax or any related expenses.
3. CUSTOMER MUST PRESENT THE SALES INVOICE OR RECEIPT FOR 1 YEAR WARRANTY SERVICES.
- Please bring along the product and sales invoice or receipt to our services center for warranty services during office hour:.
Address : Unit D, 20/F, Yip Shing Ind Bldg, No.19, Yip Shing Street, Kwai Chung.
Service Hotline : (852) 2428 1500
Service Hours:
Monday-Friday : 9:00am - 1:00pm / 2:00pm - 6:00pm
Saturday : 9:00am - 1:00pm
Sunday & Public Holiday : Closed
- THE UNIT IS FOR DOMESTIC USE ONLY.
IMPORTANT NOTICES
THE UNIT IS FOR DOMESTIC USE ONLY
IN NO EVENT SHALL OUR COMPANY OR THE SUPPLIER BE LIABLE TO YOU OR ANY OTHER PARTY FOR ANY DIRECT, INDIRECT, GENERAL SPECIAL, INCIDENTAL, CONSEQUENTIAL, EXEMPLARY OR OTHER DAMAGES ARISING OUT OF THE USE OR INABILITY TO USE THE PRODUCT (INCLUDING, WITHOUT LIMITATION, DAMAGES FOR INJURY, LOSS OF PROPERTY, BUSINESS PROFITS, BUSINESS INTERRUPTION) OR FROM ANY BREACH OF WARRANTY, EVEN IF OUR COMPANY OR SUPPLIER HAS BEEN ADVISED OF THE POSSIBILITY OF SUCH DAMAGES. IN NO CASE SHALL OUR COMPANY OR SUPPLIER'S LIABILITY EXCEED THE AMOUNT YOU PAID FOR THE PRODUCT.
Specifications, designs and dimensions subject to change without prior notice.