DZ-MV350EAU - Surveillance Camera HITACHI - Free user manual and instructions
Find the device manual for free DZ-MV350EAU HITACHI in PDF.

User questions about DZ-MV350EAU HITACHI
0 question about this device. Answer the ones you know or ask your own.
Ask a new question about this device
Download the instructions for your Surveillance Camera in PDF format for free! Find your manual DZ-MV350EAU - HITACHI and take your electronic device back in hand. On this page are published all the documents necessary for the use of your device. DZ-MV350EAU by HITACHI.
USER MANUAL DZ-MV350EAU HITACHI
natural_image
Line drawing of a digital camera with no visible text or symbols on the bodyInstruction manual
Toobtainthebestperformanceandensureyearsof trouble-free use, please read this instruction manual completely.
Important Information
For Your Safety
Thepowerswitch turns the DVD videocamera/recorder onandoff, leavingthe date/timefeature unaffected. Ifthecamera/recorder is to be left unattended for a long period of time, turn it off.
WARNING : TO PREVENT FIRE OR SHOCK HAZARD, DO NOT EXPOSE THIS UNIT TO RAIN OR MOISTURE.
WARNING : TO PREVENT FIRE OR SHOCK HAZARD, USE THE RECOMMENDED ACCESSORIES ONLY.
The DVD video camera/recorder and AC adapter/charger have the following caution marks.

CAUTION
RISK OF ELECTRIC SHOCK DO NOT OPEN

CAUTION: TO REDUCE THE RISK OF ELECTRIC SHOCK, DO NOT OPEN. NO USER-SERVICEABLE PARTS INSIDE. REFER SERVICING TO QUALIFIED SERVICE PERSONNEL.
Precautions
WARNING: Many television programmes and films are copyrighted. In certain circumstances, copy-right law may apply to private in-home videotaping of copyrighted materials.
The liquid crystal display (LCD) panel is made by highly precise technology. More than 99.99% of its picture elements (pixels) are effective, but some (less than 0.01%) may appear as coloured bright dots. This does not indicate a fault as the LCD panel stretches the limits of current technology.
Identifications of caution marks

This symbol warns the user that uninsulated voltage within the unit may have sufficient magnitude to cause electric shock. Therefore, it is dangerous to make any kind of contact with any inside part of this unit.

This symbol alerts the user that important literature concerning the operation and maintenance of this unit has been included. Therefore, it should be read carefully to avoid any problems.
WARNING: To prevent risk of injury or damage to your DVD video camera/recorder and the AC adapter/charger, use only the DZ-BP14S/DZ-BP14SW battery and DZ-ACS1 AC adapter/charger.
CLASS 1 LASERPRODUCT
CAUTION
This product contains a laser diode of higher class than 1. To ensure continued safety, do not remove any covers or attempt to gain access to the inside of the product. Refer all servicing to qualified personnel.
Important for United Kingdom (for DZ-MV350E(UK))
The mains lead on this equipment is supplied with a moulded plug incorporating a fuse, the value of which is indicated on the pin face of the plug.
Should the fuse need to be replaced, an ASTA or BSI approved BS 1362 fuse must be used of the same rating. If the fuse cover is detachable never use the plug with the cover omitted. If a replacement fuse cover is required, ensure it is of the same colour as that visible on the pin face of the plug. Fuse covers are available from your dealer.
DO NOT cut off the mains plug from this equipment. If the plug fitted is not suitable for the power points in your home or the cable is too short to reach a power point, then obtain an appropriate safety approved extension lead or consult your dealer.
If there is no alternative to cutting off the mains plug, ensure that you dispose of it immediately, having first removed the fuse, to avoid a possible shock hazard by inadvertent connection to the mains supply.
IMPORTANT
The wires in the mains lead are coloured in accordance with the following code:
Blue= Neutral, Brown=Live
As these colours may not correspond with the coloured markings identifying the terminals in your plug, proceed as follows:
The wire coloured BLUE must be connected to the terminal marked with the letter N or coloured BLUE or BLACK.
The wire coloured BROWN must be connected to the terminal marked with the letter L or coloured BROWN or RED. On no account connect either of these wires to the terminal marked E or by the earth symbol or coloured green or green and yellow.
IMPORTANT SAFEGUARDS
In addition to the careful attention devoted to quality standards in the manufacture of your video product, safety is a major factor in the design of every instrument. But, safety is your responsibility too.
Thispagelistsimportantinformationthatwillhelp to assureyourenjoyment andproperuseofDVD videocamera/recorder and accessory equipment. Please read it carefully before operating your video product and keep it in a handy place for future reference.
INSTALLATION
1 Read and Follow Instructions — All the safety and operating instruction should beread before the video product is operated. Follow all operating and use instructions.
2 Retain Instructions — The safety and operating instructions should be retained for future reference.
3 Heed Warnings — Comply with all warnings on the video product and in the operating instructions.
4 Power Sources — This video product should be operated only from the type of power source indicated on the marking label. If you are not sure of the type of mains supply to your home, consult your video dealer or local power company. For video products intended to operate from battery power, or other sources, refer to the operating instructions.
5 Overloading — Do not overload wall outlets and extension cords as this can result in a risk of fire or electric shock. Overloaded AC outlets and extension cords are dangerous, and so are frayed mains leads, damagedorcrackedwireinsulationandbrokenplugs. They may result in a shock or fire hazard. Periodically examine the cord and have it replaced by your service technician if appearance indicates damage or deteriorated insulation.

natural_image
Illustration of a mechanical device with multiple clamps and ropes, no text or symbols present6 Mains Lead Protection — Mains leads should be routed so that they are not likely to be walked on or pinched by items placed upon or against them, paying particular attention to leads at plugs, convenience receptacles, and the point where they exit from the appliance.
7 Ventilation — Slots and openings in the cabinet are provided for ventilation to ensure reliable operation of the video product and to protect it from overheating. These openings must not be blocked or covered. The openings should never be blocked by placing the video product on a bed, sofa, rug, or other similar surface. This video product should never be placed near or over a radiator or heat register. This video product should not be placed in a built-in installation such as a bookcase or rack unless proper ventilation is provided or the video product manufacturer's instructions have been followed.
8 Attachments — Do not use attachments unless recommended by the video product manufacturer as they may cause hazards.
Caution: Maintain electrical safety. Powerline operated equipment or accessories connected to this unit should bear the UL listing mark or CSA certification mark on the accessory itself and should not have been modified so as to defeat the safety features. This will help avoid any potential hazard from electric shock or fire. If in doubt, contact qualified service personnel.
9 Waterand Moisture — Do not use this video product near water — for example, near a bath, wash bowl, kitchen basin, or laundry tub, in a wet basement, or near a swimming pool, and the like.
10 Accessories — Donot place this video product on an unstable cart, stand, tripod, bracket, or table. The videoproductmay fall,causingseriousinjuryto achild or adult, and serious damage to the appliance. Use only with a cart, stand, tripod, bracket, or table recommended by the manufacturer, or sold with the video product. Any mounting of the product should followthemanufacturer'sinstructions, and shoulduse a mounting accessory recommended by the manufacturer.
11 An appliance and cart combination should be moved with care. Quick stops, excessive force, and uneven surfaces may cause the appliance and cart combination to overturn.

natural_image
Symbolic illustration of a person pushing a large object, enclosed in a circle (no text or symbols)12 Power Lines — An outside antenna system should not be located in the vicinity of overhead power lines or other electric light or power circuits, or where it can fallintosuchpowerlinesorcircuits. Wheninstalling an outside antenna system, extreme care should be taken to keep from touching or approaching such power lines or circuits as contact with them might be fatal. Installing an outdoor aerial can be hazardous and should be left to a professional aerial installer.
USE
13 Cleaning — Unplug this video product from the wall outlet before cleaning. Do not use liquid cleaners or aerosol cleaners. Use a damp cloth for cleaning.
14 Object and Liquid Entry — Never push objects of any kind into this video product through openings as they may touch dangerous voltage points or short-out parts that could result in a fire or electric shock. Never spill liquid of any kind on the video product.
15 Lightning — For added protection for this video product during a lightning storm, or when it is left unattended and unused for long periods of time, unplug it from the wall outlet and disconnect the aerial or cable-system. This will prevent damage to the video product due to lightning and power-line surges.
SERVICE
16 Servicing — Do not attempt to service this video product yourself as opening or removing covers may expose you to dangerous voltage or other hazards. Refer all servicing to qualified service personnel.
17 Conditions Requiring Service — Unplug this video product from the wall outlet and refer servicing to qualified service personnel under the following conditions.
a. When the mains lead or plug is damaged.
b. If liquid has been spilled, or objects have fallen into the video product.
c. If the video product has been exposed to rain or water.
d. If the video product does not operatenormally by following the operating instructions. Adjust only those controls that are covered by the operating instructions. Improper adjustment of other controls may result in damage and will often require extensive work by a qualified technician to restore the video product to its normal operation.
e. If the video product has been dropped or the cabinet has been damaged.
f. Whenthevideoproductexhibitsadistinctchange in performance — this indicates a need for service.
18 Replacement Parts — When replacement parts are required, have the service technician verify that the replacements he uses have the same safety characteristics as the original parts. Use of replacements specified by the video product manufacturer can prevent fire, electric shock or other hazards.
19 Safety Check — Upon completion of any service or repairs to this video product, ask the service technician to perform safetychecks recommended by the manufacturer to determine that the video product is in safe operating condition.
20 Heat — The product should be situated away from heatsourcessuch asradiators,heatregisters,stoves, or other products (including amplifiers) that produce heat.
Cautions When Using
Handle the liquid crystal display (LCD) with care:
- The LCD is a very delicate display device: Do not press its surface with force, hit it or prick it with a sharp object.
- If you push the LCD surface, unevenness in display may occur. If unevenness does not disappear soon, turn the DVD video camera/recorder off, wait for a few moments, and then turn it on again.
- Do not place the DVD video camera/recorder with the open LCD screen down.
- Close the LCD monitor when not using the DVD video camera/recorder.
Liquid crystal display and viewfinder:
- The LCD screen and viewfinder are the products of highly precise technology. Among the total number of pixels (approx. 120,000 pixels for LCD monitor and approx. 110,000 pixels for viewfinder), 0.01% or less pixels may be missing (black dots) or may remain lit as coloured dots (red, blue, green). This shows the limitations of the current technology, and does not indicate a fault that will interfere with recording.
- The LCD screen and viewfinder will be slightly dimmer than usual when the DVD video camera/ recorder is at low temperature, as in cold areas, or immediately after power is turned on. Normal brightness will be restored when the temperature inside the DVD video camera/recorder rises.
Hold the DVD video camera/recorder correctly:
- Do not hold the viewfinder or LCD monitor when lifting the DVD video camera/recorder: The viewfinder or LCD monitor could detach and the DVD video camera/recorder may fall.
Do not subject the DVD video camera/recorder to impact:
- This DVD video camera/recorder is a precision machine. Take great care that you do not strike it against a hard object or let it fall.
- Do not use the DVD video camera/recorder on a tripod in a place where it is subject to severe vibrations or impact.
No sand or dust!
- Fine sand or dust entering the DVD video camera/recorder or AC adapter/charger could cause malfunctions or defects.
Nowateroroil!
- Water or oil entering the DVD video camera/recorder or AC adapter/charger could cause electric shock, malfunctions or defects.
Heat on surface of product:
- The surface of the DVD video camera/recorder will be slightly warm, but this does not indicate a fault.
Screen on connected TV:
- Never leave the disc navigation screen, still image or camera image displayed on your TV to which the DVD video camera/recorder is connected: Doing so could result in displayed image retention or phosphor degradation of TV screen.
Be careful of ambient temperature:
- Using the DVD video camera/recorder in a place where the temperature is over 40^ C or under 0^ C will result in abnormal recording/playback.
- Take care that the temperature of this DVD video camera/recorder, when connected to PC, does not rise excessively (reference for usage: approx. 30 minutes at about 30^ ).
- Do not leave the DVD video camera/recorder on beach sand or in a closed vehicle where the temperature is very high for a long time: This could cause malfunctions.
Do not point directly at the sun:
- If direct sunlight strikes the lens or viewfinder, the DVD video camera/recorder could malfunction or a fire could occur.
- Do not leave the DVD video camera/recorder with the LCD screen exposed to direct sunlight: This could cause malfunctions.
Do not use the DVD video camera/recorder near TV or radio:
- This could cause noise to appear on the TV screen or in radio broadcasts.
Do not use the DVD video camera/recorder near strong radio waves or magnetism:
- If the DVD video camera/recorder is used near strong radio waves or magnetism, such as near a radio wave tower or electric appliances, noise could enter video and audio that are being recorded. During playback of normally recorded video and audio, noise may also be present in picture and sound. At worst the DVD video camera/recorder could malfunction.
Do not expose the DVD video camera/recorder to soot or steam:
- Thick soot or steam could damage the DVD video camera/recorder case or cause malfunctions.
Do not use the DVD video camera/recorder near corrosive gas:
- Using it in a place where there is dense exhaust gas generated by petrol or diesel engines, or corrosive gas such as hydrogen sulfide, could corrode the battery connecting terminals, which could result in loss of power.
Do not use the DVD video camera/recorder near ultrasonic humidifier:
- With some water in humidifier, calcium and other chemicals dissolved in water could scatter in the air, and white particles could adhere to the optical head of the DVD video camera/recorder, which could cause it to operate abnormally.
Do not expose the DVD video camera/recorder to insecticide:
- Insecticide entering the DVD video camera/recorder could dirty the lens in laser pickup block, and in such a case the DVD video camera/recorder might not operate normally. Turn the DVD video camera/recorder off and cover it with vinyl sheet, etc. before using insecticide.
Do not use a generally available 8 cm CD lens cleaner:
- Cleaning the lens is not necessary when using this DVD video camera/recorder in the usual way.
- Using 8 cm CD lens cleaner could cause this DVD video camera/recorder to be faulty.
Be careful of moisture condensation:
- When you move the DVD video camera/recorder between places where the difference in temperatures is great - such as entering a lodge from a ski slope or going out of a cooled room or vehicle - condensation (vapour in air warmed or cooled to water droplets) could occur on the lens and/or inside the DVD video camera/recorder. If condensation occurs, do not open the cover of disc or card insertion block if possible. If condensation occurs on the lens, wipe it off with a soft, dry cloth. Even if the external surface of DVD video camera/recorder has dried, condensation may remain inside: Turn the DVD video camera/recorder off and leave it in a dry place for at least 1-2 hours before using it again.
Do not use the DVD video camera/recorder for a long uninterrupted period of time:
- This DVD video camera/recorder cannot be used for a long time continuously as a surveillance camera/monitor. If you use the DVD video camera/recorder for a long continuous period of time, the temperature of DVD video camera/recorder could exceed a limit and the recording/playback operation could be slowed down: In this case, turn it off and wait for a while before using it again.
DonotturntheDVDvideocamera/recorderoffwhiletheACCESS/PCindicatororCARD ACCESS indicator is lit or blinking:
- The ACCESS/PC or CARD ACCESS indicator is lit or blinking to show that data is being written to disc or card, or being read from it. At this time, do not do any of the following, so as not to damage the data:
- Remove battery
- Disconnect AC adapter/charger
- Plug or unplug PC connection cable
- Remove disc or card
- Subject DVD video camera/recorder to severe vibrations or impact.
- Violently open or close the LCD monitor

text_image
CARD ACCESS indicator ACCESS/PC indicatorIf you turn the DVD video camera/recorder off while the ACCESS/PC or CARD ACCESS indicator is lit or blinking, turn it on again with the disc or card loaded in it: Repair of the disc or card will be executed automatically (see page 147).
Do not wipe the DVD video camera/recorder case with benzene or thinner:
- The coating of case could peel off or the case surface could deteriorate.
- When using a chemical cleaning cloth, follow the instructions.
Also read the instructions attached with optional accessories:
- For optional accessories, observe the cautions and follow instruction manuals attached.
Cautions When Storing
Do not leave the DVD video camera/recorder in a place where the temperature is very high for a long period of time.
- The temperature inside a closed vehicle or boot can become very high in a hot season. If you leave the DVD video camera/recorder in such a place, it could malfunction or the case could be damaged. Also, do not expose the DVD video camera/recorder to direct sunlight or place it near a heater.
Do not store the DVD video camera/recorder in a place where the humidity is high or in a dusty place:
- Dust entering the DVD video camera/recorder could cause malfunctions. If the humidity is high, the lens could be mouldy, and the DVD video camera/recorder could become inoperable. It is recommended that you put the DVD video camera/recorder with desiccant in a box when storing it in a closet, etc.
Do not store the DVD video camera/recorder in a place subject to strong magnetism or intense vibrations:
• This could cause malfunctions.
Detach the battery from the DVD video camera/recorder and store it in a cool place:
• Leaving the battery attached or storing it at high temperature could shorten its life.
Suggestions and Restrictions
Make a trial recording:
- Always make a trial recording before doing actual recording to make sure that recording is normal. The data that have not been stored normally because of a defect in the DVD video camera/recorder cannot be restored. It is recommended that you use DVD-RAM disc from which recorded contents can be deleted for trial recording.
The recorded contents cannot be compensated for:
- Hitachi cannot compensate for any damages caused when recording is not made normally or recorded contents cannot be played back because of a defect in the DVD video camera/recorder, disc or card. Also, Hitachi cannot be responsible for your recorded video and audio. - If you or a third party make a mistake when handling this DVD video camera/recorder, disc, card, etc., the recorded contents may be lost. We cannot be responsible for compensation for damage due to loss of recorded contents.
Copyright:
- Data recorded on the disc or card in this DVD video camera/recorder using other digital/analog media or devices are protected by the copyright act and cannot be used without permission of the owner of copyright, except for personal enjoyment. Be aware that recording is restricted for some demonstrations, performances and exhibitions, even for personal enjoyment.
Do not use the DVD video camera/recorder for professional applications:
- This DVD video camera/recorder is designed and produced for home-use recording and playback.
Read This First
To guide you, we've included following six chapters.
- The section on "Setups" explains how to set up the DVD video camera/recorder, battery, and set the date/time.
- The section on “Basic Techniques” explains the basic operation of this DVD video camera/ recorder-recording of movies, still images, external input, and playback of recorded images.
- The section on “Advanced Techniques” explains settings on this DVD video camera/recorder for more advanced usage.
- The section on "Disc Navigation" explains editing with Disc Navigation: Refer to this section when finalising DVD-R disc and initialising DVD-RAM disc.
- The section on "Installing Software" explains the contents of provided CD-ROM and how to install the contained software included.
- "Subsidiary Information" includes an introduction to products sold separately, proper cleaning, and troubleshooting.
We want this manual to be as helpful as possible, soitincludestwoeasywaysto findthe information you need:
- A quick index for the information you use most often (this page).
- A detailed table of contents directing you to specific information quickly (see page 14-16).
Get to know your DVD video camera/recorder by using this manual, and get to know Hitachi. We appreciate your business.
Quick Index
Available Discs 23
Recording Movie....51
Immediately Checking Recorded Scene ..... 66
Connecting to a TV....71
Functions Available with Disc Navigation ..... 97
Installing Software 130
With this DVD video camera/recorder you can view the picture being recorded or the playback picture whether on the LCD monitor or in the viewfinder. Opening or closing the LCD monitor switches the picture to appear on the LCD monitor or in the viewfinder. The following text describes the operation assuming that the viewfinder is used as a major monitor device.
Microsoft ^® , Windows ^® , Windows ^® 98, Windows ^® 98 Second Edition, Windows ^® Me, Windows ^® 2000 Professional, and Windows ^® XP are registered trademarks of Microsoft Corporation.
Intel ^® , Pentium ^® Processor, and Celeron ^® Processor are registered trademarks of Intel Corporation. IBM ^® and PC/AT ^® are registered trademarks of International Business Machines Corporation.
Manufactured under license from Dolby Laboratories.
"Dolby" and the double-D symbol are trademarks of Dolby Laboratories.
Other company names and product names listed are trademarks or brand names belonging to each individual company.
SD logo is a trademark.
Introduction
- You can record even during playback
Unlike tape devices, you do not need to search for the recording start position or locate the beginning of blank portion.
You can start recording during playback: New recording will not overwrite any previously recorded data.

flowchart
graph LR
    A["Children: Playing"] --> B["Watching: Dog"]
    B --> C["Recorded scenes: Dog and cat in sequence"]
    C --> D["Sequence 1: Dog is eating; cat is eating"]
If you stop playback midway and start recording, overwrite will not occur.
- You can immediately play back desired recorded scenes
You do not need to rewind, unlike recorders using tape.
You can select any scene you want and immediately play it back (using Disc Navigation function).
- Use Disc Navigation to create your original movie
You can delete unnecessary scenes, move any scenes, etc., and create your original movie work (PlayList).

text_image
Before editing After editing- You can easily edit scenes, which is quite difficult with tape
Using this DVD video camera/recorder, you can collect scenes of your child, for example, on play list of Disc Navigation function and create an original movie: Then simply play back the play list and dub it on VCR. It is also easy to make any number of identical tapes.
Up to now, you had to repeatedly press buttons
With DVD, you can simply play back this DVD video camera/recorder, and press the record button on VCR.

text_image
Illustration showing a device connected to a computer and a child, illustrating the process of using devices for food or eating.- Create original DVDs on PC
You can use a DVD-R disc to create an original DVD, using the provided software CD-ROM. The created DVD disc can be played back on DVD player, DVD-ROM drive, etc.

text_image
Original DVD being Playback of DVDTable of Contents
Important Information 2
For Your Safety 2
Precautions 2
IMPORTANT SAFEGUARDS 4
Cautions When Using.... 6
Cautions When Storing.... 9
Suggestions and Restrictions.... 10
Read This First 11
Introduction.... 12
Table of Contents 14
Checking Provided Accessories 17
Names of Parts.... 18
About This Manual.... 22
Discs and Cards 23
AVAILABLE DISCS 23
INFORMATION ON DVD-R DISC....24
EXAMPLES OF DISCS THAT CANNOT BE USED ON THIS DVD VIDEO CAMERA/RECORDER: 24
HANDLING DISCS....25
AVAILABLE CARDS....26
Storage Capacity on Disc or Card 27
RECORDABLE TIME OF MOVIE (VIDEO)......27
Features of DVD Video Camera/Recorder ..... 29
VERSATILE FUNCTIONS AVAILABLE ......29
Setting Up the Battery.... 37
CHARGING BATTERY....37
ATTACHING BATTERY TO DVD VIDEO CAMERA/RECORDER....38
REMOVING BATTERY ....38
BATTERY REMAINING LEVEL INDICATOR......40
EFFICIENT USE OF BATTERY 40
USING DVD VIDEO CAMERA/RECORDER WITH AC ADAPTER/CHARGER....41
Inserting and Removing Disc.... 42
INSERTING DISC 42
REMOVING DISC 44
Inserting and Removing Card.... 45
Basic Techniques
Basic Handling of DVD Video Camera/
Recorder 46
VIEWING SUBJECT THROUGH VIEWFINDER...47
VIEWING IMAGE ON LCD MONITOR SCREEN..47
CLOSING LCD MONITOR....48
Setting Date and Time.... 49
CHANGING DISPLAY FORMAT OF DATE AND TIME....50
Recording Movie.... 51
USING EXTERNAL MICROPHONE 53
Recording Stills.... 54
Zooming.... 56
MACRO RECORDING....57
RECORDING SUBJECTS FOR STRONGER WIDE-ANGLE OR TELEPHOTO EFFECT .....57
Manually Focusing Subject.... 58
FOCUSING DURING RECORDING ....58
Adjusting Exposure Manually 60
Compensating for Backlight.... 61
Using Full Auto Function 62
On-Screen Information 63
INFORMATION DISPLAY DURING RECORDING ....63
Playing Back.... 66
IMMEDIATELY CHECKING RECORDED SCENE....66
PLAYBACK FROM START OF DISC OR CARD..67
SEARCH PLAYBACK OF MOVIE 67
FRAME ADVANCE/FRAME BACK/SLOW PLAYBACK OF MOVIE....67
SKIP PLAYBACK OF MOVIE....68
PLAYING BACK STILLS....68
JUMPING TO SPECIFIED POINT (GO TO) ......69
On-Screen Information Display 70
INFORMATION DISPLAY DURING PLAYBACK..70
Playback on Other Devices 71
CONNECTING TO A TV 71
VIEWING ON TV SCREEN....72
PLAYBACK ON DVD PLAYER....73
REMOVING AND REPLACING FROM/IN ROUND DVD HOLDER....74
HOW TO REMOVE DISC 74
REPLACING DISC IN ROUND DVD HOLDER.....75
WHEN THE HINGE OF ROUND DVD HOLDER COMES OFF....75
DISC CLEANING 75
Playback on DVD Video Recorder/Player ..... 76
Advanced Techniques
Understanding Flow of Menu 77
Setting Up Camera Functions.... 79
SELECTING SHOOTING MODE TO MATCH THE SUBJECT (SWITCHING PROGRAMME AE MODE) .....79
ADJUSTING COLOUR (WHITE BALANCE) .....80
USING THE ELECTRONIC IMAGE STABILISER (EIS)......82
MAGNIFYING SUBJECT IMAGE (DIG. ZOOM) ...83
REDUCING WIND NOISE DURING RECORDING (MIC.FILTER) 84
SWITCHING TO 16:9 MODE ....84
Setting Up Record Functions.... 85
SWITCHING MOVIE QUALITY (VIDEO MODE)...85
SWITCHING QUALITY OF STILL IMAGE (QUALITY)....86
SELF-TIMER 87
SETTING ON-SCREEN DISPLAY OUTPUT ON OR OFF (OSD OUTPUT)......88
LCD Setup 89
SETTING BRIGHTNESS OF LCD SCREEN (BRIGHTNESS)....89
SETTING COLOUR DENSITY OF LCD SCREEN (COLOR LEVEL) 89
Initial Settings 90
SWITCHING OPERATING SOUND ON OR OFF (BEEP)....90
TURNING DVD VIDEO CAMERA/RECORDER OFF AUTOMATICALLY (POWER SAVE)....90
TURNING RECORD LED ON OR OFF (RECORD LED)....91
CHANGING DISPLAY LANGUAGE (LANGUAGE) 91
RESETTING MENU SETTINGS TO DEFAULTS (RESET) 92
Disc Navigation
Using Disc Navigation.... 93
STARTING DISC NAVIGATION....93
TERMINATING DISC NAVIGATION 95
PLAYING BACK FROM DISC NAVIGATION SCREEN....95
SELECTING MULTIPLE SCENES....96
SELECTING CONSECUTIVE SCENES TOGETHER....96
Disc Navigation Menu.... 97
FUNCTIONS AVAILABLE WITH DISC NAVIGATION....97
UNDERSTANDING FLOW OF DISC NAVIGATION MENU ....98
Scene....99
DELETING SCENES (DELETE) 99
CHANGING IMAGES FOR THUMBNAILS (EDIT - THUMBNAIL)....101
PLAYING BACK BY SKIPPING SCENES (EDIT - SKIP)....102
ADDING SPECIAL EFFECTS (EDIT - FADE).....103
ARRANGING ORDER OF SCENES (EDIT - MOVE)....104
COMBINING MULTIPLE SCENES (EDIT - COMBINE)....105
DIVIDING MOVIES (EDIT - DIVIDE)......106
COPYING STILLS ON DVD-RAM DISC TO CARD (COPY)......107
LOCKING SCENES ON CARD (LOCK)......108
DESIGNATING SCENES TO BE PRINTED (DPOF)....109
SELECTING SCENES USING MENU SCREEN (SELECT)....110
DISPLAYING INFORMATION USING MENU SCREEN (DETAIL) 111
Programme.... 112
WHAT IS "PROGRAMME"?......112
SWITCHING TO THUMBNAIL DISPLAY OF SPECIFIC DATE (SWITCH)....112
PLAYING BACK PROGRAMME (PLAY) .....113
CHANGING TITLE OF PROGRAMME (TITLE)..113
Play List.... 115
WHAT IS "PLAY LIST"? 115
CREATING NEW PLAY LIST (CREATE)......115
SWITCHING TO DISPLAY OF EACH PLAY LIST (SWITCH)....116
PLAYING BACK A PLAY LIST (PLAY) ......117
ADDING SCENES TO PLAY LIST (EDITING PLAY LIST)......118
DELETING SCENES FROM PLAY LIST (EDITNG PLAY LIST)....119
ADDING SCENES USING SUBMENU FOR EDITING (EDITING PLAY LIST)....119
DELETING SCENES USING SUBMENU FOR EDITING (EDITING PLAY LIST)....120
SELECTING SCENES USING SUBMENU FOR EDITING (EDITING PLAY LIST)....120
ARRANGING ORDER OF SCENES (MOVE).....121
CHANGING TITLE OF PLAY LIST (TITLE) ..... 122
DELETING PLAY LIST (DELETE) ......122
Go To....123
TOP (END)....123
Disc or Card Management.... 124
VERIFYING REMAINING FREE SPACE ON DISC OR CARD (CAPACITY) 124
PROTECTING DISC FROM WRITING (PROTECT DISC)....124
INITIALISING DVD-RAM DISC OR CARD
(FORMAT DISC/FORMAT CARD)......125
UPDATING CONTROL INFORMATION OF DVD-RAM DISC....126
FINALISING DVD-R DISC 127
Others.... 128
DISPLAYING MOVIES OR STILLS INDEPENDENTLY (CATEGORY)......128
PLAYING BACK SCENES REPEATEDLY (REPEAT PLAY) 128
SLIDE SHOW (CONTINUOUS PLAYBACK OF STILLS) 129
Installing Software
Contents on Provided CD-ROM 131
INSTALLING USB DRIVER....133
INSTALLING UDF DRIVER (DVD-RAM DRIVER)....135
INSTALLING DVD-MovieAlbumSE ....137
INSTALLING MyDVD 139
Creating DVD Video on PC from
DVD-RAM Disc Recorded on
DVD Video Camera/Recorder.... 141
Subsidiary Information
Cleaning.... 143
Changing Setting of Demonstration.... 144
No DVD Video Camera/Recorder
Operation - Check the Following: 145
Trouble Messages 147
Troubleshooting.... 154
System Reset 161
Major Specifications.... 162
Introduction to Optional Accessory 164
POWER SUPPLY....164
INFORMATION ON SQUARE ADAPTER......164
Index.... 165
Checking Provided Accessories
Make sure that you have all the following accessories in package:
Battery (model DZ-BP14S):Portable power supply for this DVD video camera/recorder. Charge it before use. | AC adapter/charger (model DZ-ACS1):Used to power the DVD video camera/recorder from AC outlet, or charge battery. | DC power cord:When powering the DVD video camera/recorder from household AC outlet, use this cord to connect the DVD video camera/recorder and AC adapter/charger. |
Mains lead:Connect between household AC outlet and AC adapter/charger.for DZ-MV350E (SW) for DZ-MV350E (AU) for DZ-MV350E (UK)and DZ-MV350E (SWH)   | Infrared remote control (model DZ-RM3W):Use to control the DVD video camera/recorder from a distance. | |
Lithium battery (model CR2025):To power the remote control. WARNING: Keep this battery away from children. If swallowed,consult a physician immediately for emergency treatment. WARNING: Keep this battery away from children. If swallowed,consult a physician immediately for emergency treatment. | AV/S output cable:Used when viewing the picture played back on the DVD video camera/recorder on TV screen, or output video to another video device. | Shoulder strap:Attach to the DVD video camera/recorder to hang it from shoulder. |
Lens cap and lens cap string:Attach the lens cap when not recording, to protect the lens. | 8 cm DVD-R disc (in Round DVD Holder)To record video (movie) on this DVD video camera/recorder | Ferrite core:In order to control radio noise emission, attach this to external microphone cable if you are using the external microphone. |
Software CD-ROM:UsethisCD-ROMwhenconnectingthe DVD video camera/recorder to PC. | PC connection cable: | |
Names of Parts

text_image
1 2 3 4 5 6 7 8 A/V MIC (Inside the cover) 9 10 11 BATTERY EJECT (Bottom)1 Recording indicator (P. 91)
The red indicator will light during recording.
2 Optical 10× zoom lens (P. 56)
3 Lens hood (P. 57)
Always remove this lens hood when using generally available tele-conversion or wide-conversion lens.
4 Infrared receiver (P. 36)
When the remote control is used to operate the DVD video camera/recorder, this receiver will receive the infrared signal.
5 Zoom lever (P. 56)
Push the lever to the T side for telephoto, or to the W side for wide-angle.
6 Accessory shoe
7 External microphone jack (P. 53)
8 AV output jack (P. 71)
9 Stereo microphone (P. 53)
10 2.5"type liquidcrystaldisplay (inside) (P.47)
11 BATTERY EJECT switch (P. 38)
The BATTERY EJECT switch is located on the bottom of this DVD video camera/recorder: Slide it when removing the battery.

text_image
12 13 14 1715 16 PUSH CLOSE SANS ACCESS 18 19 20 222112 Viewfinder (P. 47)
13 Dioptre control (P. 47)
To adjust the focus of image appearing in the viewfinder. (Pull out the viewfinder.)
14 ACCESS/PC indicator (P. 8, 51, 54)
Will blink or light while the DVD video camera/ recorder is operating.
15 DISC EJECT button (P. 42)
Press down and release this button to open the disc guide.
16 CARD ACCESS indicator (P. 8, 54)
17 Card insertion block (P. 45)
18 Battery attachment platform (P. 38)
19 Record button (REC) (P. 51)
20 Power switch (P. 46, 51, 54)
21 Speaker (P. 66)
22 Hand strap (P. 33)
23 24 25 26 27 28 29

text_image
DVD VIDEO RAM DISC ANULATION SELECT MEN1 FULL AUTO FOCUS EXPOSURE BLC VOL. RESET DISPLAY - 30 3531 32 33 3423 FULL AUTO button (P. 62)
To switch the DVD video camera/recorder to full automatic
24 FOCUS button (P. 58)
To switch between manual focus and auto-focus.
25 EXPOSURE button (P. 60)
Press this button to adjust the exposure.
26 BLC (backlight compensation) button (P. 61)
Press this button when subject is being lighted from rear.
27 DISC NAVIGATION button (P. 93)
28 SELECT button (P. 96)
29 MENU button (P. 49, 77, 99)
Press this button to display the menu for setting camera functions and Disc Navigation.
The camera menu will appear even if disc is not loaded.
30 Screen display button (DISPLAY) (P. 70)
Press this button to display the details of image being played back or camera setting status, or switch the display off.
31 Volume control buttons (VOL)/ ⊖ ⊕ buttons (P. 58, 60, 66)
To adjust the volume of sound from speaker, etc.
32 RESET button (P. 161)
To reset all settings to defaults (status when the DVD video camera/recorder was shipped from the factory).
33 PC connection terminal (TO PC)
34 Joystick (P. 49, 66, 78)

natural_image
Two identical diagrams showing a rotating object with directional arrows, no text or symbols present.Move the joystick to select a scene or menu item; then play back the scene or pause it.
35 Stop/cancel button (P. 22, 66, 95)
To end playback or cancel setting of menu.

text_image
36 37 38 39 40 41 REC DIGITAL ZOOM ZOOM T/W DISC NAVIGATION DISPLAY MENU DELETESELECT 42 43 44 45 46 47 48 49 50 HITACHI DZ-RM3W36 REC button (P. 51)
37 DIGITAL ZOOM button (P. 83)
38 Reverse skip button (P. 68)
39 Reverse search button (P. 67)
40 DISC NAVIGATION button (P. 93)
41 MENU button (P. 49, 79, 100)
42 ZOOM T button (P. 56)
43 ZOOM W button (P. 56)
44 Forward search button (P. 67)
45 Play/pause button (P. 66)
46 Forward skip button (P. 68)
47 DISPLAY button (P. 70)
48 Stop button (P. 22, 66, 95)
49 DELETE button (P. 99)
50 SELECT button (P. 96)
About This Manual
- Displays in this manual
Understand that the displays are different from those you will actually see in the viewfinder or on the LCD screen.
- Notation of cancel button
Press the stop/cancel button to stop your operation midway, or return the menu screen to the preceding one. The expression "press the □ button" will be used in this text.
- RAM, R and CARD marks beside headings
Some functions of this DVD video camera/recorder are unavailable with disc or card used. Refer to the marks at right above each function to identify whether the disc or card is compatible with the function. Refer to these marks and identify the functions and operation to match the disc or card you use.
Discs and Cards
The following table lists the storage media (discs and cards) that can be used on this DVD video camera/ recorder and the functions which are available with them:
| Function | DVD-RAM disc | DVD-R disc | SD memory card/Multimedia card |
| Recording movie | × | ||
| Recording still | × | ||
| Deleting recorded image | × | ||
| Editing on this DVDvideo camera/recorder | × | × | |
| Playback on DVD player | × ^*1 | ^*2 | × |
| Playback on DVD-RAM recorder | × ^*2 | × ^*3 |
∴: Functions available; ×: Not available
*1: Can be played back on some DVD players.
*2: Must be finalised on this DVD video camera/recorder before DVD-R disc can be played back on DVD player or DVD recorder (See P. 73). May not be playable on some DVD players.
*3: Can be played back on some DVD-RAM recorders.
AVAILABLE DISCS

| Usable discs and logos | Shape | |
| DVD-RAM Ver. 2.1 (8 cm) |  | In Round DVD Holder |
| DVD-R[for General Ver. 2.0 (8 cm)] |  | |
This DVD video camera/recorder uses 8 cm DVD-RAM discs and 8 cm DVD-R discs for camcorder use.
Discs removed from Round DVD Holder cannot be used on this DVD video camera/recorder: Use them only in the holder.
Note:
- It is recommended that you use Hitachi Maxell discs, since their compatibility with this DVD video camera/recorder has been confirmed. Using a disc other than those made by Hitachi Maxell may not allow the DVD video camera/recorder to deliver optimum performance.
- It is necessary to initialise an unformatted disc. When an unformatted disc is inserted into the DVD video camera/ recorder, a message will appear: Initialise the disc following the instructions on screen (P. 125).
- The Round DVD Holder cannot be used on the following DVD video camera/recorders:
- DZ-MV100A/E
- DZ-MV200E
- DZ-MV208E
- DZ-MV230E
- DZ-MV238E
- DZ-MV270E
- Other DVD video camera/recorders that use square type adapters.
- Image data edited on PCandcertain types of image data may not be visible on this DVD video camera/recorder.
- The image data recorded on another device may not be playable on this DVD video camera/recorder.
INFORMATION ON DVD-R DISC
You cannot record a still on DVD-R disc, or delete any recorded images or data.
For optimum recording on DVD-R disc, this DVD video camera/recorder writes control data to the disc in order to automatically make adjustments when it is inserted and ejected accompanying recording. If the disc has no area to be written for adjustment, recording may not be possible. To prevent this, do not insert or eject a DVD-R disc accompanying recording more than 50 times. The DVD video camera/recorder will not perform “write adjustment” when the DVD video camera/recorder is turned on again, from off, for recording with the disc in it, or when no recording is made, even if the disc is removed and then reinserted.
- Finalising DVD-R disc
Before using the 8 cm DVD-R disc provided on this DVD video camera/recorder on a DVD player or DVD video recorder that is compatible with 8 cm DVD-R disc, the disc must be finalised on this DVD video camera/recorder. For the finalising procedure of 8 cm DVD-R disc, refer to “Finalising DVD-R Disc” (P. 127).
Note:
- Do not insert a DVD-R disc recorded on this DVD video camera/recorder but not finalised, into a recordable device, such as a DVD videorecorder: Therecorded data may be damaged.
- DVD-RdiscseditedandfinalisedonPCorthosefinalised on another DVD video recorder may not be playable on this DVD video camera/recorder, depending on the editing software used or recorded status of DVD-R disc.
EXAMPLESOFDISCSTHATCANNOTBEUSEDONTHISDVDVIDEOCAMERA/RECORDER:
• DVD-RAM (2.6 GB) Ver. 1.0
• DVD-R (3.9 GB) Ver. 1.0
• DVD-R (4.7 GB) for Authoring Ver. 2.0
- DVD-RW
- DVD+RW
- DVD+R
- DVD-ROM
- DVD-Video
- CD-R
- CD-RW
• CD
• LD
• MO
• MD
• iD
- Floppy disk
• Discs other than those with diameter of 8 cm
- CD-ROM
- Using discs
DVD-RAM and DVD-R discs are very delicate recording media. Carefully read the following cautions and observe them:
- When using disc on this DVD video camera/ recorder, be sure to keep it in Round DVD Holder.
• Always use a brand new disc when recording important material.
- Be sure not to touch the disc exposed portion, and be careful that no dirt adheres to it.
- If there is dust, scratch, dirt on disc or if it is warped, the following phenomena may occur:

Do not touch
- Block noise in playback image
- Momentary stop of playback image
- Sound interrupted during playback, or abnormal sound
- Grey Disc Navigation screen
- Disc cannot correctly be recognised
- Delay between video and audio Even if disc is normal, the above phenomena may occasionally occur. While the ACCESS/PC indicator is lit, do not subject disc to vibrations or impact, and avoid using DVD video camera/recorder at extremely high or low temperatures, or in environment where condensation is likely to occur.

natural_image
Pixelated cartoon character with a bow and pixelated expression (no text or symbols)Block noise
- When recording images, the DVD video camera/ recorder may avoid the portions of disc where recording is not possible, due to dust, scratches, etc. [It will pause ●II at such a portion and automatically restart recording (●REC).]

text_image
001:002A Program PLAY RAM(Recording one scene may produce multiple thumbnails.)
This will cause recording to be interrupted for several seconds to several minutes, and multiple thumbnails will be created by one recording session as shown above. In this case, the recordable time on disc will decrease.
- Be careful when removing the disc since the metal of removal slot of DVD video camera/ recorder, and disc itself, may be hot.
- Storing discs
- When storing disc, insert it in Round DVD Holder into plastic case.
- Be careful that no condensation occurs on disc.
- Do not place disc in following places:
- Direct sunlight for a long time
- Where humidity is high or in dusty place
- While there is heat from a heater, etc.
Note:
• See page 75 when cleaning the removed disc.
- Seepage74 for howtohandle discremoved from Round DVD Holder.
- Seepage 74 for how to set the discre removed from Round DVD Holder or another disc correctly in Round DVD Holder.
AVAILABLE CARDS

natural_image
Simple line drawing of a rectangular electronic component or memory card (no text or symbols)
natural_image
Line drawing of a rectangular electronic component with internal slots and connectors (no text or symbols)SD memory card and multimedia card can be used on this DVDvideo camera/recorder.
- Handling card
- Do not use cards other than the designated ones.
- Be sure to use a brand new card when recording vital images.
- Do not touch the card terminal or allow it to touch metal.
- Do not paste anything other than exclusive label on label pasting portion.
- Do not subject card to impact, bend or drop it.
- Do not disassemble card or modify it.
- Do not expose card to water.
- Do not use or store card in the following places:
- Where the temperature is high, such as in vehicle at high temperatures, under burning sun or near a heater.
- Where humidity is high, or in dusty place

natural_image
Pure technical line drawing of a rectangular component with internal grid structure, labeled 'Terminal' at bottom (no other text or symbols)- When the erasure prevention switch on SD memory card is locked, no recording, deletion or editing will be possible on the card.

natural_image
Pure technical line drawing of a mechanical component or enclosure without any text, numbers, or symbolsErasure prevention switch

natural_image
Simple line drawing of a rectangular device with a 'LOCK' label on the side (no other text or symbols)Locked status
- It is recommended that you create a backup file for valuable data on hard disk of PC.
-
Do not do the following, or the data on card may be damaged or lost:
-
Do not remove the card or turn DVD video camera/recorder off during reading or writing of data
- Do not use DVD video camera/recorder in a place subject to static electricity or electrical noise
Note:
- This DVD video camera/recorder can play back image data recorded on other digital cameras conforming to the DCF (Design rule for Camera Filesystem) standard. The range of image data playable on this DVD video camera/ recorderisthatwithpixelsfrom80horizontal×60vertical to 4000 horizontal × 3000 vertical.
- DCF is an integrated image file format of digitalcameras: Image files can be used on all digital devices conforming to DCF.
- Image data edited on PC and certain types of image data may not be visible on this DVD video camera/recorder.
- The image data recorded on another device may not be playable on this DVD video camera/recorder.
Storage Capacity on Disc or Card
The recordable time will vary depending on the recording quality: See page 85 for the setting of recording quality.
Movie recordable time on one disc (on single side) (when recording only movies)
| Recording quality | Disc used | |
| DVD-RAM DVD-R | ||
| XTRA Approx. | 18 min*1 | No recording possible |
| FINE Approx. | 30 min*2 | Approx. 30 min*2 |
| STD Approx. | 60 min*3 | Approx. 60 min*3 |
*1: Variable bit recording (recording of more than 18 minutes may be possible because the transfer rate varies automatically between approx. 3-10 Mbps)
*2: Transfer rate: Approx. 6 Mbps
*3: Transfer rate: Approx. 3 Mbps
Note:
- No movie can be recorded on SD memory card or multimedia card.
- The movie quality mode can be changed for recordings on DVD-RAM disc, but not on DVD-R disc.
- Recordable stills on one DVD-RAM disc (single side) (when recording only still): Up to 999
If the disc still has free space after recording 999 stills on it, movies can also be recorded on it.
- Recordable stills on oneblank card:
The number of recordable stills will vary depending on the recording quality: See page 86 for the setting of recording quality.
| Capacity | Recording quality | ||
| FINE NO | RM ECO | ||
| 8 MB | Approx. 45 | Approx. 95 | Approx. 190 |
| 16 MB | Approx. 100 | Approx. 200 | Approx. 400 |
| 32 MB | Approx. 220 | Approx. 440 | Approx. 880 |
| 64 MB | Approx. 440 | Approx. 880 | Approx. 1,760 |
| 128MB | Approx. 880 | Approx. 1,760 | Approx. 3,520 |
| 256 MB | Approx. 1,760 | Approx. 3,520 | Approx. 7,040 |
| 512 MB | Approx. 3,520 | Approx. 7,040 | Approx. 14,080 |
(The numbers of recordable stills above are only for reference)
Note:
- Cards used on other devices can be used on this DVD video camera/recorder.
- No movie or music data recorded on card can be checked, viewed or heard on this DVD video camera/recorder. In addition, nosuchadatafilecanbedispla on this DVD video camera/recorder.
- Use the remaining display function to check the remaining free space on disc before use. See “Verifying Remaining Free Space on Disc or card (Capacity)” on page 124.
- Some still data recorded on this DVD video camera/ recorder may not be playable on another device (for example, on a device that limits the maximum number of recognisable stills to 999).
- NostillcanberecordedonDVD-Rdisc.
Features of DVD Video Camera/Recorder
VERSATILE FUNCTIONS AVAILABLE
This DVD video camera/recorder has numerous useful functions. However, the functions that can be used will vary depending on whether DVD-RAM disc, DVD-R disc or card is used.
Use the functions, following the table below:
Camera Functions:
| Function | Disc/Card used | Reference page | |||
| DVD-RAM DVD-R CARD | |||||
| Camera Functions Setup | Program AE | 79 | |||
| White Bal. | 80 | ||||
| EIS | × | 82 | |||
| Dig.Zoom | 83 | ||||
| MIC.Filter | × | 84 | |||
| 16:9 | 84 | ||||
| Record Functions Setup | VIDEO Mode | ^*1 | × | 85 | |
| Quality | × | × | 86 | ||
| Self Timer | × | 87 | |||
| OSD Output | 88 | ||||
| Date Setup | Date Mode | 50 | |||
| Date Set | 49 | ||||
| LCD Setup | Brightness | 89 | |||
| Color Level | 89 | ||||
| Initial Setup | Beep | 90 | |||
| Power Save | 90 | ||||
| Record LED | 91 | ||||
| Language | 91 | ||||
| Demo Mode | 144 | ||||
| Reset | 92 | ||||
∴ Available; ×: Unavailable
(*1 Except for XTRA mode)
Disc Navigation Functions:
| English |
| Function | Disc used | Reference page | |||
| DVD-RAM DVD-R | |||||
| Scene Delete | x | 99 | |||
| Edit Thumbnail | x | 101 | |||
| Skip | x | 102 | |||
| Fade | x | 103 | |||
| Combine | x | 105 | |||
| Divide | x | 106 | |||
| Move | x | 104, 121 | |||
| Copy | x | 107 | |||
| Select | Start → Current | 110 | |||
| Current → End | 110 | ||||
| All | 110 | ||||
| Detail | 111 | ||||
| PlayList Switch | x | 116 | |||
| Play | x | 117 | |||
| Create | x | 115 | |||
| Edit | x | 118-121 | |||
| Title | x | 122 | |||
| Delete | x | 122 | |||
| Program Switch | 112 | ||||
| Play | 113 | ||||
| Title | x | 113 | |||
| GoToTop | 123 | ||||
| End | 123 | ||||
| Disc Capacity | x | 124 | |||
| Protect Disc | x | 124 | |||
| Format Disc | x | 125 | |||
| Update Control Info. | x | 126 | |||
| Finalize Disc | x | 127 | |||
| Others Category All | x | 128 | |||
| VIDEO | x | 128 | |||
| PHOTO | x | 128 | |||
| Repeat Play On | 128 | ||||
| Off | 128 | ||||
∴ Available; ×: Unavailable
Card Navigation Functions:
| Function Reference page | |||
| Scene | Delete 99 | ||
| Lock 108 | |||
| DPOF 109 | |||
| Select Start → Current 110 | |||
| Current → End 110 | |||
| All 110 | |||
| Detail 111 | |||
| Go To | Top 123 | ||
| End 123 | |||
| Card | Capacity 124 | ||
| Format Card 125 | |||
| Slide Show | All | 129 | |
| DPOF 129 | |||
RECORDING ON DISC
You can use both 8 cm DVD-RAM and DVD-R discs on this DVD video camera/recorder for recording. The recorded video and audio will be stored on an 8 cm DVD-RAM disc or 8 cm DVD-R disc.
Using disc allows you to record without overwriting previous recordings, and also to store your valuable recordings for as long as need be while retaining clarity.
With disc you can immediately access recording and playback, in contrast to videotape, which must be fast-forwarded or rewound.
RECORDING MOVIE AND STILL
The DVD video camera/recorder can record movies of events and sports, in the same way as with conventional camcorders.
It can also record stills on a DVD-RAM disc or card, as with a digital still camera. With CCD of 800,000 pixels, high-quality movies and stills (on DVD-RAM disc only) can be recorded. When recording movies, subject images can be zoomed up to 240
In addition, simply loading a DVD-RAM disc into a PC equipped with DVD-RAM drive and DVD video recording software compatible with 8 cm DVD-RAM allows you to easily view the recorded disc.
You can finalise a recorded DVD-R disc on this DVD video camera/recorder so that you can play it back on a DVD player or DVD video recorder that is compatible with 8 cm DVD-R disc (however, the finalised DVD-R disc may not be usable on some DVD players).
times; when recording stills, subject images can be zoomed up to 40 times. Movies and stills can be recorded on the same disc, by simply switching the recording mode (power switch). However, if you use a DVD-R disc, a still image cannot be recorded. (If the DVD video camera/recorder is connected to PC, the DVD video camera/recorder can capture still images, such as JPEG data.)
IMMEDIATE REVIEWING OF RECORDED IMAGE
You can check the recorded movie or still in the viewfinder or on the LCD screen.
EDITING IN VARIOUS WAYS ON DVD VIDEO CAMERA/RECORDER ALONE
This DVD video camera/recorder is provided with a useful editing/playback tool. Disc Navigation allows you to easily attach a title or special video effect to the recorded movie or still. With Disc Navigation, you can arrange the playback order
and edit multiple images to play them back continuously. You can create an entire movie on this DVD video camera/recorder alone, without inputting video to a PC for editing.
USING WITH VARIOUS DEVICES
Connect this DVD video camera/recorder to your TV and you can enjoy the playback picture with your family and friends on the large TV screen; or connect it to a video printer (generally available) to
print the recorded image. You can also transfer recorded movies and stills (for DVD-RAM disc or card) to PC.
Setups
This section explains preparations for recording - setting up the DVD video camera/recorder and battery.
Setting Up the DVD Video Camera/Recorder
Insert your right hand from the bottom of DVD video camera/recorder up to the base of your thumb.
Put your hand in a position where you can easily operate the REC button and the Zoom lever.
Adjust the length of hand strap so that the DVD video camera/ recorder is stable when you press the REC button with your thumb.

natural_image
Illustration of a hand holding a camera (no text or symbols visible)Note:
Do not adjust the hand strap while holding the DVD video camera/recorder: Doing this could cause the DVD video camera/recorder to fall and be damaged.
Caution:
Do not lift the DVD video camera/recorder by holding the viewfinder or LCD monitor: If the viewfinderorLCDmonitorcomesoff,theDVDvideo camera/recorder will fall.

natural_image
Two hand-drawn diagrams showing a device being crossed out by a diagonal line, no text or symbols present.ATTACHING LENS CAP
Pass the provided string through the hole in the lens cap and attach it to the hand strap of DVD video camera/recorder.
1 Use the string to attach the cap to the DVD video camera/recorder.
2 Push the both sides of cap inward and attach it over the lens.

text_image
Push and fitNote:
• Always keep the lens cap on when not using the DVD video camera/recorder, to protect the lens.
- When recording, attach the lens cap to the hand strap by hooking the tab inside the cap onto strap for comfortable shooting.

natural_image
Technical line drawing of a mechanical device with an inset showing internal components (no text or symbols)ATTACHING SHOULDER STRAP


text_image
Besuretopassthroughthe2slots. Pass the shoulder strap through the shoulder strap attachments.INSERTING BATTERY INTO REMOTE CONTROL
Insert the provided lithium battery into remote control.
1 Slide the cover to remove it.
3Slide the cover to close it.
2 Insert the lithium battery with the positive ⊕ terminal facing up.
Note:
The life of lithium battery is approximately one year. If the battery is discharged, no operation is possible with remote control: Replace the battery.

text_image
Battery stopperREMOVING BATTERY FROM REMOTE CONTROL
1 While pushing the battery stopper, slide the battery out.

text_image
Battery stopper While pushing battery stopperWarning:
- KEEP THE BATTERY AWAY FROM CHILDREN AND PETS.
• IF SWALLOWED CONSULT A PHYSICIAN IMMEDIATELY FOR EMERGENCY TREATMENT. - BATTERY MAY EXPLODE IF NOT HANDLED PROPERLY.DONOTRECHARGE,DISASSEMBLEOR DISPOSE OF IN FIRE.
Note:
- Replace the battery with a Hitachi Maxell, Sony, Panasonic, Sanyo, Toshiba CR2025, or Duracell DL2025. Use of another battery may present a risk of fire or explosion.
- Dispose of battery safely in accordance with local laws. Do not dispose of in fire.
- Do not short circuit the battery.
- Do not hold the battery with the metallic tweezers.
- Keep the battery in a dark, cool, dry place.
•Using Remote Control
Point the remote control to the infrared receiver on the DVD video camera/recorder. The remote controllable distance is up to 5 m.

text_image
15° 10° 10° 15° Approx. 5m Infrared receiverNote:
- When using the remote control, make sure that the infrared receiver on DVD video camera/recorder is not exposed to direct sunlight or any intense light. If the infrared receiver is subject to light stronger than the infraredlightfromremotecontrol,theDVDvideocamera/recorder cannot be operated by remote control.
- If there is an obstacle between the remote control and infraredreceiveronDVDvideo camera/recorder,remote control may not be possible.
- The DVD video camera/recorder uses the "VCR2" remote control code of Hitachi VCRs. If you use aHitachi VCR,etc. with remote control codesetto"VCR2",aVCR placed near the DVD video camera/recorder will also be operated by the remote control: To prevent this, change the remote control code of the VCR.
Setting Up the Battery
The DZ-BP14S battery provided with this DVD video camera/recorder has not been charged at purchase time: Charge it before using the DVD video camera/recorder.
Note:
- Be sure to use the DZ-BP14S/DZ-BP14SW battery for the DVD video camera/recorder: Using other batteries could cause the DVD video camera/recorder to malfunction, or result in fire.
- Be sure to use the DZ-ACS1 AC adapter/charger to charge the battery: Using other chargers could cause electric shock or fire.
- Charge the battery at temperatures of 10-30°C.
CHARGING BATTERY
Use the provided AC adapter/charger to charge the battery.
1 Connect the mains lead to AC adapter/charger.
2 Plug the mains lead into AC outlet.
The CHARGE indicator on AC adapter/charger will light.
3 Attach the battery to AC adapter/charger.
Note:
When charging a battery, unplug the DC power cord from the DC output jack on AC adapter/charger.

text_image
POWER and CHARGE INDICATORS POWER CHARGE Battery AC adapter/charger Mains lead●Battery charged status
You can find out the charged status of battery by checking the CHARGE indicator on AC adapter/charger:
| Charge status CHARGE indicator | |
| During charge Lit | |
| Charge complete Goes out | |
Note:
See "Troubleshooting" on page 154 when the CHARGE indicator blinks.
ATTACHING BATTERY TO DVD VIDEO CAMERA/RECORDER
1 Fit the battery to the battery attachment platform on this DVD video camera/recorder and slide it upward until a click is heard.

text_image
Terminal must face up.Note:
- Make sure that the battery is in the correct orientation.
- Make sure that the battery is securely attached: Incomplete attachment could cause the battery to fall, resulting in damage.
REMOVING BATTERY
After using the DVD video camera/recorder, remove the battery from it.
1 Slide the BATTERY EJECT switch on the bottom of DVD video camera/recorder: The battery can be removed.

natural_image
Technical line drawing of a device casing with labeled parts (1 and 2), no readable text or symbols beyond labelsNote:
- For safety, be sure to turn the DVD video camera/ recorder off before attaching or removing the battery.
- Be careful not to drop the removed battery.
- If the battery remains attached, minute level current will flow even if the DVD videocamera/recorder is off, and the battery will discharge.
- Recordable time with fully charged battery (with no zoom operation, etc.)
The reference for DVD video camera/recorder recordable time with fully charged battery is between 40 and 60 minutes:
| Video quality mode | DVD-RAM disc | DVD-R disc | |
| XTRA* | When using viewfinder | 125 min | - |
| When using LCD monitor | 100 min | - | |
| FINE When using viewfinder | 125 min 125 min | ||
| When using LCD monitor | 100 min 100 min | ||
| STD When using viewfinder | 145 min 145 min | ||
| When using LCD monitor | 115 min 115 min | ||
(approx.)
* The time in XTRA mode is only for reference: It varies depending on recording contents.
Without any extraordinary operation, such as zooming:
The continuously recordable time of DVD video camera/recorder in the above table shows the time available when the DVD video camera/recorder is in the recording mode without using any other function after recording is started. In actual recording, the battery will discharge 2-3 times faster than this reference, since the REC button and zoom are being operated, and playback is performed. Assume that the recordable time with a fully charged battery is between 40 and 60 minutes, and prepare the number of batteries to allow for the time you are planning to record on the DVD video camera/recorder.
Note that the battery discharges faster in cold places.
- The time taken for charging the battery is 165 minutes at 25^
Note:
• See page 154 when charging is not possible.
- The charge time will vary depending on the battery remaining level.
- During and after charging, the battery will be warm, but this does not indicate a fault.
- If the following phenomena appear, the battery may be dead: Replace it.
- Charging does not start within 10 seconds (the CHARGE indicator does not light).
- The battery cannot be charged up to 75% if more than 9 hours has elapsed after charging started.
- The battery cannot be fully charged if more than 5 hours has elapsed after it was charged to 75%.
- Chargethebattery atambienttemperature10°C to 30°C: Charging at temperatures other than this range could damage the battery.
BATTERY REMAINING LEVEL INDICATOR
When the battery is used to power the DVD video camera/recorder, the battery remaining level appears in the viewfinder or on the LCD screen as follows:

text_image
Fully charged Nearly empty White portion shows remaining level (Blinks)Note:
The remaining level indicator “☐” may be displayed for an extended period, and “☐” or “☐” may be displayed for a shorter period.
EFFICIENT USE OF BATTERY
Charge battery immediately before using DVD video camera/recorder:
The battery will slightly discharge even if it is detached from the DVD video camera/recorder. If the battery is left attached to DVD video camera/recorder, it will consume a slight amount of power. Therefore, it is recommended that you charge the battery shortly before using the DVD video camera/recorder, usually on the day before you plan to use it.
However, since the battery used for this DVD video camera/recorder is free from the memory effect, you do not need to completely discharge the battery before charging it.
WhennotusingtheDVDvideocamera/recorder for an extended period:
It is recommended that you fully charge the battery once a year, attach it to DVD video camera/ recorder and use it up; then remove the battery and store it in a cool place again.
Store in cool, dark place:
When you are not using the DVD video camera/ recorder, remove the battery and store it in a cool, dark place. If you store it in a place where the temperature is high, the battery life will be shortened. Be especially sure not to store the battery in an environment (in a closed vehicle) over 60°C: Neglecting this could damage the battery.
Battery life:
The battery life varies greatly depending on the ambient environment and how often the DVD video camera/recorder is used. If the usable time of DVD video camera/recorder with a fully charged battery is noticeably short, the battery is probably dead: Purchase a new one.
Power save and discharge of battery:
It is recommended that you turn the DVD video camera/recorder off in status other than recording, since even during recording pause battery power is consumed at the same level as during recording. If, when you specify Power Save On, the recording pause status continues for approximately 5 minutes, the DVD video camera/recorder will automatically turn off.
To set or release power save, see "Turning DVD Video Camera/Recorder Off Automatically (Power Save)" on page 90.
USING DVD VIDEO CAMERA/RECORDER WITH AC ADAPTER/CHARGER
It is recommended that you use the AC adapter/charger to power the DVD video camera/recorder from household AC outlet when you perform settings on it, play back or edit images, or use it indoors.
Note:
Be sure to use the specified AC adapter/charger (DZ-ACS1) to power the DVD video camera/recorder. Using other AC adapter/chargers could cause electric shock or result in fire.

text_image
Mains lead AC adapter/charger To AC outlet DC power cord1 Connect the mains lead to AC adapter/charger.
2 Plug the mains lead into AC outlet.
3 Plug one end of DC power cord into the DC output jack on AC adapter/charger.
4 Attach the other end of DC power cord to the battery attachment platform on DVD video camera/recorder.
Note:
- The AC adapter/charger can be used around the world. AnACplugadapterisrequiredinsomeforeign countries. If you need one purchase it from your Hitachi distributor. - If the CHARGE indicator does not light when the AC adapter/charger is plugged into AC outlet, unplug it from the AC outlet, wait a few moments, and then plug it into the AC outlet again. If the CHARGE indicator still does not light, the AC adapter/charger may be faulty. Unplug it from the AC outlet and consult your dealer.

text_image
(for DZ-MV350E (SW) only) AC Plug Adapter (not supplied) AC 100-120VInserting and Removing Disc
INSERTING DISC
1 Press down the DISC EJECT button once and release it.
A few moments after the ACCESS/PC indicator blinks, the cover of disc insertion block will open slightly.
2 Gently open the cover by hand until it stops.
3 Insert the disc, in Round DVD Holder, into the disc guide until it stops.
Note that the recording/playback surface of disc must face the inside of DVD video camera/recorder. The orientation for inserting the disc into the disc guide is also predetermined: Load the disc correctly, referring to the figure below.

text_image
DISC EJECT button Disc cover USH CLOSE portion- The discexposed portion must face inthesamedirection as the lens, as shown in figure.
- The recording/playback side must face the inside (DVD video camera/recorder).

text_image
Disc guideIf the disc is not correctly inserted, the cover will not close. Never try to forcibly close the cover: This could cause damage. Reinsert the disc properly.

text_image
Correct orientation Incorrect orientation Incorrect orientation4 Push the section marked "PUSH CLOSE" on the cover of disc insertion block, to close the cover.
5 Turn the DVD video camera/recorder on (VIDEO or PHOTO).
When "DISC ACCESS" disappears, the DVD video camera/recorder is ready for recording.
- Identifying recording/playback sides of disc:
Single sided disc:
The recording/playback side is opposite to the printed label.
Double-sided disc:
The recording/playback side of "SIDE A" is opposite to the "SIDE A" marked side.
The recording/playback side of "SIDE B" is the "SIDE A" marked side.

text_image
"SIDE A" mark The opposite side is the "SIDE A" recording/ playback side.Note:
- Disc cannot be inserted or removed unless the battery or AC adapter/charger is connected to DVD video camera/recorder.
• See page 75 for how to set disc in Round DVD Holder. - If there is some delay before recording starts, refer to page 145.
- The disc insertion orientation is predetermined: Forcibly inserting a disc in wrong orientation could damage the DVD video camera/recorder or Round DVD Holder of disc.
- If the disc is not correctly inserted, the cover will not close. Never try to forcibly close the cover: This could cause damage. Reinsert the disc properly.
- If a single-sided disc is inserted into DVD vi recorder with the printed label facing the inside, an error message will appear. Remove the disc and reinsert it with its recording/playback side facing the inside. See "Trouble Messages" on page 147.
- When using brand-new DVD-R disc
Recognition of the disc will start.
The messages on the right will appear in sequence by pressing the ▶/Ⅱ button between messages.

text_image
Format Disc Disc is not formatted. If it formats, it becomes possible to use for camera. NEXT CANCELWhen recording on this DVD video camera/ recorder:
When final message de o c a m e r a,/ Format the disc now?" appears, choose "YES" and then press the ▶/II button. The disc will be automatically formatted. When formatting is complete, "DVD-R disc, Video mode cannot be changed" will appear (See page 150): Press the ▶/II button to erase the message. Once formatted, a DVD-R disc can no longer be changed to a disc for PC, ev recorded on this DVD video


text_image
Format Disc However, when you record from PC connection terminal, please do not format. NEXT CANCEL

text_image
Format Disc ⚠️ Format the disc now? YES 0 ENTERNote:
Seepage85formoviequalitymode.
When recording data from PC:
While the above messages are being displayed, press the □ button, or when message “Format the disc now?” appears, choose “NO” and then press the ▶/□ button.
However, if data from PC has not yet been recorded, the disc can be made usable on this DVD video camera/recorder. When inserting the disc into this DVD video camera/recorder, the same message will appear: If you wish to use it on this DVD video camera/recorder, choose "YES".
Note:
Do not initialise a disc on which you wish to record data created using the application (MyDVD) of PC.
REMOVING DISC
1 Set the power switch to "POWER OFF" to turn the DVD video camera/ recorder off.

text_image
PHOTO DIVIDEO POWER OFF CM/PHOTO2 Press down the DISC EJECT button once and release it.
In a moment, the cover of disc insertion block will open slightly.

text_image
DISC EJECT3 Gently open the cover until it stops.
When the cover is fully open, the disc will slightly come out from the disc guide, and stop.

natural_image
Technical line drawing of a mechanical device with no visible text or symbols4Remove the disc.
Hold the top of Round DVD
Hold disc around this portion.

natural_image
Illustration of a hand using a handheld device to press or install a mechanical component (no text or symbols visible)Holder as shown in the
illustration and gently pull it out.
Note:
Be careful not to touch the disc exposed portion when removing the disc.
5 Gently push the section indicated "PUSH CLOSE" on the cover of disc insertion block, to close the cover.

natural_image
Technical line drawing of a mechanical device with no visible text or symbolsNote:
- It is recommended that you turn the DVD video camera/ recorder off when inserting or removing disc, in order to prevent faulty operation.
- Evenafter the DVD videocamera/recorder is turned on, the disc can be removed unless it is in recording status. Hold down the DISC EJECT button for approximately 2 seconds, and then release it to remove the disc (The DISC EJECTindicator ontheLCDscreen will blink.). It is recommended that you turn the DVD video camera/ recorder off before inserting or removing disc to prevent misoperation.
- Do not detach the battery or AC adapter/charger until the DVD video camera/recorder is completely turned off.
- Do not insert anything other than the 8 cm DVD-RAM or DVD-R disc into the disc insertion block: Doing so could cause malfunctions.
- Set the power switch to "POWER OFF" to turn the DVD video camera/recorder off.
- When inserting or removing the disc, be careful not to touch the inside of DVD video camera/recorder (especially, the lens of laser pickup).
- When inserting or removing the disc, connect a charged battery or AC adapter/charger to the DVD video camera/recorder: The disc cover will not open unless the DVD video camera/recorder is powered.
Inserting and Removing Card
Beforeinserting or removingcard, setthe powerswitchto"POWER OFF"to turn theDVDvideo camera/recorder off.
1 Open the cover of card insertion block with power turned off.

natural_image
Close-up of a hand adjusting a mechanical component with a curved arrow indicating rotation (no text or symbols present)Removing Card Push the centre of card edge: The card will come out so that it can be held by fingers.

natural_image
Technical line drawing of a mechanical assembly with no visible text or symbols2 Insert card with its terminal inward until it locks.

natural_image
Technical diagram of a mechanical device with no visible text or symbols3 Close the cover of card insertion block.

natural_image
Illustration of a hand holding a mechanical component with a directional arrow (no text or symbols)
natural_image
Technical line drawing of a mechanical assembly with no visible text or symbols
natural_image
Technical line drawing of a mechanical device with no visible text or symbolsBasic Techniques
This section explains about recording of movies and still images, and also basic settings on DVD video camera/recorder.
Basic Handling of DVD Video Camera/Recorder
While holding down the red button at the centre of power switch, set the switch according to each recording function:
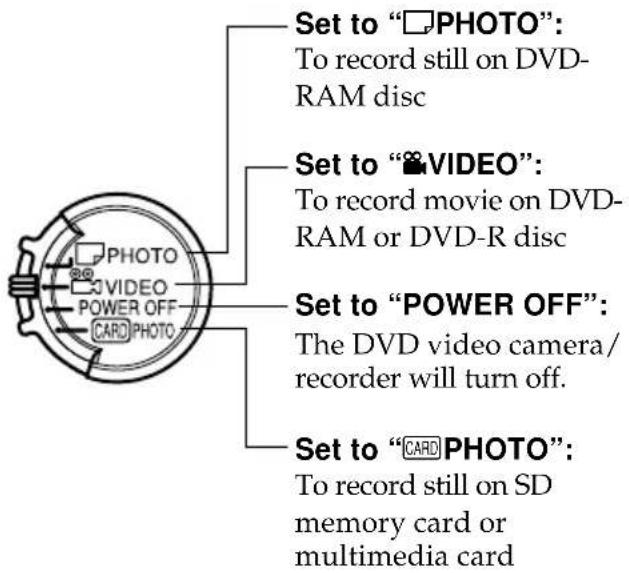
text_image
Set to "□PHOTO": To record still on DVD- RAM disc Set to "■VIDEO": To record movie on DVD- RAM or DVD-R disc Set to "POWER OFF": The DVD video camera/ recorder will turn off. Set to "□CARD PHOTO": To record still on SD memory card or multimedia cardPower ON status
During playback, set the power switch to “JPEG” or “PHOTO” when using disc, or set it to “CARD PHOTO” when using card.
Turn the switch while holding down the red button at the centre of switch.

- Once y outurn the DVD videocamera/recordero it recognise the disc, you can immediately record or play back by turning the DVD video camera/recorder on again. However, if you remove the disc, replace it, or if the date changes after power is turned on, it will take some time for the DVD videocamera/recorder to start because it must recognise the disc again (See page 145).
- It will take some time for the DVD video camera/recorder to display the Disc Navigation screen after power is turned on.
- If you turn the DVD video camera/recorder on, the ACCESS indicator will light or blink to show that the DVD video camera/recorder is recognising the disc or card: During this time, no operation, such as recording, can be performed.
After severalseconds, the ACCESS indicator will goout, and operating the DVD video camera/recorder will be possible.

text_image
CARD ACCESS indicator ACCESS/PC indicator- When the DVD video camera/recorder is turned on, the self-diagnosis function will work and a message may appear. In this case, refer to "Trouble Messages" on page 147 and take corrective action.
- While the ACCESS/PC or CARD ACCESS indicator is lit or blinking, do not violently open or close the LCD monitor.
VIEWING SUBJECT THROUGH VIEWFINDER
1 Pull out the viewfinder.
2 Turn the dioptre control knob to adjust the focus to suit your eyesight.
Note:
- If the LCD monitor is open approximately 90^ , the viewfinder will be off.
- Focusing will not be correct unless the viewfinder is pulled out.

text_image
Dioptre control Pull out the viewfinder.VIEWING IMAGE ON LCD MONITOR SCREEN
If you open the LCD monitor, you can monitor subject image on the LCD screen.
1 Open the LCD monitor.
The LCD monitor has a portion where you can hook your finger. Hook the finger there to open the monitor.
- Range where the LCD monitor can be moved
The LCD monitor can be opened up to approximately 90°.
If the LCD monitor is open 90°, it can be tilted with the screen down as much as 90°, and can also be tilted with screen up and turned up to 180° so the screen faces in the same direction as the lens.
If the LCD monitor is turned 180^ so the screen faces in the same direction as the lens during recording, subject image will also appear in the viewfinder as an mirror image (left/right reversed).
Tilt the LCD monitor to adjust its vertical angle so that you can see the screen easily.
Note:
- Be sure to open the LCD monitor approximately 90^ before changing its vertical angle.
- Do not record for a prolonged time with the LCD monitor turned approximately 180° inclosecontact with the DVD video camera/recorder body: Doing this could cause the DVD videocamera/recorder and LCD monitor tobecome hot.

text_image
90° Hook your finger (Bottom) 90° 180°CLOSING LCD MONITOR
Before closing the LCD monitor, be sure to reset it at right angles to the DVD video camera/recorder.
Replace the LCD monitor on the DVD video camera/recorder with the LCD screen facing inward until a click is heard.
Note:
- Be sure to return the LCD monitor at right angles to the DVDvideo camera/recorder beforeclosingitorreplacing it on the DVD video camera/recorder with its screen facing outside. If the LCD monitor is tilted, it cannot be closed to the DVD video camera/recorder.
- IftheLCDmonitor isnotsecurelylockedtotheDVDvideo camera/recorder, no image will appear in the viewfinder.

natural_image
Line drawing of a digital camera with an arrow indicating motion (no text or symbols)Setting Date and Time
Set the current date and time so that the date and time you make a recording can be recorded correctly. The following procedure can also be used to correct the date and time you have already set.

text_image
MENUTilt up/down and to left/right to select, and then press ▶/Ⅱto designate.
1 Turn the DVD video camera/recorder on.
2Press the MENU button.
The menu screen will appear.

text_image
Camera Funct i ons Setup Program AE : Sports White Bal. : Auto EIS : On Dig Zoom : 40x MICFilter : Off 16:9 : Off ENTER RETURN ©RAM3 Use the joystick to choose "Date Setup" and then "Date Set".

text_image
Date Setup Date Mode Date Set 1:2003 0:00 ENTER RETURN CRAM4 Tilt the joystick to right.
The figure for the day will be selected.
[The digit that is highlighted first depends on the date display format
(set up in Date Mode): The digit on the left end of the date display will be first highlighted.]
Note:
Aftersetting thefigure for the day, tilt the joystick to right to select the digit to be set. If you press the ▶/11button after selecting the figure for the day, the screen for verifying the set date will appear instead of screen for setting month, year or time.
5 Tilt the joystick to left or right to select the digit you want to set in sequence.

text_image
Date Setup Date Mode Date Set 0: 9:2003 17:00 ENTER RETURN RAMTilt the joystick up or down to select the
number for current date/time, and then repeat step 5 to set the current date and time.
Note:
To stop date/time setting midway, press the □ button.
6 After setting the current date and time, press the ▶/II button.

text_image
Date Set 3 0 / 9:2003 17:00 Date set up? YES NO ENTER RAMThe screen for verifying the set date will appear.
7 If the displayed date and time are correct, use the joystick to choose "YES", and then press the ▶/□button.
The date and time will be set, and the DVD video camera/recorder will enter the recording pause status.
Choosing "NO" will restore the menu screen.
Note:
This DVD video camera/recorder incorporates a rechargeable battery to store the date and time in memory. If this built-in battery is exhausted, the date and time will be reset. To prevent this, connect the AC adapter/charger to DVD video camera/recorder every 3 months, and leave them for at least 24 hours with the DVD video camera/recorder turned off: The built-in battery will be charged.
CHANGING DISPLAY FORMAT OF DATE AND TIME
You can select one of three date display formats: day/month/year or month/day/year, year/month/day. Associated with the selected date display, the time display format will also change as follows:
| Display format | Example of display |
| D/M/Y | 17:0030/9/2003 |
| M/D/Y | 5:00PM9/30/2003 |
| Y/M/D | PM5:002003/9/30 |
1 Press the MENU button.
The menu screen will appear.
2 Use the joystick to choose "Date Mode" on the "Date Setup" menu screen, and then press the ▶/□bottom.

text_image
Date Setup Date Mode D:\M\Y Date Set M:D\Y Y:M\D ENTER RETURN RAMThe options will appear on the right of "Date Mode": The □ mark will be attached to the currently selected option.
3 Use the joystick to select the desired date display format, and then press the ▶/□button.

text_image
Date Setup Date Mode M/D/Y Date Se 1 ENTER RETURN RAMThe menu screen for setting date will be restored, and the "Date Mode" has been changed as you designated.
4 Press the MENU button to switch off the menu screen.
Note:
If the date display format has been changed, the display format during playback as well as during recording will also be changed (See page 63).
Recording Movie
Insert a recordable DVD-RAM or DVD-R disc into this DVD video camera/recorder.

text_image
ACCESS/PC indicator Pressing REC once will start recording; pressing it onceagain will temporarily stop recording. REC Power switch1 Turn the DVD camera/recorder on.
Set the power switch to "VIDEO" to turn the DVD video camera/recorder on.
After the ACCESS/PC indicator goes out, perform the subsequent operation:
2 Check the subject on the screen (viewfinder or LCD).
If using the viewfinder, pull it out.
3Press the REC button.
The “●II” mark in the viewfinder or on the LCD screen will change to the “●REC” mark, and recording will start.
During recording, the recording indicator on the front of DVD video camera/recorder will light. Pressing REC again during recording will set the DVD video camera/recorder to the recording pause status.
4 When recording is finished, turn the DVD video camera/recorder off.
Note:
• See page 145 when recording movie is not possible.
• See page 145 if it takes some time before recording is possible.
• See page 63 for on-screen information display.
- It is recommended that you use DVD-RAM disc from which recorded contents can be deleted.
- Sound is recorded from the stereo microphone on the front of DVD video camera/recorder: Take care that this microphone is not blocked.
- Youcan press the RECbutton immediately afterthe DVD video camera/recorder enters the recording pause status, but no further recording canbemade while "DISC ACCESS" is being displayed. Recording will restartafter the message disappear.
• Take care that power is not interrupted while the ACCESS/PC indicator is blinking.
- The minimum recordable time of movie is approximately 3 seconds.
- See page 91 for setting of Record LED (recording indicator) On/Off.
- For various functions available during recording, see "Setting Up Camera Functions" on page 79.
- Hitachi cannot be responsible for video and audio that cannot be recorded or edited because of any defect.
- The power switch can be changed over even during recording, but the operation will not be changed.
- Each time the DVD video camera/recorder enters the recording pause status, the counter display will be reset to "0:00:00".
- When using DVD-R disc, do not perform the following, or data on the disc may not be read:
- Using another device, doing additional recording on DVD-R disc recorded on this DVD video camera/ recorder
- Using this DVD video camera/recorder, doing additional recording on DVD-R disc recorded on another device
- Powersaveanddischargeofbattery
If, when “Power Save: On” is specified, the DVD video camera/recorder is left in the recording pause status for approximately 5 minutes, it will automatically turn off.
To restart recording, set the power switch to "POWER OFF", and then set it to "VIDEO".
To set or release power save, see "Turning DVD Video Camera/Recorder Off Automatically (Power Save)" on page 90.
It is recommended that you specify “Power Save: On”, since even during recording pause battery power is consumed at the same level as during recording. Especially when power save has been released, turn the DVD video camera/recorder off when not in use.
USING EXTERNAL MICROPHONE
Connect external microphone (generally available) to the external microphone jack of this DVD video camera/recorder. Clearer sound can be recorded. Turn on the switch on microphone and start recording. For details on microphone, see “Major Specifications” on page 162.

text_image
To external microphone jackNote:
- If the AV/S output cable is plugged in, you cannot use external microphone: Unplug the AV/S output cable to use the external microphone.
- This DVD video camera/recorder cannot use a plug-in power type microphone (power supplied from camcorder).
- Attaching Ferrite Core
Although no ferrite core is attached in the illustrations of the cables in text, be sure to attach the provided core to the external microphone cable using the following procedure:
1 Open the cover of ferrite core.
2 Attach the core to external microphone cable at a position approximately 5 cm from its end.
3 Close the cover of core, taking care that it does not catch the external microphone cable.

text_image
Diagram illustrating the step-by-step assembly of a battery or motor, showing internal components before and after a 5cm diameter adjustment.Recording Stills
Note:
RecordingofstillimagesispossibleonDVD-RAMdiscand card.

text_image
ACCESS/PC indicator REC CARD ACCESS indicator Power switch1 Turn the DVD camera/recorder on.
When using DVD-RAM disc:
Set the power switch to "☐ PHOTO".
When using card:
Set the power switch to "CARD PHOTO".
After the ACCESS indicator goes out, perform the subsequent operation:

text_image
Still recording mode Number of recordable stills REM 999 17:00 30/9/2003 (When using DVD-RAM disc)
text_image
Still recording mode Number of recordable stills FINE 17:00 30/9/2003 (When using card)2 Check the subject on the screen (viewfinder or LCD).
3Press the REC button.
The DVD video camera/recorder automatically focuses on the subject at the centre of screen (when auto focus is selected).
The screen will be black, and then the recorded still will be displayed. When the “●II” mark appears, you can proceed with the next recording; while “DISC ACCESS” or “CARD ACCESS” is being displayed, you cannot proceed with the next recording.
4 Set the power switch to "POWER OFF" to turn the DVD video camera/recorder off.
Note:
- See "Still recording quality" on page 55 for details of stills on card.
- Donotoperatethepowerswitch or removethe cardwhile the ACCCSS/PC or CARD ACCESS indicator is lit or blinking: Doing so may damage the card or the data on card.
- Still recording quality
The DVD video camera/recorder can record JPEG stills of 640×480 pixels.
Although still images are recorded on DVD-RAM disc only in the FINE mode, the quality mode can be chosen when recording stills on card.
[Still recording quality on card]
| Quality File size Application | ||
| FINE Approx. 128 KB Whenimagequality is prioritized | ||
| NORM Approx. 64 KB Standard | ||
| ECO | Approx. 32 KB | When number of stills is prioritised (quality will be slightly inferior) |
* See page 162 for the number of recordable stills.
Note:
- The DVD video camera/recorder automatically sets the shutter speed between 1/800 and 1/30 second (between 1/800 and 1/10 second if Program AE has been set to Low Light) depending on the subject brightness.
- During recording of stills, the electronic image stabilizer will not function.
- See “Switching Quality of Still Image (Quality)” on page 86 if you want to change the still quality mode.
Zooming
This DVD video camera/recorder allows you to record using optical 10-power zoom and digital zoom.
Move the zoom lever to "T" control side, and the subject image will gradually become telescopic: Move the zoom lever to "W" control side, and the image will widen.
If Dig. Zoom 40× or 240× is specified, moving the zoom lever to "T" control side will engage the digital zoom midway (See page 83).
Note:
- The setting of digital zoom 240× is effective only during movie recording. If you set zoom to 240× when recording still, the digital zoom will be up to 40×.
- When a subject is zoomed, it may be momentarily out of focus.
- When digital zoom is engaged, the image quality will be rougher.
- If the zoom ratio is frequently changed at short intervals, the recorded image will be unclear.

text_image
Recordinginwide area W-T Recording enlarged image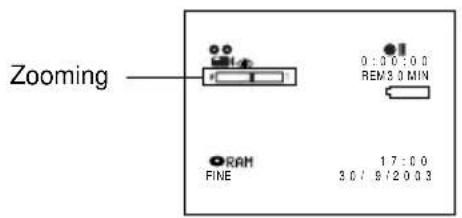
text_image
Zooming 0:30:00 REM/3.0 MIN RAM FINE 17:00 3.0 / 9/20 03
text_image
Zoom Out In case of movie recording Zoom In In case of still recording 1 × 10 × 40 × 240 × Digital zoom rangeMACRO RECORDING
Use the macro function when recording a small object from close-up position: You can shoot the subject as close as approximately 2 cm from the lens surface, magnifying the image to fill the screen.
1 Aim the DVD video camera/recorder at the subject, and press the zoom lever to "W" control side.
Note:
- Zoom can be used, but the subject may not be focused, depending on the distance to the subject. In this case, move the zoom to "W" control side to focus.
- The amount of light tends to be insufficient during macro recording: If the subject image is stood dark, use additional lighting.
RECORDING SUBJECTS FOR STRONGER WIDE-ANGLE OR TELEPHOTO EFFECT
Use generally available tele-conversion lens or wide-conversion lens with filter diameter of 30.5 mm.
Remove the lens hood on the top surface of lens, and then attach the conversion lens over the lens.

text_image
Conversion lensLens hood (Remove) (Attach)Note:
The four corners of screen may be dim depending on the conversion lens used.
Manually Focusing Subject
The DVD video camera/recorder measures the distance to a subject viewed at the centre of screen and automatically focuses on it. If it is difficult to automatically focus the subject, adjust the focus manually.
FOCUSING DURING RECORDING
This DVD video camera/recorder automatically focuses a subject at the centre of screen (auto-focus).
When the DVD video camera/recorder is turned on, auto-focus will always be set.
Focusing range
You can switch the display mode of on-screen information:
- On T (tele) side: approximately 1 m from lens surface to infinity
- On W (wide) side: approximately 2 cm from lens surface to infinity
1 Press the FOCUS button during recording.
"MF" will appear on the screen.

text_image
Manual Focus icon 0:00:00 REM 3.0 MIN RAM RIME 17:00 30/9/20032 Press the zoom lever down to "T" control side to zoom in on subject.
3 Use the ⊖ ⊕ buttons to adjust the focus, while viewing the image in the viewfinder or on the LCD screen.

text_image
W←T -00 VOL... ADD ADJUST WITH ⊖ and ⊕ buttonsNote:
- Pressing FOCUS will alternate between manual focus and autofocus. With autofocus, no indication will appear on the screen.
- Be sure to zoom in on your subject before manually focusingonit.Ifyoubringthesubject into focusatthe"W" control side, focus will be faulty when you turn the zoom lever to the "T" control side to zoom in on the subject.
- Manual focus is released when the DVD video camera/recorder is turned off. When you turn the DVD video camera/recorder on next time, auto focus will be restored.
Manually focus the following objects, which may not be automatically focused.

natural_image
Illustration of a sitting cat and a child wearing a wide-brimmed hat (no text or symbols)Objects not in the centre of screen

natural_image
Pure diagram of a rectangular container with internal geometric patterns and dotted lines, no text or symbols present.Objects with little variation in brightness, such as white wall

natural_image
Illustration of a woman waving while standing near a tree and building (no text or symbols)Objects that are far and near at the same time

natural_image
Illustration of a hockey player in action, mid-swing with a ball (no text or symbols)Objects moving rapidly

natural_image
Illustration of a woman dancing with a ball of bubbles and floating objects (no text or symbols)Objects lit by neon sign, spotlight, etc. which glaresor emits strong light

natural_image
Illustration of a girl standing with arms raised, against a cityscape background (no text or symbols)Dark objects

natural_image
Illustration of a girl sitting at a window with raindrops falling, holding a potted plant (no text or symbols)Object behind glass with waterdroplets, dirt on it

natural_image
Illustration of a city skyline with fireworks and moon in the sky (no text or symbols)Night view
Adjusting Exposure Manually
This DVD video camera/recorder measures the subject brightness and automatically adjusts the exposure. You can also adjust the exposure manually.
1 Press the EXPOSURE button during recording.
The exposure indicator will appear on the screen.

text_image
Exposure indicator 0:00:00 REM 0 MIN RAM FINE 17:00 30/5/20032 Use the ⊖ ⊕ buttons to adjust the exposure, while viewing the image in the viewfinder or on the LCD screen.

text_image
EXPOSURE VOL. Adjust with ⊖ and ⊕buttonsNote:
- Pressing EXPOSURE will alternate between manual adjustment and auto exposure. With auto exposure, no indication will appear on the screen.
- The exposure setting will return to Auto when the DVD video camera/recorder is turned off.
Compensating for Backlight
Whensubjectislightedfromrear,thisfunctionwillcompensateforlightingsothatthesubjectisnottoodark.
1 Press the BLC button during recording.

text_image
Backlight correction icon 0:0 0:0 REM 0 MIN RAM FINE 3.0 / 9/2 0.3The backlight correction icon will appear.

natural_image
Line drawing of a digital camera with an BLC disc labeled (no text or symbols on the device itself)Note:
- Pressing the BLC buttonwillalternatebetween backlight setting between on and off.
- The backlight setting will automatically return to "off" when the DVD video camera/recorder is turned off.
Using Full Auto Function
Pressing the FULL AUTO button will fully automate the camera functions.
1 Press the FULL AUTO button.
The following settings will reset to defaults:
| Function | When setting full auto |
| Program AE Auto | |
| White balance Auto | |
| Exposure Auto | |
| Backlight compensation Off | |
| Focus Auto | |
| EIS On | |
| MIC.Filter Off |

text_image
FULL AUTOOn-Screen Information
Various types of information will appear in the viewfinder or on the LCD screen during recording.

text_image
DISPLAYINFORMATION DISPLAY DURING RECORDING

text_image
1 2 3 456 7 9 10 11 12 13 14 M F REC 0:00:00 REM 6 3 MIN DISC ACCESS RAM FINE 17:00 30/9/2003 8 15 16 17 18 19The above screen is an example for explanation: It is different from the actual display.
1. Recording mode
Movie

2. Program AE (only in movie recording mode)
No display: Auto
: Sports
: Portrait
Spotlight
8: Sand & Snow
: Low Light
3. White balance
No display: Auto
△: Set
Outdoor
Indoor
4. Backlight compensation
No display: Backlight compensation OFF
Backlight compensation ON
5. Manual focus
No display: Autofocus
MF: Manual focus
6. Microphone filter (only in movie recording mode)
No display: Microphone filter OFF
: Microphone filter ON
7. Self-timer (only in still recording mode)
No display: Self-timer OFF
©: Self-timer ON (count is from 10 seconds)
8. Recording status

● IIW T : During recording pause No display ^*1
9. Electronic image stabiliser (EIS) (only in movie recording mode)
No display: EIS OFF
(↓) : EIS ON
10.Zoom

text_image
W T (Digital Zoom: Off) W T (Digital Zoom: 40×) W T(Digital Zoom: 240×, only in movie recording mode)
11.Exposure correction
12. Warning message
13.Disc/Card type
RAM : DVD-RAM
R : DVD - R
RAM: DVD-RAM (write-protected)
F : DVD-R disc already finalised on this DVD video camera/recorder
: DVD-R disc finalised on a device other than this DVD video camera/ recorder
: SD memory card or multimedia card
: Locked SD memory card
No display ^4
- Movie recording quality (only when using disc)
XTRA : Highest quality (only when using DVD-RAM disc)
FINE : High quality
STD : Standard
Still recording quality (only when using card)
FINE : High quality
NORM : Standard
ECO : Number of recordable stills is prioritised
- Movie recording time (only in movie recording mode)
16.Remaining space on disc/card *3
REM XX MIN ^*4 : Remaining recordable minutes during movie recording
REM XX ^5 : Number of remaining recordable still images during still recording
17.Remaining battery level
(full charge)

(low remaining charge)
- Brightness/Colour density of LCD screen or Volume

The volume can be adjusted during external input and playback.
- Current date/time
*1 When no disc or card is in the DVD video camera/recorder, or disc has not yet been initialised, a write-protected disc or locked card, or a disc or card with no remaining space, has been inserted.
*2 When a disc or card that cannot be used in this DVD video camera/recorder is inserted
*3 No remaining time or number will be displayed with a protected disc or locked card, or finalised DVD-R disc.
*4 In XTRA mode, possible recording time may be longer than the displayed time.
*5 The displayed number of recordable stills is for reference: The decreasing number may not be correct, depending on recording conditions (not displayed with a DVD-R disc).
- Switching the information display mode
You can switch the display mode of on-screen information:
Press the DISPLAY button.
The full and minimum display modes will alternate.
• Full display mode: All types of information will appear.
- Minimum display mode: The recording mode (see 1 on page 63) and recording status (see 8 on page 63) will appear. If the DVD video camera/recorder has warning information, a warning message will appear.

text_image
DISPLAYNote:
The DVD video camera/recorder does not record the date and time as a part of image. However, this information during recording will be recorded with image as data which can be checked on Disc Navigation screen during playback (See "Information Display During Playback" on page 70).
- Display when recording an image of yourself
When recording with the LCD screen facing the same direction as the lens, the operating status will appear, and in addition, the battery remaining level will blink when the battery has almost no remaining charge.
The following operating status indicator will light or blink to give warning message to user. The message can be checked when returning the LCD monitor 180^ to the original status from the status in which the LCD screen was facing the same direction as the lens.

natural_image
Line drawing of a digital camera with scroll wheel and rectangular lens (no text or symbols)●:The disc has almost no free space.
:Write-protected disc or locked card is loaded.
On: You are attempting to record a still on DVD-R disc.
No display :Disc or card that cannot be used has been loaded.
The disc or card is full, or you are attempting to record a copy-guarded image.

text_image
Operating status/ warning message Battery remaining levelNote:
- If the LCD screen is set facing the same direction as the lens, the LCD screen will display a mirror image (left and right reversed).
- If the LCD screen is set facing the same direction as the lens, you can also view subject image in the viewfinder.
- Although you can switch to the manual focus, exposure and on-screen display modes even during recording with LCD screen facing the same direction as lens, they will not appear on the screen.
IMMEDIATELY CHECKING RECORDED SCENE
You can check your recording immediately on the spot.

natural_image
Diagram of a digital camera with two circular inset views showing CD and playback controls (no text or symbols)Tilt up/down and to left/right to select, and then press▶/IItodesignate.
1 Press ▶/II button in the recording pause status.
The DVD video camera/recorder will enter the playback mode, and the scene you have recorded last will be played back.
When playback is finished, the DVD video camera/recorder will enter the pause status at the last image on disc.
If the playback pause status continues for as long as 5 minutes, the DVD video camera/recorder will automatically return to the recording pause status.
2Press the □ button.
Playback will stop, and recording pause status will be restored.
Note:
- If the LCD monitor is open during playback of movie, playbacksoundwillbeheardfromthespeaker.Adjustthe sound volume using the volume control buttons (⊖, ⊕).
- To temporarily stop playback, press the ▶/□ button. Press the ▶/□ button again to restart playback.
- Even if you stop playback midway and immediately start recording again, the new image will be recorded after the last scene on disc or card (the previous images will not be overwritten).
- When playing back a still with a large number of pixels on card, "Playback." will appear, and it will take sometime for the still to appear.
- Depending on the amount of data to be played back, it may take some time for the playback image to appear.
- Donotoperate the power switchorremovethecardwhile the ACCCSS/PC or CARD ACCESS indicator is lit or blinking: Doing so may damage the card or the data on card.
PLAYBACK FROM START OF DISC OR CARD
Use the Go To function (P. 69) or Disc Navigation function (P. 93) to play back from the start of disc or card.
SEARCH PLAYBACK OF MOVIE
During playback, tilt the joystick to right or left and hold it: Search playback will start.
⑨ Tilt and hold: Scenes will be visually scanned forward
② Tilt and hold: Scenes will be visually scanned backward
Release the joystick when you find the desired image: Normal playback will start from that point.
RAM R
Note:
- When you skip or search scenes from playback or playback pause, the screen will be dark briefly.
- See page 145 if search playback does not operate normally.
RAM R
FRAME ADVANCE/FRAME BACK/SLOW PLAYBACK OF MOVIE
During playback pause, tilt the joystick: Frame advance, frame back or slow playback will start.
∅ Tilt once : Picture will advance one frame.
② Tilt once : Picture will go back one frame.
∅ Tilt and hold : Forward slow playback
② Tilt and hold : Reverse slow playback
After frame advance, frame back or slow playback, the DVD video camera/recorder will enter the playback pause status.
Note:
- In forward slow, a rapidly moving subject image may be distorted.
- The intervals for playing back frames in frame advance/frame back/slow playback are as follows:
Frame advance and forward slow: Approx. 0.03 second Frame back and reverse slow: Approx. 0.5 second - No sound will be heard during search playback or slow playback.
SKIP PLAYBACK OF MOVIE
During playback, tilt the joystick up or down to locate the start of desired scene.
☐ Tilt once: To skip to the first image of the scene following the one being played back, and start playback.
^91 Tilt once: To return to the first image of the scene being played back, and start playback.
64 Tilt and hold : To continuously locate the beginnings of scenes, starting from the scene following the scene being played back. When the desired image appears, release the joystick: Playback will start from that point.
^61 Tilt and hold : To continuously locate the beginnings of scenes backward, starting from the scene preceding the scene currently being played back. When the desired image appears, release the joystick: Playback will start from that point.
PLAYING BACK STILLS
Tilt the joystick up or down during playback to quickly play back stills in sequence.
☐ Tilt once: To display stills one by one forward
^91 Tilt once: To display stills one by one backward

flowchart
graph LR
    A["Scene 1"] --> B["Scene 2"]
    B --> C["Scene 3"]
    C --> D["Tilt down twice"]
    C --> E["Tilt down once"]
    C --> F["Tilt up twice"]
    style A fill:#f9f,stroke:#333
    style B fill:#f9f,stroke:#333
    style C fill:#f9f,stroke:#333
    style D fill:#ccf,stroke:#333
    style E fill:#ccf,stroke:#333
    style F fill:#ccf,stroke:#333

flowchart
graph LR
    A["Scene 1"] -->|Tilt up once| B["Scene 2"]
    B -->|Tilt down once| C["Scene 3"]
    C -->|Tilt down twice| D["End"]
    style A fill:#f9f,stroke:#333
    style B fill:#f9f,stroke:#333
    style C fill:#f9f,stroke:#333
    note right of B: "Portion being played back"
Tilting up the joystick at a portion several seconds from the start of scene being played back will return to the start of the scene preceding that being played back.
Note:
- If you perform skip playback during playback pause, the DVD video camera/recorder will enter the playback pause status at the beginning of the located scene.
- Tilting down in the last scene on disc will set the DVD video camera/recorder to the playback pause status at the last image.
• See page 145 if skip playback does not operate normally.
RAM CARD
[When using disc]
Releasing the joystick will start continuous playback.
[When using card]
When the joystick is released, the photo at that point will be displayed, and then the DVD video camera/recorder will enter the playback pause status.
Set the slide show function for continuous display (P. 129).
JUMPING TO SPECIFIED POINT (GO TO)
1 Press the MENU button during playback.

text_image
Go To Top End Specify ENTER RETURN RAM2 Choose the option (point you want to go to), and then press the ▶/□ button.
- Specifying the point to view
1 Choose "Specify" in step 2 above, and then press the ▶/II button.
The screen for specifying the point to go to will appear.

text_image
Position of currently played back image Go to Totalrecordingtimeof all selected scenes Cursor TOP CURRENT END 0:00:00 0:03:26 0:24:24 GO TO 0:03:26 TOP END ENTER CANCEL Cursor position2 Use the joystick to select the desired time of chosen point.
To select the start.
☐:To select the end.
= = :·Press once: To move the cursor in 10-second units (1-still units for card)
·Hold down: To move the cursor in 1-minute units (10-still units for card)

text_image
Go to TCP CURRENT END 0:00:00 0:03:28 0:24:24 GO TO U:00:00 TOP END ENTER CANCEL(When the start of scene is selected)
Cursor at current image position.
- Cursor at (GO TO) position.
Top :To go to the start, and enter playback pause.
End: To go to the end of last scene, and enter playback pause.
Specify :To go to a specified point and enter playback pause. See the following for details.
3 Press the ▶/II button to enter the selection.
The DVD video camera/recorder will go to the specified point and enter the playback pause status.
To cancel the "Go To" procedure midway, press the □ button before going to the specified point.
Note:
- If multiplescenesareselected usingtheDisc Navigation function or SELECT button, choosing "Top" will jump to the beginning of selected scenes (P. 123).
- When multiple scenes are selected, the total time of selected scenes will appear in the “total recording time” display.
- When card is loaded, the number of stills will appear.
- The cursor may not move at same-pitch intervals.
On-Screen Information Display
INFORMATION DISPLAY DURING PLAYBACK
Various types of information on recording will be superimposed on playback image you are viewing.

flowchart
graph TD
    A["No display Playback information"] --> B["display"]
    B --> C["Recording date/time"]
- Switching the information display mode
Press the DISPLAY button: You can switch the display mode of on-screen information.
When using disc:

text_image
Recording mode*1 Scene No. Repeat play*5 0060 6 RAM 0:00:16 Playback operation*6 Counter Disc type*4 Programme No. or Play List No.*3 ProgrammeorPlayList*2When using card:

text_image
Scene No. File name Lock *5 DPOF *5 Slide show *5 Recording mode*1 100-0003 Playback operation*6*1 🎨 (VIDEO) or □ (PHOTO); Only □ (PHOTO) with card.
*2 ☑ Programme or ☐ Play List
*3 Number of programme or play list being played back (not displayed when all programmes are being played back)
*4 Refer to "Disc/Card type" on page 63.
*5:Will appear when each function is specified "On"
*6▶:Standard playback ■:Playback pause
▶▶:Forward search playback
◀:Reverse search playback
▶▶:Forward skip playback
◀◀:Reverse skip playback
■▶:Forward frame advance
◀II:Reverse frame back
Refer to "Playing Back" beginning on page 66 for how to operate.
The “◀” mark will appear on the first image on disc.
The “▶” mark will appear on the last image on disc.
- Recording date/time display: Shows the date/time when recording was started. Even when playback starts, the date/time display will not advance.
- No display: No information will appear. However, when the mode of playback operation is switched, the symbol will appear for approx. 3 seconds.
Note:
See "Using Disc Navigation" on page 93 and later for explanation on programme and play list.
Playback on Other Devices
This section explains about playback on another AV device, such as TV.
RAM R CARD
CONNECTING TO A TV
Use the provided AV/S output cable to connect the DVD video camera/recorder to a TV as follows:

text_image
To AV output jack AVS output cable (provided) To S-VIDEO input jack* White Yellow Red To video/ audio input jacks* If your TV has an S-VIDEO input jack, you can connect the S-VIDEO plug to it.
Note:
• Using S-VIDEO will deliver clearer playback status.
- Before connecting, make sure that the volume on TV is turned down: Forgetting this may cause howling from the TV speakers.

text_image
Stereo Type with S-VIDEO Jack S-VIDEO VIDEOAUDIO R L Red White
text_image
Stereo Type R L VIDEOAUC Red Yellow White- Insert the AV/S output cable plugs into jacks straight: Obliquely inserting them could damage the jacks.

text_image
Monaural Type VIDEOAUDI YellowWhiteVIEWING ON TV SCREEN
1 Turn the TV on and set the input selector to "VCR" whichever applicable Video input.
Refer to the TV instruction manual for how to switch the TV input.
2Turn the DVD video camera/recorder on.
The image that the DVD video camera/recorder is seeing will appear on the TV screen.
You can also monitor the image on the LCD screen or viewfinder of the DVD video camera/recorder.
3 Perform playback, recording or editing.
You can perform playback, editing or editing on Disc Navigation while checking on TV screen.
Note:
- Adjust the volume of sound on TV.
- The infrared remote control is useful when operating the DVD video camera/recorder while viewing an image on TVscreen. However, if you use a Hitachi VCR, theremote control may inadvertently operate the VCR if it is near the DVD video camera/recorder. To prevent this, set the remote control code of the VCR to a position other than "VCR2".
- Information that the DVD video camera/recorder is recording will appear on the TV screen: You can also display only part of information or switch off the display. Refer to "Setting On-Screen Display Output On or Off (OSD Output)" on page 88, and press the DISPLAY button to switch the display status.
- When copy-guarded disc is played back, no image will appear on TV screen.
- If you use TV with wide mode (aspect ratio 16:9) and set the TV to the wide mode, the entire Disc Navigation display may not be displayed on the TV screen. If this happens, release the wide mode setting on TV (see the TV instruction manual for releasing the wide mode).
PLAYBACK ON DVD PLAYER
You can play back finalised DVD-R discs on DVD players or other devices that conform to 8 cm DVD-R disc. However, DVD-R discs may not be usable on all those devices.
1 Finalise a recorded DVD-R disc.
You need to finalise a disc to play it back on DVD player: See page 127.
No further data can be recorded on finalised disc.
Note:
Use this DVD video camera/recorder to finalise the DVD-R disc recorded on the DVD video camera/recorder.
2 Remove the disc from Round DVD Holder.
See "Removing and Replacing from/in Round DVD Holder" on page 74.
3 Insert the disc into the DVD player and play it back.
See the instruction manual for DVD player.
Note:
DVD-RdiscsrecordedonthisDVDvideocamera/recorder can be played back on other DVD players, but playback on all DVD players is not guaranteed.
Playback may not be possible on some DVD players, or it may depend on the recorded status of DVD-R discs: In such cases, play back the DVD-R disc on this DVD video camera/recorder.
REMOVING AND REPLACING FROM/IN ROUND DVD HOLDER
You can remove DVD-RAM or DVD-R disc used on this DVD video camera/recorder from Round DVD Holder and use the uncovered disc on DVD player, DVD-RAM recorder, drive for PC, etc., which conforms to 8 cm DVD-RAM or 8 cm DVD-R. Removing disc from Round DVD Holder may vary with the disc maker: See the disc instruction sheet. The following explains the disc in Round DVD Holder made by Hitachi Maxell.
It is recommended that you do not remove the disc from Round DVD Holder until camera recording is finished, in order to avoid getting dirt on disc.
Note:
Using discs removed from holders on various devices may not always be possible.
RAM R
HOW TO REMOVE DISC
1
Hold the Round DVD Holder with SIDE A facing up. While pushing the two release levers in the direction of arrows (1) marked on holder, slowly open SIDE A of the holder in the direction of arrows (2), taking care not to drop the disc.

text_image
Release levers SIDE A mark Do not open more than 90°.2
Without touching the recording/playback surface, hold the disc edge and centre hole to remove it.

natural_image
Hand holding a circular object with concentric rings, no visible text or symbols
text_image
90°REPLACING DISC IN ROUND DVD HOLDER
1 Open SIDE A of the Round DVD Holder, and replace the disc in the holder with the SIDE A mark or label surface facing up, taking care not to touch the disc surface.

text_image
OPEN marks SIDE A mark or label surface SIDE A mark side 3 3 SIDE A mark2 Close SIDE A of the Round DVD Holder, and push it to lock the release levers at positions (3).
RAM R
WHEN THE HINGE OF ROUND DVD HOLDER COMES OFF
1 Push the hinged portion of the holder piece marked SIDE A with thumb and middle finger, and warp it in the direction of arrows (4).

text_image
SIDE A mark side Hinged portions Approx. 90°2 Fit the hinged portion of the other holder piece into the warped hinge portion.
Note:
- Handle the disc carefully so that no scratch, dirt, fingerprint or dust adheres to the recording/playback surface.
- When not using the Round DVD Holder, store it in case: Do not leave a bare holder as is.
- Be careful of drop or impact: If you drop the Round DVD Holder, the disc may pop out.
- Do not subject the Round DVD Holder to force.
RAM R
DISC CLEANING
Use a soft, dry cloth to lightly wipe off any dust, dirt, etc. adhering to disc, as shown in the figure. Never use solvent. Do not use thinner, water, anti-static spray, etc. to clean disc.

natural_image
Illustration of hands cleaning a circular object with arrows indicating rotation (no text or symbols)Use soft cloth to clean from inner to outer circumference in axial direction.
Playback on DVD Video Recorder/Player
Youcanuse aDVD videorecorderor DVDplayer thatconforms toDVD-RAM to play back DVD-RAM discs recorded on this DVD video camera/recorder
1 Remove the disc from Round DVD Holder.
2 Insert the disc into the DVD video recorder/ player and play it back.
See the instruction manual for DVD video recorder/player.
Note:
- DonotinsertaDVD-Rdiscthathas notbeenfinalised into a DVD video recorder: The recorded image data may be damaged.
- When playing back disc on another device, the Disc Navigation display will be different from the one on this DVD video camera/recorder.
Advanced Techniques
This section explains about various settings to further extend the usefulness of this DVD video camera recorder.
Understanding Flow of Menu
Press the MENU button during recording pause: The "Camera Functions Setup" menu screen will appear.
Tilt the joystick up, down, to left or right to select a menu item, and then press the ▶/II button to choose the option.
The screens used here to explain are displayed when DVD-RAM disc is used. Some items will not appear when a DVD-R disc or card is used, or when no disc or card is inserted.

text_image
Display of selected setup item Selection of setup items : Camera Functions Setup : Record Functions Setup : Date Setup : LCD Setup : Initial Setup Camera Funct i ons Setup Program AE White Bal. EIS Dig. Zoom MIC.Filter 16:9 Auto Sports Portrait Spotlight Sand&Snow Low Light Options settable Display of disc or card being used (P. 63) Functions settable Guide display- Flow of Menu
Refer to page indicated for details of each function.
Camera Functions Setup

text_image
Camera Funct i ons Set up Program AE : Auto White Bal. : Auto EIS : On Dig Zoom : 40x MIC Fil ter : Off 16:9 : Off ENTER RETURN ©RAMProgram AE (P. 79)
White balance (P. 80)
EIS (P. 82)
Digital zoom (P. 83)
Microphone filter (P. 84)
16:9 (P. 84)
Date Setup

text_image
Date Setup Date Mode : D:\My Date SetDisplay format (P. 50)
Date setting (P. 49)
Recording Functions Setup

text_image
Record Function Sets Setup VIDEO Mode : F I NE Sel 1 Timer : Off OSD Ou 1 put : On ENTER RETURN ©RAMMovie quality (P. 85)
[The quality mode will appear when using card (P. 86)]
Self-timer (P. 87)
On-screen information
display output (P. 88)
LCD Setup

text_image
LCD Setup Brightness Color Level ENTER RETURN RAWBrightness (P. 89)
Colour density (P. 89)
Initial Setup

text_image
Initial Setup Beep : On Power Save : Off Record LED : On Language : English Demo Mode : Auto Reset ENTER RETURN RAMBeep (P. 90)
Power save (P. 90)
Recording LED (P. 91)
Language selection (P. 91)
Demo mode (P. 144)
Reset (P. 92)
You can use the joystick on DVD video camera/recorder to select various setting options in menu and designate them.
Press the MENU button.

flowchart
graph TD
    A["MENU"] --> B["Camera Funct ions Set up"]
    B --> C["Program AE: Auto"]
    B --> D["White Bal.: Auto"]
    B --> E["EIS: On"]
    B --> F["Dig Zoom: 40x"]
    B --> G["MIC.Fi tar: Off"]
    B --> H["16:9: Off"]
    B --> I["ENTER RETURN: RAM"]
    I --> J["Record Funct ions Setup"]
    J --> K["V I DEO Mod e FIN"]
    J --> L["Sel f T imer"]
    J --> M["OSD Cut pu i"]
    J --> N["ENTER RETURN: RAM"]

text_image
or or
text_image
Camera Functions Setup Program AE Auto White Bal. Sports EIS Portrait Dig Zoom Spotlight MIC Filter Sand&Snow 16:9 Low Light ENTER RETURN PAMPress the ▶/II button directly to choose an option from menu. To return to the screen one before, press the □button.
Pressing the MENU button again will cause the menu screen to disappear.
Note:
- Pressing the MENU button during recording will not work.
- The menu screen will disappear when it is left for approx. one minute without any operation.
Setting Up Camera Functions
SELECTING SHOOTING MODE TO MATCH THE SUBJECT (SWITCHING PROGRAMME AE MODE)
This DVD video camera/recorder automatically sets the shutter speed and aperture according to the subject brightness for optimum recording: You can also specify one of six modes depending on the subject conditions, recording environment or purpose of filming.
1 Press the MENU button, use the joystick to choose "Program AE" on the "Camera Functions Setup" screen, and then press the ▶/II button.
The options will appear on the right of "Program AE".
2 Use the joystick to choose the desired option, and then press the ▶/II button: The selected option will be set.

text_image
Camera Funct ions Setup Program AE Auto White Bal Sports EIS Portrait Dig Zoom Spotlight MIC Filter Sand&Snow 16:9 Low Light ENTER RETURN ORAM
text_image
Selected AE mode 0 : 0 0 : 0 0 REM 3.0 MIN RAM FINE 17 : 0 0 3.0 : 9 / 2 0 0 33 Press the MENU button to end the setting.
The menu screen will disappear.
Note:
- You can check the selected AE mode by the on-screen information display. However, nothing will appear in the Auto mode.
- Theshootingmodesetasabovewillbestoredinmemory even if the DVD video camera/recorder is turned off.

text_image
MENU /IITilt up/down and to left/right to select, and then press▶/II to designate.
A Auto : The camera/recorder automatically judges the subject and surrounding environment for optimum recording.
Sports : Reduces blurring when recording rapidly moving subjects such as in golf or tennis. If the Sports mode is used under a fluorescent light, the image may flicker: In this case, use the Auto mode for recording.
Portrait : Makes a subject, such as a person or a creature, stand out from a blurred background.
Spotlight : Prevents overexposure of subject portrait face, etc. when strong light strikes the subject, as in a wedding or on stage.
Sand & Snow : Prevents underexposure of subject portrait face, etc. in a place where reflection of light is intense, such as at the seaside in midsummer or on a ski slope.
Low Light: Allows user to record in a dark place even with decreased lighting: However, an after-image will appear with a moving subject. Note that the Low Light mode cannot be used when the recording quality mode is STD.
If there is difficulty in automatically focusing subject image, adjust the focus manually.
ADJUSTING COLOUR (WHITE BALANCE)
This DVD video camera/recorder automatically adjusts the tint to match the conditions of subject. However, it may not allow user to deliver natural tint, depending on the weather or status of light source. In this case, change the white balance setting according to the situation.
| Mode Setting content | On-screen display | |
| Auto White | balance always automatically adjusted | None |
| Set You can | manually adjust white balance to match the light source or situation | [YY4] |
| Outdoor To | record in fine weather | [7G38] |
| Indoor To | record under incandescent light, halogen light or bulb-colour type fluorescent light |  |
1 Press the MENU button, choose "White Bal." on the "Camera Functions Setup" menu screen, and then press the ▶/II button.

text_image
Camera Func 1 ions Setup Program AE White Bal. EIS Dip,Zoo m MIC.Filter 16:9 Auto Set Outdoor Indoor ENTER RETURN2 Choose the desired option, and then press the ▶/II button.

text_image
0:00:30 REM3 0 MIN 17:00 30/9/2003 RAM FINE White balance mode3 Press the MENU button to end the setting.
Note:
- The white balance mode can be confirmed using the on-screen information.
- The white balance setting will be stored in memory even when the DVD video camera/recorder is turned off.
| Mode Setting content | On-screen display | |
| Auto White | balance always automatically adjusted | None |
| Set You can | manually adjust white balance to match the light source or situation | |
| Outdoor To | record in fine weather | |
| Indoor To | record under incandescent light, halogen light or bulb-colour type fluorescent light | |
text_image
0:00:30 REM3 0 MIN 17:00 30/9/2003 RAM FINE White balance mode- Setting white balance manually
1 Point the DVD video camera/recorder at a white object so that it fills the screen. Use an object that is not transparent.

natural_image
Line drawing of a T-shirt and digital camera with a separate card (no text or symbols)(White shirt or thick paper)
2 Press the MENU button, choose "White Bal.", "Set", and then press the ▶/II button.

text_image
Camera Funct i ons Setup Program AE Whi ta Bal. EIS Set Dig Zoom Outdoor MIC Fil ter Indoor 16:9 ENTER RETURN RAM3 Press the ▶/11 button: The "■" indicator will change from blinking to a steady light: The steady light indicates that the white balance setting is complete.

text_image
Set EXIT RAM4 Press the □ button to end the setting.

text_image
0:0 0:0 REMO MIN RAM FINE 17:00 30/9:2003Note:
- The white balanceset using the "Set" option will bestored in memory until it is reset.
- Do not use a coloured object when setting the white balance: The appropriate tint cannot be set.
USING THE ELECTRONIC IMAGE STABILISER (EIS)
This DVD video camera/recorder is equipped with an electronic image stabiliser function: When you use zoom to record a magnified subject image, it will correct fuzziness in the recorded image.
1 Press the MENU button, choose "EIS" on the "Camera Functions Setup" menu screen, and then press the ▶/II button.

text_image
Camera Funct i ons Setup Program AE Whi ie Bal. EIS On Dig. Zoom Off MIC Fi I ter 16:9 ENTER RETURN RAM2 Choose the "On" or "Off", and then press the ▶/II button.
3 Press the MENU button to end the setting.
- Checking EIS On or Off
You can check EIS On or Off by the on-screen information display.

text_image
EIS 0:0 0:0 READ 0 MIN RAM FINE 1.7:0 3.0/9/2603After recording with EIS set to "Off", it is recommended that you return the setting to "On" and then turn the DVD video camera/recorder off, unless you normally record with "Off" setting. This function is effective only during movie recording: It will not work during still recording.
Note:
- The EIS setting will be stored in memory even when the DVD video camera/recorder is turned off.
- Although you can switch EIS between on and off during still recording, the setting will be effective only during movie recording.
- It is recommended that you specify "EIS Off" when using the DVD video camera/recorder on a desk or tripod.
- When “EIS On” is specified, there will be a slight difference between the actual movement and the movement on screen.
- Gross camera shake may not be entirely corrected even if "EIS On" is specified.
- EIS may not operate correctly when the tele or wide-conversion lens (generally available) is used.
MAGNIFYING SUBJECT IMAGE (DIG. ZOOM)
When the zoom lever is moved to "T" control side with Dig. Zoom 40× or 240× specified, digital zoom will automatically kick in when optical 10× zoom range is exceeded. You can set the digital zoom to 40× or 240× for movie recording, or 40× for still recording.
1 Press the MENU button, choose "Dig. Zoom" on the "Camera Functions Setup" menu screen, and then press the ▶/II button.

text_image
Camera Funct i ons Setup Program AE White Bal. EIS Dig. Zoom 240x MIC Fil ter 40x 16:9 Off ENTER RETURN ©RAN2 Choose the desired magnification, and then press the ▶/II button.
3 Press the MENU button to end the setting.
Moving the zoom lever will display the digital zoom bar.

text_image
When Dig. Zoom is "Off" W T When Dig. Zoom is "On"(40x) W T Digital zoom range When Dig. Zoom is "On"(240x) (only in movie recording) W T Digital zoom range 0 : 0 : 0 : 0 REM 3 MIN 17 : 0 : 0 30 / 9 / 20 3Dig. Zoom "240×", "40×" or "Off" setting will be stored in memory even if the DVD video camera/ recorder is turned off.
Note:
- You can check whether Dig. Zoom is "240×", "40×" or "Off" by pressing the DISPLAY button and reviewing the on-screen information.
- You can also use the DIGITAL ZOOM button on remote control to switch the digital zoom setting: Pressing the button during movie recording will switch the setting between "Off", "40×" and "240×": Pressing the button during still recording will switch between "Off" and "40×".
- When using card, zooming only up to 40× is possible, even when “240×” or “40×” has been chosen.
- If the power switch is set to "☐ PHOTO" with DVD-RAM disc loaded, zooming only up to 40x is possible, even when "240×" has been chosen.
REDUCING WIND NOISE DURING RECORDING (MIC.FILTER)
When recording sound from the microphone built into this DVD video camera/recorder, you can reduce wind noise in recording.
If "MIC.Filter: ON" is specified, the low-frequency components in the sound picked up by microphone will be cut off during recording: This makes it easier to hear the target voice or sound during playback.
1 Press the MENU button, choose "MIC.Filter" on the "Camera Functions Setup" menu screen, and then press the ▶/II button.

text_image
Camera Funct i ons Setup Program AE White Bal. EIS Dig Zoom MIC Filter On 16:9 ENTER RETURN CRAM2 Choose "On", and then press the ▶/II button.
3 Press the MENU button to end the setting.

text_image
0:00:00 REM3.0 MIN 17:00 30/9/2003 RAM FINEMicrophone filter icon
Note:
- Youcanalsousetheon-screendisplaytoconfirmthatthe MIC.Filter has been set.
- The MIC.Filter setting will be stored in memory even when the DVD video camera/recorder is turned off.
- The MIC.Filter function will work only during movie recording.
- The microphone filter function works only with the built-in microphone: It will not function when using an external microphone (P. 53).
SWITCHING TO 16:9 MODE
If you intend to play back recorded images on a wide-screen TV, it is recommended that you switch the screen size to 16:9 mode.
1 Press the MENU button, choose "16:9" on the "Camera Functions Setup" screen, and then press the ▶/II button.

text_image
Camera Funct i ons Setup Program AE Whi le Bal. EIS Dig Zoom MIC Filitar Off 16:9 On ENTER RETURN ORAM2 Choose "On", and then press the ▶/II button.

text_image
Camera Funct i ons Setup Program AE Whit Bal. EIS Dig Zoom MIC Fi Itar 16:9 On ENTER RETURN ©RAM3 Press the MENU button to end the setting.

natural_image
Illustration of a Ferris wheel with a castle in the background (no text or symbols)Black bands will appear across the top and bottom of screen.
Note:
The black bands that appear across the top and bottom of screen will not be recorded. If you record in the 16:9 mode and play back on a TV other than wide-screen TV, the portions masked by theblack bandswill also be displayed. Use the black bands as a guide for recording when playing back on a wide-screen TV.
Setting Up Record Functions
RAM
R
SWITCHING MOVIE QUALITY (VIDEO MODE)
Choose the movie quality from "XTRA" (only with DVD-RAM disc), "FINE" and "STD".
It is recommended that you record critical subjects in the "XTRA" or "FINE" when you are using a DVD-RAM disc, or in the "FINE" with a DVD-R disc.
1 Press the MENU button, choose "VIDEO Mode" on the "Record Functions Setup" menu screen, and then press the ▶/II button.

text_image
Record Functions Setup VIDEO Mode XTRA Self Timer FINE CSD Output STD ENTER RETURN RAM2 Choose the desired quality mode, and then press the ▶/II button.
3 Press the MENU button to end the setting.

text_image
Movie quality FINE 0 : 0 0 : 0 0 REM3 0 MIN 17 : 0 0 3 0 / 9 / 2 0 0 3Note:
- The movie quality setting will be stored in memory even when the DVD video camera/recorder is turned off.
- The “VIDEO Mode” setting will not change even if the DVD-RAM disc is replaced with a DVD-R disc, or vice versa. However, if “XTRA” has been set with DVD-RAM disc, “FINE” will be set when the disc is changed.
- When using DVD-R disc, you cannot switch the movie quality while recording on the disc: The DVD video camera/recorder will be automatically set to the movie quality first used with the disc for recording.
- The movie quality setting is effective only during movie recording: Switching the movie quality will not work during still recording.
Block-like noise may appear in recorded image, or the outline of subject image is distorted under the recording conditions listed below: Pan the DVD video camera/recorder as slowly as possible. (Block noise is likely to appear in the "STD"):
- If there is a complicated pattern in background (as in following figure on left)
- If the DVD video camera/recorder is moved excessively or quickly
- If subject is moving rapidly even when the DVD video camera/recorder is not moving

natural_image
Illustration of a forest scene with trees and a pixelated tree, no text or symbols present
natural_image
Illustration of a smiling woman with shoulder-length hair waving, outdoors with soft background (no text or symbols)(Image when block-like noise occurs) (Image without block-like noise)
CARD
SWITCHING QUALITY OF STILL IMAGE (QUALITY)
You can switch the still recording quality only when using card.
It is recommended that you use "FINE" when recording vital images.
1 Press the MENU button, choose "Quality" on the "Record Functions Setup" menu screen, and then press the ▶/II button.

text_image
Record Functions Setup Quality FINE Self Timer NORM CSD Output ECO ENTER RETURN2 Choose the option you want, and then press the ▶/II button.
3 Press the MENU button to end the setting.

text_image
NORM 17:09 30/9/2003 Still recording qualityNote: The still qualitysettingwillbe stored in memory even when the DVD video camera/recorder is turned off.
SELF-TIMER
You can record stills of yourself alone or with your family, friends, etc., using the self-timer function, as with ordinary cameras. A still will be recorded approximately 10 seconds after the REC button is pressed.
1 Press the MENU button, choose "Self Timer" on the "Record Functions Setup" menu screen, and then press the ▶/II button.

text_image
Record Functions Setup VIDEO Mode Self Timer On CSD Output Off ENTER RETURN RAM2 Select "On", and then press the ▶/II button.
The self-timer will be set.
3 Press the MENU button to end the setting.

text_image
Self-timerrecording 10 REM 9 9 9 RAM 17:00 30/9/20034Press the REC button.
The recording indicator at the front of DVD video camera/recorder will blink.
The self-timer indicator will start to count down, and recording will commence approximately 10 seconds later.
Note:
- You can also check that self-timer has been set by reviewing the on-screen information.
- Toreleasethe self-timermode, choose "Off"onthemenu screen or turn DVD video camera/recorder off.
- Tosuspendself-timer, presstheRECbuttonagainbefore recording starts, or press the button.
- When the REC button is pressed, the ●II mark on LCD screen will be pink. It will also change in the same way when recording with the LCD screen facing the same direction as the lens.
SETTING ON-SCREEN DISPLAY OUTPUT ON OR OFF (OSD OUTPUT)
If you connect this DVD video camera/recorder to a TV to view images on TV screen, you can switch off the on-screen information (displayed in the viewfinder or on the LCD screen) from the TV screen.
1 Press the MENU button, choose "OSD Output" on the "Record Functions Setup" menu screen, and then press the ▶/II button.

text_image
Record Functions Setup VIDEO Mode Self Timer CSD Output On Off ENTER RETURN RAM2 Choose "On" or "Off", and press the ▶/□ button.
3 Press the MENU button to end the setting.
Note:
- The "OSD Output" setting will be stored in memory even when the DVD video camera/recorder is turned off.
- Even if "Off" is chosen, the on-screen information will appear during playback. See page 70 for playback on-screen information display.
- Evenaftertheon-screen informationisremoved from the TV screen, it will still appear in the viewfinder or on the LCD screen.

flowchart
graph TD
    A[""On" setting"] --> B["LCD screen or viewfinder"]
    B --> C[""Off" setting"]
    subgraph "On" setting
        D["RAM FINE 0:0 0:0 REMO MIN 17:00 3.0 / 9/2003"]
        E["RAM FINE 17:00 3.0 / 9/2003"]
        F["RAM FINE 0:0 0:0 REMO MIN 17:00 3.0 / 9/2003"]
    end
    G[""On" setting --> H["Off" setting"]
TV screen TV screen
LCD Setup
This function allows you to adjust the brightness and colour density of LCD screen during recording and playback.
SETTING BRIGHTNESS OF LCD SCREEN (BRIGHTNESS)

natural_image
Diagram of a digital camera with an inset circular display showing playback control buttons (no text or symbols present)Tilt up/down and to left/right to select, and then press▶/II to designate.
1 Press the MENU button, choose "Brightness" on the "LCD Setup" menu screen, and then press the ▶/II button.

text_image
LCD Setup Brightness Color Level ENTER RETURN RAMThe brightness adjustment bar will appear on the screen.
2 Use the joystick for adjustment.
②: The screen becomes dimmer ③: The screen becomes brighter
3 Press the MENU button to end the setting.

text_image
LCD Setup Brightness Color Level ENTERADJUST RAM Brightness adjustment barNote: The brightness setting will be stored in memory even when the DVD video camera/recorder is turned off.
SETTING COLOUR DENSITY OF LCD SCREEN (COLOR LEVEL)
1 Choose "Color Level" on the "LCD Setup" menu screen, and then press the ▶/II button.

text_image
LCD Setup Brightness Color Level ENTER RETURN ©RAMThe colour density adjustment bar will appear on the screen.
2 Use the joystick for adjustment.
②: For lighter colour ③: For denser colour
3Press the MENU button.

text_image
LCD Setup Brightness Color Level ENTERADJUST RAM Colour density adjustment barNote: The colour level setting will be stored in memory even when the DVD video camera/recorder is turned off.
Initial Settings
SWITCHING OPERATING SOUND ON OR OFF (BEEP)
This DVD video camera/recorder will emit a sound when the power switch is changed over, the REC button is pressed to record a movie, or other operations are engaged. If you do not need operating sound, you can switch it off.
| Setting Content | |
| On Beep is | heard |
| Off No beep | is heard |
1 Press the MENU button, choose "Beep" on the "Initial Setup" menu screen, and then press the ▶/II button.

text_image
Initial Setup Beep Power Save Record LED Language Demo Mode Reset ENTER RETURN On Off RAM2 Select "On" or "Off", and then press the ▶/II button.
3 Press the MENU button to end the setting.
Note:
The "Beep" setting will be stored in memory even when the DVD video camera/recorder is turned off.
This DVD video camera/recorder is equipped with power save function. Specify "Power Save: On": If the DVD video camera/recorder is left in the recording pause status without being operated for 5 minutes, it will automatically turn off to prevent the battery from discharging needlessly.
| Setting Content | |
| On To engage power save | |
| Off To cancel power save |
1 Press the MENU button, choose "Power Save" on the "Initial Setup" menu screen, and then press the ▶/II button.

text_image
Initial Setup Beep Power Save On Record LED Off Language Demo Mode Reset ENTER RETURN ORAM2 Select "On" or "Off", and then press the ▶/11 button.
3 Press the MENU button to end the setting.
Note:
- To turn the DVD video camera/recorder on again from automatic off activated by the power save function, set the power switch to "POWER OFF", and then set it to VIDEO, "PHOTO" or "CARD PHOTO"
- The Power Save setting will not appear in the on-screen information display.
- The Power Save setting will be stored in memory even when the DVD video camera/recorder is turned off.
You can switch off the recording indicator on the front of DVD video camera/recorder even during recording.
| Setting Content | |
| On | The recording indicatorwilllight red to show that the DVD video camera/recorder is recording. |
| Off | The recording indicator will not light even during recording. |

natural_image
Technical line drawing of a mechanical device with no visible text or symbolsRecording indicator
1 Press the MENU button, choose "Record LED" on the "Initial Setup" menu screen, and then press the ▶/II button.

text_image
Initial Setup Beep Power Save Record LED On Language Off Demo Mode Reset ENTER RETURN ©RAM2 Select "On" or "Off", and then press the ▶/11 button.
3 Press the MENU button to end the setting.
Note:
- The Record LED setting will not appear in the on-screen information display.
- The Record LED setting will be stored in memory even when the DVD video camera/recorder is turned off.
- Specify "Record LED: Off" when recording a subject behind a glass or water tank that reflects light: The reflected light of the recording indicator will not be recorded.
- When using the self-timer function, the recording indicator will blink when the REC button is pressed regardless of whether Record LED is On or Off.
CHANGING DISPLAY LANGUAGE (LANGUAGE)
You can change the language used to display the menu and information. The following shows that English is changed to French.
1 Press the MENU button, choose "Language" on the "Initial Setup" menu screen, and then press the ▶/II button.

text_image
Initial Setup Beep Power Says Record LED Language Demo Mode Reset English Français Español Deutsch Italiano ENTER RETURN RAM"English" has been set.
2 Select "Français", and then press the ▶/II button.

text_image
Configuration Initiale Beep Power Save LED Enrg. Langue Mode Demo Regl Détaut FR ança is ENTRER RETOUR RAM3 Press the MENU button to end the setting.
Note:
The language setting will be stored in memory even when the DVD video camera/recorder is turned off.
RESETTING MENU SETTINGS TO DEFAULTS (RESET)
You can restore menu settings to defaults (initial settings at the factory (P. 161)). (Note, however, that the date/time, brightness and colour density of LCD monitor will not be reset.)
1 Press the MENU button, choose "Reset" on the "Initial Setup" menu screen, and then press the ▶/II button.

text_image
Initial Setup Beep Power Save Record LED Language Demo Mode Reset ENTER RETURN DRAMThe screen for verifying reset will appear.
3 Press the MENU button to end the setting.
Note:
To cancel resetting midway, choose "NO" on thescreen for verification in step 2 or press the □button.
2 If you are sure that you wish to reset, use the joystick to choose "YES", and then press the ▶/II button.

text_image
Reset? Reset? YES NO ENTER RAMThe setting items have now been reset to defaults.
Using Disc Navigation
STARTING DISC NAVIGATION
Disc Navigation is a tool for editing scenes recorded on this DVD video camera/recorder.
Here is an explanation on “scene” and “programme”, so that you will be able to make most use of Disc Navigation function.
The screens in this instruction manual are basically those that will appear when DVD-RAM disc is used: Some items will not appear when DVD-R disc or card is used, but the operation is the same.

text_image
DISC NAVIGATION1 Press the DISC NAVIGATION button.
The Disc Navigation screen (shown on page 94) will appear.
Note:
Do not proceed with a following step while the disc is being recognised or the ACCESS/PC indicator is blinking.
- Thumbnail:
This refers to a reduced image that helps to distinguish recorded scenes quickly. Immediately recording is finished, the first image of the recorded scene will be used as a thumbnail of the scene: The thumbnail can be changed later on this DVD video camera/recorder.
- Scene:
Movie (video): One scene refers to images recorded from one press of the REC button until recording is temporarily stopped by pressing REC again.
Still (photo): One scene refers to a photo recorded by pressing the REC button.
The following screen will appear when DVD-RAM disc is used: Some display components will not appear when DVD-R disc or card is used.

text_image
Thumbnail *1 ms 001/014A Cursor Selected scene number *2/ Number of all scenes Current page position *5 Still image icon *3 Bar graph Operation guide *4 PLAY RAM Disc type icon *6*1 The displayed thumbnail will be the first image that you recorded.
*2 Scene number refers to display number on thumbnail display screen.
*3 No still icon will appear for card.
*4 The operation guide will vary depending on the operation status of DVD video camera/recorder.
*5 Appears when 13 scenes or more have been recorded.
*6 "R" appears for DVD-R disc. "☐" will appear for card.
Note:
- The background colour of screen allows you to identify whether disc or card is in DVD video camera/recorder.
- Purple: When disc is inserted
- Green: When card is inserted
- Pressing the DISPLAY button will display the recording date/timeofthesceneonwhich the cursorisplacedin the space for operating guide. Pressing DISPLAY again will display the operating guide.
- If no disc or card is inserted, the Disc navigation screen cannot be displayed even by pressing the DISC NAVIGATION button.
-
Each time Disc Navigation is started with a DVD-R disc inserted, message "Creating Thumbnail ..." will appear. After the message appears, the Disc Navigation screen will appear.
-
If the following disc or card is inserted, the Disc Navigation screen will appear or some message will be displayed:
- Write-protected disc
- Locked card
- Finalised DVD-R disc
- Do not leave the disc navigation screen displayed on TV to which the DVD video camera/recorder is connected: Doing so could damage the TV screen, possibly by burning.
TERMINATING DISC NAVIGATION
1 Press the DISC NAVIGATION button.
Disc Navigation will be terminated and the DVD video camera/recorder will enter the recording pause status.
You can also press the □ button to end Disc Navigation.

text_image
ms 001/014 All Progra PLAY RAM 0:00:00 REMS 0 MIN RAM FINE 17:00 30/9/2003
2 Use the joystick to select the desired scene.
The selected scene will be framed: This is called a "cursor".
3 Press the ▶/II button.
Playback will start from the selected scene.
Note:
Tilting the joystick to left or right will move the cursor to the preceding or following scene.
Tilting it up or down will move to preceding or following page.

- When playback ends:
The DVD video camera/ recorder will enter the playback pause status at the last image of last scene. Pressing the □ or DISC NAVIGATION button will restore the Disc Navigation screen.
When the playback pause status continues for as long as 5 minutes, the Disc Navigation screen will automatically be restored.

natural_image
Simple line drawing of a dog jumping with a play button on the right (no text or symbols)Playback pause
- Playing back stills
A still will be displayed for approx. 3 seconds. When playing back stills on card, playback will stop after each still playback.
Note:
- Press the ▶/II button to temporarily stop playback. Pressing ▶/II again will start from that point.
- If you press the ▶/II button after playback of the last scene on disc finishes, playback will start again from the beginning of disc.
- Pressing the □ button will always restore the Disc Navigation screen.
- With playback on Disc Navigation, you can select desired scenes for playback and skip unnecessary scenes.
- When playing back a still with alarge number of pixels on card, "Playback." will appear, and it will take sometime for the still to appear.
SELECTING MULTIPLE SCENES
1 Press the DISC NAVIGATION button.
2 Use the joystick to select the desired scene.
3 Press the SELECT button once:
The selected scene will be framed in red and yellow.
Repeat steps 2 and 3 to randomly select multiple scenes.
To cancel a selected scene, select the scene to be cancelled, and then press the SELECT button.
To cancel all selected scenes, press the □ button.
Note:
Although scenes can be randomly selected, playback will always start from the lowest scene number.
SELECTING CONSECUTIVE SCENES TOGETHER
1 Press the DISC NAVIGATION button.
2 Use the joystick to select the desired scene.

text_image
ms 005/014A PLAY RAMYellow frame
Note:
- You can know the status of scenes from the colours of cursor and bargraph:
Progra
| Cursor | Bar graph | Status of scenes |
| Yellow Blue | Current cursor position | |
| Blue Blue | Range of scenes being selected | |
| Red | Red | Scenes already selected |
3 Hold down the SELECT button for at least one second:
The selected scene will be doubly framed in yellow and blue.

text_image
ms 005/ 014A PLAY RAMDouble frames in yellow and blue
- Pressing the ▶/II button after selecting scenes will play Progra back only the selected scenes from the beginning of each.
- Youcanalsoselectscenesinreversefrom thelastscene in the range.
- To release multiple selection, press the SELECT or □ button after step 4.
- Up to 999 scenes can be selected for both disc and card.
4 Use the joystick to select the last scene in the range you want, and then press the ▶/II button:
The thumbnails of scenes in the specified range will be framed in red, and then selected.

text_image
ms 005:014A Program PLAY RAMRed
frame
Whenscènes uptothis point are selected
Disc Navigation Menu
FUNCTIONS AVAILABLE WITH DISC NAVIGATION
Disc Navigation allows you to do the following:
| Available function | Disc or card used | Contents | Reference page |
| Deletion of scenes | RAM CARD | You can delete unnecessary scenes. 99 | |
| Editing of scenes | RAM | You can attach fade and skip to a scene, combine scenes, or divide one scene. | 101 - 106 |
| Scene information display | RAM R CARD | You can display information on one sceneor multiple scenes,such as image quality, recording time, etc. | 111 |
| Setting of title | RAM | You canset desiredtitles to playlistsand programmes. | 113, 122 |
| Creation of play list | RAM | You can create an original movie by changing the combination of scenes. | 115 |
| Disc or Card initialisation | RAM CARD | You can initialise a DVD-RAM disc or card so that it can be used on this DVD video camera/recorder. | 125 |
| Copy from disc to card | RAM CARD | You can copy photos recorded on DVD-RAM disc to card. | 107 |
| Disc finalisation | R | You can use this DVD video camera/ recorder to finalise any DVD-R disc recorded on it so that the disc can be viewed on DVD player, etc. | 127 |
| Repeat play | RAM R | You can repeatedly play back programmes and scenes. | 128 |
| Slide show | CARD | You can play back stills continuously. | 129 |
| Remaining display (Capacity) | RAM R CARD | The remaining recordable movie time or number of recordable stills is displayed. | 124 |
| Disc protection | RAM | You can protect the DVD-RAM disc to prevent deletion or editing by mistake. | 124 |
| Scene lock | CARD | You can lock any scene so that it will not be deleted by mistake: Essential scenes are thereby protected, and recording another still is possible. | 108 |
| DPOF setting | CARD | You canset the number of printsforeach scene. | 109 |
UNDERSTANDING FLOW OF DISC NAVIGATION MENU
Press the MENU button on the Disc Navigation screen: The menu screens for Disc Navigation and menu screens for disc and card will appear.
See pages 77-78 and 94 for how to interpret the screen.
Refer to pages indicated for details of settings.
- When using DVD-RAM disc

flowchart
graph TD
    A["Scene"] --> B["Delete (P.99)"]
    A --> C["Edit (P.101)"]
    A --> D["Copy (P.107)"]
    A --> E["Select (P.110)"]
    A --> F["Detail (P.111)"]
    B --> G["Thumbnail (P.101)"]
    C --> H["Skip (P.102)"]
    D --> I["Fade (P.103)"]
    E --> J["Combine (P.105)"]
    F --> K["Divide (P.106)"]
    F --> L["Move (P.104)"]
    G --> M["Start → Current (P.110)"]
    H --> N["Current → End (P.110)"]
    I --> O["All (P.110)"]

    P["Play list"] --> Q["Switch (P.116)"]
    P --> R["Play (P.117)"]
    P --> S["Create (P.115)"]
    P --> T["Edit (P.118 - 121)"]
    P --> U["Title (P.122)"]
    P --> V["Delete (P.122)"]

    W["Program"] --> X["Switch (P.112)"]
    W --> Y["Play (P.113)"]
    W --> Z["Title (P.113)"]

    AA["Go To"] --> AB["Top (P.123)"]
    AA --> AC["End (P.123)"]

    AD["Disc"] --> AE["Capacity (P.124)"]
    AD --> AF["Protect Disc (P.124)"]
    AD --> AG["Format Disc (P.125)"]
    AD --> AH["Update Control Info. (P.126)"]

    AI["Others"] --> AJ["Category (P.128)"]
    AI --> AK["Repeat Play (P.128)"]
- When using DVD-R disc

flowchart
graph TD
    A["Scene"] --> B["Select (P.110)"]
    B --> C["Detail (P.111)"]
    C --> D["Start → Current (P.110)"]
    D --> E["Current → End (P.110)"]
    E --> F["All (P.110)"]

    G["Program"] --> H["Switch (P.112)"]
    H --> I["Play (P.113)"]
    I --> J["Disc"]
    J --> K["Capacity (P.124)"]
    K --> L["Finalize Disc (P.127)"]

    M["Go To"] --> N["Top (P.123)"]
    N --> O["End (P.123)"]
    O --> P["Others (P.128)"]
    P --> Q["Repeat Play (P.128)"]
- When using card

flowchart
graph TD
    A["Scene"] --> B["Delete (P.99)"]
    A --> C["Lock (P.108)"]
    A --> D["DPOF (P.109)"]
    A --> E["Select (P.110)"]
    A --> F["Detail (P.111)"]
    F --> G["Start → Current (P.110)"]
    F --> H["Current → End (P.110)"]
    F --> I["All (P.110)"]

    J["Go To"] --> K["Top (P.123)"]
    J --> L["End (P.123)"]

    M["Card"] --> N["Capacity (P.124)"]
    M --> O["Format Card (P.125)"]

    P["Slide Show"] --> Q["All (P.129)"]
    P --> R["DPOF (P.129)"]
DELETING SCENES (DELETE)
1 Press the DISC NAVIGATION button.
2Select the scene to be deleted.
3 Press the MENU button.

text_image
All Programs 005/014 PLAY DESELECT ALL RAMScenetobedeleted
7 Press the □ button to quit.

text_image
Delete Scene 0057013 ENTER EHT RAM4 Choose "Delete" on the "Scene" menu screen, and then press the ▶/11 button.

text_image
Scene Delete Edit Copy Select Detail ETC ENTER RETURN RAM5 The "Delete Scene" screen will appear: If you are sure you want to delete the selected scene, press the ▶/II button.
If you want to change the scene to be deleted, you can change it on this screen.
6 The screen for verifying deletion will appear: Choose "YES", and then press the ▶/II button.

text_image
De la le Scene 3 0 / 9/2003 17:00:00 Scene No. .005 Delete scene? YES ENTERChoose "NO" to cancel deletion.
After Yes or No setting, the "Delete Scene" screen will be restored.
Repeat steps 5 and 6 to delete other scenes.
Note:
- If you point the cursor at the scene to be deleted on "All Programs" screen, and then press the DELETE button on remote control, the screen in step 5 will appear.
- If you delete all data on disc or card, initialising the disc or card will be recommended (See page 125).
- If even one play list has been created, message "Same scenes on PlayList will be deleted. Delete scenes?" will appear before deleting scene(s). This message will appear even if the scene(s) to be deleted is not used in the corresponding play list. In this case, choose "YES" and then press the ▶/□button.
- If the time of deleted scenes (stills) is quite short, the remaining free space of disc may not increase in the disc or card remaining indicator.
- Thelocked scenes on cardcannot be deleted (See page 108).
- Editing using submenu
Press the MENU button before pressing the ▶/II button in step 5 (See page 99): The submenu will appear.

text_image
Edit Exit Delete ENTER RETURN RAM
text_image
Select Start→Current Current→End All ENTER RETURN © RAM
text_image
Go To Top End ENTER RETURN © RAMEdit Exit.... To restore the Disc Navigation screen Delete .... To delete selected scenes
Select Start → Current.... To select scenes from the start to the one that the cursor is on at the moment Current→End..... To select scenes from the scene the cursor is on to the end All .... To select all scenes
Go To-Top.... To move the cursor to the first scene End.... To move the cursor to the last scene
Pressing the □ button will restore the screen in step 5.
Note:
Although the submenu screen will appear for each setting, some menu items may not appear, depending on the setting.
CHANGING IMAGES FOR THUMBNAILS (EDIT - THUMBNAIL)
The thumbnail refers to a reduced image displayed on Disc Navigation to help distinguish recorded scenes. Normally, the first image of the recorded scene is displayed as a thumbnail: You can choose another image of the scene for thumbnail. If you set a vivid image to thumbnail, you can know what you recorded from a glance at the Disc Navigation screen.

text_image
Original thumbnail You can use this image as thumbnail.1 Press the DISC NAVIGATION button.
2Select the thumbnail of the scene to be changed.
3 Press the MENU button.
4 Choose "Scene", "Edit", "Thumbnail", and then press the ▶/11 button.
5 The "Change Thumbnail" screen will appear: If you are sure you want to change the thumbnail of the selected scene, press the ▶/II button: The selected scene will be played back.

text_image
Scene Delete Thumonail Edit1 Skip Copy Fade Select Combine Detail Divide ETC Move ENTER.RETURN RAM
text_image
Select Thumbnail Point SEL ENTER CANCELIf you want to change the scene whose thumbnail is to be changed, you can change it on this screen.
6 When the image you want to use as the thumbnail of the scene appears, press the SELECT button.
7 The screen for verifying switching of thumbnail will appear: Choose "YES", and then press the ▶/II button.

text_image
Change thumb Change thu mbnail ? YES NO ENTERChoose "NO" to cancel switching of thumbnail. After Yes or No setting, the "Change Thumbnail" screen will be restored. Repeat steps 5-7 to change the other scenes.
8 Press the □ button to quit.
Note:
- If you press the MENU button before pressing the button in step 5, the submenu screen will appear (See page 100).
- A thumbnail of still cannot be changed.
- Sincethescenetowhichskippingissetcannotbeplayed back, you will not be able to change its thumbnail: Release the skip setting of the scene to change the thumbnail.
PLAYING BACK BY SKIPPING SCENES (EDIT - SKIP)
You can specify "Skip" for scenes you do not want to play back: The selected scenes will be skipped.
1 Press the DISC NAVIGATION button.
2Select the scene to be skipped.
3 Press the MENU button.
4 Choose "Scene", "Edit", "Skip", and then press the ▶/II button.
5 The "Set Skip" screen will appear: If you are sure you want to skip the selected scene, press the ▶/II button.
If you want to change the scene to be skipped, you can change it on this screen.
After skip setting, the "Set Skip" screen will be restored.
Repeat step 5 to set skipping of other scenes.
6 Press the □ button to quit.
A skip mark “” will appear in the thumbnail of any scene for which skipping has been set.

text_image
Skip mark ns 001/0134 I Progra PLAY RAM- Releasing Skip
Select the scene set to be skipped, and perform the same procedure as setting skip: The skip mark will disappear and skipping of the scene will be released.
Note:
- Multiple scenes can be selected for skipping (P.96).
- If you press the MENU button before pressing the button in step5, the submenu screen will appear (P.100).
ADDING SPECIAL EFFECTS (EDIT - FADE)
You can add fading to the beginning and/or end of scene. There are three types of special effects:
Fade Out Fade Out Fade Out

natural_image
Three grayscale images of a person wearing a hat, arranged vertically with arrows pointing outward (no text or symbols)
natural_image
Two stacked images with arrows pointing downward, one showing a person wearing a hat (no text or symbols)
natural_image
Three grayscale images of people with hats and a person in a hat, arranged vertically with diagonal arrows (no text or symbols)Fade InFade InFade I
White:
Fades in from white screen Fades out to white screen
Wipe:
Fades in from black screen to vertical direction of screen Fades out from vertical direction of screen to black screen
B/W:
Fades in from Black and White screen to colour screen Fades out from colour screen to Black and White screen
1 Press the DISC NAVIGATION button.
2Select the scene for adding special effects.
3 Press the MENU button.
4 Choose, "Scene", "Edit", "Fade" and then press the ▶/II button.
5 The "Fade Set" screen will appear: If you are sure you want to add the fade effect to the scene, press

text_image
ms 005/013All Progra Delete Thumbnail Edit Skip Copy Fade Select Combine Detail Divide Move CRC PLAY RAMIf you want to change the scene to which fade is added, you can change it on this screen.
6 Select the special effects for "IN" and/or "OUT", choose "Enter", and then press the ▶/II button.

text_image
Fade IN None White Wpe B/W OUT None White Wpe B/W Enter Cancel ENTERTo cancel setting, choose "Cancel".
After setting, the "Fade Set" screen will be restored.
Repeat steps 5 and 6 to add fade to other scenes.
7 Press the □ button to quit.
The “▲” and/or “▲” mark(s) will appear in the scenes for which special effects have been set.

text_image
"In" effect "Out" effect ins 005/013A I Progra PLAY RAMWhen playing back

text_image
Sequence of cartoon illustrations showing a soccer game with ball, player, and ball, ending in a close-up view.Note:
- Setting fade will interlock with sound.
- Fading can also be set to either "IN" or "OUT".
- Anyregisteredfadecanbechangedat any timeusingthe same procedure as above.
- Fadecanalsobeaddedtoon-screeninform displayed during playback.
- Adding fade to multiple scenes is also possible.
-
If the playback time of scene is short, fade will cut off midway.
-
If you set fade-in and fade-out to a still image or a movie with recording time of no more than 3 seconds, only fade-in will be valid.
- No fade effect will operate if you start playback in the mecoding pause status.
- If you locate the start of a scene by skipping, the image at the start of the scene will appear for a moment, and then fade will operate.
- The fade effect will not function during frame advance, frame back, slow playback or search playback.
RAM
ARRANGING ORDER OF SCENES (EDIT - MOVE)
You can arrange scenes within a play list by moving them to desired positions. Create a play list first, and then arrange the scenes ["Creating New Play List (Create)", P.115].
COMBINING MULTIPLE SCENES (EDIT - COMBINE)
You can combine multiple scenes into one.
If you have recorded numerous short scenes, combining them will be facilitated by the use of Disc Navigation.
Be sure to select consecutive multiple scenes. Combining scenes is possible only when "Category: All" is specified. Stills cannot be combined.
1 Press the DISC NAVIGATION button.
2 Select the consecutive multiple scenes to be combined.
3 Press the MENU button.
4 Choose, "Scene", "Edit", "Combine" and then press the ▶/II button.
5 The "Combine Scenes" screen will appear: If you are sure you want to combine the selected scenes, press the ▶/II button.
If you want to change the scenes to be combined, you can change them on this screen.

text_image
Scene Delete Thumbnail Edit Skip Copy Fade Select Combine Detail Divide ETC Move ENTER RETURN RAM6 The screen for verifying combination will appear: Choose "YES", and then press the ▶/II button.

text_image
Combine Scenes Combine scenes? YES NO ENTERThe two images appearing on the verification screen are those of the first and last scenes to be combined.
Choose "NO" to cancel combination.
After Yes or No setting, the "Combine Scenes" screen will be restored.
The thumbnail of the first scene will appear in the combined scene.
Repeat steps 5 and 6 to combine other scenes.
7 Press the □ button to quit.
Note:
- If you press the MENU button before pressing the button in step5, the submenu screen will appear (P.100).
- Withspecial effects, the "IN" effect of the first scene in the selected range and the "OUT" effect of the last scene will be chosen.
- If you combine scenes from different programmes (different recording dates), a message that prompts you to update the control information will appear when power is turned on and Disc Navigation is first started (P.126). Note that if you choose “YES” for this message, the combined scenes will be split into separate scenes. If you choose “NO” for this message, the scenes will be combined, but the same message will appear each time Disc Navigation is started. To prevent this, when combining scenes from different programmes, create a new play list and combine the scenes on it.
DIVIDING MOVIES (EDIT - DIVIDE)
You can divide a scene into two parts.
To delete unnecessary portion of scene, first divide the scene, and then delete the unnecessary portion.
You can also cut out a part of scene and use it in the play list.
1 Press the DISC NAVIGATION button.
2Select the scene to be divided.
3 Press the MENU button.
4 Choose, "Scene", "Edit", "Divide" and then press the ▶/II button.
5 The "Divide Scene" screen will appear: If you are sure you want to divide the selected scene, The selected scene will be

text_image
Scene Delete Thumbnail Edit Skip Copy Fade Select Combine Detail Divide Move ETC ENTER RETURN RAMIf you want to change the scene to be divided, you can change it on this screen.
The selected scene will be played back.
6 When you reach the point where you want to divide the scene, press the SELECT button.

text_image
Select Division Point 002 6400:18 SELECT ENTER CANCELStatus bar of scene being played back
7 The screen for verifying division will appear: Choose "YES", and then press the ▶/II button.

text_image
Div i de Scene Div i de scene? YES NO ENTERChoose "NO" to cancel division.
After division, the “Divide Scene” screen will be restored.
Repeat steps 5-7 to divide another scene.
8 Press the □ button to quit.
Note:
- If you press the MENU button before pressing the button in step5, the submenu screen will appear (P.100).
- The status bar of scene being played back can be switched off or on by pressing the DISPLAY button.
- Search and frame advance areuseful when designating division points.
- If a special effect has been added to the original scene, the "IN" effect will be added to the first half of scene, and the "OUT" effect, to the latter half.
- The division point may drift before or after the designated point by approximately 0.5 seconds.
- Since a scene with a skip set cannot be played back, no division point can be specified: Release the skip for the scene before dividing it.
- If the division point is at a still, a message will appear, but no division will be made.
- If the division point is at the start or end of a scene, a message will appear, but no division will be made.
- A movie scene whose recording time is 0.5 seconds or less cannot be divided.
- If free space available on disc is insufficient, division will not be possible: Delete unnecessary scenes.
- Pressing the □ button on the screen for verification will restore the thumbnail display screen.
COPYING STILLS ON DVD-RAM DISC TO CARD (COPY)
You can copy stills recorded on DVD-RAM disc to card.
1 Set the power switch to "VIDEO" or "PHOTO".
2 Press the DISC NAVIGATION button.
3Select the still to be copied.
4 Press the MENU button.
5 Choose "Copy" on the "Scene" menu screen, and then press the ▶/11 button.

text_image
Scene Delete Edit Copy Select Detail EIC ENTER RETURN RAM6 The "Copy to card" screen will appear: If you are sure you want to copy the selected still, press the ▶/II button.

text_image
Copy to card 012/014 ENTER EXIT ©RAMIf you want to change the still to be copied, you can change it on this screen.
7 The screen for verifying copy will appear: Choose "YES", and then press the ▶/II button.

text_image
Copy to card Copy PHOTO scenes to card? YES NO ENTERChoose "NO" to cancel copy.
After Yes or No setting, the "Copy to card" screen will be restored.
Repeat steps 6 and 7 to copy other stills to card.
8 Press the □ button to quit.
Note:
- No movie can be copied.
- If you press the MENU button before pressing the button in step6, the submenu screen will appear (P.100).
- See "Category" (P.128) to check the stills recorded on DVD-RAM disc.
- You can also select multiple scenes (P.96).
- Even if all scenes, including movies, are selected to be copied, only stills will be copied.
• Data on card cannot be copied to disc. - The quality of still copied from disc to card will be the same as when you recorded still on disc.
- Stills recorded on a device other than this DVD video camera/recorder may not be copied normally.
LOCKING SCENES ON CARD (LOCK)
You can lock each photo recorded on card so that it will not be deleted or edited by mistake.
1 Set the power switch to "CARD PHOTO".
2Press the DISC NAVIGATION button.
3Select the scene to be locked.
4 Press the MENU button.
5 Choose "Lock" on the "Scene" menu screen, and then press the ▶/11 button.

text_image
Scene Delete Lock DPOF Select Detail ENTER RETURN6 The "LockSet" screen will appear: If you are sure you want to lock the selected scene, press the ▶/II button.

text_image
7:19 Lock Set Lock icon ENTER EXITIf you want to change the scene to be locked, you can change it on this screen.
After setting, the "Lock Set" screen will be restored.
Repeat step 6 to lock another scene.
7 Press the □ button to quit.
• To unlock the scene:
Select the locked scene, and then use the same procedure as above to unlock the scene: The lock mark will disappear and locking will be released.
Note:
- If you press the MENU button before pressing the button in step6, the submenu screen will appear (P.100).
- You can also select multiple scenes (P.96).
- When initialising the card, thelocked scenes will also be deleted.
DESIGNATING SCENES TO BE PRINTED (DPOF)
You can use DPOF to set print information, including selection of the scenes to be printed, so that you will be able to use it on a system conforming to DPOF.
Note:
DPOF stands for digital print order format. DPOF is used to ask a print lab to print recorded stills.
1 Set the power switch to "CARD PHOTO".
2Press the DISC NAVIGATION button.
3Select the scene to which DPOF is to be set.
4 Press the MENU button.
5 Choose "DPOF" on the "Scene" menu screen, and then press the ▶/11 button.

text_image
Scene Delete Lock DPOF Select Detail ENTER RETURN6 The "DPOF Set" screen will appear: If you are sure you want to set DPOF to the scene, press the ▶/II button.

text_image
7/19 DPOF Set DPOF icon ENTER EXITIf you want to change the scene to which DPOF is set, you can change it on this screen.
7 Use joystick to specify the number of prints, and then press the ▶/II button:

text_image
7/190 PCF Set ENTER EXITTilt it up or to right: To increase the number one by one.
Tilt it down or to left: To decrease the number one by one.
After setting, the "DPOF Set" screen will be restored.
Repeat steps 6 and 7 to set DPOF to another still.
8 Press the □ button to quit.
Note:
- If you press the MENU button before pressing this button in step6, the submenu screen will appear (P.100).
- You can also select multiple photos (P.96).
- Ifyouspecifythenumberafterselectingmultiplestills, the same specified number will be set to all those stills.
- Up to 99 prints can be set for one scene. The maximum number of settable prints on one card is 999.
- This DVD video camera/recorder may not recognise DPOF that has been set on another device: Always set the DPOF on this DVD video camera/recorder.
SELECTING SCENES USING MENU SCREEN (SELECT)
Using the Disc Navigation menu screen, you can simultaneously select consecutive scenes. This function is useful when there are numerous scenes.
1 Press the DISC NAVIGATION button.
2Select the first scene to be selected.
3Press the MENU button.
4 Choose "Select" on the "Scene" menu screen.
5 Choose "Start → Current", "Current → End" or "All" and then press the ▶/□button.

text_image
Scene Delete Edit Copy Select Start→Current Detail Current→End E10 All ENTER RETURN RAM
flowchart
graph TD
A["Current scene"] --> B[""Start → Current" is specified: The scenes from the first to current will be selected."<br> A --> C["Current → End" is specified: The scenes from the current to end will be selected."<br> A --> D["All" is specified: All scenes from the first to end will be selected"]
•Deselecting selected scenes
Deselecting scenes one by one:
While you are displaying the "All Programs" screen on which scenes have been selected, choose the scene to be deselected and then press the SELECT button.
Note:
Up to 999 scenes can be selected.
Deselecting all the selected scenes at once:
While you are displaying the "All Programs" screen on which scenes have been selected, press the □ button.
DISPLAYING INFORMATION USING MENU SCREEN (DETAIL)
You can display various information for a scene: the recording mode, recording date/time and length, special effects and movie quality mode.
1 Press the DISC NAVIGATION button.
2 Select the scene whose information you wish to know.
3 Press the MENU button.
4 Choose "Scene", "Detail", and then press the ▶/II button.
The detailed information on the scene will appear.
(When using disc)

text_image
Detail Scene No. 007 VIDEO(FINE) 1min13sec Date : 30/9/2003 6:00:00 Skip:Off Fade IN:None OUT:None *1 PREV MUNT RETURN(When using card)

text_image
Detail Scene No. 7 100-0007[640] Date: 30' 9/2003 8:00:00 Lock:Off DPOF Number of printings: 6 PREV NOT RETURN *2 *3*1 Not displayed with DVD-R disc.
*2 May not appear if the loaded card does not comply with DCF.
*3 Number of pixels on still in horizontal direction: This may not appear with a JPEG file does not conform to this DVD video camera/recorder.
Note:
Tilting the joystick to rightwill display information on the following scene; tilting the joystick to left will display information on the preceding scene.
5 Press the □ button to quit.
If you have selected multiple scenes, the information shown below will appear.
Pressing the □ button will restore the thumbnail display screen.
(When using disc)

text_image
Detail VIDEO: 1 min43sec ( 2scenes) (XTRA): 0 min 0sec ( 0scenes) (FINE): 1min43sec ( 2scenes) (STD) : 0 min 0sec ( 0scenes) (- - ) : min 0sec ( 0scenes) PHOTO : 0 RETURN*1 With DVD-R disc, the quality mode (FINE or STD) selected first will appear.
*2 Number of scenes whose quality mode is unknown: This willappearwhen thedisc has a scene recorded on a device other than this DVD video camera/ recorder, only if the dischas a scene whose mode is unknown.
Also, this will not appear when a DVD-Rdisc is used.
*3 This will not appear with DVD-R disc, since no still image can be recorded on it.
(When using card)

text_image
Detail Scene No. 6 28 / 9/2003 12:50:00 Scene No. 7 30 / 9/2003 8:00:00 Scenes: 2 RETURNNote:
- Ifmultiplesceneshavebeenselected, the total recording time of the selectedscenes (totalnumber in case of stills) will appear.
- If aDVD-R disc recorded on a deviceotherthan this DVD video camera/recorder is inserted (already finalised), no scene information will appear.
Programme
WHAT IS "PROGRAMME"?
Programme refers to an assembly of scenes recorded on the same date regardless of whether they are movie or still.

flowchart
graph TD
    A["Scene No. 1"] --> B["9:00 Movie"]
    B --> C["10:20 Still"]
    C --> D["11:45 Still"]
    D --> E["13:30 Movie"]
    E --> F["17:20 20:00"]
    G["Scene No. 2"] --> H["Movie"]
    H --> I["Still"]
    I --> J["Still"]
    J --> K["Still"]
    K --> L["Still"]
    L --> M["Still"]
    M --> N["Still"]
    N --> O["Still"]
    O --> P["Still"]
    P --> Q["Still"]
    Q --> R["Still"]
    R --> S["Still"]
    S --> T["Still"]
    T --> U["Still"]
    U --> V["Still"]
    V --> W["Still"]
    W --> X["Still"]
    X --> Y["Still"]
    Y --> Z["Still"]
    Z --> AA["Still"]
    AA --> AB["Still"]
    AB --> AC["Still"]
    AC --> AD["Still"]
    AD --> AE["Still"]
    AE --> AF["Still"]
    AF --> AG["Still"]
    AG --> AH["Still"]
    AH --> AI["Still"]
    AI --> AJ["Still"]
    AJ --> AK["Still"]
    AK --> AL["Still"]
    AL --> AM["Still"]
    AM --> AN["Still"]
    AN --> AO["Still"]
    AO --> AP["Still"]
    AP --> AQ["Still"]
    AQ --> AR["Still"]
    AR --> AS["Still"]
    AS --> AT["Still"]
    AT --> AU["Still"]
    AU --> AV["Still"]
    AV --> AW["Still"]
    AW --> AX["Still"]
    AX --> AY["Still"]
    AY --> AZ["Still"]
    AZ --> BA["Still"]
    BA --> BB["Still"]
    BB --> BC["Still"]
    BC --> BD["Still"]
    BD --> BE["Still"]
    BE --> BF["Still"]
    BF --> BG["Still"]
    BG --> BH["Still"]
    BH --> BI["Still"]
    BI --> BJ["Still"]
    BJ --> BK["Still"]
    BK --> BL["Still"]
    BL --> BM["Still"]
    BM --> BN["Still"]
    BN --> BO["Still"]
    BO --> BP["Still"]
    BP --> BQ["Still"]
    BQ --> BR["Still"]
    BR --> BS["Still"]
    BS --> BT["Still"]
    BT --> BU["Still"]
    BU --> BV["Still"]
    BV --> BW["Still"]
    BW --> BX["Still"]
    BX --> BY["Still"]
    BY --> BZ["Still"]
RAM R
SWITCHING TO THUMBNAIL DISPLAY OF SPECIFIC DATE (SWITCH)
Since the scenes recorded on this video camera/recorder are collected as "programmes" for each recording date, selecting a programme will allow you to display only the scenes on a specific date.
1 Press the DISC NAVIGATION button.
2Press the MENU button.
3 Choose "Switch" on the "Program" menu screen, and then press the ▶/II button.
4 Select the programme to be displayed, and then press the ▶/11 button.
The Disc Navigation screen of the selected programme will appear.

text_image
Program Switch Play Title ETC ENTER RETURN RAM
text_image
Switch Program All Programs 01 28/9/2003 02 30/9/2003 03 10/10/2003 ENTER RETURN
text_image
01 28/9/2003 001/008 PLAY RAMNote:
- Pressing the □ button on the "Switch Program" screen will restore the Disc Navigation screen.
- Thedatesdisplayedontheprogrammeselectscreenwill be in the Date Mode used when the first scenes of programmes were recorded, and the date displays D/M/Y, M/D/Y and Y/M/D may be mixed.
PLAYING BACK PROGRAMME (PLAY)
You can play back only the selected programme.
1 Press the DISC NAVIGATION button.
2Press then the MENU button.
3 Choose "Play" on the "Program" menu screen, and then press the ▶/II button.

text_image
Program Switch Play Title EIC ENTER RETURN RAM4Select the programme to be played back, and then press the ▶/II button.
Playback will start from the first scene of the selected programme.

text_image
Start Program All Programs 01 28 / 9/ 2003 02 3 0/ 9/2003 03 1 0/10/ 2003 ENTER TURN 17:00 30/9/2003Note: If “Repeat Play: On” is specified, the selected programme will be repeatedly played back.
RAM
CHANGING TITLE OF PROGRAMME (TITLE)
The recording date/time has initially been attached to any programme. You can change the recording date/time to any desired title.
1 Press the DISC NAVIGATION button.
2Press the MENU button.
3 Choose "Title" on the "Program" menu screen, and then press the ▶/II button.
4Select the programme whose title you want to change, and then press the ▶/II button.

text_image
Program Title 01 29 / 9/2003 02 3 0 8/2003 03 10/ 10/2003 ENTER RETURNThe screen for setting a title will appear.
5 Select a letter and then press the ▶/Ⅱ button: The selected letter will be entered.
Repeat this procedure to create a title.

text_image
Title input bar 30: 9' 2003TITLE 1 2 3 4 5 6 7 8 9 0 SPACE A B C D E F G H I J K L M N O P Q R S T U V W X Y Z A E I O U A E I O U A N O A E I O U A E I O U C 1 Enter Cancel INPUT DELETE SELECT Input mode Palette for selecting characters6 After entering the title, choose "Enter" and then press the ▶/II button.

text_image
at a Par TITLE 1 2 3 4 5 6 7 8 9 0 S P A C E a b c d e f g h i j k l m n o p q r s t u v w x y z à é i ó ú á é í ó ú á ñ ó á é i ó ú á é í ó ú ó ç B 2 Cancel ENTER DELETE SELECT7 The screen for verifying the change in title will appear: Choose "YES", and then press the ▶/II button.

text_image
TITLE at a Park △Finish title setting? YES NO ENTERChoose "NO" to cancel changing of the title.
After Yes or No setting, the Disc Navigation screen of the selected programme will appear.
Note:
- If you wish to delete the letter for title, press the □ button once: The input letter will be deleted. Holding down the □ button will delete all letters in the TITLE column. You can also use the DELETE button on remote control to delete any input letters.
- PressingtheSELECTbuttononthetitlesettingscreen(in step 5) will change the cursor position from the title input bar to character select palette, input mode number, and then to "Cancel".
- To cancel the setting of title, choose "NO" on the screen for verifying the entered title: The screen for verifying cancellation of title setting will appear. To cancel title setting, choose "YES".
- If you press the □ button on the screen for verifying change in title, the title setting screen will be restored.
- Double byte characters set on other devices may be displayed blank on this DVD video camera/recorder.
- Characters available for entering title
You can use the joystick to select characters from the "capital letter", "small letter" and "symbol" input modes.
With step 5, select the input mode and then press the ▶/Ⅱ button, or press the DISPLAY button.
Input mode

flowchart
graph TD
    A["TITLE 30: 9/2003"] --> B["1 2 3 4 5 6 7 8 9 0 S P A C E"]
    A --> C["A B C D E F G H I J K L W"]
    A --> D["N O P Q R S T U V W X Y Z"]
    A --> E["A E I Ő U A É I Ő U A Í N Ø"]
    A --> F["A É I Ő U A É I Ő U C"]
    A --> G["1 Enter Cancel"]
    G --> H["CHANGE DELETE SELECT"]
    I["TITLE 30: 9/2003"] --> J["1 2 3 4 5 6 7 8 9 0 S P A C E"]
    I --> K["a b c d e i g h i j k l m"]
    I --> L["n o p q r s t u v w x y z"]
    I --> M["á é l Ő u a é í o ú a Í n Ø"]
    I --> N["á é i ó ú a é í o ß u c β"]
    O["2 Enter Cancel"] --> P["CHANGE DELETE SELECT"]
    Q["TITLE 30: 9/2003"] --> R["1 2 3 4 5 6 7 8 9 0 S P A C E"]
    Q --> S["• , . , = ? ; ! ; | / |<br>    Q --> T[• = ¥ $ # E % # & * § = 1"]
    Q --> U["• < > • = { } "] { } - ±]
    V["3 Enter Cancel"] --> W["CHANGE DELETE SELECT"]
Play List
WHAT IS "PLAY LIST"?
You can create a play list on this DVD video camera/recorder by gathering your favourites from the recorded scenes.
Since the play list is not created by copying data, you will consume little of the disc capacity by making a play list. On the other hand, deleting scenes on play list will not increase the remaining disc capacity for recording.
Example:
Programme 1 (recorded on September 27, 2003)
Programme 2 (recorded on September 30, 2003)

flowchart
graph TD
    A["Child Activity 1"] --> B["Team Activity"]
    C["Child Activity 2"] --> B
    D["Child Activity 3"] --> B
    E["Child Activity 4"] --> B
    F["Child Activity 5"] --> B
    G["Child Activity 6"] --> B
    H["Child Activity 7"] --> B
    I["Child Activity 8"] --> B
    J["Child Activity 9"] --> B
    K["Child Activity 10"] --> B
    L["Child Activity 11"] --> B
    M["Child Activity 12"] --> B
    N["Child Activity 13"] --> B
    O["Child Activity 14"] --> B
    P["Child Activity 15"] --> B
    Q["Child Activity 16"] --> B
    R["Child Activity 17"] --> B
    S["Child Activity 18"] --> B
    T["Child Activity 19"] --> B
    U["Child Activity 20"] --> B
Play list 1 created
Play lists of up to No. 99 can be created and 999 scenes can be included in play lists of No. 1 to No. 99.
CREATING NEW PLAY LIST (CREATE)
Here we create a play list.
1 Press the DISC NAVIGATION button.
2Select the scenes to be programmed in a play list.
3Press the MENU button.
4 Choose "Create" on the "PlayList" menu screen, and then press the ▶/II button.
5 The scene select screen will appear: If the selected scenes on the play list are the ones you want, press the ▶/11 button.
If you want to change the scenes with which you want to create a play list, you can change them

text_image
PlayList Switch Play Create Edit Title Delete ENTER RETURN RAM
text_image
03 30/9/2003 17... 006/006 PLAY RAMWith the created play list, you can also add scenes recorded on another day or delete unnecessary scenes afterwards.
6 When creation of a play list is complete, the Disc Navigation screen will appear.
Note:
- You can also select multiple scenes (P.96).
- If the added scene had skip or fade setting, that information will also be added to the play list.
- Thedate/time when a play list was created will appear as the title for the play list.
- If free space available on disc is insufficient, creation of new play list may not be possible: Delete unnecessary scenes.
- Only the data on scenes is recorded on play list: If you create or delete play lists, the original scenes in programmes will not be erased. Editing scenes on play list will not affect the scenes in programmes.
- Editing on play list
When making settings on play list, such as changing title, adding fade, setting skip, etc., use the same procedure for setting on programme or scenes. Perform these settings, referring to the following reference pages:
Setting skip, P.102
Adding fade, P.103
Combining scenes, P.105
Dividing a scene, P.106
Changing title, P.113
SWITCHING TO DISPLAY OF EACH PLAY LIST (SWITCH)
Select the desired one of multiple play lists: The Disc Navigation screen of the selected play list will appear.
1 Press the DISC NAVIGATION button.
2 Press the MENU button.
3 Choose "Switch" on the "PlayList" menu screen, and then press the ▶/II button.

text_image
PlayList Switch Play Create Edit Title Delete ENTER RETURN RAM Switch PlayList All Programs 01 26/9/2003 12:50 02 30/9/2003 17:00 03 10/10/2003 8:00 ENTER RETURN4 Use the "Switch Playlist" screen to select the play list you wish to display, and then press the ▶/11 button.

text_image
001/00802 PLAY RAM0/9/2003 17.
The Disc Navigation screen of the selected play list will be displayed.
Note:
To display the Disc Navigation screen showing all programmes (all recorded scenes), choose "All Programs" on the "Switch PlayList" screen.
PLAYING BACK A PLAY LIST (PLAY)
1 Press the DISC NAVIGATION button.
2Press the MENU button.
3 Choose "Play" on the "PlayList" menu screen, and then press the ▶/II button.

text_image
PlayList Switch Play Create Edit Title Delete ENTER RETURN RAM Start PlayList 01 28 / 9/2003 12:50 02 30/ 9/2003 17:00 03 10/10/2003 8:00 04 12/10/ 2003 13:30 ENTER RETURN4 Use the "Start PlayList" screen to select the play list to be played back, and then press the ▶/II button.

natural_image
Line drawing of a dog wearing a donut (no text or symbols)The selected play list will be played back from the first scene. To cancel playback midway, press the □ button: The Disc navigation screen of the play list being played back will appear.
Note: If "Repeat Play On" is specified, the play list will be repeatedly played back (See page 128).
ADDING SCENES TO PLAY LIST (EDITING PLAY LIST)
You can later add scenes to the play list.
1 Press the DISC NAVIGATION button.
2Press the MENU button.
3 Choose "Edit" on the "PlayList" menu screen, and then press the ▶/II button.
4 Use the play list select screen to select the play list to which you wish to add scenes, and then press the ▶/II button.
The scenes of the programme that was displayed in step 1 will appear in the upper row, and the scenes of selected play list will appear in the lower row.

text_image
PlayList Switch Play Create Edit Tile Delete ENTER RETURN RAM
text_image
Edit PlayList 01 2 8/ 9/ 2003 12:50 02 30/ 9/2003 17:00 03 1 0/10/ 2003 8 : 00 04 1 2/10/ 2003 13:30 ENTER RETURN
text_image
Edit PlayList All Programs 004/014 PlayList No.02 007/007 ADD TNote:
If the DISPLAY button is pressed when the thumbnails are displayed, therecordingdate/timeof the selected scene will appear across the bottom of screen. Press DISPLAY again to restore the previous screen.

text_image
Edit PlayList All Programs 004:014 PlayList No.02 007:007 3 0 : 9/2003 17:00Recording date/time
5 Tilt the joystick down to move the cursor to the lower row, and tilt it to left or right to select the point where the scene is to be inserted.

text_image
Edit PlayList All Programs 004/014 PlayList No.02 007/027 Scenetobadded Insertion position ADD T *1 *2*1: Number of scene before insertion position cursor
*2: Number of all scenes on play list
6 Tilt the joystick up to move the cursor to the upper row, and tilt it to left or right to point the cursor to the scene to be added.
7 Press the ▶/II button to copy the scene.
After adding scenes is completed, the edited play list will appear. Repeat steps 5-7 to add other scenes.
8 Press the □ button: The screen for verifying exit will appear.
Note:
- The cursor shows the position where the scene is to be added.
- You can also select multiple scenes (P.96).
- Pressing □ in the middle of adding scenes will display the screen for verifying an exit from "Edit PlayList". Choose "YES" to exit the edition of play list. Choosing "NO" will restore the "Edit PlayList" screen.
- If you press the MENU button in step 5 or 6, the submen screen for editing play list will appear. You can also use this submenu to add scenes (See page 100).
DELETING SCENES FROM PLAY LIST (EDITNG PLAY LIST)
1 Press the DISC NAVIGATION button.
2 Display the editing screen of the play list to be edited.
Perform steps 2–4 on page 118.

text_image
Edit PlayList © All Programs 004/014 PlayList No.02 007/007 ADD EDIT3 Move the cursor to the play list in lower row, and place the cursor on the scene to be deleted.
4 Press the ▶/11 button.
Repeat steps 3 and 4 to delete other scenes.
5 Press the □ button: The screen for verifying exit will appear.

text_image
Edit PlayList All Programs 001/014 PlayList No 02 007/007 EX ITDELETENote:
- You can also select multiple scenes (P.96).
- Place the cursor on scene to be deleted, and then press the DELETE button nonremote control: You can delete the scene on the play list.
ADDING SCENES USING SUBMENU FOR EDITING (EDITING PLAY LIST)
You can use the menu screen to add scenes to a play list.
1 Press the DISC NAVIGATION button.
2 Display the editing screen of the play list to be edited.
Perform steps 2–4 on page 118.
3From the play list in lower row, select the position where you wish to insert a scene.
4Select the scenes to be added from the upper row.

text_image
Edit PlayList All Programs 001/014 PlayList No.02 007/007 ADD B T Scenetobe added Insertion position5Press the MENU button.
6 Choose "Add", and then press the ▶/II button.
Repeat steps 3-6 to add other scenes.
7 Press the □ button to quit.

flowchart
graph TD
    A["Edit"] --> B["Exit Bars 001:014"]
    B --> C["Add"]
    C --> D["007:007"]
    D --> E["PlayList No.02"]
    E --> F["ENTER RETURN"]
    F --> G["Edit PlayList"]
    G --> H["All Programs 001:014"]
    H --> I["PlayList No.02 008:008"]
    I --> J["DELETE EXIT"]
Note:
- The selected scenes will be added in the insertion position.
- You can also select multiple scenes (P.96).
DELETING SCENES USING SUBMENU FOR EDITING (EDITING PLAY LIST)
You can delete scenes from play list on the editing screen.
1 Press the DISC NAVIGATION button.
2 Display the editing screen of the play list to be edited.
Perform steps 2–4 on page 118.

text_image
Edit PlayList #AI Programs 001/014 PlayList No.02 007/007 ADD T3Move the cursor to the play list in lower row.
4 Select the scene to be deleted, and then press the MENU button.
5 Choose "Delete" on the "Edit" menu screen, and then press the ▶/II button.
Repeat steps 3-5: other scenes can be deleted.

text_image
Edit Exit s 001:014 Delete PlayList No.02 007:007 ENTER RETURN6 Press the □ button: The screen for verifying exit will appear.
Note:
- If all scenes on play list are deleted, the play list itself will also be deleted.
- You can also select multiple scenes (P.96).
SELECTING SCENES USING SUBMENU FOR EDITING (EDITING PLAY LIST)
You can specify the range of scenes when adding or deleting consecutive multiple scenes to/from play list. This "Select" menu item is useful when selecting consecutive multiple scenes in items for adding or deleting scenes using menu on page 110.
1 Press the DISC NAVIGATION button.
2 Display the editing screen of the play list to be edited.
Perform steps 2–4 on page 118.

text_image
Edit PlayList ©AI Programs 004/014 ©PlayList No.02 007/007 ADD T3 Specify the first scene of those you wish to select, and then press the MENU button.
4 Choose "Start → Current", "Current → End", "All" on the "Select" menu screen, and then press the ▶/□ button.

text_image
Select Programs 004/014 Start->Current Current->End All 007/007 ENTER RETURNNote:
See page 110 for the status of scenes to be selected.
5 Press the □ button: The screen for verifying exit will appear.
ARRANGING ORDER OF SCENES (MOVE)
You can move scenes only when "Category: All" is specified.
1 Press the DISC NAVIGATION button.
2 Press the MENU button.
3 Choose "Switch" on the "PlayList" menuscreen, and then press the ▶/II button.
4Select the scene to be moved.
5 Press the MENU button.
6 Choose "Scene", "Edit", "Move", and then press the ▶/II button.
7 The "Move Scenes" screen will appear: If you are sure you want to move the scene, press the ▶/II

text_image
Scene Delete Thumbnail Edit Skip Copy Fade Select Combine Detail Divide Move ETC ENTER RETURN RAMIf you want to change the scene to be moved, you can change it on this screen.
8Move the "I" mark to the position where you wish to move the scene, and then press the ▶/II button.

text_image
Select Insert Point 006/019 ENTER CANCEL RAM9 The screen for verifying move will appear: Choose "YES", and then press the ▶/II button.
Choose "NO" to cancel move.

text_image
Move Scenes Move scenes? YES ND ENTERAfter Yes or No setting, the scene select screen will be restored.
Repeat steps 7 - 9 to move another scene.
10 Press the □ button to quit.
Note:
- If you press the MENU button before pressing the button in step 7, the submenu screen will appear.
- You can also move multiple scenes (P.96).
• Stills can also be moved. - Only scenes on play list can be moved.
CHANGING TITLE OF PLAY LIST (TITLE)
The play lists have serial numbers in the order you have created them, along with the created dates/times: You can change this title at any time.
1 Press the DISC NAVIGATION button.
2Press the MENU button.
3 Choose "Title" on the "PlayList" menu screen, and then press the ▶/II button.
4 Use the "PlayList Title" screen to select the play list whose title you wish to change, and then press the ▶/II button.
See “Changing Title of Programme (Title)” on page 113 for how to enter a title.

text_image
PlayList Title 01 26/ 9/ 2003 12:50 02 30/ 9/2003 17:00 03 1 0 / 10/ 2003 8 : 0 04 1 2 / 10/ 2003 13:30 ENTER RETURN5 The screen for verifying exit will appear: Choose "YES" and then press the ▶/II button.

text_image
TITLE at a Par k Finish title setting? YES ND ENTER6 Press the □ button to quit.

text_image
02 at a Park 001/008 PLAY RAMAfter changing the title, the Disc Navigation screen on the play list whose title has been changed will appear.
Note:
The registered title can be changed at any time using the same procedure.
DELETING PLAY LIST (DELETE)
1 Press the DISC NAVIGATION button.
2 Press the MENU button.
3 Choose "Delete" on the "PlayList" menu screen, and then press the ▶/II button.
4 Use the "Delete PlayList" screen to select the play list you wish to delete, and then press the ▶/11 button.

text_image
Delete PlayList 01 2 8 / 9/2003 12: 50 02 3:0/ 9/2003 17:00 03 1 0 / 10/ 2003 8 : 00 04 1 2 / 10/ 2003 13:30 ENTER RETURN
text_image
Delete PlayList PlayList No.02 3 0:9/2003 17:00 Delete PlayList? YES ENTER5 The screen for verifying deletion will appear: Choose "YES", and then press the ▶/II button.
Choose "NO" to cancel deletion.
After Yes or No setting, the Disc Navigation screen of all programmes will be restored.
Note:
Even if you delete a play list, the original scenes stored on disc will not be deleted.
Go To
From the Disc Navigation screen, you can jump to the first scene or last scene.
TOP (END)
1 Press the DISC NAVIGATION button.
2Press the MENU button.
3 Choose "Top" or "End" on the "Go To" menu screen, and then press the ▶/II button.

text_image
Go To Top End ETC ENTER RETURN RAM ↓ 8 ms 014:014A I Progra PLAY RAM (When "End" is specified)Disc or Card Management
RAM R CARD
VERIFYING REMAINING FREE SPACE ON DISC OR CARD (CAPACITY)
You can find out how long you will be able to record on one side of disc or on card.
1 Press the DISC NAVIGATION button.
2Press the MENU button.
3 Choose "Capacity" on the "Disc" or "Card" menu screen, and then press the ▶/II button.
(When using disc)

text_image
Capacity Approx. *1 VIDEO(XTRA): 17 min VIDEO(FINE): 26 min *2 VIDEO(STD): 54 min PHOTO: 996 Capacity: 90% RETURN(When using card)

text_image
Capacity Approx. PHOTO(FINE): 462 PHOTO(NORM): 924 PHOTO(ECO): 1848 Capacity: 96% RETURN*1 With DVD-R disc: The quality mode first used for recording with disc will appear.
*2 With DVD-R disc: This will not be displayed.
4 Press the □ button to quit.
The Disc Navigation screen will be restored.
Note:
With a write-protected disc or locked card, the remaining space will always be displayed as "0".
RAM
PROTECTING DISC FROM WRITING (PROTECT DISC)
You can protect a DVD-RAM disc in order to prevent recorded images from being erased or edited by mistake.
1 Press the DISC NAVIGATION button.
2Press the MENU button.
3 Choose "Protect Disc" on the "Disc" menu screen, and then press the ▶/II button.
4 The screen for verifying protection will appear:
Choose "YES", and then press the ▶/II button.
Choose "NO" to cancel protection.
After "YES" or "NO" setting, the Disc Navigation screen will be restored.

text_image
Disc Capacity Protect Disc Format Disc Update Control Info. ENTER RETURN RAM
text_image
Protect Disc Write protect disc? YES NO ENTER
text_image
All Programs 001/019 PLAY Disc protect iconNote:
- To release disc protection, perform the same procedure as above: The screen for verifying the release of protection will appear.
Choose "YES" to release the protection.
• Further recording will not be possible on protected disc until the protection is released.
INITIALISING DVD-RAM DISC OR CARD (FORMAT DISC/FORMAT CARD)
If you want to erase all data on a recorded disc or card, you can initialise it rather than delete the data: Initialisation is useful in this case, since it takes less time than deleting all data. The initialised disc or card can be used again.
1 Press the DISC NAVIGATION button.
2Press the MENU button.
3 Choose "Format Disc" or "Format Card" on the "Disc" or "Card" menu screen, and then press the ▶/II button.
The screen for verifying "Format Disc" or "Format Card" will appear.
4 Choose "YES", and then press the ▶/II button.
Choose "NO" to cancel initialisation.
Note:
- Initialisation will delete all the recorded contents on disc or card: Be careful not to delete data by mistake.
- Be sure to use the AC adapter/charger when initialising disc orcardsothatthe DVD videocamera/recorderis not turned off midway. If initialisation is interrupted by power off,thediscorcardwillnotbeinitialisedcorrectly,oritmay be damaged.
- It may not be possible to initialise a disc with many scratches or dirt: Such a disc cannot be used.
- If you use a brand-new DVD-Rdisc, message "Disc is not formatted" will appear: initialise the disc, following the subsequent messages (See page 43).
- This DVD video camera/recorder may not recognise some discs or cards that have been initialised on PC or a device other than this DVD video camera/recorder.
- If you attempt to initialise a disc or card in this DVD via camera/recorder when it is connected to PC via PC connection cable, the disc or card may not be initialised and may be unusable on this DVD video camera/recorder.
DVD-RAM disc)

text_image
Format Disc All data will be deleted. Format the disc now? YES ND ENTER(When using Card)(When using camera/recorder when it is connected to PC via PC connection cable, the disc or card may not be initialised and may be unusable on this DVD video camera/ recorder.
When initialising one side of the disc is complete, the DVD video camera/recorder will return to the recording pause status.
UPDATING CONTROL INFORMATION OF DVD-RAM DISC
Disc Navigation in this DVD video camera/recorder handles information on scenes, such as skip, fade, in a particular manner. If you use another device to edit a disc recorded on this DVD video camera/recorder, and then use the data again with Disc Navigation in this DVD video camera/recorder, the Disc Navigation may not appear normally. If this happens, use the Update Control Info function to update the data.
1 Press the DISC NAVIGATION button.
2Press the MENU button.
3 Choose "Update Control Info." on the "Disc" menu screen, and then press the ▶/II button.
The screen for verifying "Update Control Info." will appear.
4 Choose "YES", and then press the ▶/II button.

text_image
Upda te Con t ro | In fo. ↑Upda te Con t ro I Info? YES No ENTERThe message for proceeding will appear, and then the Disc
Navigation menu screen will be restored.
A black screen may appear while the message for updating is displayed.
Choose "NO" to cancel updating.
5 Press the □ button to quit.
Note:
- BesuretousetheACadapter/chargerwhenupdatingthe control information so that the DVD video camera/ recorder is not turned off midway. If updating of control information is interrupted by power off, the control information will not be updated correctly.
- It may take time to update the control information if the disc has many recorded scenes.
- Pressing the button on the screen for verification will restore the thumbnail display screen.
FINALISING DVD-R DISC
If you want to play back a DVD-R disc recorded on this DVD video camera/recorder, using a device conforming to 8 cm DVD-R disc - such as a DVD player, etc. - you must finalise the disc on this DVD video camera/recorder.
The finalised DVD-R disc can be played on a DVD player, as "DVD Video": The date of programme will appear on the menu screen of DVD player as a title.
1 Press the DISC NAVIGATION button.
2Press the MENU button.
3 Choose "Finalize Disc" on the "Disc" menu screen, and then press the ▶/II button.
The disc will be finalised.
4 Choose "YES", and then press the ▶/II button.

text_image
Finalize Disc ⚠️ Further recording on this disc will be impossible. Finalize? (Approx. 23min.) YES NO ENTERThe message showing that the disc is being finalised will appear, and the disc will then be finalised.
^⑤ will appear on the Disc Navigation screen for a finalised disc.

text_image
ms 001:015A PLAYFinalized DVD-R disc
5 When finalisation is complete, the Disc Navigation screen of all programmes will appear.

text_image
SELECT | TEM 001/010 01: 10: 9:2003 05: 3: 11:2003 12: 15: 9:2003 07: 28: 11:2003 13: 18: 9:2003 08: 30: 11:2003 14: 8: 10:2003 09: 3: 12:2003 05: 10: 10:2003 10: 10: 12:2003 TOP PREV NEXT END(Screen when viewed on DVD player)
Note:
- DonotfinaliseadisrecordedonthisDVDvideocamera/recorder using any other device.
Program No recording can be done on any DVD-R disc that has been finalised. - If the disc in the DVD video camera/recorder has already been finalised, you cannot choose "Finalize Disc".
- Be sure to use the AC adapter/charger when finalising disc. Finalisation cannot be executed using a battery. If finalisation is interrupted by power off, the disc will not be finalised correctly, or it may be damaged.
- The time required to finalise disc that appears on the "Finalize Disc" screen is only for reference.
- The shorter the recording time on disc, the longer it will take to finalise it.
RAM
DISPLAYING MOVIES OR STILLS INDEPENDENTLY (CATEGORY)
Scenes recorded on this DVD video camera/recorder will be displayed in the order of recording regardless of whether they are movies or stills. You can use the Disc Navigation screen to switch this display to stills only or movies only.
1 Press the DISC NAVIGATION button.
2Press the MENU button.
3 Choose "Category" on the "Others" menu screen, and then press the ▶/II button.

text_image
Others Category Repeat Play VIDEO PHOTO ENTER RETURN RAM4 Specify the desired option for display, and then press the ▶/II button.

text_image
All Programs 006/015 PLAY RAM(When "PHOTO" is specified)
All: To display all scenes, movies or stills, in the order of recording.
VIDEO: To display only movies in the order of recording.
PHOTO: To display only photos in the order of recording.
RAM R
PLAYING BACK SCENES REPEATEDLY (REPEAT PLAY)
1 Press the DISC NAVIGATION button.
2 Press the MENU button.
3 Choose "Repeat Play" on the "Others" menu screen, and then press the ▶/II button.
4 Choose "On", and then press the ▶/11 button: Playback will start.

text_image
Others Category On Repeat Play Off ENTER RETURN RAMChoose "Off" to cancel Repeat Play setting.
- When Repeat Play is set:
If one scene has been specified: When playback of the last scene is finished, playback of all scenes will repeat from the first scene.
If the range for playback has been specified: Playback of the scenes in that range will repeat.
•To release Repeat Play
Use one of the following 3 methods to release:
- Choose "Off" in step 4 above.
- Turn the DVD video camera/recorder off once.
- Press the DISC EJECT button to remove the disc.
Note:
- Press the □ button to terminate playback. However, the Repeat Play setting will not be cancelled.
- Still images can also be played back repeatedly.
- Repeat playback will not function when playback is instructed from the recording pause status.
SLIDE SHOW (CONTINUOUS PLAYBACK OF STILLS)
If you play back stills recorded on a card, the DVD video camera/recorder will enter the playback pause status after each still is played back.
Setting Slide Show allows you to continuously play back stills.
1 Press the DISC NAVIGATION button.
2Press the MENU button.
3 Choose "Slide Show", "All" or "DPOF", and then press the ▶/II button.

text_image
Slide Show ALL DPOF ENTER RETURNAll: To play all stills recorded on card in slide show.
DPOF: To play only stills to which DPOF has been set in slide show.
Pressing the ▶/II button will start slide show.
When playback is finished, the DVD video camera/recorder will enter the playback pause status at the final still.
Pressing the □ button will restore the Disc Navigation screen.
Note:
- With slide show, playbackstarts from the first stillon card.
- If you press the □ button or turn the DVD video camera/ recorder off, Slide Show will be canceled.
Installing Software
Before installing the UDF driver (DVD-RAM driver) on the CD-ROM provided with this DVD video camera/ recorder, make sure that another UDF driver* has not already been installed in your PC.
* InstantWrite ^ or InstantRead ^ packed in the "DZ-WINPC1W" or "DZ-WINPC2W" PC connection kit for Hitachi DZ-MV100A/E DVD video camera/recorder, or in the "DZ-WINPC3W" PC editing kit for Hitachi DZ-MV208E, DZ-MV238E, DZ-MV230E, DZ-MV200E or DZ-MV270E DVD video camera/recorder.
If another UDF driver has already been installed, uninstall it, and then install the UDF driver bundled on the provided CD-ROM. Uninstall the previous UDF driver by choosing “Add/Remove Programs” or “Add/Remove Applications” on Windows® Control Panel.
If any question messages appear that mean “This file is not used on another application. Do you wish to delete it together?” during uninstalling, click “No” for all such questions.
Contents on Provided CD-ROM
The CD-ROM supplied with the DVD video camera/recorder contains the following folders:

text_image
DVDCAM3 CD-ROM DVDMASE3 Contains the installer for DVD-MovieAlbumSE (see page 137 for installation). You can use DVD-MovieAlbumSE to edit the images recorded on DVD-RAM disc and create a 3D title. MyDVD Contains the installer for MyDVD (see page 139 for installation). You can use MyDVD to create a DVD-Video disc from movies edited on DVD-MovieAlbumSE. UDF Contains the installer for UDF driver (see page 135 for installation). Install this driver if you wish to use JPEG stills recorded on DVD-RAM disc, on your PC. USB2 Contains the installer for USB2.0 driver (see page 133 for installation). Install this driver when using the provided PC connection cable to connect this DVD video camera / recorder to PC: If the USB terminal of your PC is USB1.1, use this driver. AcrobatReader Contains the installer for Acrobat Reader. If Acrobat Reader is not installed in your PC, you will need to install it in order to open the on-line manuals (instruction manual files) for DVD-MovieAlbumSE and UDF driver.Although the CD-ROM may contain a folder or file other than the above, they will not be needed on this DVD video camera/recorder unless some special instruction is given.
Read the electronic instruction manuals (on-line manuals) on PC for complete information on using each software programme.
•DVD-MovieAlbumSE
You can read the instruction manual using either of the following procedures:
- Open the PDF file in
DVDMASE 3\manuals\English folder contained on the provided CD-ROM. - After installing DVD-MovieAlbumSE, open "Programs" or "All Programs" from the Windows "Start" menu, choose "Hitachi DVDCAM" and "DVD-MovieAlbumSE", and then open "On-line Manual".
To read the above manual, you will need Adobe Acrobat Reader.
If Adobe Acrobat Reader has not been installed in your PC, start AcrobatReader\English \AR500ENU.exe on the provided CD-ROM to install it.
•MyDVD
- After installing MyDVD, open "Programs" or "All Programs" from the Windows "Start" menu, choose "Sonic" and "MyDVD", and then open the electronic instruction manual in "Document" folder.
To read the above manual, a Web browser (Internet Explorer, Netscape Communicator, etc.) must be set up in your PC.
If you cannot open the electronic instruction manual of MyDVD, consult the maker of your PC about the setup method for Web browser.
• UDF driver (DVD-RAM driver)
- After installing the UDF driver (DVD-RAM driver), open "Programs" or "All Programs" from the Windows "Start" menu, choose "DVD-RAM" and "DVD-RAM Driver", and then open "How to use DVD-RAM disc".
No electronic instruction manual is provided with the USB driver.
Note:
Although the above software programmes can be used on Windows® 98, Windows® 98 Second Edition or later is needed to fully utilise all functions of DVD-MovieAlbumSE.
INSTALLING USB DRIVER
Use the following procedure to install the USB driver:
1 If you add a USB card (PCI card, PC card, etc.) on your PC, do it following the instruction manual for USB card, before connecting the DVD video camera/recorder to PC.
2 Insert the provided CD-ROM into PC, set the power switch of DVD video camera/recorder to "VIDEO", and then use the provided PC connection cable to connect the DVD video camera/recorder to the USB terminal of PC.
3 The Hardware Wizard will start: Choose "Install from a list or specific location (Advanced)", and then click "Next" (a figure will appear when Windows ^ XP is used).

text_image
Found New Hardware Wizard Welcome to the Found New Hardware Wizard This wizard helps you install software for: Hitachi DVDCAM USB HG Interface If your hardware came with an installation CD or floppy disk, insert it now. What do you want the wizard to do? Install the software automatically (Recommended) Install from a list or specific location (Advanced) Click Next to continue. < Back Next > CancelConfirm Click
4 Choose "Search for best driver in these locations", check "Include this location in the search:", and then specify the folder to be browsed:

text_image
Found New Hardware Wizard Please choose your search and installation options. Search for the best driver in these locations. Use the check boxes below to limit or expand the default search, which includes local paths and removable media. The best driver found will be installed. Search removable media (loppy, CD-RDM...) Include this location in the search 0: USB2\Win3Xp Browse Don't search I will choose the driver to install. Choose this option to select the device driver from a list. Windows does not guarantee that the driver you choose will be the best match for your hardware. < Back Next > CancelConfirm Click
With Windows ^ XP / 2000 Professional:
D:\USB2\Win2kXp
With Windows ^® Me:
D:\USB2\WinMe
With Windows ^® 98 Second Edition:
D:\USB2\Win98
(D: shows the name of drive into which the CD-ROM is inserted.)
5 With Windows ^ XP, the message concerning Windows Logo Test will appear: Click "Continue Anyway".

text_image
Hardware Installation The software you are installing for this hardware. Hitachi DVD/CAM USB/HS Interface has not passed Windows Logo testing to verify its compatibility with Windows XP® (To come after this testing is important.) Continuing your installation of this software may impair or destabilize the correct operation of your system either immediately or in the future. Microsoft strongly recommends that you stop this installation now and contact the hardware vendor for software that has passed Windows Logo testing. Continue Anyway STOP Installation Click6Click "Finish".

text_image
Found New Hardware Wizard Completing the Found New Hardware Wizard The wizard has finished installing the software for: Hitachi DVD/AM USB HS Interface Click. Finish to close the wizard. Finish Cancel e Back ClickINSTALLING UDF DRIVER (DVD-RAM DRIVER)
The following explanation uses the screens for Windows ^® XP: Use the same procedure for Windows ^® 98 Second Edition / Me / 2000 Professional to install the UDF driver.
1 Open the UDF folder on the provided CD-ROM and click "setup" or "setup.exe" to start it.
2 The driver setup screen will appear: Click the "Driver and Formatter Setup" button.

text_image
DVD-RAM Software Setup Driver and Formatter Setup Exit Click3Click "Next".

text_image
InstallShield Wizard Welcome to the InstallShield Wizard for DVD-RIAM Driver The InstallShield® Wizard will install DVD-RIAM Driver on your computer. To continue, click Next. Next > Cancel Click4 Check the contents of License Agreement: If you accept it, click "Yes". (The contents displayed on actual screen may differ from those in the figure.)

text_image
InstallShield Wizard License Agreement Please read the following license agreement carefully. Pass the PAGE DOWN key to see the rest of the agreement. Rui for Software License Agreement, refer to License Agreement on manual or a paper sheet attached to the product. If you agree all of the paragraphs, press [Yes] to continue installation. If you cannot agree, press [No] to quit installation. Do you accept all the terms of the preceding License Agreement? If you choose No, the setup will close. To install DVD-FIVAM Driver, you must accept this agreement. < Back Yes No Click5 Check the folder in which the UDF driver will be installed, and then click "Next".

text_image
InstallShield Wizard Choose Destination Location Select folder where Setup will install files. Setup will install DVD-RAM Driver in the following folder. To install to this folder, click next. To install to a different folder, click Browse and select another folder. Destination Folders C:\Program Files\DVD-RAM\WebXP\DVD-RAM Drive Browse... < Back Next > Cancel Click6 Check the programme folder to be installed, and then click "Next".

text_image
InstallShield Wizard Select Program Folders Please select a program folder. Setup will add program icons to the Program Folders listed below. You may type a new folder name, or select one from the existing folders list. Click Next to continue. Program Folders: DVD RAM/DVD RAM Drive Eating Folders: Accessories Administrative Tool Games Hitachi DVD/CAM Sonic Startup < Back Next > Cancel Confirm Click7 Click "Next".

text_image
InstallShield Wizard Start Copying Files Review settings before copying files. Setup has enough information to start copying the program files. If you want to review or change any settings, click Back. If you are satisfied with the settings, click Next to begin copying files. Current Settings: Target Directory C:\Program Files\DVD-RAM\Web\DVD-RAM Driver Program Folder Name: DVD-RAM\DVD-RAM Driver < Back Next > Cancel Click8 Installation will start. When installation is complete, some notes will appear: Check the contents, and then click "x" at the top right of window.
The contents displayed on actual screen may differ from those in the figure.

text_image
Click ReadmeXP - Netepad File Edit Format View Help Limitations on Driver Software for Windows XP July 30, 2002 1. After formatting DVD-RAM disc with DVDForm software, there may be a possibility that DVD-RAM Icon are changed to CD-RAM ICON. At that case, select [refresh] from [view] menu on Explorer. 2. Note for using a DVD-RAM disc with the DVD MULTI Drive: it is not possible to write to DVD-RAM discs while the windows XP standard CD-R/KW write function is activated. After installing this driver, the windows XP standard CD-R/KW writing Function for the DVD MULTI drive is automatically turned off. if it remains on, the following message is displayed: The windows XP standard CD-R/KW writing function is active. to write to DVD-RAM discs, this function must first be turned off. Do you wish to deactivate it? should you choose to deactivate here, you can still activate the windows XP standard CD-R/KW write function by turning on the "Enable CD recording on this drive" setting in the DVD MULTI drive property. When using DVD-RAM discs, click [yes] and turn off the "Enable CD recording on this drive" setting. END9 If your PC uses Windows ^® XP / 98 Second Edition / Me, a message that prompts you to restart will appear: Click "Finish" and then restart the PC.
Installing the UDF driver is now complete. If your PC uses Windows ^® 2000 Professional, proceed with step 10.

text_image
InstallShield Wizard InstallShield Wizard Complete The InstallShield Wizard has successfully installed DVD RAM Driver. Before you can use the program, you must restart your computer. Yes, I want to restart my computer now No, I will restart my computer later Remove any disks from their drives, and then click Finish to complete setup < Back Finish Cancel Click10 If your PC uses Windows ^® 2000 Professional, a message announcing the start for detecting device will appear: Click "Finish". The detection of device will start, after which it will take several minutes for PC to detect the device. When detecting the device is complete, a message that prompts you to restart will appear: Click "Yes" and then restart the PC
Installing the UDF driver is now complete.
INSTALLING DVD-MovieAlbumSE
Software "DVD-MovieAlbumSE" is used to edit movies that conform to DVD video recording standard, and stills recorded on DVD-RAM disc.
1 Insert the provided CD-ROM into the CD-ROM drive of PC.
2 Use Windows My Computer or Explorer to open the folder where CD-ROM is stored.
3 Open the DVDMASE3 folder, and then double-click "Setup" or "Setup.exe".
4 The screen for installing "DVD-MovieAlbumSE" will appear: Click "Next".

text_image
DVD-MovieAlbumSE Welcome to the InstallShield Wizard for DVD-MovieAlbumSE 3 The InstallShield® wizard was installed (DVD-MovieAlbumSE 3 on your computer. To continue, click Next. < Back Next > Cancel Click5 Carefully read the Software License Agreement: If you accept it, click "Yes".

text_image
DVD-NovieAlbumSF SOFTWARE LICENSE AGREEMENT Please read the following License Agreement. Pass the PAGE: DOWN key to see the rest of the agreement. End User License Agreement You ("Licensee") are granted a licence for the Software defined in this End User License Agreement ("Agreement") or condition that you agree to the terms and conditions of this Agreement. If Licensee does not agree to the terms and conditions of this Agreement, promptly return the Software to Matsushita Electric Industrial Co., Ltd. ("Matsushita"), its distributors or dealers from which you made the purchase. Article 1. License Licensee is granted the right to use the software, including the information recorded or Do you accept all the terms of the preceding License Agreement? If you choose No. Setup will close. To install software, you must accept this agreement. < Back Yes No Click6 Choose the TV broadcast system (NTSC or PAL), click "Next".

text_image
DVD-NovieAlbumSF TV System Select the TV System. NTSC PAL < Back Next > Cancel Click7 If you do not change the folder where the software is installed, click "Next".

text_image
DVD-MovieAlbumSE Choose Destination Location Select folder where Setup will install files. Setup will install DVD-MovieAlbumSE 3 in the following folder. To install to this folder, click Next. To install to a different folder, click Browse and select another folder. Destination Folder C:\Program Files\DVD\CAM\DVD-MovieAlbumSE Browse < Back Next > Cancel Click8If you do not change the programme folder name, click "Next".

text_image
DVD-MovieAlbumS Select Program Folders Please select a program folder. Setup will add program icons to the Program Folder listed below. You may type a new folder name, or select one from the existing folders list. Click Next to continue. Program Folders: Interacta DIVIDREAM Eating Folders: Accessories Administrative Tool Games Startup < Back Next > Cancel Click9 Check the contents, and then click "Next".

text_image
DVD-MovieAlbumSE Start Copying Files Review settings before copying files. Setup has enough information to start copying the program files. If you want to review or change any settings, click Back. If you are satisfied with the settings, click Next to begin copying files. Current Settings: 1.Destination Folder C:\Program Files\DVDCAM\DVDMovieAlbumSE 2.Program Folder Hitachi DVDCAM < Back Next > Cancel ClickInstallation will start. Proceed with installation, following the instructions on screen.
10 A message for verifying whether a shortcut icon is to be created on desktop will appear:
If you want to create one, click "Yes". If not, choose "No".

text_image
Question Do you want to create a shortcut on Desktop? Yes No Click11 Choose the restart option, and then click "Finish".

text_image
DVD-MovieAlbumSE InstallShield Wizard Complete Setup has finished installing DVD-MovieAlbumSE 3 on your computer. * Yes, I want to restart my computer now ○ No. I will restart my computer later Remove any disks from their drives, and then click.Finish to complete setup Finish ClickINSTALLING MyDVD
1 Insert the provided CD-ROM into the CD-ROM drive of PC.
2 Use Windows My Computer or Explorer to open the folder where CD-ROM is stored.
3 Open the MyDVD folder, and then double-click "Setup.exe".
4 The screen for installing "MyDVD" will appear: Click "Next".

text_image
InstallShield Wizard Welcome to the InstallShield Wizard for MyDVD The InstallShield® Wizard will install MyDVD on your computer. To continue, click Next. Click Next > Cancel Click5 Carefully read the Software License Agreement: If you accept it, click "Yes".

text_image
InstallShield Wizard License Agreement Please read the following license agreement carefully. Press the PAGE DOWN key to see the rest of the agreement. SONIC SOLUTIONS END-USER LICENSE AGREEMENT THIS IS A CONTRACT. PLEASE READ IT CAREFULLY. BY INSTALLING THIS SOFTWARE YOU ACCEPT ALL THE TERMS AND CONDITIONS OF THIS AGREMENT. YOU WILL NOT BE ALE TO USE THIS SOFTWARE UNLESS YOU ACCEPT THIS AGREEMENT. BY USING THE SOFTWARE, YOU ARE AGREENG TO BE BOUND BY THE TERMS OF THIS LICENSE. IF YOU DO NOT AGREE TO ANY TERM OR CONDITION, RETURN THIS PACKAGE TO SONICSOLUTIONS FOR A FULL REFUND OF THE LICENSE FEE. Do you accept all the terms of the preceding License Agreement? If you choose No, the setup will close. To install MyDVD, you must accept this agreement. < Back Yes No (This window may be omitted.) Click6 If you do not wish to change the folder where the software is installed, click "Next".

text_image
InstallShield Wizard Choose Destination Location Select folder where Setup will install files. Setup will install MyDVD in the following folder. To install to this folder, click Next. To install to a different folder, click Browse and select another folder. Destination Folders C:\Program Files\Sonic\MyDVD Browse... < Back Next > Cancel Click7 Check the contents, and then click "Next".
Installation will start.

text_image
InstallShield Wizard Start Copying Files Review settings before copying files. Setup has enough information to start copying the program files. If you want to review or change are settings, click Back. If you are satisfied with the settings, click Next to begin copying files. Current Settings: User Information: DVDCAM Hitachi BDVQHQBWSIQ3DELZW3 Destination Directory: C:\Program Files\Sonic\MyDVD < Back Next > Cancel Click8Click "Finish", and then restart the PC.

text_image
InstallShield Wizard InstallShield Wizard Complete The InstallShield Wizard has successfully installed MyDVD. Before you can use the program, you must restart your computer. Yes, I want to restart my computer now No, I will restart my computer later. Remove any disks from their drives, and then click Finish to complete setup. Finish Click Cancel ClickSonic Solutions Corporation, which developed MyDVD, recommends user registration of MyDVD, in order to offer appropriate support to customer. The guide for user registration will appear when you start MyDVD for the first time, or you can do it any time by accessing the following URL:
http://www.mydvd.com (You will need the connection environment to the Internet for user registration.)
Note:
- If software that detects computer virus, etc. has been installed, invalidate it.
- If your PC uses Windows® XP or Windows® 2000 Professional, set the user name to "Administrator (computer'smanager)" (orusernamewithequivalent authorization), log on to PC, and then install the software (if you do not have authorization, consult your system manager.).
Creating DVD Video on PC from DVD-RAM Disc Recorded on DVD Video Camera/Recorder
Using DVD-MovieAlbumSE and MyDVD, you can create a DVD video (DVD-R disc) from the images recorded on this DVD video camera/recorder, following the procedure below:
1 Insert a recorded DVD-RAM disc into the DVD video camera/recorder, and connect the DVD video camera/recorder to the USB terminal of PC.
2 Start DVD-MovieAlbumSE, and edit the images on DVD-RAM disc as necessary.
3 Right-click the thumbnail from which you wish to create a DVD video on the DVD-MovieAlbumSE screen, and execute "Export".
4 The "Program Export" screen, shown below, will appear: Choose "Same Resolution" and check "Use DVD-Video" in the "Export Mode" setting box. Choose "704 × 480 (recommended)" for "Resolution".

text_image
Program Export Output File Format MPEG Program Information Title 2002/1/10 Duration 6sec Export Mode Same Resolution Use DVD-Video Simple Export Resolution 720 x 400 704 x 480 (*) 352 x 400 352 x 240 (*: Recommendation) Option Divide by Marker Add Number Destination Folder D:\Documents and Settings\IDVD\CAM\My Documents Ref Progress conditions Start Close"Program Export" Screen
Note:
- Choose "Divide by Marker" in the "Option" box: Each scene of programme recorded on the DVD video camera/recorder will be saved as an independent movie file so that export can be executed at high speed. If you do not choose "Divideby Marker", movie files may be unified and re-encoded, so it may take time to export them or the image quality may slightly deteriorate. DVD-MovieAlbumSE may automatically encode a movie recorded in the XTRA mode containing rapidly moving scenes (8 Mbps or higher), regardless of the "Divide by Marker" setting. - Do not choose "Simple Export" in the "Export Mode" setting box: Choosing it may stop export midway.
5Click the Start button to start export.
6 When export is complete, message "The file exporting was completed successfully. Do you wish to create a 'DVD-Video' disc or an 'MPEG file' disc?" will appear. Check the small box for "Eject the disc being used", and then click "Yes".
Insert a brand-new DVD-R disc into the DVD video camera/recorder.
7 DVD-MovieAlbumSE will automatically end, and the "Export to Disc" screen will appear: Click the "Start" button.
8 MyDVD will automatically start. After a few moments, the exported scene will be automatically registered on the MyDVD editing screen:
Now you can change the DVD menu to the desired style, change the title, etc. on this editing screen.

text_image
Sonic N30FD File Edit View Tools Help New Project > Edit Style > Help Capture Get Movies Add Sub-chases Add Sub-ments Happy Wedding Scene #1 Scene #2 Scene #3 SONIC™9 Click the Burn button: Writing to DVD-R disc will start. When writing is complete, a DVD video disc will be created.
Then the disc cover of DVD video camera/ recorder will open automatically.
Note:
- The menu screen created on MyDVD will not appear on the DVD video camera/recorder.
Also, depending on the written contents, the images may not be playable on the DVD video camera/recorder. In such cases, use a standard DVD player to display the created menu. - The following table shows the recordable time on 8 cm DVD-R disc from MyDVD.
| Moviequalitymodeof DVD-RAM disc in DVD video camera/ recorder | Recordable time on 8 c m D V D - R d i s c (using MyDVD) |
| STD Approx. 40 minutes | |
| FINE Approx. 25 minutes | |
| XTRA At least 18 minutes | |
* If "Style" created on MyDVD is a movie or there are many thumbnails, the recordable time will be less than that shown in the above table.
Cleaning
Be sure to set the power switch to "POWER OFF" before cleaning this DVD video camera/recorder.
- Cleaning LCD screen and camera lens
Use dry, soft cloth to wipe dirt off. When cleaning the LCD screen, be careful not to use force, scratch it, or subject it to impact: Doing such could cause a defect in the screen, result in display unevenness, or damage the LCD monitor.
- If dust adheres to the viewfinder lens, remove it using a cotton swab, etc.
Do not rub the lens with force: Doing so could scratch the lens.
- Do not use benzene or thinner to clean DVD video camera/recorder case
The coating of case could peel off or the case could deteriorate. Wipe off dirt on the case with a moist cloth which has been completely wrung out. When using chemical cleaning cloth, follow instructions for use.
Changing Setting of Demonstration
This DVD video camera/recorder has versatile functions, including special effects.
Referring to the procedureonpage 41, connect the DVD video camera/recorder, AC adapter/charger and mains lead to power the DVD video camera/recorder from AC outlet.
1 Press the MENU button.
2 Choose "Initial Setup", "Demo Mode", and then press the ▶/II button.
3 Use the joystick to choose the desired option, and then press the ▶/II button.

text_image
Initial Setup Beep Power Save Record LED Language Auto Demo Mode Off Reset Start ENTER RETURN RAMAuto: To start demonstration approx. 3 minutes after turning the DVD video camera/recorder on.
Off: To set demonstration to off.
Start: To start demonstration immediately.
Press the MENU button again: The menu screen will disappear.
To stop the demonstration midway, press the □ button.
The demo mode will end when the DVD video camera/recorder is turned off or the DISC EJECT button is pressed down.

text_image
DVDICAM HITACHI Inspire the NextNote:
- You can press the DISC NAVIGATION button to stop demonstration midway: The Disc Navigation screen will appear.
- If you choose "Auto", the demonstration will not start if a disc is loaded with the power switch set to 🎨VIDEO" or "☐ PHOTO", or a card is loaded with the power switch set to "CARD PHOTO".
- The demonstration function will not work when the DVD video camera/recorder is connected to PC.
- While the demonstration is being given, the recording indicator will blink.
No DVD Video Camera/Recorder Operation - Check the Following:
| Check 1 | No movie can be recorded |
| Movie can be recorded only on DVD-RAM or DVD-R disc.Check the following:Is DVD-RAM or DVD-R disc inserted?Is power switch set to “VIDEO”?Is the DVD-RAM disc in DVD video camera/ recorder write-protected? Release the write-protect.Does disc have remaining recording space?Ifmoviestillcannotberecordedaftertheabovecheck is clear, the disc may be damaged: Use another disc | |
| Check 2 | No still can be recorded |
| Still can be recorded only on DVD-RAM disc, SD memory card or multimedia card.Check the following:Is DVD-RAM disc, SD memory card or multimedia card inserted?Ispowerswitchsettomatchtherecordingmedium?- When using DVD-RAM disc:Set to “☐PHOTO”.- When using SD memory or multimedia card:Set to “CARD PHOTO”.Is loaded DVD-RAM disc write-protected?When using SD memory card: Is it locked?Doesdiscorcardhave remainingrecordingspace?If still cannot be recorded after the above check is clear,the disc or cardmay be damaged: Use another disc or card. | |
| Check 3 | Skip or search playback does not work well |
| If the temperature inside the DVD video camera/ recorder is high, normal operation may not be possible. Turn the DVD video camera/recorder off, wait for a few moments, and then turn it on again for operation. | |
| Check 4 | No operation can be performed because the ACCESS/PC or CARD ACCESSindicatoronthisDVD video camera/recorder remains lit or blinking.After disc or card isinserted,it takes some time until recording is possible. |
| Inthefollowingcases,itwilltakemoretimethanusual until operation is possible:When disc or card is removed and then reinsertedWhendatechanges (e.g.,duringthe firstrecording of the day)When the temperature is greatly different from the status of previous recordingWhen disc with scratches, dirt or fingerprints is insertedWhen disc is subject to severe vibrationsWhen the battery or DC power cord was disconnected instead of following the correct procedureusingpowerswitchtoturntheDVDvideo camera/recorder off | |
| Check 5 | No DVD video camera/recorder operation |
| Is a fully charged battery attached?Is the DVD video camera/recorder powered from AC outlet? | |
| Check 6 | No image in viewfinder |
| Is LCD monitor open?No image will appear in viewfinder unless the LCD monitor is closed and securely locked to DVD video camera/recorder. | |
| Check 7 | No image appears on the LCD screen or in the viewfinder |
| • Is DVD video camera/recorder connected to PC using PC connection cable?Unplug the PC connection cable.• DoesDVDvideocamera/recorderstopattheendof the scene to which wipe-out was set and played back?Press the DISC NAVIGATION button. | |
Trouble Messages
A message may appear while you are operating the DVD video camera/recorder. If a message appears, refer to the following table and take appropriate corrective action.
Messages on page 147 and later are arranged in alphabetical order.
| Message Cause | & Troubleshooting | Reference page |
| (1)Dataerrorina part of image file. Repair data now?(2)Founderinimage file. Repair data now?(3) Data error in all image file. Repair all data now? | Itispossiblethatthesystemcannotnormallycompletewritingoffile when power is turned off for some reason during recording or editing(deleting,dividingorcombiningscenes,orcreatingplaylist).Selecting “YES” will automatically repair the video file, but even if “NO” is selected, the same message will appear when the DVD video camera/recorder is turned on next time. (Do not remove the disc while the DVD video camera/recorder is recognising it: Ignoring this will deactivate the file repair function.)Follow the instructions on screen, taking note of the following cautions:· Data may not be repaired, depending on the timing when power was turned off.· Data may not be repaired normally if data recorded on another recorder is mixed in.· The repaired data may be different from the original recorded content because of partial deletion of defective portion.· Since the date/time for repair is added to the repaired data (only the corrected portion for partial repair), the original date/time information will be lost.· Since all movies, and then all stills, are repaired, the order of recorded contents will be lost.(In case of message (2) (3) only)· See *1 on page 153. | |
| (1)Discisnotformatted.If it formats, it becomes possible to use for camera.(2) However, when you record from PC connection terminal, please do not format.(3)Formatthediscnow? | DVD-R disc that was not initialised for camera use was inserted. | 43 |
| (1) Error has occurred.Please restart. | · Errorhasoccurred.TrytorestarttheDVDvideocamera/recorder using the following methods:(1)Turnpoweroff,removethebatteryorACadapter/chargerand reattach it, and then turn power on again.(2) Turn power off, and reinsert the disc. Then turn power on again.(3) Take note of the number (xxxx), and then consult your dealer.· See *3 on page 153. | 8, 38, 41, 42 |
| (2) Error has occurred.Please reinsert a disc. | ||
| (3) Error has occurred.Error code No. xxxx.Pleaseread the manual. | ||
| (4) ERROR xxxx | ||
| Battery is almost replace it. | Replace with a charged battery, or use AC adapter/charger to power the DVD video camera/recorder. | 37, 41 |
| Cannot combine scene. | Unless consecutive scenes are selected, they cannot be combined. | 105 |
| Cannot combine. Deselect PHOTO scenes. | Select only movies and combine them. | 105 |
| Cannotcombine.Select multiple scenes. | Select a range of at least 2 scenes to be combined, and then combine them. | 105 |
| Cannot delete scenes. | This may occur when scene that was edited for division, etc. is to be deleted. Combine the divided scenes, and then delete them. | 105 |
| Cannot execute. Change display category to ALL. | Thismessagewillappearifyouattempttocombineormovescenes with “Category: VIDEO or PHOTO” specified. | 128 |
| Cannot execute. Unselect multiple scenes. | Division or change in thumbnail was executed when multiple scenes were selected. 96 | |
| Cannot move scene in programme mode. Create new PlayList. | Scenes can be moved only on a play list. Create a play list and move the scenes on it. | 121 |
| CANNOT RECORD PHOTOS | Are you using DVD-R disc? You cannot record still image on DVD-R disc (recordable of still images from PC). Use DVD-RAM disc to record still images. | 23 |
| Cannot replace thumbnail on PHOTO scene. | The thumbnail of a still cannot be changed. Select a movie. 101 | |
| Cannot select any more scenes. | The maximum number of selectable scenes is 999. | 110 |
| CARD ALMOST FULL | Remaining space is only enough to record less than 10 stills. Delete unnecessary stills and try the card, or use another card. | 28, 99 |
| Carderrorhasoccurred. Format the card now? | Was the card formatted on PC? Was formatting interrupted midway?Whenusingthe cardonthis DVDvideocamera/recorder, choose “YES” and format it. | 125 |
| Carderrorhasoccurred. Formatting is not complete. | The card may be damaged: Use another card. | 26 |
| Card error. | The card terminals may be dirty: Wipe off dirt, and try the card again, or use another card.Data other than still image may be included: Use another card. | 26 |
| Carderrorhasoccurred. Keep card inside & restart. | Card error could have occurred during editing of scenes. Turn off the DVD video camera/recorder with the card being used inside, connect the AC adapter/charger, and then power the DVD video camera/recorder again. Repair of scenes will be attempted. | 41, 46 |
| Card full. | Delete unnecessary stills and try the card, or use another card. | 28, 99 |
| No more recording on this card can be done: Delete unnecessary stills or use another card. | ||
| Card full. Cannot execute. | Delete unnecessary stills and try the card, or use another card. | 28, 99 |
| Card has no data. | This message will appear when the ▶/II button is pressed with a card inserted on which no still is recorded. (It will appear if you attempt playback or editing on Disc Navigation, but will not appear if you press ▶/II on camera through image.) | |
| Card is not formatted.Format the card now? | Was the card formatted on PC? When using the card on this DVD video camera/recorder, choose “YES” and format it. | 125 |
| Control Information Error. | Mismatch may occur between the recorded image and scene information.Update the control information. | 126 |
| • Use another disc.• See *3 on page 153. | 23, 75 | |
| DISCACCESST herecordedsceneisbeingstoredondisc. | Wait until the message disappears, and you can start to use the DVD video camera/recorder. | 51, 54 |
| This DVD video camera/recorder is verifying whether the correct disc has been inserted.Wait until the message disappears, and you can start to use the DVD video camera/recorder.This message will be displayed for a little longer when the date changes. | ||
| DISC ALMOST FULL | The disc will soon be full, and recording will be impossible.Delete unnecessary scenes and try the disc again, or use another disc. | 27, 28, 99 |
| Disc errorhasoccurred.Finalising is not complete. | • Disc error occurred during finalising, and finalising failed.Replace the disc.• S e e * 3 o n 1 5 3 | 127 |
| Disc errorhasoccurred.Format the disc now? | • Has the disc been initialised on PC? Has initialising the disc on PC been interrupted?Choose “YES” and initialise the disc when using it on this DVD videocamera/recorder.initialisingthediscwilleraseall dataonit.• See *2 on page 153. | 125 |
| Disc errorhasoccurred.Formatting is not complete. | The disc may be dirty.Removethedisc andwipe offfingerprints, dust,etc. before reusing it, or use another disc.This message may also appear if you insert a disc for which formatting was interrupted midway. In this case, use another disc. | 75, 125 |
| Disc errorhasoccurred.Keep disc inside & restart. | Disc error could have occurred during editing of scenes.Turnoffthe DVD videocamera/recorderwiththedisc beingusedin it, connect AC adapter/charger, and then power the DVD video camera/recorder again. Repair of scenes will be tried. | 41 |
| Disc error. | • Use another disc.• See *3 on page 153. | 23, 75 |
| • Mismatch in recording information may be caused by editing doneonsomedeviceotherthanthisDVDvideocamera/recorder. initialise the disc or use another disc.• initialising the disc will erase all data on it. | 125 | |
| “DISC ERROR” appears when an attempt to release write-protect is made. | If you havewrite-protectedadisc usingthe write-protect setting tool (WPTOOL) that is equipped with the UDF driver contained on the CD-ROM provided with this DVD video camera/recorder, you cannot release the write-protect on this DVD video camera/ recorderasis. Usethewrite-protectsettingtoolonPCtoreleasethe write-protect. | |
| Disc full. Cannot execute. | Delete unnecessary scenes before using this disc, or use another disc. | 99 |
| Disc has no data. | This message will appear when the ▶/IIbutton is pressed with a disc inserted on which no still is recorded (It will appear if you attempt playback or editing on Disc Navigation, but will not appear if you press ▶/II on camera through image.). | |
| Disc has no PlayList. | Switching of play list was selected with no play list stored. | 116 |
| Disc includes protected scenes. Delete scenes? | The disc may be software protected from a device other than this DVD video camera/recorder. Toreleasethiscase, use adevice that has executed software-protect. | |
| Disc is full. Cannot add control info. | The number of entered scenes has reached the limit that can be entered, so the control information for generating thumbnails cannot be added. Combine several scenes or delete them. | 99, 105 |
| Disc is not formatted. Format the disc now? | Has the disc been initialised on a PC? Choose “YES” and initialise the disc when using it on this DVD video camera/recorder. Initialisation will delete all data on the disc.See *2 on page 153. | 125 |
| DPOF is not set to a scene. | Thismessagewillappearwhen“SlideShow:DPOF”isspecifiedfor the card to which DPOF was not set. | 129 |
| DPOF scenesover limit. Cannot set DPOF scenes. | Themaximumnumberof scenesfor which DPOF canbeset is 999. | 109 |
| Drive overheat. Please retry later. | ThetemperatureinsidetheDVDvideocamera/recorderistoohigh, and reading or writing of the data on disc may not be performed normally.Turn the DVD video camera/recorder off and wait for a while. The temperaturewill be effectively decreased if the DVD video camera/ recorder is placed in a well-ventilated spot. | 46 |
| DVD-R Disc, Video mode cannot be changed. | With DVD-R disc, the movie quality mode once used for recording cannot be changed. 27 | |
| END OF DISC | The disc is full.You cannot record on this disc anymore. Prepare another disc or delete unnecessary movie scenes from this disc. | 27 |
| End scene cannot be divided. | Division is not possible at the end of scene. | 106 |
| Error occurred. Please replace disc or format disc. | AbnormalityhasoccurredwiththeDVD-RAMdisctoberepaired. initialise the disc before using it, or use the another disc. initialising the disc will erase all data on it.See *2 on page 153. | 125 |
| Message | Cause & Troubleshooting | Reference page |
| Error occurred. Please replace disc. | Use another disc. | |
| Finalise may not be complete.Finaliseagain now? | Instantaneousshutoffoccurredduring finalising,afterwhichpower was supplied and disc was inserted. | 127 |
| Itisunrecordableonthis card. | The inserted card cannot be used in this DVD video camera/ recorder: Use another card. | 26 |
| JPEG file related to scenes are not found. | This message will appear when stills recorded on DVD-RAM disc usinga deviceotherthanthisDVDvideocamera/recorderaretobe copied to card. | |
| No card. Insert a card. 45 | ||
| No card.Please insert card. | No card is inserted.Insert a card. | 45 |
| NO DISC | This message may appear when the DVD video camera/recorder or disc is moved from a cold place to a warm place. Condensation has occurred on the camera/recorder lens or DVD-RAM drive. Do not remove the disc; leave the DVD video camera/ recorder turned off in a place as dry as possible for 1-2 hours. | 8 |
| The disc has not been inserted.Insert it. | 42 | |
| No more scenes. Play List was deleted. | All scenes are deleted from the play list.Since a play list with no scenes cannot be supported by specifications, a play list from which all registered scenes have been deselected will be deleted. | 119, 120 |
| Photo cannot be divided. | Still image cannot be divided. | 106 |
| PlayLists over limit. An attempt was made to create new play list or copy play list, even though limit specified for play lists in the video recording standard had already been stored. | 115 | |
| Same scenes on Play List will be deleted.Delete scenes? | This will appear when scenes are to be deleted.When a play list exists on disc, an attempt to delete scenes in programwilldisplaythismessage(Thismessagewillnotappear if you deselect scenes from play list.). | 99 |
| Scene without control info. Update control information? | This message may appear when a disc edited on a device other than this DVD video camera/recorder is to be used. In this case, choose“YES”ontheverificationscreen.ThisDVDvideocamera/ recorder will make the disc playable and display the Disc Navigation screen normally.This message may appear when a disc is usedon which scenes with different recording dates were combined on this DVD video camera/recorder. If you choose “YES”, the combined scene will be divided and the Disc Navigation screen will appear normally. If you choose “NO”, the combined scene will not be divided and the Disc Navigation screen will appear normally: In this case, however, this message will appear each time the DVD video camera/recorder is turned on. | 126 |
| Scenes over limit.Cannot add scenes. | Thenumberofscenesentered in playlisthasreached the limit that can be entered.Delete several scenes. | 115, 120 |
| Scenes over limit. Cannot divide scene. | The number of entered scenes has reached the limit that can be entered. Delete several scenes. | 106, 115 |
| Scenes over limit. Cannot move scene. | This message will appear if you try to move a scene when the number of scenes has already reached the registrable limit. | 104, 115 |
| Stop processing | The button was pressed to stop processing of multiple scenes. | |
| There was no scene which can be deleted. | ThismessagewillappearifyoutrytodeletemultiplescenesonDisc Navigation when all the selected scenes have been locked. Release the lock on scenes before executing deletion. | 99, 108 |
| This card cannot be used. Please replace card. | The card cannot be used in this DVD video camera/recorder: Use another card. 26 | |
| This disc cannot be used. Please replace disc. | A disc that cannot be used on thisDVD video camera/recorderhas been loaded. Check the type of disc. | 24 |
| This disc is recorded by the NTSC system. Please replace disc. | This DVD video camera/recorder can use only discs recorded on the PAL system. A disc recorded on the NTSC system cannot be used on this DVD video camera/recorder. | |
| Top scene cannot be divided. | Division is not possible at the start of scene. | 106 |
| UNFORMAT DISC | The disc is not initialised or it is damaged. If this message appears, be sure to initialise the disc on this DVD video camera/recorder before using it. Reinitialising even a disc used on this DVD video camera/recorder may be necessary (initialising will erase all recorded contents on disc). If this message appears, try to initialise the disc. If the same messagestillappears,thediscmaybedamaged:Useanotherdisc. | 125 |
| See * 2 on page 153. 75 | ||
| Use AC adapter/charger. | Finalisationis notpossiblewhenthe DVDvideocamera/recorderis powered by a battery: Use the AC adapter/charger for finalisation. | 41, 127 |
| Use AC adapter/charger. Turn off power. | Scenecannotbe repairedwhenthe DVD videocamera/recorder is powered by a battery. IftheACadapter/chargerisunavailableinhandyplace,removethe disc, use the opposite side, or use another disc. To repair the removed disc, insert the disc into the DVD video camera/recorder afterwards, and connect the AC adapter/charger. | 41 |
| VIDEO scenecannot be copied to card. | No movie can be copied to card. Select stills and copy them to card. | 107 |
| Write protected. Check card. Write protected. Check disk. | A locked card or write-protected disc is inserted. Release the lock or write-protect using the Card or Disc Navigation menu. | 26, 124 |
*1
- This message may also appear when dirt adheres to disc. If this message appears when a recorded disc is recognised immediately after it is inserted, do not repair the disc; remove it and then use a soft, dry cloth to clean off the dirt before using it.
- This message may also appear when condensation occurs. In this case, do not repair the disc; turn the DVD video camera/recorder off, wait until it dries out, and then turn it on again.
- If the repair message appears when you turn the DVD video camera/recorder on from off with a disc loaded after recording on it, choose repair.
- If the repair message appears when recording and playback are normally possible with another disc - and no condensation occurs and the disc is not dirty - choose repair.
*2
- This message may also appear when dirt adheres to disc. In this case, do not initialise the disc; remove it and then use a soft, dry cloth to clean the dirt before using it.
- This message may also appear when condensation occurs. In this case, do not initialise the disc; turn the DVD video camera/recorder off, wait until it dries out, and then turn it on again.
- Initialisation will delete all data on disc.
*3
- This message may also appear when dirt adheres to disc. Remove the disc and then use a soft, dry cloth to clean the dirt before using it.
- This message may also appear when condensation occurs. Wait until the DVD video camera/recorder dries out, and then turn it on again.
Troubleshooting
Check to see the following before asking for a repair. If the suggested solution still cannot restore the DVD video camera/recorder to normal, do not attempt to repair it yourself, but consult your dealer.
Power supplies
| Symptom Cause | and Correction | Reference page |
| Battery cannot be charged. | Is the ambient temperature too low or too high?Charge the battery at 10-30°C. | 37 |
| Is the battery abnormally hot?Remove the battery, leaveit for a while to cool down, then charge it. | ||
| Is the DC power cord connected to AC adapter/charger? Unplug it. | ||
| Has the battery been unused for a long time?Remove the battery, and then reattach it. If the battery is still not charged, it may be dead: Purchase a new one.* If the battery does not charge after you try the above four procedures, it may be dead: Purchase a new battery. | ||
| Battery weakens fast | Are you using the DVD video camera/recorder where the temperature is very low?The DVD video camera/recorder can normally be used for 40-60 minutes with a fully charged battery, but this time will be shorter at low temperatures. Keep extra batteries on hand. | 39 |
| Battery may be dead.The performance of battery will deteriorate if it is used for an extended period of time or frequently: Purchase a new battery. | 40 | |
| The CHARGE indicator onACadapter/chargeris blinking. | Is the ambient temperature too low or too high?Chargethebatteryinvironmentwherethetemperatureis10-30°.The battery has possibly discharged excessively. Continue charging: After a while, the battery will be charged to the specified voltage, and the CHARGE indicator will light. Then the battery charge will be completed normally. | 37 |
| Power turns off immediately after being turned on. | Is battery charged?Charge it. | 37 |
| When power is turned on, the LCD screen will turn on and off. | ||
| Power goes off unexpectedly. | Is Power Save set to “On”?If the powered DVD video camera/recorder is left for as long as 5 minutes without recording or playback with “Power Save: On” specified, it will automatically turn off to save battery power. To restartrecordinginthiscase,setthepowerswitchto“POWEROFF” andthensetitto“VIDEO”.Youcanalsospecify“PowerSave:Off” to stop automatic power off. | 90 |
| Power cannot be turned off. | Detachthebatteryor AC adapter/charger once, and then pressthe RESET button of DVD video camera/recorder: Reattach a power supply to DVD video camera/recorder before turning it on again. | ☐ |
During recording
| Symptom Cause | and Correction | Reference page |
| Recording starts but stops immediately. | Is disc scratched or does dirt or fingerprint adhere to it? Clean the disc. If there is still no improvement, replace the disc. | 75 |
| LCD screen is hard to see. | Has brightness of LCD screen been adjusted? Stop recording and adjust the brightness. | 89 |
| Is the DVD video camera/recorder being used outdoors? Usetheviewfinder.WhenusingLCDmonitor,adjustitsanglesothat LCD screen is not exposed to direct sunlight. | 46, 48 | |
| Focus is not correct. | Is it difficult to use auto focus with your subject? Focus manually. | 59 |
| Does “MF” appear? The DVD video camera/recorder is set to manual focus. Focus the subject manually, or release manual focus. | 58 | |
| Is the dioptre control correctly adjusted if you are using the viewfinder as a monitor? Adjust the dioptre control. | 47 | |
| In cases other than the above, set the power switch to “POWER OFF”, and then set it to VIDEO, “☐ PHOTO” or “CARD PHOTO” again. | 46 |
During playback
| English |
| Symptom Cause | and Correction | Reference page |
| Recognitionofdiscis not complete | Is disc dirty?Use soft, dry cloth to clean it. | 75 |
| Pressing the playback button will not start playback. | Has the image been recorded by devices other than this DVD video camera/recorder?Playback of image recorded on devices other than this DVD video camera/recorder may be impossible on this DVD video camera/ recorder. | 126 |
| Has scene been edited on a device other than this DVD video camera/recorder?Ifa scene recorded on this DVD video camera/recorderiseditedon a device other than this DVD video camera/recorder, playbackmay not be possible on this DVD video camera/recorder. | ||
| No playback picture appears on TV screen. | Is TV input selector set correctly?Some TVs have multiple video input jacks. Check whether the correctinputwasselectedonTVtomatchtheconnectedjacks.Ifthe DVD video camera/recorder is connected to VCR, set its input selector to “external input (LINE)". | 72 |
| Is the DVD video camera/recorder connected to TV correctly?Check the connections. | 71 | |
| Playback picture is momentarily interrupted. | Is disc scratched or does dirt or fingerprint adhere to it?Clean the disc. | 75 |
| Poor playback picture | Was the image input from analog VCR (VHS, 8 mm) and recorded?The problem may be improved if a VCR equipped with TBC circuit is used for playback. | ☐ |
| No sound | Is the TV volume control set correctly?Adjust TV volume control, and be sure to adjust the volume on TV. | 72 |
When the DVD video camera/recorder is connected to PC:
| Symptom Cause | and Correction | Reference page |
| Nodriveiconappearson PC. | The DVD video camera/recorder is not turned on.Check the power supply. | 46 |
| Driver is not properly recognised.Turn PC off and on again. If the drive icon still does not appear, use "Refresh driver" in Device Manager to reinstall the driver. | ||
| Turn PC off and then disconnect the PC connectioncable. Turn PC onagain,andthenusethe PCconnectioncabletoconnecttheDVD video camera/recorder to PC. | ||
| Make sure the PC connection cable is completely plugged into this DVD video camera/recorder. | ||
| If a yellow "!" mark is attached to some device in Windows®Device Manager, uninstall the USB device driver, and then reinstall it, following the procedure on page 133. | ||
| Afatalexception0Aerror occurs while installing USB driver in Windows®2000 Professional. | It is recommended that you install Windows®2000 Service Pack 3 or later. | |
| Error occurs in playback of DVD video camera/ recorder on PC. | IferroroccurswithUSBconnection,thetransferrateisnotsufficient.It is recommended that you use a USB terminal conforming to USB2.0 when connecting the DVD video camera/recorder. | |
| Application is not normally run on PC. | Turn the PC and DVD video camera/recorder off, and try again. | |
| Error occurs during writing to DVD-R disc. | The temperature of DVD video camera/recorder is too high due to continuous operation.Disconnectthe DVDvideocamera/recorderfromPC once, remove the disc from the DVD video camera/recorder, and then turn it off. Aftera few moments,connect them again and write to a brand-new disc. | |
| Transfer of images stops. | Connect the DVD video camera/recorder to another USB terminal of PC. Ifyour PC is a desktop type, it is recommended that you use USB terminal on the back of PC. If you are using USB2.0 extended card, it is also recommended that you install the newest version driver provided by each USB2.0 card maker. | |
| DVD-RAM/R/RW drive built into PC cannot be used after the provided software has been installed. | This problem may be solved if the software related to DVD-RAM/R/RW of your PC is upgraded, or if the UDF driver is uninstalled.However, with Windows®98 Second Edition / Me / 2000Professional, uninstalling the UDF driver will make it impossible for the JPEG stills recorded on DVD-RAM of this DVD video camera/ recorder to be read by the PC. | |
| DVD-R disc cannot be played back on DVD-MovieAlbumSE. | DVD-MovieAlbumSE does not support playback or data read on DVD-R disc: Use generally available DVD video playbacksoftware to play back DVD-R disc on PC. | 137 |
| Error appears when starting DVD-MovieAlbumSE. | Make sure that your PC display adapter (video card) conforms to DirectX8.1. |
| Symptom Cause and Correction | Reference page |
| Videowrittentoharddisk of PC cannot be edited on DVD-MovieAlbum copy tool. | DVD-MovieAlbumSE cannotedit DVD-VRdata stored on harddisk of PC: Copy the data to another DVD-RAM disc and then edit it. |
| Movies are not recognised by application in PC. | Make sure the power switch of this DVD video camera/recorder is set to “VIDEO”, “PHOTO” or “CARD PHOTO”. |
| The DISC EJECT button isnotvalidwhentheDVD videocamera/recorderis connected to PC. | While the DVD video camera/recorder is connected to PC, use Explorertoright-clicktheDVDvideocamera/recorderdriveiconand execute “Eject”. |
| The DVD - RAM d r i DVD video camera/ recorder cannot be opened by PC Explorer or application. Error appears. Disc cannot be ejected. | The DVD-MovieAlbumSE is running, terminate it. |
| When the time a file in DVD-RAM is viewed on PC, it is different from the actual recording time. | The file system of this DVD video camera/recorder is operated on Greenwich Mean Time (GMT), and time lag information has not beenset.With Windows® asof January,2003,the time stampoffile viewed on Explorer looks different from the actual recording time. The actual recording time will appear for date/time indication on playback screen. |
| When DVD-MovieAlbumSE is started, “Disc in Drive X: cannot be used” appears. | AdiscotherthanDVD-RAMisloadedindrive:DVD-MovieAlbumSE cannot be used for media other than DVD-RAM. |
| Click the “Preference” button in the dialog box, click the “Device Setting” tab to choose the drive where DVD-RAM disc is loaded in the “Drive Select” column, and then click “OK”. | |
| An image that should have been recorded does not appear when DVD-MovieAlbumSE is started. | Click the “Preference” button at top right of DVD-MovieAlbumSE screen, click the “Device Setting” tab to choose the drive where DVD-RAMdiscisloadedinthe“DriveSelect”column,andthenclick “OK”. |
| “DISCERROR”appears when releasing write-protect. | A disc that was write-protected using the write-protect setting tool (WPTOOL)equipped with theUDF driveronthe CD-ROMprovided with this DVD video camera/recorder cannot be released on this DVD video camera/recorder as is. Use the write-protect settingtool on PC to release the write-protect. |
| “USBNTMAP.SYS not found” appears while installing USB driver. | You have designated a folder which is different from that for Windows® when installing USB driver: Designate the correct folder. |
| NoUSBHS (highspeed) connection even when USB2.0 card is used. | Make sure that you have already installed the driver provided with the USB2.0 card. You will need to install the driver provided by USB2.0 card maker in order to operate the USB2.0 card at HS (high speed). |
| Executing “Export” on DVD-MovieAlbumSEwill interrupt reading midway. | Do not choose “Simple Export”: If you do, reading will stop midway. |
| Symptom Cause | and Correction | Reference page |
| When executing“Export” onDVD-MovieAlbumSE, it will take time to read. | If stills areincluded in therange of “export”,itmaytake moretime because data must be re-encoded and read.If“DividebyMaker”is notchosen,itmay takesometime because data will be read while being re-encoded. | 141 |
| “Hardware Removal” results in error. | Exit Windows® once, and then disconnect the DVD video camera/ recorder.IfyourPCusesWindows® 2000Professional,theproblem may be solved if you install Windows® 2000 Service Pack 3 or later. | |
| Powerdoesnotcomeon, ornooperationoccursby pressing button. | Execute system reset (press the RESET button). | 161 |
| Has the DVD video camera/recorder been subjected to impact? The DVD video camera/recorder could be damaged. Consult your dealer. | ☐ | |
| The date and time are incorrect. | Has the DVD video camera/recorder been left unused for a long period of time? The internal backup battery may be discharged: Charge it. | 49 |
| No scene can be deleted. | Is the cursor placed on the scene to be deleted? Iftheselectedscene(framedinred)exists,thatscenewillbedeleted evenifyou useyellow cursortoselectanyscene.Checkthecolours of cursors and bar graph on the thumbnail screen. | 94 |
| Disc cannot be removed. | Did you detach the batteryor ACadapter/charger beforesettingthe power switch to “POWER OFF”? Connect the battery or AC adapter/charger, set the powerswitch to “VIDEO” and then “POWER OFF”, and remove the disc. | 41, 46 |
| DVD video camera/ recorder cannot be operated from remote control. | Is the remote control pointed at the infrared receiver on DVD video camera/recorder? Point it at the infrared receiver to operate the DVD video camera/ recorder. | 36 |
| Is the infrared receiver on DVD video camera/recorder exposed to direct sunlight or strong fluorescent light, etc.? TheremotecontrolcannotoperatetheDVDvideocamera/recorder when strong light strikes the infrared receiver. Adjust the place or angle of the DVD video camera/recorder. | 36 | |
| Is there battery in the remote control? Also check the polarities of battery. The battery could be dead: Try replacing it. | 35 | |
| Is the DVD video camera/recorder powered? Turn it on. | 46 | |
| Disc cover cannot be closed. | Is disc correctly inserted? Was disc inserted from wrong direction? Remove the disc and then reinsert it. | 42 |
| Operatingsoundisheard cyclically. | This soundisheardbecausethedisciscyclicallyoperatedanddoes not indicate a fault. | ☐ |
| Some vibrations are felt or slight sound is heard from mechanism. | These vibrations or sound are caused by disc drive: This does not indicate a fault. ☐ |
System Reset
If the DVD video camera/recorder does not operate normally, perform "System Reset": The DVD video camera/recorder may recover to normal. "SystemReset" will reset all setting to factory defaults. The date and time will also be reset: Set the date and time again before using the DVD video camera/recorder.
1 Set the power switch to "POWER OFF" to turn the DVD video camera/reorder off.
Detach the battery or AC adapter/charger.
2 Use a fine tipped pen to hold down the reset button for several seconds.
All settings will be reset.
Note:
Do not press the reset button with undue force.

text_image
RESET- List of setting items
| Item Default | Setting method | ||
| CameraFunctionsSetup | Program AE Auto P. 79 | ||
| White Bal. Auto P. 80 | |||
| EIS On P. 82 | |||
| Dig.Zoom | 40× | P. 83 | |
| MIC.Filter | Off P. 84 | ||
| 16 : 9 | Off | P. 84 | |
| Record Functions Setup | VIDEO Mode | FINE | P. 85 |
| Quality | FINE | P. 86 | |
| Self Timer | Off | P. 87 | |
| OSD Output | On | P. 88 | |
| Date Setup | Date Mode | D/M/Y | P. 50 |
| Date Set | 1/1/2003 0:00 | P. 49 | |
| LCD Setup | Brightness | -□□□+ | P. 89 |
| Color Level | -□□□+ | P. 89 | |
| Initial Setup | Beep | On | P. 90 |
| Power Save | Off P. 90 | ||
| Record LED | On P. 91 | ||
| Language | English | P. 91 | |
| Demo Mode Auto | P. 144 |
* Some items will not appear depending on the disc or card inserted.
Major Specifications
| CCD 1/4-inch interlaced | ||
| Total number of pixels: approx. 800,000Number of effective pixelsMovie: approx. 410,000Still: approx. 340,000 | ||
| Lens F1.8-2.5, f = 3.15-31.5 mm | Filter diameter: 30.5 mm | |
| Focus Auto/Manual | ||
| Zoom | Optical 10×, 40×-240× with digital zoom added (40× for still) | |
| Required minimum illumination | 0.1 lx : When Low Light mode is selected | |
| Viewfinder | 0.44-inch colour TFT (approx. 110,000 pixels) | |
| LCD monitor | 2.5-inch colour TFT (approx. 120,000 pixels) | |
| Electronic image stabiliser Electronic type | ||
| Shutter speed 1/60 - 1/4000 second (movie) | ||
| Self-timer recording Still recording only | ||
| External microphone jack | ø3.5 mm stereo mini-jack: (a plug-in power type microphone cannot be used) | |
| Recording mode | Movie (with sound)Still (with DVD-RAM disc, SD memory card, MultiMediaCard) | |
| Maximum recordable time (per side) | DVD-RAM disc | approx. 18 minutes (XTRA)approx. 30 minutes (FINE)approx. 60 minutes (STD) |
| DVD-R disc | approx. 30 minutes (FINE)approx. 60 minutes (STD) | |
| Maximum number of recordable stills | DVD-RAM disc (per side) | 999. However, if movies and stills are mixed on one disc, the recordable number will decrease. |
| SD memory card (when using 32 MB card) | Approx. 220. (in FINE mode): Varies depending on the recording quality and the type of card (P. 28). | |
| Recording format | DVD-RAM disc | Movie: Conforming to DVD video recording standardStill: Simultaneous recording, conforming to DVD video recording standard (704 × 544 pixels) and JPEG (640 × 480 pixels) |
| DVD-R disc | Movie: Conforming to DVD video recording standard | |
| Card | Still: Conforming to JPEG (640 × 480-pixel) standard | |
| Audio playback format | MPEG Audio layer 2, Dolby AC3 | |
| Recording medium | 8 cm DVD-RAM disc (conforming to DVD-RAM Ver. 2.1 Book 2.1)8 cm DVD-R disc (conforming to DVD-R for General Ver. 2.0)SD memory card, multimedia card | |
| Jacks | Video/audio output × 1, External microphone input × 1, PC connection terminal (connected to PC USB port) × 1 | |
| Battery system Lithium-ion | ||
| Power consumption | approx. 4.7 W when recording with LCD monitor off (FINE) | |
| Dimensions(W × H × D) | approx. 57 × 89 × 134 mm(excluding projections) | |
| Operating temperature (humidity) | 0-40°C (less than 80%).0-30°C when connected to PC | |
| Storage temperature -20-60°C | ||
| Weight | approx. 480 g (without battery or disc) | |
| Total weight when recording approx. 565 g | ||
| Provided accessories ACadapter/charger,battery,AV/Soutputcable,infraredremotecontrol,Lithium battery for remote control,lens cap,lens cap string,shoulder strap,mains lead,DC power cord,ferrite core,PC connection cable,software CD-ROM,8 cm DVD-R disc (in Round DVD Holder) | ||
Introduction to Optional Accessory
POWER SUPPLY
Battery (DZ-BP14SW)

INFORMATION ON SQUARE ADAPTER
This DVD video camera/recorder cannot use a square adapter, such as for 8 cm DVD-RAM disc (DRMS-V28R), 8 cm DVD-R disc (DR30.1P): Remove the disc from square adapter and set it in Round DVD Holder, referring to the instruction sheet of disc.
- Removing disc from square adapter

flowchart
graph TD
    A["Example 1: Device capture"] --> B["Snap off and remove lock pin"]
    B --> C["Close-up of device with hand holding part"]
    C --> D["Final packaging with disc and drive"]
(Example 2)

text_image
Diagram showing two hands operating a mechanical device with labeled parts ① and ②, indicating a step or operation.Slide the disc obliquely upward so that it is not caught by claws.
Note:
Refer to page 75 if you want to correctly set the removed disc in Round DVD Holder that can be used in this DVD video camera/recorder.
Index
Numerics
16:9 84
240× (Dig.zoom) 83
40× (Dig.zoom) 83
8 cm DVD-R disc 23
8 cm DVD-RAM disc 23
A
AC adapter/charger ....41
ACCESS/PC indicator 51, 54
Add (edit) 119
All programmes ....112
Auto (programme AE) 79
Auto-focus 58
AV output jack 71
B
Backlight correction ....61
Battery 37
Attaching to DVD video camera/ recorder 38
Charging 37
Recordable time on DVD video camera/ recorder 39
Removing from DVD video camera/ recorder 38
Setting Up 37
BATTERY EJECT button ....38
Beep 90
Black & White fade 103
Brightness 89
C
Camera Functions Setup 79
Capacity 124
Card Available ....26
Capacity 28,124
Category 128
Format 125
Handling 26
Quality 86
CARD ACCESS indicator 54
CHARGE indicator ....37
Cleaning 143
Colour Level 89
Connecting to TV 71
Copy 107
Create 115
D
Date and time 49
Date setup 49
Defaults 92
Delete (edit) 120
Delete (play list) ......122
Delete (scene) 99,119
Demo Mode 144
Detail (scene) 111
Dig. zoom 83
Dioptre control 47
Disc 23
Available 23
Capacity 27
Finalise Disc 127
Format 125
Handling 25
Protect 124
Update Control Info. 126
DISC EJECT button 44
Disc guide 42
Display 63
Information LCD 63
Scenes information ....111
Viewfinder 47
Divide 106
DPOF 109
DVD-R 23
DVD-RAM 23
E
Edit (play List) 119
EIS 82
EXPOSURE button 60
Exposure control 60
External microphone jack ....53
F
Fade 103
Ferrite core 53
Finalise Disc 127
FINE (VIDEO Mode) 85
FOCUS button 58
Format Disc 125
Frame advance/Frame back 67
FULL AUTO button 62
G
Go To (during playback) 69
Go To (on Disc Navigation) 123
H
Hand strap 33
|
Information display mode ....63
Infrared receiver 36
Initial Setup 90
L
Language 91
Lens cap 33
Lock 108
Low Light (Programme AE) 79
M
MENU button 78
MF 58
MIC.Filter 84
Move 121
0
Optical 10× zoom lens ....18
OSD Output 88
P
Play (play list) 117
Play (programme) 113
Play list 115
Addscenes 118
Recording indicator 91
Remote control 35
Repeat Play 128
Reset 92
settings 92
system 161
RESET button 161
S
Sand & Snow (Programme AE) 79
Scene
Combine 105
Delete 99
Detail 111
Divide 106
Fade 103
Move 121
Select 110
Skip 102
Searching for image 67
Select (Scene) 96
SELECT button 96
Self Timer 87
Shoulder Strap 34
Skip (Scene) 102
Skip playback 68
Slide Show 129
Sports (Programme AE) 79
Spotlight (Programme AE) 79
STD (VIDEO Mode) 85
Stereo microphone ....51
Submenu ....100
Switch (play list) 116
Switch (programme) ......112
T
Thumbnail 94
Title (play list) 122
Title (programme) 113
U
Update Control Info. 126
V
VIDEO Mode 85
FINE 85
STD 85
XTRA 85
Vol. button 66
W
White Bal. 80
White fade 103
Wipe fade 103
X
XTRA (VIDEO Mode) 85
Z
Zoom lever 56

natural_image
Illustration of various electronic components including batteries, coils, and a battery pack (no text or symbols)BATTERY SAFETY
GUIDELINES
PLEASE PHOTOCOPY AND DISPLAY
Used correctly, domestic batteries are a safe and dependable source of portable power. Problems can occur if they are misused or abused — resulting in leakage or, in extreme cases, fire or explosion.
Here are some simple guidelines to safe battery use designed to eliminate any such problems.
ALWAYS

natural_image
Two battery icons, one with a plus sign and the other with a circle (no text or symbols)Take care to fit your batteries correctly, observing the plus and minus marks on the battery and appliance. Incorrect fitting can cause leakage or, in extreme cases, fire or even an explosion.
ALWAYS

natural_image
Diagram showing battery arrangement with arrows indicating flow direction (no text or symbols)Replace the whole set of batteries at one time, taking care not to mix old and new batteriesorbatteriesofdifferenttypes, since this can result in leakage or, in extreme cases, fire or even an explosion.
ALWAYS

natural_image
Icon set showing a battery, three rectangular cells, a crossed-out fork, and a cross symbol (no text or labels)Store unused batteries in their packaging and away from metal objects which may cause a short-circuit resulting in leakageor, in extreme cases, fire overvenane
ALWAYS

natural_image
Abstract black-and-white graphic with three vertical rectangular shapes and cloud-like patterns (no text or symbols)Removedeadbatteriesfromequipmentand all batteries from equipment you know you are not going to use for a long time. Otherwisethe batteriesmay leak andcause damage.
NEVER

natural_image
Simple diagram showing a flame next to a battery with an 'X' symbol (no text or labels)Never dispose of batteries in fire asthis can cause them to explode. Please put dead batteries in with the normal household waste.
NEVER

natural_image
Pure electrical circuit lines without any symbolsNever attempt to recharge ordinary batteries, either in a charger or by applying heat to them. They may leak, cause fire or even explode. There are special rechargeable batteries which are clearly marked as such.
ALWAYS

natural_image
Illustration of a hand holding a device with a rectangular clip (no text or symbols)Supervise children if they are replacing batteries themselves in order to ensure these guidelines are followed.
ALWAYS

natural_image
Illustration of a human mouth with a pill and a cross mark, no text or symbols presentRemember that small button cell batteries such as used in some hearing aids, toys, games and other appliances, are easily swallowedbyyoungchildrenandthiscanbe dangerous.
ALWAYS

natural_image
Abstract black-and-white graphic with white hand gestures and a circular symbol (no text or symbols)Keep loose button cells away from young children.
ALWAYS

natural_image
Illustration of a hand inserting a card into a slot (no text or symbols)Make sure battery compartments are secure.
ALWAYS

natural_image
Silhouette of a human torso with arrows indicating downward pressure and a cross symbol (no text or labels)Seekmedicaladviceifyoubelieveacell has been swallowed.
SOME DO'S AND DON'TS ON THE SAFE USE OF EQUIPMENT
This equipment has been designed and manufactured to meet international safety standards but, like any electrical equipment, care must be taken if you are to obtain the best results and safety is to be assured.
★★★★★★★★★
DO read the operating instructions before you attempt to use the equipment.
DO ensure that all electrical connections (including the mains plug, extension leads and interconnections between pieces of equipment) are properly made and in accordance with the manufacturer's instructions. Switch off and withdraw the mains plug when making or changing connections.
DO consult your dealer if you are ever in doubt about the installation, operation or safety of your equipment.
DO be careful with glass panels or doors on equipment.
★★★★★★★★★
DON'T continue to operate the equipment if you are in any doubt about it working normally, or if it is damaged in any way — switch off, withdraw the mains plug and consult your dealer.
DON'T remove any fixed cover as this may expose dangerous voltages.
DON'T leave equipment switched on when it is unattended unless it is specifically stated that it is designed for unattended operation or has a standby mode. Switch off using the switch on the equipment and make sure that your family know how to do this. Special arrangements may need to be made for infirm or handicapped people.
DON'T use equipment such as personal stereos or radios so that you are distracted from the requirements of traffic safety. It is illegal to watch television whilst driving.
DON'T listen to headphones at high volume, as such use can permanently damage your hearing.
DON'T obstruct the ventilation of the equipment, for example with curtains or soft furnishings. Overheating will cause damage and shorten the life of the equipment.
DON'T use makeshift stands and NEVER fix legs with wood screws — to ensure complete safety always fit the manufacturer's approved stand or legs with the fixings provided according to the instructions.
DON'T allow electrical equipment to be exposed to rain or moisture.
ABOVE ALL
— NEVER let anyone especially children push anything into holes, slots or any other opening in the case — this could result in a fatal electrical shock;
— NEVER guess or take chances with electrical equipment of any kind
— it is better to be safe than sorry!
★★★★★★★★★
HITACHI
Hitachi, Ltd. Tokyo, Japan
International Sales Division
THE HITACHI ATAGO BUILDING,
No. 15–12 Nishi Shinbashi, 2 – Chome,
Minato - Ku, Tokyo 105-8430, Japan.
Tel: 03 35022111
HITACHI EUROPE LTD,
Whitebrook Park
Lower Cookham Road
Maidenhead
Berkshire
SL6 8YA
UNITED KINGDOM
Tel: 01628 643000
Fax: 01628 643400
Email: consumer-service@hitachi-eu.com
HITACHI EUROPE S.A.
364 Kifissias Ave. & 1, Delfon Str.
152 33 Chalandri
Athens
GREECE
Tel: 1-6837200
Fax: 1-6835964
Email: service.hellas@hitachi-eu.com
HITACHI EUROPE GmbH
Munich Office
Dornacher Strasse 3
Email: HSE-DUS.service@hitachi-eu.com
HITACHI EUROPE S.A.
Gran Via Carlos III, 101-1
08028 Barcelona
SPAIN
Tel: 93 409 2550
Fax: 93 491 3513
Email: customerservice.italy@hitachi-eu.com
HITACHI Europe AB
Box 77 S-164 94 Kista
SWEDEN
Tel: +46 (0) 8 562 711 00
Fax: +46 (0) 8 562 711 13
Email: csgswe@hitachi-eu.com
HITACHI EUROPE S.A.S
Lyon Office
B.P. 45, 69671 BRON CEDEX
FRANCE
Tel: 04 72 14 29 70
Fax: 04 72 14 29 99
HITACHI EUROPE LTD (Norway) AB
STRANDVEIEN 18
1366 Lysaker
NORWAY
Tel: 67 5190 30
Fax: 67 5190 32
Email: csgnor@hitachi-eu.com
HITACH EUROPE AB
Egebækgård
Egebækvej 98
DK-2850 Nærum
DENMARK
Tel: +45 43 43 6050
Fax: +45 43 60 51
Email: csgnor@hitachi-eu.com
HITACHI EUROPE AB
Neopoli / Niemenkatu 73
FIN-15140 Lahti