AVD-W9000 - Audio-vidéo PIONEER - Free user manual and instructions
Find the device manual for free AVD-W9000 PIONEER in PDF.

| Product Type | In-Dash Multimedia Monitor |
| Display Size | 7 inches (diagonal) |
| Display Resolution | 480 x 234 pixels (WQVGA) |
| Aspect Ratio | 16:9 |
| Dimensions (W x H x D) | 178 x 112 x 26 mm |
| Weight | 1.0 kg |
| Power Supply | 12V DC (negative ground) |
| Power Consumption | 5A max |
| Playback Formats | DVD, DVD-R/RW, CD, CD-R/RW, MP3, WMA |
| Inputs | AV1, AV2, RGB, Backup Camera |
| Outputs | Video output, Audio L/R |
| Touchscreen | Yes, resistive |
| Remote Control | Included |
| Built-in Tuner | FM/AM |
| USB Port | 1 (front, for media) |
| SD Card Slot | 1 (front) |
| Operating Temperature | -10°C to +60°C |
| Cleaning Instructions | Wipe with a soft dry cloth; avoid solvents |
| Safety Certifications | CE, FCC |
| Spare Parts Availability | Contact Pioneer authorized service centers |
Frequently Asked Questions - AVD-W9000 PIONEER
User questions about AVD-W9000 PIONEER
0 question about this device. Answer the ones you know or ask your own.
Ask a new question about this device
Download the instructions for your Audio-vidéo in PDF format for free! Find your manual AVD-W9000 - PIONEER and take your electronic device back in hand. On this page are published all the documents necessary for the use of your device. AVD-W9000 by PIONEER.
USER MANUAL AVD-W9000 PIONEER
ThankyouforpurchasingthisPIONEERproduct.
Pleasereadthroughthismanualbeforeusingtheproductforthefirsttime,toensure proper use. After reading, please keep the manual in a safe and accessible place forfuturereference.
01 Precautions
IMPORTANTSAFEGUARDS3
Toensuresafedriving3
-Whenusingadisplayconnectedto
COMPONENTOUT(componentoutput)
orVCROUT(VCRoutput)4
Toavoidbatteryexhaustion4
02 BeforeYouStart
Aboutthisunit5
Visitourwebsite5
Incaseoftrouble5
ToprotecttheLCDscreen5
ForviewingtheLCDcomfortably5
-Changingthewidescreensize5
-Changing the picture adjustment 5
Installingandremovingthedisplayunit5
-Installingthedisplayunit6
-Removingthedisplayunit7
Resettingthemicroprocessor7
03 Operatingthisunit
What's What8
-Displayunit8
BasicOperations9
-PowerON/OFF9
-Selectingasource9
-Adjustingthevolume9
-Changingthewidescreenmode9
Changing the picture adjustment 10
-Adjustingthedimmer11
Setup11
-Settingthecomponentvideo11
-Selectingthevideoformat12
-Settingthepowercontrolfunction12
04 Connectionandinstallation
Partssupplied13
Connections14
-Connectingthepowercable15
-ConnectingwithRCAcables16
-Connectingwithcomponent cables17
Installation18
-Installingthehide-awayunit18
AdditionalInformation
Usingthedisplaycorrectly19
-Handlingthedisplay19
–Liquidcrystaldisplay(LCD)screen19
-Keepingthedisplayingood condition19
-LED(light-emittingdiode) backlight19
Specifications21
IMPORTANTSAFEGUARDS
Pleasereadalloftheseinstructionsregarding yourdisplayandretainthemforfuturereference.
1 Read this manually and carefully before operating your display.
2 Keep this manual handy as a reference for operating procedures and safety information.
3Paycloseattentiontoallwarningsinthis manualandfollowtheinstructionscarefully.
4 Donotallowotherpersonstousethissystemuntiltheyhavereadunderstood theoperatinginstructions.
5 Donotinstallthedisplaywhereitmay(i) obstructthedriver'svision,(ii)impairthe performanceofanyofthevehicle'soperatingsystemsorsafetyfeatures,includingairbags,hazardlampbuttonsor(iii) impairthedriver'sabilitytosafelyoperatethevehicle.
6Aswithanyaccessoryinyourvehicle'sinterior,thedisplayshouldnotdivertyourattentionfromthesafeoperationofyourvehicle.Ifyouexperienceddifficultyinoperatingthesystemorreadingthedisplay,pleaseparksafelybeforemakingadjustments.
7 Pleaseremembertowearyourseatbeltat alltimeswhileoperatingyourvehicle.If youareeverinanaccident,yourinjuries canbeconsiderablymoresevereifyour seatbeltisnotproperlybuckled.

WARNING
- Donotattempttoinstallorserviceyour displaybyyourself.Installationorservicingofthedisplaybypersonswithout trainingandexperienceinelectronic equipmentandautomotiveaccessories maybedangerousandcouldexposeyou
totheriskofelectricshockorotherha-zards.

WARNING
- NEVERinstallthisdisplayinalocation whereitisvisiblebythedriver.Doingso cancausethedrivertobedistractedby imageswhilethevehicleisinmotion.
- Useofthisdisplayissubjecttoallgovernmentlawsregardingplacementoruse.
- PIONEERdoesnotacceptanyliabilityfor anyproblems,damageorlossincurredas aresultofthedisplaybeingusedwithan incorrectsettingorinviolationofanygovernmentlaws.

Toensuresafedriving

WARNING
• To avoid the risk of accident and the potential violation of applicable laws, reardisplay units should not be in a location where they are visibly distracting to the driver.
- Thisdisplayisdesignedsolelyforusefrom therearseats. NEVER installthedisplayina locationthatenablesthedrivertowatch imageswhiledriving.
- In some countries or states the viewing of images on adisplay inside a vehicle even by person so other than the driver may be illegal. Wheresuch regulations apply, they must be obeyed and display unit should not be used.
When using adisplay connected to COMPONENTOUT(component output) or VCROUT(VCRoutput)
Thisunit'sCOMPONENTOUT(component output)orVCROUT(VCRoutput)isforconnectionofadisplaytoenablepassengersin therearseatstowatchtheDVDorTV.

WARNING
NEVER install thereard displayinalocation that enable the drivertowatch the DVD or TV while driving.
Toavoidbatteryexhaustion
Besuretorunthevehicleenginewhileusing thisunit.Usingthisunitwithoutrunningthe enginecanresultinbatterydrainage.
BeforeYouStart
Aboutthisunit

CAUTION
- Donotallowthisunittocomeintocontact with liquids. Electricalshockcouldresult. Also, damagethisunit, smoke, andoverheatingcouldresultfromcontactwithliquids.
- Keep this manual handy as a reference for operating procedures and precautions.
• Alwayskeepthevolumelowenoughsothat youcanhearsoundsfromoutsidethevehicle. - Protectthisunitfrommoisture.
Visitourwebsite
Visitusatthefollowingsite:
http://www.pioneer.eu
- Registryyourproduct.Wewillkeepthedetailsofyourpurchaseonfiletohelpyou refertothisinformationintheeventofan insuranceclaimsuchaslossortheft.
- Weofferthelatestinformationabout PioneerCorporationonourwebsite.
Incaseoftrouble
Should this product fail to operate properly, contact your dealer or nearest authorized PioneerServiceStation.
ToprotecttheLCDscreen
- Donotallowdirectsunlighttofallonthe displaywhenthisunitisnotbeingused. Extendedexposuretodirectsunlightcan resultinLCDscreenmalfunctiondueto theresultinghightemperatures.
- When using acellular phone, keep the an-tenna of the cellular phone away from the
displaytopreventdisruptionofthevideoby theappearanceofspots,coloredstripes, etc.
ForviewingtheLCD comfortably
Duetoitsconstruction, theviewingangle of the screensize is limited. You can adjust it by changing either screensize or picture adjustment.
Changingthewidescreensize
Bychangingthescreensizefrom4:3to16:9, youcanadjustthescreensothatthescreen canfittothevideoimageyouareplaying. Fordetailsconcerningoperation,referto Changingthewidescreenmodeonpage9.
Changing the picture adjustment
Youcanmakethebestadjustmenttothepic-turedisplaybytheBRIGHTNESS,CONTRAST, COLOR,etc.Youcanalsodimorbrightenthe overallpicturetheDIMMER.
Fordetailsconcerningoperation,referto Changingthepictureadjustmentonpage 10.
Installingandremoving thedisplayunit
Themountingarmdescribedbelowissoldseparately.Formoreinformationontheinstallation,refertothemountingkitowner'smanualorconsultyournearestdealer.

Important
- Topreventfailure,besuretoturntheignition switchorsystempowerOFFbeforeinstalling orremovingthedisplayunit.Alsotakecare nottogripthescreenorbuttonstoofirmly andnottodropthedisplayunit.
- Donotletanywatergetontheterminalson thedisplayunitoronthecableanddonot allowtheterminalstobeshortedbyametal objectorthelike.Thiscancausesystem breakdown.
- Becarefulnottotouchterminalsonthedisplayunitoronthecable.Doingsomaycause connectionfailures.Ifanyterminalsaredirty, wipethemwithacleandrycloth.
- Attachthebracketstopperonthe bracketbeforeinstallingthebracketonthe displayunit.
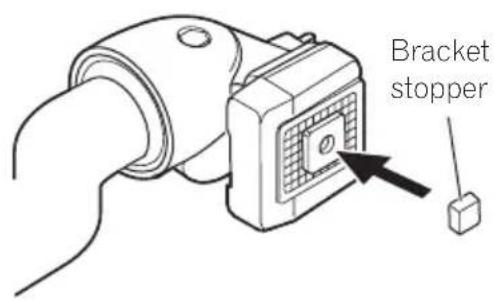
text_image
Bracket stopperInstallingthedisplayunit
1Alignthebracketintothegroovesof thebase.
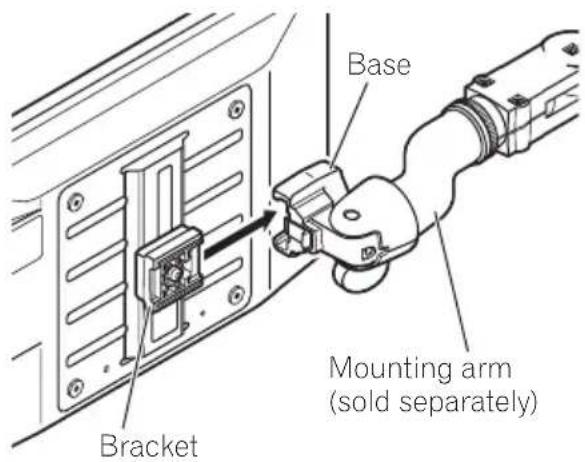
text_image
Base Mounting arm (sold separately) Bracket2Slidethedisplayunituntilitclicksinto place.

natural_image
Technical line drawing of a mechanical assembly with a clamping tool inserted into a panel (no text or symbols present)BeforeYouStart
3Connectthecabletothedisplayunit.

natural_image
Diagram showing a hand inserting a cable into a server rack with an arrow indicating the component (no text or symbols present)Removingthedisplayunit
Todetertheftofthedisplayunit,removethe displayunitwhenleavingthevehicle.
1Holddownthereleasesectionandunplugtheconnector.

natural_image
Diagram showing a hand inserting cable into a device panel, with no visible text or symbols.2Unlockthelockreleaselever, thenslide thedisplayunitanddetachitfromthe base.
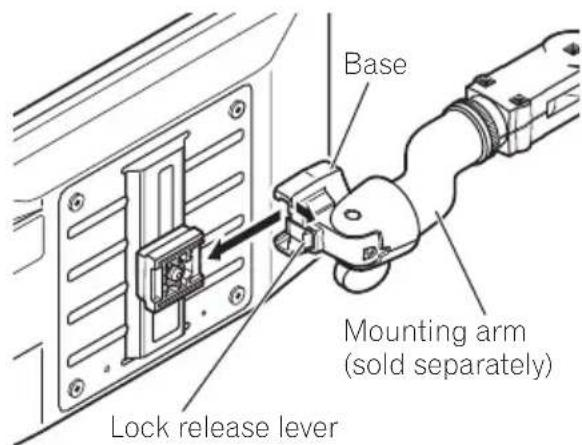
text_image
Base Mounting arm (sold separately) Lock release lever
Resettingthemicroprocessor
Themicroprocessormustberesetunderthe followingconditions:
- Priortousingthisunitforthefirsttime afterinstallation
- Iftheunitfailstooperateproperly
-
Whenstrangeorincorrectmessagesappearonthedisplay
-
PressRESETonthehide-awayunitwith apentiporotherpointedinstrument.
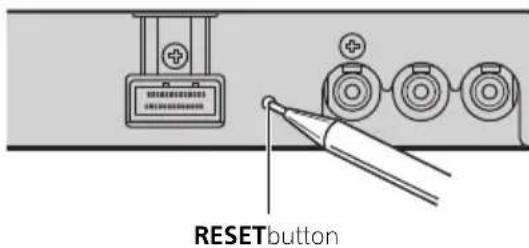
text_image
RESETbutton

text_image
Technical diagram of a monitor with labeled parts and exploded view, showing front, side, and top views.What's What
Displayunit
①Built-inspeaker
Outputsthesoundfromadeviceconnected tothisunit.
- Audiodoesnotoutputfromthebuilt-in speakerwhenheadphonesareconnected.
②Ambientlightsensor
Sensesambientlight. This system automatically adjust the brightness of the display to compensate for ambient light.
③SRC/POWERbutton
Thisunitisturnedonbyselectingasource. Presstocyclethroughalltheavailable sources.
Pressandholdtoturntheunitoff.
- This button is not effective when selecting FRONT in POWER.C. (Referto Setting the power control function on page 12.)
④VOLDOWN/VOLUPbuttons
Presstoincreaseordecreasethevolume.
Presstochangethesettingswhenthe setupmenuorthepictureadjustment menuisdisplayed.
⑤WIDE/MENUbutton
Presstoselectadesiredmodeforenlarging a4:3picturetoa16:9one.
Pressandholdtodisplaythepictureadjustmentmenu.
Pressandholdtodisplaythesetupmenu whentheunitisoff.
⑥Headphonejack(3.5mmstereojack)
Usetoconnectheadphones.

Operatingthisunit
BasicOperations
PowerON/OFF
Turningtheuniton
- PressSRC/POWERtoturntheuniton. Whenyouselectasource,theunitisturned on.
Turningtheunitoff
- PressSRC/POWERandholduntilthe unitturnsoff.

Note
Takeoffyourheadphoneswhenturningthedisplayunitonoroff.Ifyouleaveyourheadphones on,anoisemaybeheardwhenthevolumeish high.
Selectingasource
Youcanselectasourceyouwanttolistento.
- PressSRC/POWERToselectasource.
PressSRC/POWERrepeatedlytoswitchbetweenthefollowingsources.
VCR1COMPONENT or VCR1(VCR1)—VCR2(VCR2)

Notes
- Thisunitisequippedwithtwovideoinputs, VCR1IN(VCR1input)andVCR2IN(VCR2 input).
VCR1IN(VCR1input)hasacomponentvideo input(VCR1[COMPONENT])aswellasan RCAvideoinput(VCR1). - VCR1[COMPONENT]isacomponentvideo fromtheAVdeviceconnectedtoCOMPONENT(componentinput)ofVCR1IN(VCR1 input).
- InVCR1IN(VCR1input),COMPONENT(componentinput)isgivenpriorityoverRCAinput
when both inputs are connected at the same time.
- Avideoinputterminalwhichisnotconnected cannotbeselected.
- VCR1isselectedwhennoconnectionismade for both VCR1IN(VCR1input) and VCR2IN (VCR2input).
Adjustingthevolume
You can adjust both the built-inspeak volume and the head phone volume.
- Audiodoesnotoutputfromthebuilt-in speakerwhenheadphonesareconnected.
- PressVOLDOWNorVOLUPtoadjust thesoundlevel.
Changingthewidescreenmode
Youcanselectadesiredmodeforenlarginga 4:3picturetoa16:9one.
- PressWIDE/MENUtoselectthedesired setting.
PressWIDE/MENUrepeatedlytoswitchbetweenthefollowingsettings:
AUTO (auto)—FULL (full)—JUST (just)—CINEMA (cinema)—ZOOM (zoom)—NORMAL(normal)
■YoucanselectAUTOonlywhenselecting VCR1[COMPONENT]asthesource.
AUTO(auto)
Whenwidemodeinformationisincludedinthe videosignal,thewidemodeadjustsautomatically accordingtotheinformation.
FULL(full)
A4:3pictureisenlargedinthehorizontaldirectiononly,givingyoua4:3TVpicture(normalpicture)withoutanyomissions.
JUST(just)
Thepictureisenlargedslightlyatthecenterand theamountofenlargementincreaseshorizontally totheends,enablingyoutoenjoya4:3picture withoutsensinganydisparityevenonawide screen.
CINEMA(cinema)
Thepictureisenlargedbythesameproportionas FULLorZOOMinthehorizontaldirectionandby anintermediateproportionbetweenFULLand ZOOMintheverticaldirection;idealforacinema-sizedpicture(widescreenpicture)wherecaptionslieoutside.
ZOOM(zoom)
A4:3pictureisenlargedinthesameproportion bothverticallyandhorizontally;idealforacinema-sizedpicture(widescreenpicture).
NORMAL(normal)
A4:3pictureisdisplayedasitis, giving you no sense of disparity since its proportions are the same asthatofthenormal picture.

Notes
- Differentsettingscanbememorizedforeach videosource.
- Whenvideoisviewedinawidescreenmode thatdoesnotmatchitsoriginalaspectratio,it mayappeardifferent.
- Remember that using the wide mode feature of this system for commercial or public viewing purposes may constitute an infringement on the author's rights protected by the Copyright Law.
- Thevideoimagewillappearcoarserwhen viewedinCINEMAorZOOMmode.
Changing the picture adjustment
You can adjust the BRIGHTNESS (brightness), CONTRAST (contrast), COLOR (color) and HUE (hue) foreach source.
- TheadjustmentsofBRIGHTNESS, CONTRASTandA.CONTRASTarestored separatelyforlightambient(daytime)and darkambient(nighttime)conditions.Asun *ormoonisdisplayednextto BRIGHTNESSandCONTRAST,respectively, astheambientlightsensordetermines brightnessordarkness.
- YoucanadjusttheHUEonlyforNTSC video.
- WhenVCR1[COMPONENT]isselectedas thesource,youcannotadjusttheHUE.
1PressWIDE/MENUandholdtodisplay thepictureadjustmentmenu.
The adjustment function names are displayed.
2PressWIDE/MENUtoselectthedesired item.
PressWIDE/MENUrepeatedlytoswitchbetweenthefollowingadjustmentfunctions: BRIGHTNESS (brightness)—CONTRAST (contrast)—COLOR (color)—HUE (hue)—COLORTEMP(colortemperature)—A.CONTRAST(activecontrast)—DIMMER (dimmer)
3PressVOLDOWNorVOLUPtoadjust theselecteditem.
EachtimeVOLDOWNorVOLUPispressed, thelevelofselecteditemisincreasedorde- decreased.
• BRIGHTNESS—Adjuststheblackintensity
•CONTRAST-Adjuststhecontrast
• COLOR-Adjuststhecolorsaturation
• HUE–Adjuststhetoneofcolor(redisemphasizedorgreenisemphasized)
• COLORTEMP—Adjuststhecolortemperature, resulting in a better white balance
Operatingthisunit
•A.CONTRAST—Automatically set the most suitable contrast forthescene
■ You can select ON or OFF, when
A. CONTRASThasbeenselected.
■ If you donotoperatethe function within about 30 seconds, the screen automatically return to the ordinary display.
■Toreturntotheordinarydisplay,press
WIDE/MENUandhold.
Adjustingthedimmer
The adjustment of the DIMMER is stored separately for each ambient light condition; daytime, evening and nighttime. The brightness of the LCD screen will be adjusted to optimum level automatically in accordance with the ambient light based on the setting values.
- Theiconsindicatingthecurrentambient brightnessusedforadjustingthe BRIGHTNESSandCONTRASTmaydiffer fromtheDIMMERslightly.
1PressWIDE/MENUandholdtodisplay thepictureadjustmentmenu.
The adjustment function names are displayed.
2PressWIDE/MENUtoselectDIMMER.
PressWIDE/MENUrepeatedlytoswitchbetweenthefollowingadjustmentfunctions:
BRIGHTNESS(brightness)—CONTRAST(contrast)—COLOR (color)—HUE (hue)—
COLORTEMP(colortemperature)—
A. CONTRAST(activecontrast)—DIMMER (dimmer)
The ambient light level used as the standard for adjusting the DIMMER appears above the level bar.
- Yellowsun–Adjustthebrightnessfor brightambientlight(daytime)
- Redsun ⚙️ –Adjustthebrightnessforintermediatebrightness(evening)
- Bluemoon ⚙ -Adjustthebrightnessfor darkambientlight(nighttime)
3PressVOLDOWNorVOLUPtoadjust thebrightness.
EachtimeVOLDOWNorVOLUPispressed, thecursormovestowardstheleftorright.
The level indicates the brightness of the screen being adjusted. The farther the cursor moves other right, the brighter the screen becomes.
■ If you donotoperatethe function within about 30 seconds, the screen automatically return to the ordinary display.
■Toreturntotheordinarydisplay,press
WIDE/MENUandhold.
Setup
Settingthecomponentvideo
SelecttheappropriatesettingfortheAVdeviceconnectedtothisunit'sCOMPONENT (componentinput).Nomally,settoMODE1.
- Depending on the connected AV device, MODE1 setting displays no images. In this case, MODE2 may be effective.
1PressSRC/POWERandholduntilthe unitturnsoff.
2PressWIDE/MENUandholdtodisplay thesetupmenu.
TheSETUPMENUappearsonthedisplay.
3PressWIDE/MENUtoselect VCR1[COMPONENT].
PressWIDE/MENUrepeatedlytoswitchbetweenthefollowingadjustmentfunctions:
VCR1COMPONENT—
VCR1(VCR1 colorsystem)—VCR2(VCR2 colorsystem)—POWER.C(powercontrol)
4PressVOLDOWNorVOLUPtoselect thedesiredsetting.
EachtimeVOLDOWNorVOLUPispressed, thesettingswitchesbetweenMODE1and MODE2.
■ If you donotoperatethe function within about 30 seconds, the screen automatically return to the ordinary display.
■Toreturntotheordinarydisplay,press WIDE/MENUandhold.
Selectingthevideoformat
WhenthisunitisconnectedtoanAVdevice, youneedtoadjustthevideoformattosuitthat AVdevice.
1PressSRC/POWERandholduntilthe unitturnsoff.
2PressWIDE/MENUandholdtodisplay thesetupmenu.
TheSETUPMENUappearsonthedisplay.
3PressWIDE/MENUtoselectVCR1or VCR2.
PressWIDE/MENUrepeatedlytoswitchbetweenthefollowingadjustmentfunctions: VCR1COMPONENT—VCR1(VCR1colorsystem)—VCR2(VCR2 colorsystem)—POWER.C(powercontrol)
4PressVOLDOWNorVOLUPtoselect thedesiredvideoformat.
EachtimeVOLDOWNorVOLUPispressed, thevideoformatisselectedinthefollowing order:
AUTO—NTSC—PAL—SECAM
■ If AUTO is selected, NTSC, PAL and SECAM are automatically identified and displayed.
■ Broadcastreceptionmaybeinferiorwhen AUTOisselected.
■ If you donotoperatethe function within about 30 seconds, the screen automatically return to the ordinary display.
■Toreturntotheordinarydisplay,press WIDE/MENUandhold.
Setting the power control function
Whenconnectingwithaheadunitwhichhas apowercontrolfunction,suchasAVH-P7900DVD,youcanturnthisdisplayunitON orOFFusingtheheadunit.
- WhenthisfunctionissettoFRONT, a 26pincomponentcable(e.g.,CD-CP300)is required.
1PressSRC/POWERandholduntilthe unitturnsoff.
2PressWIDE/MENUandholdtodisplay thesetupmenu.
TheSETUPMENUappearsonthedisplay.
3PressWIDE/MENUtoselectPOWER.C. PressWIDE/MENUrepeatedlytoswitchbetweenthefollowingadjustmentfunctions: VCR1COMPONENT—VCR1(VCR1colorsystem)—VCR2(VCR2 colorsystem)—POWER.C(powercontrol)
4PressVOLDOWNorVOLUPtoselect thedesiredsetting.
EachtimeVOLDOWNorVOLUPispressed, thefollowingsettingsareselected:
• NORMAL—Youcanturnthisdisplayunit on/offbypassing SRC/POWER
- FRONT-Youcanturnthisdisplayuniton/offusingaheadunitwithapowercontrol function
■IfFRONTisselected,youcannotturnthisdisplayuniton/offbypressingSRC/POWER.
■ If you donotoperatethe function within about 30 seconds, the screen automatically return to the ordinary display.
■Toreturntotheordinarydisplay,press
WIDE/MENUandhold.
Connection and installation

CAUTION
- PIONEERdoesnotrecommendthatyouinstallorserviceyourdisplayunityourself.Installingorservicingtheproductmayexposeyoutoriskofelectricshockorotherhazards.Referallinstallationandservicingofyourdis-playunittoauthorizedPioneerservicepersonnel.
- Secureallwiringwithcableclampsorelectricaltape.Donotallowanybarewiringtore-mainexposed.
- Donotdrillaholeintotheenginecompartmenttoconnecttheyellowcableofthedisplayunittothevehiclebattery.Engine vibrationmayeventuallycausetheinsulation tofailatthepointwherethewirepassesfrom thepassengercompartmentintotheengine compartment.Takeextracareinsecuringthe wireatthispoint.
- Makesurethatcableswill not interferewith movingpartsofthevehicle,suchasthegearshift,parkingbrakeorseatslidingmechanism.
- Donotshortenanycables.Ifyoudo,theprotectioncircuitmayfailtoworkproperly.
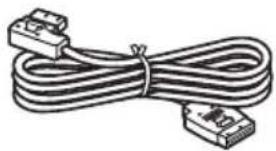
natural_image
Pure electrical circuit lines without any symbolsPowercable

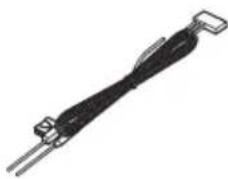
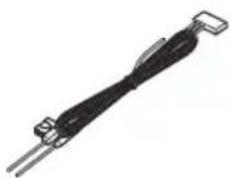
natural_image
Coiled cable with two connectors (no text or symbols visible)Displaycable
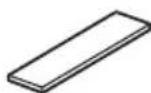
Hookfastener(2pcs.)
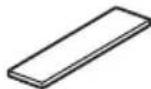
Loopfastener(2pcs.)

Bracketstopper
Partssupplied
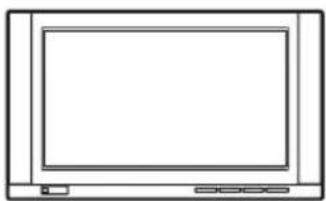
natural_image
Line drawing of a flat-screen monitor with control buttons at the bottom (no text or symbols)Displayunit

natural_image
Front view diagram of a network device with ports and connectors (no text or labels)Hide-awayunit

Connection and installation
Connections

Important
- Whenthisunitisinstalledinavehiclewithout ACC(accessory)positionontheignition switch,redcablemustbewiredtotheterminalthatcandetecttheoperationoftheignitionkey. Otherwise,batterydrainmayresult.

ACC position

No ACC position
- Useofthisunitinconditionsotherthanthe followingcouldresultinfireormalfunction. —Vehicleswitha12-voltbatteryandnegative grounding.
- Topreventashort-circuit,overheatingormal-function,besuretofollowthedirections below.
—Disconnectthenegativeterminalofthe batterybeforeinstallation.
—Securethewiringwithcableclampsoradhesivetape.Toprotectthewiring,wrapadhesivetapearoundthemwheretheylie againstmetalparts.
—Placeallcablesawayfrommovingparts, suchasgearshiftandseatrails.
—Placeallcablesawayfromhotplaces, suchasneartheheateroutlet.
—Donotpasstheyellowcablethrougha holeintotheenginecompartmenttoconnecttoabattery.
—Coveranydisconnectedcableconnectors withinsulatingtape.
—Donotshortenanycables.
—Nevercuttheinsulationofthepowercable ofthisunitinordertosharethepower withotherdevices.Currentcapacityofthe cableislimited.
—Useafuseoftheratingprescribed.
Connection and installation
Connectingthepowercable

text_image
Pink 4 m Display cable Pink Hide-away unit Power cable Black (chassis ground) Connect to a clean, paint-free metal location. Fuse (4 A) Yellow Connect to the constant 12 V supply terminal. Fuse resistor Red Connect to terminal controlled by ignition switch (12 V DC).Connection and installation
ConnectingwithRCAcables
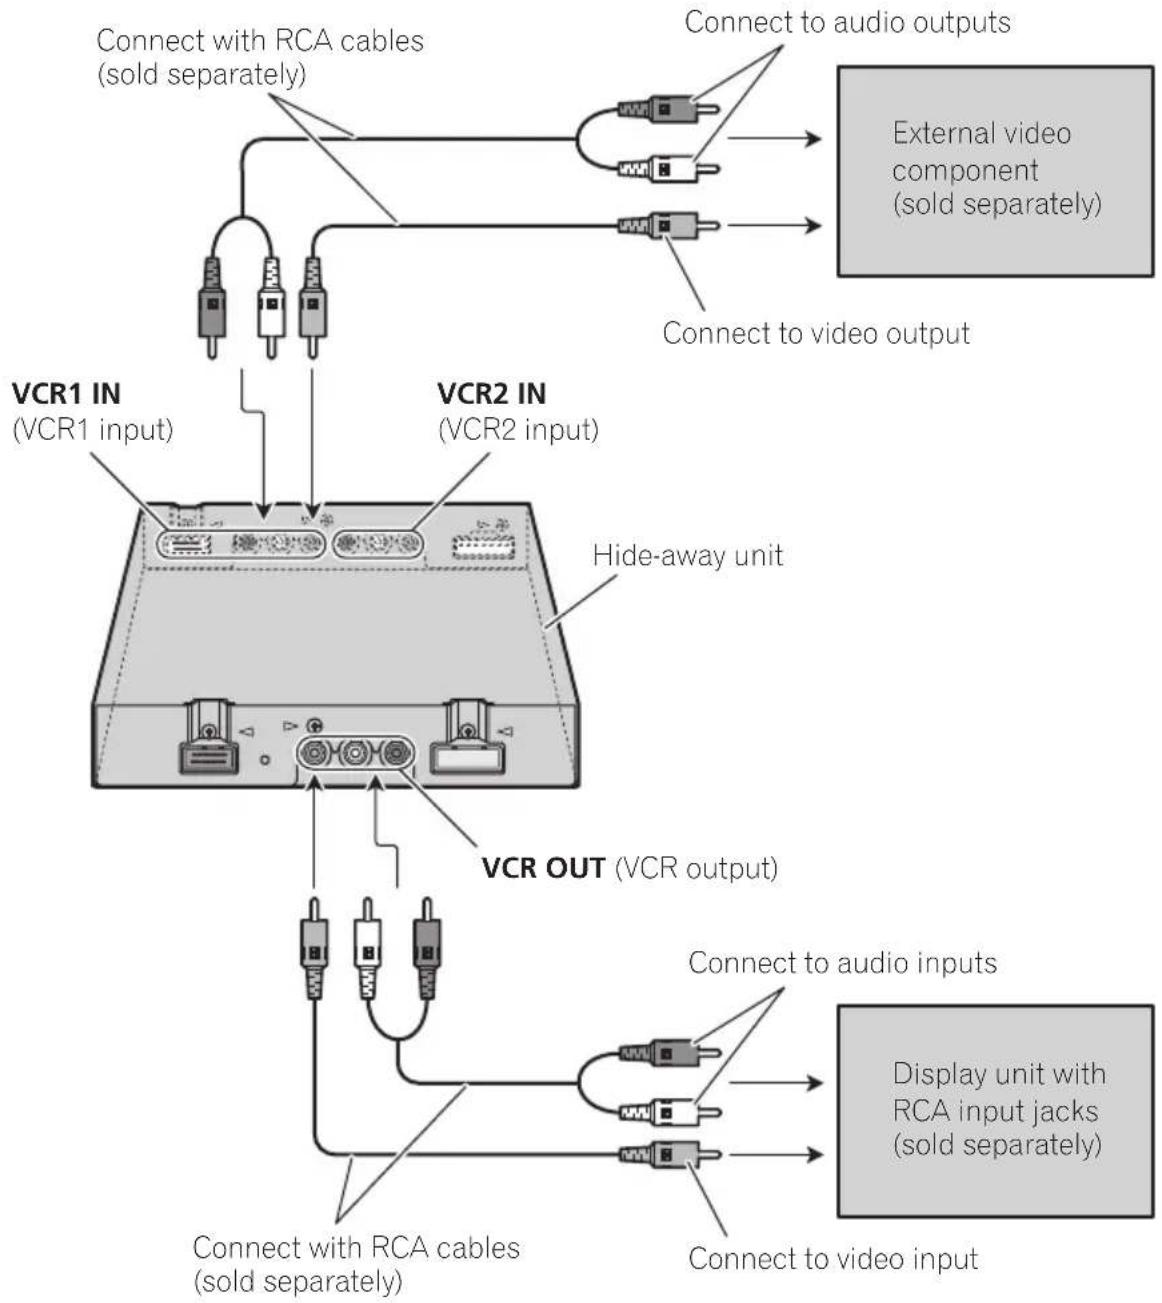
flowchart
graph TD
    A["VCR1 IN (VCR1 input)"] --> B["Connect with RCA cables (sold separately)"]
    C["VCR2 IN (VCR2 input)"] --> D["Connect to audio outputs"]
    E["VCR OUT (VCR output)"] --> F["Connect to audio inputs"]
    G["External video component (sold separately)"] --> H["Connect to video output"]
    I["Hide-away unit"] --> J["Connect with RCA cables (sold separately)"]
    K["Display unit with RCA input jacks (sold separately)"] --> L["Connect to video input"]
- ThesignalfromCOMPONENTOUT(componentoutput)andVCROUT(VCRoutput)isnotoutputwhenpowertothisdisplayunitisturnedoff.
Connection and installation
Connectingwithcomponentcables
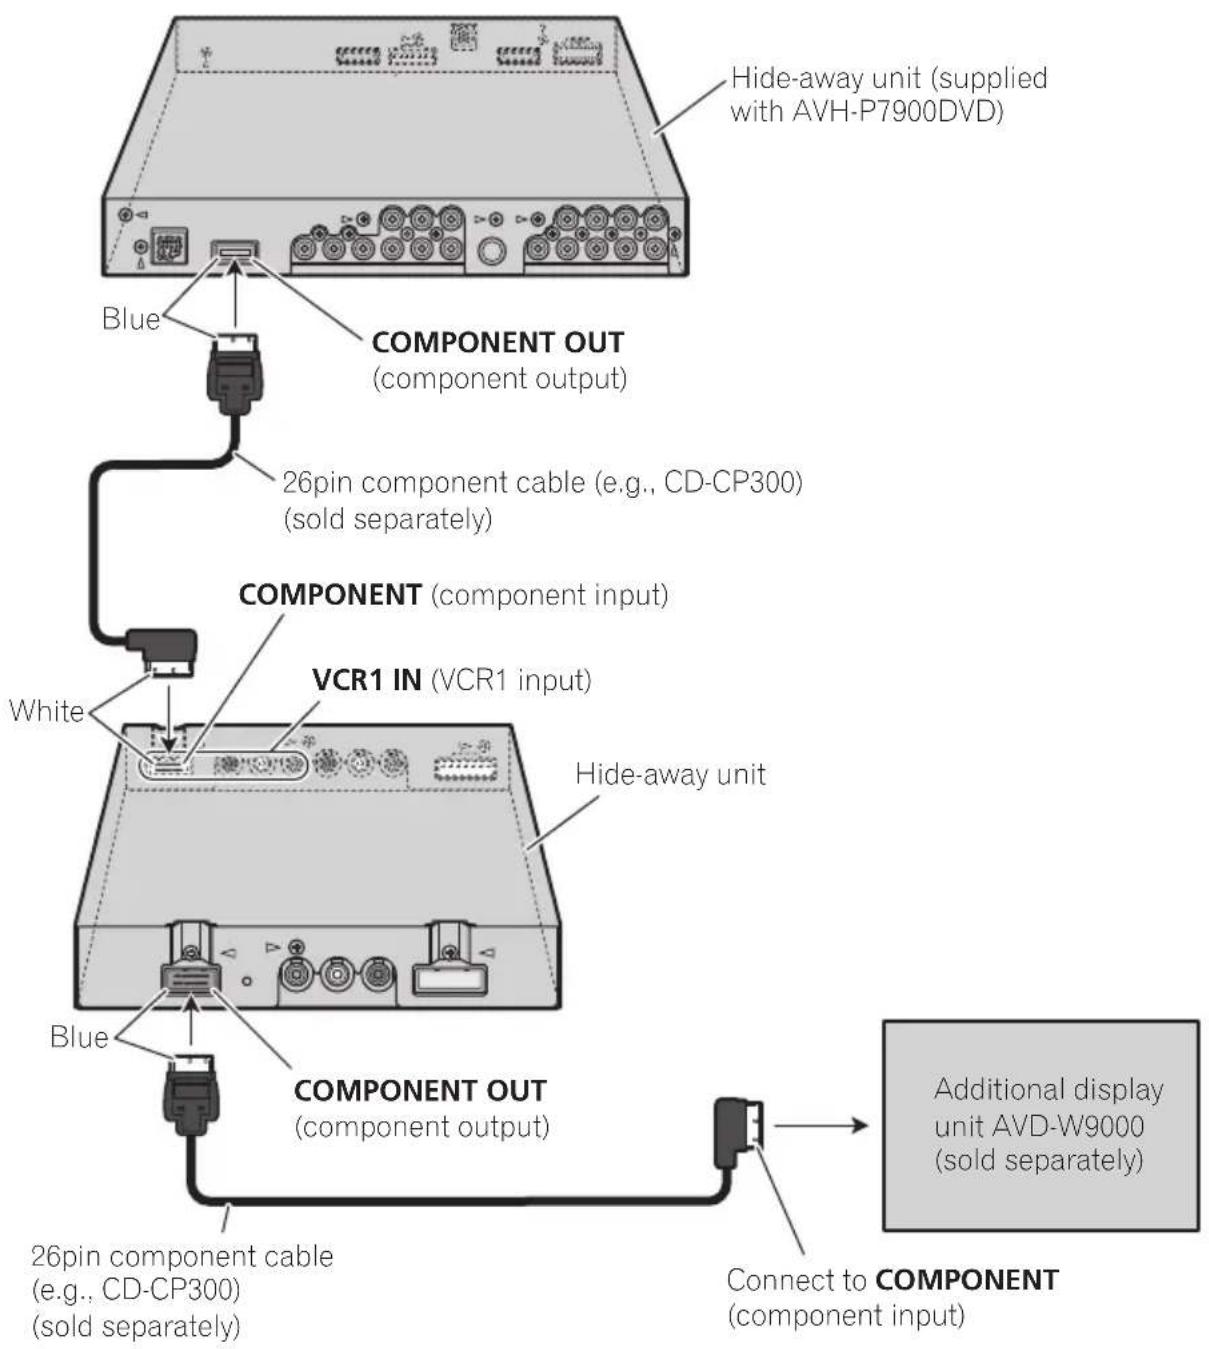
flowchart
graph TD
    A["Component OUT (component output)"] --> B["26pin component cable (e.g., CD-CP300) (sold separately)"]
    B --> C["COMPONENT (component input)"]
    C --> D["VCR1 IN (VCR1 input)"]
    D --> E["White"]
    E --> F["COMPONENT OUT (component output)"]
    F --> G["Blue"]
    G --> H["26pin component cable (e.g., CD-CP300) (sold separately)"]
    H --> I["Connect to COMPONENT (component input)"]
    I --> J["Additional display unit AVD-W9000 (sold separately)"]
    K["Hide-away unit (supplied with AVH-P7900DVD)"] --> A
- WhenyouwatchaDVD(built-inDVD playerofAVH-P7900DVD)onbothAVH-P7900DVDandthisdisplayunit,audiois notoutputfromthebuilt-inspeakerofthis displayunit.
- ThesignalfromCOMPONENTOUT(componentoutput)andVCROUT(VCRoutput)
isnotoutputwhenpowertothisdisplay unitisturnedoff.
Connection and installation
Installation

Important
- Checkall connections and systems before final installation.
- Donotuseunauthorizedparts.Useofun- authorizedpartsmaycausemalfunctions.
- Consultyourdealerifinstallationrequiresdrillingofholesorothermodificationstothevehicle.
- Donotinstallthisunitwhere: —itmayinterferewithoperationofthevehicle. —itmaycauseinjurytoapassengerasaresultofasuddenstop.
- Whenmountingthisunit, makesurenone of theleadsaretrappedbetweenthisunit and thesurroundingmetalworkorfittings.
- Donotmountthisunitnearheateroutlets whereitwouldbeaffectedbyheat,ornearthe doorswhererainwatermightsplashontoit.
- Beforedrillinganymountingholes,always checkbehindwhereyouwanttodrillthe holes.Donotdrillintothegasline,brakeline, electricalwiringorotherimportantparts.
- If this unit is installed in the passenger compartment, anchor it securely so it does not break freewhile the vehicle is moving, causing injury or an accident.
- If this unit is installed under the front seat, makes sure it does not obstruct seat movement. Route all leads and cord scarefully around the sliding mechanism so they do are not caught or pinched in themechanism and cause short-circuit.
Installingthehide-awayunit
Thoroughlywipeoffthesurfacebeforeaffixing thehookandloopfasteners.
- If the hook fasteners adher to the car mat directly, you may install this unit without using the loop fasteners.
●Mountthehide-awayunitusingthe hookandloopfasteners.

text_image
Hide-away unit Hook fastener Loop fastenerCar mat or chassis

Usingthedisplaycorrectly

CAUTION
- Ifliquidorforeignmattersshouldgetinside thisunit,turnoffthepowerimmediately and consultyourdealerorthenearestauthorized PIONEERServiceStation.Donotusetheunit inthisconditionbecausedoingsomayresult infire.electricshock,orotherfailure.
- Ifyounoticesmoke, astrangenoiseorsmell, oranyotherabnormalsignsfromthedisplay, turnoffthepowerimmediatelyandconsult yourdealerorthenearestauthorized PIONEERServiceStation. Usingthisunitin thisconditionmayresultinpermanentdamagetothesystem.
- Donotdisassembleormodifythisunit, as therearehigh-voltagecomponentsinside whichmaycauseelectricshock.Besureto consultyourdealerorthenearestauthorized PIONEERServiceStationforinternalinspection,adjustments,orrepairs.
Handlingthedisplay
- Whenthedisplayissubjectedtodirectsunlightforalongperiodoftime, itwillbecomeveryhotresultinginpossible damagetotheLCDscreen. You should avoid exposingthedisplayunittodirect sunlightasmuchaspossible.
- Thedisplayunitshouldbeusedwithinthe specifiedtemperatureranges.(Referto Specificationsonpage21.) Attemperatureshigherorlowerthanthe operatingtemperaturerange,thedisplay maynotoperatenormally.
- TheLCDscreenisexposedinordertoincreaseitsvisibilitywithinthevehicle. Pleasedonotpressstronglyonitasthis maydamageit.
- DonotpushtheLCDscreenforcefullyas thismayscratchit.
Liquidcrystaldisplay(LCD)screen
- Ifthedisplayunitisinstallednearthevent ofanairconditioner, makesurethatair fromtheairconditionerisnotblowingon it. Heatfromtheheatermaydamagethe LCDscreen, andcoolairfromthecooler maycausemoisturetoforminsidethedisplayresultinginpossibledamage.
- Smallblackdotsorwhitedots(brightdots) mayappearontheLCDscreen.Theseare duetothecharacteristicsoftheLCD screenanddonotindicateaproblemwith thedisplay.
•TheLCDscreenwillbedifficulttoseeifitis exposedtodirectsunlight. - When using a portable phone, keep the antenna of the portable phone away from the display to prevent disruption of the video by the appearance of spots, colored stripes, etc.
Keepingthedisplayingood condition
- When removing dust from the screen or cleaning the display, first turn the system power off, then wipewith as of t dry cloth.
- Whenwipingthescreen, takecarenotto scratchthesurface. Donotuseharshor abrasivechemicalcleaners.
LED(light-emittingdiode) backlight
- Atlowtemperatures, using the LED backlight may increase image lag and degrade the image quality because of the characteristic of the LCD screen. Image quality will improve with an increase in temperature.
- ToprotecttheLEDbacklight,displaywill darkeninthefollowingenvironment: —Inthedirectsunlight —Neartheheatervent
AdditionalInformation
• The product lifetime of the LED backlight is more than 10000 hours. However, it may decrease if used in high temperatures.
- IftheLEDbacklightreachestheendofits productlifetime,thescreenwillbecome darkandtheimagewillnolongerbeprojected.Inthiscase,pleaseconsultyour dealerorthenearestauthorizedPIONEER ServiceStation.
AdditionalInformation
Specifications
General
Powersource....14.4VDC(10.8Vto15.1V allowable)
Groundingsystem......Negativetype
Max.currentconsumption 2.5A
Storagetemperaturerange -20^ Cto + 80°C
Displayunit
Dimensions(W×H×D)...251mm×156mm×40 mm
Weight....1.2kg
Screensize/aspectratio.....9.0inchwideXGA (effectivedisplayarea:199.7 mm×112.3mm)
Pixels....2764800[1280(Horizontal) ×720(Vertical)×3(RGB)]
Displaymethod......TFTactivematrix,transmissivetype
Videoformat....480i/60,480p/60,576i/50, 576p/50,1080i/60,720p/60 NTSC/PAL/SECAMcompatible
Built-inspeaker....40mm×15mm(Oval-type) × 2
Headphoneoutputlevel.....8mW+8mW/16Ω
Operatingtemperature range -10^ C to +50^ C
Hide-awayunit
Componentinputlevel.....Y:1.0Vp-p/75Ω Cb,Cr:0.7Vp-p/75Ω
Componentoutputlevel.....Y:1.0Vp-p/75Ω Cb,Cr:0.7Vp-p/75Ω
Operatingtemperature range -10^ Cto + 60^ C

Note
Specificationsandthedesignaresubjecttomodificationswithoutnoticeduetoimprovements.

Содержание
natural_image
Technical line drawing of a mechanical assembly with a clamping tool inserted into a panel (no text or symbols present)natural_image
Diagram showing cable insertion into a device panel with a hand holding a connector (no text or symbols present)Снятие дисплея
natural_image
Diagram showing a hand inserting a cable into a device panel, with no visible text or symbols.text_image
Diagram of a computer monitor with labeled parts and an inset view showing the front panel and rear panel.natural_image
Line drawing of a flat-screen monitor with no text or symbolsДисплей

natural_image
Front view of a network device with ports and connectors (no visible text or symbols)Скрытое устройство
natural_image
Close-up of a black cable or wire component with two metal pins (no text or symbols visible)Шнур питания
natural_image
Coiled cable with two connectors (no text or symbols visible)Кабель дисплея
Visit www.pioneer.eu to register your product.
4-1,MEGURO1-CHOME,MEGURO-KU
TOKYO153-8654,JAPAN
Корпорация Пайонир
PIONEERELECTRONICSAUSTRALIAPTY.LTD.
178-184BoundaryRoad, Braeside, Victoria3195, Australia
TEL:(03)9586-6300
PIONEERELECTRONICSOFCANADA, INC.
300AllstateParkway, Markham, OntarioL3R0P2, Canada
TEL:1-877-283-5901
TEL:905-479-4411
PIONEERELECTRONICSDEMEXICO,S.A.deC.V.
Blvd.ManuelAvilaCamacho13810piso
Col.LomasdeChapultepec,Mexico,D.F.11000
TEL:55-9178-4270
先鋒股份有限公司
總公司:台北市中山北路二段44號13樓
電話:(02)2521-3588
先鋒電子(香港)有限公司
香港九龍尖沙咀海港城世界商業中心
9樓901-6室
電話:(0852)2848-6488
PublishedbyPioneerCorporation.
Copyright©2008byPioneerCorporation.
Allrightsreserved.
права ©2008PioneerCorporation.Bce
права защищены.