39HB5000 - TV VESTEL - Free user manual and instructions
Find the device manual for free 39HB5000 VESTEL in PDF.

| Product Type | LED TV |
| Brand | Vestel |
| Model | 39HB5000 |
| Screen Size | 39 inches (99 cm diagonal) |
| Resolution | HD Ready (1366 x 768) |
| Display Technology | LED |
| Dimensions (without stand) | 88.5 x 51.2 x 7.6 cm |
| Weight (without stand) | 6.2 kg |
| Power Consumption (typical) | 65 W |
| Standby Power Consumption | < 0.5 W |
| Power Supply | AC 100-240 V, 50/60 Hz |
| Connectivity | 2 x HDMI, 1 x USB, 1 x SCART, 1 x RF, 1 x CI slot |
| Audio Output | 2 x 8W speakers |
| Operating System | None (basic TV) |
| Tuner | DVB-T2/C/S2 |
| Remote Control | Included (RC type) |
| Key Functions | Teletext, EPG, sleep timer, parental lock |
| Cleaning Instructions | Wipe with a soft, dry cloth. Do not use liquids. |
| Safety Precautions | Keep ventilation slots clear; do not expose to rain or moisture. |
| Spare Parts Availability | Contact authorized service centers for spare parts. |
| Repairability | Repairable by qualified technicians; see manual for guidance. |
| Warranty | Standard 2 years (subject to region) |
Frequently Asked Questions - 39HB5000 VESTEL
User questions about 39HB5000 VESTEL
0 question about this device. Answer the ones you know or ask your own.
Ask a new question about this device
Download the instructions for your TV in PDF format for free! Find your manual 39HB5000 - VESTEL and take your electronic device back in hand. On this page are published all the documents necessary for the use of your device. 39HB5000 by VESTEL.
USER MANUAL 39HB5000 VESTEL
text_image
Diagram showing a mechanical or electrical component with numbered parts and directional arrows indicating flow or movement.natural_image
Diagram of a cylindrical device with labeled terminals and internal components, no readable text or symbols present.Fişi Takın
natural_image
Symbol of a trash bin crossed with no text or numbers, representing waste sorting or disposal (no text present)First of all, congratulations for choosing our environment and technology friend product. Taking it as a goal to offer you products beyond your expectations, we present the television which is elaborately manufactured in modern facilities and subjected to strict quality controls for your use. This user manual will guide you through use of your device; you will realize that your device includes cutting edge technological solutions and is very easy to use.
Your device will serve you for long years as long as you display the necessary care and maintenance. We hope you enjoy using your device. Your device will serve you for long years as long as you display the necessary care and maintenance. We hope you enjoy using your device. This product was manufactured in environmentally friendly VESTEL ELEKTRONİK A.Ş. facilities with no harm to the nature.
Important Safety-Related Information
Please read the instructions in this manual carefully to know your device quickly and make use of all of its functions and keep for future reference. This user manual includes important information regarding first use, installation, safety, intended uses, cleaning and maintenance and troubleshooting of your device.
Follow the instructions in the user manual.

WARNING: Risk of serious injury or death.
RISK OF ELECTRIC SHOCK: Dangerous voltage.

CAUTION: Risk of injury or damage to properties.

IMPORTANT: Running the system properly.

WARNING: Additional remarks are highlighted.

MAINTENANCE: Important maintenance component.
Contents
Safety Information to Be Observed During Transport and Shipping 41
Batteries 41
WARNING......41
Liability Limitation 41
Getting Started 42
Notifications & Features & Accessories 42
Environmental Information 42
Standby Notifications....42
Accessories Included 42
TV Control Switch & Operation....42
Inserting the Batteries into the Remote 43
Connect Power 43
Antenna Connection....43
Notification....43
Specification 44
Features.... 44
(*) MY BUTTON 1 & MY BUTTON 2: ....47
Connections 48
Switching On/Off.... 49
To Switch the TV On 49
To Switch the TV Off.... 49
First Time Installation 49
Aerial Installation....50
Cable Installation 50
Satellite Installation....50
Media Playback via USB Input....50
Media Browser Menu 51
Loop/Shuffle Mode Operation 51
Quick Menu....51
General TV Operation 56
Using the Channel List.... 56
Configuring Parental Settings 56
Electronic Programme Guide (EPG)....56
Troubleshooting 57
Information....60
PC Input Typical Display Modes 60
AV and HDMI Signal Compatibility 60
(X: Not Available, O: Available) 60
Supported File Formats for USB Mode....61
Dear Customer; 62
Sub-pixel errors are mainly 2 types. 62
IMPORTANT WARNINGS....63
Optional Rights of Customer....65

natural_image
Black triangular warning symbol with an exclamation mark (no text or numbers)
text_image
CAUTION RISK OF ELECTRIC SHOCK DO NOT OPEN
natural_image
Black triangular warning symbol with a white lightning bolt inside, indicating electrical hazard (no text)CAUTION: TO REDUCE THE RISK OF ELECTRIC SHOCK DO NOT REMOVE COVER (OR BACK). NO USER-SERVICEABLE PARTS INSIDE. REFER SERVICING TO QUALIFIED SERVICE PERSONNEL.
In extreme weather (storms, lightning) and long inactivity periods (going on holiday) disconnect the TV set from the mains.
The mains plug is used to disconnect TV set from the mains and therefore it must remain readily operable. If the TV set is not disconnected electrically from the mains, the device will still draw power for all situations even if the TV is in standby mode or switched off.
Note: Follow the on screen instructions for operating the related features.
Markings on the Product
The following symbols are used on the product as a marker for restrictions and precautions and safety instructions. Each explanation shall be considered where the product bears related marking only. NOTE such information for security reasons.
Class II Equipment: This appliance is

designed in such a way that it does not require a safety connection to electrical earth.
Class II Equipment With Functional
Earthing: This appliance is designed in such

a way that it does not require a safety connection to electrical earth, the earth connection is used for functional
purposes.
Protective Earth Connection: The marked
terminal is intended for connection of the protective earthing conductor associated with the supply wiring.
Hazardous Live Terminal: The marked

terminal(s) is/are hazardous live under normal operating conditions.
Caution, See Operating Instructions: The

marked area(s) contain(s) user replaceable coin or button cell batteries.
Class 1 Laser Product: This product contains

text_image
CLASS 1 LASER PRODUCTClass 1 laser source that is safe under reasonably foreseeable conditions of operation.
WARNING
Never place a television set in an unstable or inclined locations. A television set may fall, causing serious personal injury or death. Many injuries, particularly to children, can be avoided by taking simple precautions such as;
Using cabinets or stands recommended by the manufacturer of the television set.
Only using furniture that can safely support the television set.
Ensuring the television set is not overhanging the edge of the supporting furniture.
Not placing the television set on tall furniture (for example, cupboards or bookcases) without acnhoring both the furniture and the television set to a suitable support.
Not standing the television set on cloth or other materials placed between the television and supporting furniture.
Educating children about the dangers of climbing on furniture to reach the television set or its controls. If your existing television set is being retained and relocated, the same considerations as above should be applied.
WALL MOUNTING WARNINGS
Read the instructions before mounting your TV on the wall.
The wall mount kit is optional. You can obtain from your local dealer, if not supplied with your TV.
Do not install the TV on a ceiling or on an inclined wall.
Use the specified wall mounting screws and other accessories.
Tighten the wall mounting screws firmly to prevent the TV from fall. Do not over-tighten the screws.
WARNING
Apparatus connected to the protective earthing of the building installation through the MAINS connection or through other apparatus with a connection to protective earthing – and to a television distribution system using coaxial cable, may in some circumstances create a fire hazard. Connection to a television distribution system has therefore to be provided through a device providing electrical isolation below a certain frequency range (galvanic isolator, see EN 60728-11)
IMPORTANT - Please read these instructions fully
before installing or operating
⚠ WARNING: Never let people (including children) with reduced physical, sensory or mental capabilities or lack of experience and / or knowledge use electrical devices unsupervised.
- Use this TV set at an altitude of less than 2000 meters above the sea level, in dry locations and in regions with moderate or tropical climates.
- The TV set is intended for household and similar general use but may also be used in public places.
- For ventilation purposes, leave at least 5cm of free space around the TV.
- The ventilation should not be impeded by covering or blocking the ventilation openings with items, such as newspapers, table-cloths, curtains, etc.
- The power cord plug should be easily accessible. Do not place the TV, furniture, etc. on the power cord. A damaged power cord/plug can cause fire or give you an electric shock. Handle the power cord by the plug, do not unplug the TV by pulling the power cord. Never touch the power cord/plug with wet hands as this could cause a short circuit or electric shock. Never make a knot in the power cord or tie it with other cords. When damaged it must be replaced, this should only be done by qualified personnel.
- Do not expose the TV to dripping or splashing of liquids and do not place objects filled with liquids, such as vases, cups, etc. on or over the TV (e.g., on shelves above the unit).
- Do not expose the TV to direct sunlight or do not place open flames such as lit candles on the top of or near the TV.
- Do not place any heat sources such as electric heaters, radiators, etc. near the TV set.
- Do not place the TV on the floor and inclined surfaces.
• To avoid danger of suffocation, keep plastic bags out of the reach of the babies, children and domestic animals.
- Carefully attach the stand to the TV. If the stand is provided with screws, tighten the screws firmly to prevent the TV from tilting. Do not over-tighten the screws and mount the stand rubbers properly.
- Do not dispose of the batteries in fire or with hazardous or flammable materials.
Safety Information to Be Observed During Cleaning and Maintenance
• Always unplug the device before starting cleaning and maintenance.
- Make sure that device is off and disconnected from all electrical outlets.
- Wipe the cabin with a dry soft cloth.
- Do not use damp cloth, alcohol, ammonia, corrosive material included cleaning liquid or inflammables such as thinner.
- Do not allow liquid or foreign entry bodies to enter into speaker grills or other gaps.
Safety Information to Be Observed During Transport and Shipping
- Your device must be kept in its original package to protect from damage to its accessories during transport and shipping.
Keep the product in normal position during transport.
Do not drop the device during transport and protect it against impacts.
Damages and faults that occur during transport after the delivery of the appliance to the customer are not included in the
Batteries
- Do not expose batteries to direct sunlight, fire etc. factors or extreme temperatures.
- Replace the discharged battery with a battery in shape and type explained in the section "installing the batteries to remote".
- Do not use rechargeable batteries.
- Do not use remote if there is a leak from the battery.
- Do not touch the liquid leaking from battery. Wash with water in case of contact.
WARNING
- Do not ingest the battery, Risk of Chemical Burn
- (Accompanying accessories or) This product can include a pull/button type battery. If button type battery is ingested, it may cause serious burns within your body and death only within 2 hours.
- Keep new and used batteries away from children.
- If battery housing doesn't close properly, do not use the product and keep away from children.
- If you think that batteries were ingested or exists within your body, please get medical care immediately.
Liability Limitation
Manufacturing company does not assume any responsibility for damages and injuries that might be caused due to not observing the instructions in this user manual,
Getting Started
Notifications & Features & Accessories Environmental Information • Batterie
This television is designed to consume less energy to help save the environment. To reduce energy consumption, you should take the following steps:
If you set the Power Save Mode as Eco, the TV will switch to energy-saving mode. The Power Save Mode settings can be found in the 'Picture' section of the Main Menu. Note that some picture settings will be unavailable to be changed.
If Picture Off is selected, "Screen will be off in 3 seconds." message will be displayed. Select PROCEED and press OK to continue. The screen will be off immediately.
When the TV is not in use, please switch off or disconnect the TV from the mains plug. This will also reduce energy consumption.
Standby Notifications
1) If the TV does not receive any input signal (e.g. from an aerial or HDMI source) for 5 minutes, the TV will go into standby. When you next switch-on, the following message will be displayed: "TV switched to standby mode automatically because there was no signal for a long time." Press OK to continue.
2) If the TV has been left on and not been operated for a while, the TV will go into standby. When you next switch-on, the following message will be displayed. "TV switched to stand-by mode automatically because no operation was made for a long time." Press OK to continue.
Accessories Included
- Remote Control
- Batteries: 2 x AAA
- Instruction Book
TV Control Switch & Operation

text_image
Diagram showing a device with labeled components and directional arrows, including numbered parts ①, ②, and ③.- Up direction
- Down direction
- Programme/Volume / AV / Standby-On selection switch
The Control button allows you to control the Volume/ Programme/ Source and Standby-On functions of the TV.
To change volume: Increase the volume by pushing the button up. Decrease the volume by pushing the button down.
To change channel: Press the middle of the button, the channel information banner will appear on screen. Scroll through the stored channels by pushing the button up or down
To change source: Press the middle of the button twice, the source list will appear on screen. Scroll through the available sources by pushing the button up or down.
To turn the TV off: Press the middle of the button down and hold it down for a few seconds, the TV will turn into standby mode.
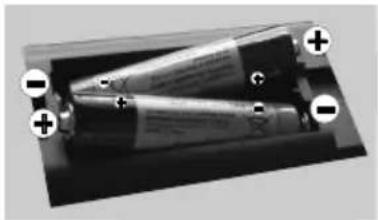
Inserting the Batteries into the Remote
Lift the cover on the back of the remote gently. Insert two AAA batteries. Make sure the (+) and (-) signs match (observe correct polarity). Place the cover back on.
natural_image
Close-up of a cylindrical electronic component with two metallic leads and a central shaft, no visible text or symbols.Connect Power
IMPORTANT: The TV set is designed to operate on 220-240V AC, 50 Hz socket. After unpacking, allow the TV set to reach the ambient room temperature before you connect the set to the mains. Plug the power cable to the mains socket outlet.
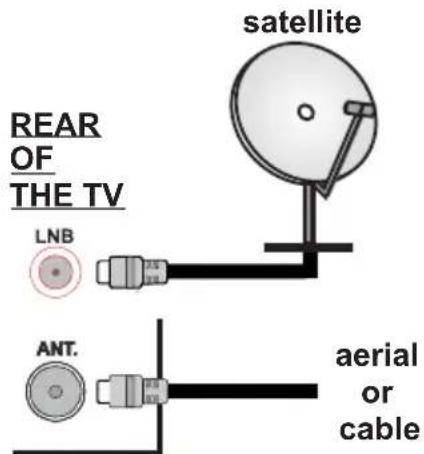
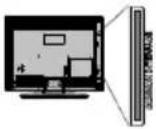
Antenna Connection
Connect the aerial or cable TV plug to the AERIAL INPUT (ANT) socket or satellite plug to SATELLITE INPUT (LNB) socket located on the back of the TV.
text_image
satellite REAR OF THE TV LNB ANT. aerial or cableNotification
Manufactured under license from Dolby Laboratories.
TRADEMARK ACKNOWLEDGMENT
"Dolby" and the double-D symbol are trademarks of Dolby Laboratories.

"HDMI, the HDMI logo and High-Definition Multimedia Interface are trademarks or registered trademarks of HDMI Licensing LLC."

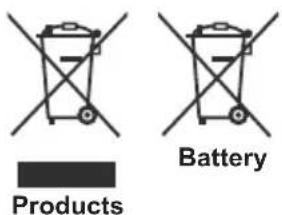
Information for Users on Disposal of Old Equipment and Batteries
These symbols indicate that equipment with these symbols should not be disposed of as general household waste. If you want to dispose of the product or battery, please consider the collection systems or facilities for appropriate recycling.
Caution: "Pb" sign will occur below the crossed-out wheelie bin symbol if the battery contains lead.
text_image
Products Battery"In conformity with the WEEE Regulation."
Specification
| TV Broadcasting | PAL B/GD/K K I/I' |
| Receiving Channels | VHF (BAND I/III)- UHF (BAND U)- HYPERBAND |
| Number of Preset Channels | 10000 |
| Channel Indicator | On Screen Display |
| RF Aerial Input | 75 Ohm (un-balanced) |
| Operating Voltage | 220-240VAC, 50Hz. |
| Audio | German+Nicam Stereo |
| Audio Output Power (WRMS.) (10% THD) | 2 x 6 W |
| Power Consumption | 75 W |
| TV Dimensions DxLxH (with foot) | 220 x 889 x 582 mm |
| TV Dimensions DxLxH (without foot) | 59(min)97(max) x 889 x 523 mm |
| Operation temperature and operation humidity: | 0°C up to 40°C, 85% humidity max |
Features
- Remote controlled colour LCD TV.
- Fully integrated digital/cable/satellite TV (DVB-T/C/S-S2)
- HDMI inputs are for connecting a device that has a HDMI socket.
- USB input.
- OSD menu system.
- Scart socket for external devices (such as DVD Players, PVR, video games, etc.)
- Stereo sound system.
- Teletext.
• Headphone connection.
• Automatic programming system. - Manual tuning.
• Automatic power down after up to six hours. - Sleep timer.
- Child lock.
• Automatic sound mute when no transmission. - NTSC playback.
• AVL (Automatic Volume Limiting). - PLL (Frequency Search).
- PC input.
- Plug&Play for Windows 98, ME, 2000, XP, Vista, Windows 7.
• Game Mode (Optional).
Pixelence
Teletext
Press “” button to enter. Press again to activate mix mode. Press once more to exit. Follow the instructions displayed on digital teletext screen.
Digital Teletext (for UK only)
Press “button to view digital teletext information. Operate it with the coloured buttons, cursor buttons and the OK button. The operation method may differ depending on the contents of the digital teletext. Follow the instructions displayed on the digital teletext screen. When the “button is pressed again, the TV returns to television broadcast.
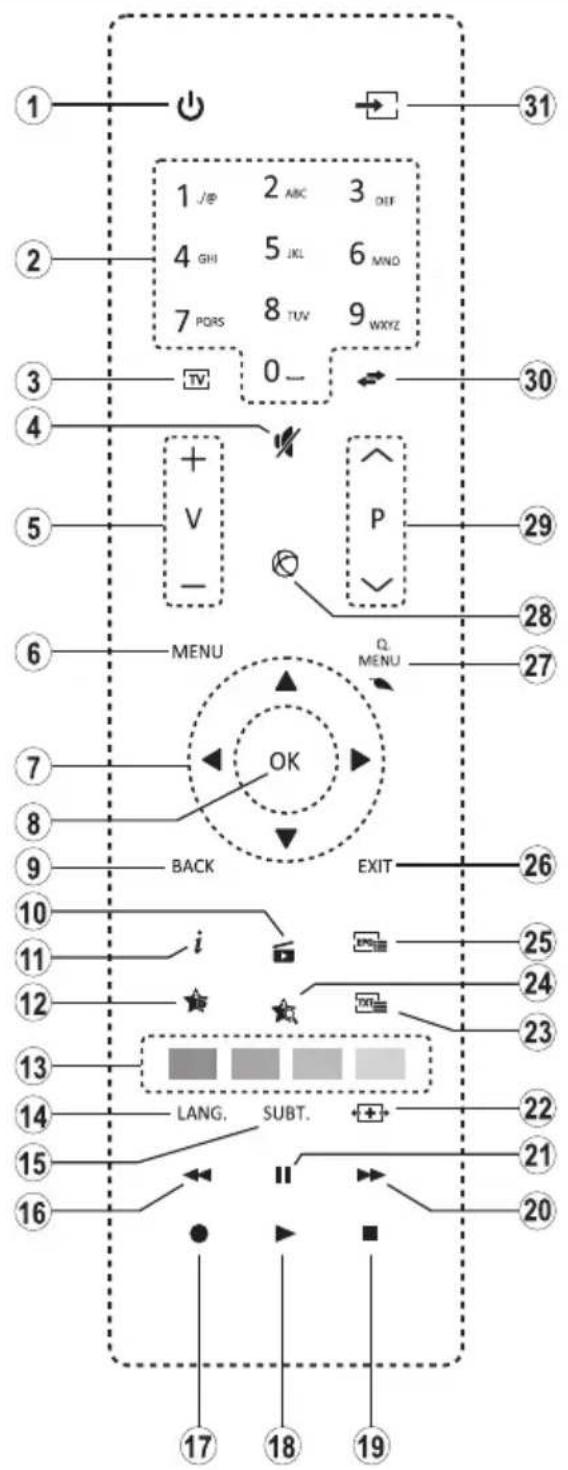
Remote Control
text_image
1 2 3 4 5 6 7 MENU 8 BACK 9 i 10 11 12 13 14 15 16 17 18 19 1 J/ε 2 ABC 3 DEF 4 GHI 5 IKL 6 MNO 7 PQRS 8 TUV 9 WXYZ 0 - P Q. MENU OK EXIT LANG, SUBT. 20 21 22 23 24 25 26 27 28 29 30 31- Standby: Switches On / Off the TV
- Numeric buttons: Switches the channel, enters a number or a letter in the text box on the screen.
- TV: Displays channel list / Switches to TV Source
- Mute: Completely turns off the volume of the TV
- Volume +/-
- Menu: Displays TV menu
- Directional buttons: Helps navigate menus, content etc. and displays the subpages in TXT mode when pressed Right or Left
- OK: Confirms user selections, holds the page (in TXT mode), views channel list (DTV mode)
- Back/Return: Returns to previous screen, opens index page (in TXT mode)
- Media browser: Opens the media browsing screen
- Info: Displays information about on-screen content, shows hidden information (reveal - in TXT mode)
- My button 1 (*)
- Coloured Buttons: Follow the on-screen instructions for coloured button functions
- Language: Switches among sound modes (analogue TV), displays and changes audio/subtitle language (digital TV, where available)
- Subtitles: Turns subtitles on and off (where available)
- Rapid reverse: Moves frames backwards in media such as movies
-
No function
-
Play: Starts to play selected media
- Stop: Stops the media being played
- Rapid advance: Moves frames forward in media such as movies
- Pause: Pauses the media being played
- Screen: Changes the aspect ratio of the screen
- Text: Displays teletext (where available), press again to superimpose the teletext over a normal broadcast picture (mix)
- My button 2 (*)
- EPG (Electronic programme guide): Displays the electronic programme guide
- Exit: Closes and exits from displayed menus or returns to previous screen
- Quick Menu: Displays a list of menus for quick access
- No function
- Programme +/-
- Swap: Quickly cycles between previous and current channels or sources
- Source: Shows all available broadcast and content sources
(\*) MY BUTTON 1 & MY BUTTON 2:
These buttons may have default functions depending on the model. However you can set a special function to these buttons by pressing on them for five seconds when on a desired source or channel. A confirmation message will be displayed on the screen. Now the selected MY BUTTON is associated with the selected function.
Note that if you perform First Time Installation, MY BUTTON 1&2 will return to their default function.
Connections
| Connector Type Cables Device | |||
 | ScartConnection(back) |  |  |
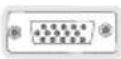
 | VGAConnection(back) |  |  |
 SIDE AV SIDE AV | PC/YPbPrAudioConnection(side) | 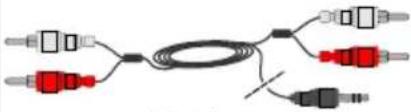 Side AudioYPbPr or PCConnection Cable Side AudioYPbPr or PCConnection Cable |  |
 | HDMIConnection(back) | 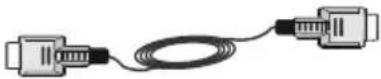 |  |
 SPDIF SPDIF | SPDIFConnection(back) |  |  |
 SIDE AV SIDE AV | Side AV(Audio/Video)Connection(side) |  |  |
 HEADPHONE HEADPHONE | HeadphoneConnection(side) | 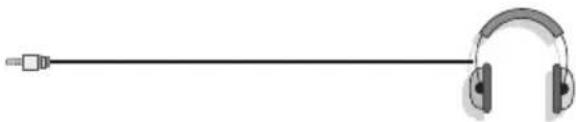 | |
 | YPbPr VideoConnection(side) | 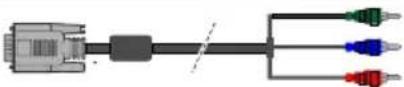 YPbPr Connection Cable YPbPr Connection Cable |  |
 | USBConnection(side) |  | 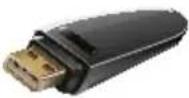 |
 | CIConnection(side) |  | [XAB6] |
NOTE: When connecting a device via the YPbPr or Side AV input, you must use a connection cable to enable connection.
See the illustrations above. | To enable PC audio, you will need to use the SIDE AV CONNECTION cable's WHITE & RED inputs. | If an external device is connected via the SCART socket, the TV will automatically switch to AV mode. When receiving DTV channels (Mpeg4 H.264) or while in Media Browser mode, output will not be available via the scart socket. | When using the wall mounting kit (optional), we recommend that you plug all your cables into the back of the TV before mounting on the wall. | Insert or remove the CI module only when the TV is SWITCHED OFF. You should refer to the module instruction manual for details of the settings.
Switching On/Off
To Switch the TV On
Connect the power cord to the 220-240V AC, 50 Hz.
To switch on the TV from standby mode either:
Press the “☐ button, P+ / P- or a numeric button on the remote control.
Press the side function switch until the TV comes on from standby.
To Switch the TV Off
Press the "button on the remote control or press the side function switch until the TV switches into standby mode.
To power down the TV completely, unplug the power cord from the mains socket.
NOTE: When the TV is switched to standby mode, the standby LED can blink to indicate that features such as Standby Search, Over Air Download or Timer is active. The LED can also blink when you switch on the TV from standby mode.
First Time Installation
When turned on for the first time, the language selection screen is displayed. Select the desired language and press OK.
The First Time Installation (FTI) screen will be displayed next. Set your preferences using the navigation buttons and when finished, press OK to continue.
You can activate Store mode option to be available in “Other settings” menu and your TV’s features will be illustrated on the top of the screen. A confirmation screen will be displayed. Select YES to proceed.
If Home Mode is selected, Store mode will not be available after the First Time Instal-
lation. Press OK button to continue.
Aerial Installation
If you select AERIAL option from the Search Type screen, the television will search for digital terrestrial TV broadcasts.
NOTE: You can press MENU button to cancel.
After all the available stations are stored, the Channel List will be displayed on the screen. If you like how the channels are sorted according to the LCN (*), please select "Yes" and than press OK.
Press MENU button to quit channel list and watch TV.
(*) LCN is the Logical Channel Number system that organizes available broadcasts in accordance with a recognizable channel sequence (if available).
Cable Installation
If you select CABLE option and press OK button on the remote control. To continue, please select YES and press OK. To cancel operation, select NO and press OK. You can select frequency ranges from this screen.
Enter the frequency range manually by using the numeric button.
NOTE: Searching duration will change depending on the selected search step.
Satellite Installation
If you select Satellite option from the Search Type screen, you can set a satellite and watch the satellite channels. When you select Satellite installation, Antenna Type menu will be displayed.
There are three types of antenna selection. You can select Antenna type as Direct, Unicable or DiSEqC switch by using “◀” or "▶" buttons.
Direct: If you have a single receiver and a direct satellite dish, select this antenna type. After selecting Direct, another menu screen will be displayed. Select an available satellite and press OK to scan for services.
Unicable: If you have multiple receivers and a unicable system, select this antenna type. Press OK to continue. Configure settings by following instructions on the screen. Press OK to scan for services.
DiSEqC switch: If you have multiple satellite dishes and a DiSEqC switch, select this antenna type. After selecting DiSEqC switch, another menu screen will be displayed. You can set four DiSEqC options (if available). Press GREEN button to scan all satellites or press YELLOW button to scan only the highlighted satellite. To save and exit press OK button.
Media Playback via USB Input
You can connect a 2.5" and 3.5" inch (hdd with external power supply) external hard disk drives or USB memory stick to your TV by using the USB inputs of the TV.
IMPORTANT! Back up your files before making any connections to the TV. Manufacturer will not be responsible for any file damage or data loss. Certain types of USB devices (e.g. MP3 Players) or USB hard disk drives/memory sticks may not be compatible with this TV. The TV supports FAT32 and NTFS disk formatting but recording will not be available with NTFS formatted disks. While formatting a USB hard disk that has 1TB (Tera Byte) or more file capacity, you can experience problems with the formatting process. Do not repeatedly quickly plug and unplug the drive. This may cause physical damage to the USB player and USB device itself. Do not pull out USB
module while playing a file.
Some USB harddisk drives might not be supported
Media Browser Menu
You can play photo, music, and movie files stored on a USB disk by connecting it to your TV. Connect a USB disk to one of the USB inputs located on the side of the TV. Pressing the Menu button while in the Media Browser mode will access the Picture, Sound and Settings menu options. Pressing the Menu button again will exit from this screen. You can set your Media Browser preferences by using the Settings Menu.
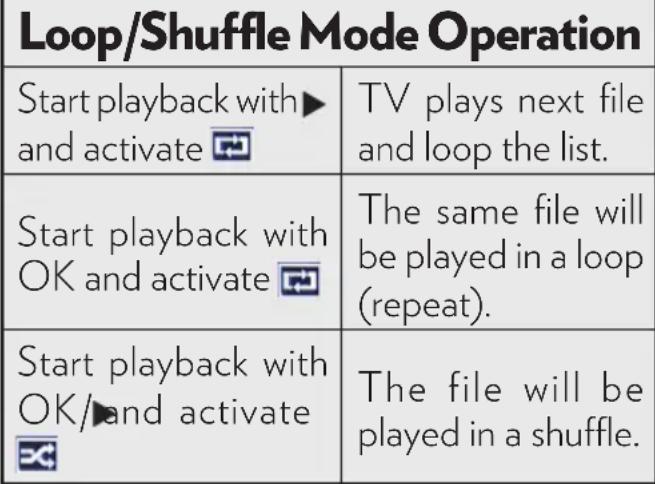 |
Quick Menu
Quick Settings menu allows you to access some options quickly. This menu includes Power Save Mode, Picture Mode, Equalizer Settings, Favourites and Sleep Timer options. Press Q.MENU button on the remote control to view quick menu. See the following chapters for the details of the listed features.
Custom Boot Up Logo
(optional)
You can personalize your TV and see your favorite image or photo on the screen each time your TV boots up. To do this, copy your favorite image files into a USB disk and open them from the Media Browser menu. When you have chosen the desired image, highlight it and press OK to view it in full screen. Press OK again to choose the image as custom logo. A confirmation message will be displayed. Select Yes and press OK again. If the image is suitable(*) you will see it on the screen during the TV's next boot up.
Note: If you perform a First Time Installation the TV will return to using the default logo, if any.
(*) Images should have an aspect ratio of 16:9 and they should be in .jpg, .jpeg or .jpe file formats. Only files with sizes no greater then 300KB are supported. The image cannot be set as boot logo, which's resolution doesn't appear on the info banner.
| TV Menu Features and Functions | |
| Mode | You can change the picture mode to suit your preference or requirements.Picture mode can be set to one of these options: Cinema,Game,Dynamic and Natural. While Mode option is highlighted,Pixellence Demo Mode: While Mode option is highlighted, Pixellence demo mode will be displayed bottom of the menu screen. Pixellence function optimizes the TV's video settings and helps to acquire a better image quality. Press OK to start Pixellence demo mode to experience Pixellence quality. Press OK button to cancel (except Game Mode). |
| Contrast | Sets the lightness and darkness values of the screen. |
| Brightness | Sets the brightness value for the screen. |
| Sharpness | Sets the sharpness value for the objects displayed on the screen. |
| Colour | Sets the colour value, adjusting the colors. |
| Power Save Mode | To set the Power Save Mode as Eco, Picture Off and Disabled.(When the Mode is Dynamic, Power Save mode is automatically set as disabled.) |
| Backlight(Optional) | This setting controls the backlight level. The backlight function will be inactive if the Power Save Mode is set to Eco. The backlight cannot be activated in VGA, Media Browser mode or while the picture mode is set to Game. |
| Noise Reduction | If the broadcast signal is weak and the picture is noisy, use the Noise Reduction setting to reduce the amount of noise. |
| Advanced Settings | |
| Dyanmic Contrast | You can change the Dynamic Contrast ratio to desired value. |
| Colour Temp | Sets the desired colour tone. |
| Picture Zoom | Sets the desired picture size from picture zoom menu.Note: Auto (Only available in Scart mode with SCART PIN8 high voltage/ low voltage switching) |
| Film Mode | Films are recorded at a different number of frames per second to normal television programmes. Turn this feature on when you are watching films to see the fast motion scenes clearly. |
| Skin Tone | Skin tone can be changed between -5 and 5. |
| Colour Shift | Adjusts the desired colour tone. |
| RGB Gain | You can configure the colour temperature values using the RGB Gain feature. |
| Reset | Resets the picture settings to factory default settings.(Except Game Mode) |
| Autoposition (in PC mode) | Automatically optimizes the display. Press OK to optimize. |
| H Position (in PC mode) | This item shifts the image horizontally to the right hand side or left hand side of the screen. |
| V Position (in PC mode) | This item shifts the image vertically towards the top or bottom of the screen. |
| Dot Clock (in PC mode) | Dot Clock adjustments correct the interference that appear as vertical banding in dot intensive presentations like spreadsheets or paragraphs or text in smaller fonts. |
| Phase (in PC mode) | Depending on the resolution and scan frequency that you input to the TV set, you may see a hazy or noisy picture on the screen. In such a case you can use this item to get a clear picture by trial and error method. |
| While in VGA (PC) mode, some items in Picture menu will be unavailable. Instead, VGA mode settings will be added to the Picture Settings while in PC mode. | |
| Sound Menu Contents | |
| Volume | Adjusts the volume level. |
| Equalizer | Selects the equalizer mode. Custom settings can be made only when in user mode. |
| Balance | This setting is used for emphasizing left or right speaker balance. |
| Headphone | Sets headphone volume. |
| Sound Mode | You can select a sound mode. (If the selected channel supports). |
| AVL (Automatic Volume Limiting) | Function sets the sound to obtain fixed output level between programmes. |
| Digital Out | Sets digital out audio type. |
| Ayarlar Menüsü İçeriği | |
| Conditional Access | Controls conditional access modules when available. |
| Language | Configures language settings (may change depending on the country selected) Preferred and current settings will be available. Current settings can be changed only if the broadcaster supports. |
| Parental | Enter correct password to change parental settings. You can easily adjust menu lock, maturity lock(may change depending on the country selected) and child lock in this menu. You can also set new pin number. |
| Timers | Sets sleep timer to turn off the TV after a certain time. Sets timers for selected programmes. |
| Date/Time | Sets date and time. |
| Sources | Enables or disables selected source options. |
| Satellite Settings | Displays the satellite settings. |
| Other Settings: Displays other setting options of the TV set: | |
| Menu Timeout | Changes timeout duration for menu screens. |
| Scan Encrypted Channels | When this setting is on, the search process will locate the encrypted channels as well. |
| Blue Background | Activates or deactivates the blue background system when the signal is weak or absent. |
| Software Upgrade | To ensure that your TV always has the most up to date firmware. |
| Application Version | Displays application version. |
| Hard of Hearing | Enables any special feature sent from the broadcaster. |
| Audio Description | Audio description refers to an additional narration track for blind and visually impaired viewers of visual media, including television and movies.You can use this feature, only if the broadcaster supports that additional narration track.Note: Audio description sound feature cannot be available in recording or time shifting mode.. |
| Auto TV Off | You can set the timeout value of auto off feature. When the timeout value is reached and the TV has not been operated for a selected time, the TV will go into standby mode. |
| Standby Search (Optional) | If the Standby Search is set to On, when the TV is in standby mode, available broadcasts will be searched. If the TV locates any new or missing broadcasts, a menu screen will be displayed, asking you whether or not to execute these changes. Channel list will be updated and changed after this process. |
| Store Mode | If you are displaying the TV in a store, you can activate this mode. Whilst StoreMode is enabled, some items in the TV menu may not be available. |
| Power Up Mode T | This setting configures the power up mode preference. |
| Biss Key | Biss is a satellite signal scrambling system that is used for some broadcasts. If you need to enter BISS key on a broadcast, you can use Biss Key setting located in the Other Settings menu. Highlight Biss Key and press OK to enter keys on the desired broadcast. |
| Install and Retune Menu Contents | |
| Automatic Channel Scan (Retune) (If available) | Displays automatic tuning options. Digital Aerial: Searches and stores aerial DVB stations. Digital Cable: Searches and stores cable DVB stations. Analogue: Searches and stores analogue stations. Digital Aerial & Analogue: Searches and stores aerial DVB and analogue stations. Digital Cable & Analogue: Searches and stores cable DVB and analogue stations. Satellite: Searches and stores satellite stations. |
| Manual Channel Scan | This feature can be used for direct broadcast entry. |
| Network Channel Scan | Searches for the linked channels in the broadcast system. |
| Analogue Fine Tune | You can use this setting for fine tuning analogue channels. This feature is not available if no analogue channels are stored. |
| First Time Installation | Deletes all stored channels and settings, resets TV to factory settings. |
English-52
General TV Operation
Using the Channel List
The TV sorts all stored stations in the Channel List. You can edit this channel list, set favourites or set active stations to be listed by using the Channel List options.
Configuring Parental Settings
To prohibit viewing of certain programmes, channels and menus can be locked by using the parental control system.
To display parental lock menu options, the PIN number should be entered. The factory default PIN number is 0000. After coding the correct PIN number, parental settings menu will be displayed.
Menu Lock: Menu lock setting enables or disables the menu access.
Maturity Lock: When set, this option gets the maturity information from the broadcast and if this maturity level is disabled, disables access to the broadcast.
Child Lock: When Child Lock is set, the TV can only be controlled by the remote control. In this case the control panel buttons will not work.
Set PIN: Defines a new PIN number.
Note: If the Country option is set to France, you can use 4725 as the default code.
Electronic Programme Guide (EPG)
Some, but not all channels send information about the current and next programmes. Press the "button to view the EPG menu.
Red button (Prev Day): Displays the pro-
grammes of previous day.
Green button (Next day): Displays the programmes of the next day.
Yellow button (Zoom): Expands programme information.
Blue button (Filter): Views filtering options.
SUBTTL: Press “≡” button to view Select Genre menu. Using this feature, you can search the programme guide database in accordance with the genre. Info available in the programme guide will be searched and results matching your criteria will be listed.
INFO(İ): Displays, in detailed, information on the programme selected.
Numeric buttons (Jump): Jumps to the preferred channel directly via numeric buttons.
OK: Displays programme options.
Text (Search): Displays "Guide Search" menu.
Now (Now) : Shows the current programme.
Software Upgrade
Your TV is capable of finding and updating automatically via the Aerial/Cable/Satellite signal.
Software upgrade search via user interface Simply navigate on your main menu. Choose Settings and select Other Settings menu. In Other Settings menu navigate on to the Software for Upgrade item and press OK button to check for a new software upgrade.
Troubleshooting
When you detect an abnormal condition on your device, you may try to resolve the issue as per the description given on the table.
If your device does not resume normal operation still, contact Call Center.
You can find authorized services list and contact information from the web site.
| PROBLEM CAUSE REMEDY | ||
| Device doesn’t turn on. | Power cable might be unplugged. | Make sure it’s plugged into the wall plug. |
| Batteries of remote controller might be discharged. | Replace the batteries of remote controller with new ones. Press the On/Off button on TV. | |
| Bad image quality. | Correct TV system might not have been selected. | Make sure you have selected right TV system. |
| Signal level might be low. | Low signal level might cause distortion of the image. Please check the antenna connection. | |
| If you’re performing a manual search, frequency settings of the channel might be incorrect. | Make sure you entered frequency settings correctly. | |
| Antenna is connected to two external devices simultaneously. | Disconnect either device. | |
| There is shade, reflection on the display. | Tuning might be not performed. | Automatic or manual tuning/fine tuning must be made. |
| No display. | Means that your TV doesn’t receive any broadcast. | Make sure that you have broadcast on your TV. |
| Antenna might have been connected incorrectly. | Make sure antenna is connected correctly. | |
| Antenna cable might be damaged. | Make sure antenna cable isn’t damaged. | |
| Incorrect connectors might be used for connecting the antenna. | Have an authorized person check antenna connection is made correctly. | |
| Incorrect buttons might have been pressed on the remote control. | Retry and make sure you press the correct buttons. | |
| Correct input source might not have been selected. | Make sure you have selected the correct input. | |
| PROBLEM CAUSE | REMEDY | |
| Display contrast, brightness and colour are low. | Display settings might be incorrect. | Adjust contrast, brightness and colour. |
| Displaying, no sound. | TV might be muted. | To cancel the mute option, press the button or turn up the volume. |
| Display is bad in computer mode. | Screen resolution and settings of computer and TV might be incompatible. | Change resolution information on your computer. |
| Sound is received from one speaker only. | Balance set might be adjusted to one direction extreme. | Check from audio menu section. |
| Remote control does not work. | Battery may have been discharged. | Replace the batteries. |
| Batteries might have been inserted incorrectly. | Check the directions of batteries and make sure you install them correctly. | |
| There might be a barrier between remote and TV. | Remove the barrier. | |
| Input options can't be selected. | No device might be connected. | Make sure a device is connected to your TV. |
| AV cables and connections might be incorrect if you have tried to connect a device. | Make sure AV cables and connections are correct. | |
| According to the place and position of viewing (up / down / right / left) there might be differences in brightness and color of the panel. | Panel's feature might cause that. | It is not a problem. It does not affect device's performance. |
Information
PC Input Typical Display Modes
The following table is an illustration of some of the typical video display modes. Your TV may not support all resolutions. Your TV supports up to 1920x1080.
| Index | Resolution | Frequency |
| 1 | 640x480 60 | Hz |
| 2 | 800x600 56 | Hz |
| 3 | 800x600 60 | Hz |
| 4 | 1024x768 60 | Hz |
| 5 | 1024x768 66 | Hz |
| 6 | 1280x768 60 | Hz |
| 7 | 1280x960 60 | Hz |
| 8 | 1280x1024 60 | Hz |
| 9 | 1360x768 60 | Hz |
| 10 | 1400x1050 60 | Hz |
| 11 | 1600x1200 60 | Hz |
| 12 | 1920x1080 60 | Hz |
AV and HDMI Signal Compatibility
| Source Supported Signals | Available | ||
| EXT(SCART) | PAL 50/60 O | ||
| NTSC 60 O | |||
| RGB 50 O | |||
| RGB 60 O | |||
| Side AV | PAL 50/60 O | ||
| NTSC 60 O | |||
| PC/YPbPr | 480l, 480P | 60Hz | O |
| 576l, 576P | 50Hz | O | |
| 720P | 50Hz,60Hz | O | |
| 1080l | 50Hz,60Hz | O | |
| 1080P | 50Hz,60Hz | O | |
| HDMI1HDMI2 | 480l | 60Hz | O |
| 480P | 60Hz | O | |
| 576l, 576P | 50Hz | O | |
| 720P | 50Hz,60Hz | O | |
| 1080l | 50Hz,60Hz | O | |
| 1080P | 24Hz, 25Hz30Hz, 50Hz,60Hz | O | |
(X: Not Available, O: Available)
In some cases a signal on the LCD TV may not be displayed properly. The problem may be an inconsistency with standards from the source equipment (DVD, Set-top box, etc.). If you do experience such a problem please contact your dealer and also the manufacturer of the source equipment.
Supported File Formats for USB Mode
| Media File Extension | Format | Remarks (Maximum resolution/Bit rate etc.) | ||
| Video | Audio | |||
| Movie | mpg, mpeg | MPEG1,MPEG2 | MPEG1: 768x576 @30PMPEG2:1920x1080 @ 30P | |
| vob | MPEG2 | 1920x1080 @ 30P | ||
| mp4 | MPEG4,Xvid , H.264 | |||
| mkv | H.264,MPEG4,VC-1 | |||
| avi | MPEG2,MPEG4,Xvid , H.264 | |||
| flv | H.264/VP6/Sorenson | H.264/VP6:1920x1080 @ 30PSorenson: 352x288 @30P | ||
| 3gp | MPEG4,H.264 | 1920x1080 @ 30P | ||
| Music .mp3 - | MPEG 1Layer 2 | 32Kbps ~ 448Kbps(Bit rate)32K, 44.1k, 48k Hz,16K, 22.05K,24K Hz (Sampling rate) | ||
| MPEG 1Layer 3 | 32Kbps ~ 320Kbps(Bit rate)32K, 44.1k, 48k Hz,16K,22.05K, 24K Hz,8K, 11.025K,12K Hz (Sampling rate) | |||
| Photo | .jpg .jpeg | BaselineJPEG | - | max WxH = 17000x100004147200bytes |
| . | Progressive JPEG | - | max WxH = 4000x40003840000bytes | |
| .bmp -- | max WxH = 5760x40963840000bytes | |||
| Subtitle | .sub .srt | - | - | - |
Dear Customer;
This appliance is manufactured with TFT LCD Display technology.
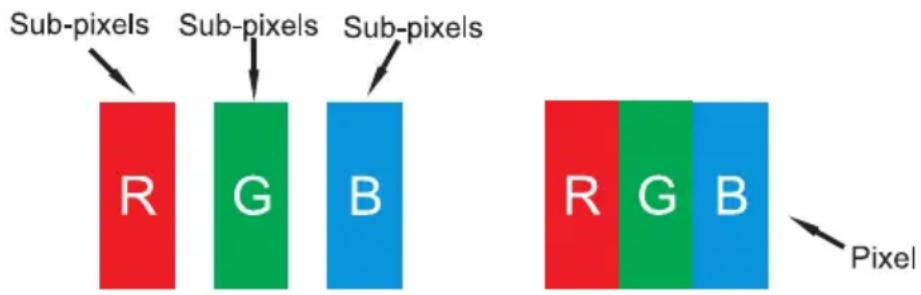
An image is created with colour light points callLCD pixels in TFT-LCD appliances.
Each pixel consists of 3 sub-pixels [fixed colour (red, green, blue) light points].
text_image
Sub-pixels R G B Sub-pixels Sub-pixels R G B PixelAs a requirement of production technologies, the abovementioned sub-pixels may cause “sub-pixel errors” by way of lighting continuously or remaining dim continuously.
Please consider the following explanation about a possible sub-pixel error.
This problem can be encountered during the production phase as well as during use.
Sub-pixel errors are mainly 2 types.
Type 1: The sub-pixel lighting continuously (may be red, green or blue)
Type 2: The sub-pixel which is continuously dim (seems black)
The sub-pixel errors determined according to the ISO 13406-2 standard are given in the following table.
| Type Exp | anation Quantity Note | ||
| Type1 | Random(at 5 mm or higher intervals) 2 | Within the compass of the criterion, not intervened | |
| Adjacent 2 pixel 1 | Within the compass of the criterion, not intervened | ||
| Adjacent 3 or more pixel Off-criterion | |||
| Type2 | Random(at 5 mm or higher intervals) 7 | Within the compass of the criterion, not intervened | |
| Adjacent 2 pixel 2 | Within the compass of the criterion, not intervened | ||
| Adjacent 3 or more pixel | Within the compass of the criterion, not intervened | ||
| Type1 and Type2 Total | 7 | Kriter Dahilidir, müdahale edilmez. | |
IMPORTANT WARNINGS
1. Rights reserved by the manufacturer:
The manufacturer reserves the right to change the features stated in the product or in the user's manual of the product without giving any information, when required by the improvements in technology.
2. Warnings about Screen Technology:
Due to TFT and Plasma technologies, there may be inactive or continuously shining white, red or blue pixels in the screen. This does not affect the performance of the product, and it is not a failure. The related details are given in the related pages of the user's manual. The manufacturer does not have any responsibility in the cases within the compass of the criteria.
3. A continuous fixed image on the screen:
Due to TFT and Plasma technologies, “burning” effect may arise in the screen after a continuous fixed image on the screen, displaying the same background continuously or watching a 4:3 video on a 16:9 television for a long time. In order to avoid this effect, it is highly recommended that you follow the followings.
- Do not watch a fixed image continuously.
- Do not watch videos in the format of 4:3 in your television which supports the format of 16:9.
- Try to use contrast and brightness at a minimum level.
4. In Full HD products;
The expected performance may not be achieved in TV broadcasts and the broadcasts of satellite receivers which are not supported by other sources in terms of high definition, DVD players or cable television; and in these broadcasts, mosaic images may occur, sharpness and resolution of the image may be low; some effects may arise on the screen. This is not a failure. It is advisable to watch high definition broadcasts for your TV which supports high definition (1920x1080) to work with a high performance as a requirement of the Full HD technology. The expected performance may not be achieved in TV broadcasts and the broadcasts of satellite receivers which are not supported by other sources in terms of high definition, DVD players or cable television; and in these broadcasts, mosaic images may occur, sharpness and resolution of the image may be low; some effects may arise on the screen. This is not a failure. If your appliance supports high definition, it is recommended that you use high definition broadcast sources in order to achieve a high screen
performance as a requirement of the high definition (HD) technology.
5. About Working Sound of the Appliance:
A working sound may be generated in the electronic circuits in your appliance as a requirement of its technology depending on the current on it while running or in standby status. This sound can sometimes be heard depending on the sensitivity of human ear and watching distance although it is within the compass of the standards. This sound does not affect the performance of your appliance and it is not a failure.
A click sound may be heard when watching TV or as it is being shut down. This is a result of loosening and contracting thermal plastic due to heat and humidity. Besides the "click" sound, it doesn't hinder the reliability or the performance.
6. Make sure that the panel (screen) of your appliance is never subjected to any external mechanical impact:
The panels (screens) of the TFT-LCS televisions are not only a piece of glass; on the contrary they are composed of layers. If your appliance is damaged in its panel (screen) which is the front part by an external impact, the inner layer of the screen might be broken / cracked even when no break/crack arises in the layer of the screen which is the closest to the outer environment. This can be technically detected by the authorized service. Therefore, make sure that the panel (screen) of your appliance is never subjected to any external mechanical impact. Otherwise, as any damage “caused by an external hit” is considered as a usage error, the manufacturer will not have any legal responsibility.
7. About the use of the appliance:
The appliance you purchased was produced for home-type use, and it can be used only at home and for the specified purposes, not for commercial or collective use. Otherwise, the manufacturer and the dealer will not be responsible for the failures within the period of warranty and free repair, which is determined in the provisions of the Act on the Protection of Consumers.
Optional Rights of Customer
Consumer may exercise any of his/her optional rights below within two years of expiry period starting with the date of delivery of the good to the consumer if the good is found to be defective as per the provisions of Law on the Protection of Consumers no. 6502, even if the defect is found later;
- To terminate the contract by stating that he is ready to return the sold good,
- To request a discount on the sale price proportional to the defect and keep the defective good, against the Seller;
- To request the sold good to be repaired at the seller's expense by bringing all repair costs to the seller if such costs are not excessive,
- If possible, to request the purchased good to be exchanged for a non-defective good, against the Seller, manufacturer or importer.
Consumer may exercise either of its rights to terminate the contract or discount from the price in proportion to the defect if free repair or replacement of the good with a non-defective fungible will bring about disproportional challenges.
Consumer may apply to Consumer Courts and Arbitration Committees for their complaints and concerns.
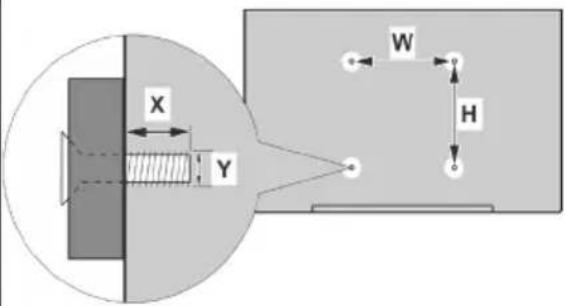
| A | VESA WALL MOUNT MEASUREMENTS | ||
| B | Hole Pattern Sizes (mm) | W | H |
| 200 | 200 | ||
| C | Screw Sizes | ||
| D | Length (X) | min. (mm) | 10 |
| max. (mm) | 13 | ||
| E | Thread (Y) | M6 | |
text_image
X Y W H| A B C D E | |||||
| English VESA W | ALL MOUNT MEASUREMENTS | Hole Pattern Sizes (mm) | Screw Sizes Length (X) | Thread (Y) | |
| Deutsch | MASSANGABEN FÜR VESA-WANDMONTAGE | Lochmustergrößen (mm) | Schraubengrößen | Länge (X) Gewinde (Y) | |
| Français | DIMENSIONS DU SUPPORT DE FIXATION MURALE VESA | Dimensions des modèles de trous de montage (mm) | Dimensions des vis | Longueur (X) Filetage (Y) | |
| Italiano | Misurazioni installazione a parete VESA | Dimensioni schema foro (mm) | Dimensioni vite | Lunghezza (X) | Filettatura (Y) |
| Português | MEDIÇÕES DE MONTAGEM MURAL VESA | Dimensões do molde de furação (mm) | Tamanhos do parafuso | Comprimento (X) | Rosca (Y) |
| Español | MEDIDAS DEL MONTAJE DE PARED VESA | Tamaños de patrón para agujero (mm) | Tamaños de tornillo | Longitud (X) | Rosca (Y) |
| Türkçe | VESA DUVARA MONTAJ APARATI ÖLÇÜLERİ | Açılacak Delik Ölçüleri (mm) | Vida Ölçüleri | Uzunluk (X) | Yüzey (Y) |
| Ελληνικ | ΔΙΑΣΤΑΣΕΙΣ ΒΑΣΗΣ ΤΟΙΧΟΥ VESA | Μεγέθη σχήματος σπών (mm) | Μεγέθη βιδών | Μήκος (X) | Σπείρωμα (Y) |
| Polski | WYMIARY DO MONTAZU NAŚCIENNEGO VESA | Rozmiary szablonu otworów (mm) | Rozmiary wkrętów | Długość (mm) | Gwint (Y) |
| čeština | ROZMĚRY DRŽÁKU NA ZEŐ VESA | Rozměry velikosti děr (mm) | Rozměry śroubů | Délka (X) Závit (Y) | |
| Magyar | VESA FALI TARTÓ MÉRETEK | Lyukak méretének nagysága(mm) | Csavar méret | Hossz (X) | Menet (Y) |
| Română | MĂSURĂTORI SUPORT PERETE VESA | Dimensiuni tipar gaură (mm) | Dimensiuni şuruburi | Lungjime (X) | Filet (Y) |
| Svenska | VESA VÄGGMONTERINGSMÄTT | Hålmönsterstorlear (mm) | Skruvstorlekar | Längd (X) Träd (Y) | |
| Nederlands | VESA WANDMONTAGE METINGEN | Grootte booropening (mm) | Schroefgroote | Lengte (X) | Draad (Y) |
| Suomi | VESA-SEINĂASENNUKSEN MITAT | Relikākuvion koot (mm) | Ruuvinkoot | Pituus (x) Kierre (Y) | |
| Norsk | VESA VEGGMONTERINGSMÄL | Hulimønster størrelser (mm) | Skruestørrelser | Lengde (x) | Träd (Y) |
| Dansk | VESA VÆGGMONTERINGS-MÄL | Hulimønster-størrelser (mm) | Skruestørrelser | Længde(X) | Träd (Y) |
| Русский | РАЗМЕРЫ НАСТЕННОГО КРЕПЛЕНИЯ VESA | Размеры системы отверстий | Размеры винтов | Длина(X) | Резьба (Y) |
| беларуская | ПАМЕРЫ НАСЦЕННАГА МАЦАВАННЯ VESA | Памеры сістэмы адтулін | Памеры вінтоў | Даўжыня (X) | Разьба (Y) |
| македонски | МЕРКИ ЗА МОНТИРАЊЕ НА СИД ЗА „BECA“ | Шема на големини на дупката (мм) | Големина на шрафот | Должина (X) | Навој (Y) |
| український | РОЗМИРИ НАСТИННОГО КРИПЛЕННЯ VESA | Відстань між кріпильними отворами, мм | Розміри гвинтів | Довжина (X) | Діаметр різьби (Y) |
| Srpski | DIMENZIJE VESA ZIDNOG NOSAČA | Dimenzije šablona za bušenje | Dimenzije zavrtnjeva | Dužina (X) | Navoj (Y) |
| Slovenčina | ROZMERY DRŽIAKA NA STENU VESA | Rozmery veľkosti dier (mm) | Rozmery skrutiek | Dĺžka (X) | Závit (Y) |
| Slovenščina | MERE STENSKEGA NOSILCA VESA | Velikosti vzorca lukenj (mm) | Velikosti vijakov | Dolžina (X) | Navoj (Y) |
| Hrvatski | VESA MJERE ZIDNOG DRŽAČA | Veličine uzorka otvora (mm) | Veličine vijka | Dužina (X) | Navoji (Y) |
| Bosanski | DIMENZIJE VESA ZIDNOG NOSAČA | Dimenzije šablona za bušenje | Dimenzije vijaka | Dužina (X) | Navoj (Y) |
| Български | РАЗМЕРИ ЗА КОМПЛЕКТ ЗА МОНТАЖ НА СТЕНА VESA | Размери на отвора (mm) | Размер на болта | Дължинат (X) | Резба (Y) |
| Lietuvių | VESA TVIRTINIMO PRIE SIENOS MATAVIMAI | Angos šablono dydis (mm) | Varžtu dydis | Ilgis (X) | Sriegis (Y) |
| Latviešu | VESA SIENAS STIPRINĀJUMA IZMĚRI | Caurumu šablona izmērs (mm) | Skrūvju izmēri | Garums (X) Vitne (Y) | |
| Eesti | VESA SEINALE KIN NITAMISE MÕÖDUD | Kruvi suuruse mõõt (mm) | Kruvi suurus | Kõrgus(x) | Keere (Y) |
| Shqip | PÉRMASAT E NJÊSISE SÉ MONTIMIT NÉ MUR VESA | Madhësitė modele të vrimave (mm) | Madhësitė e vidhave | Giatësia (X) | Filetimi (Y) |
| عربية | مQLIIS للاويت علي الجدار VESA | أحجمال القوب (ام) | أحجمال البراغي | (Х) | (У) |
| النام | VESA 2000 2010 2020 2030 2040 2050 | (النام) 2010 2020 2030 2040 | (النام) 2010 2020 2030 2040 | (Х) | (У) |
| فارسی | VESA 2020 2030 2040 2050 2060 2070 | (النام) 2010 2020 2030 2040 | (النام) 2010 2020 2030 2040 | (Х) | (У) |
