
C235 - Mp3 player EMTEC - Free user manual and instructions
Find the device manual for free C235 EMTEC in PDF.


| Product Type | Portable MP3/MP4 Player |
| Brand | EMTEC |
| Model | C235 |
| Dimensions (H x W x D) | 87.5 x 37 x 22 mm |
| Net Weight | 38 g |
| Internal Flash Memory | 2 GB |
| Power Supply | Via USB cable (computer or self-powered hub) |
| Battery Charging Time | Approximately 4 hours |
| PC Interface | High speed USB 2.0 |
| Audio Format Supported | MP3, WMA |
| Photo Format Supported | JPG |
| Video Playback | Yes (requires conversion using included software) |
| FM Radio | Yes, 87.5-108 MHz |
| Frequency Response | 60 – 20,000 Hz |
| Distortion | < 0.5% |
| Operating Temperature | 0 to 40 °C |
| Storage Temperature | -10 to 60 °C |
| Care and Cleaning | Clean with a soft cloth; avoid water and chemicals |
| Safety Precautions | Keep away from moisture, extreme temperatures, strong magnets; do not disassemble |
| Spare Parts and Repairability | Not specified; no user-serviceable parts |
| General Information | Includes USB cable, earphones, user manual; supports MSC and MTP modes |
Frequently Asked Questions - C235 EMTEC
User questions about C235 EMTEC
0 question about this device. Answer the ones you know or ask your own.
Ask a new question about this device
Download the instructions for your Mp3 player in PDF format for free! Find your manual C235 - EMTEC and take your electronic device back in hand. On this page are published all the documents necessary for the use of your device. C235 by EMTEC.
USER MANUAL C235 EMTEC
Manual
MP4 Player
C235
Influx Collection
Thank you for purchasing this C235 portable media player, which delivers a combination of style, features and user friendliness, the best combination that you can find nowhere else – a new experience of powerful, yet intuitive control over you audio and video collection.
Highlights of the player include:


Plays MP3 and WMA files

Music library, group music files by album name, artist name, song title, genre, year and playlist. (in conjunction with Windows Media Player Software)
Playlists (WMP playlist created by PC)
Plays video files (after using the Video Conversion software available from the CD)
Views photo and slideshow while enjoying your music collection
USB 2.0 high speed transfer
FM radio
LIABILITY EXEMPTION STATEMENT
- All of the information included in this manual was produced with our great caution, but there may still be some errors and mistakes. The supplier or retailer will not be held responsible for any operation errors caused by confusion or mis-interpretation of the information shown in this manual.
- As we cannot control users' understanding of this manual, Therefore the supplier or retailer will not be held responsible for any accident or other loss caused by misunderstanding of this manual. We shall not be held responsible for any loss caused by using this product.
- The supplier reserves the right to modify software, hardware and user manual of this device without prior notice.
- To make copies, publish, transfer, store in a traceable system, or translate to any other language without written authorization from the supplier is strictly prohibited.
TRADEMARKS
Windows ME, Windows 2000, Windows XP and Window Media Device are the registered trademarks of Microsoft Corp.
This product is not sponsored, endorsed or approved by Microsoft Corporation.

Warning:
C235 is a precision device made of sensitive components. Some safety precautions and guidelines must be followed. To avoid damage, make sure that you do not drop, smash or mis-use the device. Operate the device in acceptable temperature. Make sure that you only use the player where temperature between 0\ °C 40\ °C .
If the product suddenly has no response or turns off :
- Turn off the device for 15s
- Turn on the device again
SAFETY PRECAUTION

Warning:
C235 is a precision device made of sensitive components. Some safety precautions and guidelines must be followed.

Do not place heavy objects on the device. Keep away from harsh environments including humid, dusty and smoky areas.
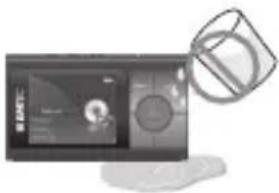
Avoid contact with water and other liquid.

Do not use water or chemicals to clean the player. Clean the surface with a soft cloth.
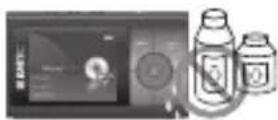
Do not clean with chemical or detergent.

Do not use excessive force on the buttons or attempt to disassemble the device.

Keep out of direct sunlight, extreme heat or cold.
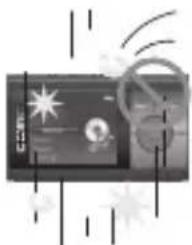
Do not drop or subject the device to impact.
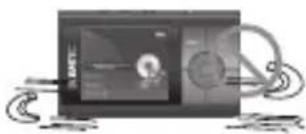
Keep the player away from strong magnets.

Do not disassemble or modify the player.

Do not dry the product with heater or microwave.
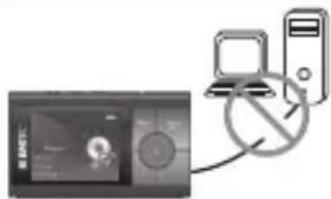
When you upload or download files using USB cable, do not disconnect during data transfer or turn the device off.

Data can be damaged because of physical impact, lightning and power failure.
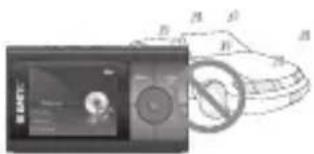
Do not use headphone/earphone while cycling, driving, or operating any motorized vehicle.
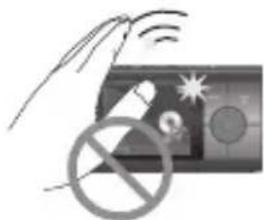
To avoid damage, make sure you do not drop, smash, bend or crash the player.


Make sure you only use the device where temperature between 0-40 C.

Reduce volume or stop using the player if you experience a ringing in your ears.

Do not use at high volume for continuous listening.
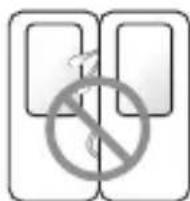
Keep headphone/ earphone cords under control to avoid getting caught on various objects.

Reduce volume while walking especially at pedestrian crosswalk.

Do not use headphone/ earphone at high volume. Hearing experts advise that do not listen to continuous, loud player for long.
LOCATION OF CONTROLS AND KEYS
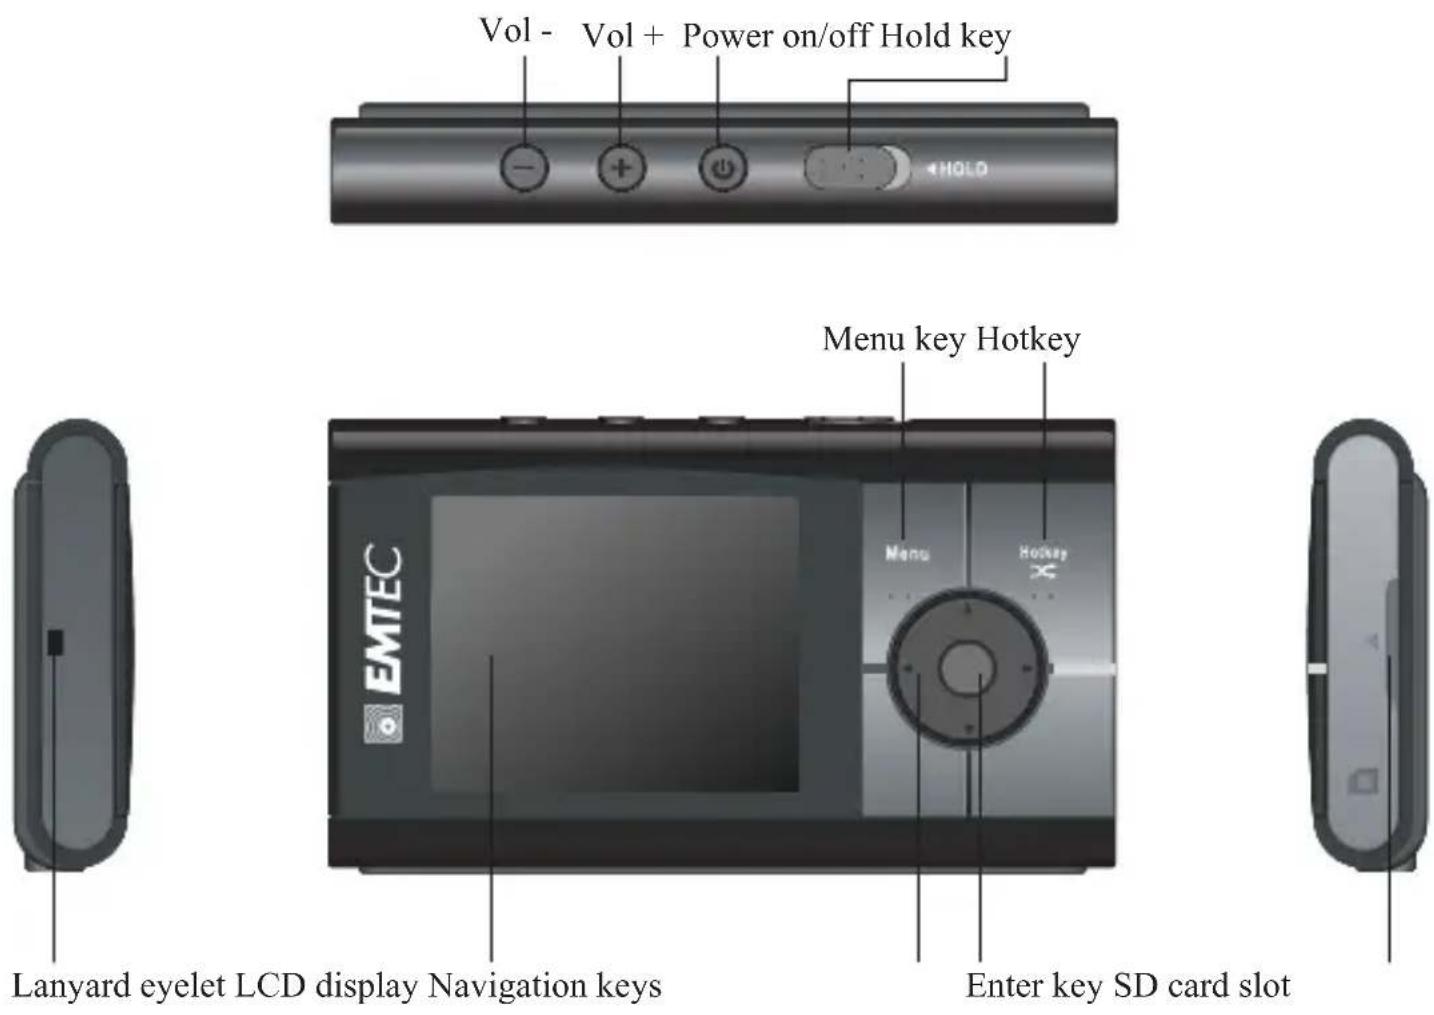

Earphone jack USB2.0 port with plastic cover (There is a reset hole beside USB2.0 port under the plastic cover)
DESCRIPTION OF LCD DISPLAY

PACKING LIST

User Manual Main Unit
USB cable (for PC connection and battery charging)

Earphone

Note:
Please keep all the packing materials for future reference or transportation.
BATTERY CHARGING
Charge the battery using the supplied USB2.0 cable. When connecting the device to PC via USB cable and it will start charging automatically. And it will take about 4 hours to charge the device fully.
Note : THE COMPUTER MUST BE ON TO CHARGE THE PLAYER CORRECTLY.


Note:
- For first time use, please charge the device for at least 4 hours.
- If the device connects to the PC via a USB hub, the USB hub must be self-powered in order to charge the battery properly.
- Charging time may be prolonged due to file transfer.
- Avoid using USB extension cable but PC rear port for stable connection.
INSTALLATION OF SD CARD
Push the card in until you hear a click. Pay attention to the card direction. Push it again to eject it.
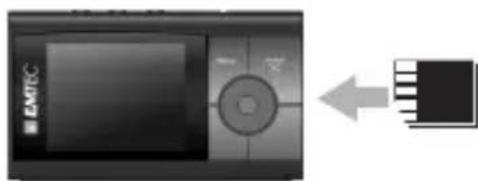

Note:
Push in or remove the card only after the player is powered off to avoid data loss or damage.
RESET
If the device freezes and has no response when operating, please shut down the device and turn it on again in 15 seconds, or insert a clip into the reset hole under the plastic cover of USB2.0 port.
MINIMUM PC SYSTEM REQUIREMENT
You can connect the device to PC via the provided USB2.0 cable for Charging and File Transfer purposes. Your PC system must meet the following minimum requirement:
- Windows 2000 (Service pack 3 or above) with Window Media Player 9 Series (DRM9 supported)
- Or Windows XP (Service pack 1 or above) with Window Media Player 10 Series (DRM 9, 10 supported in service pack 2)
- Pentium Class MMX 166 MHz processor or better
- 128MB RAM
- 50MB hard drive space
- Sound card
- USB port 1.1 (for faster data transfer, USB 2.0 is highly recommended)
The above minimum PC requirement allows you to connect the device to PC and perform basic features. There are some advanced features which require higher PC configuration.
| PC configurationFeatures | Windows 2000 (Service pack 3 or above) and XP (no service pack) with Windows Media Player 9 Series | Windows XP (Service pack 1 or above) with Windows Media Player 10 Series |
| Window Media Player playlist supported | No Yes | |
| PC connection MSC only MTP only |
MTP VS MSC
| MSC | MTP | |
| Database rebuild Not require | The device requires database rebuild after USB connection |
GETTING STARTED
Power ON
Press and hold the ⏻key for a few seconds to turn on the device as illustrated below :
Power OFF
Press and hold the ⏻key for a few seconds to turn off the device as illustrated below:

Volume adjustment
Press the + or - key to increase or decrease the volume.
Key lock
To lock the keys, slide the "Hold" button to the left side, all the keys will be disabled and there will be a "Hold" icon ( 🔺) on the LCD display.

GETTING STARTED
Battery low
When the battery power level is very low, a message will be shown on the current interface as below. It is advised that you charge the player, or it may power off automatically during use.:

Hotkey ( ✗)
Pressing the Hotkey during playback provides a shortcut to users to set their preferences. Press the hot key ( ✗) for the first time, Shuffle mode (ON or OFF) can be set as illustrated below:

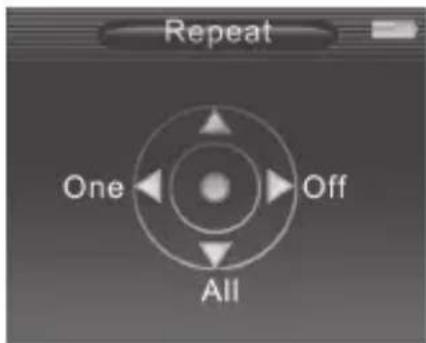
Press the hot key ( ✗) for the second time, it changes to Repeat mode (One, Off or All) as illustrated below:
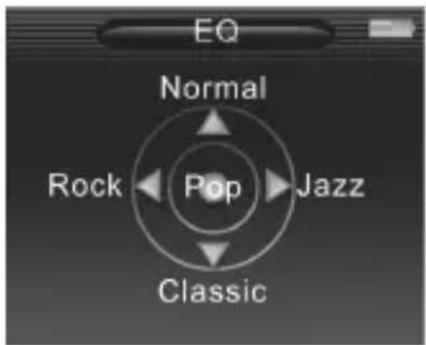
Press the hot key (✗) for the third time, it changes to the EQ mode (Normal, Pop, Rock, Jazz or Classic) as illustrated below.
CONNECTING TO A PC
Connect C235 to PC
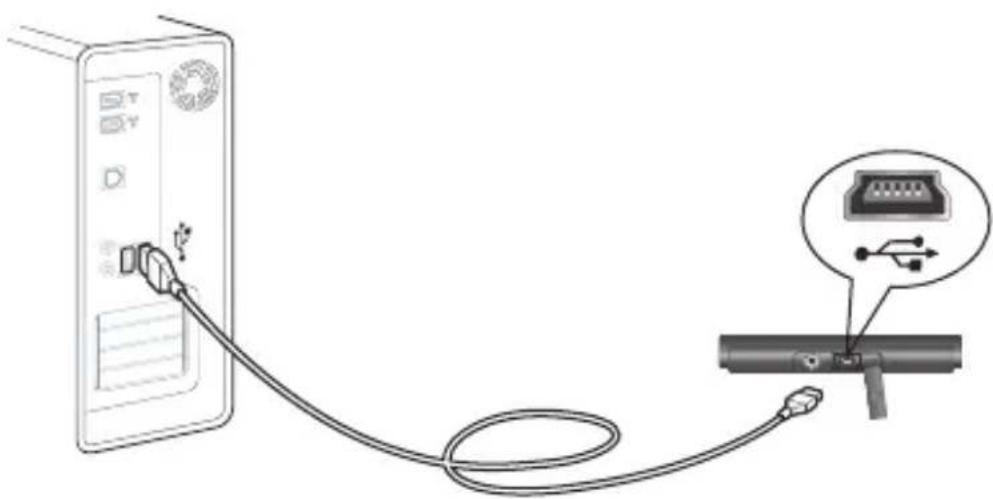
Connect the supplied USB cable to the USB port on player and to an available USB port on your computer.

Warning:
Please keep it connected until this player is safely removed from your PC after uploading or downloading is completed. Otherwise, the player may be subject to fatal failure or data loss.
BUILD MUSIC LIBRARY
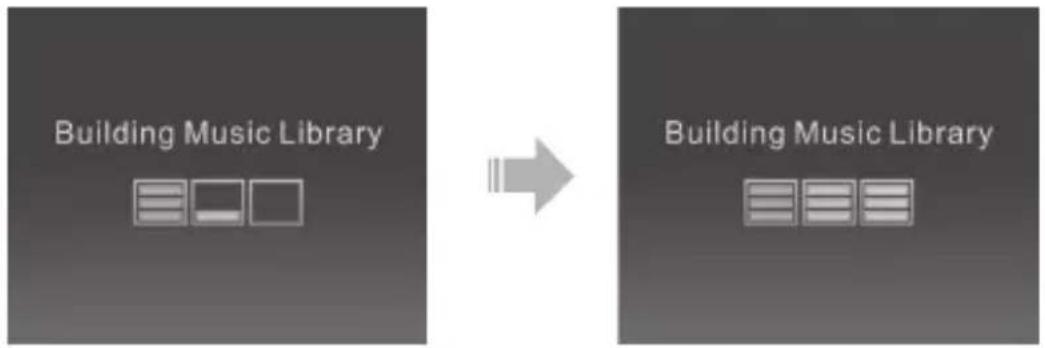
After turning on the device, it will go through a process of building music library. It is a process of updating and reorganizing the database as illustrated below:

FORMAT THE DEVICE
(Formatting is not required unless data corruption has occurred)
Windows 2000
For Window ME or 2000, connect the device with PC, right click the removable drive in "My Computer" and select "Format".
In MTP mode
For Window XP, it must be done in Windows Media player 10, click the button as the figure below:

VIDEO CONVERSION
To play your video clip in the player, you have to install the conversion software to your pc. Please follow the below instruction to install the software
Download and install the software & required library
- Insert the included CD and the installation procedure starts automatically.
- Follow the on-screen instruction to proceed the installation.
- The install shield wizard lead yon to install the required applications. Please read the instruction carefully the confirm your option.
- After the installation is completed, a short-cut will be shown on the desktop.
Way to convert a video clip
-
Connect the player to your PC.
-
Launch the application by double click the short-cut

on the desktop.

-
Click "Add File" to add the source file(s).
-
You can choose to save the converted file to the connected player, or click the folder icon at the bottom to choose the destination folder.
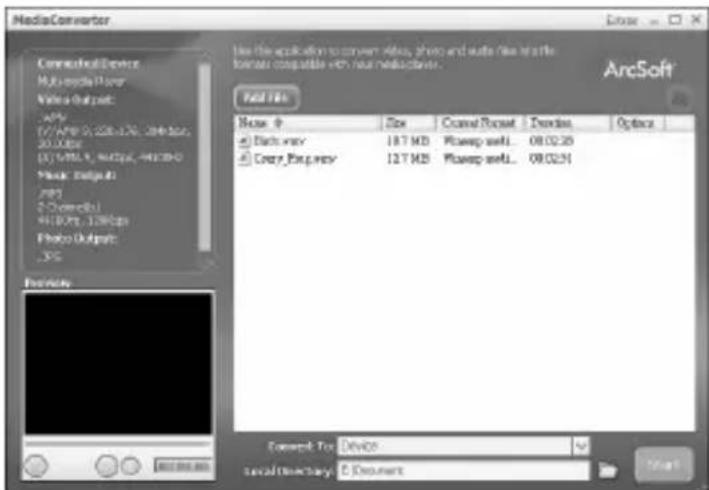
- Click "Start!" to start the encoding.
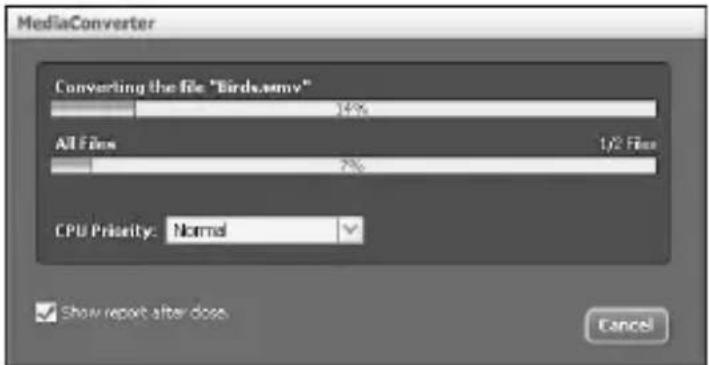
- After the encoding, you may find the converted file(s) in the target location.

- Copy/Sync the converted file(s) into the device.
(Please refer to the section of "General and DRM File Transfer")

Note:
Actual Interface of the software will subject to the changes on software version.
GENERAL AND DRM FILE TRANSFER
General file transfer
By drag and drop
MSC mode:
After the player is connected to computer for uploading/downloading, no special operation other than simple "drag-drop" is needed.
- Double click "My Computer" in Windows, you will find a new icon "Removable disk", which represents your player.
- Drag your files to "Removable Disk".
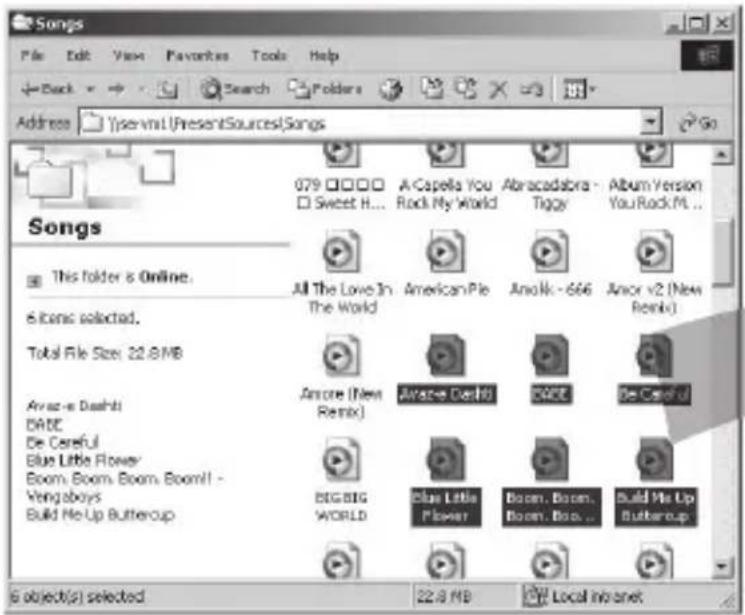
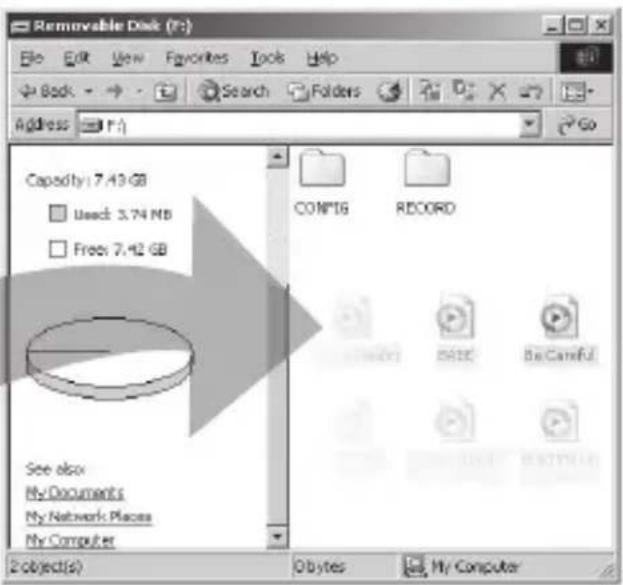
Windows XP (MTP mode):
- Double click "My Computer" in Windows, you will find a new drive

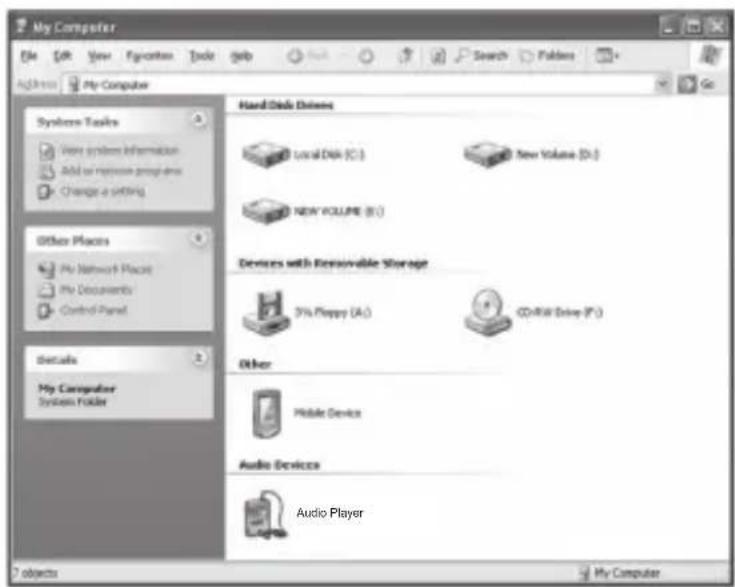
- Drag your media files to "Media" folder and other files to "Data" folder (Windows Media Player 10 installed) or "Internal Storage" (Windows media player11 installed).
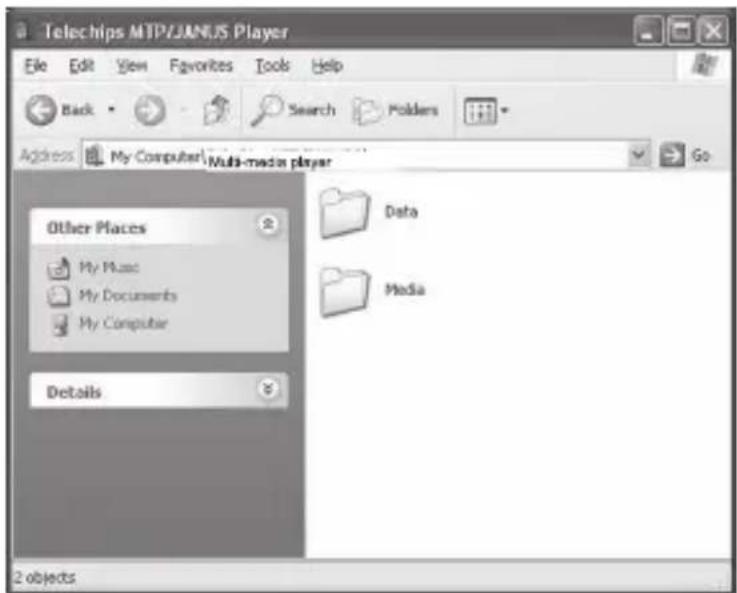

Note:
- You can also upload the files from the device to your PC.
- During uploading / downloading, keep USB cable connected to your PC. Unplug it from USB port when the uploading / downloading is finished.
- The device can store all types of data in addition to music files.
- For definition of MTP and MSC connection, please refer to FAQ chapter.
- Data files stored in the device cannot be browsed using the interface of the device.
DRM file transfer
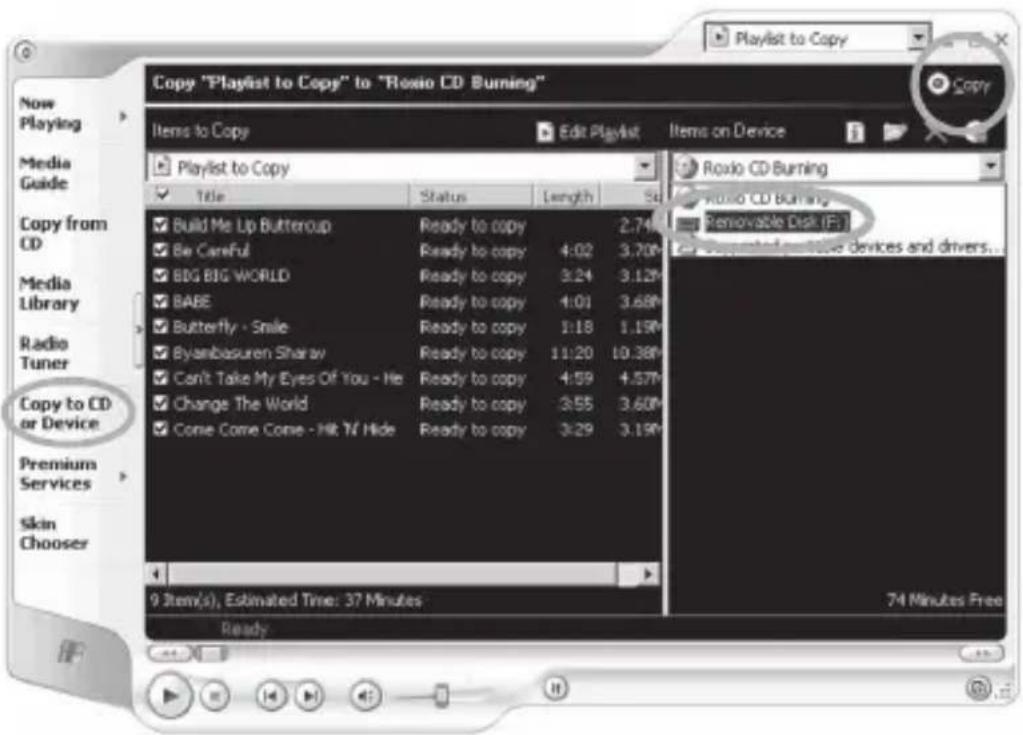
By synchronization using Windows Media Player 9 (Windows 2000) under MSC mode
- Run Windows Media Player 9
- Connect your player to the computer
- Select "Copy to CD or Device".
- Drag the desired songs, photos or converted video clips in PC to the left panel.
- Select "Removable Disk"
6.Click "Copy"
By synchronization using Windows Media Player 10 (Windows XP) under MTP mode Follow the steps below to transfer files using Windows Media Player 10
- Run Windows Media Player 10
- Connect your player to the computer
- Window of "MTP Media Player" window pop up, choose "Synchronize media files to the device using Windows Media Player", then click "ok" to confirm.
- Choose "Manual" and click "Finish" for the new pop up window.
- Select "Sync", you can sync your files to your player in 2 ways:
i. Drag your files to the sync list on the left hand side. Click "Start Sync" and the synchronization starts.
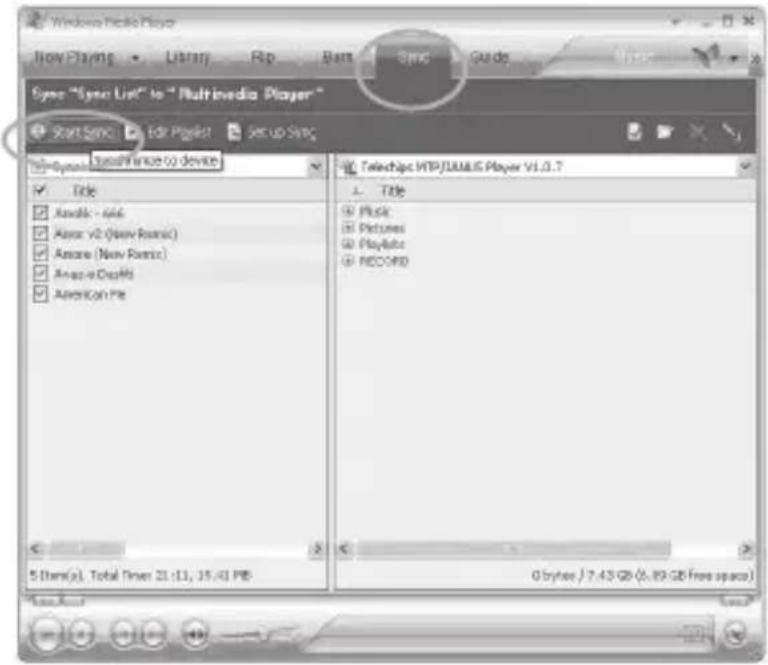
ii. Select playlist from the drop down menu of "Sync List", then click "Start Sync". Files in the list will be transferred to your device.

Hint:
Windows Media Player should be used to alter the Music Library Information and files. For more information on how to use Windows Media Player 10 correctly, open Windows Media Player 10 and press the "GUIDE" selection at the top of the screen.
CREATE PLAYLIST USING WINDOWS MEDIA PLAYER 10 (Windows XP only)
-
Run Windows Media Player 10
-
Choose "Library", then drag the desired song(s) to the "Now Playing List" on the right hand side.
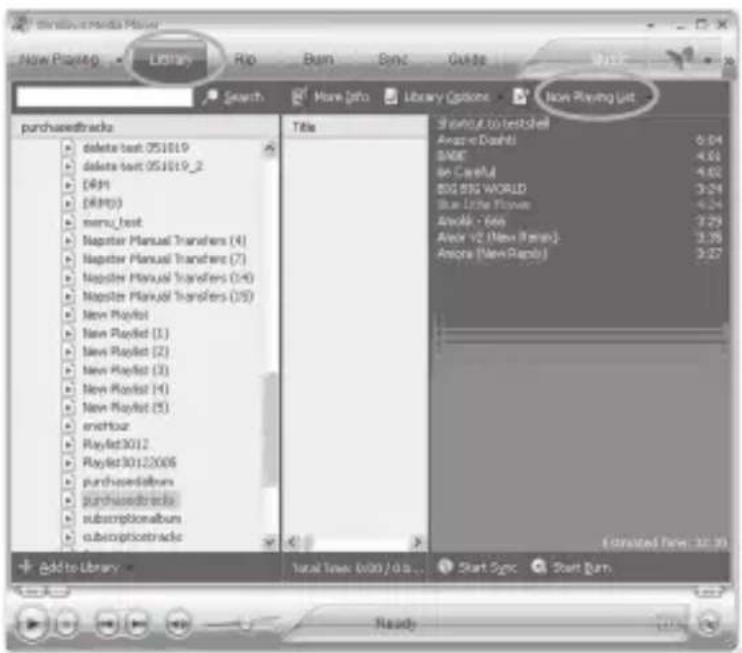
- Select all songs in the playlist and right click the mouse. Choose "Add to" and "Additional Playlist..." then a window will appear.

- Select "New" and enter the playlist name, then click "OK" then a new playlist will be created.

Add Playlist through Windows Media Device 10 to C235
Sync option for your device with WMP10 is set to "Manual Transfer". You can sync your playlist to your device by changing "Synchronization Settings" on WMP10.
Please follow the below steps.
-
Connect your device with the computer.
-
Run Window Media Device 10
-
Go to SYNC menu and click "Set up Sync" button. "Synchronization Settings" window will appear.
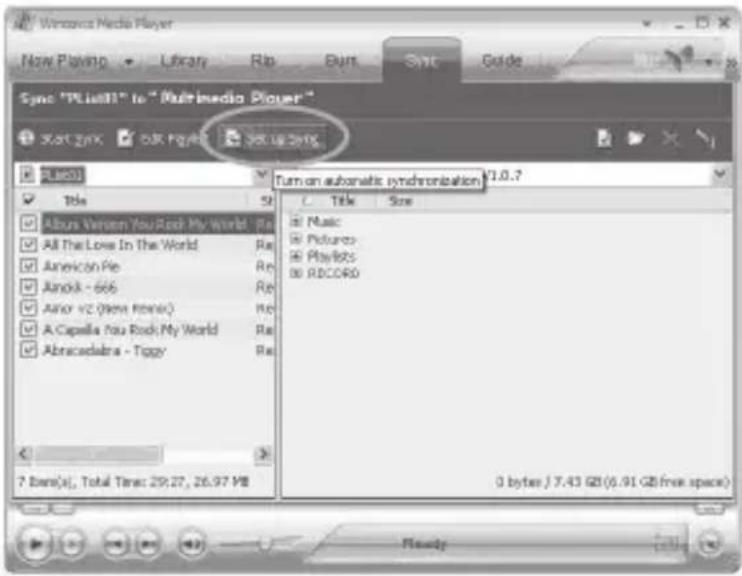
- Check "Synchronize device automatically" and check the playlist(s) you want to sync.

- After choosing your playlist(s) to sync, click "OK" and the synchronization starts.
- When the synchronization finished, disconnect your device from computer properly.
- Turn on your device and select "Music".
- Your playlist(s) from WMP is added under the "Playlist" menu.
FAQ
What is DRM ?
Short for digital rights management, a system for protecting the copyrights of data circulated via the Internet or other digital media by enabling secure distribution and/or disabling illegal distribution of the data. Typically, a DRM system protects intellectual property by either encrypting the data so that it can only be accessed by authorized users or marking the content with a digital watermark or similar method so that the content can not be freely distributed.
What is MTP?
MTP stands for 'Media Transfer Protocol' and it has been developed by Microsoft based on WMP10. Here is the related content referred from Microsoft website.
Media Transfer Protocol Specification
Microsoft has developed the Media Transfer Protocol (MTP) to manage content on any portable device with storage. It is based upon an existing protocol, Picture Transfer Protocol (PTP), and can be implemented to be fully compatible with that protocol. The primary purpose of MTP is to facilitate communication between devices that connect to a computer or other host, exchange data, and then disconnect for standalone use. A secondary purpose of MTP is to enable command and control of a connected device. This includes remote control of device functionality, monitoring of device-initiated events, and reading and setting of device properties.
What is MSC?
MSC stands for Mass Storage Class. It doesn't require separate drive installation when It's first connected to PC and it can be used as an external mass storage device using 'drag and drop' method with 'Windows Explorer'.
TROUBLE SHOOTING
| Symptom Possible Solution | |
| The device cannot be turned on | The battery is exhausted.·Please charge the device via USB cable. |
| No sound during playback | ·Check if volume setting is too low.·Make sure to plug the earphone firmly. |
| Keys do not work | ·Check if the HOLD switch is ON.·Move the slide switch to OFF position (to the right side) and try again. |
| WMP or PC does not recognize | Make sure you have Windows XP and Windows Service Pack 1 installed on your computer before proceeding.·Windows Media Player 10 is recommended.You can download Windows Media Player 10 at www.windowsmedia.com. |
| There is noise during playback | ·Check if the earphone plug is connected firmly.·Check if the earphone plug is dirty.·The songs maybe corrupted, please download other songs and try again. |
| The file cannot be played The file | ·may not be compatible with the device.·Check the supported formats in the chapter “Technical Specification”. |
| Cannot download / upload | ·Videos without audio stream are unable to be converted.·Make sure the video is with audio signal before the conversion. |
| No FM channel is detected | ·The earphone acts as an antenna so make sure an earphone is connected when searching FM channel. |
TECHNICAL SPECIFICATION
| Category Specification | |
| Dimensions (H x W x D) 87 | 5 X 37 X 22 M M |
| Net Weight 38G | |
| Internal Flash Memory 2G | B |
| Power Supply | Via USB cable |
| PC Interface High speed USB 2.0 | |
| Distortion < 0.5 | % |
| Frequency Response 60 ~ 20,000 HZ | |
| Operating temperature 0 to 40 °C | |
| Storage temperature -10 to 60 °C | |
| Relative humidity 5~95% | |
| Operating altitude Up to 20,000 ft | |
| Audio format supported | MP3, WMA |
| Photo Format Supported JPG | |
| Radio Frequency | 87.5-108MHz |

Note:
The above specifications are subject to change without prior notice.

- HIGHLIGHTS OF THE PLAYER INCLUDE
- LIABILITY EXEMPTION STATEMENT
- TRADEMARKS
- WARNING
- SAFETY PRECAUTION
- LOCATION OF CONTROLS AND KEYS
- BATTERY CHARGING
- NOTE
- INSTALLATION OF SD CARD
- RESET
- MINIMUM PC SYSTEM REQUIREMENT
- GETTING STARTED
- POWER ON
- POWER OFF
- VOLUME ADJUSTMENT
- KEY LOCK
- BATTERY LOW
- HOTKEY ( ✗)
- CONNECTING TO A PC
- CONNECT C235 TO PC
- BUILD MUSIC LIBRARY
- FORMAT THE DEVICE
- WINDOWS 2000
- IN MTP MODE
- VIDEO CONVERSION
- DOWNLOAD AND INSTALL THE SOFTWARE & REQUIRED LIBRARY
- WAY TO CONVERT A VIDEO CLIP
- GENERAL AND DRM FILE TRANSFER
- GENERAL FILE TRANSFER
- MSC MODE
- WINDOWS XP (MTP MODE)
- DRM FILE TRANSFER
- BY SYNCHRONIZATION USING WINDOWS MEDIA PLAYER 9 (WINDOWS 2000) UNDER MSC MODE
- BY SYNCHRONIZATION USING WINDOWS MEDIA PLAYER 10 (WINDOWS XP) UNDER MTP MODE FOLLOW THE STEPS BELOW TO TRANSFER FILES USING WINDOWS MEDIA PLAYER 10
- HINT
- CREATE PLAYLIST USING WINDOWS MEDIA PLAYER 10 (WINDOWS XP ONLY)
- ADD PLAYLIST THROUGH WINDOWS MEDIA DEVICE 10 TO C235
- FAQ
- WHAT IS DRM
- WHAT IS MTP
- MEDIA TRANSFER PROTOCOL SPECIFICATION
- WHAT IS MSC
- TECHNICAL SPECIFICATION
Brand : EMTEC
Model : C235
Category : Mp3 player