
PU953 - Video projector BENQ - Free user manual and instructions
Find the device manual for free PU953 BENQ in PDF.


| Product Type | Digital Projector |
| Model | PU953 (also known as PU9530, PX9510, PW9520) |
| Display Technology | 0.67" DLP Chip (PU9530), 0.7" DLP Chip (PX9510), 0.65" DLP Chip (PW9520) |
| Native Resolution | WUXGA (1920x1200) for PU9530; XGA (1024x768) for PX9510; WXGA (1280x800) for PW9520 |
| Dimensions (W x H x D) | 505 mm x 386 mm x 206 mm (19.9" x 15.1" x 8.1") |
| Weight | 17 kg (37.5 lb) |
| Power Supply | AC 100-240V, 50/60Hz |
| Power Consumption | 710W (AC 100V) / 690W (AC 240V); Standby: <0.5W (Eco) or <24W (Standard) |
| Lamp Type | Dual lamp system, user-replaceable |
| Lens System | Interchangeable lenses (optional: wide fix, wide zoom, standard, semi long zoom, long zoom, ultra wide zoom) |
| Lens Shift | Vertical and horizontal shift (range depends on lens) |
| Keystone Correction | Vertical and horizontal keystone adjustment |
| 3D Support | DLP Link; formats: side-by-side, top/bottom, frame sequential |
| Input Terminals | DVI-D (HDCP), HDMI (HDCP), COMPUTER 2 (BNC RGBHV/YUV), COMPUTER 1 (D-sub 15p), Component (RCA), S-Video, Video (RCA), HDBaseT (RJ45) |
| Output Terminals | Monitor Out (D-sub 15p), Trigger (DC 12V via 3.5mm jack) |
| Control Interfaces | RS-232C, LAN (RJ45), Wired Remote (3.5mm), USB Type B for service, IR receivers (front/rear) |
| Network Control | Web browser, Crestron, PJLink, AMX (via HDBaseT) |
| Security Features | Kensington lock, password protection, panel key lock |
| Supported Aspect Ratios | 5:4, 4:3, 16:10, 16:9, 1.88:1, 2.35:1, Auto, Native |
| Operating Temperature | 5°C to 40°C (41°F to 104°F) |
| Storage Temperature | -10°C to 60°C (14°F to 140°F) |
| Maintenance | Clean air filters every 500 hours; lens cleaning with soft cloth; lamp replacement by user |
| Accessories Included | Power cable, remote control (batteries), lens cap, user manual (may vary by region) |
Frequently Asked Questions - PU953 BENQ
User questions about PU953 BENQ
0 question about this device. Answer the ones you know or ask your own.
Ask a new question about this device
Download the instructions for your Video projector in PDF format for free! Find your manual PU953 - BENQ and take your electronic device back in hand. On this page are published all the documents necessary for the use of your device. PU953 by BENQ.
USER MANUAL PU953 BENQ
PX9510 / PW9520 / PU9530
Digital Projector
User Manual
Table of Contents
Important safety instructions....4
Overview 7
Shipping contents 7
Projector exterior view 8
Front and upper side view....8
Rear view....8
Left side view....8
Upper-right side view 9
Under view....9
Control panel and functions 10
Remote control and functions.... 11
Remote control operation....12
Setup and operations 13
Setting the remote control batteries....13
Connecting to the projector....13
Projection lens selection and Installation.... 14
Installing or removing the optional lens....14
Installing the new lens 14
Using the Anti-theft Screw 14
Removing the existing lens from the projector 15
Choosing a location....16
Throw distance and screen size....17
Lens shift adjustable range 19
Preventing the unauthorized use of the projector 20
Locking the projector....20
Locking the control panel....21
Using the physical lock 21
Making connections....22
Preparations 22
Connecting DVI-D devices....22
Connecting COMPONENT-video devices....23
Connecting a computer 24
Connecting a external HDBaseT transmitter....25
Connecting a monitor 26
Using the projector 27
Preparations 27
Turning the projector on or off 28
Selecting an input source....29
To select the video source 29
Using the menus 30
Adjusting the projected image....31
Adjusting the image position....31
Fine-tuning the image size and clarity 31
Adjusting the projection angle....32
Correcting picture distortion....32
Auto-adjusting the image....32
Turning off the projector 33
Using On-Screen Display....34
Using the menus 34
Navigating the OSD 34
On-Screen Display (OSD) menus....35
Menu Map....35
PICTURE 38
Advanced....39
SIGNAL......40
SETUP 42
Advanced....44
Installation....45
Network Settings 47
SERVICE....49
Additional information 51
Care of the projector....51
Care of the projector....51
Cleaning the lens 51
Cleaning the projector case....51
Storing the projector....51
Transporting the projector 52
Replacing the lamp 52
Removing the used lamp....53
Installing the optional color wheel 55
Cleaning the filters....56
Troubleshooting....58
Indicator messages 58
Common problems and solutions 59
Tips for troubleshooting....59
Image problems....59
Lamp problems....60
Remote control problems....60
Specifications....62
Dimensions 63
Timing chart....64
PC timing....64
3D supported timing 65
RS232 command control....66
Control the projector through a Network....69
Set up the projector for Network 69
Control the projector through a web browser....70
Projector status 70
Alert mail setup 71
Crestron control page....72
BenQ ecoFACTS 74
Copyright....74
Disclaimer 74
Statement regarding hyperlinks and third-party websites....74
Thank you for your purchase of this quality BenQ projector. For the best results, please read this manual through carefully as it is your guide through the control menus and operation.
Important safety instructions
Your projector is designed and tested to meet the latest standards for safety of information technology equipment. However, to ensure safe use of this product, it is important that you follow the instructions mentioned in this manual and marked on the product.
I. Please read this user manual before you operate your projector. Keep this manual in a safe place for future reference.
-
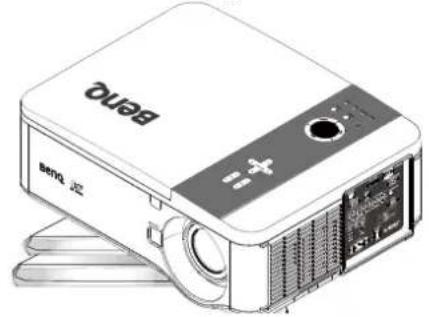
Always place the projector on a level, horizontal surface during operation.
-
Do not place the projector on an unstable cart, stand, or table as it may fall and be damaged.
- Do not place inflammables near the projector.
- Do not use if tilted at an angle of more than 10 degrees left to right, nor at angle of more than 15 degrees front to back.
natural_image
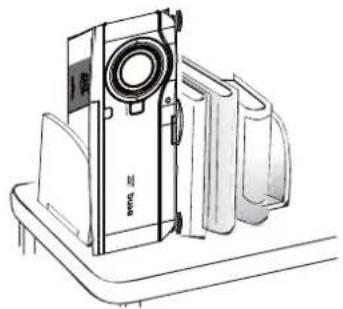
Illustration of a Benq projector device with visible internal components and ventilation slots (no text or symbols)- Do not store the projector on end vertically. Doing so may cause the projector to fall over, causing injury or resulting in damage.
natural_image
Line drawing of a vintage camera mounted on a flat base with stacked books nearby (no text or symbols)-
Do not place the projector in any of the following environments:
-
space that is poorly ventilated or confined. Allow at least 50 cm clearance from walls and free flow of air around the projector.
- locations where temperatures may become excessively high, such as the inside of a car with all windows closed.
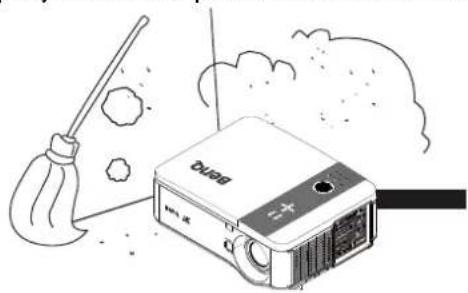
- locations where excessive humidity, dust, or cigarette smoke may contaminate optical components, shorten the projector's lifespan and darken the screen.
natural_image
Illustration of a broom and a projector device with smoke effects (no text or symbols)- locations near fire alarms.
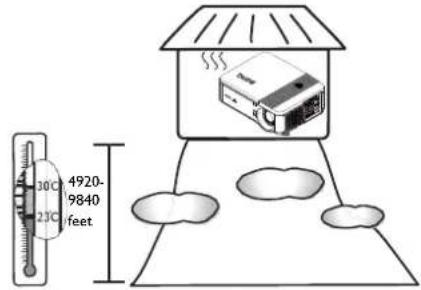
- locations with an ambient temperature above 35^ C/ 95^ F.
- locations where altitude is higher than 1500 meters/4920 feet above sea level.
-
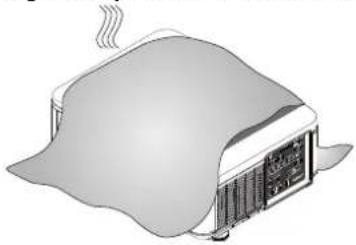
Do not block the vents holes while the projector is on (even in standby mode):
-
Do not cover the projector with any item.
- Do not place the projector on a blanket, bedding or any other soft surface.
natural_image
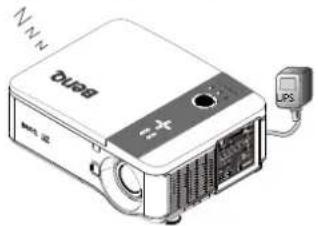
Illustration of a toaster oven with steam rising from its side (no text or symbols)- In areas where the mains power supply voltage may fluctuate by ±10 volts, it is recommended that you connect your projector through a power stabilizer, surge protector or uninterruptible power supply (UPS) as appropriate to your situation.
natural_image
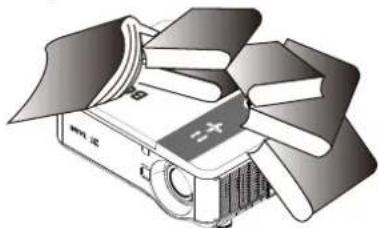
Illustration of a dual projector with a connected IPS (no text or symbols visible)- Do not step on the projector or place any objects upon it.
natural_image
Illustration of a projector with blades extending into the cover (no text or symbols)- Do not place liquids near or on the projector. Liquids spilled into the projector will void your warranty. If the projector does become wet, disconnect it from the power point and call BenQ to have the projector repaired.
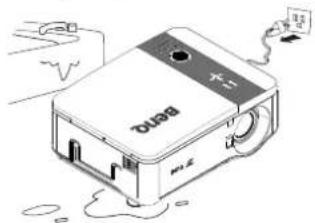
- Do not look straight into the projector lens during operation. It may harm your sight.
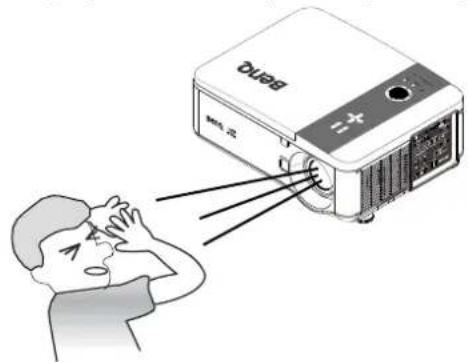
- Do not operate the projector lamp beyond the rated lamp life. Excessive operation of lamps beyond the rated life could cause a lamp to break on rare occasions.
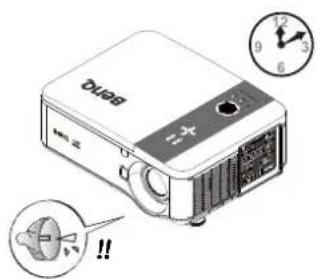
II. The lamp becomes extremely hot during operation. Allow the projector to cool for approximately 45 minutes prior to removing the lamp assembly for replacement.
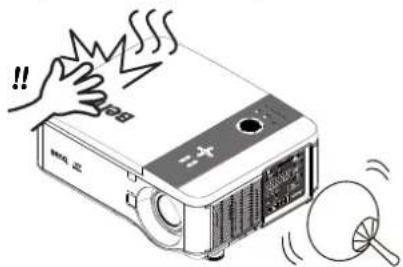
- This projector is capable of displaying inverted images for ceiling mount installation. Use only BenQ's Ceiling Mount Kit for mounting.
natural_image
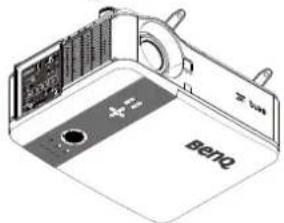
Isometric view of a device casing with labeled components and a central button (no readable text or symbols)- Never attempt to replace the lamp assembly until the projector has cooled down and is unplugged from the power supply.
natural_image
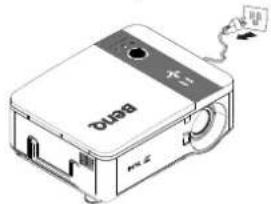
Illustration of a beige BENO printer case with a paper clip and cable (no text or symbols)- When you think service or repair is required, take the projector only to a suitably qualified technician.
natural_image
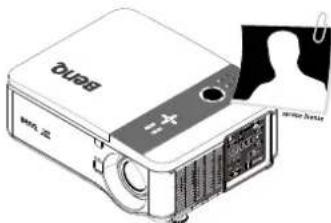
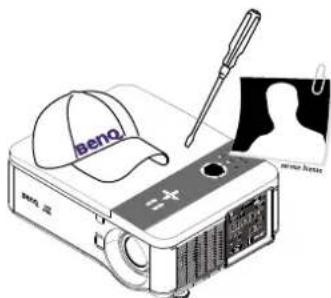
Illustration of a projector with a screen and indicator lights (no text or symbols visible)- Do not attempt to disassemble this projector. There are dangerous high voltages inside which may cause death if you should come into contact with live parts. The only user serviceable part is the lamp which has its own removable cover. Under no circumstances should you ever undo or remove any other covers. Refer servicing only to suitably qualified professional service personnel.
natural_image
Illustration of a projector with a cap and screwdriver, no text or symbols present
Please keep the original packing for possible future shipment.
Overview
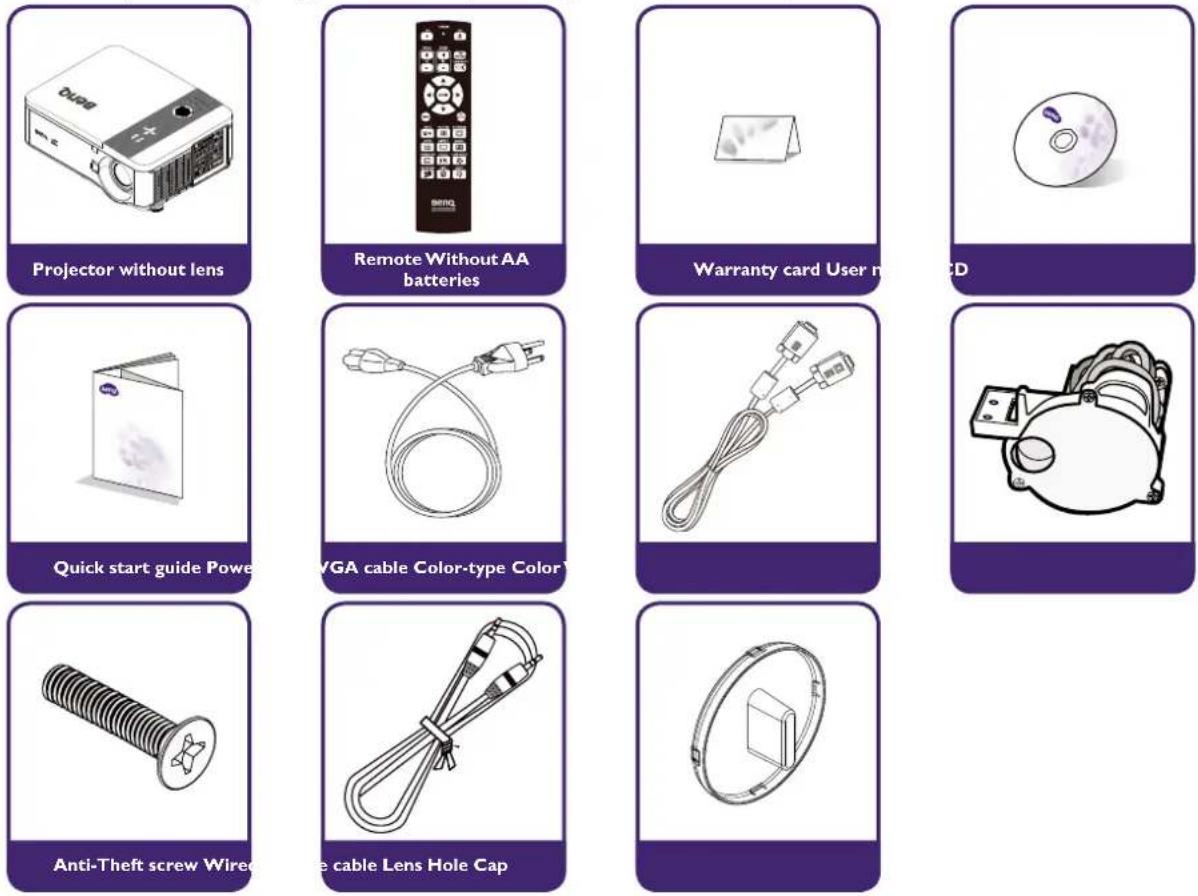
Shipping contents
Carefully unpack and verify that you have the items below. Some of the items may not be available depending on your region of purchase. Please check with your place of purchase.

• Some of the accessories may vary from region to region.
- The warranty card is only supplied in some specific regions. Please consult your dealer for detailed information.
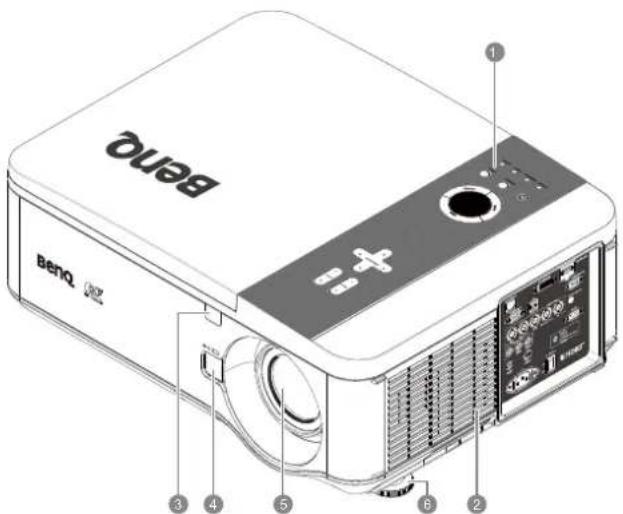
Projector exterior view
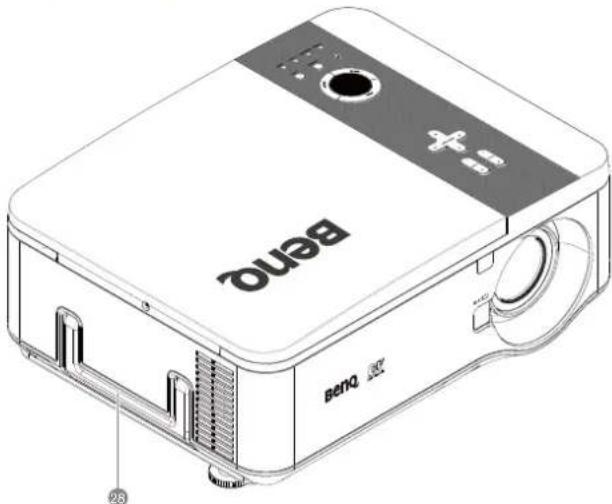
Front and upper side view
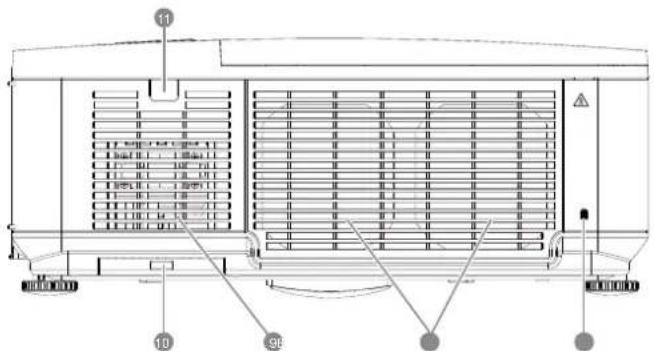
Rear view
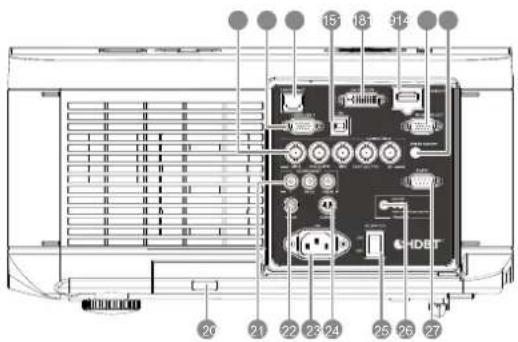
Left side view
I. Control Panel
2. Air Inlet
3. Front IR sensor
4. Lens Change button
5. Lens (Remove lens hole cap before use)
6. Foot for adjusting projector level
- Kensington Lock
- Air Exhaust
- Air Inlet
-
Air Filter
II. Rear IR sensor -
Computer 2, RGBHV, Y/Pb(CB)/Pr(Cr) input
- Computer I, VGA
- LAN/HDBaseT
- USB port for service
- DVI-D Input
- HDMI (HDCP)
- Monitor Out, only for computer I.
- WIRED REMOTE
- Air Filter
- Components Y/Pb (Cb)/Pr(Cr) input
- Video input
- AC Power Cable Inlet
- S-VIDEO input
- AC Power Switch
- Screen Trigger output
- RS-232 control input
Upper-right side view
Under view
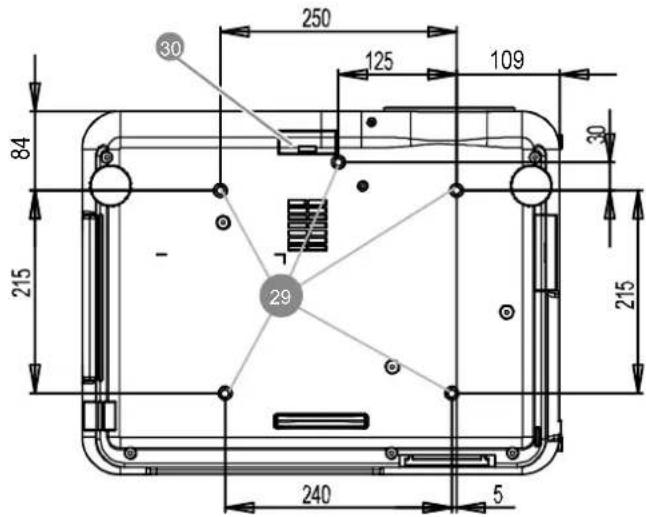
-
Handle
-
Ceiling support holes (Mounting Screw: M4*12mm)
-
Air Filter
Control panel and functions
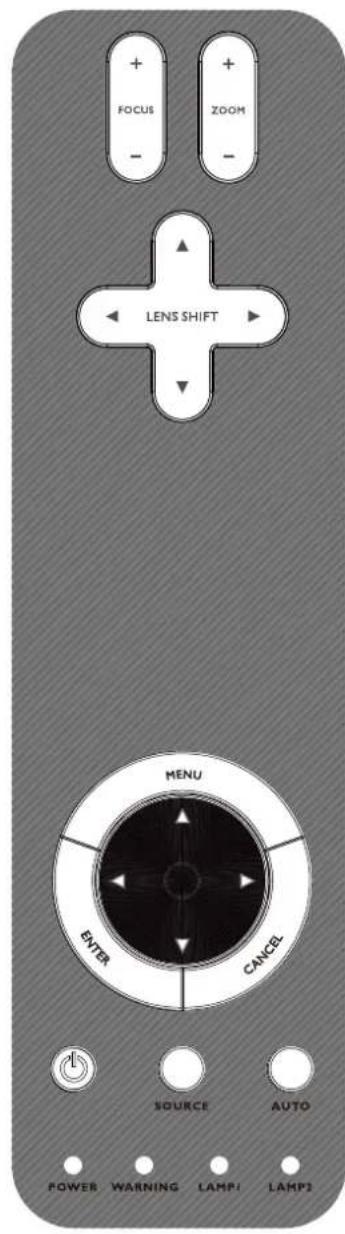
| Name Function | |
| FOCUS+ | Focus the projected image |
| FOCUS- | |
| ZOOM+ | Increase/decrease projected image size |
| ZOOM- | |
| UP BUTTON | Control Lens shift to move image left, right, up, or down |
| RIGHT BUTTON | |
| DOWN BUTTON | |
| LEFT BUTTON | |
| MENU Open / Close the OSD | |
| UP/ DOWN/ LEFT/ RIGHT BUTTONS | Navigate and change settings in the OSD |
| ENTER | Select or change settings in the OSD |
| CANCEL | Exit the On-Screen Display (OSD) |
| POWER | Turn the projector on or off (main power switch must be turned on first). Press to place the projector in standby mode |
| SOURCE | Select the input source |
| AUTO | Auto Sync to optimize image size, position, and resolution |
| POWER (LED) | Green / Red / Orange / FlashingSee “Indicator messages” on page 58 |
| WARNING (LED) | Green / Red / Orange / FlashingSee “Indicator messages” on page 58 |
| LAMP 1 (LED) | Green / Flashing,See “Indicator messages” on page 58 |
| LAMP 2 (LED) | |
Remote control and functions
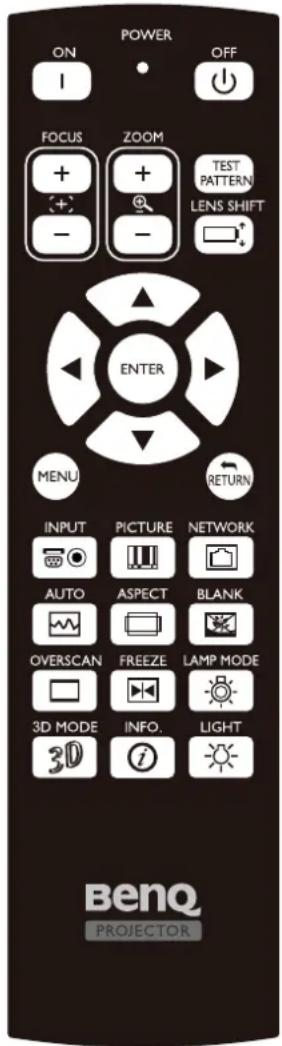
| Name Function | |
| Status LED Lights when the remote control is used | |
| ON | Turn the projector on |
| OFF | Turn the projector off (standby mode) |
| FOCUS+ Focus the projection image | |
| FOCUS- Focus the projection image | |
| ZOOM + Increase the projection image size | |
| ZOOM - Reduce the projection image size | |
| TEST PATTERN | Test Pattern selection |
| LENS SHIFT | Adjust lens shift range |
| UP Move OSD cursor up | |
| RIGHT Move OSD cursor right or enter submenu | |
| DOWN Move OSD cursor down | |
| LEFT Move OSD cursor right or enter submenu | |
| ENTER | Select or change setting in the OSD |
| MENU | Display OSD main menu |
| RETURN | Return to last OSD page or exit menu |
| INPUT | Select input source to be displayed |
| PICTURE | Display picture menu |
| NETWORK | Display Network Settings menu for configuration |
| AUTO | Auto adjustment for phase, tracking, size, position |
| ASPECT | Set up aspect ratio of the projected image |
| OVERSCAN | Enable or disable the overscan function |
| FREEZE | Freeze/unfreezes the on-screen picture |
| 3D MODE | Open the 3D Mode menu |
| INFO. | Display the Information menu |
| LIGHT | Illuminates the buttons on the remote control for 10 seconds. |
| BLANK | Enable or disable the display image function |
| LAMP MODE | Display the Lamp Settings menu |
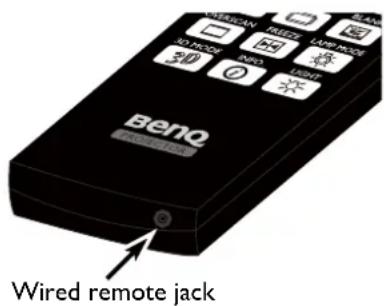
| Wired remote jack | Connect the remote cable to the jack on the projector |
Remote control operation
- Make sure that there is nothing positioned between the remote control and the infrared (IR) sensors on the projector that might obstruct the IR beam from the remote control reaching the projector.
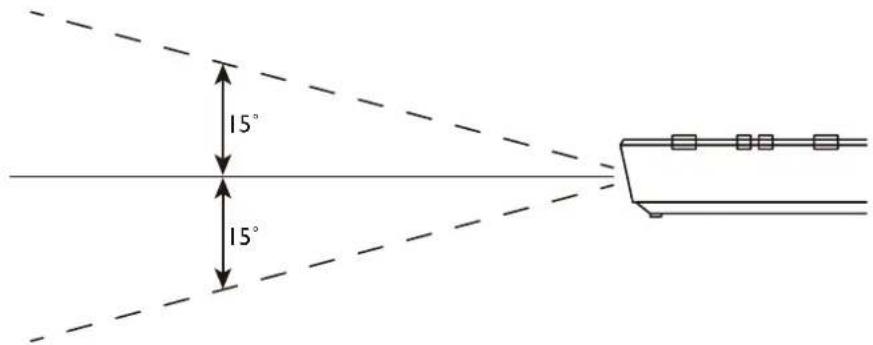
- The effective range of the remote control is up to 7 meters, and at an angle within 30 degrees of the IR beam. Always aim straight at the projector, however most screens will also reflect the IR beam to the projector.
Setup and operations
Setting the remote control batteries
-
To open the battery cover, turn the remote control over to view its back, push on the finger grip on the cover and slide it up in the direction of the arrow as illustrated. The cover will slide off.
-
Remove any existing batteries (if necessary) and install two new AA batteries observing the battery polarities as indicated in the base of the battery compartment. Positive (+) goes to positive and negative (-) goes to negative.
-
Refit the cover by aligning it with the case and sliding it back up into position. Stop when it clicks into place.

flowchart
graph LR
    A["Door Panel"] --> B["Downward Arrow"]
    B --> C["Top Door Panel"]
    C --> D["Downward Arrow"]
    D --> E["Bottom Door Panel"]

- Do not mix old batteries with new ones, or mix different types of batteries.
- Avoid leaving the remote control and batteries in an excessive hot or humid environment like the kitchen, bathroom, sauna, sunroom, or in a closed car.
- Dispose of used batteries according to the battery manufacturer's instructions and local environment regulations for your region.
- If the remote control will not be used for an extended period of time, remove the batteries to avoid damage to the control from possible battery leakage.
Connecting to the projector
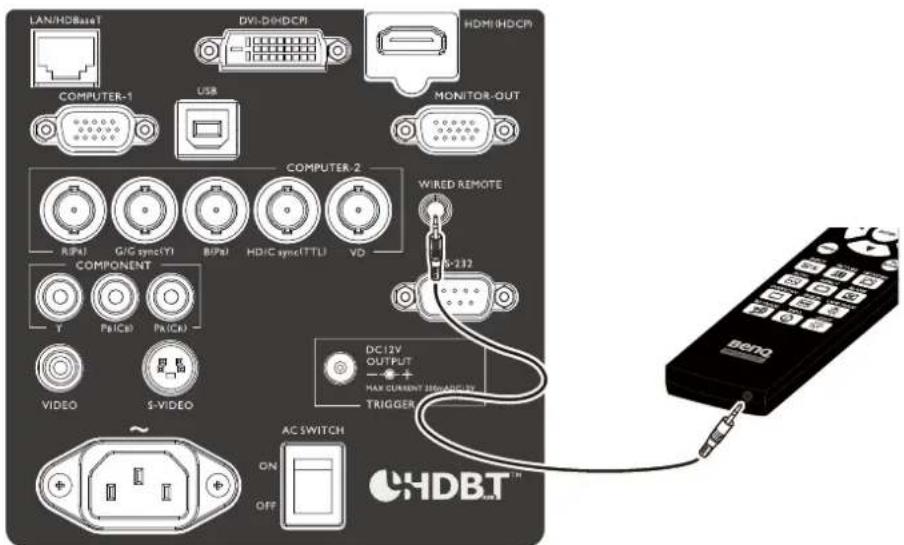
If the path between the remote control and the projector is obstructed or remote control operation is disrupt by certain high-frequency fluorescent lights, you can connect to the projector with M3 stereo mini jack cable to operate the projector.
Projection lens selection and Installation

When installing the lens into the projector, be sure to remove the lens cap from the back of the optional lens before installing the optional lens into the projector. Failure to do so will cause damage to the projector.
Installing or removing the optional lens
Installing the new lens
I. Remove the lens cap.
Insert the Lens with arrow mark on top.
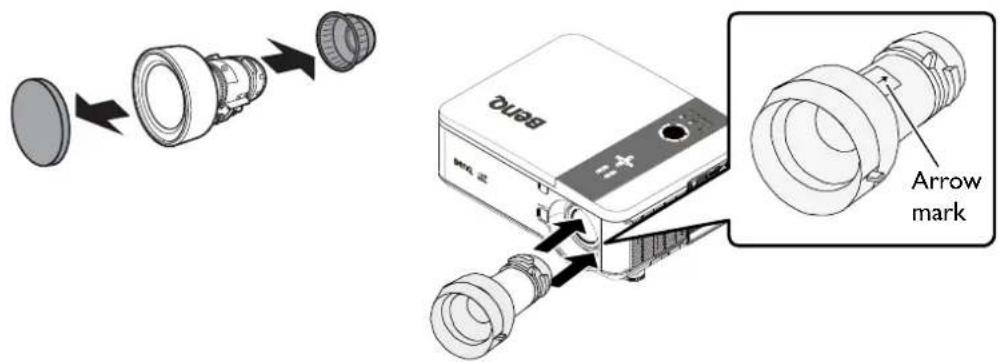
- Rotate the Lens clockwise till click sound twice.
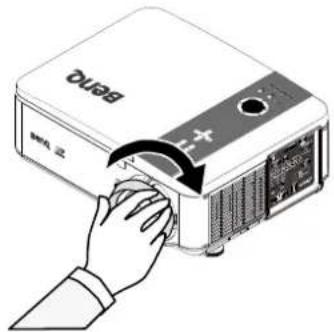
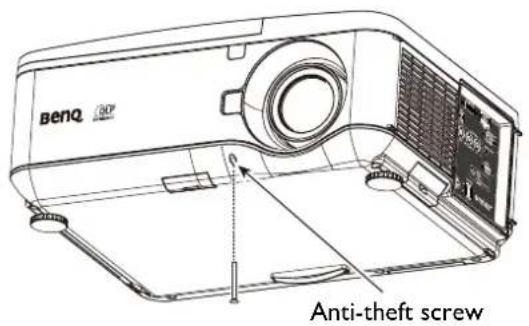
Using the Anti-theft Screw
Using the anti-theft screw to prevent theft of the lens. Tighten the supplied anti-theft screw on the front bottom.
Removing the existing lens from the projector
- Push the LENS CHANGE button all the way in and rotate the lens counterclockwise. The existing lens will be disengaged.
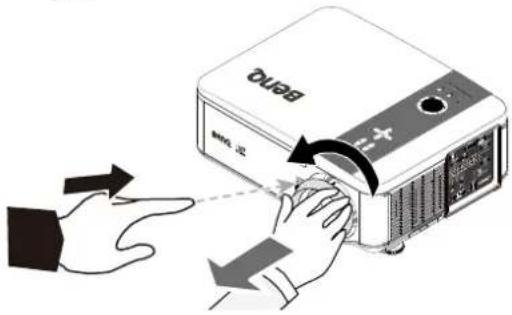
- Pull out the existing lens slowly.
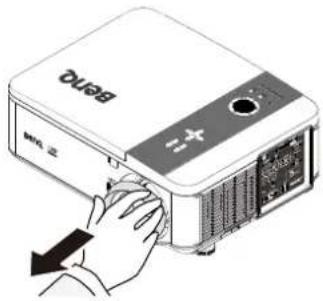

- Do not shake or place excessive pressure on the projector or the lens components as the projector and lens components contain precision parts.
- Before removing or installing the lens, be sure to turn off the projector, wait until the cooling fans stop, and turn off the main power switch.
- Do not touch the lens surface when removing or installing the lens.
- Keep fingerprints, dust or oil off the lens surface. Do not scratch the lens surface.
• If you remove and store the lens, attach the lens cap to the projector to keep off dust and dirt.
Choosing a location
Your projector is designed to be installed in one of four possible installation locations.
Your room layout or personal preference will dictate which installation location you select. Take into consideration the size and position of your screen, the location of a suitable power outlet, as well as the location and distance between the projector and the rest of your equipment.
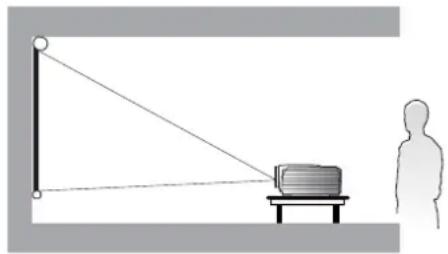
I. Front Table:
Select this location with the projector placed near the floor in front of the screen. This is the most common way to position the projector for quick setup and portability.
natural_image
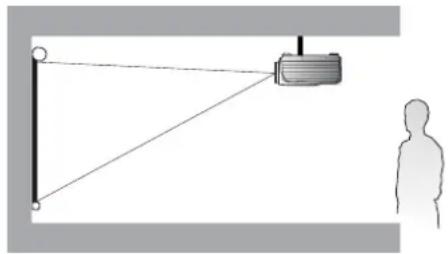
Diagram showing a person observing a television on a desk with a flagpole and a human silhouette nearby (no text or symbols)2 Front Ceiling:
Select this location with the projector suspended from the ceiling in front of the screen. Purchase the BenQ Projector Ceiling Mount Kit from your dealer to mount your projector on the ceiling.
natural_image
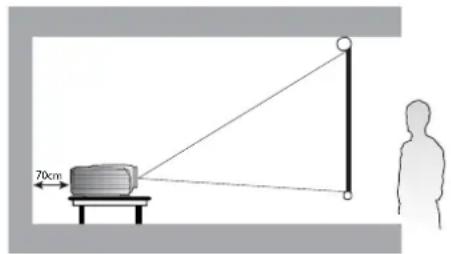
Diagram showing a person silhouette facing a wall-mounted device with a triangular load, no text or symbols present3. Rear Table:
Select this location with the projector placed near the floor behind the screen. Note that a special rear projection screen is required.
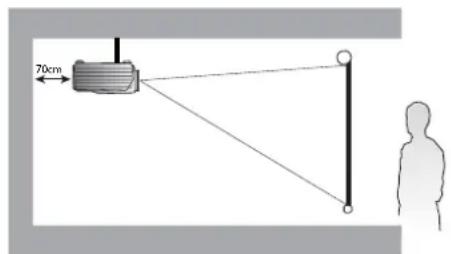
4. Rear Ceiling:
Select this location with the projector suspended from the ceiling behind the screen. Note that a special rear projection screen and the BenQ Projector Ceiling Mount Kit are required for this installation location.
* To set the projector position:
Press MENU and then press ◀/▶ until INSTALLATION menu is highlighted.
Press ▲/▼ to highlight Projector Installation and press ◀/▶ until the correct position is selected.
!
- Ceiling installation must be done by a qualified professional. Contact your dealer for more information. It is not recommended you install the projector yourself.
- Only use the projector on a solid, level surface. Serious injury and damage can occur if the projector is dropped.
- Do not use the projector in an environment where extreme temperature occurs. The projector must be used at temperatures between 41 degrees Fahrenheit (5 degrees Celsius) and 104 degrees Fahrenheit (40 degrees Celsius).
- Screen damage will occur if the projector is exposed to moisture, dust or smoke.
- Do not cover the vents on the projector. Proper ventilation is required to dissipate heat. Damage to the projector will occur if the vents are covered.
Throw distance and screen size
Example of PW9520 using Standard lens:
The further your projector is from the screen or wall, the larger the image. The minimum size the image can be is approximately 40 inches (1 m) measured diagonally when the projector is roughly 79.8 inches (2.03 m) from the wall or screen. The largest the image can be is 500 inches (12.7 m) when the projector is about 1028 inches (26.11 m) from the wall or screen.
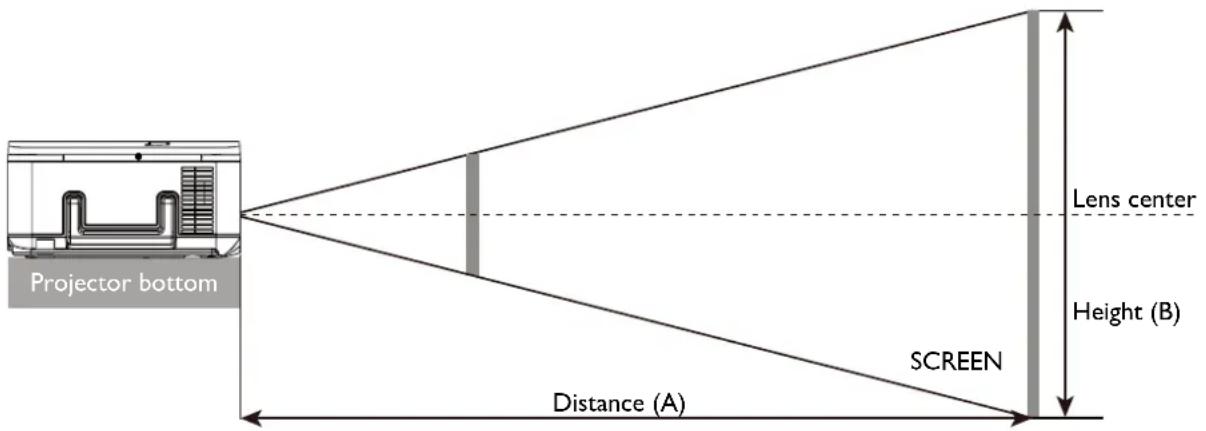
PW9520
| Screen Size | 5J.JAM37.021 5J.JAM37.001 5J.JAM37.051 | ||||||||||||||||||
| Wide Fix Lens | Wide Zoom Lens Standard Lens Semi long Zooml | ||||||||||||||||||
| Diagonal Width Height(B) Distance(A) | |||||||||||||||||||
| N/A Wide | Tele Wide Tele Wide Tele | ||||||||||||||||||
| (inch) | (m) (inch) | (m) | (inch) | (m) (inch) | (m) (inch) | (m) (inch) | (m) | (inch) | (m) (inch) | (m) (inch) | (m) (inch) | (m) | (inch) | (m) | |||||
| 40 | 1.02 | 34 | 0.86 | 21 | 0.54 | 26.4 | 0.67 | 43.6 | 1.11 | 63.1 | 1.60 | 60.2 | 1.53 | 79.8 | 2.03 | 77.6 | 1.97 | 130.5 | 3.31 |
| 50 | 1.27 | 42 | 1.08 | 26 | 0.67 | 33.5 | 0.85 | 55.0 | 1.40 | 79.3 | 2.01 | 75.9 | 1.93 | 100.4 | 2.55 | 97.8 | 2.48 | 163.9 | 4.16 |
| 60 | 1.52 | 51 | 1.29 | 32 | 0.81 | 40.5 | 1.03 | 66.4 | 1.69 | 95.5 | 2.43 | 91.7 | 2.33 | 121.0 | 3.07 | 117.9 | 3.00 | 197.3 | 5.01 |
| 80 | 2.03 | 68 | 1.72 | 42 | 1.08 | 54.7 | 1.39 | 89.3 | 2.27 | 128.0 | 3.25 | 123.1 | 3.13 | 162.3 | 4.12 | 158.3 | 4.02 | 264.1 | 6.71 |
| 100 | 2.54 | 85 | 2.15 | 53 | 1.35 | 68.8 | 1.75 | 112.1 | 2.85 | 160.5 | 4.08 | 154.5 | 3.93 | 203.5 | 5.17 | 198.7 | 5.05 | 330.9 | 8.41 |
| 120 | 3.05 | 102 | 2.58 | 64 | 1.62 | 82.9 | 2.11 | 135.0 | 3.43 | 193.0 | 4.90 | 186.0 | 4.72 | 244.7 | 6.22 | 239.0 | 6.07 | 397.7 | 10.10 |
| 150 | 3.81 | 127 | 3.23 | 79 | 2.02 | 104.1 | 2.64 | 169.2 | 4.30 | 241.7 | 6.14 | 233.1 | 5.92 | 306.5 | 7.79 | 299.6 | 7.61 | 498.0 | 12.65 |
| 180 | 4.57 | 153 | 3.88 | 95 | 2.42 | 125.3 | 3.18 | 203.5 | 5.17 | 290.4 | 7.38 | 280.3 | 7.12 | 368.4 | 9.36 | 360.1 | 9.15 | 598.2 | 15.19 |
| 200 | 5.08 | 170 | 4.31 | 106 | 2.69 | 139.4 | 3.54 | 226.4 | 5.75 | 322.9 | 8.20 | 311.7 | 7.92 | 409.6 | 10.40 | 400.5 | 10.17 | 665.0 | 16.89 |
| 300 | 7.62 | 254 | 6.46 | 159 | 4.04 | 210.0 | 5.33 | 340.6 | 8.65 | 485.3 | 12.33 | 468.9 | 11.91 | 615.7 | 15.64 | 602.3 | 15.30 | 999.0 | 25.38 |
| 400 | 10.16 | 339 | 8.62 | 212 | 5.38 | 280.6 | 7.13 | 454.8 | 11.55 | 647.7 | 16.45 | 626.1 | 15.90 | 821.9 | 20.88 | 804.1 | 20.42 | 1333.1 | 33.86 |
| 500 | 12.70 | 424 | 10.77 | 265 | 6.73 | 351.2 | 8.92 | 569.0 | 14.45 | 810.1 | 20.58 | 783.3 | 19.90 | 1028.0 | 26.11 | 1005.9 | 25.55 | 1667.1 | 42.35 |
| Screen Size | 5J.JAM37.031 5J.JAM37.041 5J.JAM37.061 | ||||||||||||||||
| Long Zoom 1 Lens | Long zoom 2 Lens | Ultra Wide zoom Lens | |||||||||||||||
| Diagonal Width Height(B) | Distance(A) | ||||||||||||||||
| Wide Tele | Wide Tele Wide Tele | ||||||||||||||||
| (inch) | (m) (inch) | (m) | (inch) | (m) (inch) | (m) (inch) | (m) (inch) | (m) (inch) | (m) (inch) | (m) (inch) | (m) (inch) | (m) (inch) | (m) (inch) | (m) (inch) | (m) (inch) | (m) (inch) | (m) (inch) | (m) (inch) |
| 40 | 1.02 | 34 | 0.86 | 21 | 0.54 | 124.9 | 3.17 | 190.3 | 4.83 | 183.3 | 4.65 | 292.2 | 7.42 | 25.8 | 0.65 | 32.8 | 0.83 |
| 50 | 1.27 | 42 | 1.08 | 26 | 0.67 | 157.5 | 4.00 | 239.2 | 6.08 | 232.0 | 5.89 | 368.1 | 9.35 | 32.7 | 0.83 | 41.4 | 1.05 |
| 60 | 1.52 | 51 | 1.29 | 32 | 0.81 | 190.1 | 4.83 | 288.1 | 7.32 | 280.7 | 7.13 | 444.0 | 11.28 | 39.6 | 1.00 | 50.0 | 1.27 |
| 80 | 2.03 | 68 | 1.72 | 42 | 1.08 | 255.2 | 6.48 | 385.9 | 9.80 | 378.1 | 9.60 | 595.9 | 15.13 | 53.3 | 1.35 | 67.3 | 1.71 |
| 100 | 2.54 | 85 | 2.15 | 53 | 1.35 | 320.3 | 8.14 | 483.7 | 12.29 | 475.6 | 12.08 | 747.7 | 18.99 | 67.1 | 1.70 | 84.5 | 2.15 |
| 120 | 3.05 | 102 | 2.58 | 64 | 1.62 | 385.5 | 9.79 | 581.5 | 14.77 | 573.0 | 14.55 | 899.6 | 22.85 | 80.9 | 2.05 | 101.8 | 2.59 |
| 150 | 3.81 | 127 | 3.23 | 79 | 2.02 | 483.2 | 12.27 | 728.2 | 18.50 | 719.1 | 18.27 | 1127.3 | 28.63 | 101.6 | 2.58 | 127.6 | 3.24 |
| 180 | 4.57 | 153 | 3.88 | 95 | 2.42 | 580.9 | 14.75 | 874.9 | 22.22 | 865.3 | 21.98 | 1355.1 | 34.42 | 122.2 | 3.10 | 153.5 | 3.90 |
| 200 | 5.08 | 170 | 4.31 | 106 | 2.69 | 646.0 | 16.41 | 972.7 | 24.71 | 962.7 | 24.45 | 1506.9 | 38.28 | 136.0 | 3.45 | 170.8 | 4.34 |
| 300 | 7.62 | 254 | 6.46 | 159 | 4.04 | 971.7 | 24.68 | 1461.8 | 37.13 | 1449.9 | 36.83 | 2266.2 | 57.56 | 204.9 | 5.20 | 257.0 | 6.53 |
| 400 | 10.16 | 339 | 8.62 | 212 | 5.38 | 1297.3 | 32.95 | 1950.8 | 49.55 | 1937.1 | 49.20 | 3025.4 | 76.85 | 273.8 | 6.95 | 343.2 | 8.72 |
| 500 | 12.70 | 424 | 10.77 | 265 | 6.73 | 1623.0 | 41.22 | 2439.8 | 61.97 | 2424.2 | 61.58 | 3784.7 | 96.13 | 342.7 | 8.70 | 429.4 | 10.91 |
PX9510
| Screen Size | 5J.JAM37.021 5J.JAM37.001 5J.JAM37.051 | |||||||||||||||||||
| Wide Fix Lens | Wide Zoom Lens Standard Lens Semi long Zoom1 | |||||||||||||||||||
| Diagonal Width Height(B) Distance(A) | ||||||||||||||||||||
| N/A Wide | Tele Wide Tele Wide Tele | |||||||||||||||||||
| (inch) | (m) (inch) | (m) | (inch) | (m) (inch) | (m) (inch) | (m) (inch) | (inch) | (m) (inch) | (inch) | (m) (inch) | (m) (inch) | (inch) | (m) | |||||||
| 40 | 1.02 | 32 | 0.81 | 24 | 0.61 | 24.5 | 0.62 | 40.4 | 1.03 | 58.5 | 1.49 | 55.8 | 1.42 | 74.1 | 1.88 | 71.9 | 1.83 | 121.3 | 3.08 | |
| 50 | 1.27 | 40 | 1.02 | 30 | 0.76 | 31.0 | 0.79 | 51.0 | 1.30 | 73.6 | 1.87 | 70.4 | 1.79 | 93.2 | 2.37 | 90.7 | 2.30 | 152.4 | 3.87 | |
| 60 | 1.52 | 48 | 1.22 | 36 | 0.91 | 37.6 | 0.96 | 61.6 | 1.57 | 88.8 | 2.25 | 85.1 | 2.16 | 112.4 | 2.86 | 109.5 | 2.78 | 183.5 | 4.66 | |
| 80 | 2.03 | 64 | 1.63 | 48 | 1.22 | 50.8 | 1.29 | 82.9 | 2.11 | 119.0 | 3.02 | 114.3 | 2.90 | 150.8 | 3.83 | 147.0 | 3.73 | 245.7 | 6.24 | |
| 100 | 2.54 | 80 | 2.03 | 60 | 1.52 | 63.9 | 1.62 | 104.1 | 2.65 | 149.2 | 3.79 | 143.5 | 3.65 | 189.1 | 4.80 | 184.6 | 4.69 | 307.9 | 7.82 | |
| 120 | 3.05 | 96 | 2.44 | 72 | 1.83 | 77.1 | 1.96 | 125.4 | 3.18 | 179.4 | 4.56 | 172.8 | 4.39 | 227.4 | 5.78 | 222.1 | 5.64 | 370.1 | 9.40 | |
| 150 | 3.81 | 120 | 3.05 | 90 | 2.29 | 96.8 | 2.46 | 157.3 | 3.99 | 224.8 | 5.71 | 216.7 | 5.50 | 285.0 | 7.24 | 278.4 | 7.07 | 463.4 | 11.77 | |
| 180 | 4.57 | 144 | 3.66 | 108 | 2.74 | 116.6 | 2.96 | 189.1 | 4.80 | 270.1 | 6.86 | 260.5 | 6.62 | 342.5 | 8.70 | 334.8 | 8.50 | 556.7 | 14.14 | |
| 200 | 5.08 | 160 | 4.06 | 120 | 3.05 | 129.7 | 3.30 | 210.4 | 5.34 | 300.3 | 7.63 | 289.8 | 7.36 | 380.8 | 9.67 | 372.3 | 9.46 | 618.9 | 15.72 | |
| 300 | 7.62 | 240 | 6.1 | 180 | 4.57 | 195.5 | 4.97 | 316.6 | 8.04 | 451.5 | 11.47 | 436.0 | 11.07 | 572.6 | 14.54 | 560.0 | 14.23 | 930.0 | 23.62 | |
| 400 | 10.16 | 320 | 8.13 | 240 | 6.1 | 261.3 | 6.64 | 422.9 | 10.74 | 602.6 | 15.31 | 582.2 | 14.79 | 764.3 | 19.41 | 747.8 | 18.99 | 1241.0 | 31.52 | |
| 500 | 12.70 | 400 | 10.16 | 300 | 7.62 | 327.1 | 8.31 | 529.1 | 13.44 | 753.7 | 19.14 | 728.5 | 18.50 | 956.1 | 24.28 | 935.5 | 23.76 | 1552.0 | 39.42 | |
| Screen Size | 5J.JAM37.031 5J.JAM37.041 5J.JAM37.061 | ||||||||||||||||
| Long Zoom I Lens | Long zoom 2 Lens | Ultra Wide zoom Lens | |||||||||||||||
| Diagonal Width Height(B) | Distance(A) | ||||||||||||||||
| Wide Tele | Wide Tele Wide Tele | ||||||||||||||||
| (inch) | (m) (inch) | (m) | (inch) | (m) (inch) | (m) (inch) | (m) (inch) | (inch) | (m) (inch) | (inch) | (m) (inch) | (m) (inch) | (m) | |||||
| 40 | 1.02 | 32 | 0.81 | 24 | 0.61 | 115.9 | 2.94 | 176.8 | 4.49 | 169.6 | 4.31 | 271.2 | 6.89 | 23.9 | 0.61 | 30.4 | 0.77 |
| 50 | 1.27 | 40 | 1.02 | 30 | 0.76 | 146.2 | 3.71 | 222.3 | 5.65 | 215.0 | 5.46 | 341.9 | 8.68 | 30.3 | 0.77 | 38.4 | 0.98 |
| 60 | 1.52 | 48 | 1.22 | 36 | 0.91 | 176.5 | 4.48 | 267.9 | 6.80 | 260.3 | 6.61 | 412.6 | 10.48 | 36.7 | 0.93 | 46.5 | 1.18 |
| 80 | 2.03 | 64 | 1.63 | 48 | 1.22 | 237.1 | 6.02 | 358.9 | 9.12 | 350.9 | 8.91 | 554.0 | 14.07 | 49.5 | 1.26 | 62.5 | 1.59 |
| 100 | 2.54 | 80 | 2.03 | 60 | 1.52 | 297.7 | 7.56 | 450.0 | 11.43 | 441.6 | 11.22 | 695.3 | 17.66 | 62.4 | 1.58 | 78.6 | 2.00 |
| 120 | 3.05 | 96 | 2.44 | 72 | 1.83 | 358.2 | 9.10 | 541.0 | 13.74 | 532.2 | 13.52 | 836.7 | 21.25 | 75.2 | 1.91 | 94.7 | 2.40 |
| 150 | 3.81 | 120 | 3.05 | 90 | 2.29 | 449.1 | 11.41 | 677.6 | 17.21 | 668.2 | 16.97 | 1048.8 | 26.64 | 94.4 | 2.40 | 118.8 | 3.02 |
| 180 | 4.57 | 144 | 3.66 | 108 | 2.74 | 540.0 | 13.72 | 814.2 | 20.68 | 804.1 | 20.42 | 1260.9 | 32.03 | 113.7 | 2.89 | 142.9 | 3.63 |
| 200 | 5.08 | 160 | 4.06 | 120 | 3.05 | 600.6 | 15.26 | 905.3 | 22.99 | 894.8 | 22.73 | 1402.2 | 35.62 | 126.5 | 3.21 | 158.9 | 4.04 |
| 300 | 7.62 | 240 | 6.1 | 180 | 4.57 | 903.6 | 22.95 | 1360.5 | 34.56 | 1348.0 | 34.24 | 2109.1 | 53.57 | 190.7 | 4.84 | 239.2 | 6.08 |
| 400 | 10.16 | 320 | 8.13 | 240 | 6.1 | 1206.6 | 30.65 | 1815.8 | 46.12 | 1801.2 | 45.75 | 2816.0 | 71.53 | 254.9 | 6.47 | 319.5 | 8.12 |
| 500 | 12.70 | 400 | 10.16 | 300 | 7.62 | 1509.5 | 38.34 | 2271.1 | 57.69 | 2254.3 | 57.26 | 3522.9 | 89.48 | 319.1 | 8.10 | 399.9 | 10.16 |
PU9530
| Screen Size | 5J.JAM37.021 5J.JAM37.001 5J.JAM37.051 | ||||||||||||||||||
| Wide Fix Lens | Wide Zoom Lens Standard | Lens Semi long Zooml | |||||||||||||||||
| Diagonal Width Height(B) Distance(A) | |||||||||||||||||||
| N/A Wide | Tele Wide Tele | Tele Wide Tele | |||||||||||||||||
| (inch) | (m) (inch) | (m) | (inch) | (m) (inch) | (m) (inch) | (m) (inch) | (m) (inch) | (m) (inch) | (m) (inch) | (m) (inch) | (m) (inch) | (m) (inch) | (m) (inch) | (m) (inch) | (m) (inch) | (m) (inch) | (m) (inch) | (m) (inch) | (m) (inch) |
| 40 | 1.02 | 34 | 0.86 | 21 | 0.54 | 25.1 | 0.64 | 41.4 | 1.05 | 59.9 | 1.52 | 57.2 | 1.45 | 75.8 | 1.93 | 73.6 | 1.87 | 124.1 | 3.15 |
| 50 | 1.27 | 42 | 1.08 | 26 | 0.67 | 31.8 | 0.81 | 52.3 | 1.33 | 75.4 | 1.92 | 72.1 | 1.83 | 95.5 | 2.42 | 92.9 | 2.36 | 155.9 | 3.96 |
| 60 | 1.52 | 51 | 1.29 | 32 | 0.81 | 38.5 | 0.98 | 63.1 | 1.60 | 90.9 | 2.31 | 87.1 | 2.21 | 115.1 | 2.92 | 112.1 | 2.85 | 187.8 | 4.77 |
| 80 | 2.03 | 68 | 1.72 | 42 | 1.08 | 52.0 | 1.32 | 84.9 | 2.16 | 121.8 | 3.09 | 117.0 | 2.97 | 154.3 | 3.92 | 150.5 | 3.82 | 251.4 | 6.39 |
| 100 | 2.54 | 85 | 2.15 | 53 | 1.35 | 65.5 | 1.66 | 106.6 | 2.71 | 152.7 | 3.88 | 147.0 | 3.73 | 193.5 | 4.92 | 188.9 | 4.80 | 315.0 | 8.00 |
| 120 | 3.05 | 102 | 2.58 | 64 | 1.62 | 78.9 | 2.01 | 128.4 | 3.26 | 183.6 | 4.66 | 176.9 | 4.49 | 232.8 | 5.91 | 227.6 | 5.78 | 378.6 | 9.62 |
| 150 | 3.81 | 127 | 3.23 | 79 | 2.02 | 99.1 | 2.52 | 161.0 | 4.09 | 230.0 | 5.84 | 221.8 | 5.63 | 291.6 | 7.41 | 285.0 | 7.24 | 474.1 | 12.04 |
| 180 | 4.57 | 153 | 3.88 | 95 | 2.42 | 119.3 | 3.03 | 193.6 | 4.92 | 276.4 | 7.02 | 266.7 | 6.77 | 350.5 | 8.90 | 342.6 | 8.70 | 569.5 | 14.47 |
| 200 | 5.08 | 170 | 4.31 | 106 | 2.69 | 132.8 | 3.37 | 215.3 | 5.47 | 307.3 | 7.81 | 296.6 | 7.53 | 389.7 | 9.90 | 381.0 | 9.68 | 633.1 | 16.08 |
| 300 | 7.62 | 254 | 6.46 | 159 | 4.04 | 200.1 | 5.08 | 324.0 | 8.23 | 461.9 | 11.73 | 446.3 | 11.34 | 585.9 | 14.9 | 573.2 | 14.56 | 951.2 | 24.16 |
| 400 | 10.16 | 339 | 8.62 | 212 | 5.38 | 267.4 | 6.79 | 432.7 | 10.99 | 616.6 | 15.66 | 595.9 | 15.14 | 782.3 | 19.87 | 765.3 | 19.44 | 1269.7 | 32.25 |
| 500 | 12.70 | 424 | 10.77 | 265 | 6.73 | 334.8 | 8.50 | 541.5 | 13.75 | 771.2 | 19.59 | 745.6 | 18.94 | 978.3 | 24.85 | 957.4 | 24.32 | 1587.8 | 40.33 |
| Screen Size | 5J.JAM37.03 | 5J.JAM37.04 | 5J.JAM37.06 | | ||||||||||||||||
| Long Zoom 1 Lens | Long zoom 2 Lens | Ultra Wide zoom Lens | |||||||||||||||
| Diagonal Width Height(B) | Distance(A) | ||||||||||||||||
| Wide Tele | Wide Tele Wide Tele | ||||||||||||||||
| (inch) | (m) (inch) | (m) | inch) | (m) (inch) | (m) (inch) | (m) (inch) | (inch) (m) | (inch) (m) | (inch) (m) | (inch) (m) | (inch) (m) | ||||||
| 40 | 1.02 | 34 | 0.86 | 21 | 0.54 | 118.7 | 3.01 | 181.0 | 4.60 | 173.9 | 4.42 | 277.7 | 7.05 | 24.5 | 0.62 | 31.1 | 0.79 |
| 50 | 1.27 | 42 | 1.08 | 26 | 0.67 | 149.7 | 3.80 | 227.6 | 5.78 | 220.2 | 5.59 | 350.0 | 8.89 | 31.1 | 0.79 | 39.2 | 1.00 |
| 60 | 1.52 | 51 | 1.29 | 32 | 0.81 | 180.7 | 4.59 | 274.1 | 6.96 | 266.6 | 6.77 | 422.3 | 10.73 | 37.6 | 0.96 | 47.4 | 1.20 |
| 80 | 2.03 | 68 | 1.72 | 42 | 1.08 | 242.7 | 6.16 | 367.3 | 9.33 | 359.4 | 9.13 | 567.0 | 14.40 | 50.8 | 1.29 | 63.8 | 1.62 |
| 100 | 2.54 | 85 | 2.15 | 53 | 1.35 | 304.3 | 7.73 | 460.4 | 11.70 | 452.1 | 11.48 | 711.6 | 18.07 | 63.9 | 1.62 | 80.2 | 2.04 |
| 120 | 3.05 | 102 | 2.58 | 64 | 1.62 | 366.7 | 9.31 | 553.6 | 14.06 | 544.9 | 13.84 | 856.2 | 21.75 | 77.1 | 1.96 | 96.6 | 2.45 |
| 150 | 3.81 | 127 | 3.23 | 79 | 2.02 | 459.4 | 11.67 | 693.3 | 17.61 | 684.0 | 17.37 | 1073.1 | 27.26 | 96.8 | 2.46 | 121.1 | 3.08 |
| 180 | 4.57 | 153 | 3.88 | 95 | 2.42 | 552.4 | 14.03 | 833.0 | 21.16 | 823.1 | 20.91 | 1290.1 | 32.77 | 116.5 | 2.96 | 145.7 | 3.70 |
| 200 5 | 08 | 170 | 4.31 | 106 | 2.69 | 614.7 | 15.6 | 926 | 4 | 23.53 | 915.9 | 23.26 | 14 | 34.7 | 36 | 44 | 129 | 7 | 3.29 | 162.1 | 4 | 12 | ||||
| 300 7 | 62 | 254 | 6.46 | 159 | 4.04 | 924.0 | 23.47 | 13 | 92.1 | 35 | 36 | 1379.6 | 35.04 | 2157.8 | 54.81 | 195.4 | 4 | 96 | 244.0 | 6.20 | ||||||
| 400 1 | 0.16 | 339 | 8.62 | 212 | 5.38 | 1233.9 | 31.34 | 1857.9 | 47.19 | 1843.3 | 46.82 | 2880.9 | 73.13 | 261.2 | 6.63 | 32 | 5.9 | 8.28 | ||||||||
| 500 1 | 2.70 | 424 | 10.77 | 265 | 6.73 | 1543.7 | 39.21 | 2323.6 | 59.02 | 2307.1 | 58.60 | 3604.0 | 91.54 | 326.9 | 8.30 | 407.7 | 10.36 |
Lens shift adjustable range
The adjustable range for lens shift is tabulated below and subject to the conditions listed.

The drawings below apply to the standard lens only.
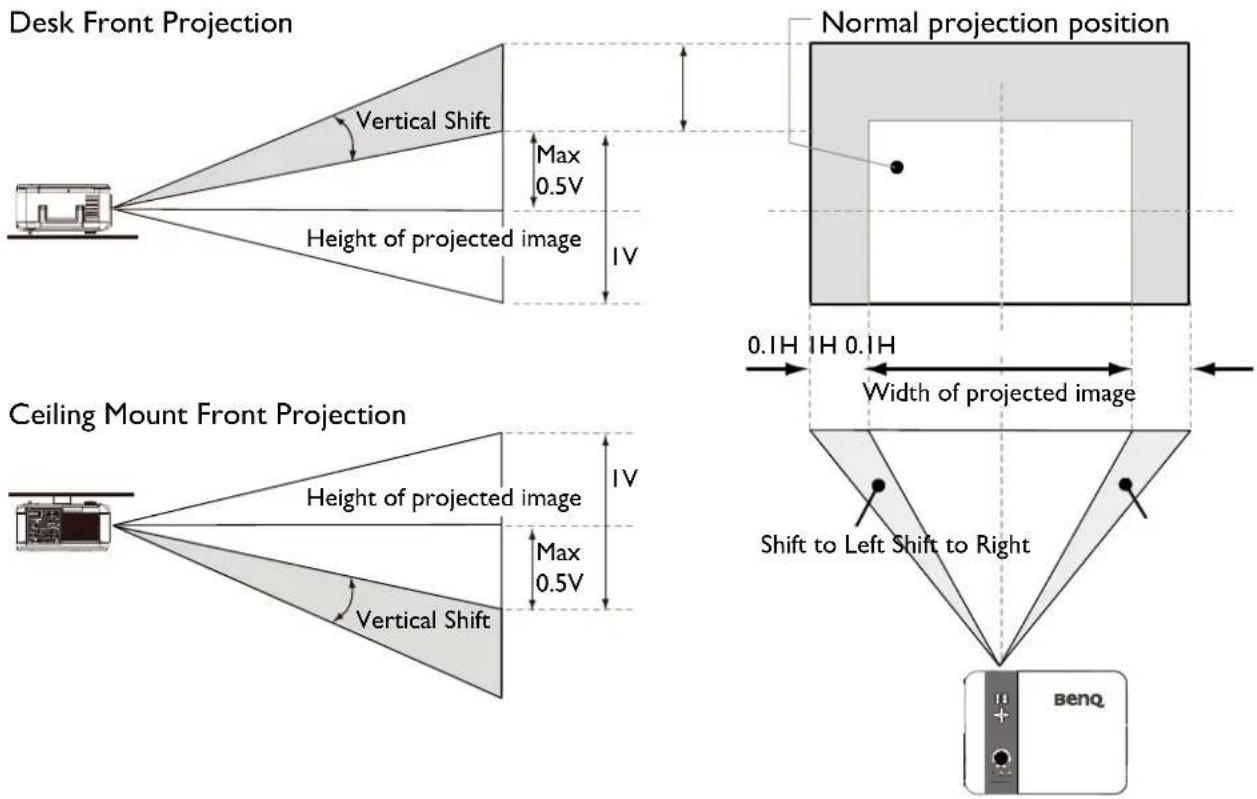
Preventing the unauthorized use of the projector
The projector has a built-in security feature to lock the OSD control panels and deny remote control operation. The security feature has no default keyword; in the first instance of enabling the security feature, the user must define a keyword.
Locking the projector
To setup the security keyword, refer to the following guide.
I. Press Menu on the OSD control panel on the projector or remote control to display the Main menu. Press arrow keys to select Security Lock under Setup > Advanced menu, then enable the function.
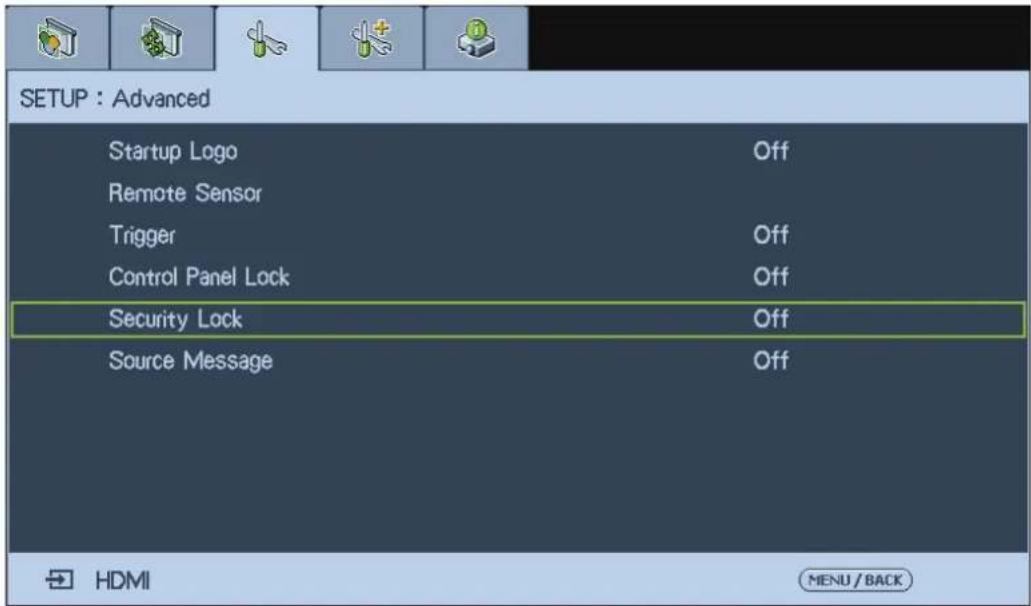
- Enter the password by arrow keys and confirm to perform Security Lock function.
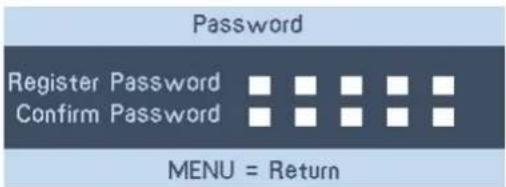
- If the Security Lock function is performed, the PIN code window will be displayed when any control button is pressed.
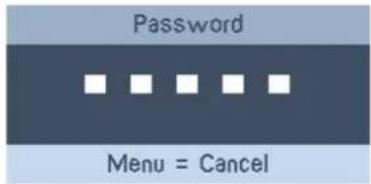

When you have set or changed the password, take a memo and keep it securely. If you forget your PIN code, the projector can no longer be stared. Contact your dealer or the service center.
Unlocking the projector
To unlock the projector, refer to the following guide.
-
When the projector is locked, either by request during operation or at start up, the locked message is displayed.
-
To unlock the projector, press Menu on the control panel or remote control. The PIN code window is displayed. Enter the previously defined PIN code to activate the projector.
Locking the control panel
Press Menu on the OSD control panel on the projector or remote control to display the Main menu. Press arrow keys to selectPanel Key Lock under Setup >Advanced menu, then enable the function to lock control panel on the projector.
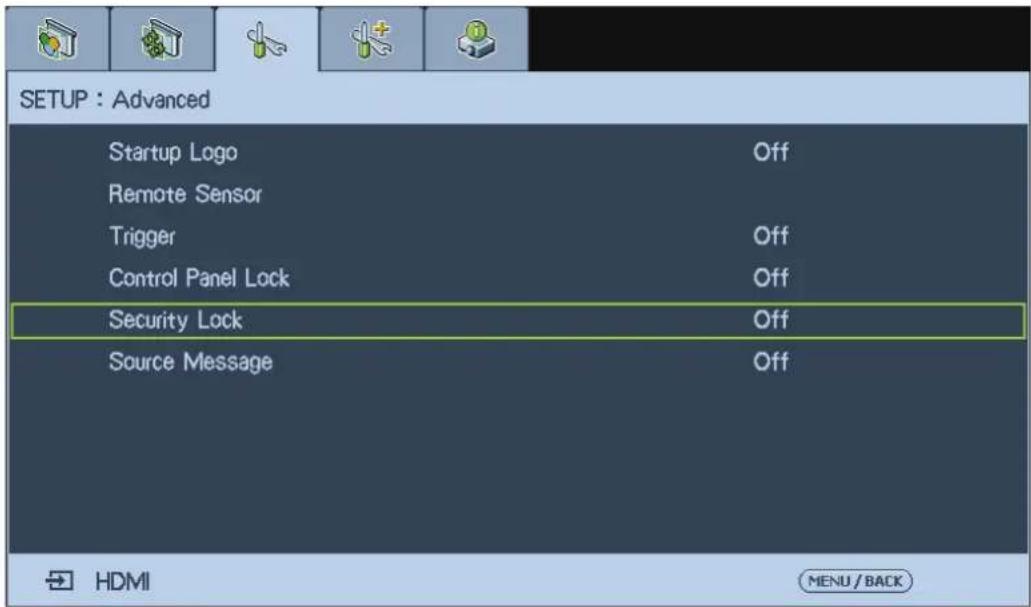
Once Panel Key Lock is performed, locking message displays on the screen few seconds if any control button is pressed.
Control Panel Look is turned on
To unlock the control panel, use ◀ or ▶ button on the remote control to disable the Panel Key Lock function. The unlocking message shows on the screen few seconds.
Control Panel Lock unlocked
Using the physical lock
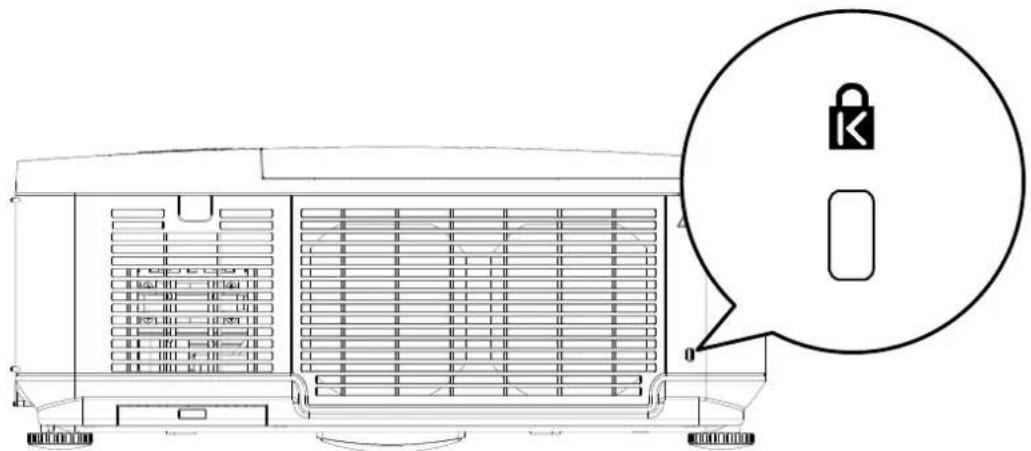
If you are concerned about security, attach the projector to a permanent object with the Kensington slot and a security cable.
Making connections
Preparations
When connecting a signal source to the projector, be sure to:
I. Turn off all equipment before making any connections.
2. Use only the correct type cables for each source with proper type plugs.
3. Ensure that all cable plugs are firmly fitted to the equipment jacks.

Note that all cables shown in the following connection diagrams may not be supplied with the projector (See “Shipping contents” on page 7). Most cables are commercially available from electronics stores.
Connecting DVI-D devices
DVI-D (Digital Visual Interface) supports uncompressed video data transmission between compatible devices like DTV tuners, DVD players and displays over a single cable. It provides pure digital viewing and listening experience. You should use an DVI-D cable when making connection between the projector and DVI-D devices.

To make sure you select a correct input source type for the DVI-D signal.
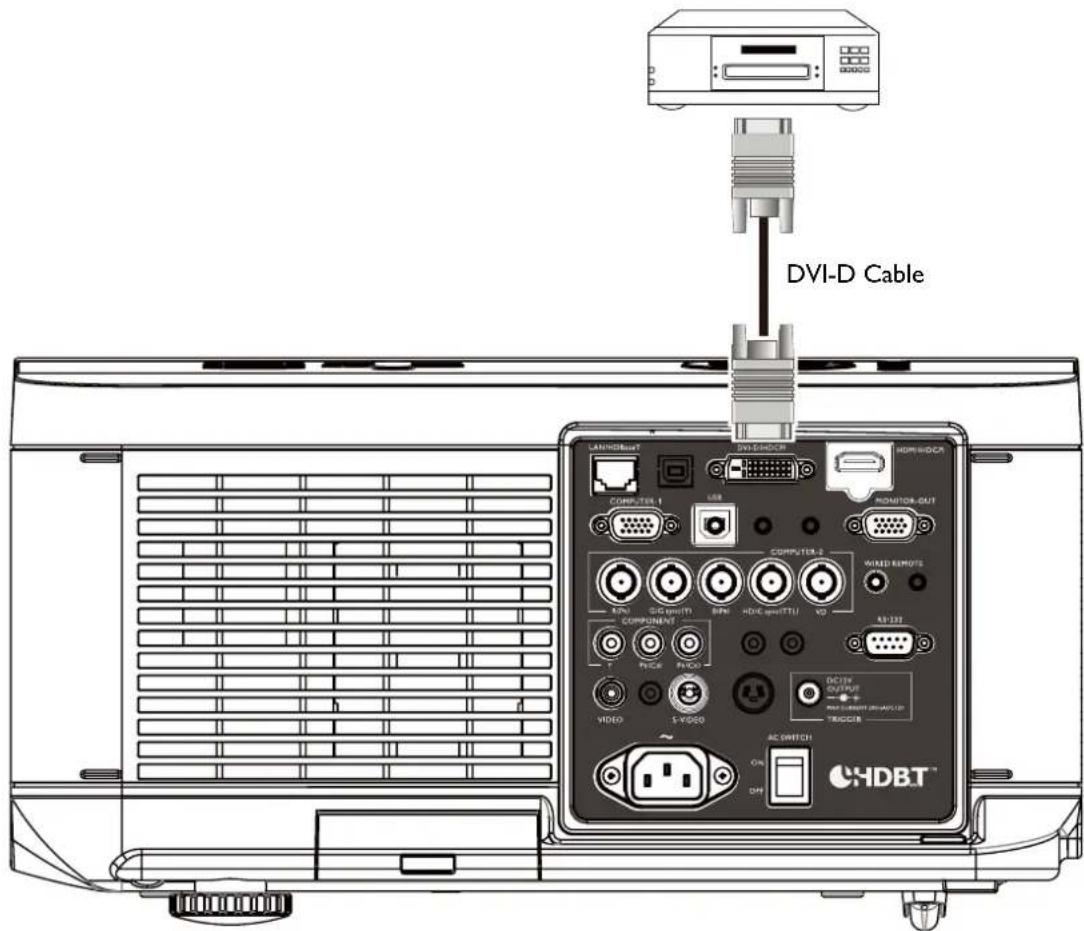
DVI-D device: DVD player, digital tuner, etc.
Connecting COMPONENT-video devices
Be sure to match the corresponding colors between the cables and the terminals. The COMPUTER 2 and COMPONENT and be used for connection to video output devices.
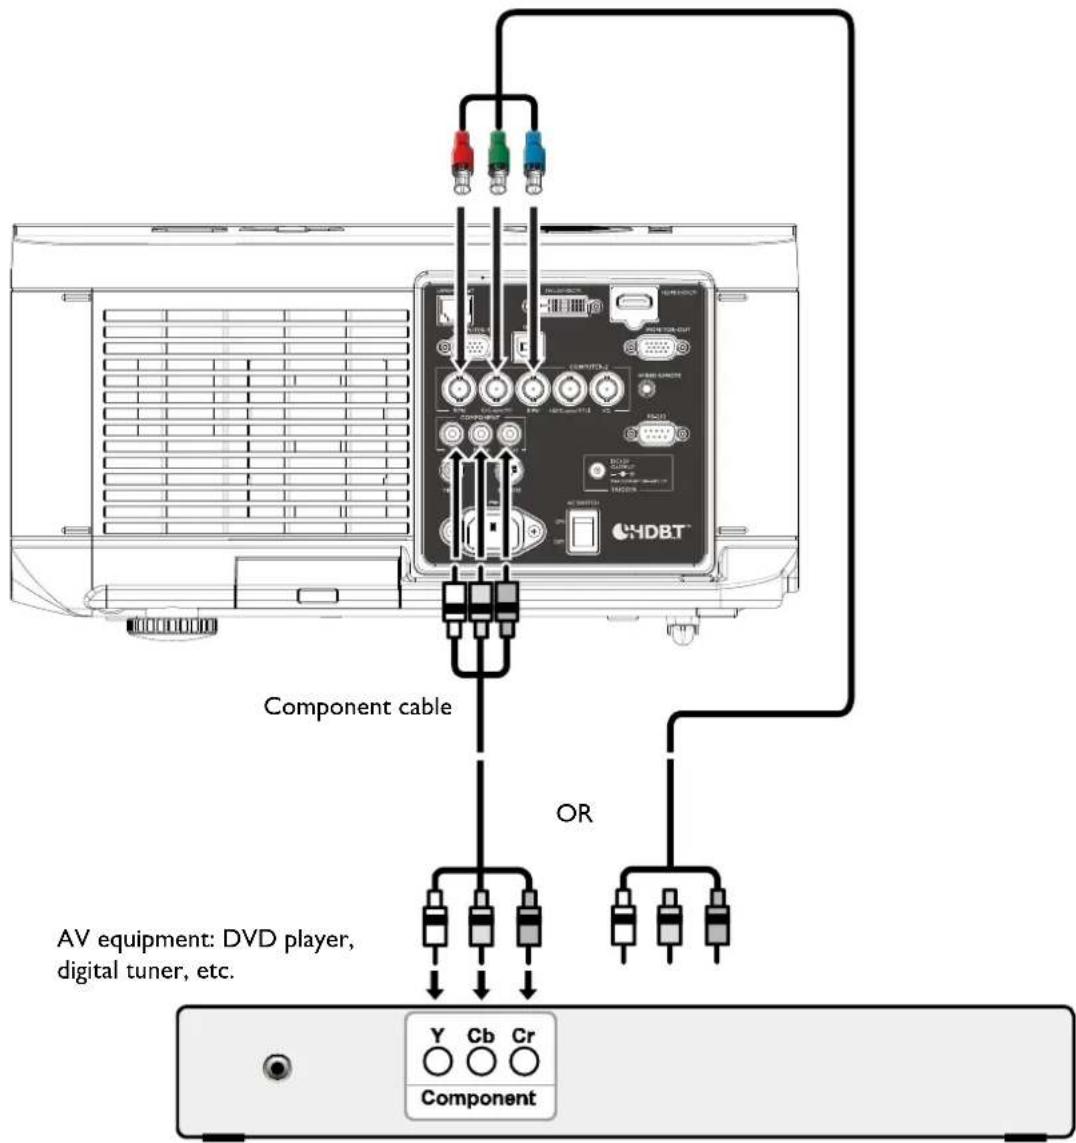

- If you have already made a Component Video connection between the projector and the video source device, you need not connect to this device again using a composite Video connection as this makes an unnecessary second connection of poorer picture quality.
- If the selected video image is not displayed after the projector is turned on and the correct video source has been selected, please check that the video source device is turned on and operating correctly. Also check that the signal cables have been connected correctly.
Connecting a computer
Connect the projector to a computer with a COMPUTER 1 or COMPUTER 2 as below illustration.
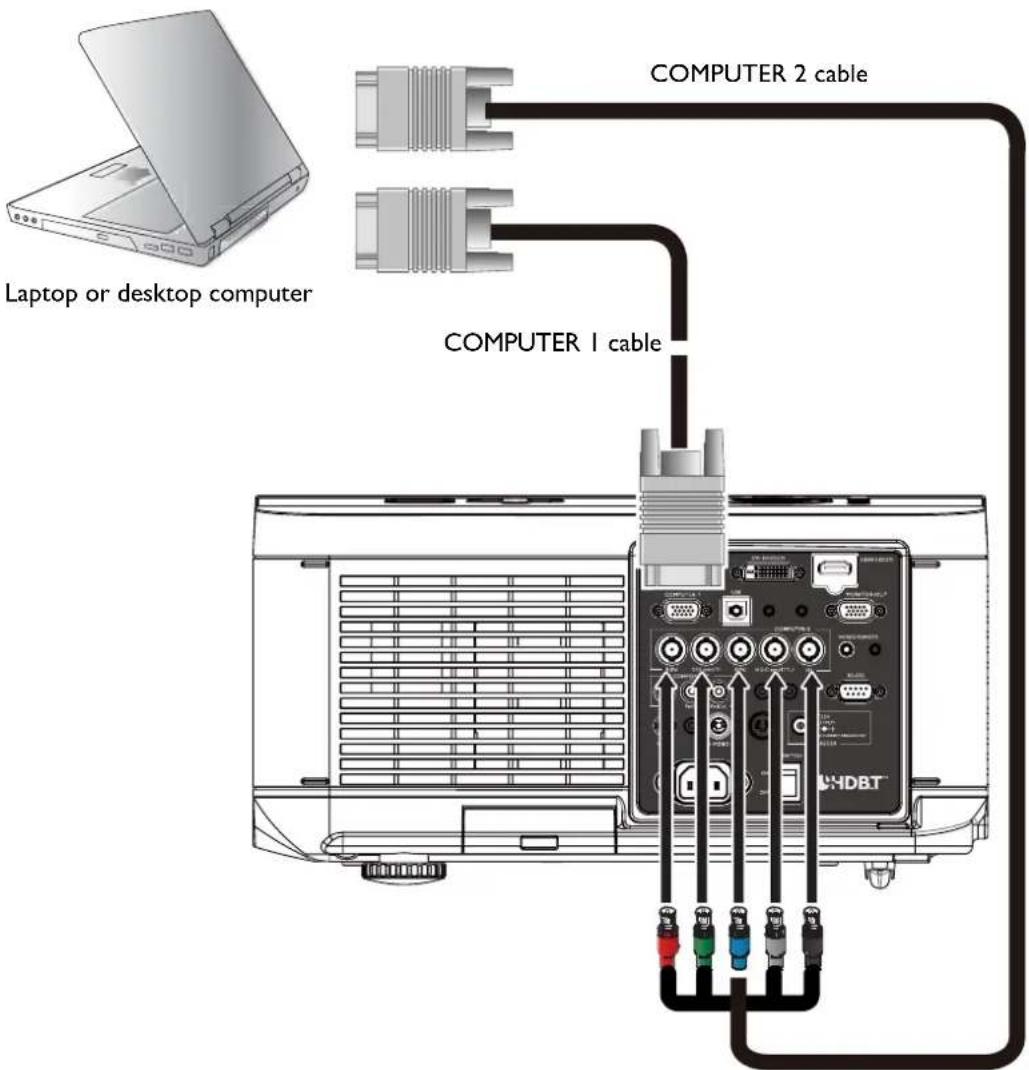

Many laptops do not turn on their external video ports when connected to a projector. Usually a key combination like Fn + F3 or CRT/LCD key turns the external display on/off. Locate a function key labeledCRT/LCD or a function key with a monitor symbol on the laptop. PressFn and the labeled function key simultaneously. Refer to your laptop's documentation to discover your laptop's key combination.
Connecting a external HDBaseT transmitter
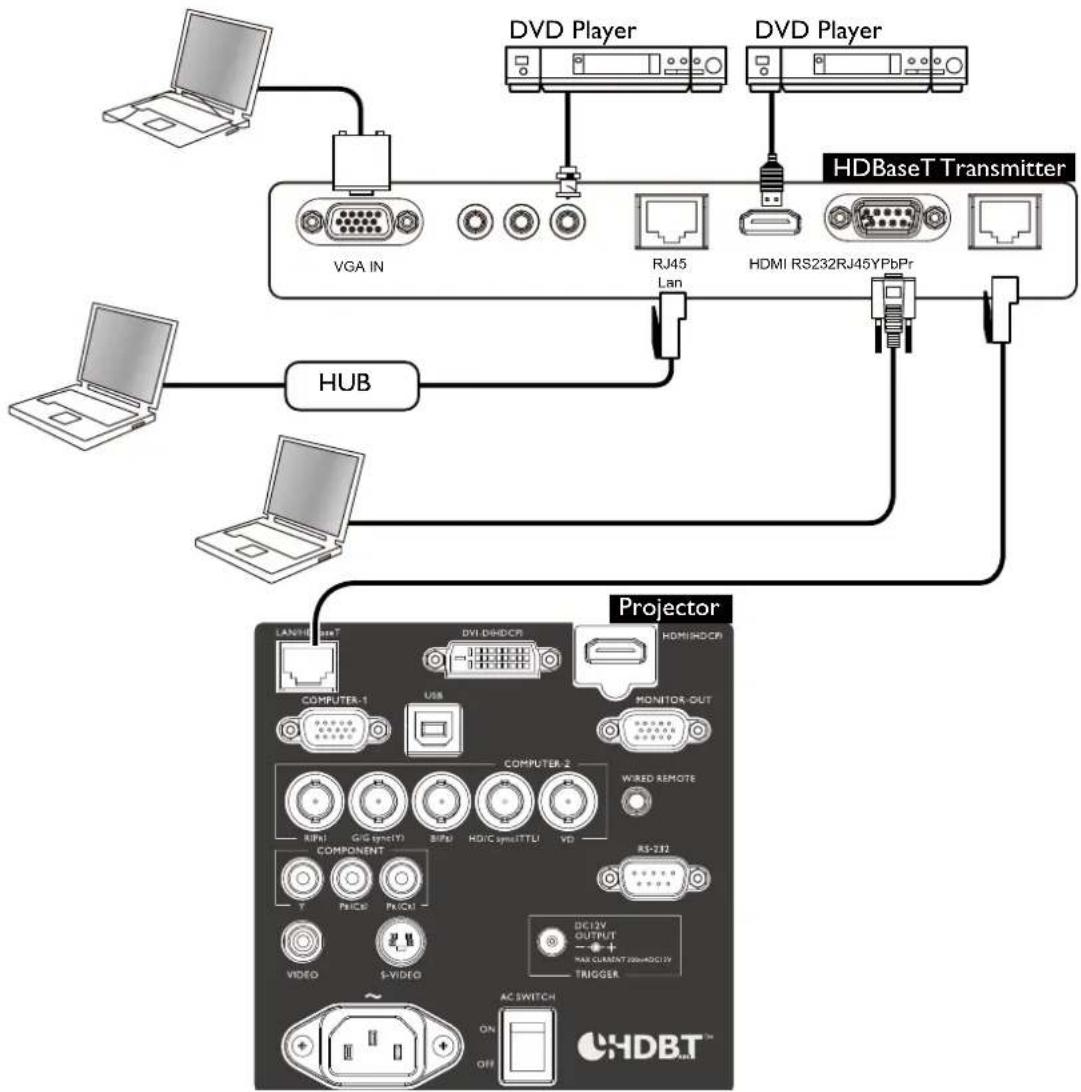
The projector features a built-in HD Connect for you to work with optional HDBaseT transmitter to send video, RS-232, LAN signal to projector with single RJ-45 cable. If the optional HDBaseT transmitter supports IR remote controller I/O, you may also send IR remote controller signal to PU9530/PW9520/PX9510 projector using the same RJ-45 cable.
flowchart
graph TD
    A["Computer"] --> B["UGA IN"]
    C["Computer"] --> D["HUB"]
    B --> E["VDG Player"]
    D --> F["VDG Player"]
    E --> G["RJ45 Lan"]
    F --> H["HDMI RS232RJ45YPbPr"]
    G --> I["HDBaseT Transmitter"]
    H --> I
    I --> J["Projector"]
    J --> K["AC SWITCH ON OFF"]
    K --> L["VIDEO S-VIDEO"]
    L --> M["COMPONENT"]
    M --> N["COMPITER-1 USB MONITOR-OUT"]
    N --> O["COMPUTER-2 WIRED REMOTE"]
    O --> P["MONITOR-OUT HDI/HD/HD/HD/HD/HD/HD/HD/HD/HD/HD/HD/HD/HD/HD/HD/HD/HD/HD/HD/HD/HD/HD/HD/HD/HD/HD/HD/HD/HD/HD/HD/HD/HD/HD/HD/HD/HD/HD/HD/HD/HD/HD/HD/HD/HD/HD/HD/HD/HD/HD/HC"]
    style A fill:#f9f,stroke:#333
    style C fill:#f9f,stroke:#333
    style J fill:#ccf,stroke:#333
    style K fill:#cfc,stroke:#333
    style L fill:#fcc,stroke:#333
    style M fill:#cff,stroke:#333
    style N fill:#ffc,stroke:#333
    style O fill:#ffc,stroke:#333
    style P fill:#ffc,stroke:#333
    style Q fill:#ffc,stroke:#333
    style R fill:#ffc,stroke:#333
    style S fill:#ffc,stroke:#333
    style T fill:#ffc,stroke:#333
    style U fill:#ffc,stroke:#333
    style V fill:#ffc,stroke:#333
    style W fill:#ffc,stroke:#333
    style X fill:#ffc,stroke:#333
    style Y fill:#ffc,stroke:#333
    style Z fill:#ffc,stroke:#333

- The HDBaseT/LAN of your projector supports to video, RS-232, remote controller, and network control signal receiving but not Power over Ethernet (PoE) transmission and receiving.
- To send RS232 commands with an external digital transmitter via RJ45 cable to your projector: set INSTALLATION> RS232 > Channel to HDBaseT in OSD menu, the transmission speed is changed to 9600 by the system automatically.
- Effective transmission distance of your digital transmitter is 100 meters. Transmission over 100 meters may lead to projection screen interruption, interference, or control signal failure.
- Please use Cat.5e RJ-45 cable or better and prevent the cable from becoming twisted. Otherwise the cable may be damaged and signal transmission quality poor, reducing transmission distance and image.
Connecting a monitor
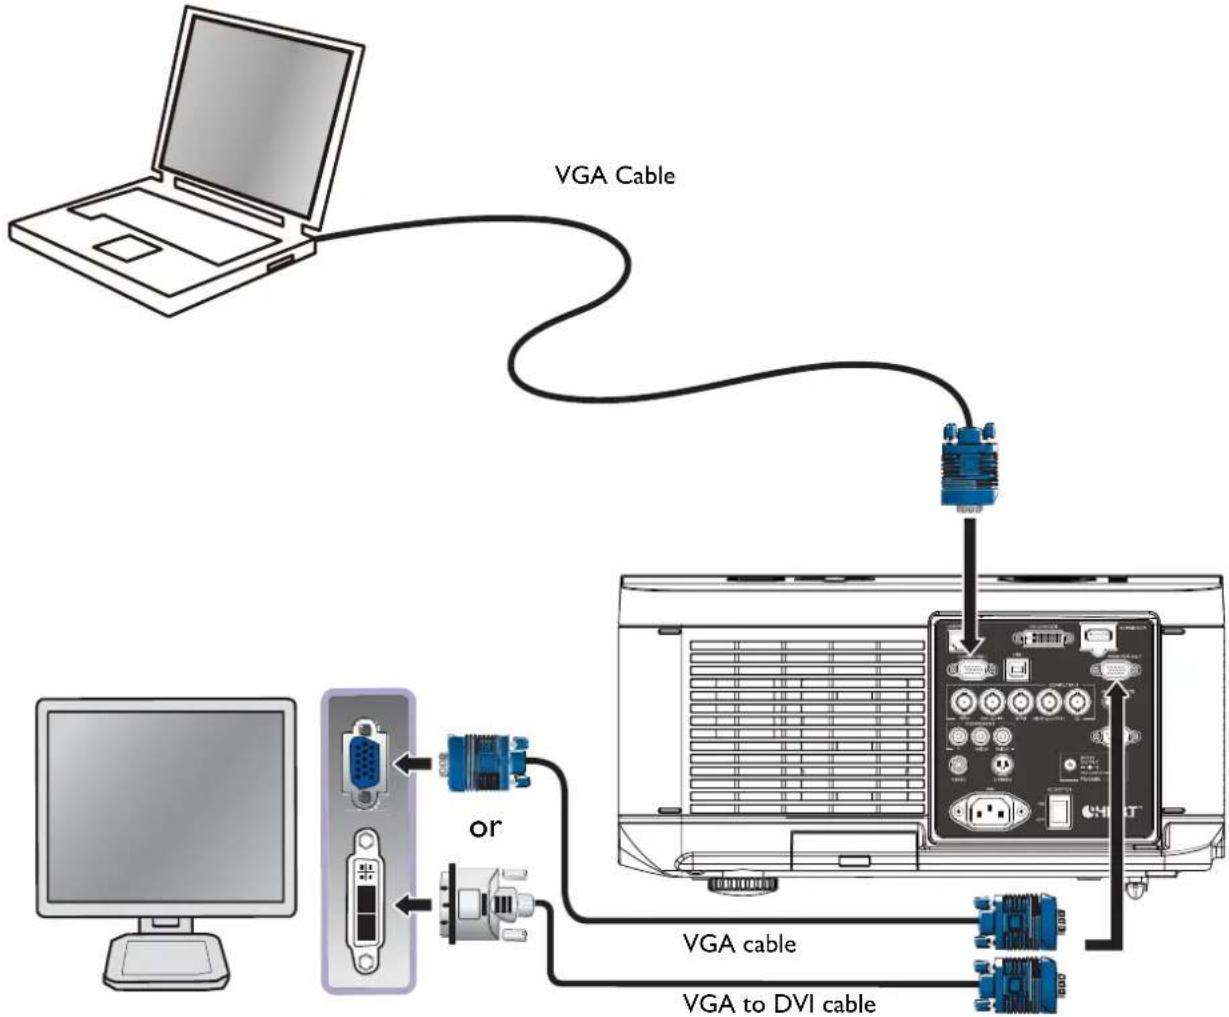
If you want to view your presentation close-up on a monitor as well as on the screen and the MONITOR OUT jack is available on your projector, you can connect theMONITOR OUT signal output jack on the projector.
flowchart
graph TD
    A["Laptop"] -->|VGA Cable| B["Outdoor Console"]
    B -->|VGA cable| C["Computer"]
    B -->|VGA to DVI cable| D["Computer"]

• The MONITOR OUT jack only works when an appropriate D-Sub input is made to the PC jack.
- The MONITOR OUT function is not available when the projector enters standby mode.
Using the projector
Preparations
I. Plug in and turn all of the connected equipment on.
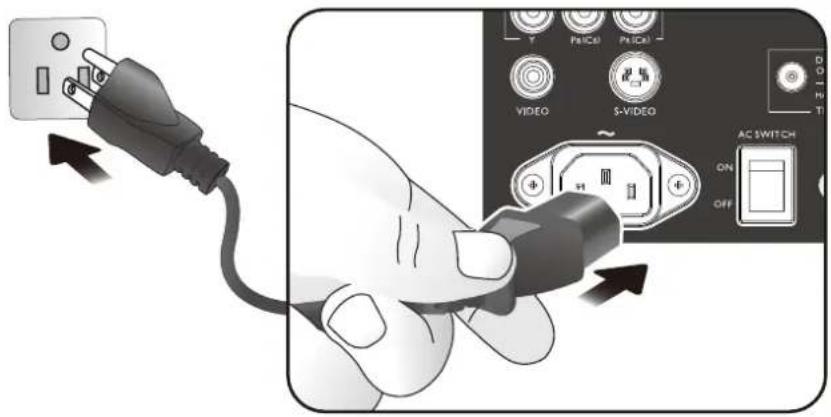
2. If not already in, plug the supplied power cable into the AC inlet on the rear of the projector.
3. Plug the power cable into a wall power outlet and turn the wall switch on.

Please use the original accessories (e.g. power cable) only with the device to avoid possible dangers such as electric shock and fire.
Turning the projector on or off
Once the projector is correctly located and the power cable and other connections are in place, it is important that the projector is connected and powered on correctly in order to avoid possible dangers such as electric shock and fire. Refer to the following guide to power on the projector.
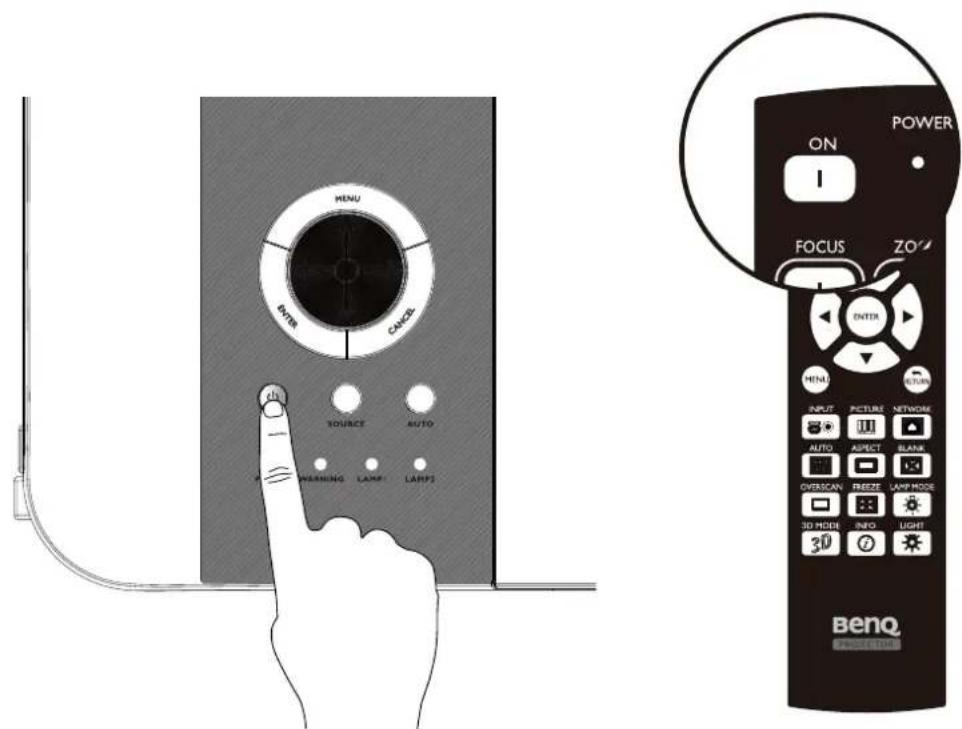
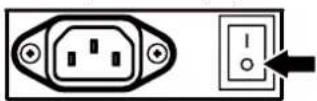
I. Turn the main power switch to ON, Power light is red after power has been applied.
2. Press the POWER button on the projector or ON button on the remote control to start the projector. The Power and Lamp LED flashes green and the cooling fan start operating.
3. The projected image will be displayed on the screen for a few second while it is warming up.
4. Once the power LED is lit a solid green, the projector is ready for use.
5. If any of the LEDs remain flashing or blink there may be a problem with the start up. Please refer to "Troubleshooting" on page 58.

If you attempt to re-start the projector shortly after shutdown, the fans may run for a few minutes to cool down. Press Power again to start the projector after the fans stop and the Power indicator light turns orange.
Selecting an input source
The projector can be connected to multiple equipment at the same time. When the projector is first turned on, it will attempt to reconnect with the input source which was in use when the projector was last shut down.
To select the video source
The input source can be selected from the projector's control panel or from the remote control. Refer to the following guide to select the desired input source.
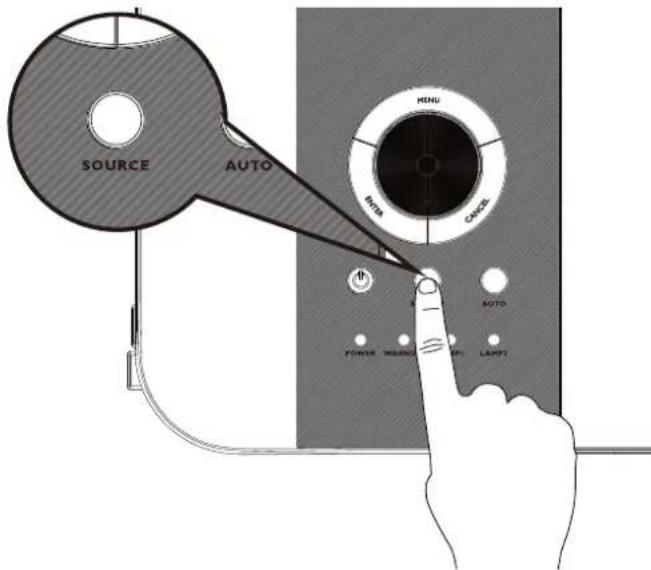
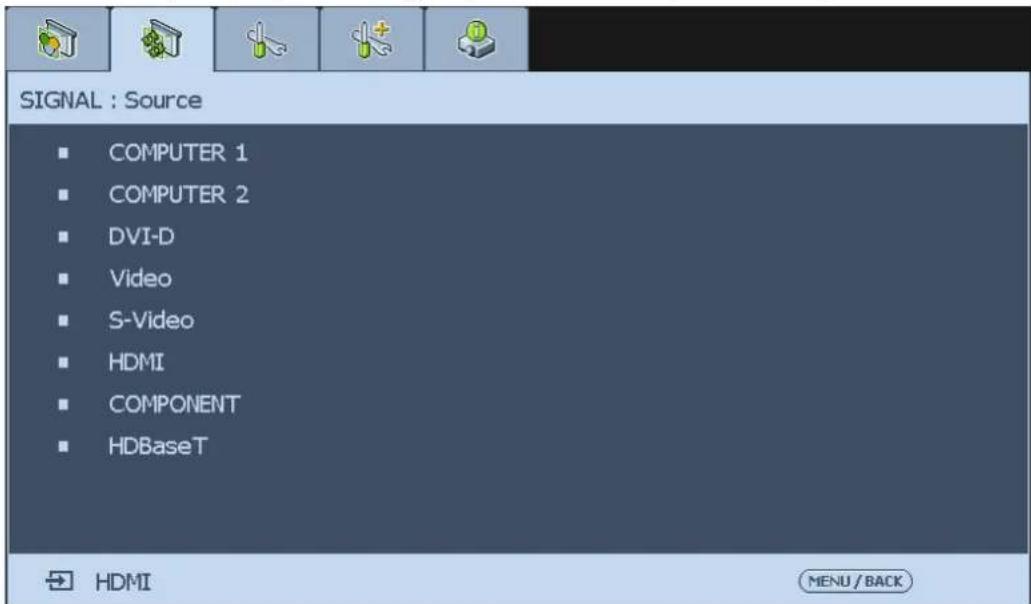
I. Press INPUT key on the remote control or control panel to display Source menu.
2 Select your desired input source via ▲/▼ key.
- Press ENTER key to confirm the source, it will take few seconds to detect the desired input signal and display the projected image.
Press RETURN key to projected image if you want to keep current input source.
If you want the projector to automatically search for the signals, select On in the Signal > Auto Search menu.
Using the menus
The projector is equipped with multilingual On-Screen Display (OSD) for making various adjustment and settings, below is the overview of the OSD menu.
To use the OSD menu, please set the OSD menu to your familiar language.
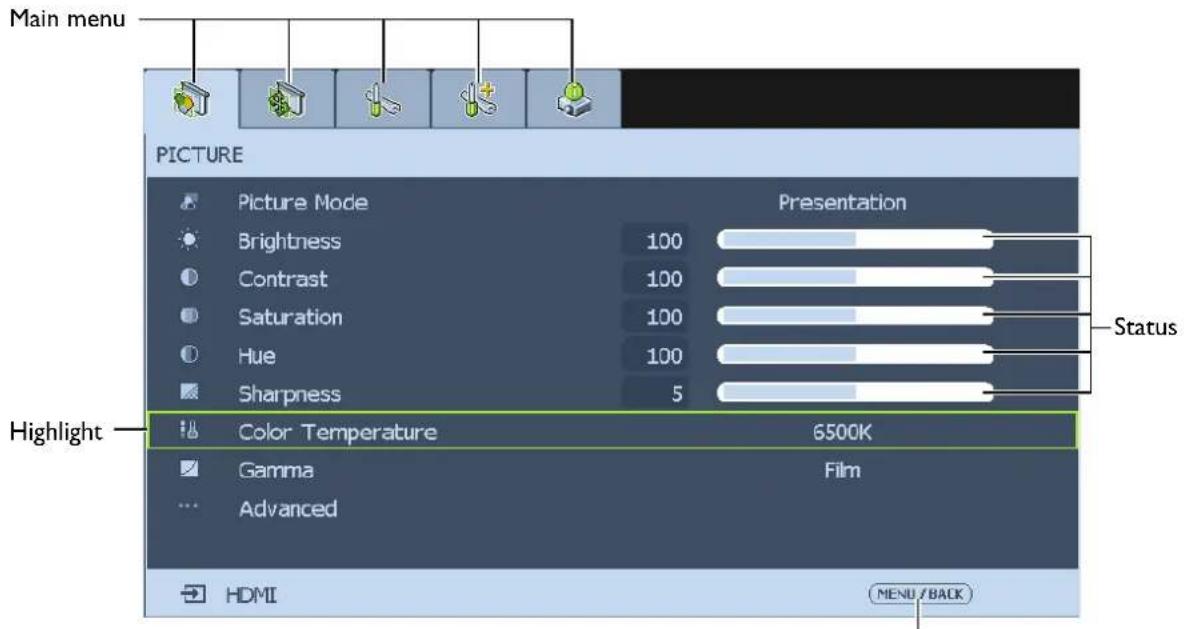
Press MENU to go back to the previous page or to exit.
Adjusting the projected image
Adjusting the image position
The projected image position and size can be adjusted manually from the control panel or the remote control unit. Refer to the following guides to adjust picture position manually.
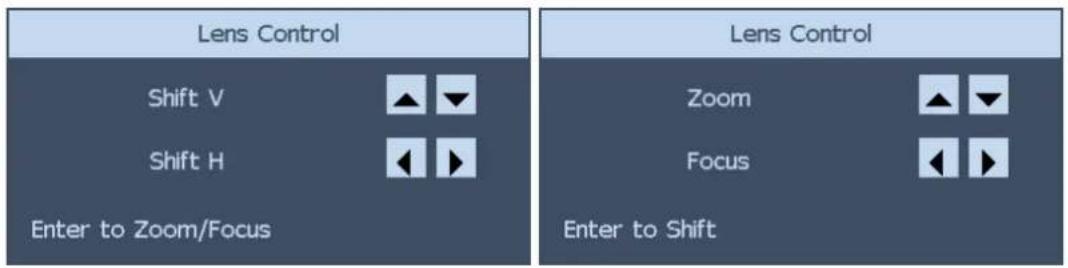
I. Press the LENS SHIFT key on the remote control to bring up the Lens Shift window or press direction key to ship the projected image directly.
2. If the lens shift is operated via remote control, use ENTER button to switch Lens shift and Zoom/Focus, arrow buttons to adjust Lens shift setting.
Fine-tuning the image size and clarity
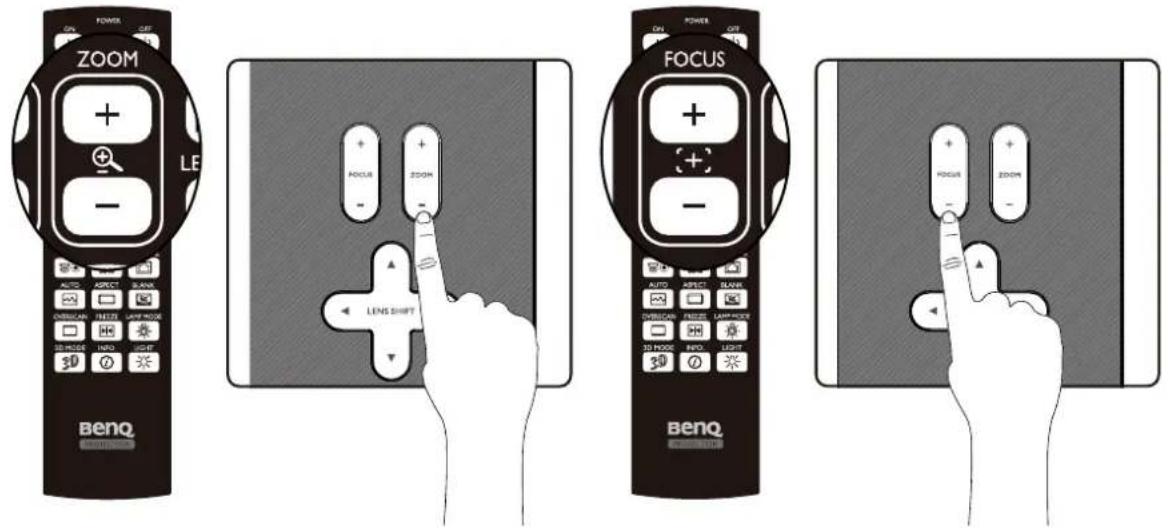
I. Press the ZOOM + or ZOOM- button on the control panel or the remote control to adjust the projected imaged as you desired.
2 Sharpen the picture by pressing FOCUS+ or FOCUS- button on the control panel or the remote control.
Adjusting the projection angle
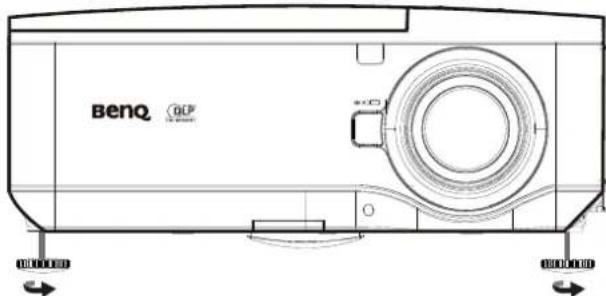
There are two adjuster feet on the bottom of the projector, these can be used if necessary to change the projection angle. Screw the feet in or out as appropriate to aim and level the projection angle.
I. Twist the adjusters clockwise to raise the level of the projector.
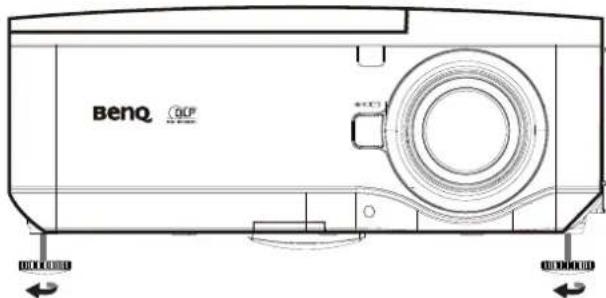
- To lower the level of the projector, lift the projector and twist the adjusters counter clockwise.
Correcting picture distortion
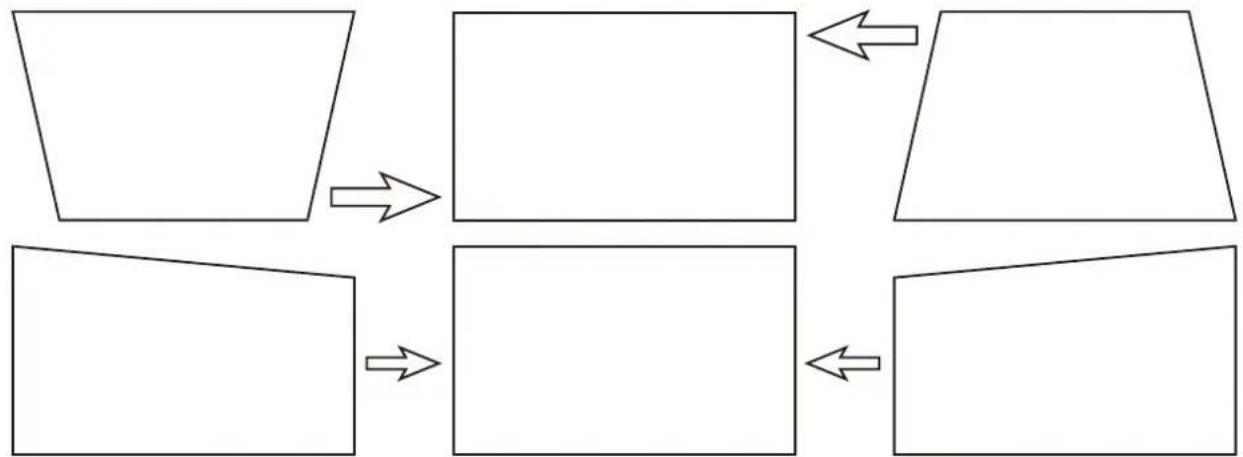
When the image is projected either from the top or from the bottom towards the screen at angle, the image becomes distorted trapezoidally. Keystone function in the SETUP > Keystone can be used to correct trapezoidal distortion, select V Keystone or H Keystone then press ◀/▶ button to correct trapezoidal distortion till you are satisfied with the shape.
flowchart
graph TD
    A["Top: Flat, Right Arrow"] --> B["Left: Square, Left Arrow"]
    C["Bottom: Triangle, Left Arrow"] --> D["Right: Square, Left Arrow"]
    E["Right: Square, Left Arrow"]
When the values reach their maximum or minimum with repeated key presses, the picture's shape will stop changing. You will not be able to change the picture further in that direction.
Auto-adjusting the image
In some cases, you may need to optimize the RGB picture quality. To do this, presAUTO key on the remote control or control panel, the built-in Intelligent Auto Adjustment function will re-adjust the values of Frequency and Clock to provide the best picture quality.

This function is only available when a PC signal (analog RGB) is selected.
Turning off the projector
If the projector is no longer required, it is important to shut it down correctly to avoid damage or unnecessary wear and tear to the projector. Refer to the following guide to turn the projector off.

- Do not unplug the power cable from the wall outlet or projector when the projector is powered on, it may cause damage to the AC IN connector of the projector and (or) the prong plug of the power cable.
- Do not turn off the AC power supply within 10 seconds of making adjustment or setting changes and closing the menu, it may cause loss of adjustments and settings and return to default.
I. Press the POWER button on the control panel or OFF button on the remote control.
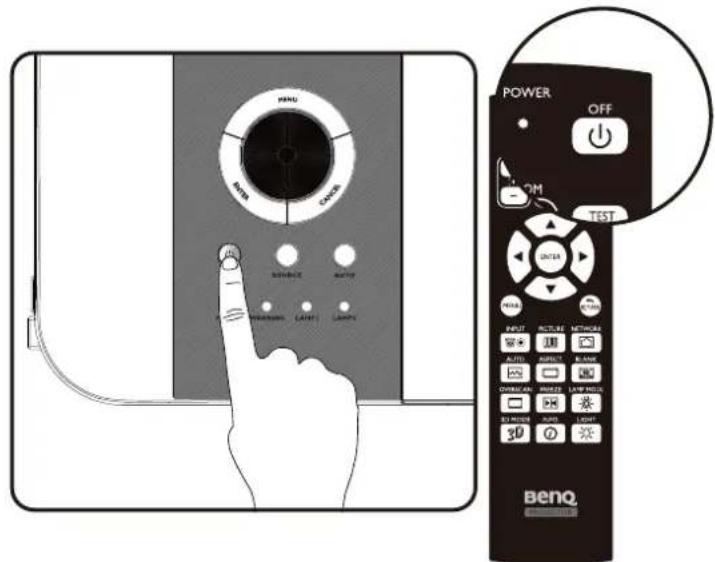
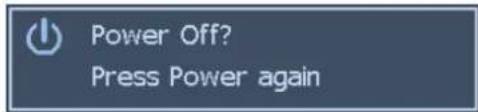
- Press the POWER or OFF button again to verify power off, the cooling fans continue to operate (cooling-off time) and the power LED flashes orange. The cooling fans stop.
- Press the Main Power switch to the off position (O) to turn off the projector.
Using On-Screen Display
Using the menus
The projector has an On-Screen Display (OSD) that lets you make image adjustments and change various settings.
Navigating the OSD
You can use the remote control or the buttons on the top of the projector to navigate and make changes to the OSD. The following illustration shows the corresponding buttons on the remote control and on the projector.
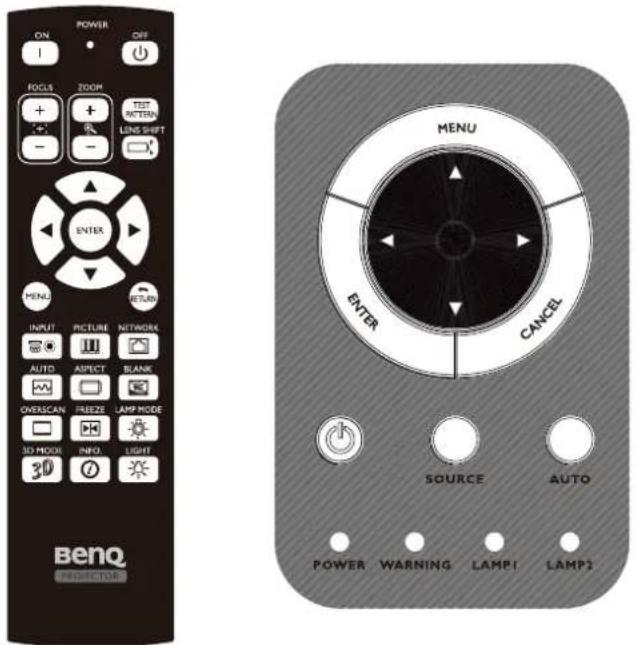
I. To open the OSD, press the Menu button on the OSD control panel or remote control. There are five folders on the menu. Press the cursor ◀ or ▶ buttons to move through secondary menus.
2. Press ▲ or ▼ to select menu items and ◀ or ▶ to change values for settings. Press ENTER to confirm the new setting.
- Press CANCEL/RETURN to leave a submenu or MENU to close menu.
On-Screen Display (OSD) menus
Use the following illustrations to quickly find a setting or determine the range for a setting. Please note that the on-screen display (OSD) menus vary according to the signal type selected.
Menu Map
Menu Sub Menus and Control
| PICTURE Picture Mode Bright | ||
| Presentation | ||
| Cinema | ||
| Brightness | ||
| Contrast | ||
| Saturation | ||
| Hue | ||
| Sharpness | ||
| Color Temperature Native | ||
| 6500K | ||
| 7800K | ||
| 9300K | ||
| Gamma 2.2 | ||
| Film | ||
| Graphics | ||
| Video | ||
| PC | ||
| Advanced Input Balance | R Offset, G Offset, BOffset, Red Gain, GreenGain, Blue Gain | |
| HSG | Red, Green, Blue, Cyan,Magenta, Yellow, White | |
| Noise Reduction | ||
| Dynamic Black | ||
| SIGNAL Source | ||
| COMPUTER 1, COMPUTER | ||
| 2, DVI-D, Video, S-Video,HDMI, COMPONENT,HDBaseT | ||
| Auto Search | On, Off | |
| Auto Sync Adjust | Always, Auto | |
| Color Space | Auto, YPbPr, YCbCr, RGB-PC, RGB-Video | |
| VGA Setup | H Total, H Start, H Phase, VStart | |
| Aspect Ratio 5:4, 4:3, | 16:10, 16:9, 1.88:1,2.35:1, Auto, Native | |
| Overscan | On, Off | |
| Background | Blue, Black, Logo | |
Menu Sub Menus and Control
| SETUP Language | English, Deutsch, Español, Français, Italiano, Svenska, Português, Русский, 繁體中文,簡體中文,한국어,日本語 | |
| Lamp Settings | Dual, Single, Lamp1,Lamp2 | |
| Lamp Power | Normal, Eco, CustomPower Level | |
| Custom Power LevelKeystone H / V Keystone | ||
| Digital Alignment | Digital Zoom, Digital Pan,Digital Scan, Reset | |
| H/V Alignment | H Zoom, V Zoom, H Shift, VShift, Reset | |
| 3D 3D Format | Off, Auto, Side by Side,Top / Bottom, FrameSequential | |
| DLP-Link | On, Off | |
| 3D Swap | Normal, Reverse | |
| 3D 24Hz Display | 96Hz, 144Hz | |
| Filter Message | Off, 100H, 200H, 500H,1000H | |
| Advanced Startup Logo | On, Off | |
| Remote Receiver | ||
| Trigger | ||
| Panel Key Lock | ||
| Security Lock | ||
| Source Message | ||
Menu Sub Menus and Control
| INSTALLATION Projector Installation | Front Table, Rear Table, Front Ceiling, Rear Ceiling | ||
| Standby Setting | Standard, Eco, Network | ||
| High Altitude | On, Off | ||
| Auto Power Off | On, Off | ||
| Auto Power On | On, Off | ||
| RS232 Baud rate | 115200, 57600, 38400, 19200, 14400, 9600 | ||
| Channel | Local, HDBaseT | ||
| Network Settings IP Address | 192.168.00.100 | ||
| Subnet mask | 255.255.255.0 | ||
| Gateway | 192.168.00.254 | ||
| DNS | 0.0.0.0 | ||
| DHCP | On, Off | ||
| Apply | Apply, Cancel | ||
| MAC Address | x: x: x: x: x: x: x | ||
| Lens Control Enter | |||
| Zoom | |||
| Focus | Enter, Shift V, Shift H | ||
| Test Pattern | Color Bar, Crosshatch, Burst, H Ramp, Red, Green, Blue, White, Black, Off | ||
| HDBaseT / Network | Auto, HDBaseT | ||
| SERVICE Model BenQ projector | |||
| Serial Number | xxxxx xxxxx | ||
| Software Version | xxxxx xxxxx | ||
| BenQ Firmware version | xx-xxx | ||
| Lamp Status Lamp1 Status | |||
| Lamp2 Status | |||
| Source Information Active Source VGA | |||
| Pixel Clock | 13.50 MHZ | ||
| Signal Format | 1080P | ||
| H/V Refresh Rate | H: 15.736 KHZ V: 60 HZ | ||
| Sync Type Separate Sync | |||
| Sync Polarity | H:() V:() | ||
| Scan Type Non-Interlace Video Type PAL | |||
| Usage Time | Lamp1 Life Remaining, Lamp2 Life Remaining, Lamp1 Time, Lamp2 Time, Filter Time, Power On Time | ||
| Filter Timer Reset | Reset Filter Time ? | OK, Cancel | |
| Factory Reset | Reset Everything ? | OK, Cancel | |
PICTURE
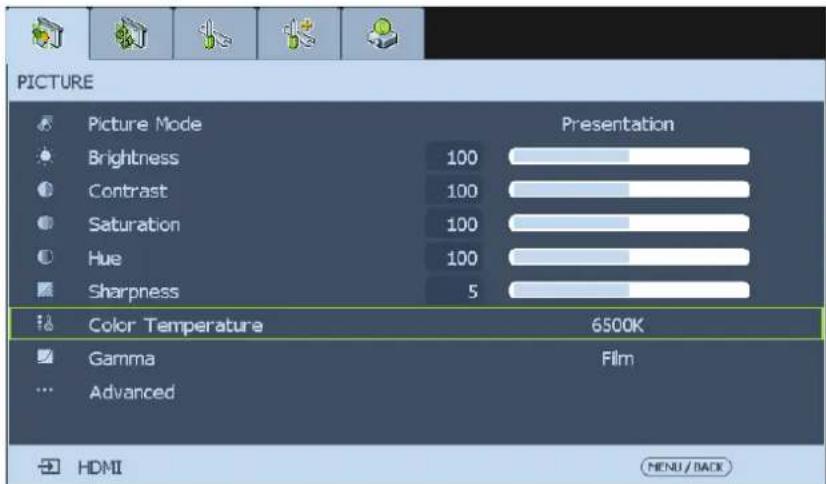
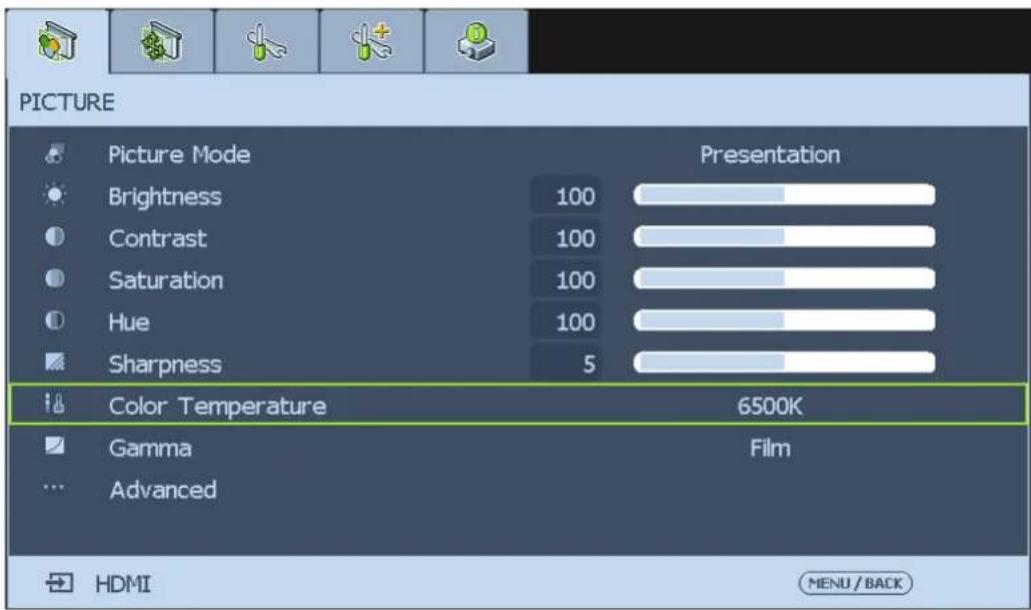
The pre-defined picture mode settings can be altered via the available items shown in the PICTURE menu such as picture mode, brightness, color temperature...etc..
Picture Mode
Select a set of preset values using ◀ or ▶ from the list.
Bright: Maximizes the brightness of the projected image for more enhanced presentations. Presentation: For standard image, it's suitable for the best effect of the projected image or picture.
Cinema: Give natural tint to the projected image.
Brightness
Adjust the Brightness value using ◀ or ▶ to lighten or darken the picture.
Contrast
Adjust the Contrast value using ◀ or ▶ to highlight the differences between light and dark areas of the picture.
Saturation
Use ◀ or ▶ to adjust Saturation of the main color, the selected color become lighter or thicker.
Hue
Use ◀ or ▶ to adjust Hue of the main color as below.
| Main Color Hue | |||
| R Magenta | Yellow | ||
| G Yellow | Cyan | ||
| B Cyan | Magenta | ||
| C Green | Blue | ||
| M Blue | Red | ||
| Y Red | Green | ||
Sharpness
Adjust the Sharpness value using ◀ or ▶ to sharpen or blur the borders between colors and objects.
Color Temperature
Set the color temperature to Native, 6500K, 7800K, and 9300K.
About color temperatures:
There are many different shades that are considered to be "white" for various purposes. One of the common methods of representing white color is known as the "color temperature". A white color with a low color temperature appears to be reddish white. A white color with a high color temperature appears to have more blue in it.
Gamma
Details of darker areas in an image may look worse when ambient light is very bright. You may use the following gamma correction options to adjust color difference of image.
2.2: Set color difference correction to 2.2
Film: Adjust color difference correction to approximate Gamma 2.2.
Graphics: Apply to situation where brightness at the expense of gray scale precision is required by computer demonstration document.
Video: Similar to film color difference correction but differs in the darker colored areas of an image. This addresses the image creation function employed by cameras.
PC: It's suitable for the application when personal computer is connected.
Advanced
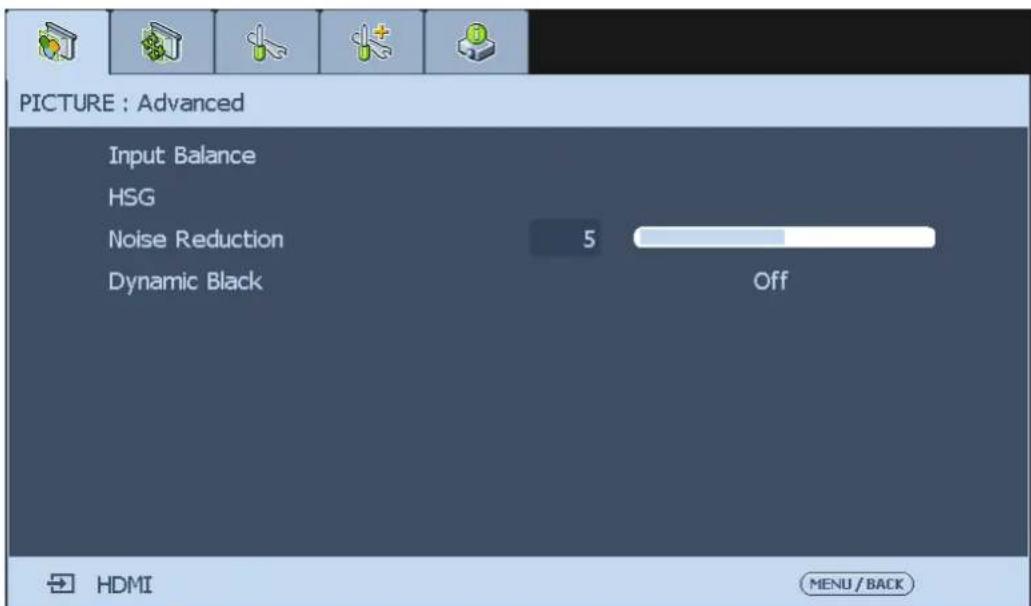
Input Balance
There are two options to fine tune Red, Green and Blue color.
Offset: Use this function to shift the color spectrum for the whole image and change its brightness, the offset of the corresponding color can be adjusted accordingly if minimal amount of red, green or blue appears in the gray areas. After the offset is increased, the image brightness will become lower.
Gain: Use this option to increase or decrease the range of color input for the entire image, lower the gain of the corresponding color If minimal amount of red, green or blue appears in the gray areas. The contrast of the image will become lower as gain increases.
HSG
Use this function to adjust Hue, Saturation and Gain independently, it allows for specified color adjustments that are more intuitive. This is a useful function to adjust Hue, Saturation and Gain for Red, Green, Blue, Cyan, Magenta, Yellow and white independently in some applications such as edge blending...etc.
Noise Reduction
This function provides high-quality images with minimal crawl and cross color noise, you can set your preferred level from 0 to 15 steps to view a clear image.
Dynamic Black
Set this function as ON to improve the black level of the projected images.
SIGNAL
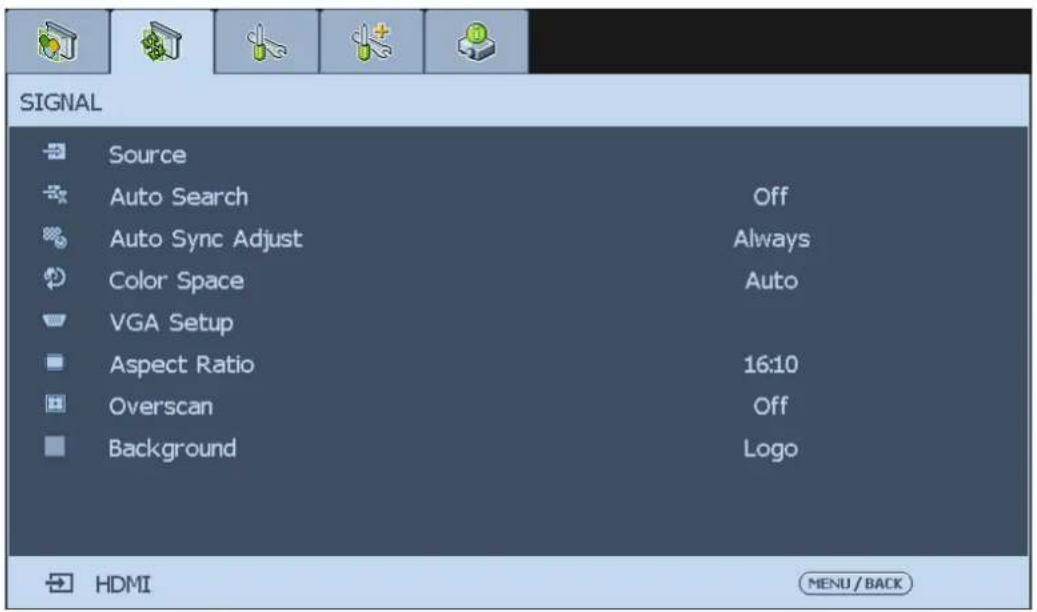
Source
This function is the same as the Hotkey on your remote controller. You can select the desired input source via the remote controller or this function.
HDMI: This is the terminal to input HDMI signals from PC or media device.
DVI-D: This is the terminal to input DVI-D signals from PC.
COMPUTER 1: This is the terminal to input RGB signals from PC.
COMPUTER 2: This is the terminal to input YCbCr/YPbPr or RGB singals (RGBHV) from PC or media device.
HDBaseT/LAN: This is the terminal to input uncompressed high-definition video (HD) via RJ-45 cable.
Auto Search
This function enables the projector to detect the input signal and to switch the input mode automatically when the project is turned on. Set it to On to enable Auto Search function or Off to disable it.
Color Space
This function enables you to change color space of input signal. In most cases, you can select Auto to adopt the color space automatically set by the projector. You can select one the following options to use specific color space instead:
Auto: The projector switches to valid color space by detecting input signal.
YCbCr: Set color space to ITU-R BT.601.
YPbPr: Set color space to ITU-R BT.709.
RGB-PC: Set color space to RGB with black set to 0,0,0 and white to 255, 255, 255 (for 8-bit image).
RGB-Video: Set color space to RGB with black set to 16, 16, 16 and white to 235, 235, 235 (for 8-bit image) to comply with brilliance value defined in digital component standard.
VGA Setup
Set up VGA signal display's H Total, H Start, H Phase and V Start.
Aspect Ratio
Select aspect ratio for the projected image.
For normal input of 16:10 the aspect ratio will look like the following images:
Normal output 16:10
Aspect ratio of output screen 5:4
Aspect ratio of output screen 4:3
Aspect ratio of output screen 16:9
Aspect ratio of output screen 1.88
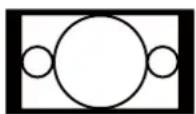
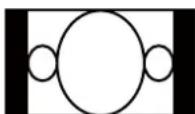
Aspect ratio of output screen 2.35:1
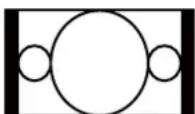
Aspect ratio of output screen Letter Box
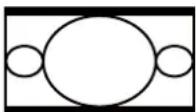
Aspect ratio of output screen Auto
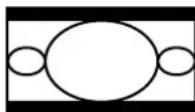
Aspect ratio of output screen Native
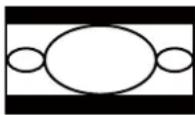
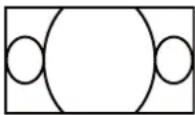
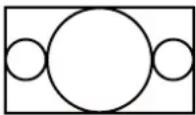
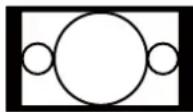
For normal input of ratio 4:3, the aspect ratio will look like the following images:
Normal output 4:3 Aspect ratio of
output screen 5:4
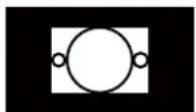
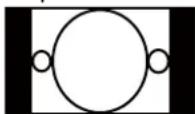
Aspect ratio of output screen 2.35:1
Aspect ratio of output screen 4:3
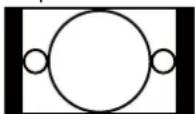
Aspect ratio of output screen Letter Box
Aspect ratio of output screen 16:9
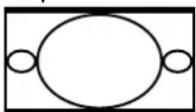
Aspect ratio of output screen Auto
Aspect ratio of output screen 1.88
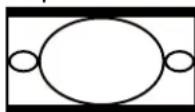
Aspect ratio of output screen Native
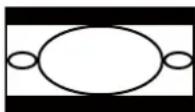
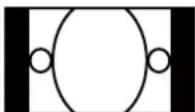
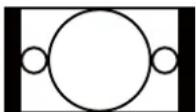
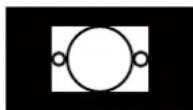
Overscan
The edge of the image may or may not be displayed correctly, this function allows you to set Overscan On to crop the border area of the image.
Background
Background enables you to display a blue, black screen or Logo when there is no signal.
SETUP
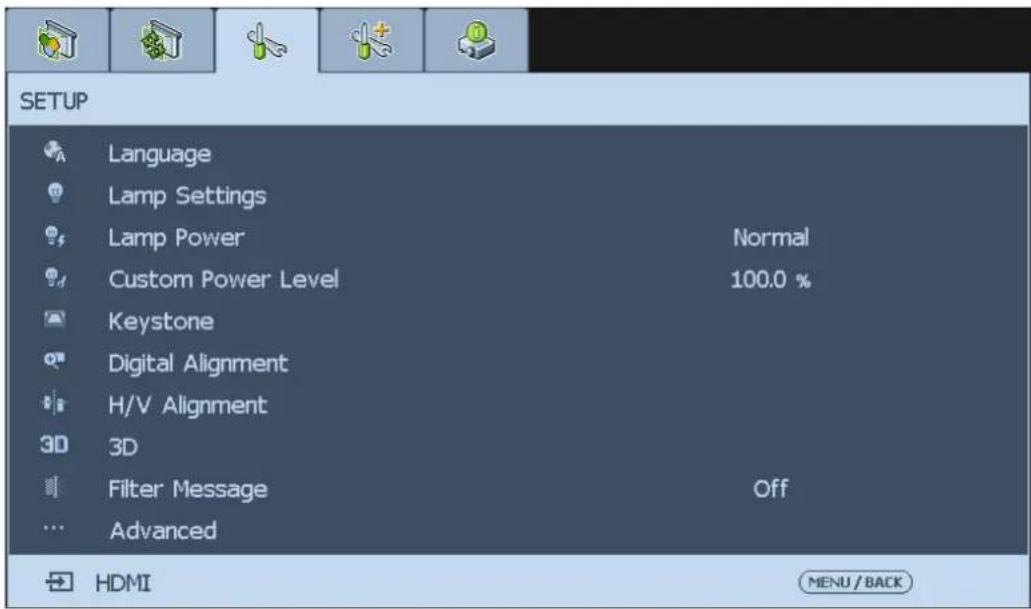
Language
Select the OSD language to be used, the available options are English, Français, Español, Deutsch, Português, 简体中文,繁體中文,日本語,한국어,Italiano, Svenska, Русский.
Lamp Settings
This projector is capable of dual-lamp projection and provides four lamp modes for different purposes. Select Lamp Setting then press Enter to display available options.
Dual: Both lamps are used for greater brightness.
Signal: Select the lamp which the usage is lower than the other one.
Lamp1: Select Lamp I for the projector. If lamp I burns out, the projector switches to lamp2 automatically.
Lamp2: Select Lamp 2 for the projector. If lamp 2 burns out, the projector switches to lamp I automatically.
Lamp Power
Press ◀▶ arrow key to select ECO (power saving), Normal, or Custom Power Level.
Normal: To project at normal lamp power for the highest brightness output.
ECO: To project in economic mode for longer lamp life cycle.
Custom Power Level: You can set lamp power at 75-100% to normal mode for fine tuning image projection. This function helps for fast installation of multiple projectors and regular maintenance.
Custom Power Level
Press ◀▶ arrow key to customize lamp output power in the range of 75-100% of normal mode. This function is valid only when the Custom Power Level option is set to Custom Power Level mode. In the other two modes, Normal and ECO, this function is disabled (dimmed).
Digital Alignment
Select this function to zoom the projection image.
Digital Zoom: Press ◀▶ arrow key to zoom in the projection image.
Digital Pan: Press ◀▶ arrow key to pan out on projection image. This is valid only when the projected image is enlarged.
Digital Scan: Press ◀▶ arrow key to tilt projection image. This is valid only when the projected image is enlarged.
Reset: Press to reset Digital Alignment settings to factory default values.
H/V Alignment
H Zoom: Use ◀▶ to narrow the horizontal size of the projected image.
V Zoom: Use ◀▶ to narrow the vertical size of the projected image.
H Shift: Use ◀▶ to move the narrowed projected image horizontally. This function is only available when the projected image is narrowed.
V Shift: Use ◀▶ to move the narrowed projected image vertically. This function is only available when the projected image is narrowed.
Reset: Set the H/V Alignment back to the factory default settings.
3D
Set up 3D format and sync method. The projector displays options available for setup by detecting connected input signal type and dims these unavailable items. Please ensure you have connected to input signal before 3D setup.
3D Format
Select this option and press the Enter button to enable 3D playback and set 3D options.
Off: Turn off the 3D Display Mode and press the Enter button..
Note when Auto, Side by Side, Top/Bottom or Frame Sequential is selected, the 3D mode will be turned on automatically.
Auto: Enable the 3D format detection such as Side by Side, Top/Bottom and Frame Sequential. This function may only be enabled for the input signal below:
• The input signal is HDMI 1.4 3D.
- The HDMI 1.4 3D signal connects to the projector through HDBaseT transmitter.
Side by Side: Manually switch the 3D Format to Side by Side. This option is only applicable to the HDMI input signal, the signal can be sent from the HDMI output of media device or through HDBaseT transmitter.
Top/Bottom: Manually switch the 3D Format to Top/Bottom. This option is only applicable to the HDMI input signal, the signal can be sent from the HDMI output of media device or through HDBaseT transmitter.
Frame Sequential: Set the format to Frame Sequential.
DLP Link: Select to disable or enable DLP Link sync.
3D Swap: Set 3D Swap to Inverse if left and right eye 3D image inversion by 3D glasses is needed. If image looks normal, keeps current settings.
3D 24Hz Display: Set frame rate to 144fps or 96fps when input signal is at 24Hz.
Filter Message
Set the interval time to display a message for cleaning the filter, the selectable options areOff, 100H, 200H, 500H and 1000H.
Advanced
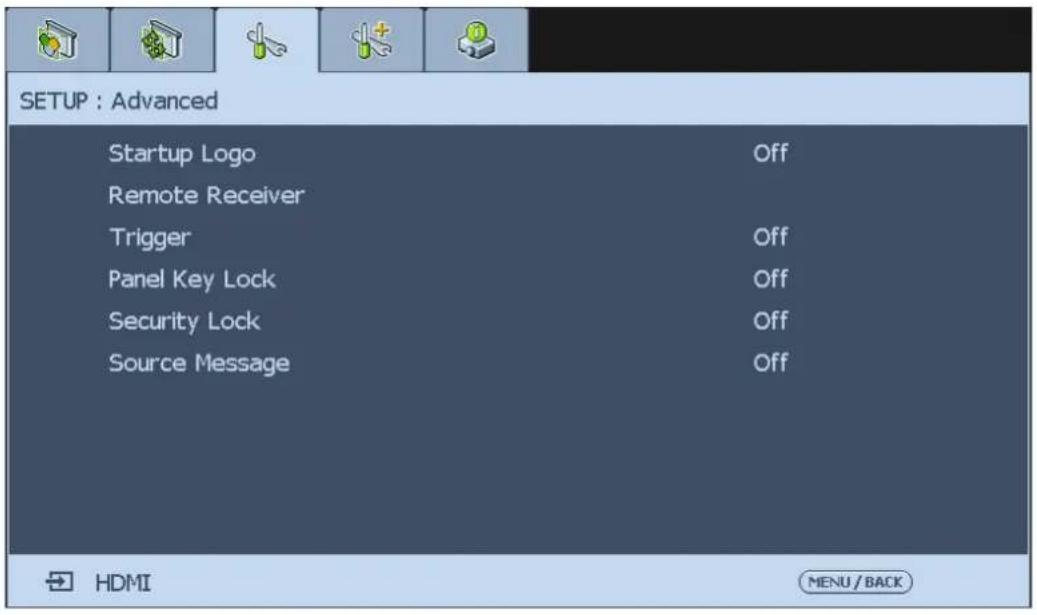
Startup Logo
Press ◀▶ arrow key to enable /disable the startup logo function.
Remote Receiver
Setup the IR control signal receiving by the projector, there are four options to setup control signal receiving as below.
Front+Rear: Both front IR and back IR receiver are turned on.
Front: Turn on front IR receiver only; back IR receiver is turned off.
Rear: Turn on back IR receiver only; front IR receiver is turned off.
HDBaseT: Select HDBaseT as a channel for IR control signal transmitting if the optional HDBaseT transmitter is capable of IR signal receiving and transmitting. If the option is selected, both front IR receiver and back IR receiver are turned off.
Trigger
The projector features one trigger output. If the projector comes with an auto screen device, you can connect it to the trigger to open the screen when the projector powers up. This function may have a 2-3 second lag before powering up.
Panel Key Lock
This function allows you to lock the control panel for preventing the unauthorized use.
Security Lock
This function allows you to enable or disable Security Lock, this is a useful function to preventing the unauthorized use of the projector. Set itOn to lock the OSD control panels and deny remote control operation, the password is required for the operation. Please refer to "Preventing the unauthorized use of the projector" on page 20.

When you have set or changed the password, take a memo and keep it securely. If you forget your PIN code, the projector can no longer be stared. Contact local dealer or service center.
Source Message
The function allows you to turn off "Searching for source" on the projection screen when projector is searching for the input source. Select On to display the message; select Off to hide the message on the screen.
Installation
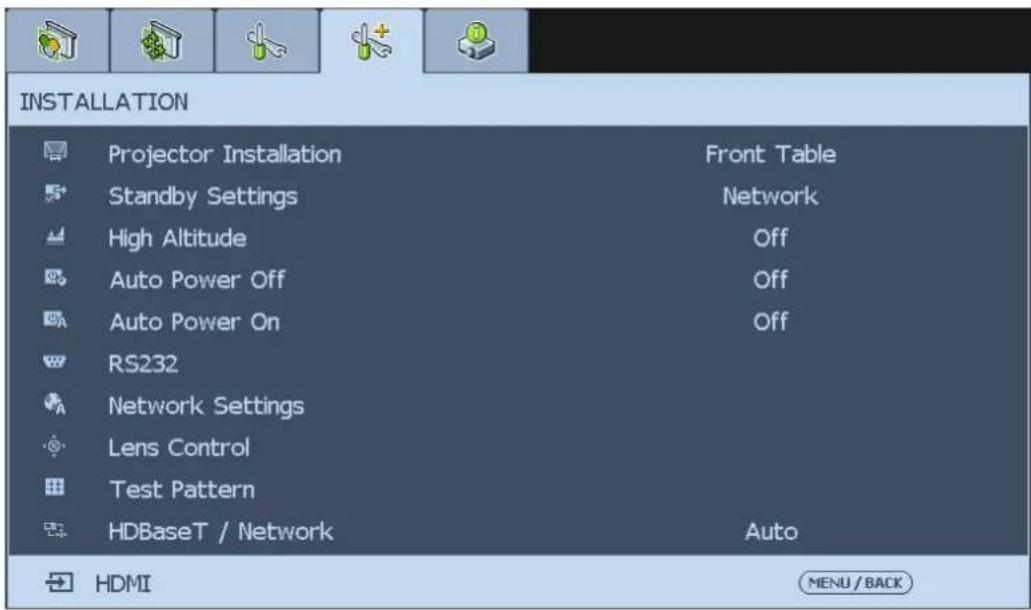
Projector Installation
This function enables you to set how the projected image is displayed. Select from the following option for the projector installation.
Front Table: Standard forward facing projection (Default setting).
Rear Table: Standard rear projection, enables the projector to produce the image from behind the screen by reversing the image.
Front Ceiling: Forward facing ceiling mounted projection, enables ceiling mounted projection by inverting the image.
Rear Ceiling: Rear ceiling mounted projection, enables ceiling mounted projection from behind the screen by inverting and reversing the image.

The cooling fan speed varies with projector installation to ensure the projector's proper heat dissipation. Invalid projection can lead to the projector overheating or shortened lamp life. Be careful to choose the correct projector installation when installing your projector.
Standby Settings
Press ◀▶ arrow key to toggle switch between Standard, Eco and Network mode.
Standard: The projector can be turned on using the remote control, RS-232 command or network control.
Eco: The projector maintains in the standby status at the lowest power (<0.5W). In this mode, the projector can be turned on only using the power button on the remote controller or projector.
Network: The projector maintains in the standby status at the power consumption under 6W, the projector can be turned on using the power button or network control only, RS-232 control command and wired remote control signal via external transmitter through RJ45 cable are not available.

Some of communication ports are turned off if it's set to Eco or Network mode, please make sure that the Standby Settings is set to proper setting.
High Altitude
You can use this function to turn the option to On for switching the cooling setting if the project is installed in a high altitude environment, the default is Off.
The projector may turn off automatically if it is used in an environment at excessively high temperature or in an area at a high altitude. In this case, you can enable this function by setting it to On and have the cooling fan operate at a higher speed to low the internal temperature of the projector.

An area is considered high altitude when it is above 5000 feet.
Auto Power Off
This function enables the projector to enter standby mode automatically when no input signal is detected more than 15 minutes. Set the function to On to enable Auto Power off or to Off to disable it.
Auto Power On
This function enables the projector to be turned on automatically when the power cord is plugged into the AC outlet or the breaker switch is turned. Set the function toOn to enable this function.
This function is activated by below conditions
- The Main Power switch on the projector has to be switched to On.
- The projector should be turned off by unplugging power cord or the breaker switch directly, Auto Power On will be activated next time when you plug in the power cord or turn on breaker switch.
RS232
Baud Rate: Set transmission speed to:115200, 57600, 38400, 19200, 14400, and 9600.
Transmission speed shall vary with length of RS-232 cable (longer cable requires slower speed). In case of unstable signal or connection failure when controlling with RS-232 cable, try downgrading the transmission speed.
Channel: You can send RS-232 control commands to your projector through the RS-232 port or external HDBaseT transmission box connected to its HDBaseT/LAN port. Please set up the following communication channel before sending control commands:
Local: Send RS-232 control command through your projector's RS-232 port. Please set up proper transmission speed in advance.
HDBaseT: Send RS-232 control commands to your projector's HDBaseT/LAN port through an external HDBaseT transmission box. The transmission speed is automatically set to 9600.

RS-232 control is only available when Standby Settings is set to Standard mode, it's unavailable when Standby Settings is set to Network or Eco mode.
Network Settings
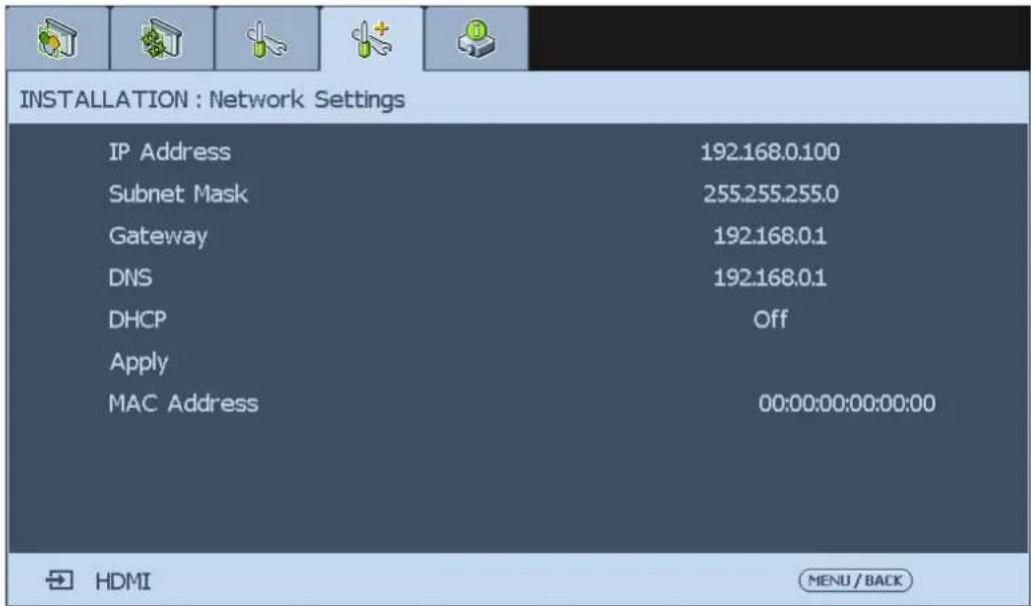
IP Address: To specify an IP address, press the Enter button to show the IP address input window. Use the ◀▶ button to select the number in the address to be changed. Use the ▲▼ button to increase or decrease the number in the IP address.
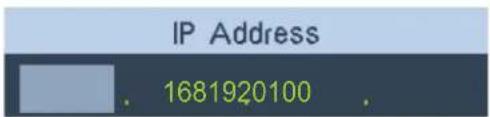
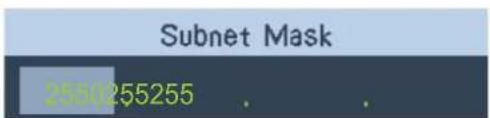
Subnet Mask: Set up IP address of subnet.
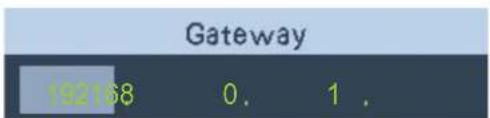
Gateway: Set up IP address of gateway.
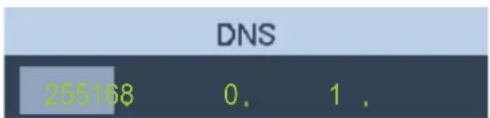
DNS: The Domain Name System (DNS) is a hierarchical distributed naming system for computers connected to the Internet or a private network. Set up DNS address via ▲ or ▼ buttons.
DHCP: Set DHCP to On or Off. If this is set to On, the DHCP server of the network domain assigns an IP address to the projector. That is, the IP address is displayed in the address window instead of being entering manually. Otherwise, the domain does not or cannot assign an IP address, and 0.0.0.0 is shown on the IP address window.
Apply: Select this button to display Apply window then select Enter button on the window to confirm the each change you made. It takes several seconds to execute the change in network settings till the following message disappears.
Setting Network configuration, please wait.
MAC Address: Display the MAC address of the projector.
Lens Control
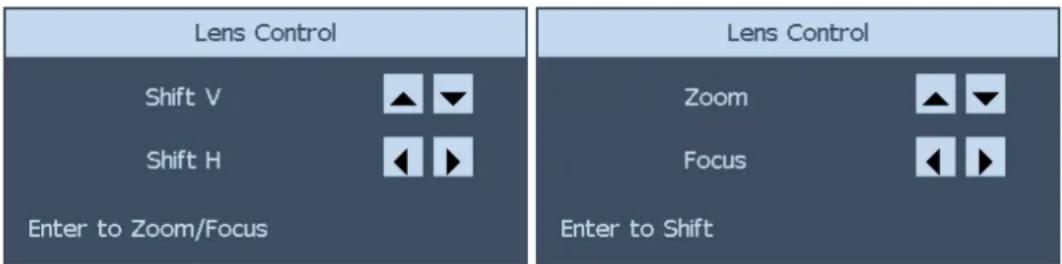
Select this function or press the LENS SHIFT button on the remote controller to open the lens control menu to zoom, focus or shift the lens. Press the Enter key to switch zoom/ focus or lens shift menu. Press ◀▶ arrow key focus the projected image or shift the lens in horizontal direction, and ▲▼ to zoom the projection size or shift the lens in vertical direction.
Test Pattern
The projector has a set of test patterns for installation and adjustment. Select Test Pattern to display pattern menu. Use ◀▶ or ▲▼ to select the desired test pattern, press the RETURN button to exit test pattern or return to pattern menu by pressing the MENU button.
HDBaseT / Network
The projector features with HDBaseT receiver and allows you control the projector via RJ-45 cable connected from external HDBaseT transmitter.
Auto: The projector detects the signal from HDBaseT transmitter or LAN, and switch to the channel automatically.
HDBaseT: Select HDBaseT as the channel for LAN control.

- If HDBaseT is selected, LAN control channel is switched to HDBaseT transmitter. LAN control signal must be transmitted through HDBaseT transmitter, directly connected to the LAN will not be available.
- HDBaseT function enters to lower power mode if the connection is interrupt. If the option is set to Auto, some of HDBaseT transmitter may not send a signal to active the function, Power On/Off operation via LAN control may not be operated. In this case, please switch it to HDBaseT.
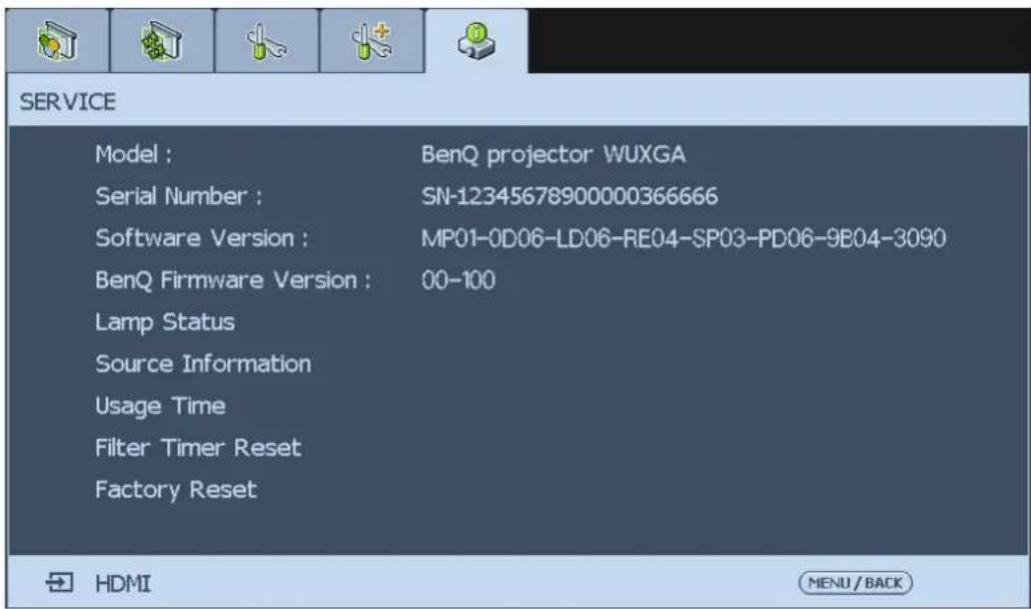
SERVICE
Model
Display the model name of the projector.
Serial Number
Display the serial number of the projector.
Software Version
Display current software version installed in the projector.
BenQ Firmware Version
Display current firmware version installed in the projector.
Lamp Status
Select this option to display current lamp status, the menu shows which lamp is in use.
Source Information
Select this option to display source information such as active source, pixel clock, signal format, H/V refresh rate, sync type, sync polarity and video type.
Usage Time
Select this option to display lamp usage time.
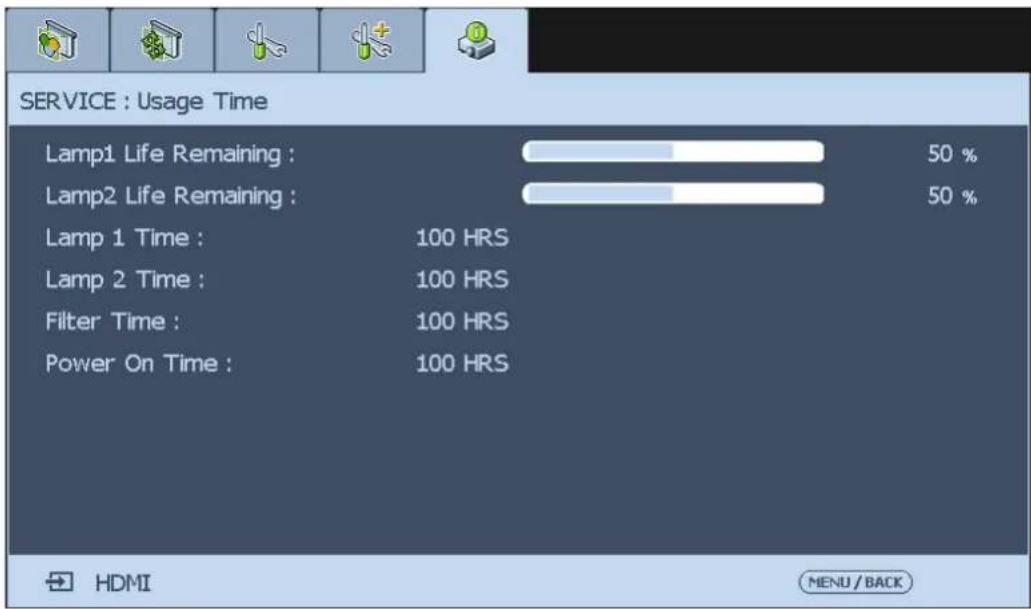
Lamp 1 Life Remaining: Display estimated remaining life of lamp I.
Lamp 2 Life Remaining: Display estimated remaining life of lamp 2.
Lamp 1 Time: Display used hours of lamp I.
Lamp 2 Time: Display used hours of lamp 2.
Power On Time: Display the operation hours of the projector.

• Used hours and remaining lamp life are estimated by the used hours of lamp at Normal and Eco mode. The actual lamp life may vary with installation and operation conditions.
• After replacing a new lamp, please contact your dealer to reset lamp usage counter.
Filter Timer Reset
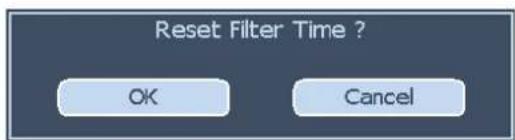
The function allows you to reset the filter timer, please make sure to reset the timer after cleaning or change the dust filter. PressEnter or ▶ to display the message window and select OK to reset the filter timer.
Factory Reset
Select this option to reset menu settings back to factory default including every user defined value.

Used hours or estimated remaining life of the lamp is not reset when executing Factory Reset.
Additional information
Care of the projector
Care of the projector
Your projector needs little maintenance. The only thing you have to do on a regular basis is keep the lens clean. Never remove any parts of the projector except the lamp. Contact your dealer or local customer service center if the projector fails to operate as expected.
Cleaning the lens
Clean the lens whenever you notice dirt or dust on the surface. Before you attempt to clean the lens, turn the projector off, unplug the power cable, and leave it several minutes to cool completely.
Use a canister of compressed air to remove dust. (Available from building hardware or photographic suppliers.)
If there is stubborn dirt or smudge marks, use a proper photographic lens brush or moisten a clean soft lens cloth with lens cleaner to gently wipe the lens surface.
Never use any type of abrasive pad, alkaline/acid cleaner, scouring powder, or volatile solvent, such as alcohol, benzene, thinner or insecticide. Using such materials or maintaining prolonged contact with rubber or vinyl materials may result in damage to the projector surface and cabinet material.

Never touch the lens with your finger or rub the lens with abrasive materials. Even paper towels can damage the lens coating. Only ever use a proper photographic lens brush, cloth, and cleaning solution. Do not attempt to clean the lens while the projector is switched on or is still hot from previous use. Be sure to turn off the projector and let it cool down completely before cleaning the lens.
Cleaning the projector case
Before you attempt to clean the case, turn the projector off, unplug the power cable, and leave it several minutes to cool completely.
To remove dirt or dust, wipe the case with a soft, dry, lint-free cloth.
To remove stubborn dirt or stains, moisten a soft cloth with water and a neutral detergent. Then wipe the case.

Never use wax, alcohol, benzene, thinner or other chemical detergents. These can damage the case.
Storing the projector
If you need to store the projector for an extended time, please:
- Make sure the temperature and humidity of the storage area are within the recommended range for the projector. Please refer to “Specifications” on page 62 in this manual or consult your dealer about the range.
- Retract the adjuster feet.
- Remove the batteries from the remote control.
- Pack the projector in its original packing or equivalent.
Transporting the projector
It is recommended that you ship the projector with its original packing or equivalent.
Replacing the lamp
The projection lamps should be replaced when they burn out. They should only be replaced with a certified replacement part, contact your local dealer if unsure.
!
- Lamps are positioned differently. Take care not to force the lamps when replacing.
- Installation of both lamp modules (Lamp 1 and Lamp 2) is required to operate the projector in dual or single lamp mode. If only a single lamp module is installed, the projector's lamp will not turn on and will appear as a lamp failure.
!
- The lamp contains a certain amount of mercury and should be disposed of according to local ordinance regulations.
- Avoid touching the glass surface of the new lamp: doing so may shorten its operation life.
#
Lamp Handling Precautions
- This projector uses a high-pressure lamp which must be handled carefully and properly. Improper handling may result in accidents, injury, or create a fire hazard.
- Lamp life may differ from lamp to lamp and according to the environment of use. There is no guarantee of the same life for each lamp. Some lamps may fail or terminate their life in a shorter period of time than other similar lamps.
- If the projector indicates that the lamp should be replaced, i.e., if LAMP 1 and/or LAMP 2 light up, replace the lamp with a new one IMMEDIATELY after the projector has cooled down. (Follow carefully the instructions in the Lamp Replacement section of this manual.) Continuous use of the lamp with LAMP 1 and/or LAMP 2 lighted may increase the risk of lamp explosion.
- A lamp may explode as a result of vibration, shock or degradation as a result of hours of use as its lifetime draws to an end. Risk of explosion may differ according to the environment or conditions in which the projector and lamp are being used.
- If a lamp explodes, the following safety precautions should be taken:
- Disconnect the projector's AC plug from the AC outlet immediately. Contact an authorized service station for a checkup of the unit and replacement of the lamp. Additionally, check carefully to ensure that there are no broken shards or pieces of glass around the projector or coming out from the cooling air circulation holes. Any broken shards found should be cleaned up carefully. No one should check the inside of the projector except those who are authorized trained technicians and who are familiar with projector service. Inappropriate attempts to service the unit by anyone, especially those who are not appropriately trained to do so, may result in an accident or injury caused by pieces of broken glass.
- The projection lamp should be replaced when it burns out. It should only be replaced with a certified replacement part, which you can order from your local dealer.
!
- Be sure to turn off and unplug the projector at least 30 minutes before replacing the lamp. Failure to do so could result in a severe burn.
- Safety glasses should be worn when replacing the lamp while the projector is ceiling mounted.
Removing the used lamp
- Turn the power off and disconnect the projector from the power outlet. Turn off all connected equipment and disconnect all other cables.
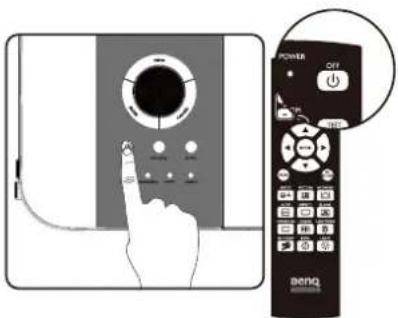
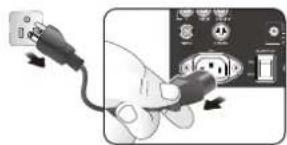
natural_image
Hand inserting a cable into an electronic control panel (no text or symbols visible)- Remove the screws on the lamp cover (A), and slide the lamp cover as shown (B).
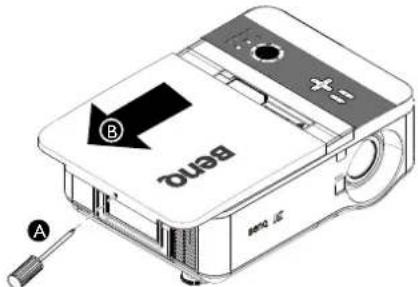
- Loosen the two captive screws on the lamp module (A). Lift the module handle up as shown (B).
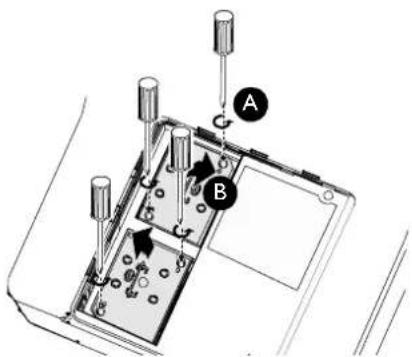
- Pull firmly on the module handle in the direction shown to remove the lamp.
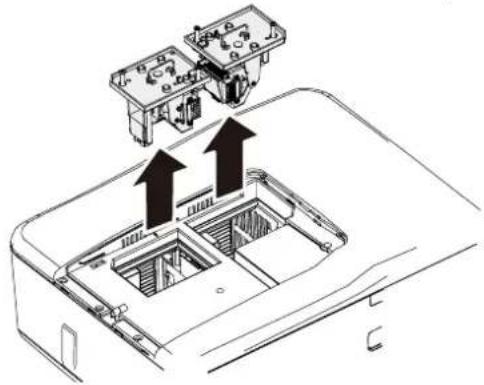
natural_image
Technical line drawing of a device interior with two mounted components and upward arrows indicating motion (no text or symbols)
- Pulling it too quickly may cause the lamp to break and scatter broken glass in the projector. To reduce the risk of injuries to fingers and damage to internal components, use caution when removing lamp glass that has shattered.
- Do not place the lamp in locations where water might splash on it, children can reach it, near or above heat sources, or near flammable materials.
-
Do not insert your hand into the projector when the lamp is removed. If you touch the optical components inside, it could cause blurred images.
-
Reverse steps 1 to 3 to install the new lamp module(s).
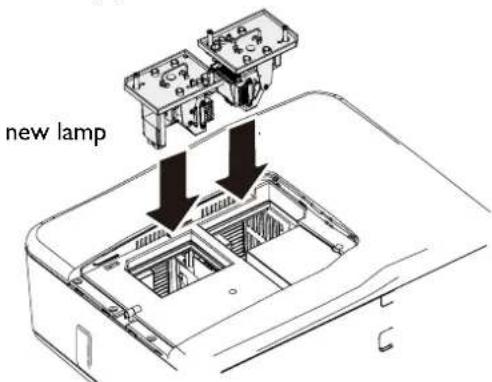
-
Tighten the screws securing the lamp box. Reconnect the lamp connector.
-
Ensure the handle is fully locked in place.
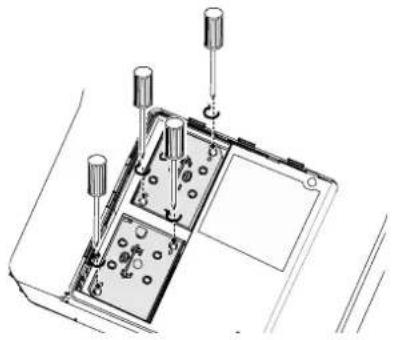
natural_image
Technical line drawing of a mechanical assembly with multiple cylindrical components and mounting holes (no text or symbols)- Replace the lamp cover. Close the lamp cover (A) and lock attached screws (B).
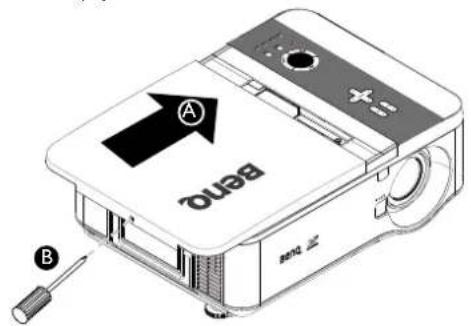
-
Tighten the screws on the lamp cover.
-
Reapply power and turn the projector back on.

- Please be careful to not over-tighten the screws.
- Loose screws may cause a bad connection, which could result in malfunction.
Installing the optional color wheel
The projector comes with a four-segment color wheel installed. An additional six-segment color wheel is optional. To replace the color wheel (located under the lamp cover adjacent to lamp I) refer to the following guide.

Wait until the lamp house and the color wheel cool off.
- Turn the power off and disconnect the projector from the power outlet. Turn off all connected equipment and disconnect all other cables.
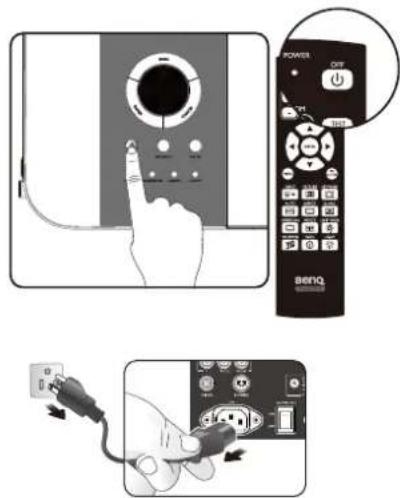
- Remove the screws on the lamp cover (A), and slide the lamp cover as shown (B).
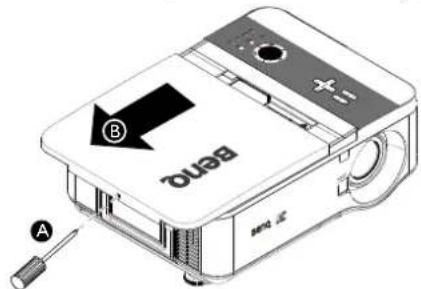
- Unscrew the retaining screws (x 4) on the four-segment color wheel.
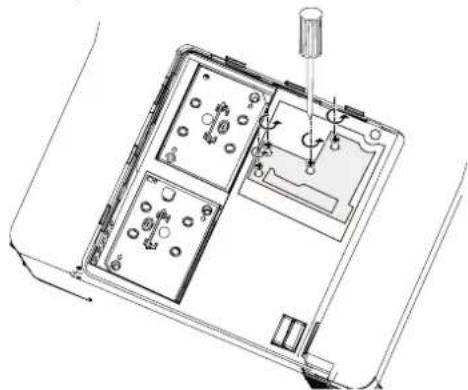
natural_image
Technical line drawing of a device interior with labeled components and a screwdriver inserted (no text or symbols present)- Lift the color wheel in the direction shown.
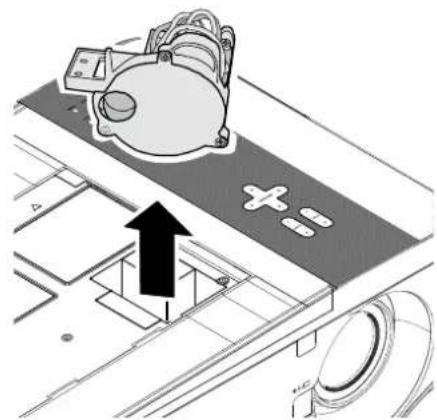
natural_image
Diagram of a device with an upward arrow and control panel, no readable text or symbols present- Insert the six-segment color wheel.
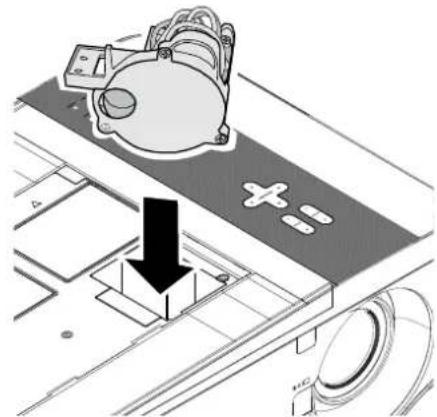
natural_image
Diagram of a mechanical device with a downward arrow indicating a component or process (no text or symbols present)- Secure the retaining screws as shown, and then close the lamp cover.
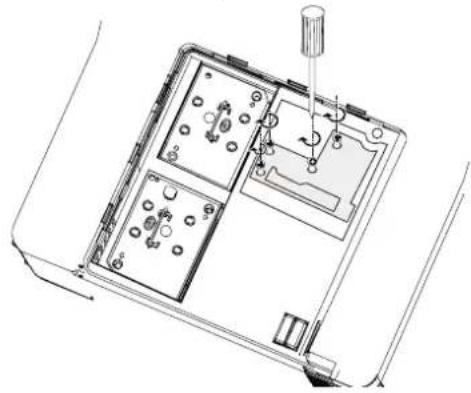
natural_image
Technical line drawing of an electronic device interior with labeled components (no text or symbols)Storing Unused Color Wheel: Keep the unused color wheel in the zipper bag in which the 6-segment color wheel (not supplied) was packaged. This bag prevents dust from falling or collecting on the color wheel.
Cleaning the filters
The projector uses three filters to keep the fans free of dust and other particles, and should be cleaned every 500 hours of operation. In dusty environments, it is recommended to clean the filters more frequently. If the filter is dirty or clogged, your projector may overheat. When the message be-low is displayed, the filters must be cleaned.

When the "Please clean filter" message is displayed, please clean all three filters at the same time to synchronize the filter time display. The Filter Message item should be enabled in the Options menu.
Refer to the following guide to clean the filters:
- The left-side and rear filters can be cleaned as demonstrated in the following images.

Only clean the outside of the exhaust vents with a vacuum cleaner.
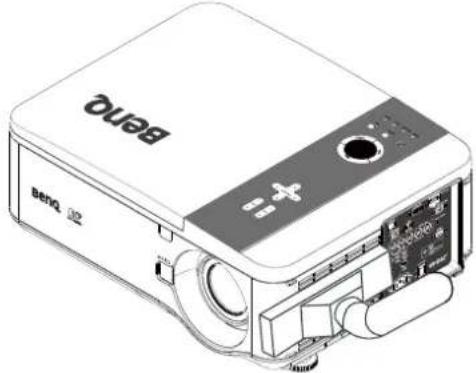
natural_image
Illustration of a Beno projector with visible internal components and ports (no text or symbols)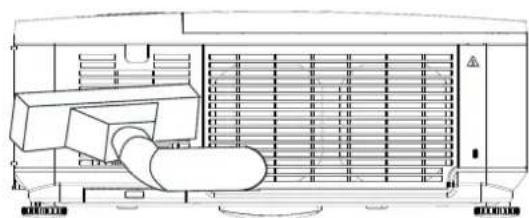
natural_image
Technical line drawing of an industrial machine with cooling unit and fan (no text or symbols)2 The bottom exhaust vent can be accessed as shown.
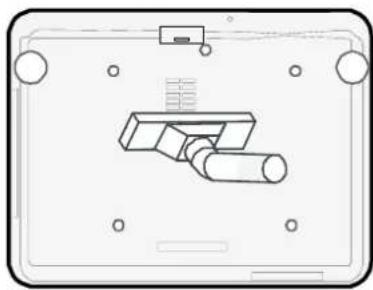
natural_image
Pure technical line drawing of a mechanical component without any text, numbers, or symbols- Gently slide the filter holders in the direction shown.
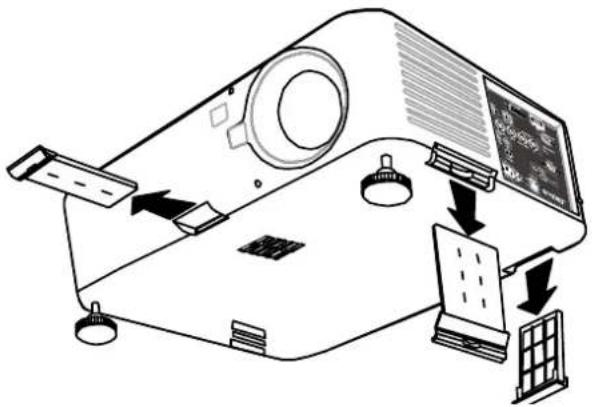
natural_image
Diagram of a projector with labeled components and directional arrows indicating assembly or operation (no text or symbols present)- Lift the filter foams from all three filter holders in the direction shown. Remove them completely from each filter holder and discard.
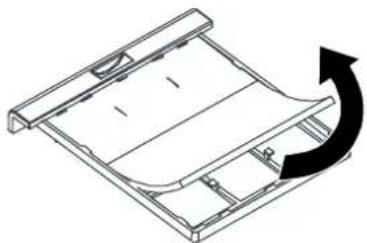
natural_image
Technical line drawing of a mechanical component with an arrow indicating rotational motion (no text or symbols)- Place a replacement foam and press down firmly.
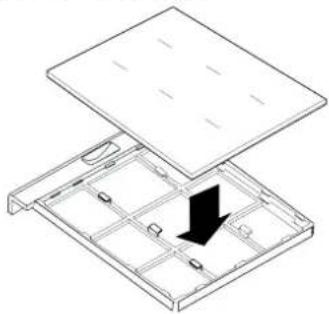
natural_image
Isometric line drawing of a modular device with a black arrow indicating a component or assembly (no text or symbols)- Replace the filter holders by pushing-in gently in the direction shown.
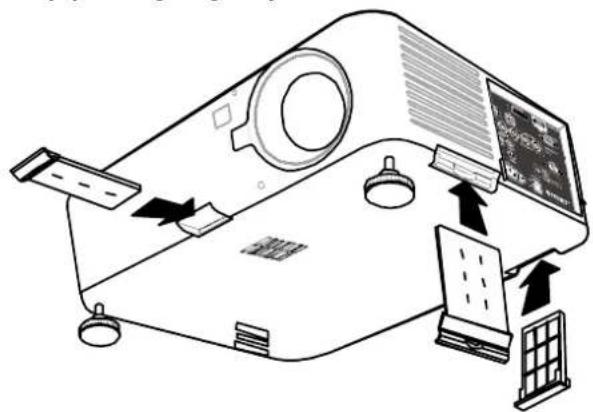
Troubleshooting
Indicator messages
Several indicator messages are used by the projector to alert users of problems with setup or internal parts. The LEDs on the top surface of the projector show the status of the WARNING and lamp 1/2 as well as the general working order of the projector through the WARNING LED.
The following tables describe the various states of the 4 LEDs.
| LED indicator LED status Projector status | ||
| Power Indicator | Off AC off | |
| Red on Standby | ||
| Green on Power on | ||
| Orange blinks Projector is under cooling | ||
| Green blinks Start up | ||
| Lamp indicator | Green on Normal, Lamp Power is set to Normal | |
| Orange on Normal, Lamp Power is set to ECO | ||
| Green blinks Lamp Power is set to Normal and is warming up | ||
| Orange blinks Lamp Power is set to Eco and is warming up | ||
| LED indicator LED status Possible cause | ||
| Warning indicator | Red blinks The lamp cover is open. | |
| Red blinks 2 times | The internal temperature is abnormally over specification.The temperature around the projector is high.Placed projector under temperature 104^ ( 40^ ). | |
| Air intake may be blocked.Placed projector at proper ventilation environment.Internal circuit may be fail. | ||
| Orange blinks | The internal temperature is abnormally over specification.Cooling fan breakdown.Air intake may be blocked.Internal circuit may be fail.Contact with your nearest authorized dealer or service center. | |
| Lamp indicator | Red blinks | The lamp does not illuminateNo lamp is installed or lamp should be replaced.Install the lamp or check if the lamp is installed properly. |
| Red blinks 2 times (Repeatedly) | The lamp does not illuminateThe lamp is shut down abnormally.The lamp is burnt outLamp circuit failureContact with your nearest authorized dealer or service center. | |
Common problems and solutions
These guidelines provide tips to deal with problems you may encounter while using the projector. If the problem remains unsolved, contact your dealer for assistance.
Often the problem is something as simple as a loose connection. Check the following before proceeding to the problem-specific solutions.
- Use some other electrical device to confirm that the electrical outlet is working.
- Ensure the projector is turned on.
- Ensure all connections are securely attached.
- Ensure the attached device is turned on.
- Ensure a connected PC is not in suspend mode.
- Ensure a connected notebook computer is configured for an external display. (This is usually done by pressing an Fn-key combination on the notebook.)
Tips for troubleshooting
In each problem-specific section, try the steps in the order suggested. This may help you to solve the problem more quickly.
Try to pinpoint the problem to avoid replacing non-defective parts.
For example, if you replace batteries and the problem remains, put the original batteries back and go to the next step.
Keep a record of the steps you take when troubleshooting: The information may be useful when calling for technical support or for passing on to service personnel.
Image problems
Problem: No image appears on the screen
I. Verify the settings on your notebook or desktop PC.
2 Turn off all equipment and power up again in the correct order.
Problem: The image is blurred
I. Adjust the Focus on the projector.
2 Press the AUTO SYNC button on the remote control or projector.
3. Ensure the projector-to-screen distance is within the specified range.
4. Check that the projector lens is clean.
5. Remove the lens cover.
Problem: The image is wider at the top or bottom (trapezoid effect)
I. Position the projector so it is as perpendicular to the screen as possible.
2. Use the Keystone function on the remote control to correct the problem.
Problem: The image is reversed or upside down
Check the Ceiling & Rear setting on the Setting menu of the OSD.
Problem: The image is streaked
I. Adjust the Phase and Clock on the Signal menu of the OSD to the default settings.
2. To ensure the problem is not caused by a connected PC's video card, connect to another computer.
Problem: The image is flat with no contrast
I. Adjust the Contrast setting on the Picture menu of the OSD.
2 Adjust the Brightness setting on the Picture menu of the OSD.
Problem: The color of the projected image does not match the source image.
Adjust the Color temperature and Picture settings.
Lamp problems
Problem: There is no light from the projector
I. Check that the power cable is securely connected.
2. Ensure the power source is good by testing with another electrical device.
3. Restart the projector in the correct order and check that the Power LED is green.
4. If you have replaced the lamp recently, try resetting the lamp connections.
5. Replace the lamp module.
6. Remove the lens cap.
7. Put the old lamp back in the projector and have the projector serviced.
Problem: The lamp goes off
- Power surges can cause the lamp to turn off. Press the power button twice to turn off the projector. When the Power LED is orange, press the power button.
- Replace the lamp module.
- Put the old lamp back in the projector and have the projector serviced.
Remote control problems
Problem: The projector does not respond to the remote control
I. Direct the remote control towards remote receiver on the projector.
2. Ensure the path between remote and sensor is not obstructed.
3. Turn off any fluorescent lights in the room.
4. Check the battery polarity.
5. Replace the batteries.
- Turn off other Infrared-enabled devices in the vicinity.
- Have the remote control serviced.
- Ensure that the remote control code conforms to the projector's code.
Specifications

All specifications are subject to change without notice
| Model PU9530 PX9510 PW9520 | ||||
| Display Devices 0.67",I- D | LP Chip 0.7",I- DLP | Chip 0.65",I-DLP Chip | ||
| Display Devices | WUXGA(1920x1200) | XGA (1024x768) | WXGA(1280x800) | |
| Input Terminals | DVI-D (Compatible with HDCP) | XI | ||
| HDMI (Compatible with HDCP) | XI | |||
| COMPUTER 2 (BNC) | XI | |||
| COMPUTER I(D-sub 15p) | XI | |||
| Component (RCA) XI,Y/Pb(Cb)/Pr(Cr) xI | ||||
| S-Video(min Din 4 pin) | XI | |||
| Video (RCA) XI | ||||
| HDBaseT X I, share the same terminal with LAN | ||||
| Output | Monitor Out(D-sub 15 p) | XI | ||
| Trigger (φ3.5mm stereo min jack) | XI (DC 12V Output) | |||
| Control | Wired Remote(φ3.5mm stereo minijack) | XI | ||
| LAN XI, share the same terminal with HDBaseT | ||||
| RS-232C XI | ||||
| Service | USB (Type B) for service | XI | ||
| Power Requirement | AC 100 - 240V, 50/60Hz | |||
| Input Current | 7.30A | |||
| Power Consumption(Standby Setting: Standard/Eco) | 710W (<24W/<0.5W) with AC 100V | |||
| 690W (<24W/<0.5W) with AC 240V | ||||
| Operation Temperature | 41°F to 104°F (5°C to 40°C) | |||
| Storage Temperature | 14°F to 140°F (-10°C to 60°C),5% to 90% Humidity (non-condensing) | |||
| Dimensions | 19.9" (W) × 15.1" (H) × 8.1" (D)505 mm (W) × 386 mm (H) × 206 mm (D)(not including protrusions) | |||
| Weight 37.5 lb/17 kg | ||||
Dimensions
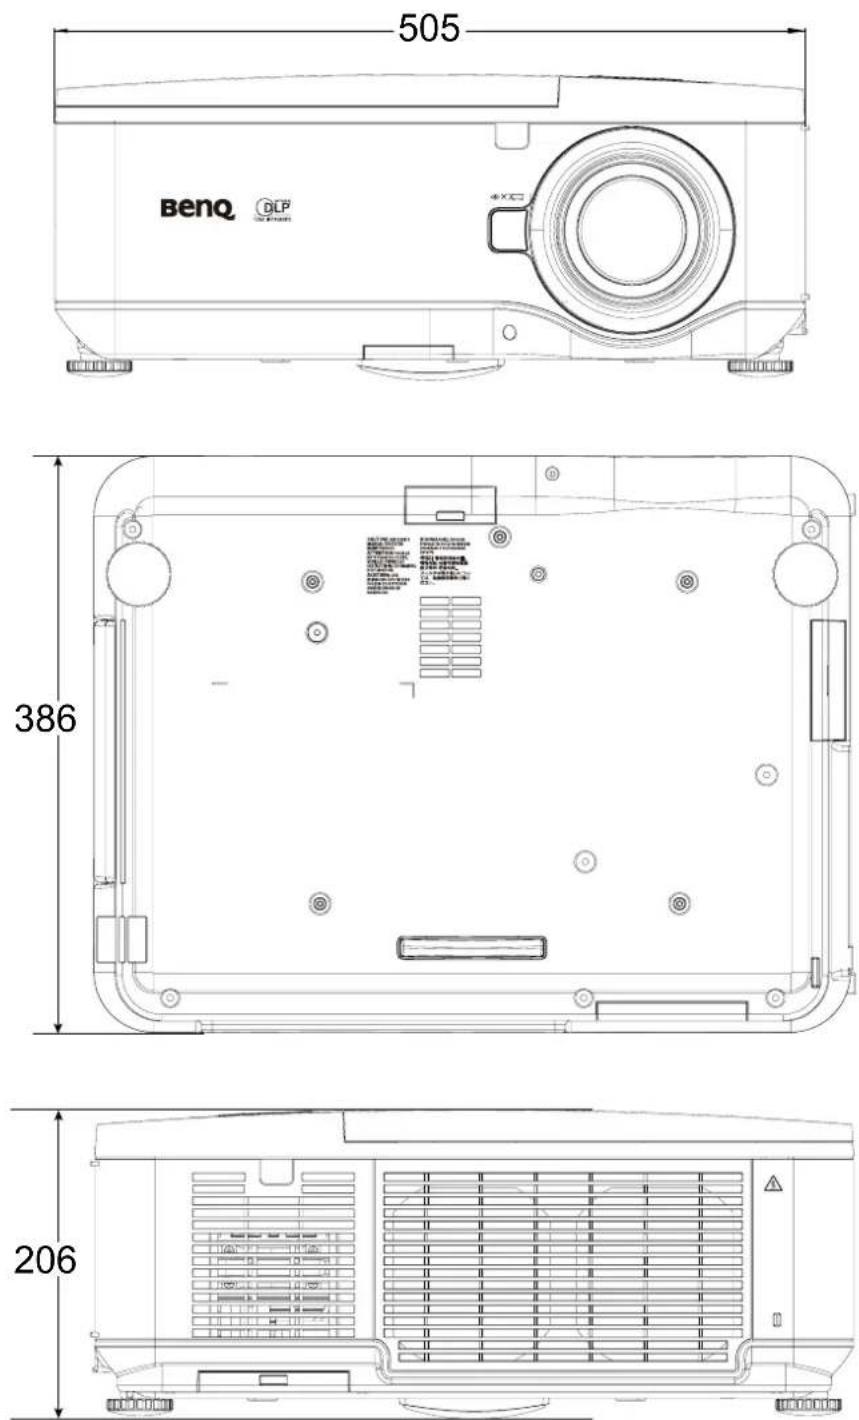
Unit: mm
Timing chart
The following table shows compatible signal types, their resolution and frequency refresh rates.
Horizontal: 15kHz, 31kHz to 90 kHz, Vertical: 50 Hz to 85 Hz
PC timing
| Signal Type | Resolution | Frame Rate | Computer 2 Computer I | DVI-D | HDMI | HDBaseT | Video / S-Video | ||||
| RGBHV YUV RGBHV YUV RGB YUV | |||||||||||
| PC | 640x480 60 V | VV V | |||||||||
| 640x480 75 V | VV V | ||||||||||
| 640x480 85 V | VV V | ||||||||||
| 800x600 60 V | VV V | ||||||||||
| 800x600 75 V | VV V | ||||||||||
| 800x600 85 V | VV V | ||||||||||
| 848x480 60 V | VV V | ||||||||||
| 1024x768 60 V | VV V | ||||||||||
| 1024x768 75 V | VV V | ||||||||||
| 1024x768 85 V | VV V | ||||||||||
| 1024x768 120 V | VV V | ||||||||||
| 1024x768 RB 120 | VV V V | ||||||||||
| 1280x720 60 V | VV V | ||||||||||
| 1280x720 120 V | VV V V | ||||||||||
| 1280x768 60 V | VV V V | ||||||||||
| 1280x800 60 V | VV V V | ||||||||||
| 1280x800 RB 120 | VV V V V | ||||||||||
| 1280x960 60 V | VV V V | ||||||||||
| 1280x1024 60 V | VV V V | ||||||||||
| 1280x1024 75 V | VV V V | ||||||||||
| 1280x1024 85 V | VV V V | ||||||||||
| 1440x900 60 V | VV V V | ||||||||||
| 1400X1050 | 60 V V | VV V | |||||||||
| 1600x1200 60 V | VV V V | ||||||||||
| 1680x1050 | 59.94 | VV V V | |||||||||
| 1920X1200 RB | 60 V V | VV V | |||||||||
| Video | NTSC (M) (3.58, 4.43) | 59.94 | V | ||||||||
| PAL (B,G,H,I) | 50 | V | |||||||||
| PAL (N) | 50 | V | |||||||||
| PAL (M) | 60 | V | |||||||||
| SECAM (M) (4.25/4.4) | 50 | V | |||||||||
| SDTV | 1440x480i | 60 | VV | V (HDMI) | |||||||
| 1440x576i | 50 | VV | V (HDMI) | ||||||||
| 480i 59.94 | VV | V | |||||||||
| 576i | 50 | VV | V | ||||||||
| EDTV | 480p | 59.94 | V | V | V | V | V | V | V | V | |
| 576p | 50 | V | V | V | V | V | V | V | V | ||
| 1080i | 50 | V | V | V | V | V | V | ||||
| 1080i | 60 | V | V | V | V | V | V | ||||
| 720p | 50 | V | V | V | V | V | V | V | V | ||
| 720p | 60 | V | V | V | V | V | V | V | V | ||
| 1080p | 24 | V | V | V | V | V | V | V | V | ||
| 1080p | 25 | V | V | V | V | V | V | V | V | ||
| 1080p | 29.97 | V | V | V | V | V | V | V | V | ||
| 1080p | 30 | V | V | V | V | V | V | V | V | ||
| 1080p | 50 | V | V | V | V | V | V | V | V | ||
| 1080p | 60 | V | V | V | V | V | V | V | V | ||
3D supported timing
| Signal Type | Resolution Frame | Rate Frame Packing | Side by Side Top / Bottom Frame Sequential | |||
| PC | 640x480 60 V | |||||
| 800x600 60 V | ||||||
| 848x480 60 V | ||||||
| 1024x768 60 V | ||||||
| 1024x768 120 V | ||||||
| 1024x768 RB 120 V | ||||||
| 1280x720 60 V | ||||||
| 1280x720 120 V | ||||||
| 1280x768 60 V | ||||||
| 1280x800 60 V | ||||||
| 1280x800 RB 120 V | ||||||
| 1280x960 60 V | ||||||
| 1280x1024 60 V | ||||||
| 1440x900 60 V | ||||||
| 1400x1050 60 V | ||||||
| 1600x1200 60 V | ||||||
| 1680x1050 59.94 V | ||||||
| 1920x1200 RB | 60 V | |||||
| 720p | 50 | V | V | V | V | |
| 720p | 60 | V | V | V | V | |
| 1080i | 50 | V | ||||
| 1080i | 60 | V | ||||
| 1080p | 24 | V | V | V | ||
| 1080p | 50 | V | V | V | ||
| 1080p | 60 | V | V | V | ||

- An image with higher or lower resolution than the projector's native resolution will be compressed.
• Some Sync on Green signals may not be displayed correctly. - Signals other than those specified in the table above may not be displayed correctly. If this should happen, change the refresh rate or resolution on your PC.
RS232 command control
| Function Type Description | ASCII | ||
| Power Write Power | *pow=on# | ||
| Write Power off*pow=off# | |||
| Read Power Status*pow=?# | |||
| Source Selection | Write COMPUTER/YPbPr*sour=RGB# | ||
| Write COMPUTER 2/YPbPr2*sour=RGB2# | |||
| Write Component*sour=YPbr# | |||
| Write DVI-D*sour=dvid# | |||
| Write HDMI*sour=hdmi# | |||
| Write Composite*sour=vid# | |||
| Write S-Video*sour=svid# | |||
| Write HDBaseT*sour=hdbaset# | |||
| Read Current source*sour=?# | |||
| Picture Setting | Write Bright*appmod=bright# | ||
| Write Presentation*appmod=preset# | |||
| Write Cinema*appmod=cine# | |||
| Read Picture Mode*appmod=?# | |||
| Write Contrast +*con=+# | |||
| Write Contrast -*con=-# | |||
| Read Contrast value*con=?# | |||
| Write Brightness +*bri=+# | |||
| Write Brightness -*bri=-# | |||
| Read Brightness value*bri=?# | |||
| Write Color +*color=+# | |||
| Write Color -*color=-# | |||
| Read Color value*color=?# | |||
| Write Sharpness +*sharp=+# | |||
| Write Sharpness -*sharp=-# | |||
| Read Sharpness value*sharp=?# | |||
| Write Color Temperature-Warm*ct=warm# | |||
| Write Color Temperature-Normal*ct=normal# | |||
| Write Color Temperature-Cool*ct=cool# | |||
| Write Color Temperature-lamp native*ct=native# | |||
| Read Color Temperature Status*ct=?# | |||
| Write Aspect 4:3*asp=4:3# | |||
| Write Aspect 16:9*asp=16:9# | |||
| Write Aspect 16:10*asp=16:10# | |||
| Write Aspect Auto*asp=AUTO# | |||
| Picture Setting | Write Aspect Real*asp=REAL# | ||
| Write Aspect 5:4*asp=5:4# | |||
| Write Aspect 1.88*asp=1.88:1# | |||
| Write Aspect 2.35*asp=2.35:1# | |||
| Read Aspect Status*asp=?# | |||
| Write Digital Zoom In*zooml# | |||
| Write Digital Zoom out*zoomO# | |||
| Write Auto*auto# | |||
| Function Type | Description | ASCII | |
| Operation Settings | Write Projector Position-Front Table*pp=FT# | *pp=FT# | |
| Write Projector Position-Rear Table*pp=RE# | *pp=RE# | ||
| Write Projector Position-Rear Ceiling*pp=RC# | *pp=RC# | ||
| Write Projector Position-Front Ceiling | *pp=FC# | ||
| Read Projector Position Status*pp=?# | |||
| Write Quick auto search on*QAS=on# | |||
| Write Quick auto search off*QAS=off# | |||
| Read Quick auto search status*QAS=?# | |||
| Write Direct Power On-on*directpower=on# | |||
| Write Direct Power On-off*directpower=off# | |||
| Read Direct Power On-Status*directpower=?# | |||
| Write Standby Settings-Standard*standbynet=standard# | |||
| Write Standby Settings-Eco*standbynet=eco# | |||
| Write Standby Settings-Network*standbynet=network# | |||
| Read Standby Settings-Network Status*standbynet=?# | |||
| Write 9600*baud=9600# | |||
| Write 14400*baud=14400# | |||
| Write 19200*baud=19200# | |||
| Write 38400*baud=38400# | |||
| Write 57600*baud=57600# | |||
| Write 115200*baud=115200# | |||
| Read Current Baud Rate*baud=?# | |||
| Lamp Control | Read Lamp Hour*ltim=?# | ||
| Read Lamp2 Hour*ltim2=?# | |||
| Write Lamp hour reset*ltim=reset# | |||
| Write Lamp2 hour reset*ltim2=reset# | |||
| Write Normal mode*lampm=lnor# | |||
| Write Eco mode*lampm=eco# | |||
| Write Dual lamp*lammd=dual# | |||
| Lamp Control | Write Number 1 lamp*lammd=num1l# | ||
| Write Number 2 lamp*lammd=num2# | |||
| Write Single lamp (minimum)*lammd=single# | |||
| Read Current Lamp status*lammd=?# | |||
| Read Lamp Mode Status*lampm=?# | |||
| Function Type Description ASCII | |||
| Miscellaneous Read Model Name*modelname=?# | |||
Control the projector through a Network
Set up the projector for Network
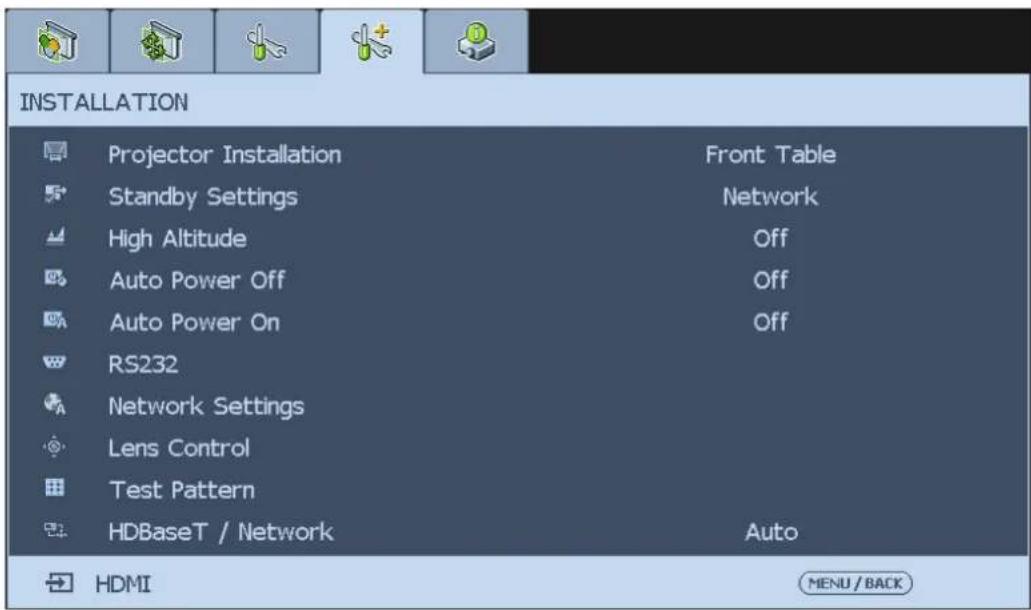

Please set DHCP option to Off and select Apply to activate it. The DHCP service assigns an IP address and settings. The IP address, Subnet Mask and Gateway options will be dimmed and not available for selection. If the LAN does not support DHCP service, please press ▲▼ and Enter key to select network and its settings:
IP Address: To specify an IP address, press the Enter button to show the IP address input window. Use the ◀▶ button to select the number in the IP address to be changed. Use the ▲▼ button to increase or decrease the number in the IP address.
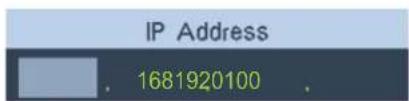
Subnet Mask: Set up the subnet address in the same way as for the IP Address setup.
Gateway: Set up the gateway address in the same way as for the IP Address setup.
DHCP: Set DHCP to On or Off. If this is set to On, the DHCP server of network domain will assign an IP address to the projector. That is, the IP address will display in the address window instead of having to be manually entered. Otherwise, the domain does not or cannot assign an IP address, and 0.0.0.0 is shown on the IP address window.
Apply: Select this button and pressEnter. It takes the projector several seconds to execute the change in network setting until the following message disappears.

Please contact your network administrator if the network remains disconnected.
Control the projector through a web browser
Open a web browser and enter the projector's IP address. Its home page with four options will display:
Projector Status: Current projector settings.
Alert Mail Setup: Settings for projector abnormality email reminders. In case of any abnormality the projector sends emails to preset users.
Crestron: Crestron compatible network browser control page.
PJLink: This page lets you set up a security password for PJLink connection.
Projector status
The following illustrates a projector with IP address "192.168.0.100":
Projector Status
Alert Mail Setup
Crestron
PJLink
| System | |
| Model Name | PW9620 |
| Software Version | ME02 |
| System Status | Power On |
| Display Source | Computer 1 |
| Lamp 1 Hours | 19 |
| Lamp 2 Hours | 5 |
| Error Status | (No Error) |
| RJ45 Version | |
| LAN Version | RE07 |
| IP address | 192.168.0.101 |
| Subnet mask | 255.255.255.0 |
| Default gateway | 0.0 0.0 |
| DNS Server | 0.0 0.0 |
| MAC address | 00:18:23:00:00:88 |
System
Model Name : Model number of the projector
Software Version : Version of projector system software
System Status : Current projector power on status
Display Source : Current input signal
Lamp 1 Hours : Use hours of lamp I
Lamp 2 Hours : Use hours of lamp 2
Error Status : Display projector error messages
Network control setup information (RJ-45 Version)
Lan Version : Version of network control software
IP address : Current IP address
Subnet mask : Current subnet setting
Default gateway : Current gateway setting
DNS server : Current DNS server setting
MAC address : Preset MAC address
Alert mail setup
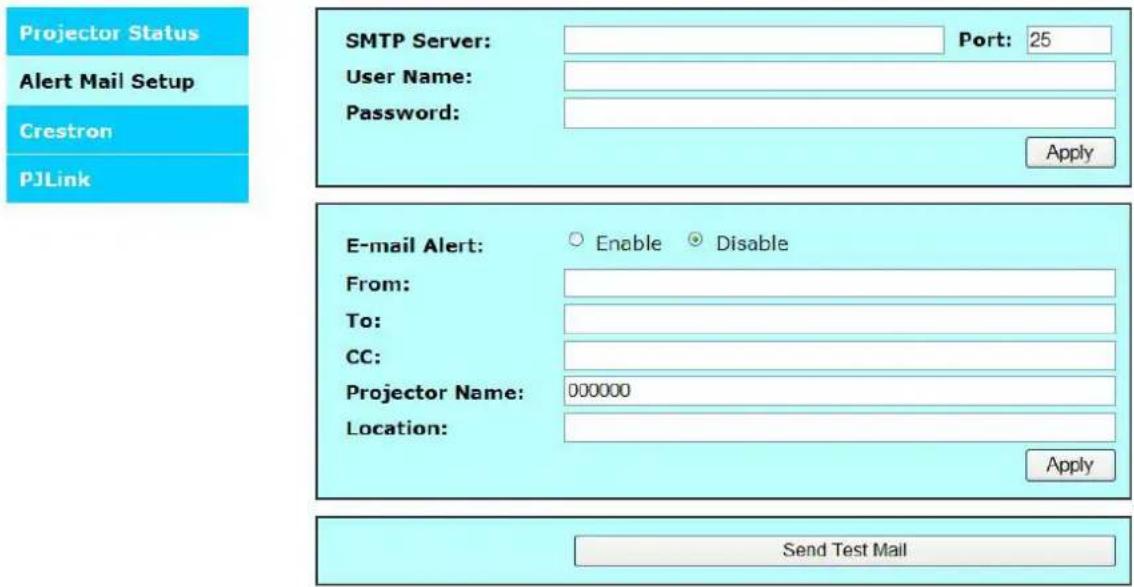
The projector can send alert messages with Email to predefined users. Make the following settings before enabling this function:
| SMTP Sever | : Set up name of SMTP server for the projector's sending reminder email. |
| Port | : Set up transmission port |
| User Name | : Set up user name for the projector's sending reminder email through SMTP server. |
| Password | : Set up user password. |
| E-mail Alert | : Enable or disable E-mail Alert function. |
| From | : Set up sender's email address. |
| To | : Set up recipient's email address. |
| CC | : Set up CC recipient's email address. |
| Projector Name | : Set up projector name or ID |
| Location | : Set up installation location of projector. |
| Apply | : Accept settings. Press this button to save the changes made. |
| Send Test Mail | : Send test email to validate your settings. The reminder email is sent only in the event of a projector error. Press this button to validate email settings after setup is completed. |
Crestron control page
Click the Crestron option in your projector's home page to display its control page in a new tab.
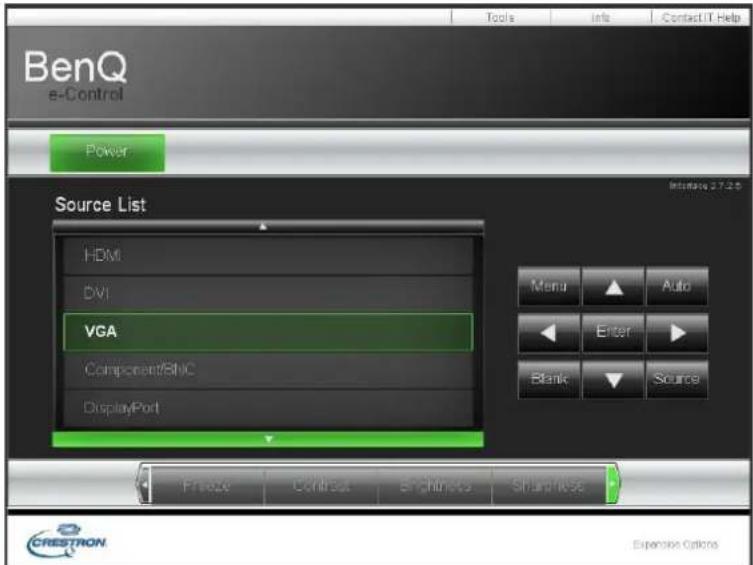
Power: Press to power on or off your projector.
Source List: Switch among list of available projector input signal sources. Press the▲ (at top of screen) or ▼ (at bottom of screen) arrow key to scroll through the list.
Image adjust options
Press the ◀ (to the left of screen) or ▶ (to the right of screen) arrow key to scroll through other adjustment options.
Freeze: Freeze the current projection screen. The projection screen prompts "Freeze" message once the freeze function is enabled. Press the Freeze button again to unfreeze the image.
Contrast: Press to display the adjustment window, click◀▶ arrow key to adjust contrast.

Brightness: Press to display the adjustment window, click◀▶ arrow key with the mouse to adjust brightness.

Sharpness: Press to display the adjustment window, click◀▶ arrow key with the mouse to adjust sharpness.

Zoom: Zoom in on the projection image. Click +" key to zoom in and "-" to zoom out. Click the four arrow keys in the window to move the zoomed projection image.
Control key window
This window simulates keys on the remote controller and control panel.
Enter: Confirm the changes and select the OSD option
Menu: Press to display the OSD menu. Press again to exit it.
Auto: Execute the auto image adjustment function.
Blank: Pause the image projection, i.e. the projection image is masked. Press again to resume the projection.
Source: Display list of signal sources.
Tool: Set up options to work with Creston compatible devices. See relevant manuals for detailed setup steps.
Info: Display current projector status and Creston settings.
Control your projector with PJLink commands
PJLink is a standard designed by the Japan Business Machine and Information System Industries Association (JBMIA) to control projectors with genuine commands. A projector featuring PJLink functions can be controlled with standard commands regardless of who made it. This product supports PJLink control commands. Please set up password for PJLink connection on this page.
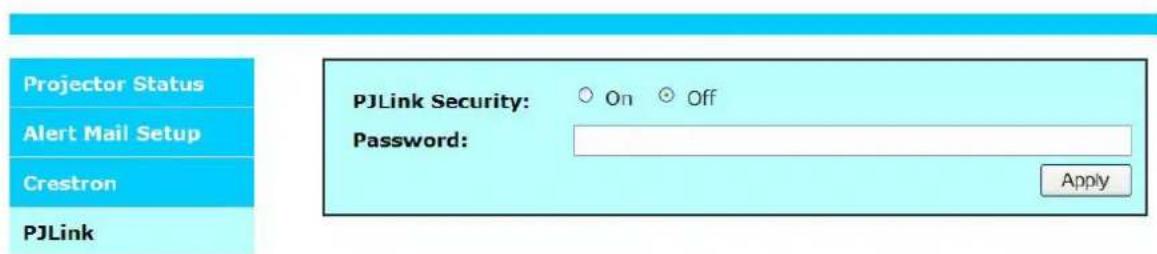
PJLink Security: Select On to enable PJLink security password or Off to disable it.
Password: Set up security password at length of up to 32 characters. See PJLink official web site for standard commands and connection methods.
BenQ ecoFACTS
BenQ has been dedicated to the design and development of greener product as part of its aspiration to realize the ideal of the "Bringing Enjoyment 'N Quality to Life" corporate vision with the ultimate goal to achieve a low-carbon society. Besides meeting international regulatory requirement and standards pertaining to environmental management, BenQ has spared no efforts in pushing our initiatives further to incorporate life cycle design in the aspects of material selection, manufacturing, packaging, transportation, using and disposal of the products. BenQ ecoFACTS label lists key eco-friendly design highlights of each product, hoping to ensure that consumers make informed green choices at purchase. Check out BenQ's CSR Website at http://csr.BenQ.com/ for more details on BenQ's environmental commitments and achievements.
Copyright 2015 BenQ Corporation. All rights reserved. No part of this publication may be reproduced, transmitted, transcribed, stored in a retrieval system or translated into any language or computer language, in any form or by any means, electronic, mechanical, magnetic, optical, chemical, manual or otherwise, without the prior written permission of BenQ Corporation.
All other logos, products, or company names mentioned in this manual may be the registered trademarks or copyrights of their respective companies, and are used for informational purposes only.
Disclaimer
BenQ Corporation makes no representations or warranties, either expressed or implied, with respect to the contents hereof and specifically disclaims any warranties, merchantability or fitness for any particular purpose. Further, BenQ Corporation reserves the right to revise this publication and to make changes from time to time in the contents hereof without obligation of BenQ Corporation to notify any person of such revision or changes.
This user manual aims to provide the most updated and accurate information to customers, and thus all contents may be modified from time to time without prior notice. Please visit http://www.benq.com for the latest version of this manual.
Statement regarding hyperlinks and third-party websites
BenQ is not responsible for the content of the websites or of similar resources, which are maintained and controlled by third parties, that may be linked from this product. Providing links to those websites or to similar resources does not mean that BenQ makes any warranty or representation to their content by expression or by implication.
Any third party content or service preinstalled in this product is provided "as is". BenQ does not, by expression or by implication, make any warrant to the content or to the services provided by third parties. BenQ does not warrant or guarantee that the content or services provided by third
parties are accurate, effective, most up-to-date, legal, or complete. Under no circumstances shall BenQ be liable for the content or services provided by third parties including their negligence. Services provided by third parties may be terminated temporarily or permanently. BenQ does not warrant or guarantee that any content or services provided by third parties are in good condition at any time, and is not liable for the termination of the said content and services. In addition, BenQ is not involved in any transactions you conduct in the websites or similar resources maintained by third parties.
You should contact the content or service providers for any questions, concerns, or disputes.
- PX9510 / PW9520 / PU9530
- Digital Projector
- User Manual
- Table of Contents
- Important safety instructions....4
- Overview 7
- Setup and operations 13
- Making connections....22
- Using the projector 27
- Important safety instructions
- Overview
- Shipping contents
- Projector exterior view
- Front and upper side view
- Control panel and functions
- Remote control and functions
- Remote control operation
- Setup and operations
- Setting the remote control batteries
- Connecting to the projector
- Projection lens selection and Installation
- Installing or removing the optional lens
- Installing the new lens
- Using the Anti-theft Screw
- Removing the existing lens from the projector
- Choosing a location
- Front Table:
- Front Ceiling:
- Rear Table:
- Rear Ceiling:
- !
- Throw distance and screen size
- Lens shift adjustable range
- Preventing the unauthorized use of the projector
- Locking the projector
- Unlocking the projector
- Locking the control panel
- Control Panel Look is turned on
- Control Panel Lock unlocked
- Using the physical lock
- Making connections
- Preparations
- Connecting DVI-D devices
- Connecting COMPONENT-video devices
- Connecting a computer
- Connecting a external HDBaseT transmitter
- Connecting a monitor
- Using the projector
- Turning the projector on or off
- Selecting an input source
- To select the video source
- Using the menus
- Adjusting the projected image
- Adjusting the image position
- Fine-tuning the image size and clarity
- Adjusting the projection angle
- Correcting picture distortion
- Auto-adjusting the image
- Turning off the projector
- Using On-Screen Display
- Navigating the OSD
- On-Screen Display (OSD) menus
- Menu Map
- PICTURE
- Picture Mode
- Brightness
- Contrast
- Saturation
- Hue
- Sharpness
- Color Temperature
- Gamma
- Advanced
- Input Balance
- HSG
- Noise Reduction
- Dynamic Black
- SIGNAL
- Source
- Auto Search
- Color Space
- VGA Setup
- Aspect Ratio
- Overscan
- Background
- SETUP
- Language
- Lamp Settings
- Lamp Power
- Custom Power Level
- Digital Alignment
- H/V Alignment
- 3D
- 3D Format
- Filter Message
- Startup Logo
- Remote Receiver
- Trigger
- Panel Key Lock
- Security Lock
- Source Message
- Installation
- Projector Installation
- Standby Settings
- High Altitude
- Auto Power Off
- Auto Power On
- RS232
- Network Settings
- Lens Control
- Test Pattern
- HDBaseT / Network
- SERVICE
- Model
- Serial Number
- Software Version
- BenQ Firmware Version
- Lamp Status
- Source Information
- Usage Time
- Filter Timer Reset
- Factory Reset
- Additional information
- Care of the projector
- Cleaning the lens
- Cleaning the projector case
- Storing the projector
- Transporting the projector
- Replacing the lamp
- #
- Lamp Handling Precautions
- Removing the used lamp
- Installing the optional color wheel
- Cleaning the filters
- Troubleshooting
- Indicator messages
- Common problems and solutions
- Tips for troubleshooting
- Image problems
- Problem: No image appears on the screen
- Problem: The image is blurred
- Problem: The image is wider at the top or bottom (trapezoid effect)
- Problem: The image is reversed or upside down
- Problem: The image is streaked
- Problem: The image is flat with no contrast
- Problem: The color of the projected image does not match the source image.
- Lamp problems
- Problem: There is no light from the projector
- Problem: The lamp goes off
- Remote control problems
- Problem: The projector does not respond to the remote control
- Specifications
- Timing chart
- 3D supported timing
- Control the projector through a Network
- Control the projector through a web browser
- Projector status
- Alert Mail Setup
- Crestron
- PJLink
- System
- Network control setup information (RJ-45 Version)
- Crestron control page
- BenQ ecoFACTS
- Disclaimer
- Statement regarding hyperlinks and third-party websites
Brand : BENQ
Model : PU953
Category : Video projector