
PDK-5011 - DVD player PIONEER - Free user manual and instructions
Find the device manual for free PDK-5011 PIONEER in PDF.
User questions about PDK-5011 PIONEER
0 question about this device. Answer the ones you know or ask your own.
Ask a new question about this device
Download the instructions for your DVD player in PDF format for free! Find your manual PDK-5011 - PIONEER and take your electronic device back in hand. On this page are published all the documents necessary for the use of your device. PDK-5011 by PIONEER.
USER MANUAL PDK-5011 PIONEER
Operating instructions
Mode d'emploi
Bedienungsanleitung
- Thank you for purchasing this Pioneer product.
- To ensure safe and proper usage, please read the accompanying Operating Instructions carefully before using the product.
- Keep the Operating Instructions stored in an accessible place.
Installation Work
- This product is sold on the premise that it will be installed by a professional with sufficient technique and skills. Make sure to request installation and mounting from a professional construction company or your sales agent.
- Pioneer shall not be liable in any way for any accidents or damage resulting from improper installation or mounting, incorrect usage, remodeling, natural disasters or the like.
Note to Construction Companies
Prior to installing this product, please read Pioneer's technical manual thoroughly and heed its content.
Pioneer shall not be liable in any way for any accidents or damage resulting from other than the specified assembly, mounting and usage, from remodeling, or from natural disasters or the like.
Usage Precautions
- This product is exclusively for use with the plasma display.
-
It should not be used for any other purpose, such as for holding a plasma display, or remodeled in any way.
-
The installation site should
(a) be strong enough to support the weight of the plasma display,
(b) not allow people to easily hang from or bump into the setup,
(c) not be outdoors or in proximity to hot springs or the ocean, and
(d) not be subjected to vibration or shock.
(e) In addition, a professional construction company should be consulted in the event that the walls are not structurally sound enough to permit installation.
(f) Make sure to thoroughly read the Operating Instructions for the plasma display and heed all other cautions pertaining to the installation site.
- Assembly and Installation
(a) Follow the assembly procedure and tighten screws in all of the specified places. Failure to do so could cause an unexpected accident, such as the display breaking or falling down after it has been installed.
(b) For safety reasons, have two or more people perform the work.
(c) Prior to starting the work, make sure to turn OFF the plasma display's main power switch and to unplug the power plug from its outlet.
- Do not loosen any of the screws, as doing so could cause the display to fall down or a similar accident.
- If you detect any abnormalities or poor performance, immediately contact a professional construction company for repairs.
- As damage that is not readily visible, such as to the interior of the display's metal fixtures or the parts mounted against walls, could cause the display to fall down, make sure to contact a professional construction company for related inspection when having the display inspected or repaired or when having interior finishing done.
We recommend having a professional construction company make periodic inspections, when possible.
8. With long-term use, the display's metal fixtures could lose their strength, depending on the environment. To promote problem-free use, we thus recommend having a professional construction company inspect the installation every five years, as a rule.
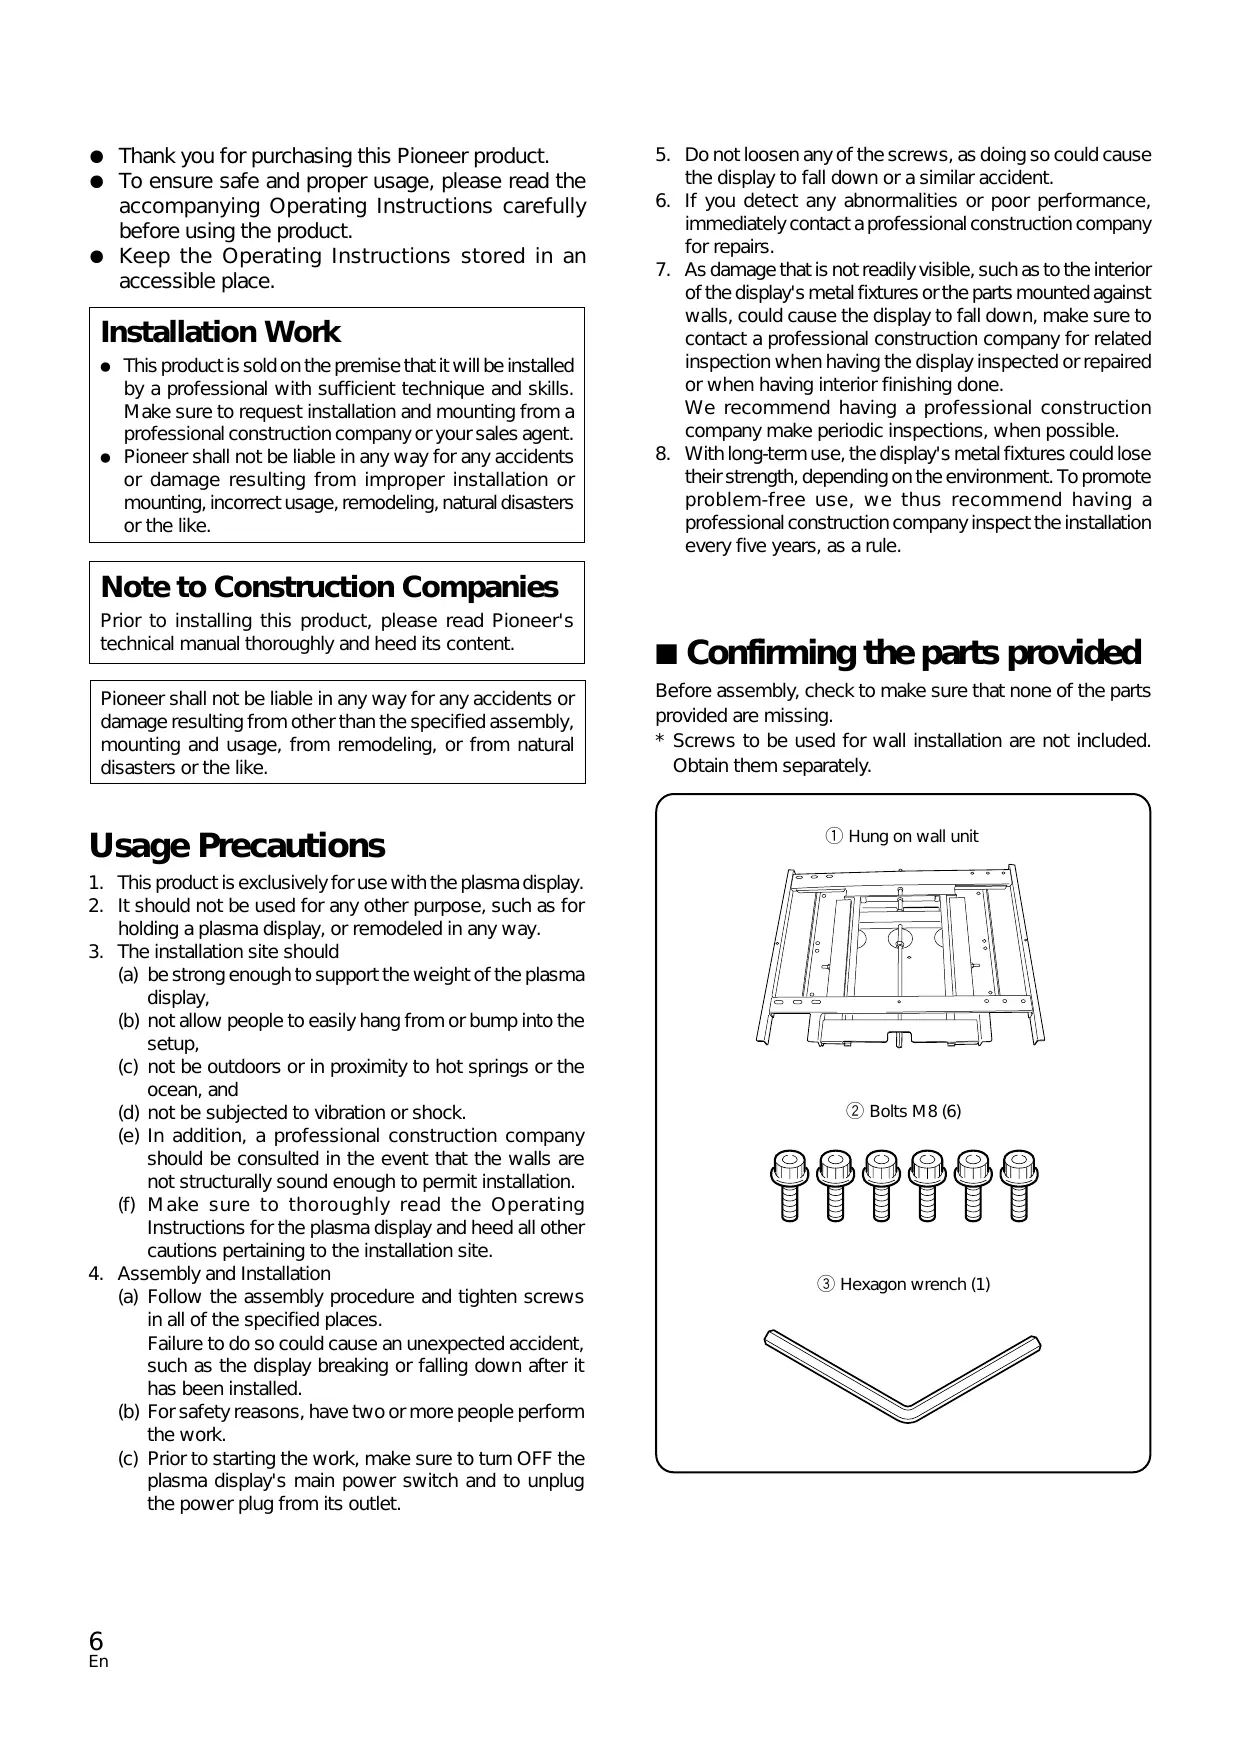
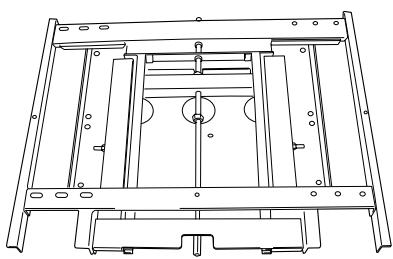
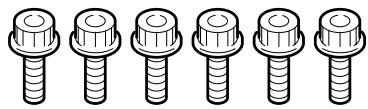
Confirming the parts provided
Before assembly, check to make sure that none of the parts provided are missing.
- Screws to be used for wall installation are not included. Obtain them separately.
① Hung on wall unit
② Bolts M8 (6)
③ Hexagon wrench (1)
■ Installation procedure
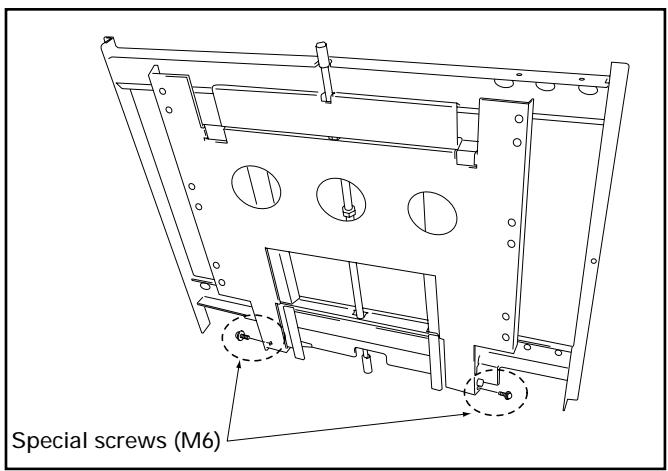
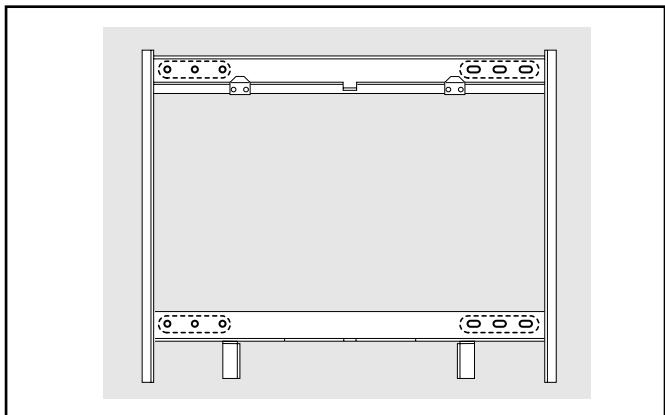
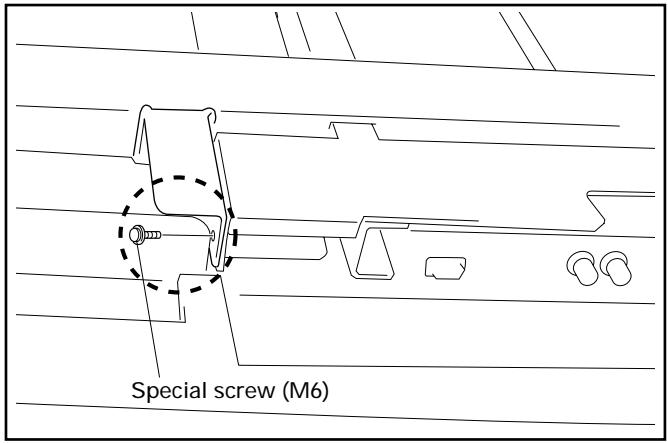
1 Remove the special screws (2 locations) from the bottom of the hung on wall unit.
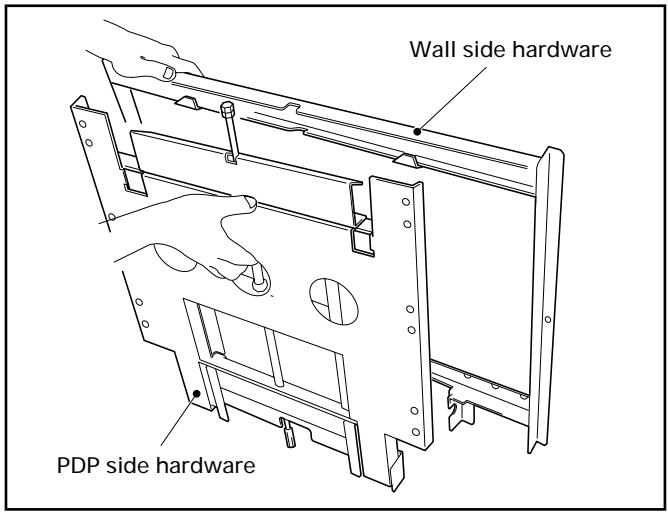
2 Remove the hardware on the wall side and the hardware on the PDP side.
3 Attach the PDP side hardware to the plasma display.
Warning
- Cover the display with a sheet or similar protective material to protect it from scratches or other damage.
- Be sure to attach it on top of a flat table or similar surface.
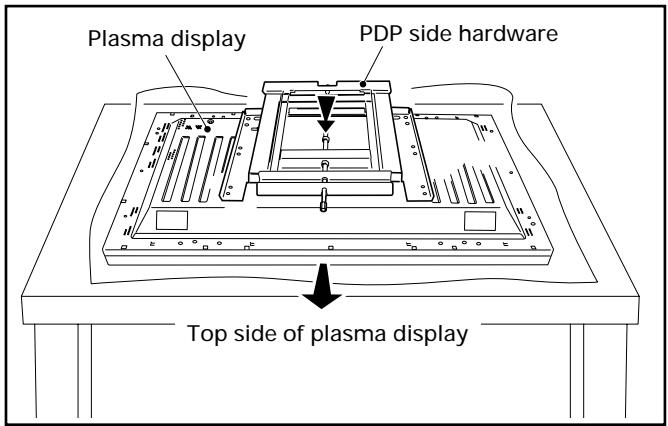
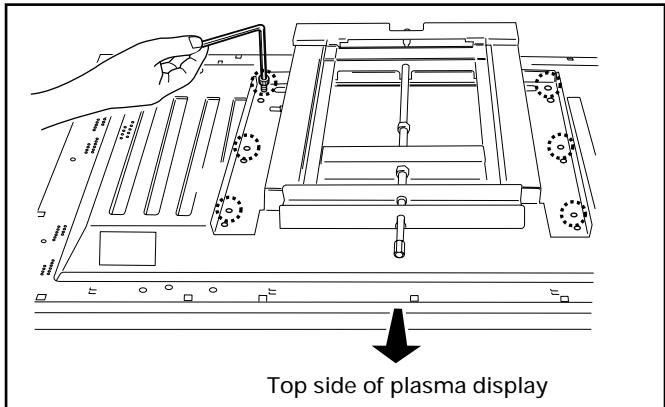
Fix the plasma display to the PDP side hardware with bolt M8 (6 locations). Be sure to use the holes marked with the red triangle "△".
5 Attach the wall side hardware to the wall. Install the wall side hardware (4 locations) symmetrically on the left and right side (one at each location from the center of the ). Because the screws and bolts used to do this are different according to the wall strength and wall material, purchase suitable screws and bolts separately.
Warning
Check the strength of the wall and beams before installing the display.
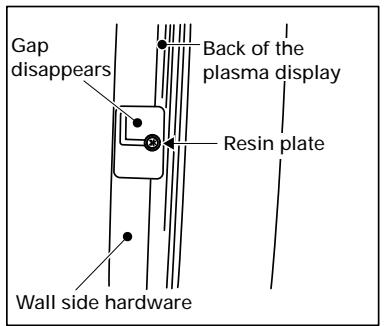
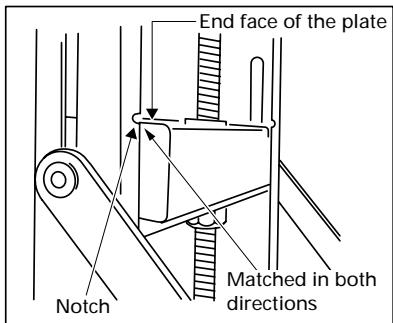
6 Attach the hook on the PDP side hardware to the wall side hardware.

7 Fix the bottom of the hardware with the special screws removed at step 1 (one on the left and one on the right).
Angle setup
This installation hardware allows the display to be directed downwards freely at any angle from the vertical to 25^ . This adjustment must always be done by 2 people. Adjust the angle by rotating the screws at the center top and center bottom of the wall side hardware to the left or right.
Warning
- If the angle is increased while you are adjusting the angle using the screw at the center of the bottom, it is difficult to turn the screw. When this happens, adjust it at the center of the upper.
- Turn the screws very carefully to avoid damaging the wall.
- When a screw becomes tight at either end of the adjustment range, do not turn the adjustment screw any further, because if you do, you will apply excessive force, deforming the screw.
Criterion for the vertical location
When it is in this state, do not turn the adjustment screw any further in the closing direction.
(8) Criterion when its angle is 25^
When it is in this state, do not turn the adjustment screw any further in the opening direction.
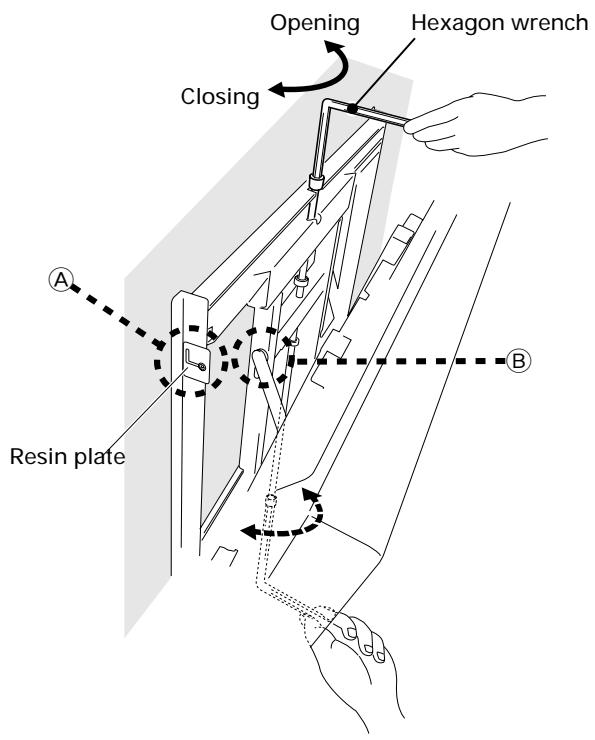

Measuring the opening distance X enables approximate angle values to be determined.
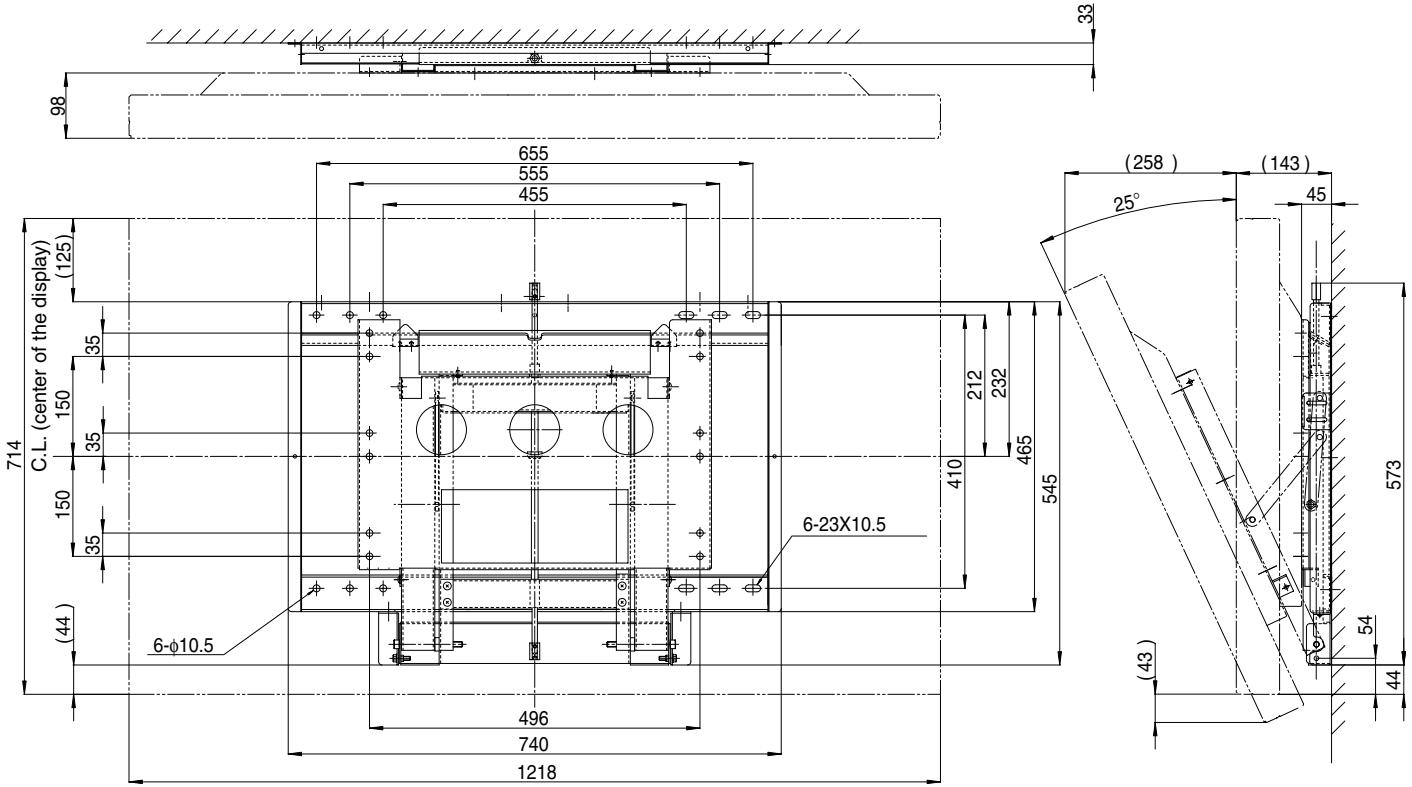
Dimensions
Weight 13.8 kg (30.4 lbs) (Hung on wall unit only)
52.7 kg (116.2 lbs) (Hung on wall unit + Plasma Display
(Unit: mm)
Service Parts List
Mark No. Description Parts No.
BOLT M8
Parts No.
SPECIAL SCREW
AZB1435-
PACKING SET
AZH1141-
INSTRUCTION MANUAL
AZR1049-
HEXAGON WRENCH
AZE1122-
Published by Pioneer Corporation
Copyright © 2001 Pioneer Corporation.
All rights reserved.
PIONEER ELECTRONICS OF CANADA, INC. 300 Allstate Parkway, Markham, Ontario L3R 0P2, Canada, TEL: (905) 479-4411
PIONEER EUROPE NV MULTIMEDIA DIVISION Pioneer House Hollybush Hill, Stoke Poges, Slough SL2 4QP, U.K., TEL: 44-1753-789-789
PIONEER ELECTRONICS AUSTRALIA PTY.LTD. 178-184 Boundary Road, Braeside, Victoria 3195, Australia, TEL: 61-39-586-6300
PIONEER ELECTRONICS ASIACENTRE PTE. LTD. 253 Alexandra Road #04-01, Singapore 159936 TEL: 64-472-1111
PIONEER HIGH FIDELTY TAIWAN CO., LTD. 13Fl. No.44 Chung Shan North Road Sec.2. Taipei TAIWAN, TEL: 886-2-521-3588
PIONEER ELECTRONICS (CHINA) LTD. Unit 03-07, 24/F Peregrine Tower Lippo Centre, Queensway, H.K., TEL: 852-2848-6488
PIONEER GULF FZE P.O. BOX 61226, Jebel Ali, Dubai, United Arab Emirates, TEL: (971) 4-815756