
9H.J4J77.35L - Video projector BENQ - Free user manual and instructions
Find the device manual for free 9H.J4J77.35L BENQ in PDF.


| Product Type | Video Projector |
| Brand | BenQ |
| Model | 9H.J4J77.35L |
| Display Technology | Single-chip DLP |
| Native Resolution | 1920 x 1080 (1080p) |
| Brightness | High brightness (exact lumen not specified, estimated >3000 ANSI lumens) |
| Lens | F=2.41-2.91, f=20.72-31 mm |
| Lamp Type | 280 W |
| Lamp Life (Normal Mode) | Approx. 3000 hours |
| Dimensions (W x H x D) | 339.2 x 138.8 x 260.6 mm |
| Weight | 3.6 kg (8 lbs) |
| Power Supply | AC 100-240 V, 3.8 A, 50-60 Hz |
| Power Consumption (Normal) | 370 W (max) |
| Power Consumption (Standby) | < 1 W |
| Inputs | HDMI, VGA (D-Sub 15), S-Video, Composite Video, Component (RCA), Audio (3.5mm, RCA), USB (Type A, Mini-B), RJ45 LAN |
| Outputs | VGA (D-Sub 15), Audio (3.5 mm), 12V trigger, Speaker (10 W x 2) |
| Control | RS-232, USB (Type B for firmware), LAN (RJ45), IR remote |
| Keystone Correction | Digital vertical keystone correction |
| Projection Modes | Front table, front ceiling, rear table, rear ceiling |
| Security | Kensington lock slot, password protection |
| Special Features | LAN display (4-1), USB display, USB reader, remote desktop, Q Presenter, PIP, 3D color management, SRS sound, microphone input, blank timer, sleep timer |
| Operating Temperature | 0° to 35°C at sea level; high altitude mode up to 3000 m |
Frequently Asked Questions - 9H.J4J77.35L BENQ
User questions about 9H.J4J77.35L BENQ
0 question about this device. Answer the ones you know or ask your own.
Ask a new question about this device
Download the instructions for your Video projector in PDF format for free! Find your manual 9H.J4J77.35L - BENQ and take your electronic device back in hand. On this page are published all the documents necessary for the use of your device. 9H.J4J77.35L by BENQ.
USER MANUAL 9H.J4J77.35L BENQ
Projector features 7
Shipping contents...... 8
Projector exterior view...... 9
Controls and functions ...... 10
Positioning your projector15
Choosing a location.... 15
Obtaining a preferred projected image size.... 16
Connection ......19
Connecting Video source devices..... 21
Operation ......22
Starting up the projector.... 22
Adjusting the projected image ...... 23
Using the menus.... 25
Securing the projector.... 26
Switching input signal.... 28
Magnifying and searching for details . 29
Selecting the aspect ratio.... 29
Optimizing the image.... 31
Remote paging operations .... 34
Hiding the image 34
Setting the Sleep Timer 34
Freezing the image.... 34
Operating in a high altitude environment 35
Adjusting the sound 35
Displaying more than one image source simultaneously.... 37
Personalizing the projector menu display....37
Shutting down the projector ....38
Controlling the projector through a LAN environment....39
Displaying image through Q Presenter49
Using the Web Control Lock......53
Using the Projection Login Code......54
Presenting From a USB Reader......55
Remote Desktop Control through Q Presenter....58
Menu operation ......60
Maintenance....73
Care of the projector....73
Lamp information....74
Troubleshooting ....80
Specifications ....81
Dimensions....82
Ceiling mount installation......82
Timing chart....83
Warranty and Copyright information......86
Regulation statements .....87
Important safety instructions
Your projector is designed and tested to meet the latest standards for safety of information technology equipment. However, to ensure safe use of this product, it is important that you follow the instructions mentioned in this manual and marked on the product.
Safety Instructions
- Please read this manual before you operate your projector. Save it for future reference.
natural_image
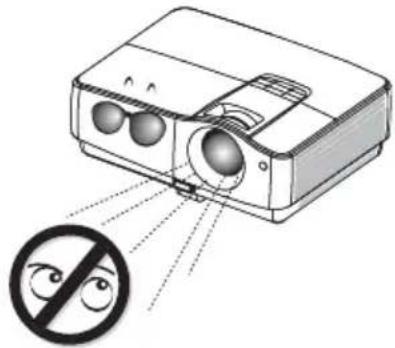
Cartoon illustration of a projector with a paper roll and cartoon eyes, connected by a hand (no text or symbols)- Do not look straight at the projector lens during operation. The intense light beam may damage your eyes.
natural_image
Illustration of a projector with a prohibition symbol (no text or labels present)- Refer servicing to qualified service personnel.
natural_image
Cartoon illustration of a projector with a beho cap and thumbs-up gesture (no text or symbols)- Always open the lens shutter or remove the lens cap when the projector lamp is on.
natural_image
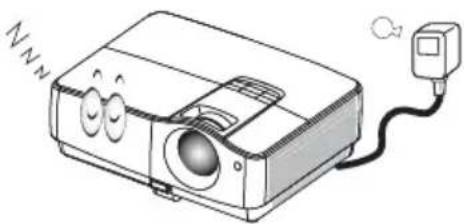
Cartoon illustration of a projector with eyes and a pointing gesture (no text or symbols)- In some countries, the line voltage is NOT stable. This projector is designed to operate safely within a mains voltage between 100 to 240 volts AC, but could fail if power cuts or surges of ±10 volts occur. In areas where the mains voltage may fluctuate or cut out, it is recommended that you connect your projector through a power stabilizer, surge protector or uninterruptible power supply (UPS).
natural_image
Illustration of a projector with cartoon eyes and a connected cable (no text or symbols)- Do not block the projection lens with any objects when the projector is under operation as this could cause the objects to become heated and deformed or even cause a fire.
Safety Instructions (Continued)
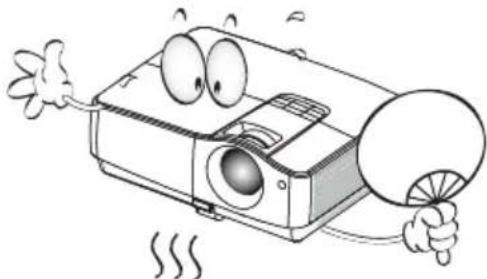
- The lamp becomes extremely hot during operation. Allow the projector to cool for approximately 45 minutes prior to removing the lamp assembly for replacement.
natural_image
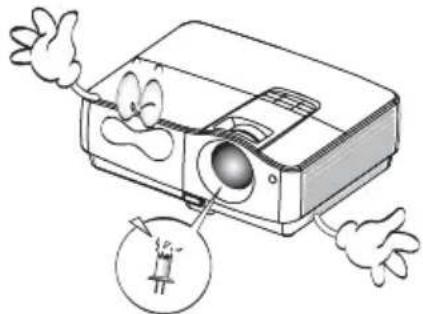
Cartoon illustration of a projector with a fan and emitting steam (no text or symbols)- Do not operate lamps beyond the rated lamp life. Excessive operation of lamps beyond the rated life could cause them to break on rare occasions.
natural_image
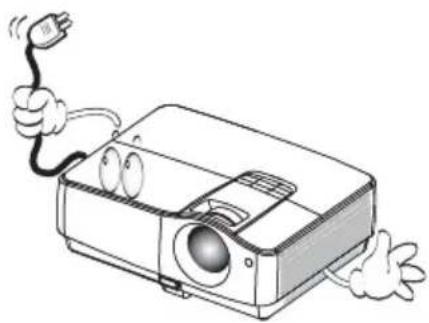
Cartoon illustration of a projector with cartoon eyes and a magnified inset showing a small component (no text or symbols)- Never replace the lamp assembly or any electronic components unless the projector is unplugged.
natural_image
Cartoon illustration of a projector with a cable and motion lines, no text or symbols present- Do not place this product on an unstable cart, stand, or table. The product may fall, sustaining serious damage.
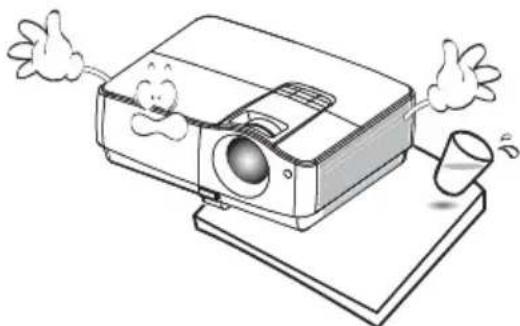
natural_image
Cartoon illustration of a projector with motion lines and a cup on a base (no text or symbols)- Do not attempt to disassemble this projector. There are dangerous high voltages inside which may cause death if you should come into contact with live parts. The only user serviceable part is the lamp which has its own removable cover. Under no circumstances should you ever undo or remove any other covers. Refer servicing only to suitably qualified professional service personnel.
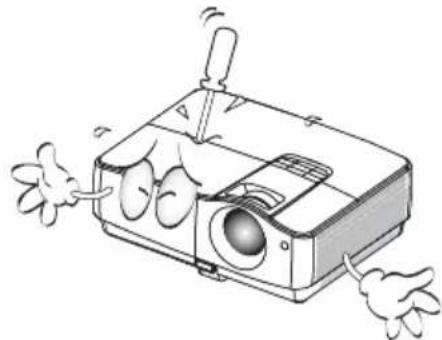
natural_image
Cartoon illustration of a projector with motion lines indicating sound or vibration (no text or symbols)- When the projector is under operation, you may sense some heated air and odor from its ventilation grill. It is a normal phenomenon and not a product defect.
Safety Instructions (Continued)
- Do not place this projector in any of the following environments.
- Space that is poorly ventilated or confined. Allow at least 50 cm clearance from walls and free flow of air around the projector.
- Locations where temperatures may become excessively high, such as the inside of a car with all windows rolled up.
- Locations where excessive humidity, dust, or cigarette smoke may contaminate optical components, shortening the projector's life span and darkening the image.
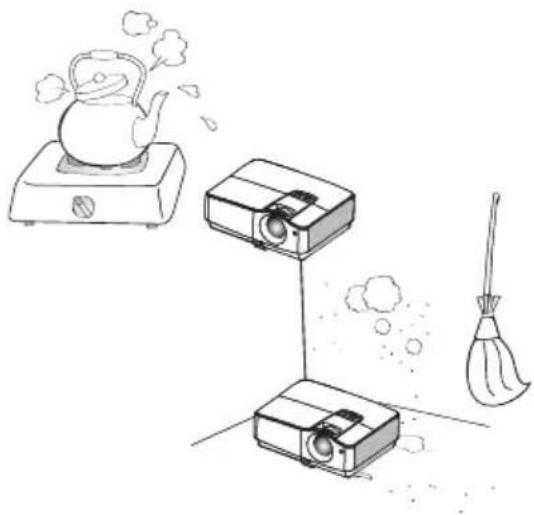
natural_image
Illustration of a kitchen setup with a kettle on an induction cooker, two projector monitors, and a broom (no text or symbols)- Locations near fire alarms
- Locations with an ambient temperature above 35^ C / 95^ F
- Locations where the altitudes are higher than 3000 m (10000 feet).
3000 m (10000 feet)
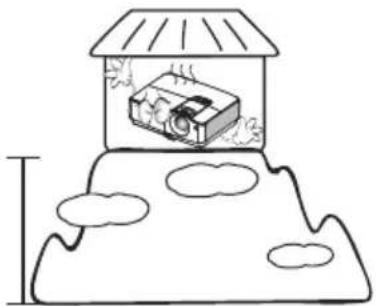
natural_image
Simple line drawing of a house with a roof and cloud-like shapes at the base (no text or symbols)0 m (0 feet)
- Do not block the ventilation holes.
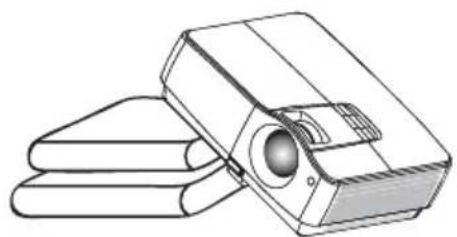
- Do not place this projector on a blanket, bedding or any other soft surface.
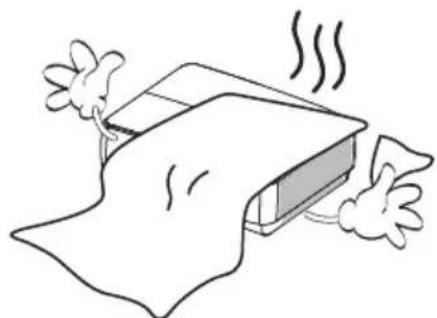
- Do not cover this projector with a cloth or any other item.
- Do not place inflammables near the projector.
natural_image
Simple line drawing of a folded paper or document with steam rising (no text or symbols)If the ventilation holes are seriously obstructed, overheating inside the projector may result in a fire.
- Always place the projector on a level, horizontal surface during operation.
- Do not use if tilted at an angle of more than 10 degrees left to right, nor at angle of more than 15 degrees front to back. Using the projector when it is not fully horizontal may cause a malfunction of, or damage to, the lamp.
natural_image
Line drawing of a projector with two stacked plates (no text or symbols)Safety Instructions (Continued)
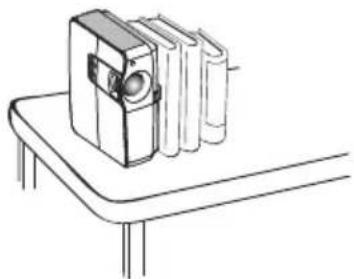
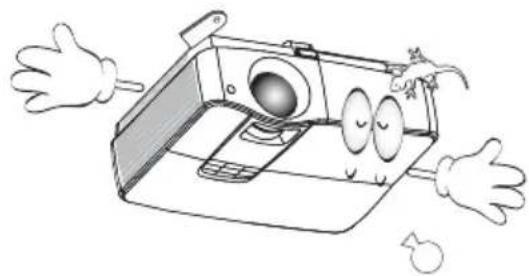
- Do not stand the projector on end vertically. Doing so may cause the projector to fall over, causing injury or resulting in damage to the projector.
natural_image
Line drawing of a vintage-style camera on a table with three books beside it (no text or symbols)- Do not step on the projector or place any objects upon it. Besides probable physical damage to the projector, doing so may result in accidents and possible injury.
natural_image
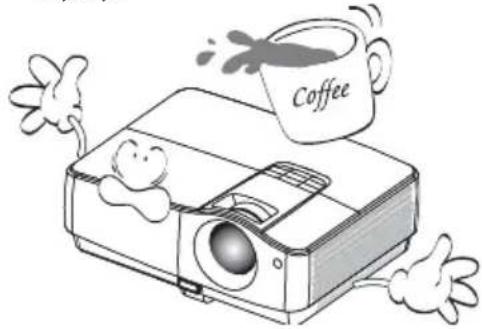
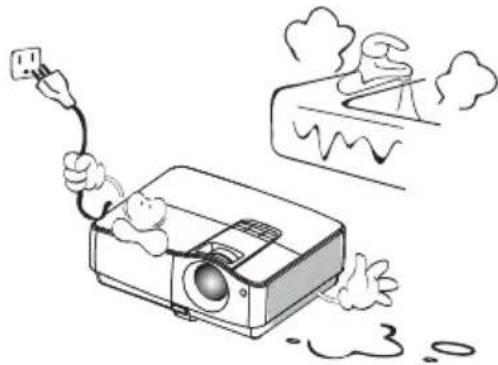
Cartoon illustration of a projector with a coffee mug and motion lines, no text or symbols present- Do not place liquids near or on the projector. Liquids spilled into the projector may cause it to fail. If the projector does become wet, disconnect it from the power supply's wall socket and call BenQ to have the projector serviced.
natural_image
Cartoon illustration of a projector with a plug and smoke, emitting exhaust smoke (no text or symbols)- This product is capable of displaying inverted images for ceiling mount installation.

Use only BenQ's Ceiling Mount Kit for mounting the projector and ensure it is securely installed.
natural_image
Cartoon illustration of a smiling projector with arms and legs, surrounded by cartoon characters (no text or symbols)Introduction
Projector features
The projector integrates high-performance optical engine projection and a user-friendly design to deliver high reliability and ease of use.
The projector offers the following features.
• LAN display for network control and web server
• LAN display 4-1 (maximum 4PC/ NB display to 1 projector)
- Remote desktop feature for LAN and USB display 1-M (maximum 1PC/ NB can display to 8 projectors at the same time)
- USB display supports computer connection via USB mini-B type to A type cable
- USB Reader supports USB flash drive or HDD display
- Variable audio output
- Microphone input with big speakers (10W x2) can save extra audio systems for schools
- S R S W™ Significantly improves the playback quality of audio, delivering a dynamic 3D entertainment experience with deep, rich bass and high frequency clarity for crisp detail.

• HDMI compatibility
- HDCP compatibility
- Quick auto search speeding up the signal detecting process
- Selectable password protected function
• 3D color management allowing color adjustments to your liking
- One-key auto-adjustment to display the best picture quality
• Digital keystone correction to correct distorted images
- Adjustable color balance control for data/video display
• High brightness projection lamp
- Multi-language On-Screen Display (OSD) menus
- Component HDTV compatibility (YP bPr)

- The apparent brightness of the projected image will vary depending on the ambient lighting conditions, selected input signal contrast/brightness settings, and is proportional to projection distance.
- The lamp brightness will decline over time and may vary within the lamp manufacturers specifications. This is normal and expected behavior.
Shipping contents
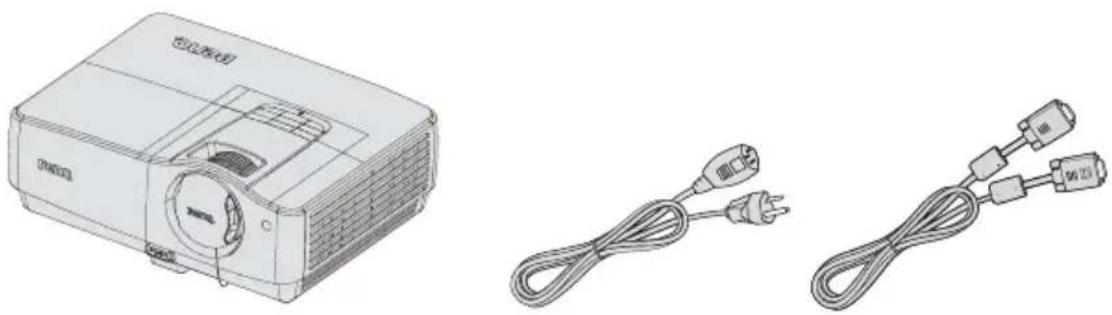
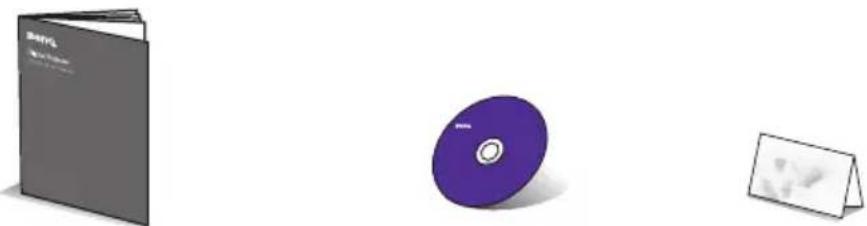
Carefully unpack and verify that you have all of the items shown below. If any of these items are missing, please contact your place of purchase.
Standard accessories

The supplied accessories will be suitable for your region, and may differ from those illustrated.
*The warranty card is only supplied in some specific regions. Please consult your dealer for detailed information.
natural_image
Illustration of a projector and two connected cables (no text or symbols)Projector Power cord VGA cable
natural_image
Three objects: a gray CD, a purple DVD with a circular lens, and a white card (no visible text or symbols)Quick start guide User manual CD Warranty card*
natural_image
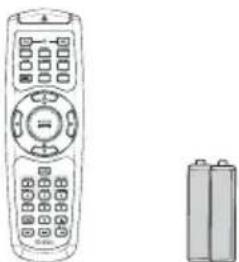
Line drawing of a remote control with two batteries (no text or symbols)Remote control with batteries
Optional accessories
-
Spare lamp kit
-
Soft carry case
-
Ceiling mount kit
-
RS232 cable
Projector exterior view
Front/upper side
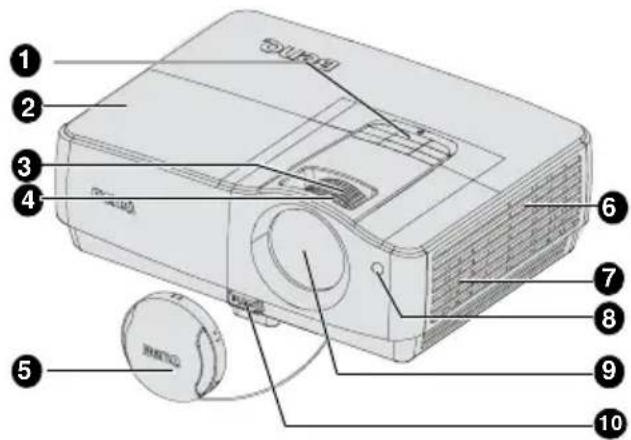
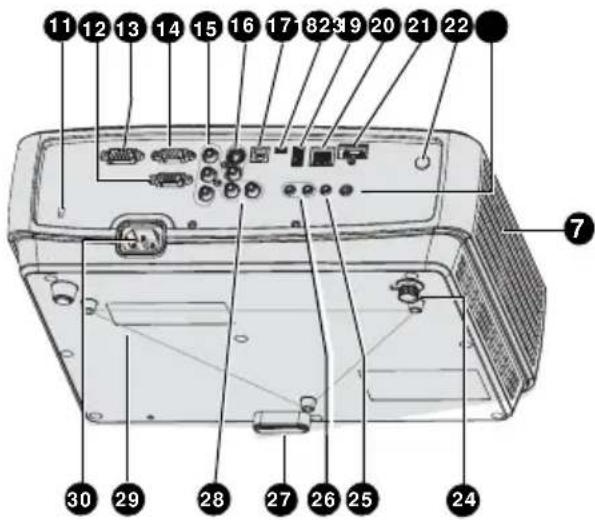
Rear/lower side
- External control panel (See "Projector" on page 10 for details.)
- Lamp cover
- Zoom ring
- Focus ring
- Lens cover
- Vent
- Speaker
- Front IR remote sensor
- Projection lens
- Quick-release button
- Kensington anti-theft lock slot
- RGB (PC)/Component video (YPbPr/ YCbCr) signal input jack
- RS-232 control port
- RGB signal output jack
- Component input jacks
- S-Video input jack Video input jack
- Type B USB jack
- mini-B USB jack
- Type A USB jack
- RJ45 LAN input jack
- HDMI input jack
- Rear IR remote sensor
- 12V DC output terminal Used to trigger external devices such as an electric screen or light control, etc. Consult your dealer for how to connect these devices.
- Rear adjuster foot
- Microphone input jack
- Audio input jack Audio output jack
- Quick release foot
- Audio (L/R) input jack
- Ceiling mount holes
- AC power cord inlet
Controls and functions
Projector
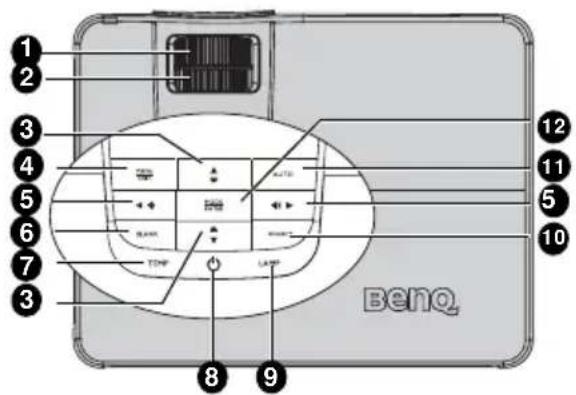
1. Focus ring
Adjusts the focus of the projected image.
See "Fine-tuning the image size and clarity" on page 24 for details.
2. Zoom ring
Adjusts the size of the image. See "Fine-tuning the image size and clarity" on page 24 for details.
3. Keystone/Arrow keys (/ Up
▼ Down)
Manually corrects distorted images resulting from an angled projection. See "Correcting keystone" on page 24 for details.
4. MENU/EXIT
Turns on the On-Screen Display (OSD)
menu. Goes back to previous OSD menu, exits and saves menu settings.
5. Volume/Arrow keys (/ Left,
▶ Right)
Adjusts the sound level.
When the On-Screen Display (OSD) menu is activated, the #3 and #5 keys are used as directional arrows to select the desired menu items and to make adjustments. See "Using the menus" on page 25 for details.
6. BLANK
Used to hide the screen picture. See
"Hiding the image" on page 34 for details.
7. TEMPerature indicator light
Lights up red if the projector's temperature becomes too high. See "Indicators" on page 79 for details.
8. Power/POWER indicator light
Toggles the projector between standby mode and on. See "Starting up the projector" on page 22 and "Shutting down the projector" on page 38 for details.
Lights up or flashes when the projector is under operation. See "Indicators" on page 79 for detail.
9. LAMP indicator light
Indicates the status of the lamp. Lights up or flashes when the lamp has developed a problem. See "Indicators" on page 79 for details.
10. Source
Displays the source selection bar. See "Switching input signal" on page 28 for details.
11. AUTO
Automatically determines the best picture timings for the displayed image. See "Auto-adjusting the image" on page 23 for details.
12. MODE/ENTER
Selects an available picture setup mode. See "Selecting a picture mode" on page 31 for details.
Activates the selected On-Screen Display (OSD) menu item. See "Using the menus" on page 25 for details.
⚠️ Ceiling mounting the projector
We want you to have a pleasant experience using your BenQ projector, so we need to bring this safety matter to your attention to prevent possible damage to person and property.
If you intend to mount your projector on the ceiling, we strongly recommend that you use a proper fitting BenQ projector ceiling mount kit and that you ensure it is securely and safely installed.
If you use a non-BenQ brand projector ceiling mount kit, there is a safety risk that the projector may fall from the ceiling due to an improper attachment through the use of the wrong gauge or length screws.
You can purchase a BenQ projector ceiling mount kit from the place you purchased your BenQ projector. BenQ recommends that you also purchase a separate Kensington lock compatible security cable and attach it securely to both the Kensington lock slot on the projector and the base of the ceiling mount bracket. This will perform the secondary role of restraining the projector should its attachment to the mounting bracket become loose.
Remote control
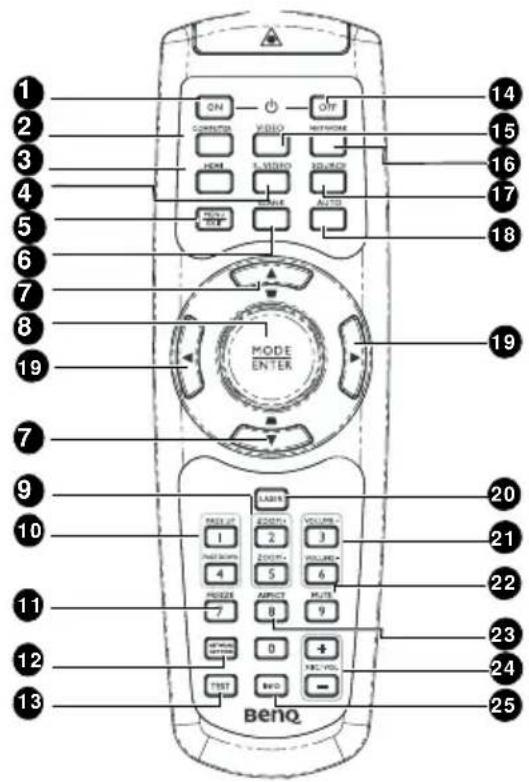
- ON
Turns on the projector. See "Starting up the projector" on page 22 for details.
- COMPUTER
Displays RGB (PC)/Component video (YPbPr/ YCbCr) signal.
- HDMI
Displays HDMI signal.
- S-VIDEO
Displays S-video signal.
- MENU/EXIT
Turns on the On-Screen Display (OSD) menu. Goes back to previous OSD menu, exits and saves menu settings. See "Using the menus" on page 25 for details.
- BLANK
Used to hide the screen picture. See "Hiding the image" on page 34 for details.
- Keystone/Arrow keys (/ U]
▼ Down)
Manually corrects distorted images resulting from an angled projection. See "Correcting keystone" on page 24 for details.
- MODE/ENTER
Selects an available picture setup mode. See "Selecting a picture mode" on page 31 for details.
Activates the selected On-Screen Display (OSD) menu item. See "Using the menus" on page 25 for details.
- ZOOM+/ZOOM-
Magnifies or reduces the projected picture size. See "Magnifying and searching for details" on page 29 for details.
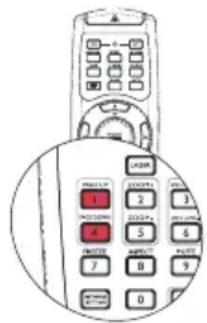
- Page Up/Down
Page up/down arrows when connected through USB to a PC. See "Remote paging operations" on page 34 for details.
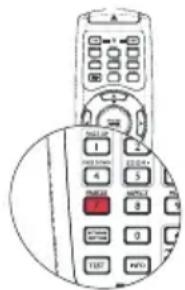
- FREEZE
Freezes the projected image. See "Freezing the image" on page 34 for details.
- Network Setting
Enables Network Settings OSD menu.
- TEST
Displays the test pattern. See "Test Pattern" on page 70 for details.
- OFF
Turns off the projector. See "Shutting down the projector" on page 38 for details.
- VIDEO
Displays vidoe signal.
- NETWORK
Enables the network mode.
- SOURCE
Displays the source selection bar. See "Switching input signal" on page 28 for details.
18. AUTO
Automatically determines the best picture timings for the displayed image. See "Auto-adjusting the image" on page 23 for details.
19. Arrow keys ( ◀ e ▶ f t , Right)
When the On-Screen Display (OSD) menu is activated, the #7, and #19 keys are used as directional arrows to select the desired menu items and to make adjustments. See "Using the menus" on page 25 for details.
20. LASER
Emits visible laser pointer light for presentation purposes.
21. Volume
Adjusts the projector's sound level. See "Adjusting the sound" on page 35 for details.
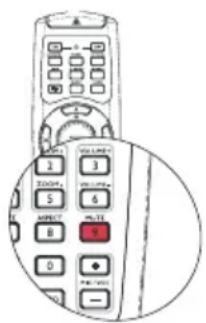
22. MUTE
Toggles projector audio between on and off. See "Muting the sound" on page 35 for details.
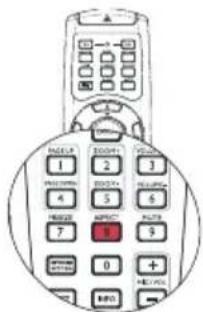
23. ASPECT
Selects the display aspect ratio. See "Selecting the aspect ratio" on page 29 for details.
24. MIC/VOL
Adjusts the microphone's sound level. See for details. See "Adjusting the microphone's sound level" on page 36 for details.
25. INFO
Displays INFORMATION menu.
Operating the LASER pointer
The Laser Pointer is a presentation aid for professionals. It emits red colored light when you press it and the indicator lights up red.
The laser beam is visible. It is necessary to press and hold LASER for continuous output.
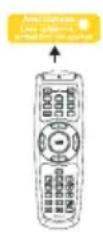

Do not look into the laser light window or shine the laser light beam on yourself or others. See the warning messages on the back of the remote control prior to using it.
The laser pointer is not a toy. Parents should be mindful of the dangers of laser energy and keep this remote control out of the reach of children.
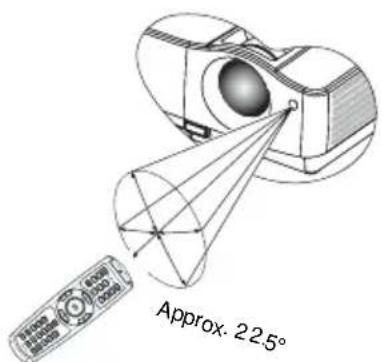
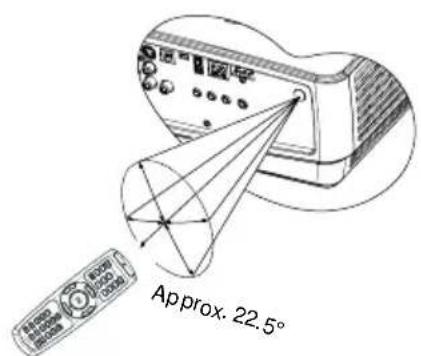
Infra-Red (IR) remote control sensor is located on the front of the projector. The remote control must be held at an angle within 22.5 degrees perpendicular to the projector's IR remote control sensor to function correctly. The distance between the remote control and the sensor should not exceed 8 meters (\~ 26 feet).
Make sure that there are no obstacles between the remote control and the IR sensor on the projector that might obstruct the infra-red beam.
- Operating the projector from the front • Operating the projector from the rear
Replacing the remote control battery
-
To open the battery cover, turn the remote control over to view its back, push on the finger grip on the cover and slide it up in the direction of the arrow as illustrated. The cover will slide off.
-
Remove any existing batteries (if necessary) and install two AAA batteries observing the battery polarities as indicated in the base of the battery compartment. Positive (+) goes to positive and negative (-) goes to negative.
-
Refit the cover by aligning it with the base and sliding it back down into position. Stop when it clicks into place.
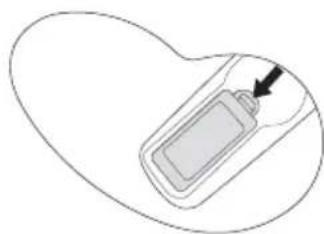
natural_image
Simple line drawing of a rectangular device with an arrow pointing to it, enclosed in an oval shape (no text or symbols)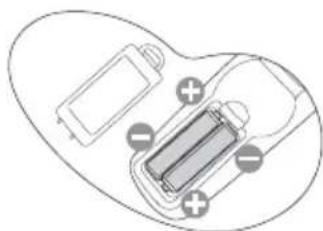
natural_image
Diagram of a battery pack with two batteries and a battery, no text or symbols present
- Avoid excessive heat and humidity.
- There may be battery damage if the battery is incorrectly replaced.
- Replace only with the same or equivalent type recommended by the battery manufacturer.
- Dispose of the used battery according to the battery manufacturer's instructions.
- Never throw a battery into a fire. There may be danger of an explosion.
- If the battery is dead or if you will not be using the remote control for a long time, remove the battery to prevent damage to the remote control from possible battery leakage.
Positioning your projector Choosing a location
Your room layout or personal preference will dictate which installation location you select. Take into consideration the size and position of your screen, the location of a suitable power outlet, as well as the location and distance between the projector and the rest of your equipment.
Your projector is designed to be installed in one of four possible installation locations:
1. Front Table
Select this location with the projector placed near the floor in front of the screen. This is the most common way to position the projector for quick setup and portability.
2. Front Ceiling
Select this location with the projector suspended upside-down from the ceiling in front of the screen.
Purchase the BenQ Projector Ceiling Mounting Kit from your dealer to mount your projector on the ceiling.
Set Front Ceiling in the SYSTEM SETUP: Basic > Projector Position menu after you turn the projector on.
3. Rear Table
Select this location with the projector placed near the floor behind the screen.
Note that a special rear projection screen is required.
Set Rear Table in the SYSTEM SETUP: Basic > Projector Position menu after you turn the projector on.
4. Rear Ceiling
Select this location with the projector suspended upside-down from the ceiling behind the screen.
Note that a special rear projection screen and the BenQ Projector Ceiling Mounting Kit are required for this installation location.
Set Rear Ceiling in the SYSTEM SETUP: Basic > Projector Position menu after you turn the projector on.
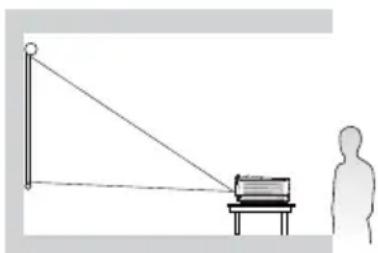
natural_image
Simple line drawing of a person observing a small object on a table, with a pole and connecting lines (no text or symbols)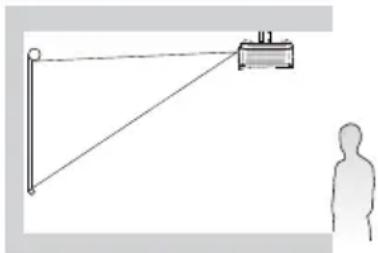
natural_image
Simple line drawing of a person standing next to a mechanical device with a triangular arm and connecting lines (no text or symbols)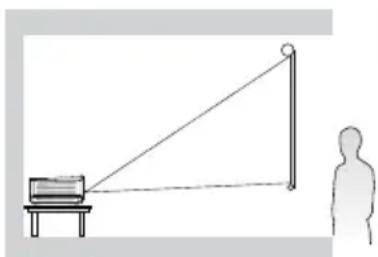
natural_image
Simple line drawing of a person observing a projector mounted on a table with a pointer, no text or symbols present.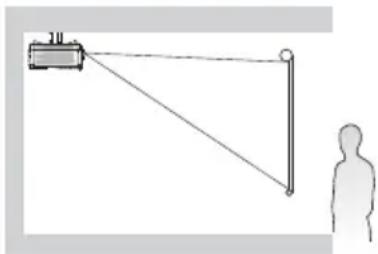
natural_image
Simple line drawing of a person observing a mechanical device with wires, no text or symbols presentObtaining a preferred projected image size
The distance from the projector lens to the screen, the zoom setting (if available), and the video format each factors in the projected image size.
16:9 is the native aspect ratio of this projector.
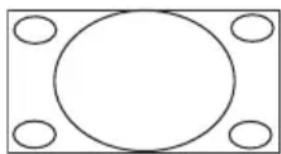
natural_image
Simple geometric diagram with a circle centered on four corner circles, no text or symbols present.4:3 aspect image in a 16:9 aspect display area
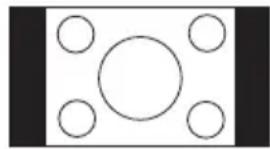
natural_image
Simple geometric diagram with a central circle surrounded by four smaller circles, no text or symbols present.16:9 aspect image scaled to a 4:3 aspect display area
The projector should always be placed horizontally level (like flat on a table), and positioned directly perpendicular ( 90^ right-angle square) to the horizontal center of the screen. This prevents image distortion caused by angled projections (or projecting onto angled surfaces).
If the projector is mounted on a ceiling, it must be mounted upside-down so that it projects at a slightly downward angle.
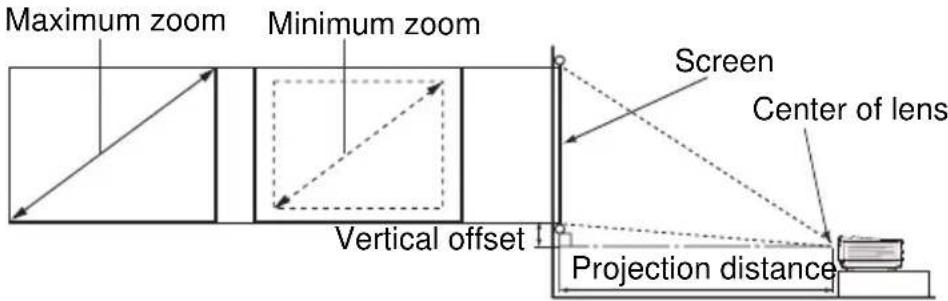
You can see from the diagram on page 18, that this type of projection causes the bottom edge of the projected image to be vertically offset from the horizontal plane of the projector. When ceiling mounted, this refers to the top edge of the projected image.
If the projector is positioned further away from the screen, the projected image size increases, and the vertical offset also increases proportionately.
When determining the position of the screen and projector, you will need to account for both the projected image size and the vertical offset dimension, which are proportional to the projection distance.
BenQ has provided a table of screen sizes to assist you in determining the ideal location for your projector. There are two dimensions to consider, the perpendicular horizontal distance from the center of the screen (projection distance), and the vertical offset height of the projector from the horizontal edge of the screen (offset).
How to determine the position of the projector for a given screen size
- Select your screen size.
- Refer to the table on page 18 and find the closest match to your screen size in the left columns labelled "Screen size". Using this value, look across this row to the right to find the corresponding average distance from screen value in the column labelled "Average". This is the projection distance.
- On that same row, look across to the right column and make note of the "Vertical offset (mm)" value. This will determine the final vertical offset placement of the projector in relation to the edge of the screen.
- The recommended position for the projector is aligned perpendicular to the horizontal center of the screen, at the distance from the screen determined in step 2 above, and offset by the value determined in step 3 above.
For example, if you are using a 120-inch screen, the average projection distance is 4710 mm and with a vertical offset of 513 mm.
How to determine the recommended screen size for a given distance
This method can be used for situations where you have purchased this projector and would like to know what screen size will fit in your room.
The maximum screen size is limited by the physical space available in your room.
- Measure the distance between the projector and where you want to position the screen. This is the projection distance.
- Refer to the table on page 18 and find the closest match to your measurement in the average distance from screen column labelled "Average". Check that your measured distance is between the min and max distances listed on either side of the average distance value.
- Using this value, look across that row to the left to find the corresponding "Screen size" listed in that row. That is the projected image size of the projector at that projection distance.
- On that same row, look across to the right column and make note of the "Vertical offset (mm)" value. This will determine the final placement of the screen in relation to the horizontal plane of the projector.
For example, if your measured projection distance was 4.0 m (4000 mm), the closest match in the "Average" column is 3920 mm. Looking across this row shows that a 100-inch screen is required.
If you place the projector in a different position (to that recommended), you will have to tilt it down or up to center the image on the screen. In these situations, some image distortion will occur. Use the Keystone function to correct the distortion. See "Correcting keystone" on page 24 for details.
Projection dimensions
Refer to "Dimensions" on page 82 for the center of lens dimensions of this projector before calculating the appropriate position.
| Screen size | Distance from screen (mm) | Vertical offset (mm) | |||||
| Diagonal W | H | Min length Average Max length | |||||
| Inch mm (max. zo(mm)) (1mim2oom) | |||||||
| 30 | 762 | 664 | 374 | 890 | 1140 | 1390 | 128 |
| 40 | 1016 | 886 | 498 | 1210 | 1540 | 1870 | 171 |
| 50 | 1270 | 1107 | 623 | 1520 | 1935 | 2350 | 214 |
| 60 | 1524 | 1328 | 747 | 1830 | 2330 | 2830 | 256 |
| 80 | 2032 | 1771 | 996 | 2460 | 3125 | 3790 | 342 |
| 100 | 2540 | 2214 | 1245 | 3090 | 3920 | 4750 | 427 |
| 120 | 3048 | 2657 | 1494 | 3720 | 4710 | 5700 | 513 |
| 150 | 3810 | 3321 | 1868 | 4660 | 5900 | 7140 | 641 |
| 200 | 5080 | 4428 | 2491 | 6240 | 7890 | 9540 | 854 |
| 220 | 5588 | 4870 | 2740 | 6870 | 8685 | 10500 | 940 |
| 250 | 6350 | 5535 | 3113 | 7810 | 9875 | 11940 | 1068 |
| 300 | 7620 | 6641 | 3736 | 9380 | 11855 | 14330 | 1282 |

There is 3% tolerance among these numbers due to optical component variations. BenQ recommends that if you intend to permanently install the projector, you should physically test the projection size and distance using the actual projector in situ before you permanently install it, so as to make allowance for this projector's optical characteristics. This will help you determine the exact mounting position so that it best suits your installation location.
Connection
When connecting a signal source to the projector, be sure to:
- Turn all equipment off before making any connections.
- Use the correct signal cables for each source.
- Ensure the cables are firmly inserted.

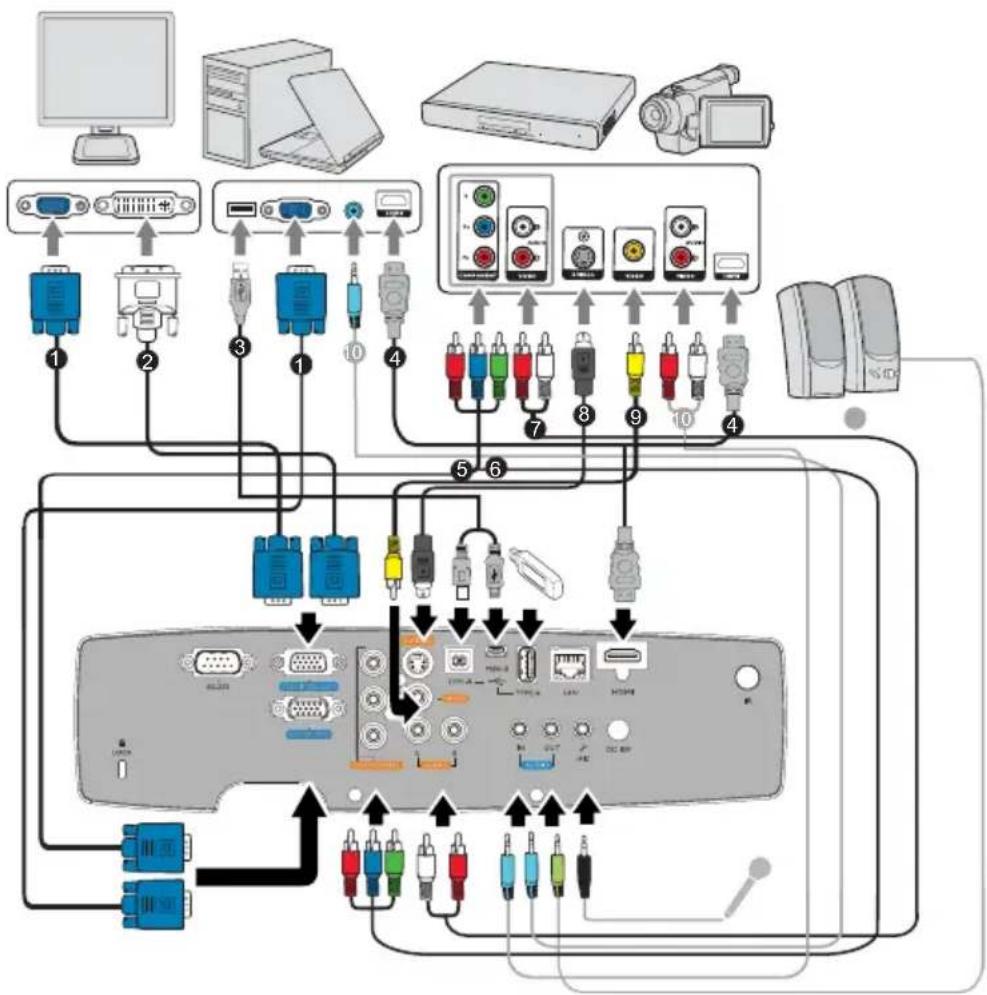
- In the connections shown below, some cables may not be included with the projector (see "Shipping contents" on page 8). They are commercially available from electronics stores.
flowchart
graph TD
    A["Computer"] --> B["1"]
    A --> C["2"]
    A --> D["3"]
    A --> E["4"]
    A --> F["5"]
    A --> G["6"]
    A --> H["7"]
    A --> I["8"]
    A --> J["9"]
    A --> K["10"]
    A --> L["11"]
    A --> M["12"]
    A --> N["13"]
    A --> O["14"]
    A --> P["15"]
    A --> Q["16"]
    A --> R["17"]
    A --> S["18"]
    A --> T["19"]
    A --> U["20"]
    A --> V["21"]
    A --> W["22"]
    A --> X["23"]
    A --> Y["24"]
    A --> Z["25"]
    A --> AA["26"]
    A --> AB["27"]
    A --> AC["28"]
    A --> AD["29"]
    A --> AE["30"]
    A --> AF["31"]
    A --> AG["32"]
    A --> AH["33"]
    A --> AI["34"]
    A --> AJ["35"]
    A --> AK["36"]
    A --> AL["37"]
    A --> AM["38"]
    A --> AN["39"]
    A --> AO["40"]
    A --> AP["41"]
    A --> AQ["42"]
    A --> AR["43"]
    A --> AS["44"]
    A --> AT["45"]
    A --> AU["46"]
    A --> AV["47"]
    A --> AW["48"]
    A --> AX["49"]
    A --> AY["50"]
- VGA cable
- VGA to DVI-A cable
- USB Cable
- HDMI cable
-
Component Video to VGA (D-Sub) adapter cable
-
Component Video cable
- Audio L/R cable
- S-Video cable
- Video cable
- Audio cable

- Many notebooks do not turn on their external video ports when connected to a projector. Usually a key combo like FN + F3 or CRT/LCD key turns the external display on/off. Locate
a function key labeled CRT/LCD or a function key with a monitor symbol on the notebook. Press FN and the labeled function key simultaneously. Refer to your notebook's documentation to find your notebook's key combination.
- The output signal for MONITOR OUT jack only works when the input signal comes from COMPUTER jack. When the projector is powered on, the output signal from MONITOR OUT jack varies depending on the input signal from COMPUTER jack.
- If you wish to use "Monitor Out" connection method when the projector is in standby mode, make sure the Monitor Out function is turned on in the SYSTEM SETUP: Advanced menu. See "Standby Settings" on page 62 for details.
Connecting Video source devices
You need only connect the projector to a Video source device using just one of the above connecting methods, however each provides a different level of video quality. The method you choose will most likely depend upon the availability of matching terminals on both the projector and the Video source device as described below:
| Terminal name | Terminal appearance | Picture quality |
| HDMI | HDMI | Best |
| Component Video | COMPONENT[HAK0]   | Better |
| S-Video | S-VIDEO[AOHC] | Good |
| Video | VIDEO | Normal |

- If the selected video image is not displayed after the projector is turned on and the correct video source has been selected, check that the Video source device is turned on and operating correctly. Also check that the signal cables have been connected correctly.
- In the unlikely event that you connect the projector to a DVD player via the projector's HDMI input and the projected picture displays wrong colors, please change the color space to YUV. See "Changing Color Space" on page 28 for details..
Operation
Starting up the projector
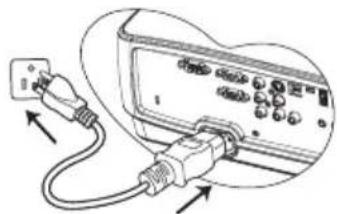
- Plug the power cord into the projector and into a power outlet. Turn on the power outlet switch (where fitted). Check that the POWER indicator light on the projector lights red after power has been applied.
natural_image
Diagram of an electronic device with a plug and cable, showing connections without any text or symbols.
- Please use the original accessories (e.g. power cable) only with the device to avoid possible dangers such as electric shock and fire.
- If Direct power on function is activated in the SYSTEM SETUP: Basic > Operation Settings menu, the projector will turn on automatically after the power cord has been connected and power has been applied.
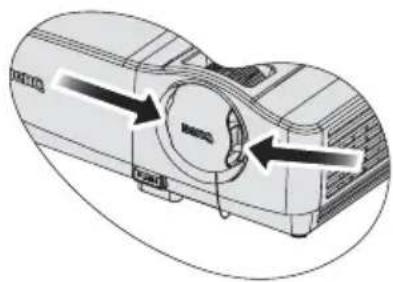
- Remove the lens cap. If it is closed, it could become deformed due to the heat produced by the projection lamp.
natural_image
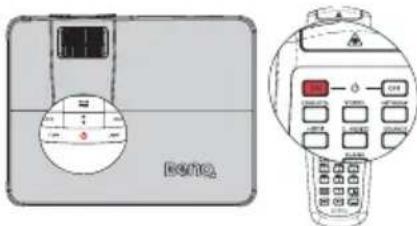
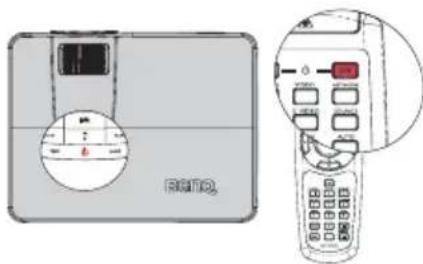
Diagram of a projector with two arrows indicating direction (no text or symbols present)- Press Ⓐ Power on the projector or ON on the remote control to start the projector. The POWER indicator light flashes and stays green when the projector is on.
The start up procedure takes about 30 seconds. In the later stage of start up, a startup logo is projected.
(If necessary) Rotate the focus ring to adjust the image clearness.
natural_image
Illustration of a beige electronic device with a circular dial and a separate control panel (no text or symbols visible)
If the projector is still hot from previous activity, it will run the cooling fan for approximately 90 seconds before energizing the lamp.
-
If the projector is activated for the first time, select your OSD language following the on-screen instructions.
-
If you are prompted for a password, press the arrow keys to enter a six digit password. See "Utilizing the password function" on page 26 for details.
-
Switch all of the connected equipment on.
-
The projector will start to search for input signals. The current input signal being scanned displays in the screen. If the projector doesn't detect a valid signal, the message 'No Signal' will continue displaying until an input signal is found.
| English | 한국어 | Hrvatski |
| Français | Svenska | Românj |
| Deutsch | Nederlands | Norsk |
| Italiano | Türkçe | Dansk |
| Español | Čeština | Beazrapore |
| Pyccostal | Portuguis | suomi |
| 秘籍中文 | Ivus | Indonesia |
| 简体中文 | Polski | EALAVIS |
| 日本語 | Megyer |
You can also press SOURCE on the projector or Source selection keys on the remote control to select your desired input signal. See "Switching input signal" on page 28 for details.

If the frequency/resolution of the input signal exceeds the projector's operating range, you will see the message 'Out of Range' displayed on a blank screen. Please change to an input signal which is compatible with the projector's resolution or set the input signal to a lower setting. See "Timing chart" on page 83 for details.
Adjusting the projected image
Adjusting the projection angle
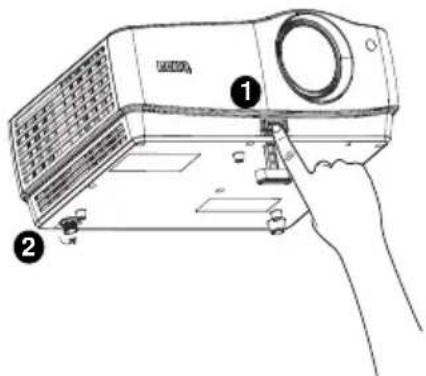
The projector is equipped with 1 quick-release adjuster foot and 1 rear adjuster foot. These adjusters change the image height and projection angle. To adjust the projector:
- Press the quick-release button and lift the front of the projector. Once the image is positioned where you want it, release the quick-release button to lock the foot in position.
- Screw the rear adjuster foot to fine tune the horizontal angle.
To retract the foot, hold up the projector while pressing the quick-release button, then slowly lower the projector. Screw the rear adjuster foot in a reverse direction.
If the projector is not placed on a flat surface or the screen and the projector are not perpendicular to each other, the projected image becomes trapezoidal. To correct this situation, see "Magnifying and searching for details" on page 29 for details.

- Do not look into the lens while the lamp is on. The strong light from the lamp may cause damage to your eyes.
- Be careful when you press the adjuster button as it is close to the exhaust vent where hot air comes from.
Auto-adjusting the image
In some cases, you may need to optimize the picture quality. To do this, press AUTO on the projector or remote control. Within 3 seconds, the built-in Intelligent Auto Adjustment function will re-adjust the values of Frequency and Clock to provide the best picture quality.
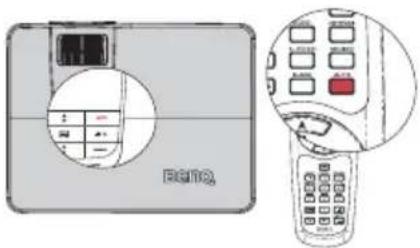

- The screen will be blank while AUTO is functioning.
- This function is only available when PC signal (analog RGB) is selected.
Fine-tuning the image size and clarity
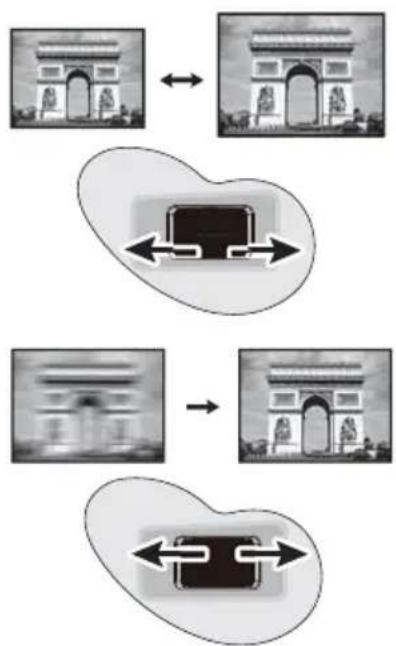
- Adjust the projected image to the size that you need using the zoom ring.
flowchart
graph TD
    A["Arch Structure"] <--> B["Circular Model"]
    C["Central Object"] <--> D["Circular Model"]
    E["Arch Structure"] --> F["Central Object"]
    G["Circular Model"] --> H["Central Object"]
- Then sharpen the image by rotating the focus ring.
Correcting keystone
Keystoning refers to the situation where the projected image is noticeably wider at either the top or bottom. It occurs when the projector is not perpendicular to the screen.
To correct this, besides adjusting the height of the projector, you will need to manually correct it following one of these steps.
• Using the remote control
Press ▼ on the projector or remote control to display the Keystone correction page. Press ▲ to correct keystoning at the top of the image. Press ▼ to correct keystoning at the bottom of the image.
• Using the OSD menu
- Press MENU/EXIT and then press / ◀ ▶ until the DISPLAY menu is highlighted.
- Press to highlight Keystone and adjust the value with ◀ ▶
- Press to correct keystoning at the top of the image or press to correct keystoning at the bottom of the image.
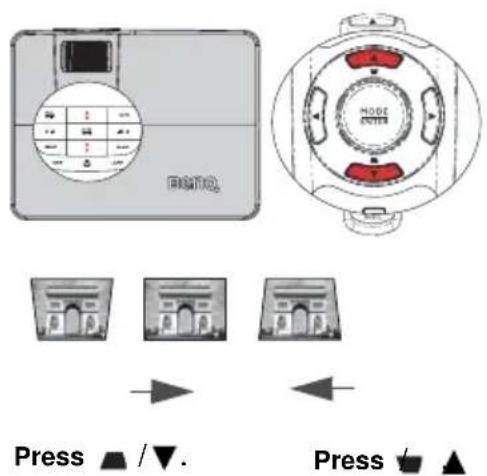
Using the menus
The projector is equipped with On-Screen Display (OSD) menus for making various adjustments and settings.
Below is the overview of the OSD menu.
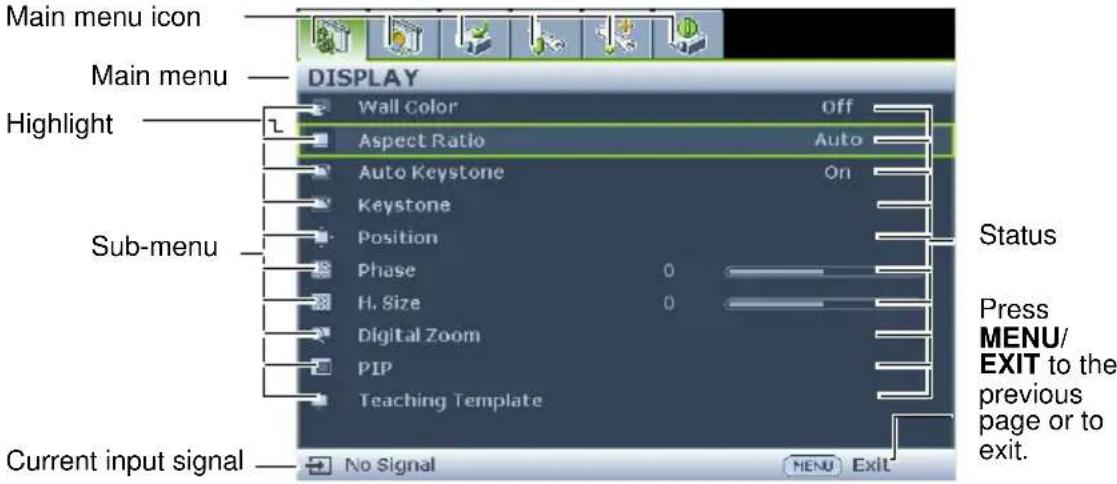
The following example describes how to set the OSD language.
- Press MENU/EXIT on the projector or remote control to turn the OSD menu on.
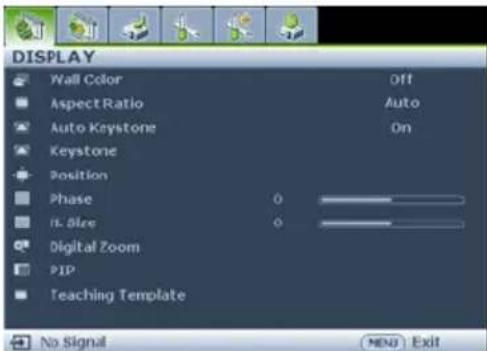
- Use / to highlight the SYSTEM SETUP: Basic menu.
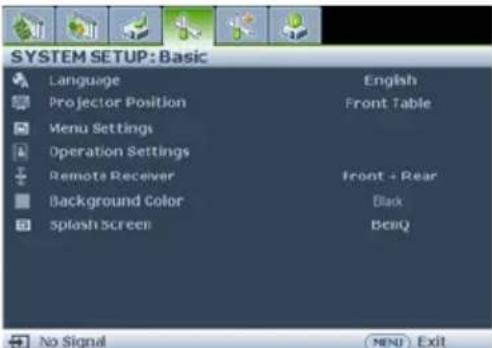
- Press ▼ to highlight Language and press ↗to select a preferred language.
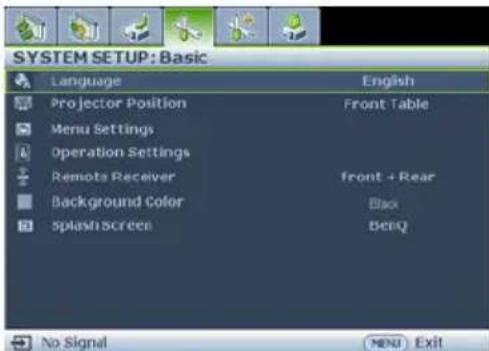
- Press MENU/EXIT twice* on the projector or remote control to leave and save the settings.
*The first press leads you back to the main menu and the second press closes the OSD menu.
Securing the projector
Using a security cable lock
The projector has to be installed in a safe place to prevent theft. Otherwise, purchase a lock, such as the Kensington lock, to secure the projector. You can locate a Kensington lock slot on the rear side of the projector. See item 11 on page 9 for details.
A Kensington security cable lock is usually a combination of key(s) and the lock. Refer to the lock's documentation for finding out how to use it.
Utilizing the password function
For security purposes and to help prevent unauthorized use, the projector includes an option for setting up password security. The password can be set through the On-Screen Display (OSD) menu.

WARNING: You will be inconvenienced if you activate the power-on lock functionality and subsequently forget the password. Print out this manual (if necessary) and write the password you used in this manual, and keep the manual in a safe place for later recall.
Setting a password

Once a password has been set, the projector cannot be used unless the correct password is entered every time the projector is started.
- Highlight Power on Lock and select On by pressing ◀/▶.
- As pictured to the right, the four arrow keys ( , ▲
▶ , ▼) respectively represent 4 digits (1, 2, 3, 4). According to the password you desire to set, press the arrow keys to enter six digits for the password. -
Confirm the new password by re-entering the new password.
Once the password is set, the OSD menu returns to the Security Settings page. -
Open the OSD menu and go to the SYSTEM SETUP: Advanced > Security Settings menu. Press MODE/ENTER.
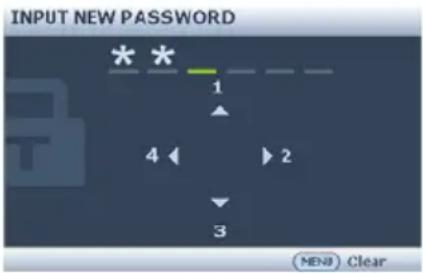

IMPORTANT: The digits being input will display as asterisks on-screen. Write your selected password down here in this manual in advance or right after the password is entered so that it is available to you should you ever forget it.
Password: ____
Keep this manual in a safe place.
- To leave the OSD menu, press MENU/EXIT.
If you forget the password
If the password function is activated, you will be asked to enter the six-digit password every time you turn on the projector. If you enter the wrong password, the password error message as pictured to the right displays lasting for three seconds, and the message 'INPUT PASSWORD' follows. You can retry by entering another six-digit password, or if you did not record the
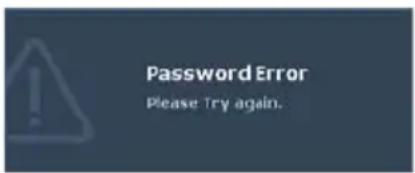
password in this manual, and you absolutely do not remember it, you can use the password recall procedure. See "Entering the password recall procedure" on page 27 for details.
If you enter an incorrect password 4 times in succession, the projector will automatically shut down in a short time.
Entering the password recall procedure
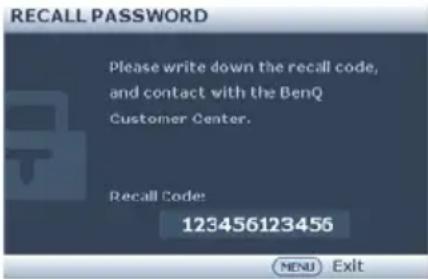
- Press and hold AUTO on the projector or remote control for 3 seconds. The projector will display a coded number on the screen.
- Write down the number and turn off your projector.
- Seek help from the local BenQ service center to decode the number. You may be required to provide proof of purchase documentation to verify that you are an authorized user of the projector.
Changing the password
- Open the OSD menu and go to the SYSTEM SETUP: Advanced > Security Settings > Change password menu.
- Press MODE/ENTER. The message 'INPUT CURRENT PASSWORD' displays.
-
Enter the old password.
-
If the password is correct, another message 'INPUT NEW PASSWORD' displays.
-
If the password is incorrect, the password error message displays lasting for three seconds, and the message 'INPUT CURRENT PASSWORD' displays for your retry. You can press MENU/EXIT to cancel the change or try another password.
-
Enter a new password.

IMPORTANT: The digits being input will display as asterisks on-screen. Write your selected password down here in this manual in advance or right after the password is entered so that it is available to you should you ever forget it.
Password: ____
Keep this manual in a safe place.
- Confirm the new password by re-entering the new password.
- You have successfully assigned a new password to the projector. Remember to enter the new password next time the projector is started.
- To leave the OSD menu, press MENU/EXIT.
Disabling the password function
To disable password protection, go back to the SYSTEM SETUP: Advanced > Security Settings > Power on Lock menu after opening the OSD menu system. Select Off by pressing
◀ /▶ . The message 'INPUT PASSWORD' displays. Enter the current password.
i. If the password is correct, the OSD menu returns to the Security Settings page with 'Off' shown in the row of Power on Lock. You will not have to enter the password next time you turn on the projector.
ii. If the password is incorrect, the password error message displays lasting for three seconds, and the message 'INPUT PASSWORD' displays for your retry. You can press MENU/EXIT to cancel the change or try another password.

Though the password function is disabled, you need to keep the old password in hand should you ever need to re-activate the password function by entering the old password.
Switching input signal
The projector can be connected to multiple devices at the same time. However, it can only display one full screen at a time. When starting up, the projector automatically searches for the available signals.
Be sure the Quick Auto Search function in the SOURCE menu is On (which is the default of this projector) if you want the projector to automatically search for the signals.
You can also manually cycle through the available input signals.
- Press SOURCE on the projector. A source selection bar displays.
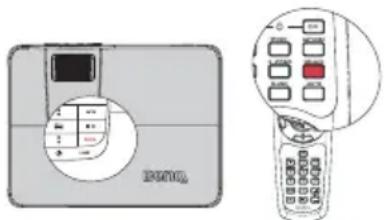
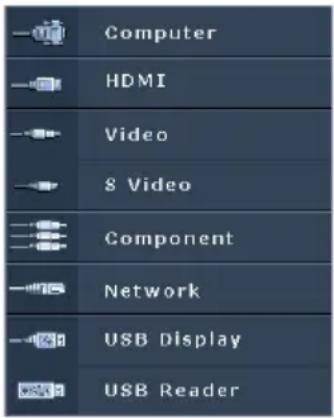
- Press / until your desired signal is selected and press MODE/ENTER.
Once detected, the selected source information will display on the screen for seconds. If there is multiple equipment connected to the projector, repeat steps 1-2 to search for another signal.

- The brightness level of the projected image will change accordingly when you switch between different input signals. Data (graphic) "PC" presentations using mostly static images are generally brighter than "Video" using mostly moving images (movies).
- The input signal type effects the options available for the Picture Mode. See "Selecting a picture mode" on page 31 for details.
- The native display resolution of this projector is in a 16:9 aspect ratio. For best display picture results, you should select and use an input signal which outputs at this resolution. Any other resolutions will be scaled by the projector depending upon the 'aspect ratio' setting, which may cause some image distortion or loss of picture clarity. See "Selecting the aspect ratio" on page 29 for details.
Changing Color Space
In the unlikely event that you connect the projector to a DVD player via the projector's HDMI input and the projected picture displays wrong colors, please change the color space to YUV.
- Press MENU/EXIT and then press ◀ /▶ until the SOURCE menu is highlighted.
- Press ▼ to highlight Color Space Conversion and press ◀/▶ to select a suitable color space.

This function is only available when the HDMI input port is in use.
Magnifying and searching for details
If you need to find the details on the projected picture, magnify the picture. Use the direction arrow keys for navigating the picture.
• Using the remote control
- Press ZOOM+/ZOOM- to display the Zoom bar.
- Press ZOOM + to magnify the center of the picture. Press the key repeatedly until the picture size is suitable for your need.
- Use the directional arrows ( , ,▲ ) ▼ on the ▶ projector or remote control to navigate the picture.
- To restore the picture to its original size, press AUTO. You can also press ZOOM -. When the key is pressed again, the picture is further reduced until it is restored to the original size.
- Using the OSD menu
- Press MENU/EXIT and then press ◀ /▶ until the DISPLAY menu is highlighted.
- Press ▼ to highlight Digital Zoom and press MODE/ENTER. The Zoom bar displays.
- Repeat steps 2-4 in the section of "Using the remote control" above. Or if you are using the projector control panel, continue to the following steps.
- Press on the projector repeatedly to magnify the picture to a desired size.
- To navigate the picture, press MODE/ENTER to switch to the paning mode and press the directional arrows (▲,▼) to navigate the picture.
- Use the directional arrows (, , ▲) on the projector or remote control to navigate the picture.
- To reduce size of the picture, press MODE/ENTER to switch back to the zoom in/out functionality, and press AUTO to restore the picture to its original size. You can also press ▼repeatedly until it is restored to the original size.

The picture can only be navigated after the picture is magnified. You can further magnify the picture while searching for details.
Selecting the aspect ratio
The 'aspect ratio' is the ratio of the image width to the image height. Most analog TV and computers are in 4:3 ratio, which is the default for this projector, and digital TV and DVDs are usually in 16:9 ratio.
With the advent of digital signal processing, digital display devices like this projector can dynamically stretch and scale the image output to a different aspect than that of the image input signal.
To change the projected image ratio (no matter what aspect the source is):
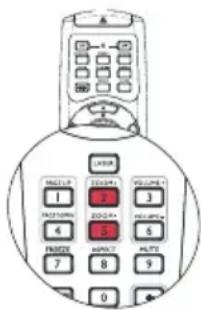
• Using the remote control
- Press ASPECT to show the current setting.
Press ASPECT repeatedly to select an aspect ratio to suit the format of the video signal and your display requirements.
• Using the OSD menu
-
Press MENU/EXIT and then press / until the DISPLAY menu is highlighted.
-
Press ▼ to highlight Aspect Ratio.
-
Press / to select an aspect ratio to suit the format of the video signal and your display requirements.
About the aspect ratio

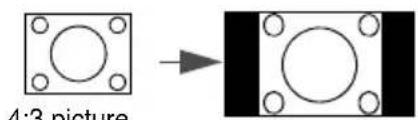
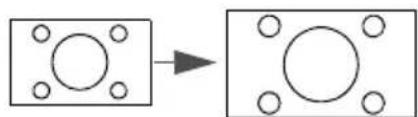
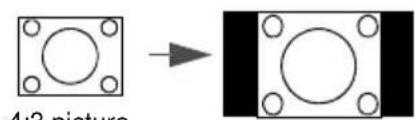
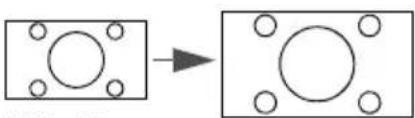
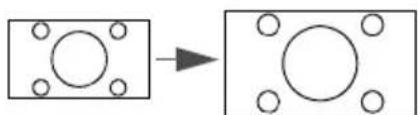
In the pictures below, the black portions are inactive areas and the white portions are active areas. OSD menus can be displayed on those unused black areas.
- Auto: Scales an image proportionally to fit the projector's native resolution in its horizontal or vertical width. This is suitable for the incoming image which is neither in 4:3 nor 16:9 and you want to make most use of the screen without altering the image's aspect ratio.
natural_image
Diagram showing a square object transforming into a circular component with six holes, no text or symbols present.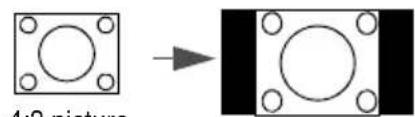
-
Real: The image is projected as its original resolution, and resized to fit within the display area. For input signals with lower resolutions, the projected image will display smaller than if resized to full screen. You could adjust the zoom setting or move the projector towards the screen to increase the image size if necessary. You may also need to refocus the projector after making these adjustments.
-
4:3: Scales an image so that it is displayed in the center of the screen with a 4:3 aspect ratio. This is most suitable for 4:3 images like computer monitors, standard definition TV and 4:3 aspect DVD movies, as it displays them without aspect alteration.
natural_image
Diagram showing a square with circular holes and an arrow pointing to a larger square with circles (no text or symbols)-
16:9: Scales an image so that it is displayed in the center of the screen with a 16:9 aspect ratio. This is most suitable for images which are already in a 16:9 aspect, like high definition TV, as it displays them without aspect alteration.
-
16:10: Scales an image so that it is displayed in the center of the screen with a 16:10 aspect ratio. This is most suitable for images which are already in a 16:9 aspect, like high definition TV, as it displays them without aspect alteration.
natural_image
Diagram showing a square with circular holes and an arrow pointing to a larger circle (no text or symbols)16:10 picture
Optimizing the image
Selecting a picture mode
The projector is preset with several predefined picture modes so that you can choose one to suit your operating environment and input signal picture type.
To select an operation mode that suits your need, you can follow one of the following steps.
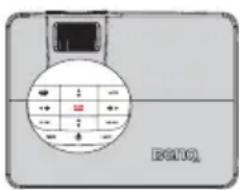
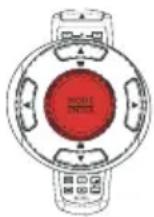
- Press MODE/ENTER on the remote control or projector repeatedly until your desired mode is selected.
- Go to the PICTURE > Picture Mode menu and press ◀/▶ to select a desired mode.
The picture modes are listed below.
- Dynamic mode: Maximizes the brightness of the projected image. This mode is suitable for environments where extra-high brightness is required, such as using the projector in well lit rooms.
- Presentation mode (Default): Is designed for presentations. The brightness is emphasized in this mode.
- sRGB mode: Maximizes the purity of RGB colors to provide true-to-life images regardless of brightness setting. It is most suitable for viewing photos taken with an sRGB compatible and properly calibrated camera, and for viewing PC graphic and drawing applications such as AutoCAD.
- Cinema mode: Is appropriate for playing colorful movies, video clips from digital cameras or DVs through the PC input for best viewing in a blackened (little light) environment.
- User 1/User 2 mode: Recalls the settings customized based on the current available picture modes. See "Setting the User 1/User 2 mode" on page 31 for details.
Setting the User 1/User 2 mode
There are two user-definable modes if the current available picture modes are not suitable for your need. You can use one of the picture modes (except the User 1/User 2) as a starting point and customize the settings.
- Press MENU/EXIT to open the On-Screen Display (OSD) menu.
- Go to the PICTURE > Picture Mode menu.
- Press ◀/▶ to select User 1 to User 2.
- Press ▼ to highlight Reference Mode.

This function is only available when User 1 or User 2 mode is selected up in the Picture Mode sub-menu item.
- Press / to select a picture mode that is closest to your need.
- Press ▼ to select a sub-menu item to be changed and adjust the value with ◀/▶. See "Fine-tuning the image quality in user modes" below for details.
- When all settings have been done, highlight Save Settings and press MODE/ENTER to store the settings.
- The confirmation message 'Setting Saved' displays.
Using Wall Color
In the situation where you are projecting onto a colored surface such as a painted wall which may not be white, the Wall Color feature can help correct the projected picture's color to prevent possible color difference between the source and projected pictures.
To use this function, go to the DISPLAY > Wall Color menu and press ◀ /▶ to select a color which is the closest to the color of the projection surface. There are several precalibrated colors to choose from: Light Yellow, Pink, Light Green, Blue, and Blackboard.
Fine-tuning the image quality in user modes
According to the detected signal type, there are some user-definable functions available when User 1 or User 2 mode is selected. Based on your needs, you can make adjustments to these functions by highlighting them and pressing ▶onthe projector or remote control
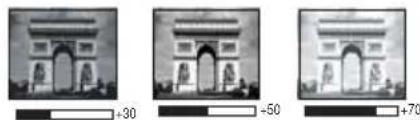
Adjusting Brightness
The higher the value, the brighter the image. And the lower the setting, the darker the image. Adjust this control so the black areas of the image appear just as black and that detail in the dark areas is visible.
natural_image
Three grayscale images of the arches of the same architectural complex, each with a scale bar indicating elevation from +30 to +70 meters (no text or symbols on the structures themselves)Adjusting Contrast
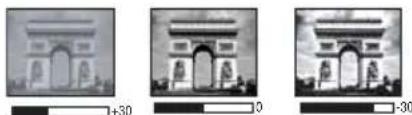
The higher the value, the greater the contrast. Use this to set the peak white level after you have previously adjusted the Brightness setting to suit your selected input and viewing environment.
natural_image
Three grayscale images of the Arc de Triomphe with scale bars at +30, 0, and -30 (no text or symbols on the structures themselves)Adjusting Color
Lower setting produces less saturated colors. If the setting is too high, colors on the image will be overpowering, which makes the image unrealistic.
Adjusting Tint
The higher the value, the more reddish the picture becomes. The lower the value, the more greenish the picture becomes.
Adjusting Sharpness
The higher the value, the sharper the picture becomes. The lower the value, the softer the picture becomes.
Adjusting Brilliant Color
This feature utilizes a new color-processing algorithm and system level enhancements to enable higher brightness while providing truer, more vibrant colors in picture. It enables a greater than 50% brightness increase in mid-tone images, which are common in video and natural scenes, so the projector reproduces images in realistic and true colors. If you prefer images with that quality, select On. If you don't need it, select Off.
On is the default and recommended selection for this projector. When Off is selected, the Color Temperature function is not available.
Selecting a Color Temperature
Highlight Color Temperature in the PICTURE menu and adjust the values by pressing ◀ / ▶ on the projector or remote control.
Choose a preferred color temperature from among Warm/Normal/Cool.
\*About color temperatures:
There are many different shades that are considered to be "white" for various purposes. One of the common methods of representing white color is known as the "color temperature". A white color with a low color temperature appears to be reddish white. A white color with a high color temperature appears to have more blue in it.
3D Color Management
In most installation situations, color management will not be necessary, such as in classroom, meeting room, or lounge room situations where lights remain on, or where building external windows allow daylight into the room.
Only in permanent installations with controlled lighting levels such as boardrooms, lecture theaters, or home theaters, should color management be considered. Color management provides fine color control adjustment to allow for more accurate color reproduction, should you require it.
Proper color management can only be achieved under controlled and reproducible viewing conditions. You will need to use a colorimeter (color light meter), and provide a set of suitable source images to measure color reproduction. These tools are not provided with the projector, however, your projector supplier should be able to provide you with suitable guidance, or even an experienced professional installer.
The Color Management provides six sets (RGBCMY) of colors to be adjusted. When you select each color, you can independently adjust its range and saturation according to your preference.
If you have purchased a test disc which contains various color test patterns and can be used to test the color presentation on monitors, TVs, projectors, etc. You can project any image from the disc on the screen and enter the 3D Color Management menu to make adjustments.
To adjust the settings:
- Go to the PICTURE menu and highlight 3D Color Management.
- Press MODE/ENTER and the 3D Color Management page displays.
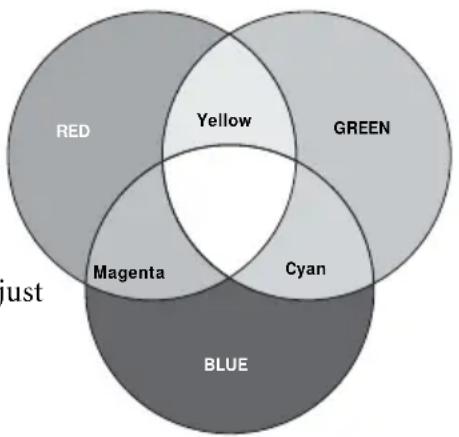
- Highlight Primary Color and press ◀/▶ to select a color from among Red, Yellow, Green, Cyan, Blue, or Magenta.
- Press ▼ to highlight Hue and press ◀/▶ to select its range. Increase in the range will include colors consisted of more proportions of its two adjacent colors.
Please refer to the illustration to the right for how the colors relate to each other.
For example, if you select Red and set its range at 0, only pure red in the projected picture will be selected. Increasing its range will include red close to yellow and red close to magenta.
other
| Region | Count | |---|---| | RED | 15 | | GREEN | 15 | | BLUE | 20 | | Yellow | 10 | | Cyan | 10 | | Magenta | 10 | | Red & Blue | 10 | | Yellow & Blue | 10 | | Red & Green & Blue | 10 | | Yellow & Blue & Green | 10 | | Red & Blue & Yellow & Magenta | 10 | | Yellow & Blue & Blue & Cyan | 10 | | Red & Blue & Yellow & Blue & Magenta | 10 | | Red & Blue & Green & Blue & Yellow & Cyan | 10 | | Red & Blue & Yellow & Blue & Magenta | 10 | | Red & Blue & Green & Blue & Yellow & Cyan | 10 | | Red & Blue & Yellow & Blue & Magenta | 10 | | Red & Blue & Green & Blue & Yellow & Cyan | 10 | | Red & Blue & Yellow & Blue & Magenta | 10 | | Red & Blue & Green & Blue & Yellow + Blue | 10 | | Red & Blue & Yellow + Blue + Magenta | 10 | | Red & Blue & Green + Blue + Yellow + Magenta | 10 | | Red & Blue & Yellow + Blue + Magenta | 10 | | Red & Blue & Green + Blue + Yellow + Magenta | 10 | | Red & Blue & Yellow + Blue + Magenta | 10 | | Red & Blue & Green + Blue + Yellow + Magenta | 10 | | Red & Blue & Yellow + Blue + Magenta | 10 | | Red & Blue & Green + Blue + Yellow and Magenta | 10 | | Red & Blue & Yellow + Blue and Magenta | 10 | | Red & Blue & Green + Blue and Yellow and Magenta | 10 | | Red & Blue & Yellow + Blue and Magenta | 10 | | Red & Blue & Green + Blue and Yellow and Magenta | 10 | | Red & Blue & Yellow + Blue and Magenta | 10 | | Red & Blue & Green + Blue and Yellow and Magenta | 10 | | Red & Blue & Yellow + Blue and Magenta | 10 | | Red & Blue & Green+Blue and Magenta | 10 | | Red & Blue & Yellow+Blue and Magenta | 10 | | Red & Blue & Green+Blue and Magenta | 10 | | Red & Blue & Yellow+Blue and Magenta | 10 | | Red & Blue & Green+Blue and Magenta | 10 | | Red & Blue & Yellow+Blue and Magenta | 10 | | Red & Blue & Green+Blue and Magenta | 10 | | Red & Blue & Yellow+Blue and Magenta + Blue | 10 | | Red & Blue & Green+Blue and Magenta + Blue | 10 | | Red & Blue & Yellow+Blue and Magenta + Blue | 10 | | Red & Blue & Green+Blue and Magenta + Blue | 10 | | Red & Blue & Yellow+Blue and Magenta + Blue | 10 | | Red & Blue & Green+Blue and Magenta + Blue | 10 | | Red & Blue & Yellow+Blue and Magenta + Blue | 10 | | Red & Blue + Green+Blue and Magenta + Blue | 10 | | Red & Blue + Yellow+Blue and Magenta + Blue | 10 | | Red & Blue + Green+Blue and Magenta + Blue | 10 | | Red & Blue + Yellow+Blue and Magenta + Blue | 10 | | Red & Blue + Green+Blue and Magenta + Blue | 10 | | Red & Blue + Yellow+Blue and Magenta + Blue | 10 | | Red & Blue + Green+Blue and Magenta + Blue |- Press ▼ to highlight Saturation and adjust
its values to your preference by pressing
▶. Every adjustment made will reflect to the image immediately.
For example, if you select Red and set its value at 0, only the saturation of pure red will be affected.

Saturation is the amount of that color in a video picture. Lower settings produce less saturated colors; a setting of "0" removes that color from the image entirely. If the saturation is too high, that color will be overpowering and unrealistic.
-
Press ▼ to highlight Gain and adjust its values to your preference by pressing ◀/▶. The contrast level of the primary color you select will be affected. Every adjustment made will reflect to the image immediately.
-
Repeat steps 3 to 6 for other color adjustments.
- Make sure you have made all of the desired adjustments.
- Press MENU/EXIT to exit and save the settings.
Remote paging operations
Connect the projector to your PC or notebook with a USB cable prior to using the paging function.
You can operate your display software program (on a connected PC) which responds to page up/down commands (like Microsoft PowerPoint) by pressing Page Up/Down on the remote control.
If remote paging function doesn't work, check if the USB connection is correctly made and the mouse driver on your computer is updated to the latest version.
Hiding the image
In order to draw the audience's full attention to the presenter, you can use BLANK on the projector or remote control to hide the screen image. Press any key on the projector or remote control to restore the image. The word 'BLANK' appears at the screen while the image is hidden. When this function is activated with an audio input connected, the audio can still be heard.
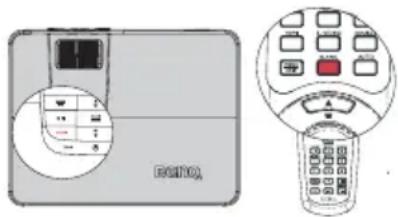
You can set the blank time in the SYSTEM SETUP:
Basic > Operation Settings > Blank Timer menu to let the projector return the image automatically after a period of time when there is no action taken on the blank screen. The length of time can be set from 5 to 30 minutes in 5-minute increments.

Do not block the projection lens from projecting as this could cause the blocking object to become heated.
Setting the Sleep Timer
You can set the Sleep Timer interval so the projector powers off after the specified time period of inactivity (regardless of signal).
Set the sleep timer in the SYSTEM SETUP: Basic > Operation Settings > Sleep Timer from among Disable/30 min/1 hr/2 hr/3 hr/4 hr/8 hr/ 12hr.
Freezing the image
Press FREEZE on the remote control to freeze the image. The word 'FREEZE' will display in the screen. To release the function, press any key on the projector or remote control.
Even if an image is frozen on the screen, the pictures are running on the video or other device. If the connected devices have active audio output, you will still hear the audio even though the image is frozen on screen.
Operating in a high altitude environment
We recommend you use the High Altitude Mode when your environment is between 1500 m –3000 m above sea level, and ambient temperature is between 0^ C– 35^ C.

Do not use the High Altitude Mode if your altitude is between 0 m and 1500 m and ambient temperature is between 0°C and 35°C. The projector will be over cooled, if you turn the mode on under such a condition.
To activate the High Altitude Mode:
- Press MENU/EXIT and then press ◀ / ▶ until the SYSTEM SETUP: Advanced menu is highlighted.
- Press ▼ to highlight High Altitude Mode and press ◀/▶ to select On. A confirmation message displays.
- Highlight Yes and press MODE/ENTER.
Operation under "High Altitude Mode" may cause a higher decibel operating noise level because of increased fan speed necessary to improve overall system cooling and performance.
If you use this projector under other extreme conditions excluding the above, it may display auto shut-down symptoms, which is designed to protect your projector from over-heating. In cases like this, you should switch to High Altitude mode to solve these symptoms. However, this is not to state that this projector can operate under any and all harsh or extreme conditions.
Adjusting the sound
The sound adjustments made as below will have an effect on the projector speaker(s). Be sure you have made a correct connection to the projector audio input. See "Connection" on page 19 for how the audio input is connected.
Muting the sound
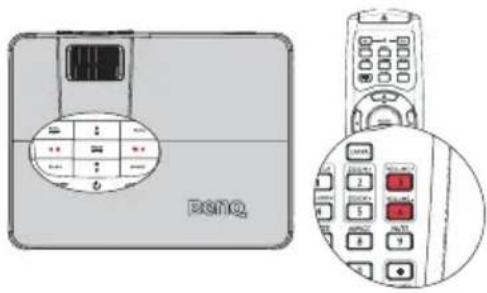
To adjust the sound level, press MUTE on the remote control, or:
- Press MENU/EXIT and then press / until the SYSTEM SETUP: Advanced menu is highlighted.
- Press ▼ to highlight Audio Settings and press MODE/ENTER. The Audio Settings page displays.
- Highlight Mute and select On.
Adjusting the sound level
To adjust the sound level, press VOLUME +/VOLUME-on the remote control, or:
- Repeat steps 1-2 above.
- Highlight Volume and select a desired sound level.
Turning off the Power on/off ring tone
To turn off the ring tone:
-
Repeat steps 1-2 in Muting the sound section.
-
Highlight Power on/off Ring Tone and select Off.

The only way to change Power on/off ring tone is setting On or Off here. Setting the sound mute or changing the sound level will not affect the Power on/off ring tone.
Adjusting the microphone's sound level
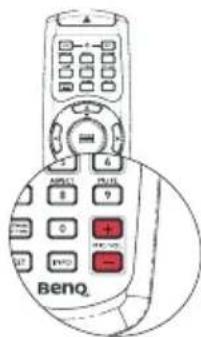
To adjust the sound level, press MIC/VOL +/- on the remote control, or
- Repeat steps 1-2 in Muting the sound section.
- Highlight Microphone volume and select a desired sound level.

Microphone sound will still function even though Mute is activated.
Turning on/off the SRS
• Using the OSD menu
-
Press MENU/EXIT and then press ◀ /▶ until the SYSTEM SETUP: Advanced menu is highlighted.
-
Press ▼ to highlight Audio Settings and press MODE/ENTER. The Audio Settings page displays.
-
Highlight SRS and press ◀ /▶ to select On/Off.
Displaying more than one image source simultaneously
Your projector is capable of displaying pictures simultaneously from two input sources, which can be used to enhance your presentation in an interesting way. Ensure the signals you want to display are correctly connected to the projector.
• Using the OSD menu
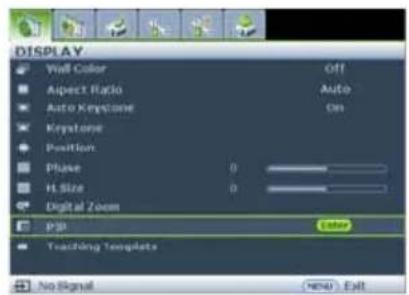
- Press MENU/EXIT and then press / until the DISPLAY menu is highlighted.
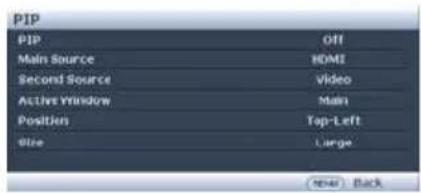
- Press ▼ to highlight PIP and press MODE/ENTER. The PIP page displays.
- Highlight PIP and press ◀ /▶ to select On.
The projector will select two currently active signals to display and the last viewed picture will be displayed on the big screen as a main source.
The PIP function is effective at below source combinations.
| Source 2 | |
| Source 1 HDMI | |
| Component V | |
| PC | V |
| Video V | |
| S-Video V | |
- To change the Main Source or Second Source, press ▼ to highlight Main Source or Second Source, use 🔍 to highlight the source you want to display for the main (bigger) or second (smaller) window.
- To make OSD settings to one of the two sources (main or second), highlight Active Window and press 🔊 to select the source you want to make adjustments.

The settings made on the OSD menus will only take effect on the active window.
- To change the position of the smaller picture, highlight Position and press ◀ /▶ repeatedly until a suitable position is selected.
- To resize the small picture, highlight Size and press ◀/▶ to set the PIP size among Small or Large
- To leave the OSD menu, press MENU/EXIT repeatedly until the menu disappears.
Personalizing the projector menu display
The On-Screen Display (OSD) menus can be set according to your preferences. The following settings do not affect the projection settings, operation, or performance.
- Menu display time in the SYSTEM SETUP: Basic >Menu Settings menu sets the length of time the OSD will remain active after your last key press. The time length ranges from 5 to 30 seconds in 5-second increments. Use A to select a suitable time frame.
- Menu position in the SYSTEM SETUP: Basic >Menu Settings menu sets the OSD position in five locations. Use ▲ to select a preferred position.
- Language in the SYSTEM SETUP: Basic menu sets your familiar language for the OSD menus. Use 🔊 to select your language.
- Reminder Message in the SYSTEM SETUP: Basic >Menu Settings menu sets whether to display reminder messages on screen. Use ↕ to select your desired setting.
Shutting down the projector
- Press Power and a confirmation message displays prompting you. If you don't respond in a few seconds, the message will disappear. If you use the remote control, press OFF to shut down the projector.
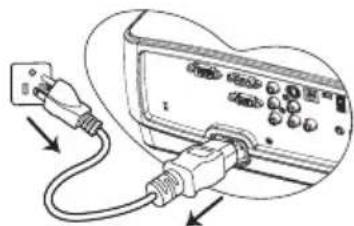
- Press ⚙Power a second time. The POWER indicator light flashes red, the projection lamp shuts down, and the fans will continue to run for approximately 90 seconds to cool down the projector.
natural_image
Diagram of a device with two connected cables, one showing an external plug and the other inserted into a socket (no text or symbols present)
- To protect the lamp, the projector will not respond to any commands during the cooling process.
-
Once the cooling process finishes, the POWER indicator light is a steady red and fans stop.
-
Disconnect the power cord from the power putlet if the projector will not be used in an extended period of time.

- If the projector is not properly shut down, to protect the lamp, when you attempt to re-start the projector, the fans will run for a few minutes to cool down. Press Power again to start the projector after the fans stop and the POWER indicator light turns red.
- Actual lamp life may vary due to different environmental conditions and usage.
Controlling the projector through a LAN environment
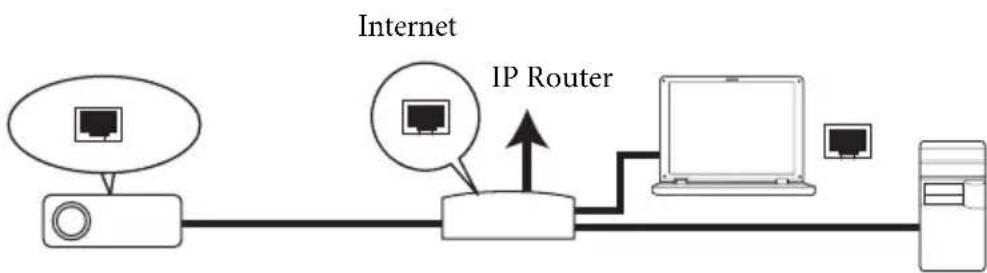
Network Settings allow you to manage the projector from a computer using a web browser when the computer and the projector are properly connected to the same local area network.
Configuring the Wired LAN Settings
flowchart
graph LR
    A["Internet"] --> B["IP Router"]
    B --> C["Laptop"]
    B --> D["Computer"]
    B --> E["Monitor"]
    B --> F["Camera"]
If you are in a DHCP environment:
- Take a RJ45 cable and connect one end to the LAN input jack of the projector and the other end to the RJ45 port.
- Press MENU/EXIT and then press ◀ /▶ until the SYSTEM SETUP: Advanced menu is highlighted.
- Press ▼ to highlight Network Settings and press MODE/ENTER. The Network Settings page displays.
- Press ▼ to highlight Wired LAN and press MODE/ENTER.
- Press ▼ to highlight DHCP and press ◀ /▶ to select On.
- Press ▼ to highlight Apply and press MODE/ENTER.
- Re-enter the Wired LAN page. The IP Address, Subnet Mask, Default Gateway, and DNS Server settings will be displayed. Note down the IP address.

If the IP Address still does not display, contact your ITS administrator.
If you are in a non-DHCP environment:
- Repeat steps 1-4 above.
- Press ▼ to highlight DHCP and press ◀/▶ to select Off.
- Contact your ITS administrator for information on the IP Address, Subnet Mask, Default Gateway, and DNS Server settings.
- Press ▼ to select the item you want to modify and enter the value.
- Press ▼ to highlight Apply and press MODE/ENTER.
Configuring the Wireless LAN Settings
-
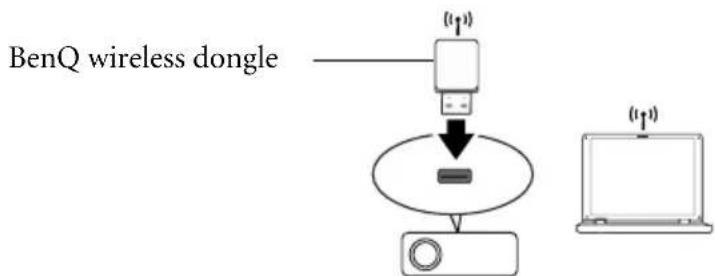
Connect the BenQ wireless dongle (optional) to the TYPE-A USB input jack of the projector.
-
Make sure the projector is turned on.
-
From the OSD menu, go to SYSTEM SETUP: Advanced > Network Settings > Wireless LAN, and press MODE/ENTER.
-
Make sure the Status is Connect.
-
Make sure the SSID information is displayed.
-
Highlight Connection Mode and press ◀ /▶ to select AP or Infrastructure. In AP mode, you need to use your computer's wireless connection utility to search the projector's SSID and connect to it. To use Infrastructure mode, you should connect both your computer and projector to the same AP router and make connections with the IP address.
-
Enter the IP address for the projector in the bottom of the network screen in the address bar of your browser and press Enter.
-
Download and install Q Presenter on your computer. Use the software to transfer the desktop content to the network projector via local network connection. See "Displaying image through Q Presenter" on page 49 for details.

If WEP Key is set in the projector, the user must enter the password of WEP Key to connect the network.
Controlling the projector remotely through a web browser
Once you have configured the LAN settings, you can find the IP address for the projector in the bottom of the network screen. You can use any computer that is on the same local area network to control the projector.
- Enter the address of the projector in the address bar of your browser and press Enter. For example: http://10.60.7.199
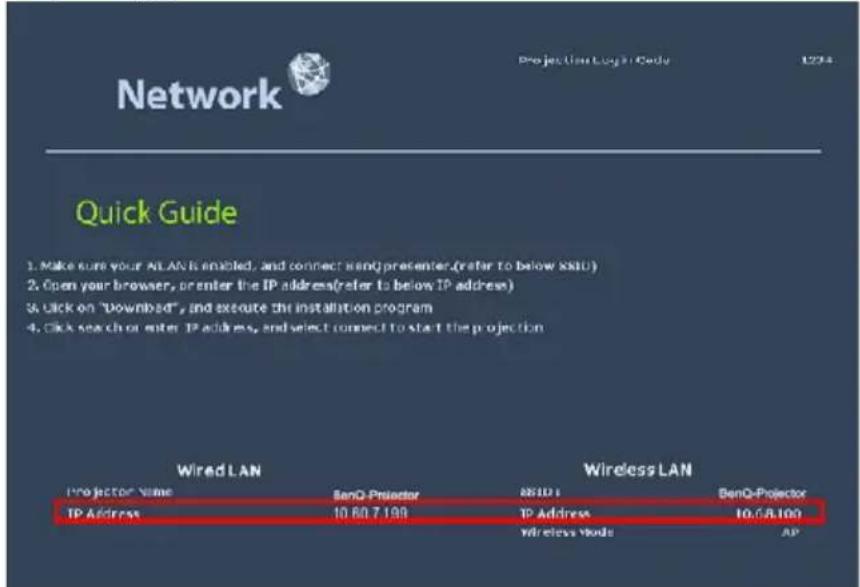

- The BenQ remote network operation page opens.
• The web page control supports IE version 7.0 or higher.
- The illustrations in web page control, Q Presenter and USB Reader sections are for the purpose of explanation and may differ from the actual design of your projector.
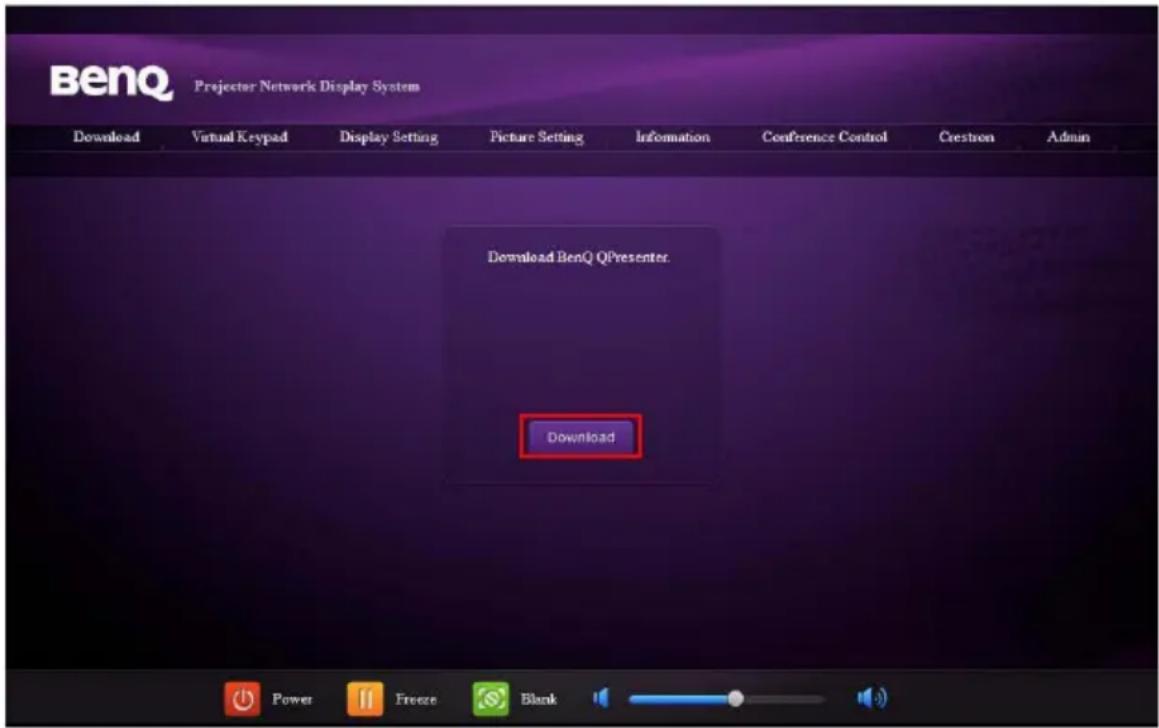
- Click Download to save Q Presenter software on your computer.

You can also link to the web page control from Q Presenter > Settings > Advanced Setting > Control projector via web page on page 52.
- Execute the program installation.
- Open Q Presenter, search and connect a network display. See "Displaying image through Q Presenter" on page 49 for details.
The Virtual Keypad page allows you to operate the projector as if you were using the remote control or control panel on the projector.
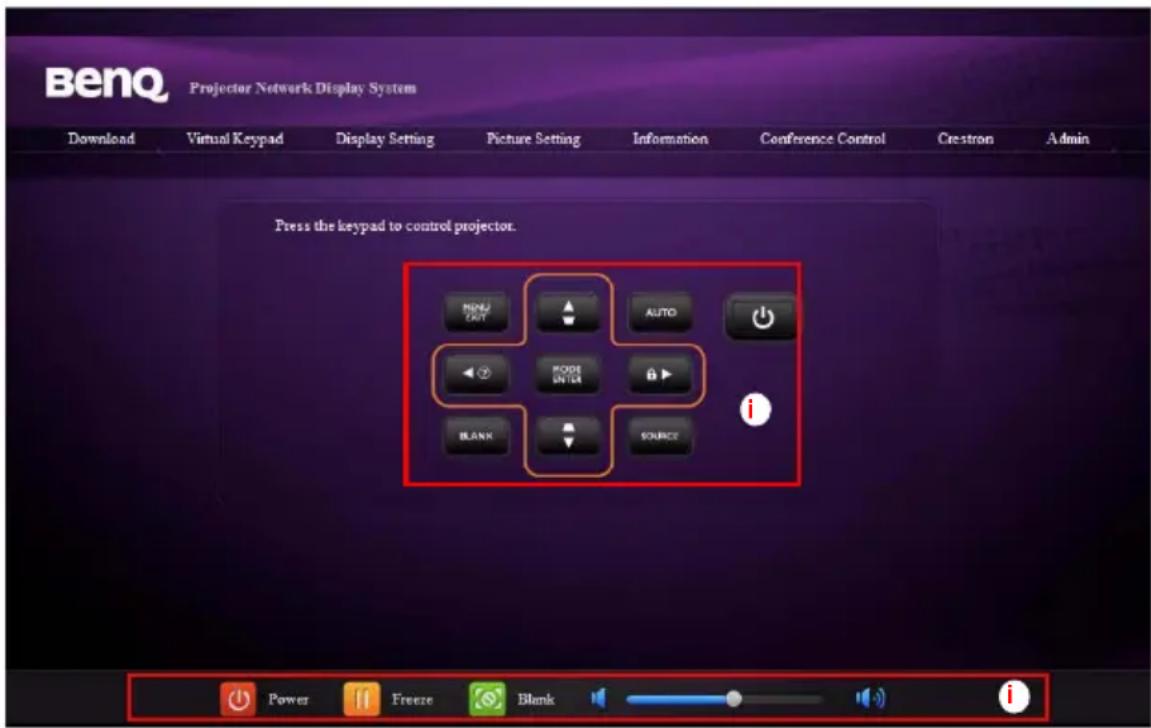
i. These buttons function the same as the ones on the remote control. See "Remote control" on page 12 for details.
The Display Setting page allows you to operate the projector as if you were using the OSD menus. These functions are some useful menu settings.
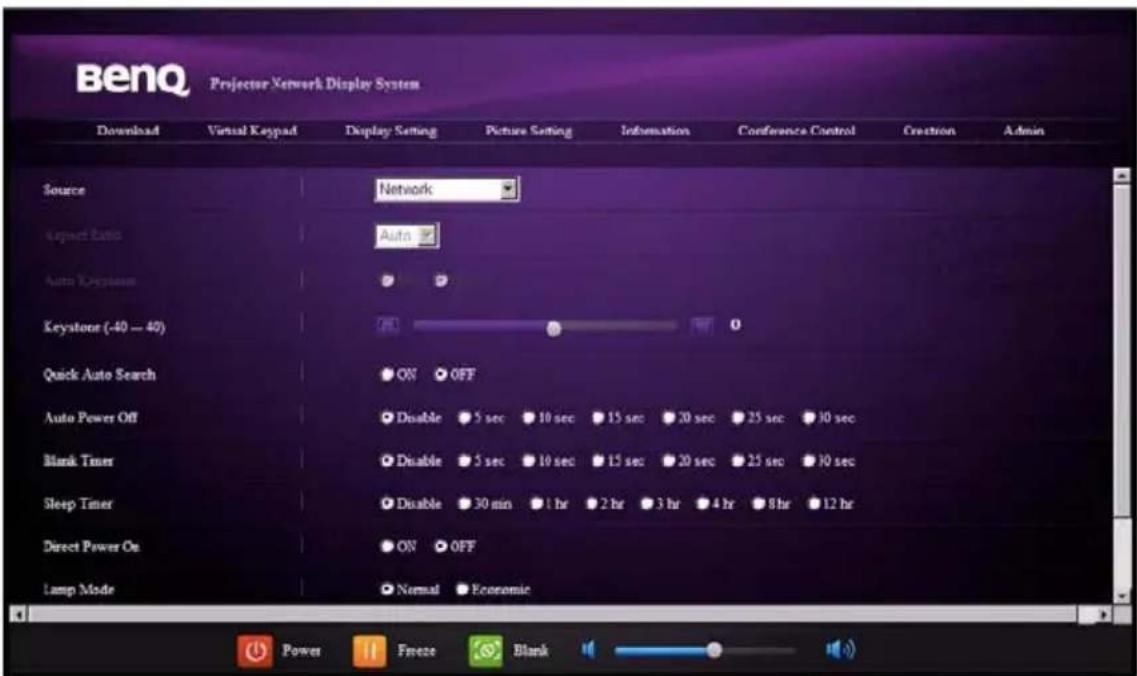
The Picture Setting page allows you to manage the projector as if you were using the PICTURE menu.
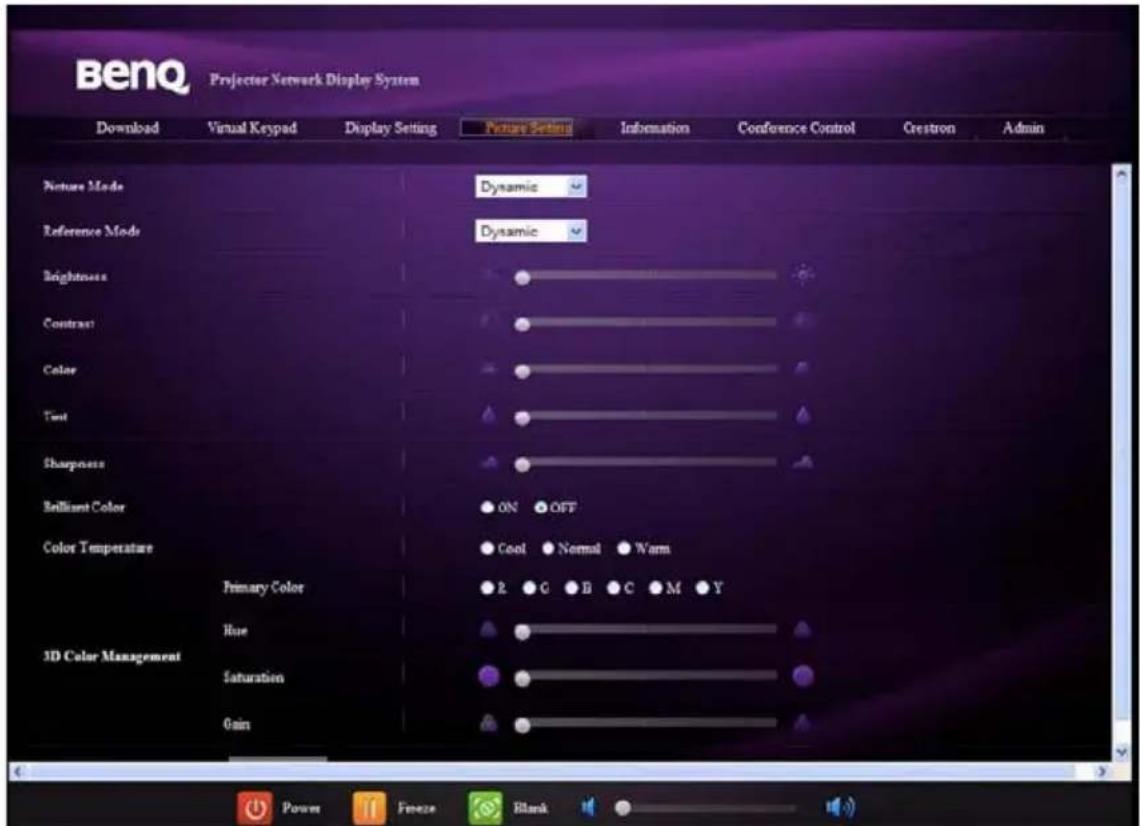
The Information page displays the information and status of this projector.
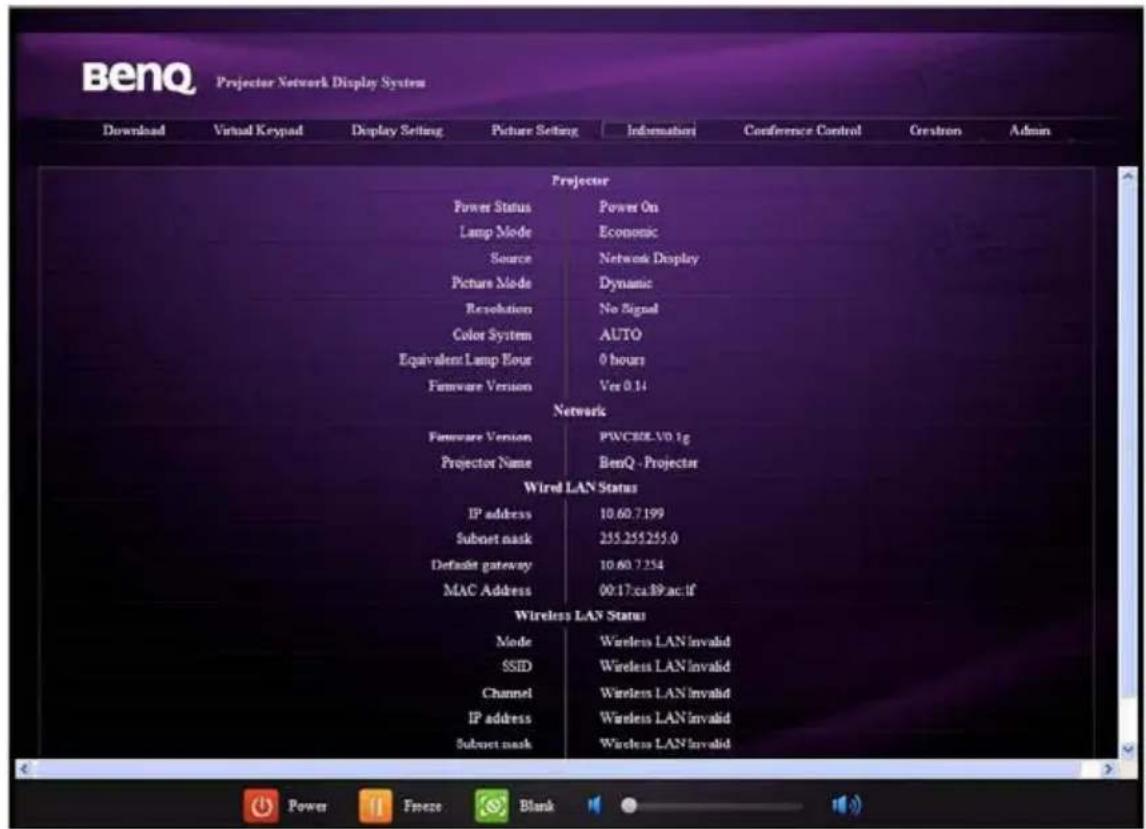
The Conference Control page allows you to control computer's display status of all the computers linked to this projector.
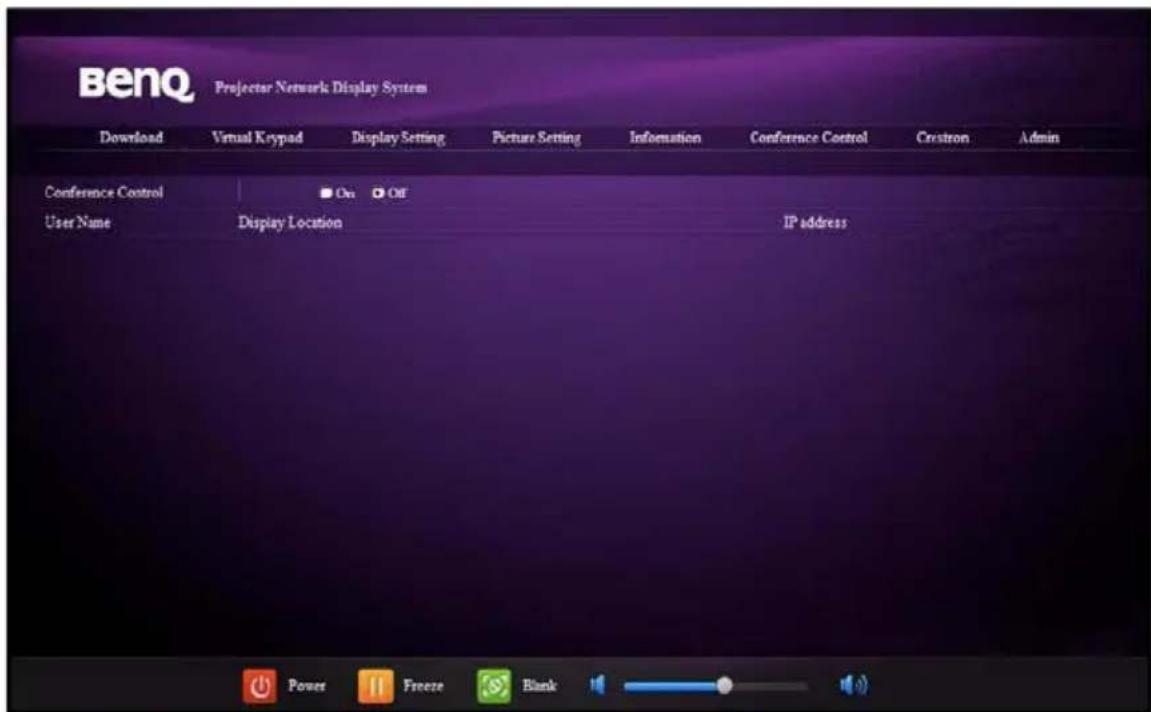
The Crestron page is only available when you are on a Wired LAN network. It also allows you to control the projector remotely. The Crestron supports RoomView version 6.2.2.9.
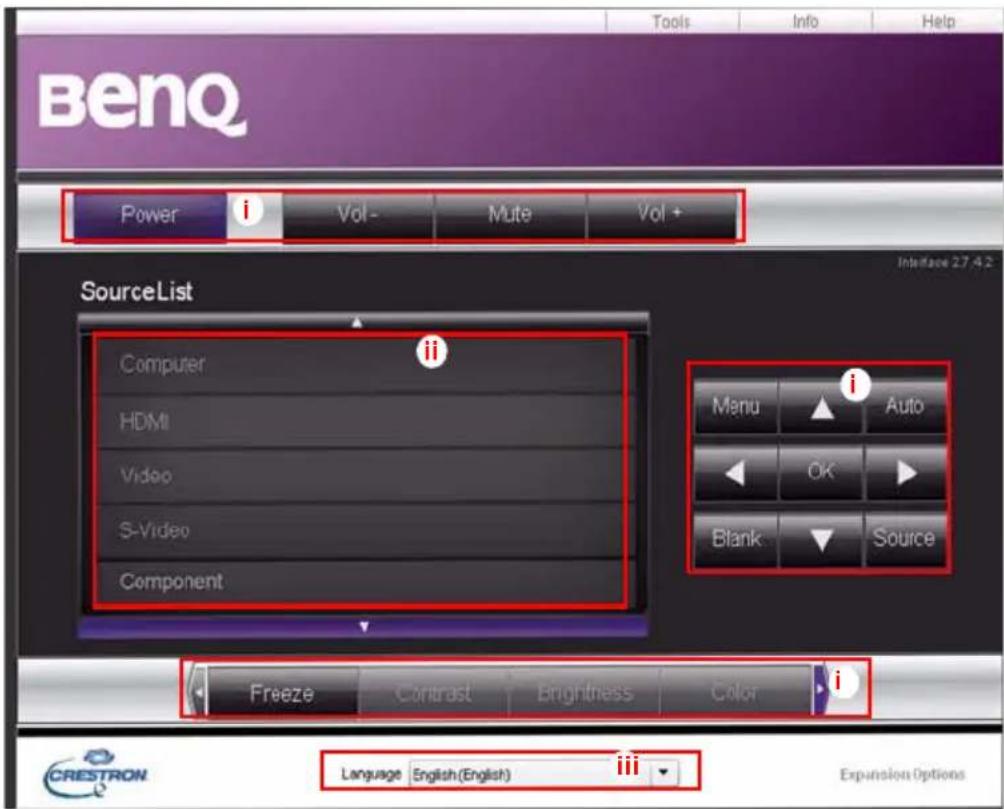
i. These buttons function the same as the ones on the OSD menus or remote control. See "2. PICTURE" on page 60 and "Remote control" on page 12 for details.

The Menu button can also be used to go back to previous OSD menu, exit and save menu settings.
ii. To switch input source, click on your desired signal.
iii. You can select a preferred OSD language.
The tools page allows you to manage the projector, configure the LAN control settings and secure access of remote network operation on this projector.
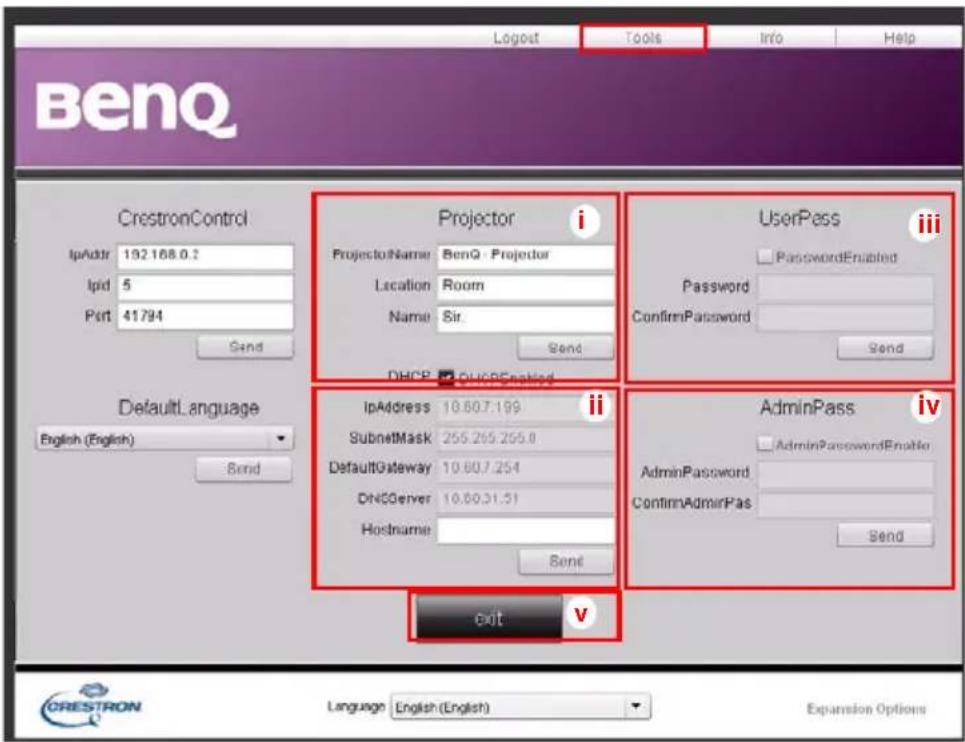
i. You can name the projector, keep track of its location and the person in charge of it.
ii. You can adjust the Wired LAN settings.
iii. Once set, access to the remote network operation on this projector has been password-protected.
iv. Once set, access to the tools page has been password-protected.

After making the adjustments, press the Send button and the data will be saved in the projector.
v. Press exit to go back to the Crestron remote network operation page.
The info page displays the information and status of this projector.
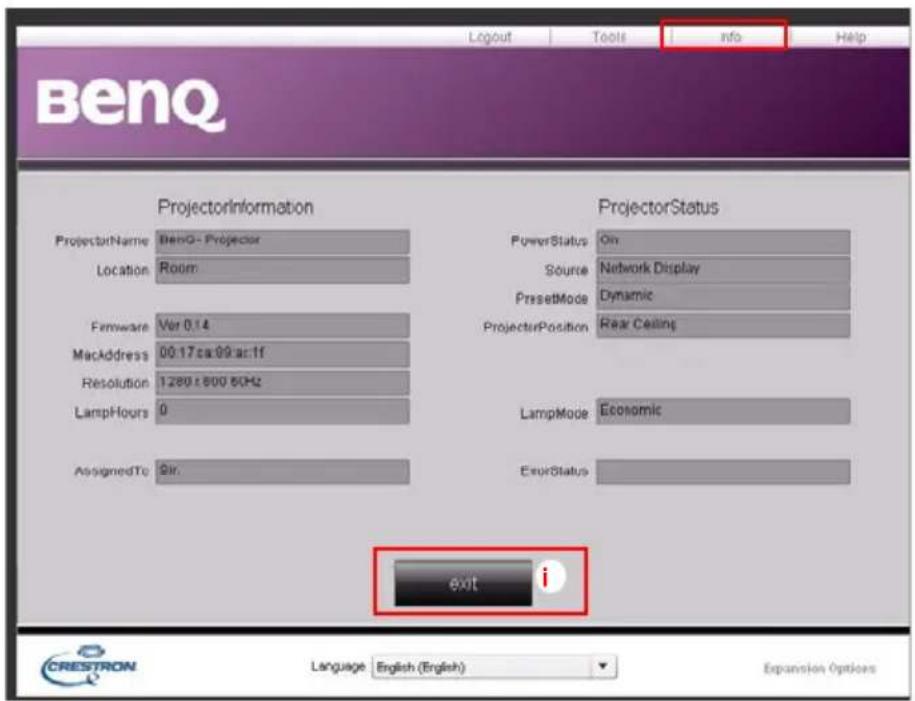
i. Press exit to go back to the Crestron remote network operation page.
The Admin page allows you to enter Basic, Wired LAN, Wireless LAN and Mail pages once the password is entered. The default password is "0000". If you want to change the password, please enter Basic page.
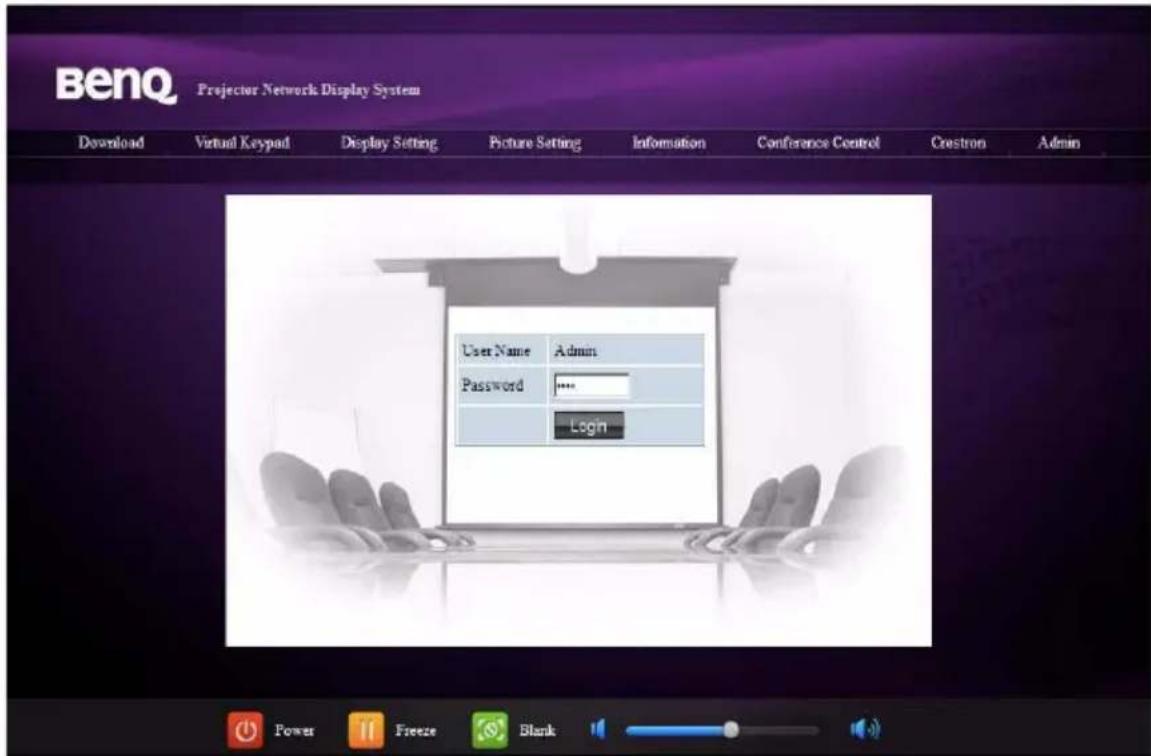
The Basic page allows you to change the password and select connected persons. The number of connected persons may affect the network display performance.
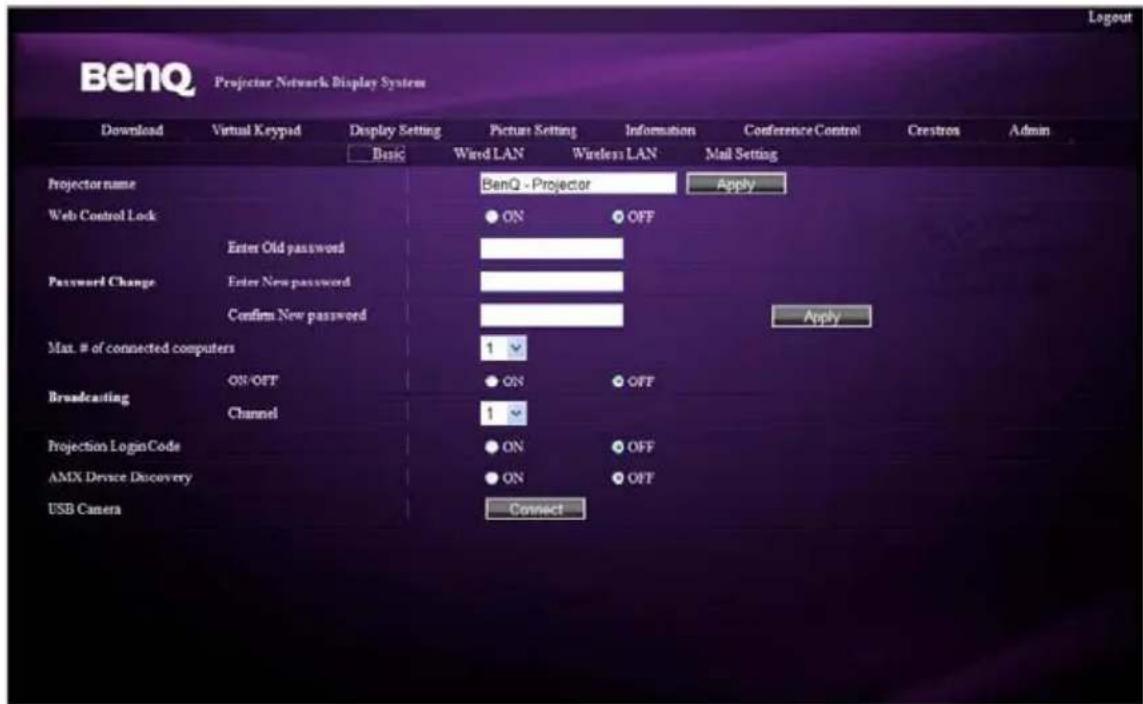
The Wired LAN page allows you to adjust the Wired LAN settings.
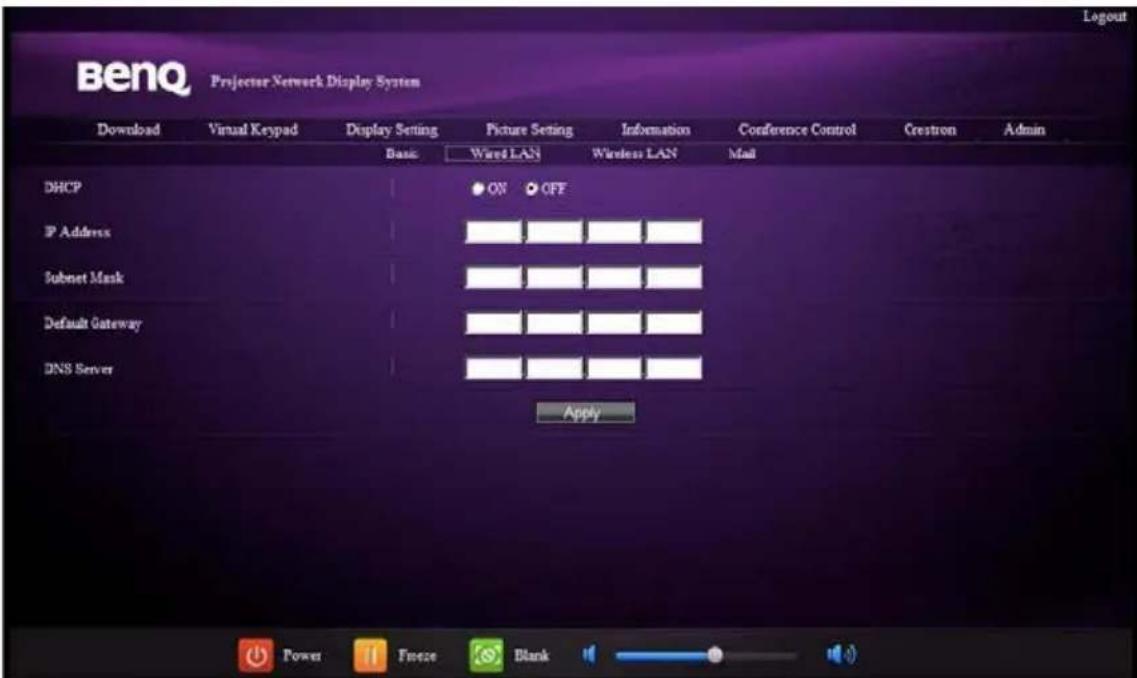
The Wireless LAN page allows you to adjust the Wireless LAN settings.
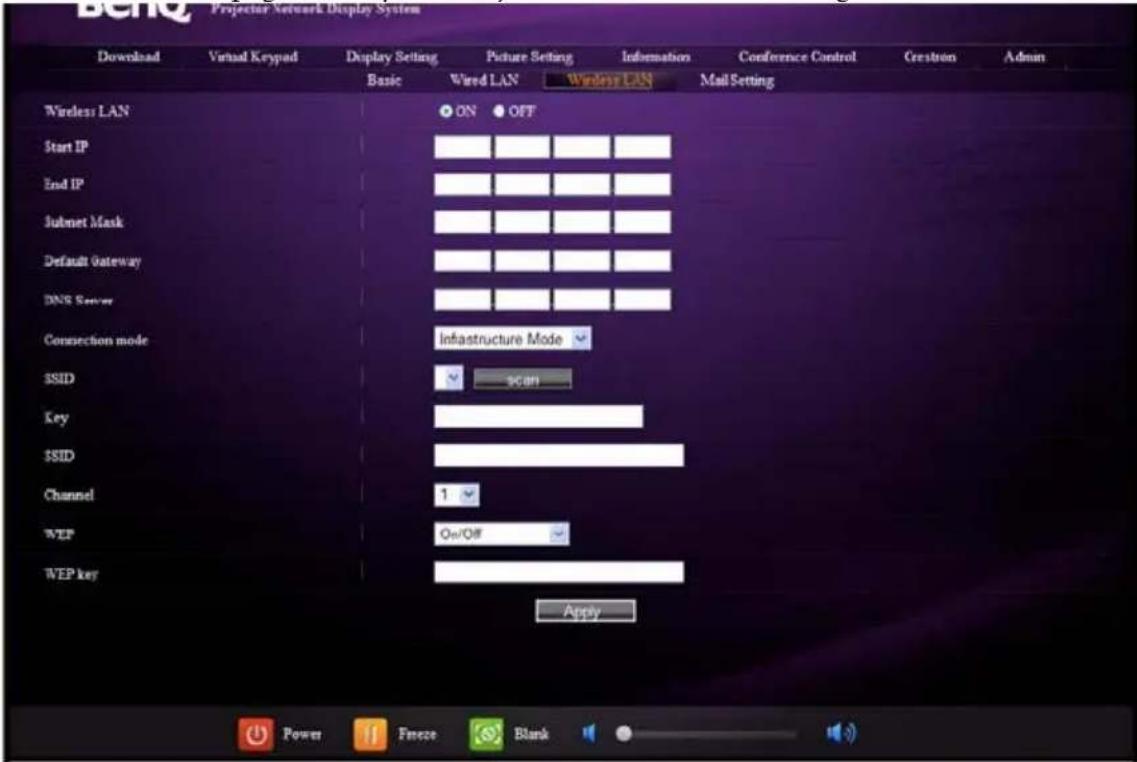

Max. length for SSID string is 16 bytes. Please use a different SSID when more than two projectors are connecting through wireless LAN.
The Mail page allows you to send alert e-mail to your ITS administrator.
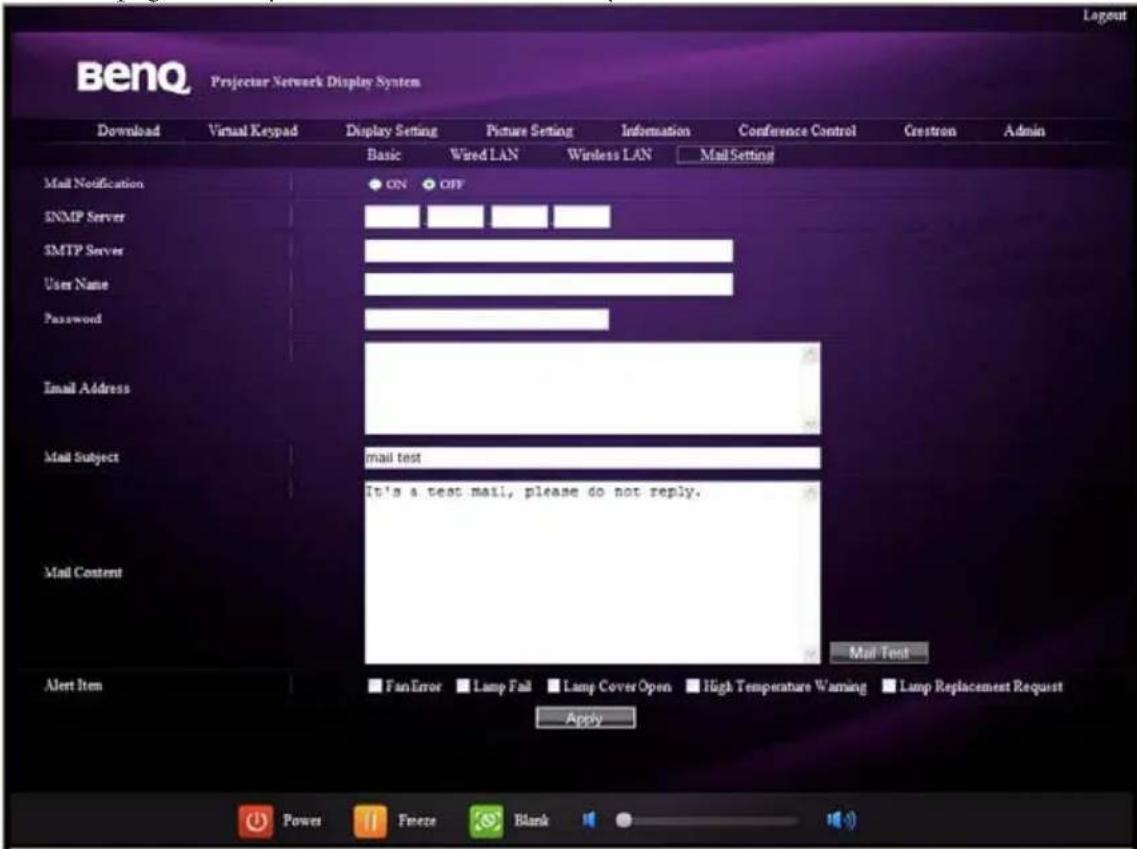

You can first try the Mail Test function to check if the Alert Mail works.
Displaying image through Q Presenter
The Q Presenter is an application running on the host PC. It connects to an available network display and transfers the desktop contents to the network display via local network connection.

Be sure to turn off other virtual network control programs before using Q Presenter.
-
Connect the projector with the RJ45 cable, and make sure your laptop or computer also link to the LAN. See "Configuring the Wired LAN Settings" on page 39 and "Configuring the Wireless LAN Settings" on page 39 for details.
-
Find the IP address and enter the address of the projector in the address bar of your browser. See "Controlling the projector remotely through a web browser" on page 40 for details.
-
Download the Q Presenter, unzip it and complete program installation.
-
Once installed, double click the Q Presenter icon. The Q Presenter page appears.
-
Click the Search icon.
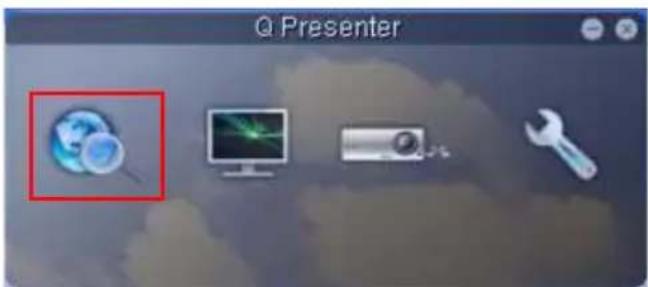
The Search page allows you to search and connect a network display.
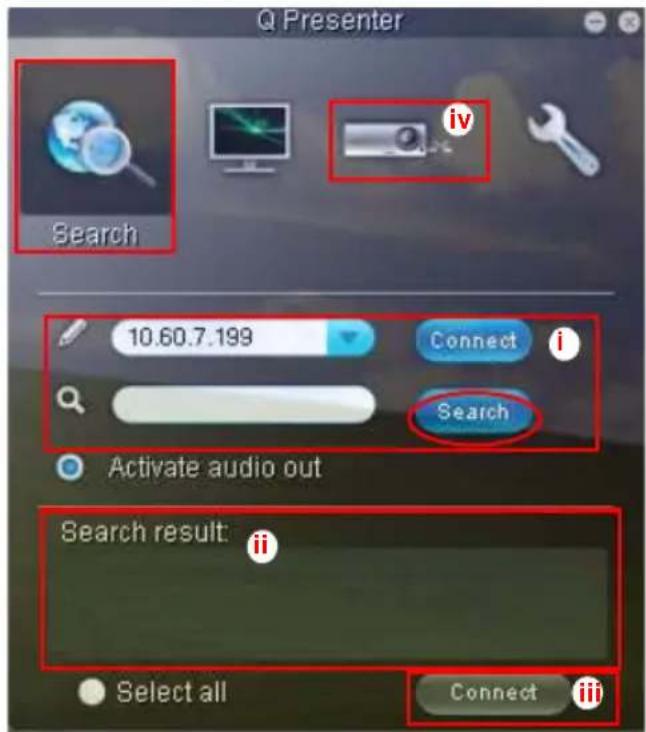
i. You can key in the IP address (see "Controlling the projector remotely through a web browser" on page 40 for details.) or just click "Search".
ii. Projectors linked in the LAN will be found. Then select the projector you want to link.
iii. Click "Connect". Then you should be able to see the image on projector.
iv. You can click to disconnect all connected projectors.
The Special Feature page allows you to have some advanced functions to manage the display image on your projector.
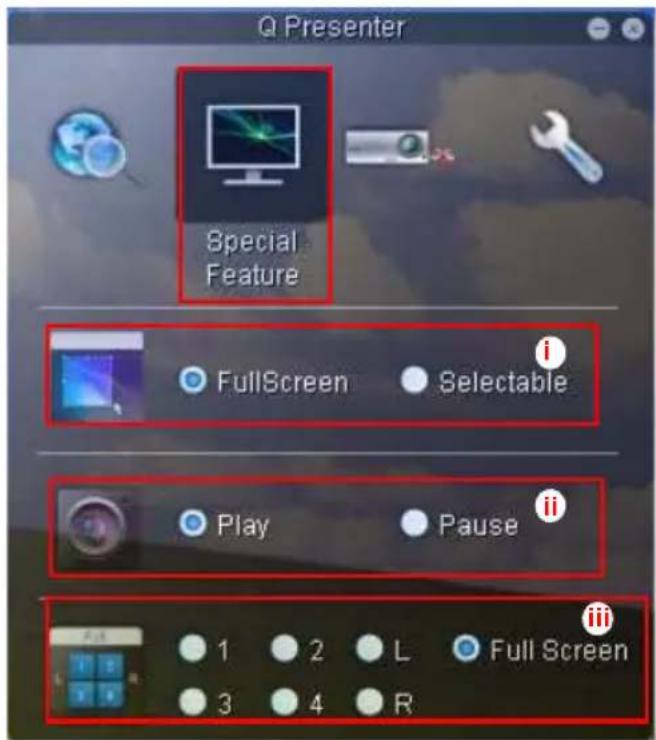
i. Full Screen: whole image display on the projector. Selectable: a square will pop-up then you can move and drag the area you want to show the audience.
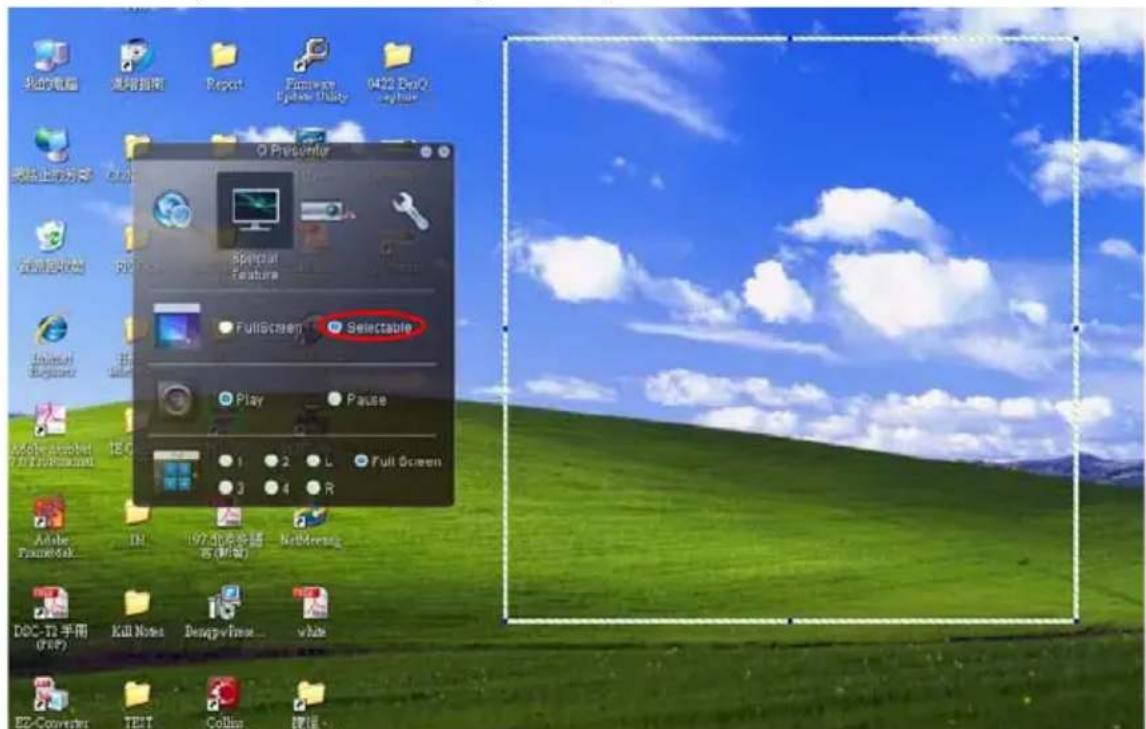
ii. You can select to stop/start displaying desktop contents to connected network display.
iii. 4-1 Display (up to 4 computers can shoot to 1 projector at the same time). Click the location you want to display. 4 locations can be chosen (1-4) or 2 places (L and R) if it's 2 computers. Once you click the place you want to display, the image appears on the eprojector. You can change the elocation anytime you want, even back to full screen or blank out.
The Basic and Advanced Settings pages allow you to configure the Q Presenter.
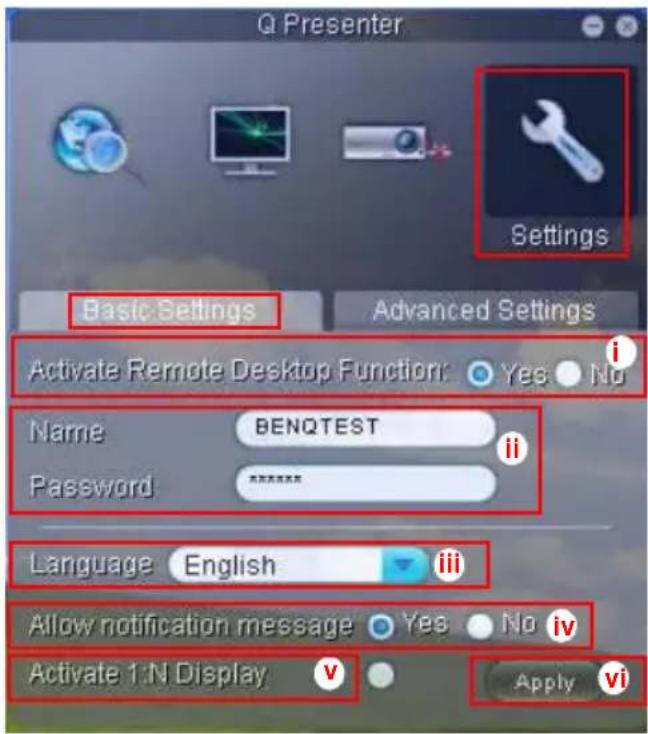
i. You can select whether to activate Remote Desktop function. If the Remote Desktop function is activated, you can change the Name and Password. If it isn't activated, the Name and Password will be gray out.
ii. You can set the name and password of the connected computer. The Name must be eight capital letters from A-Z & 0-9. The Password must be 6 digits from 1 to 4.
iii. When you install the Q Presenter, the program will automatically identify the language of your computer's operating system and install the same language as your operating system. If your language isn't included, the system will keep English as the default setting.
iv. You can select whether to allow notification message popup.
v. Once you set to activate 1:N display, 1PC/NB can display up to 8 projectors at the same time.
vi. Once set, press Apply to save the changes.
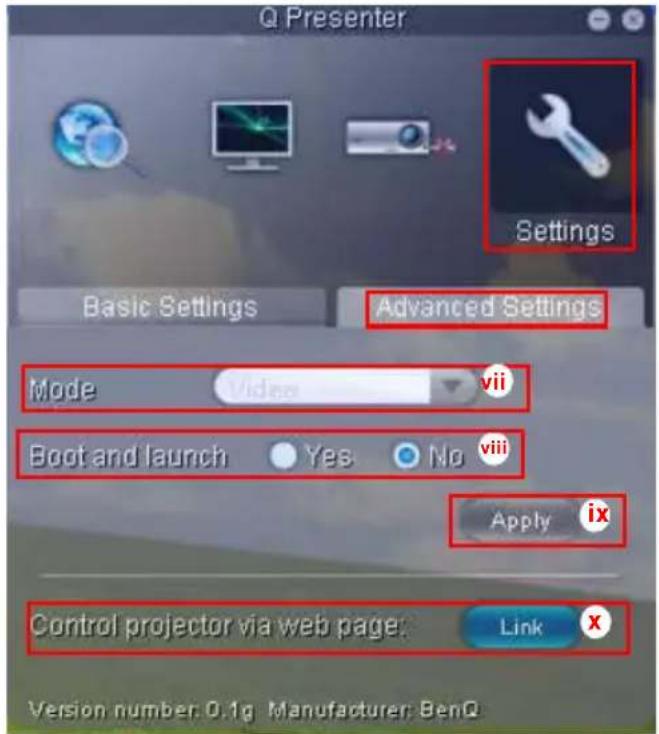
vii. You can select Video or Graphic display mode. Graphic Mode: worse image quality but faster transmission speed. Video Mode: better image quality but slower transmission speed. However, the actual transmission performance was determined by the status of network usage at that time.
viii. You can select whether to automatically open the Q Presenter application when the computer is powered on.
ix. Once set, press Apply to save the changes.
x. You can link to the BenQ remote network operation page on page 40.
Using the Web Control Lock
This function is designed to prevent unauthorized people from maliciously changing the projector settings through the Projector Network Display System.
To enable the function:
- After your computer is connected to the projector, enter the address of the projector in the address bar of your browser and press Enter.
- Go to the Admin page of the Projector Network Display System.
- Enter the current password.
- Click ON in the Web Control Lock row.
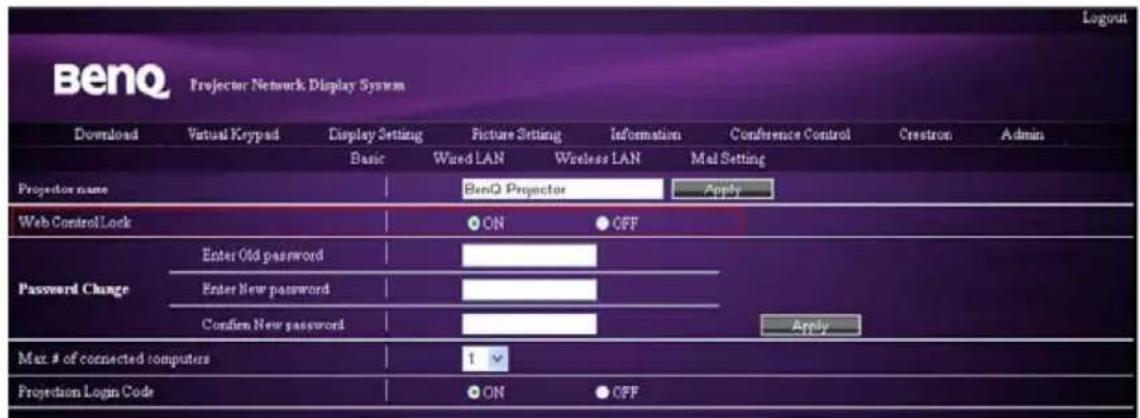
The next time someone connects to this projector, the Projector Network Display System page provides limited functions.
To disable the function:
- Go to the Admin page of the Projector Network Display System.
- Enter the current password.
-
Click OFF in the Web Control Lock row.
You can also use the OSD menu to toggle this function: -
Go to the SYSTEM SETUP: Advanced > Security Settings > Web Control Lock menu after opening the OSD menu system.
- Select On or Off by pressing / . The message 'INPUT PASSWORD' displays. Enter the current password.
Using the Projection Login Code
This function is designed to ensure network display through the correct projector. To toggle this function:
- Go to the SYSTEM SETUP: Advanced > Network Settings menu after opening the OSD menu system. Press MODE/ENTER.
- Press ▼ to highlight Projection Log in Code and press ◀ /▶ to select On or Off. When this function is on, the projector generates a random 4-digit code in the upper right corner when you switch the source to Network Display. You need to key in this 4-digit code in the Q Presenter when connecting to the projector.
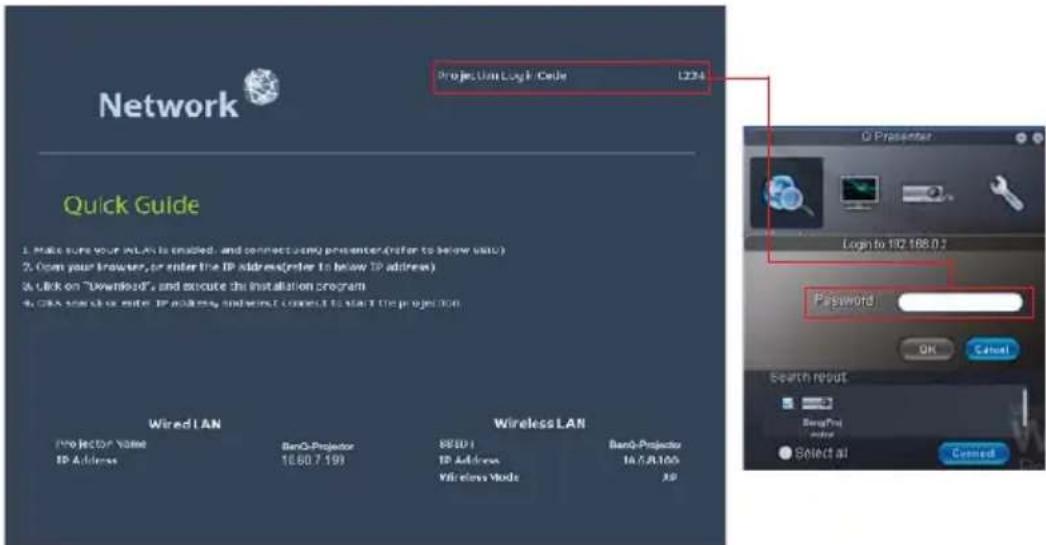
Presenting From a USB Reader
This feature displays a slide show of images stored on a USB flash drive connected to the projector. It can eliminate the need for a computer source.
Image File Types
USB Reader displays images files in JPEG, GIF, TIFF, PNG and BMP formats.

- A square box will display on the filename for unidentified characters.
- Thai filename is not supported.
- Files in GIF, TIFF, PNG and BMP formats can be displayed for the file size smaller than WXGA (1280 x 800) only.
- If a folder consists of more than 200 photos, only the first 200 photos can be displayed.
Preparation
To view your pictures as a slideshow, follow these steps:
-
Connect a USB flash drive to your computer and copy files from your computer to the USB flash drive.
-
Turn on your projector if needed.
-
Remove the USB flash drive from your computer and plug it into the USB TYPE-A jack of the projector.
-
The thumbnails display.
Controlling USB Reader
While viewing thumbnails:
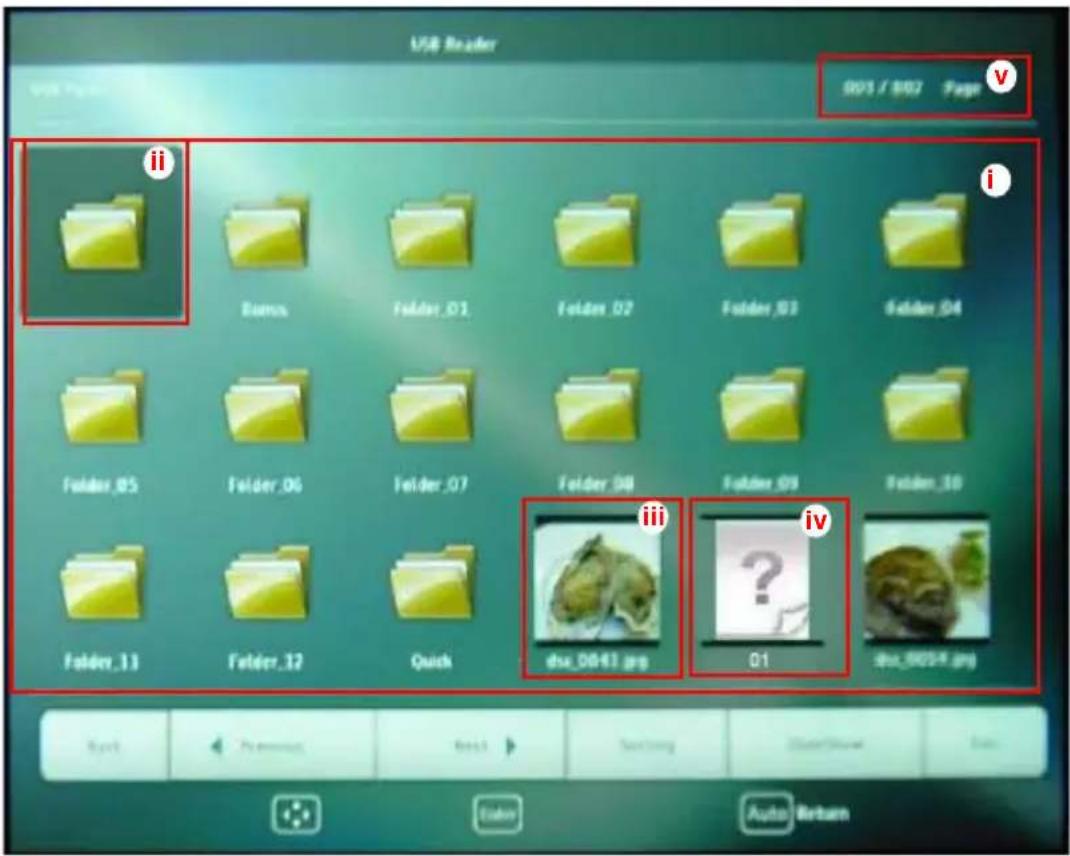
i. Thumbnails
ii. Selected folder
iii. Supported file format
iv. Unsupported file format
v. Current path and page number
| ToPress | |
| open folder Enter | |
| scroll through thumbnails four arrow keys | |
| return to a previous page Auto | |
| exit USB Reader Exit | |
| change to a different page | ◀ /▶ |
| go back to the first page of that folder Back | |
| start slide show Slideshow when an image is highlighted. | |
| adjust USB Reader settings Setting | |
During slideshow:
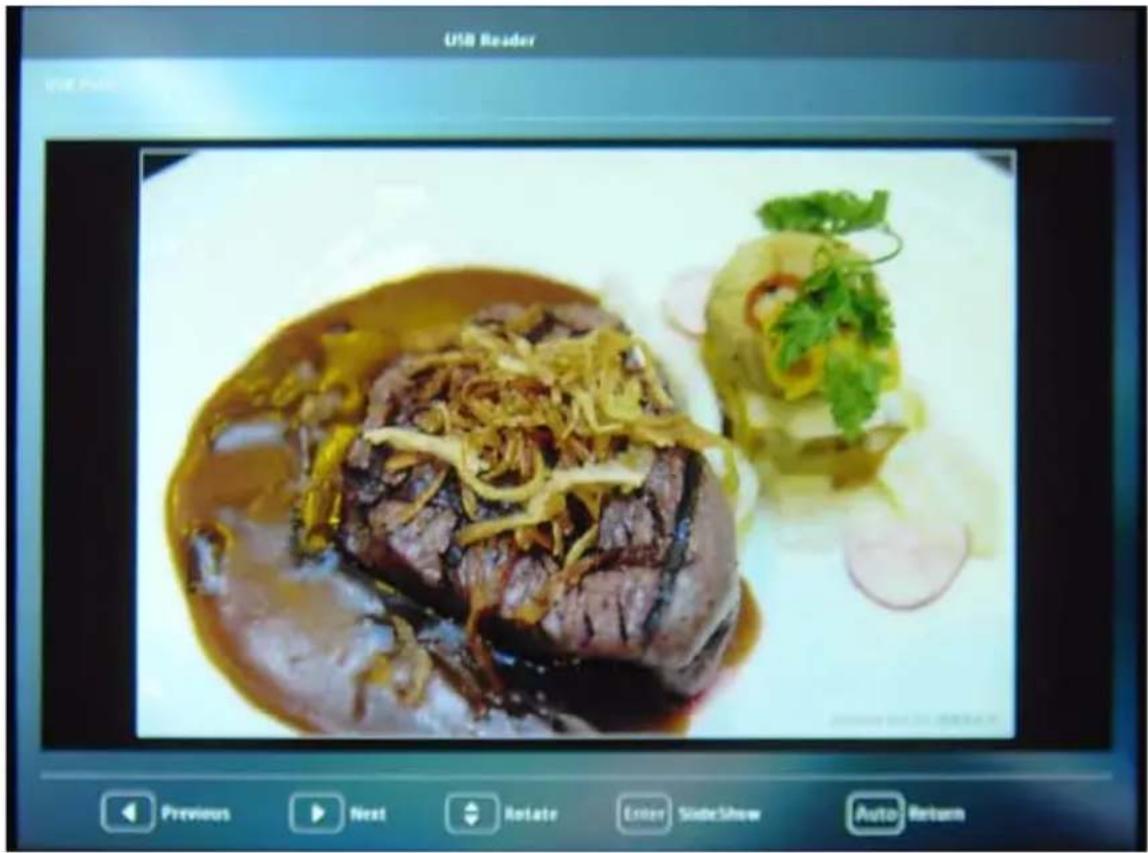
natural_image
Close-up of a plated dish featuring a marinated meat in sauce, garnished with herbs and a halved radish, displayed on a white plate (no visible text or symbols)| ToPress | |
| go to previous or next image | ◀ /▶ |
| rotate the image by 90 degree clockwise/ counterclockwise | ▲ /▼ (Rotation is temporary; the image returns to its original orientation when you go back to thumbnails) |
| return to a previous page Auto | |
| start/stop slideshow Enter |
Settings page:
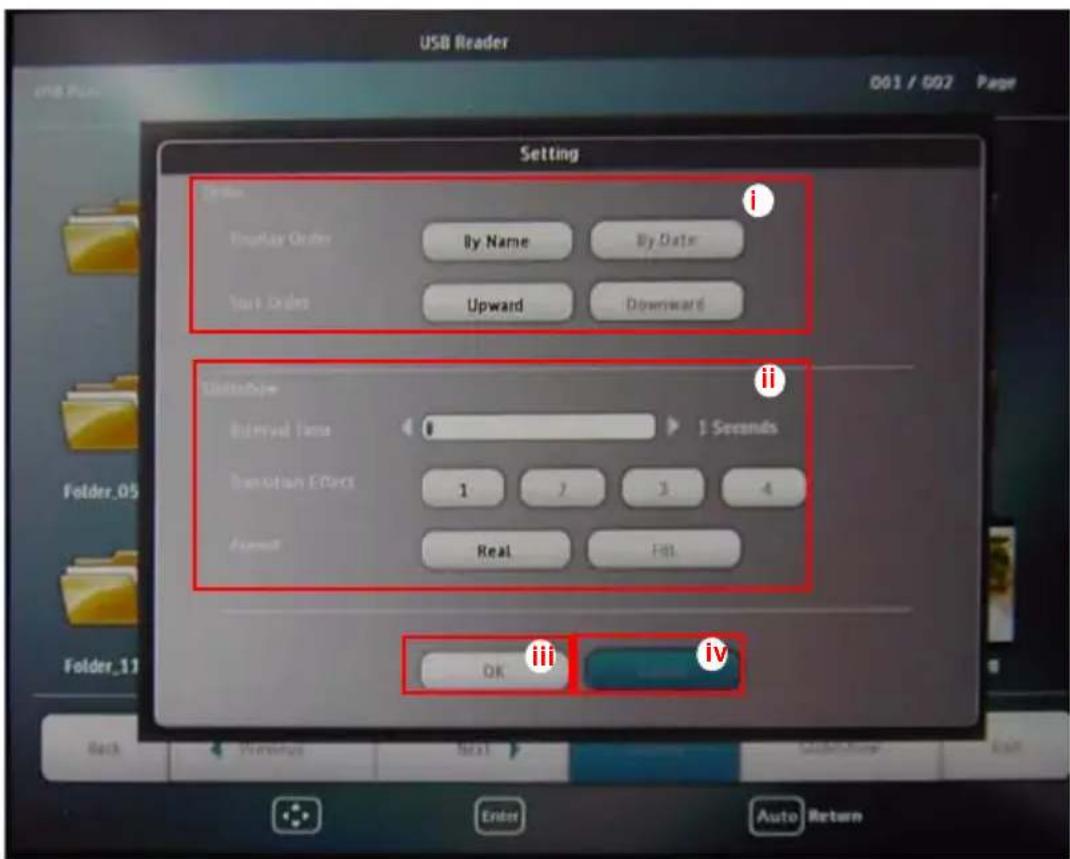
i. You can adjust order settings.
ii. You can adjust Slideshow settings.
iii. Press OK to save the settings.
iv. Press Cancel to ignore the change.
Remote Desktop Control through Q Presenter
The Q Presenter can proceed the Remote Desktop Control (RDC) the host PC from projector site.
- Setup the RDC login account (User name and Password) in Q Presenter.
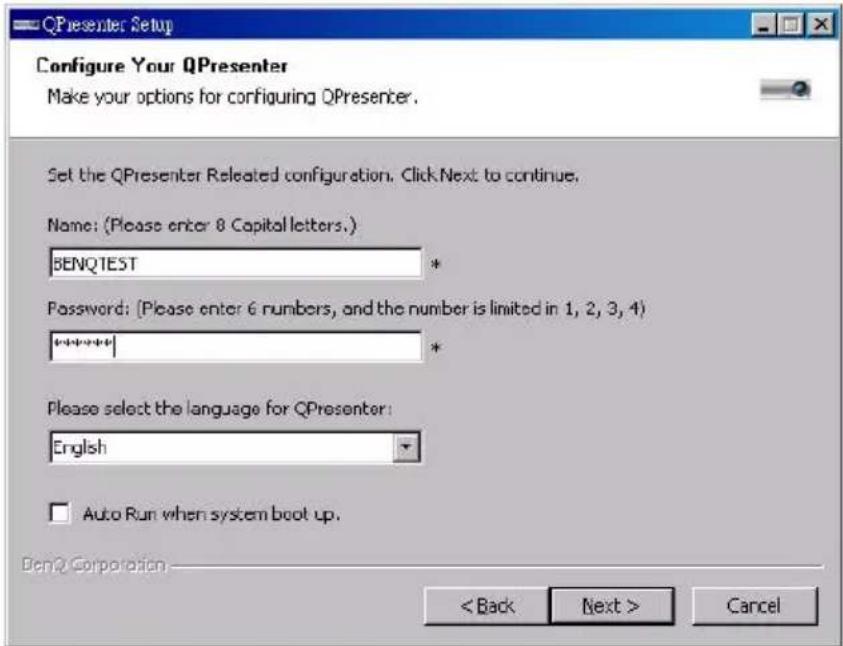
- Name: must be 8 English capital letters A\~Z and number 0 \~9.
- Password: must be 6 digits and limit the range from 1\~4.
- If there are lot of audience is watching the display while the user is entering the password, the number will be transferred to up, left, down, right in order from 1 to 4 of remote control's or projector's keypads.
-
If multiple same Q Presenter names are found, an error like "duplicate" is displayed in projector OSD.
-
Activate Remote Desktop Control Function in Q Presenter > Settings > Basic Settings.
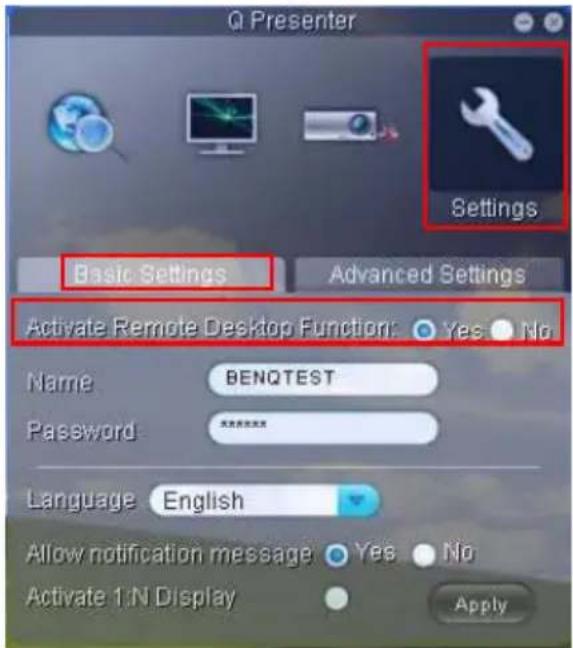
-
Open the OSD menu and go to the SYSTEM SETUP: Advanced > Network Settings menu. Press MODE/ENTER.
-
Highlight Remote Desktop and press MODE/ENTER.
-
Enter the Account and Password the same as step 1.
-
Highlight Connect and press MODE/ENTER to connect the selected PC.
-
Connect USB keyboard or mouse to control the host PC's desktop through the projector.
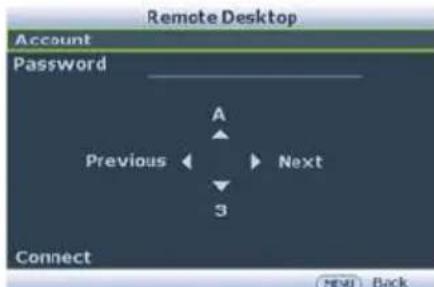

- Remote Desktop Control does not support PC Standby mode.
- Remote Desktop Control only supports LAN source so the projector source is fixed on LAN.
Menu operation
Menu system
Please note that the on-screen display (OSD) menus vary according to the signal type selected.
| Main menu Sub-menu Options | |||
| 1. DISPLAY | Wall Color | Off/Light Yellow/Pink/Light Green/Blue/Blackboard | |
| Aspect Ratio | Auto/Real/4:3/16:9/16:10 | ||
| Auto Keystone On/Off | |||
| Keystone | |||
| Position | |||
| Phase | |||
| H. Size | |||
| Digital Zoom | |||
| PIP | PIP On/Off | ||
| Main Source | HDMI/Video/S-Video/ Component/PC | ||
| Second Source | |||
| Active Window Main/PIP | |||
| Position | Top-Right/Bottom-Left/Bottom- Right/Top-Left | ||
| Size Large/Small | |||
| Teaching Template | Blackboard | Off/Letter Formation/Worksheet/ Coordinate Chart | |
| Whiteboard | Off/Letter Formation/Worksheet/ Coordinate Chart | ||
| 2. PICTURE | Picture Mode | Dynamic/Presentation/sRGB/Cinema/User 1/User 2 | |
| Reference Mode | Dynamic/Presentation/sRGB/Cinema | ||
| Brightness | |||
| Contrast | |||
| Color | |||
| Tint | |||
| Sharpness | |||
| Brilliant Color On/Off | |||
| Color Temperature | Cool/Normal/Warm | ||
| 3D Color Management | Primary Color R/G/B/C/M/Y | ||
| Hue | |||
| Saturation | |||
| Gain | |||
| Save Settings | |||
| 3. SOURCE | Quick Auto Search On/Off | ||
| Color Space Conversion | Auto/RGB/YUV | ||
| 4. SYSTEM SETUP: Basic | Language | English/ Français/ Deutsch/ Italiano/ Español / Русский / 繁體中文/简体中文/日本語/한국어/Svenska/Nederlands/Türkçe/ Čeština/ Português/ İnu/Polski Magyar/Hrvatski/Românã/Norsk/Dansk/Български/Suomi/Еллгнікá Bahasa Indonesia | |
| Projector Position | Front Table/Rear Table/Rear Ceiling/Front Ceiling | ||
| Menu Settings | Menu display time | 5 sec/10 sec/15 sec/20 sec/25 sec/30 sec | |
| Menu position | Center/Top-left/Top-right/Bottom-right/Bottom-left | ||
| Reminder Message On/Off | |||
| Operation Settings | Direct Power On On/Off | ||
| Auto Power Off | Disable/5 min/10 min/15 min/20 min/25 min/30 min | ||
| Quick Cooling On/Off | |||
| Blank Timer | Disable/5 min/10 min/15 min/20 min/25 min/30 min | ||
| Sleep Timer | Disable/30 min/1 hr/2 hr/3 hr/4 hr/8 hr/12 hr | ||
| Remote Receiver | Front+Rear/Front/Rear | ||
| Background Color | Black/Blue/Purple | ||
| Splash Screen BenQ/Black/Blue | |||
| 5. SYSTEM SETUP: Advanced | High Altitude Mode | On/Off | |
| Audio Settings | SRS On/Off | ||
| Mute On/Off | |||
| Volume | |||
| Microphone Volume | |||
| Power on/off Ring Tone | On/Off | ||
| Lamp Settings | Lamp Mode Normal/Economic | ||
| Reset lamp timer | |||
| Equivalent lamp hour | |||
| Security Settings | Change password | ||
| Change Security Settings | Power on Lock Web Control Lock | ||
| Baud Rate | 2400/4800/9600/19200/38400/57600/115200 | ||
| Test Pattern On/Off | |||
| Closed Caption | Closed Caption Enable | On/Off | |
| Caption Version | CC1/CC2/CC3/CC4 | ||
| Standby Settings | Network On/Off | ||
| Microphone On/Off | |||
| Monitor Out On/Off | |||
| Audio Pass Through | Off/Computer/Vidoe/HDMI | ||
| 5. SYSTEM SETUP: Advanced | Network Settings | Wired LAN | Status |
| DHCP | |||
| IP Address | |||
| Subnet Mask | |||
| Default Gateway | |||
| DNS Server | |||
| Apply | |||
| Wireless LAN | Status | ||
| SSID | |||
| IP Address | |||
| Connection Mode | |||
| DHCP | |||
| IP Address | |||
| Subnet Mask | |||
| Apply | |||
| Remote Desktop | Account | ||
| Password | |||
| Connect/Disconnect | |||
| Projection Log in Code | On/Off | ||
| Mac Address | |||
| Reset All Settings | |||
| 6. INFORMATION | Current System Status | SourcePicture ModeResolutionColor SystemEquivalent Lamp HourFirmware Version | |
Note that the menu items are available when the projector detects at least one valid signal. If there is no equipment connected to the projector or no signal detected, limited menu items are accessible.
Description of each menu

- The default values listed in this manual, especially on pages 64-72, are for reference only. They may vary between the projectors due to the continuous improvement to the products.
| FUNCTION DESCRIPTION | |
| Wall Color | Corrects the projected picture's color when the projection surface is not white. See "Using Wall Color" on page 32 for details. |
| Aspect Ratio | There are four options to set the image's aspect ratio depending on your input signal source. See "Selecting the aspect ratio" on page 29 for details. |
| Auto Keystone | Auto corrects any keystoning of the image. |
| Keystone | Corrects any keystoning of the image. See "Correcting keystone" on page 24 for details. |
| Position | Displays the position adjustment page. To move the projected image, use the directional arrow keys. The values shown on the lower position of the page change with every key press you made until they reach their maximum or minimum.This function is only available when a PC signal (analog RGB) is selected. |
| Phase | Adjusts the clock phase to reduce image distortion. This function is only available when a PC signal (analog RGB) is selected. This function is only available when a PC signal (analog RGB) is selected. |
| H. Size | Adjusts the horizontal width of the image.This function is only available when a PC signal (analog RGB) is selected. |
| Digital Zoom | Magnifies or reduces the projected image. See "Magnifying and searching for details" on page 29 for details. |
| PIP | Turns the PIP window on or off and makes related adjustments. See "Displaying more than one image source simultaneously" on page 37 for details. |
| Teaching Template | Provides some templates as teaching aids. Teachers can use them for teaching. |
| FUNCTION) DESCRIPTION | |
| Picture Mode | Pre-defined picture modes are provided so you can optimize your projector image set-up to suit your program type. See "Selecting a picture mode" on page 31 for details. |
| Reference Mode | Selects a picture mode that best suits your need for the image quality and further fine-tune the image based on the selections listed on the same page below. See "Setting the User 1/User 2 mode" on page 31 for details.This function is only available when User 1 or User 2 is selected. |
| Brightness | Adjusts the brightness of the image. See "Adjusting Brightness" on page 32 for details.This function is only available when User 1 or User 2 is selected. |
| Contrast | Adjusts the degree of difference between dark and light in the image. See"Adjusting Contrast" on page 32 for details.This function is only available when User 1 or User 2 is selected. |
| Color | Adjusts the color saturation level -- the amount of each color in a video image. See "Adjusting Color" on page 32 for details.This function is only available when User 1 or User 2 is selected.This function is only available when a Video or S-Video signal is selected and the system format is NTSC or PAL. |
| Tint | Adjusts the red and green color tones of the image. See "Adjusting Tint" on page 32 for details.This function is only available when User 1 or User 2 is selected.This function is only available when a Video or S-Video signal is selected and the system format is NTSC or PAL. |
| Sharpness | Adjusts the image to make it look sharper or softer. See "Adjusting Sharpness" on page 32 for details.This function is only available when User 1 or User 2 is selected. |
| FUNCTION DESCRIPTION | ||
| 2. PICTURE menu | Brilliant Color | Adjusts white peaking while maintaining correct color presentation.See "Adjusting Brilliant Color" on page 32 for details.This function is only available when User 1/2 is selected. |
| Color Temperature | See "Selecting a Color Temperature" on page 32 for details.This function is only available when User 1/2 is selected. | |
| 3D Color Management | See "3D Color Management" on page 33 for details.This function is only available when User 1/2 is selected. | |
| Save Settings | Saves the settings made for User 1 or User 2 mode.This function is only available when User 1/2 is selected. | |
| 3. SOURCE menu | Quick Auto Search | See "Switching input signal" on page 28 for details. |
| Color Space Conversion | See "Changing Color Space" on page 28 for details. | |
| Language | Sets the language for the On-Screen Display (OSD) menus. See "Using the menus" on page 25 for details. | |
| Projector Position | The projector can be installed on a ceiling or behind a screen, or with one or more mirrors. See "Choosing a location" on page 15 for details. | |
| Menu Settings | Menu display timeSets the length of time the OSD will remain active after your last key press. The range is from 5 to 30 seconds in 5-second increments.Menu positionSets the On-Screen Display (OSD) menu position.Reminder MessgSets whether to display the reminder message. | |
| 4. SYSTEM SETUP:Basic menu | Direct Power OnSelecting On enables the function. See "Starting up the projector" on page 22 for details.Auto Power OffAllows the projector to turn off automatically if no input signal is detected after a set period of time. See "Setting Auto Power Off" on page 74 for details. | |
| Operation Settings | Quick CoolingSelecting On enables the function and the projector cooling time will be shortened to a few seconds.If you attempt to restart the projector right after the quick cooling process, it may not be turned on successfully and will rerun its cooling fans. | |
| Blank TimerSets the image blank time when the Blank feature is activated, once elapsed the image will return to the screen. See "Hiding the image" on page 34 for details.Sleep TimerSets the auto-shutdown timer. The timer can be set to a value between 30 minutes and 12 hours. | ||
| FUNCTION DESCRIPTION | ||
| Basic menu4. SYSTEM SETUP: | Remote Receiver | Sets which IR remote sensor of the projector will receive the signal from the remote control. |
| Background Color | Allows you to select which background color will display when no signal is input into the projector. Three options are available: Black, Blue, or Purple. | |
| Splash Screen | Allows you to select which logo screen will display during projector start-up. Three options are available: BenQ logo, Black, or Blue. | |
| 5. SYSTEM SETUP: Advanced menu | High Altitude ModeA mode for operation in high altitude areas. See "Operating in a high altitude environment" on page 35 for details. | |
| Audio SettingsAllows you to enter the audio setting menu. See "Adjusting the sound" on page 35 for details.SRSSee "Turning on/off the SRS" on page 36 for details.MuteSee "Muting the sound" on page 35 for details.VolumeSee "Adjusting the sound level" on page 35 for details.Microphone volumeSee "Adjusting the microphone's sound level" on page 36 for details.Power on/off Ring ToneSee "Turning off the Power on/off ring tone" on page 36 for details. | ||
| Lamp SettingsLamp ModeSee "Setting Lamp Mode as Economic" on page 74 for details.Reset lamp timerSee "Resetting the lamp timer" on page 78 for details.Equivalent lamp hourSee "Getting to know the lamp hour" on page 74 for details on how the total lamp hour is calculated. | ||
| Security SettingsChange passwordYou will be asked to enter the current password before changing to a new one.Change Security SettingsPower on LockSee "Securing the projector" on page 26 for details.Web Control LockSelecting On prevents unauthorized people from maliciously changing the projector settings through the Projector Network Display System. | ||
| FUNCTION DESCRIPTION | ||
| 5. SYSTEM SETUP: Advanced menu | Baud Rate | Selects a baud rate that is identical with your computer's so that you can connect the projector using a suitable RS-232 cable. This function is intended for qualified service personnel. |
| Test Pattern | Selecting On enables the function and the projector displays the grid test pattern. It helps you adjust the image size and focus and check that the projected image is free from distortion. | |
| Closed Caption | Closed Caption EnableActivates the function by selecting On when the selected input signal carries closed captions.• Captions: An on-screen display of the dialogue, narration, and sound effects of TV programs and videos that are closed captioned (usually marked as "CC" in TV listings).Set your screen aspect ratio to 4:3. This function is not available when the aspect ratio is “16:9”, “16:10” or “Real”.Caption VersionSelects a preferred closed captioning mode. To view captions, select CC1, CC2, CC3, or CC4 (CC1 displays captions in the primary language in your area). | |
| Standby Settings | NetworkSelecting On enables the function, and the projector can be monitored or controlled over a network when it is in standby mode.MicrophoneSelecting On enables the function, and the microphone can be used even in standby modeMonitor OutSelecting On enables the function. The projector can output a VGA signal when it is in standby mode and the COMPUTER and MONITOR OUT jacks are correctly connected to devices.Enabling this function slightly increases the standby power consumption.Audio Pass ThroughSets audio input source when the projector is in standby mode. | |
FUNCTION DESCRIPTION
| 5. SYSTEM SETUP: Advanced menu | Network Settings | Wired LANSee "Controlling the projector through a LAN environment" on page 39 for details.Wireless LANSee "Controlling the projector through a LAN environment" on page 39 for details.Remote DesktopSee "Displaying image through Q Presenter" on page 49 for details.Projection Log in CodeSelecting On ensures network display through the correct projector.Mac AddressDisplays the mac address for this projector.The system limitation of 1:1 audio is Intel Pentium 4, 3.0G CPU, 1G RAM. |
| Reset All Settings | Returns all settings to the factory preset values.The following settings will still remain: Position, Phase, H. Size, User 1, User 2, Language, Projector Position, High Altitude Mode, Security Settings, Baud Rate, and Network Settings. | |
| FUNCTION DESCRIPTION | ||
| 6. INFORMATION menu | Current System Status | SourceShows the current signal source.Picture ModeShows the selected mode in the PICTURE menu.ResolutionShows the native resolution of the input signal.Color SystemShows input system format, NTSC, PAL, SECAM, or RGB.Equivalent Lamp HourDisplays the number of hours the lamp has been used.Firmware VersionShows firmware version. |
Maintenance
Care of the projector
Your projector needs little maintenance. The only thing you need to do on a regular basis is to keep the lens and case clean.
Never remove any parts of the projector except the lamp. Contact your dealer if other parts need replacing.
Cleaning the lens
Clean the lens whenever you notice dirt or dust on the surface.
- Use a canister of compressed air to remove dust.
- If there is dirt or smears, use lens-cleaning paper or moisten a soft cloth with lens cleaner and gently wipe the lens surface.
- Never use any type of abrasive pad, alkaline/acid cleaner, scouring powder, or volatile solvent, such as alcohol, benzene, thinner or insecticide. Using such materials or maintaining prolonged contact with rubber or vinyl materials may result in damage to the projector surface and cabinet material.

Never rub the lens with abrasive materials.
Cleaning the projector case
Before you clean the case, turn the projector off using the proper shutdown procedure as described in "Shutting down the projector" on page 38 and unplug the power cord.
- To remove dirt or dust, wipe the case with a soft, lint-free cloth.
- To remove stubborn dirt or stains, moisten a soft cloth with water and a neutral pH detergent. Then wipe the case.

Never use wax, alcohol, benzene, thinner or other chemical detergents. These can damage the case.
Storing the projector
If you need to store the projector for an extended time, please follow the instructions below:
- Make sure the temperature and humidity of the storage area are within the recommended range for the projector. Please refer to "Specifications" on page 81 or consult your dealer about the range.
- Retract the adjuster feet.
- Remove the battery from the remote control.
- Pack the projector in its original packing or equivalent.
Transporting the projector
It is recommended that you ship the projector with its original packing or equivalent.
Lamp information
Getting to know the lamp hour
When the projector is in operation, the duration (in hours) of lamp usage is automatically calculated by the built-in timer.

See "Setting Lamp Mode as Economic" below for more information on Economic mode.
To obtain the lamp hour information:
- Press MENU/EXIT and then press ◀/▶ until the SYSTEM SETUP: Advanced menu is highlighted.
- Press ▼ to highlight Lamp Settings and press MODE/ENTER. The Lamp Settings page displays.
- You will see the Equivalent Lamp Hour information displaying on the menu.
- To leave the menu, press MENU/EXIT.
You can also get the lamp hour information on the INFORMATION menu.
Extending lamp life
The projection lamp is a consumable item. To keep the lamp life as long as possible, you can do the following settings via the OSD menu.
Setting Lamp Mode as Economic
Using Economic mode reduces system noise and power consumption by 20%. If the Economic mode is selected, the light output will be reduced and result in darker projected pictures.
Setting the projector in Economic mode also extends the lamp operation life. To set Economic mode, go into the SYSTEM SETUP: Advanced > Lamp Settings > Lamp Mode menu and press ◀ ▶
Setting Auto Power Off
This function allows the projector to turn off automatically if no input source is detected after a set period of time to prevent unnecessary waste of lamp life.
To set Auto Power Off, go into the SYSTEM SETUP: Basic > Operation Settings > Auto Power Off menu and press 🔍. The time period can be set from 5 to 30 minutes in 5-minute increments. If the preset time lengths are not suitable for your presentation, select Disable. The projector will not automatically shut down in a certain time period.
Timing of replacing the lamp
When the Lamp indicator lights up red or a message appears suggesting it is time to replace the lamp, please install a new lamp or consult your dealer. An old lamp may cause a malfunction in the projector and in some instances the lamp may explode.
Go to http://lamp.benq.com for a replacement lamp.

The Lamp indicator light will light up if the lamp becomes too hot. See "Indicators" on page 79 for details.
The following lamp warning displays will remind you to change the lamp.

The warning messages below are for reference only. Please follow the actual on-screen instructions to prepare and replace the lamp.
| Status Message | |
| Install a new lamp for optimal performance. If the projector is normally run with Economic selected ("Setting Lamp Mode as Economic" on page 74), you may continue to operate the projector until the next lamp warning appears.Press MODE/ENTER to dismiss the message. | 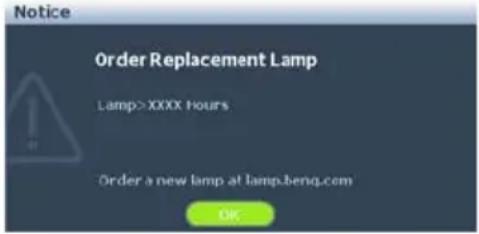 |
| A new lamp should be fitted to avoid the inconvenience when the projector runs out of lamp time.Press MODE/ENTER to dismiss the message. | 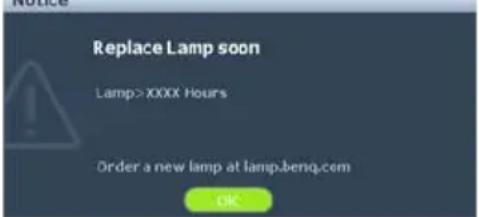 |
| It is strongly recommended that you replace the lamp at this stage. The lamp is a consumable item. The lamp brightness diminishes with use. This is normal lamp behavior. You can replace the lamp whenever you notice that the brightness level has significantly diminished.Press MODE/ENTER to dismiss the message. | 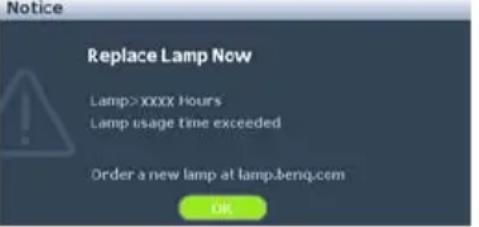 |
| The lamp MUST be replaced before the projector will operate normally.Press MODE/ENTER to dismiss the message. | 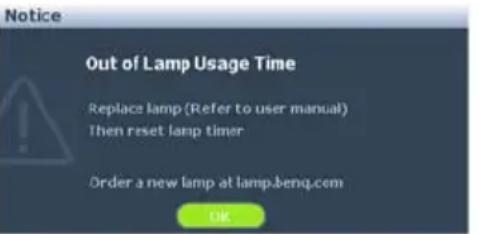 |

"XXXX" shown in the above messages are numbers that vary depending on different models.
Replacing the lamp
!
- Hg - Lamp contains mercury. Manage in accordance with local disposal laws. See www.lamprecycle.org.
- If lamp replacement is performed while the projector is suspended upside-down from the ceiling, make sure that no one is underneath the lamp socket to avoid any possible injury or damage to the human eyes caused by fractured lamp.
• To reduce the risk of electrical shock, always turn the projector off and disconnect the power cord before changing the lamp.
• To reduce the risk of severe burns, allow the projector to cool for at least 45 minutes before replacing the lamp.
- To reduce the risk of injuries to fingers and damage to internal components, use caution when removing lamp glass that has shattered into sharp pieces.
• To reduce the risk of injuries to fingers and/or compromising image quality by touching the lens, do not touch the empty lamp compartment when the lamp is removed.
- This lamp contains mercury. Consult your local hazardous waste regulations to dispose of this lamp in a proper manner.
• To assure optimal performance from the projector, it is recommended that you purchase a BenQ projector lamp for lamp replacement.
-
Turn the power off and disconnect the projector from the power outlet. If the lamp is hot, avoid burns by waiting for approximately 45 minutes until the lamp has cooled.
-
Loosen the screw that secures the lamp cover.
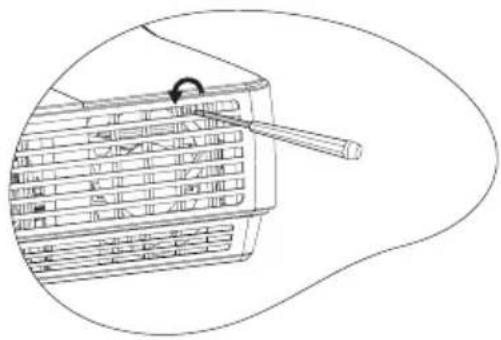
natural_image
Line drawing of a mechanical component with a lever and curved arrow indicating rotation (no text or symbols)- Remove the lamp cover by (a) sliding the cover toward the side of the projector and (b) lifting it off.

- Do not turn the power on with the lamp cover removed.
- Do not insert your fingers between the lamp and the projector. The sharp edges inside the projector may cause injuries.
-
Loosen the screws that secure the lamp.
-
Lift the handle so that it stands up. Use the handle to slowly pull the lamp out of the projector.

- Pulling it too quickly may cause the lamp to break and scatter broken glass in the projector.
- Do not place the lamp in locations where water might splash on it, children can reach it, or near flammable materials.
- Do not insert your hands into the projector after the lamp is removed. If you touch the optical components inside, it could cause color unevenness and distortion of the projected images.
- Insert the new lamp into the lamp compartment and make sure it fits in the projector.
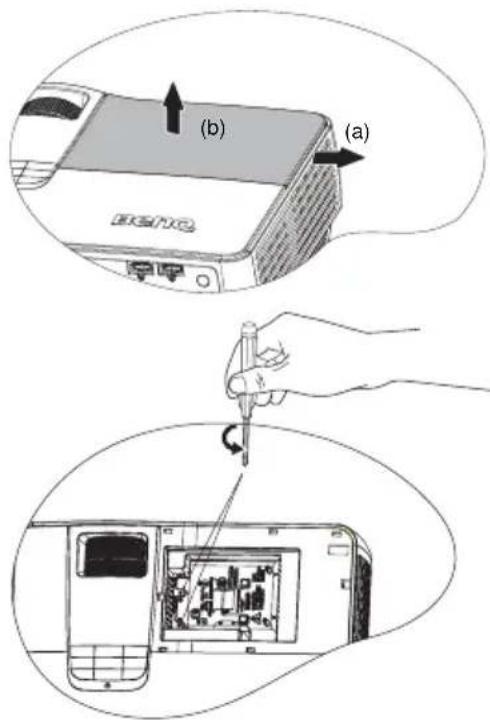
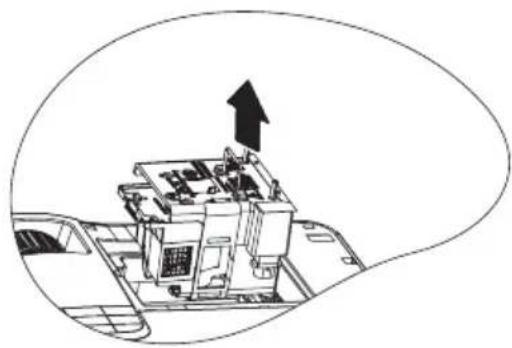
natural_image
Diagram of a military vehicle with an upward arrow indicating movement or force (no text or symbols present)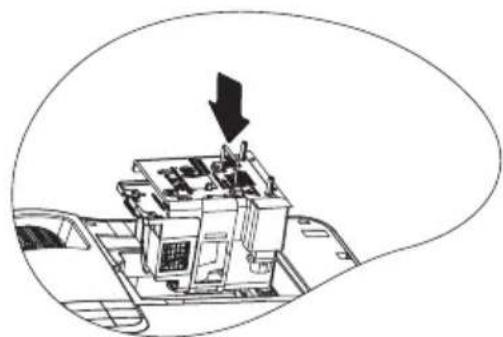
natural_image
Diagram of a mechanical device with an arrow pointing to a component (no text or symbols present)- Tighten the screws that secure the lamp.

- Loose screw may cause a bad connection, which could result in malfunction.
- Do not over tighten the screws.
-
Ensure the handle is fully laid flat and locked in place.
-
Replace the lamp cover by sliding it into place.
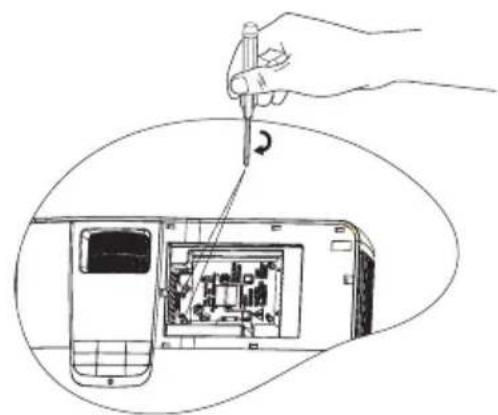
natural_image
Hand using a screwdriver to adjust internal components of an electronic device (no text or symbols visible)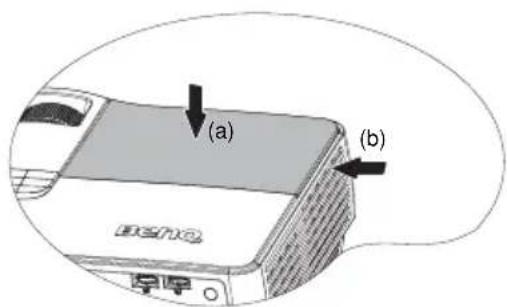
- Tighten the screw that secures the lamp cover.

- Loose screw may cause a bad connection, which could result in malfunction.
- Do not over tighten the screw.
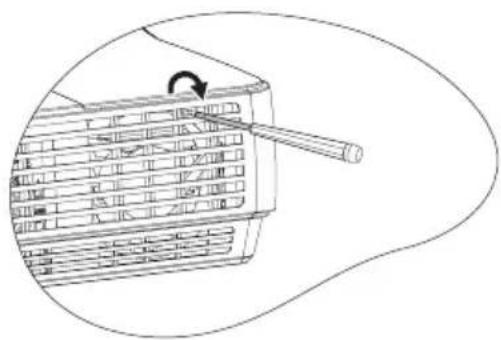
natural_image
Line drawing of a mechanical component with a curved arrow indicating rotation (no text or symbols)- Restart the projector.

Do not turn the power on with the lamp cover removed.
Resetting the lamp timer
- After the startup logo, open the On-Screen Display (OSD) menu. Go to the SYSTEM SETUP: Advanced > Lamp Settings menu. Press MODE/ENTER. The Lamp Settings page displays. Press ▼to highlight Reset Lamp Timer and press MODE/ENTER. A
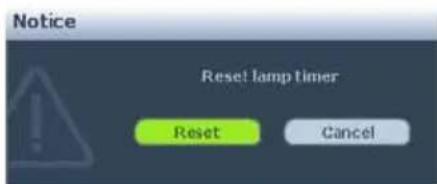
warning message displays asking if you want to reset the lamp timer. Highlight Reset and press MODE/ENTER. The lamp time will be reset to '0'.

Do not reset if the lamp is not new or replaced as this could cause damage.
Indicators
| Light Status & Description | |||
| POWER | TEMP LAMP | ||
| Power events | |||
| Red Off | Off | Stand-by mode | |
| Green Flashing | Off Off | Powering up | |
| Green Off Off | Normal operation | ||
| Red Flashing | Off Off | The projector needs to cool for 90 seconds after the power is turned off. | |
| Lamp events | |||
| Off Off | Red | The projector has shutdown automatically. If you try to re-start the projector, it will shutdown again. Please contact your dealer for assistance. | |
| Off Off | Red Flashing | 1. The projector needs 90 seconds to cool down. Or2. Please contact your dealer for assistance. | |
| Thermal events | |||
| Off | Red Flashing | Off | The projector has shutdown automatically. If you try to re-start the projector, it will shutdown again. Please contact your dealer for assistance. |
| Off Red Off | |||
| System events | |||
| Off | Red Flashing | Red Flashing | The projector has shutdown automatically. If you try to restart the projector, it will shutdown again. Please contact your dealer for assistance. |
| Off Red Red | |||
Troubleshooting
? The projector does not turn on.
| Cause Remedy | |
| There is no power from the power cable. | Plug the power cord into the AC inlet on the projector, and plug the power cord into the power outlet. If the power outlet has a switch, make sure that it is switched on. |
| Attempting to turn the projector on again during the cooling process. | Wait until the cooling down process has completed. |
⑦ No picture
| Cause Remedy | |
| The video source is not turned on or connected correctly. | Turn the video source on and check that the signal cable is connected correctly. |
| The projector is not correctly connected to the input signal device. | Check the connection. |
| The input signal has not been correctly selected. | Select the correct input signal with the SOURCE key on the projector or remote control. |
| The lens cover is still closed. Open the | lens cover. |
⑦ Blurred image
| Cause Remedy | |
| The projection lens is not correctly focused. | Adjust the focus of the lens using the focus ring. |
| The projector and the screen are not aligned properly. | Adjust the projection angle and direction as well as the height of the unit if necessary. |
| The lens cover is still closed. Open the lens cover. | |
⑦ Remote control does not work
| Cause Remedy | |
| The battery is out of power. Replace the battery with new one. | |
| There is an obstacle between the remote control and the projector. | Remove the obstacle. |
| You are too far away from the projector. | Stand within 8 meters (26 feet) of the projector. |
⑦ The password is incorrect
| Cause Remedy | |
| You do not remember the password. | Please see "Entering the password recall procedure" on page 27 for details. |
Specifications

All specifications are subject to change without notice.
Optical
Resolution
1920x1080, 1080p
Display system
1-CHIP DMD
Lens F/Number
F = 2.41 to 2.91
f = 20.72 to 31 mm
Lamp
280 W lamp
Electrical
Power supply
AC100-240V, 3.8A,
50-60 Hz (Automatic)
Power consumption
370 W (Max); < 1 W (Standby)
Mechanical
Weight
3.6 Kg (8 lbs)
Output terminals
RGB output
D-Sub 15-pin (female) x 1
Speaker
10 watt x 2
Audio output
3.5mm jack x 1
12V Trigger
3.5mm jack x 1
Control
RS-232 serial control
9 pin x 1
Type B USB x 1
(Supports firmware upgrade)
LAN control
RJ45 x 1 (wired)
Type A USB x 1 (wireless)
Input terminals
Computer input
RGB input
D-Sub 15-pin (female) x 1
Video signal input
HDMI
Screw type x 1
S-VIDEO
Mini DIN 4-pin port x 1
VIDEO
RCA jack x 1
SD/HDTV signal input
Component RCA jack x 3
Audio input
PC audio jack x 1
RCA jack x 2
Mini-B USB x 1
(Supports USB display)
Type A USB x 1
(Supports mouse/keyboard/card
reader)
Environmental Requirements
Operating temperature
0°C-35°C at sea level
Operating relative humidity
10%-90% (without condensation)
Operating altitude
0-1499 m at 0°C-35°C
1500-3000 m at 0°C-30°C (with High
Altitude Mode on)
Dimensions
339.2 mm (W) × 138.8 mm (H) × 260.6 mm (D)
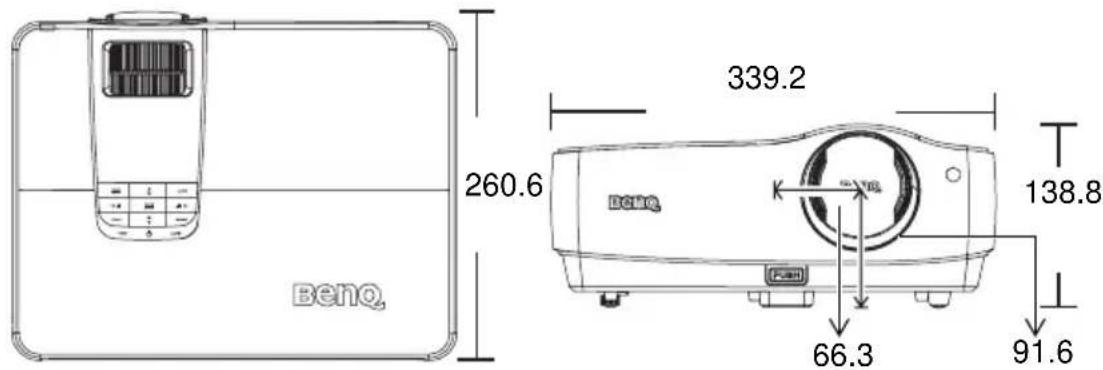
Ceiling mount installation
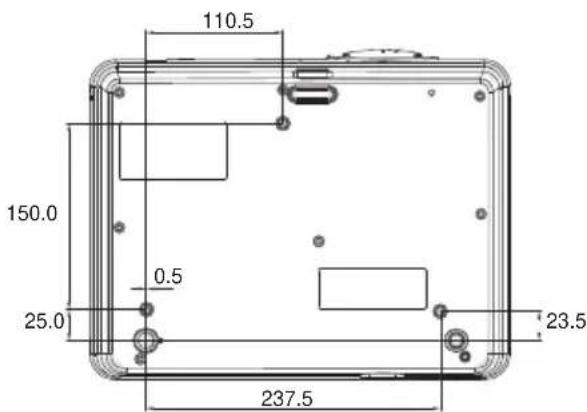
Ceiling mount screws:
M4 x 8 (Max. L = 8 mm)
Unit: mm
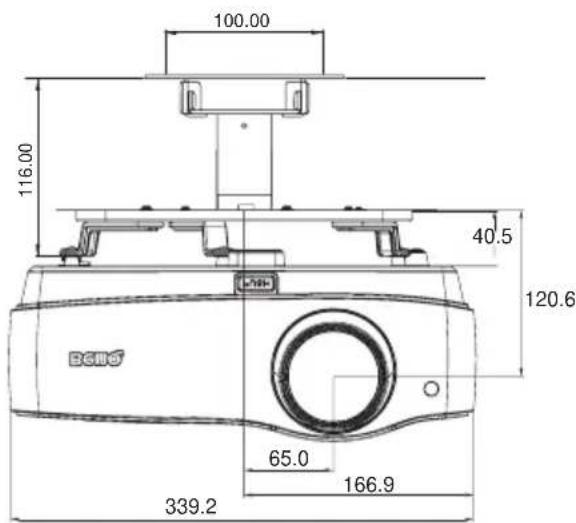
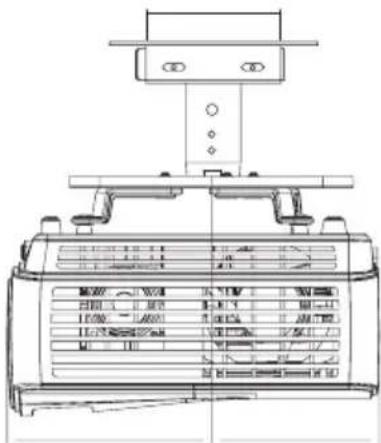
Timing chart
Supported timing for PC input
| Resolution Horizontal Frequency (kHz) | Vertical Frequency (Hz) | Pixel Frequency (MHz) | Mode | |
| 640 x 480 | 31.469 59.940 | 25.175 VGA_60 | ||
| 37.861 72.809 | 31.500 VGA_72 | |||
| 37.500 75.000 | 31.500 VGA_75 | |||
| 43.269 85.008 | 36.000 VGA_85 | |||
| 720 x 400 31.469 | 70.087 28.3221 720 | x 400_70 | ||
| 800 x 600 | 37.879 60.317 | 40.000 SVGA_60 | ||
| 48.077 72.188 | 50.000 SVGA_72 | |||
| 46.875 75.000 | 49.500 SVGA_75 | |||
| 53.674 85.061 | 56.250 SVGA_85 | |||
| 1024 x 768 | 48.363 60.004 | 65.000 XGA_60 | ||
| 56.476 70.069 | 75.000 XGA_70 | |||
| 60.023 75.029 | 78.750 XGA_75 | |||
| 68.667 84.997 | 94.500 XGA_85 | |||
| 1024 x 576 35.820 | 60.0 46.966 BenQ | |||
| 1024 x 600 41.467 | 64.995 51.419 BenQ | |||
| 1024 x 600@60Hz 37 | 32 60.00 48.964 | Notebook timing | ||
| 1280 x 800 | 49.702 59.810 | 83.500 WXGA_60 | ||
| 62.795 74.934 | 106.500 WXGA_75 | |||
| 71.554 84.880 | 122.500 WXGA_85 | |||
| 1280 x 1024 | 63.981 60.020 | 108.000 | SXGA_60 | |
| 79.976 75.025 | 135.000 | SXGA_75 | ||
| 91.146 85.024 | 157.500 | SXGA_85 | ||
| 1280 x 960 | 60.000 60.000 | 108 | 1280 x 960_60 | |
| 85.938 85.002 | 148.500 | 1280 x 960_85 | ||
| 1440 x 900 | 55.935 59.887 | 106.500 | WXGA+_60 | |
| 1400 x 1050 | 65.317 59.978 | 121.750 | SXGA+_60 | |
| 1600 x 1200 | 75.000 60.000 | 162.000 UXGA | ||
| 640 x 480@67Hz 35 | 000 66.667 30.240 MAC13 | |||
| 832 x 624@75Hz 49 | 722 74.546 57.280 MAC16 | |||
| 1024 x 768@75Hz | 60.241 75.020 | 80.000 MAC19 | ||
| 1152 x 870@75Hz 68 | 68 75.06 100.00 MAC21 | |||
| 640 x 480 61.910 | 119.518 | 52.500 VGA_120 | ||
| 800 x 600 | 77.425 | 119.854 | 83.000 | SVGA_120 |
| 1024 x 768 98.958 | 119.804 | 137.750 | XGA_120 | |
| 1280 x 800 | 101.563 | 119.909 | 146.250 | WXGA_120 |
Supported timing for HDMI input
| Resolution Horizontal Frequency (kHz) | Vertical Frequency (Hz) | Pixel Frequency (MHz) | Mode | |
| 640 x 480 | 31.469 59.940 | 25.175 VGA_60 | ||
| 37.861 72.809 | 31.500 VGA_72 | |||
| 37.500 75.000 | 31.500 VGA_75 | |||
| 43.269 85.008 | 36.000 VGA_85 | |||
| 61.910 119.51 | 8 52.500 VGA_120 | |||
| 720 x 400 31.469 | 70.087 28.3221 720 | x 400_70 | ||
| 800 x 600 | 35.156 56.250 | 36.000 SVGA_56 | ||
| 37.879 60.317 | 40.000 SVGA_60 | |||
| 48.077 72.188 | 50.000 SVGA_72 | |||
| 46.875 75.000 | 49.500 SVGA_75 | |||
| 53.674 85.061 | 56.250 SVGA_85 | |||
| 77.425 119.85 | 4 83.000 SVGA_120 | |||
| 1024 x 768 | 48.363 60.004 | 65.000 XGA_60 | ||
| 56.476 70.069 | 75.000 XGA_70 | |||
| 60.023 75.029 | 78.750 XGA_75 | |||
| 68.667 84.997 | 94.500 XGA_85 | |||
| 98.958 119.80 | 4 137.750 XGA_120 | |||
| 1152 x 864 67.500 | 75.00 108.000 1152 | x 864_75 | ||
| 1280 x 768 | 47.396 60 | 68.25 | 1280 x 768_60 | |
| 47.776 59.870 | 79.5 | 1280 x 768_60 | ||
| 60.289 74.893 | 102.25 1280 x 768_75 | |||
| 68.633 84.837 | 117.50 1280 x 768_85 | |||
| 1280 x 800 | 49.702 59.810 | 83.500 WXGA_60 | ||
| 62.795 74.934 | 106.500 | WXGA_75 | ||
| 71.554 84.880 | 122.500 | WXGA_85 | ||
| 101.563 119.909 | 146.250 | WXGA_120 | ||
| 1280 x 1024 | 63.981 60.020 | 108.000 | SXGA_60 | |
| 79.976 75.025 | 135.000 | SXGA_75 | ||
| 91.146 85.024 | 157.500 | SXGA_85 | ||
| 1280 x 960 | 60.000 60.000 | 108 | 1280 x 960_60 | |
| 85.938 85.002 | 148.500 1280 x 960_85 | |||
| 1360 x 768 47.712 | 60.015 85.500 1360 | x 768_60 | ||
| 1440 x 900 | 55.469 60 | 88.75 | WXGA+_60 | |
| 55.935 59.887 | 106.500 | WXGA+_60 | ||
| 70.635 74.984 | 136.75 | WXGA+_75 | ||
| 80.430 84.842 | 157.000 | WXGA+_85 | ||
| 1400 x 1050 | 65.317 59.978 | 121.750 | SXGA+_60 | |
| 1600 x 1200 | 75.000 60.000 | 162.000 | UXGA | |
| 1680 x 1050 | 64.674 59.883 | 119.000 | 1680 x 1050_60 | |
| 65.290 59.954 | 146.250 | 1680 x 1050_60 | ||
| 1920 x 1200 | 74.038 59.950 | 154.000 | 1920 x 1200_60 | |
| 640 x 480@67Hz | 35.000 66.667 | 30.240 MAC13 | ||
| 832 x 624@75Hz | 49.722 74.546 | 57.280 MAC16 | ||
| 1024 x 768@75Hz | 60.241 75.020 | 80.000 MAC19 | ||
| 1152 x 870@75Hz | 68.68 | 75.06 100.00 | MAC21 | |
| 1024 x 576@60Hz | 35.820 60.00 | 46.996 | Notebook timing | |
| 1024 x 600@60Hz | 37.32 | 60.00 48.964 | Notebook timing | |
| 1024 x 600@65Hz | 41.467 64.995 | 51.419 | Notebook timing | |
| VIDEO (HDCP) | 15.73 59.94 27 480i | ||
| 15.63 50i 27 576i | |||
| 31.47 59.94 27 480p | |||
| 31.25 50p 27 576p | |||
| 44.96 59.94 74.25 720p60 | |||
| 37.50 50p 74.25 720p50 | |||
| 26.97 23.98 74.25 1080/24P | |||
| 28.13 25 74.25 1080/25P | |||
| 33.72 29.97 74.25 1080/30P | |||
| 67.43 59.94 148.5 1080p60 | |||
| 56.25 50p 148.5 1080p50 |

Displaying a 1080i(1125i)@60Hz or 1080i(1125i)@50Hz signal may result in slight image vibration.
Supported timing for Component-YPbPr input
| Signal Format Horizontal Frequency (kHz) | Vertical Frequency (Hz) | |
| 480i 15.73 | 59.94 | |
| 480p | 31.47 | 59.94 |
| 576i 15.63 | 50.00 | |
| 576p | 31.25 | 50.00 |
| 720/50p | 37.5 50.00 | |
| 720/60p | 44.96 | 59.94 |
| 1080/24P | 26.97 | 23.98 |
| 1080/25P | 28.125 | 25 |
| 1080/30P | 33.72 | 29.97 |
| 1080/50P | 56.25 | 50 |
| 1080/60P | 67.43 | 59.94 |
Supported timing for Video and S-Video inputs
| Video mode | Horizontal Frequency (kHz) | Vertical Frequency (Hz) | Color sub-carrier Frequency (MHz) |
| NTSC | 15.73 | 60 | 3.58 |
| PAL | 15.63 | 50 | 4.43 |
| SECAM | 15.63 | 50 | 4.25 or 4.41 |
| PAL-M | 15.73 | 60 | 3.58 |
| PAL-N | 15.63 | 50 | 3.58 |
| PAL-60 | 15.73 | 60 | 4.43 |
| NTSC4.43 | 15.73 | 60 | 4.43 |
Warranty and Copyright information
Patents for SH910
This BenQ projector is covered by the following patents:
U.S. patents 6,837,608; 7,275,834; 7,181,318; TW patents 202690; 205470; I228635; I259932;
China Patents (中国发明专利) ZL01143168.7; ZL03119907.0; ZL200510051609.2
Limited warranty
BenQ warrants this product against any defects in material and workmanship, under normal usage and storage.
Proof of purchase date will be required with any warranty claim. In the event this product is found to be defective within the warranty period, BenQ's only obligation and your exclusive remedy shall be replacement of any defective parts (labor included). To obtain warranty service, immediately notify the dealer from which you purchased the product of any defects.
Important: The above warranty shall be void if the customer fails to operate the product in accordance with BenQ's written instructions, especially the ambient humidity must be in-between 10% and 90%, temperature in-between 0°C and 35°C, altitude lower than 4920 feet, and avoiding to operate the projector in a dusty environment. This warranty gives you specific legal rights, and you may have other rights which vary from country to country.
For other information, please visit www.BenQ.com.
Copyright
Copyright 2010 by BenQ Corporation. All rights reserved. No part of this publication may be reproduced, transmitted, transcribed, stored in a retrieval system or translated into any language or computer language, in any form or by any means, electronic, mechanical, magnetic, optical, chemical, manual or otherwise, without the prior written permission of BenQ Corporation.
Disclaimer
BenQ Corporation makes no representations or warranties, either expressed or implied, with respect to the contents hereof and specifically disclaims any warranties, merchantability or fitness for any particular purpose. Further, BenQ Corporation reserves the right to revise this publication and to make changes from time to time in the contents hereof without obligation to notify any person of such revision or changes.
* DLP, Digital Micromirror Device and DMD are trademarks of Texas Instruments. Others are copyrights of their respective companies or organizations.
Regulation statements
FCC statement
CLASS B: This equipment generates, uses and can radiate radio frequency energy and, if not installed and used in accordance with the instructions, may cause harmful interference to radio communications. However, there is no guarantee that interference will not occur in a particular installation. If this equipment does cause harmful interference to radio or television reception, which can be determined by turning the equipment off and on, the user is encouraged to try to correct the interference by one or more of the following measures:
— Reorient or relocate the receiving antenna.
— Increase the distance between the equipment and receiver.
— Connect the equipment into an outlet on a circuit different from that to which the receiver is connected.
— Consult the dealer or an experienced radio/TV technician for help.
EEC statement (for European users)
This device complies with the requirements set out in the Council Directives on the Approximation of the Laws of the Member States relating Electromagnetic Compatibility (2004/108/EC), Low Voltage Directive (2006/95/EC), the Restriction of The Use of Certain Hazardous Substances in Electrical And Electronic Equipment Directive (2002/95/EC), Turkish EEE Directive, Commission Regulation (EC) No 1275/2008 implementing Directive 2005/32/EC of the European Parliament and of the Council with regard to ecodesign requirements for standby and off mode electric power consumption of electrical and electronic household and office equipment, and the Directive 2009/125/EC of the European parliament and of the council establishing a framework for the setting of ecodesign requirements for energy-related products.
WEEE directive
Disposal of Waste Electrical and Electronic Equipment by users in private households in the European Union.
This symbol on the product or on the packaging indicates that this can not be disposed of as household waste. You must dispose of your waste equipment by handling it over to the applicable take-back scheme for the recycling of electrical and electronic equipment. For more information about recycling of this equipment, please contact your city office, the shop where you purchased the equipment or your household waste disposal service. The recycling of materials will help to conserve natural resources and ensure that it is recycled in a manner that protects human health and environment.
Accessibility Requirements for Rehabilitation Act of 1973, Section 508
BenQ's commitment to accessible products allows us to support government in making accessible technology choices BenQ's LCD monitors and projectors are compliant with Section 508 guidelines by including the assistive features as below:
- BenQ's monitors have colored "Power" indicators. While the indicator shows green, it means that the monitor is using the full power. While the indicator shows yellow or amber, it means that the monitor is in suspend or sleep mode and is using less than 2 watts of electricity.
- BenQ's monitors have a variety of settings of pre-programmed flicker-free timing to make the screen shown on the monitor readily accessible. The default timing setting is automatically turned on every time the monitor is powered up, and thus reduces the hassle of user intervention.
- BenQ's monitors and projectors have options for brightness and contrast adjustments that text and images could be displayed differently to meet the demands of the visually impaired. Other similar adjustments are also available by using the On-Screen Display (OSD) controls on the products.
- BenQ's monitors and projectors include user-selectable color controls, such as color temperature selections (Monitor: 5800K, 6500K and 9300K, Projector: 5500K, 6500K, 7500K and 9300K), with a wide range of contrast levels.
- BenQ's multimedia monitors and projectors usually have one or two speakers for audio performance which allow users (including hearing impaired) to interact with the computer systems connected. Speaker controls are typically located on the front-panel.
- Firmware of BenQ's monitors and projectors contain unique product information that helps computer systems to identify BenQ products and activate their Plug-and-Play function when connected.
- All BenQ's monitors and projectors are compatible with the PC99 standard. For example, connectors are color-coded to help users easily connecting products to computer systems correctly.
- Some models of BenQ's monitors and projectors contain additional USB and DVI ports for connection to more devices such as a special headphone to assist the hearing impaired.
- All BenQ monitors and projectors come with user manuals on compact discs which could be easily read by commercial software such as Adobe Reader via a connected computer system. These documents are also available on the BenQ's web site (www.BenQ.com http://www.BenQ.com). Other types of documents may be available upon requests.
- BenQ's customer service provides answers and assistance to all our customers through phone calls, facsimiles, e-mails, or web sites.
• The mains lead (power cable) on the Projector comes with a moulded plug incorporating a fuse.
- The rating of the fuse is indicated on the pin face of the plug and, if it requires replacing, a fuse approved by ASTA or BSI to BS 1362 of the same rating must be used.
- If the plug has a detachable fuse cover, remember to place the fuse cover back if you need to change the fuse.
- Do NOT use a plug without the fuse cover. If the fuse cover is missing, contact your nearest BenQ Customer Service Center for assistance.
- Positioning your projector15
- Connection ......19
- Operation ......22
- Maintenance....73
- Troubleshooting ....80
- Specifications ....81
- Warranty and Copyright information......86
- Regulation statements .....87
- Important safety instructions
- Safety Instructions
- Safety Instructions (Continued)
- Introduction
- Projector features
- Shipping contents
- Standard accessories
- Optional accessories
- Projector exterior view
- Controls and functions
- Projector
- Focus ring
- Zoom ring
- Keystone/Arrow keys (/ Up
- MENU/EXIT
- Volume/Arrow keys (/ Left,
- BLANK
- TEMPerature indicator light
- Power/POWER indicator light
- LAMP indicator light
- Source
- AUTO
- MODE/ENTER
- ⚠️ Ceiling mounting the projector
- Remote control
- AUTO
- Arrow keys ( ◀ e ▶ f t , Right)
- LASER
- Volume
- MUTE
- ASPECT
- MIC/VOL
- INFO
- Operating the LASER pointer
- Replacing the remote control battery
- Positioning your projector Choosing a location
- Front Table
- Front Ceiling
- Rear Table
- Rear Ceiling
- Obtaining a preferred projected image size
- How to determine the position of the projector for a given screen size
- How to determine the recommended screen size for a given distance
- Projection dimensions
- Connection
- Connecting Video source devices
- Operation
- Starting up the projector
- Adjusting the projected image
- Adjusting the projection angle
- Auto-adjusting the image
- Fine-tuning the image size and clarity
- Correcting keystone
- Using the menus
- Securing the projector
- Using a security cable lock
- Utilizing the password function
- Setting a password
- If you forget the password
- Entering the password recall procedure
- Changing the password
- Disabling the password function
- Switching input signal
- Changing Color Space
- Magnifying and searching for details
- Selecting the aspect ratio
- About the aspect ratio
- Optimizing the image
- Selecting a picture mode
- Setting the User 1/User 2 mode
- Using Wall Color
- Fine-tuning the image quality in user modes
- Adjusting Brightness
- Adjusting Contrast
- Adjusting Color
- Adjusting Tint
- Adjusting Sharpness
- Adjusting Brilliant Color
- Selecting a Color Temperature
- \*About color temperatures:
- 3D Color Management
- To adjust the settings:
- Remote paging operations
- Hiding the image
- Setting the Sleep Timer
- Freezing the image
- Operating in a high altitude environment
- Adjusting the sound
- Muting the sound
- Turning off the Power on/off ring tone
- Adjusting the microphone's sound level
- Turning on/off the SRS
- Displaying more than one image source simultaneously
- Personalizing the projector menu display
- Shutting down the projector
- Controlling the projector through a LAN environment
- Configuring the Wired LAN Settings
- If you are in a DHCP environment:
- Configuring the Wireless LAN Settings
- Controlling the projector remotely through a web browser
- Displaying image through Q Presenter
- Be sure to turn off other virtual network control programs before using Q Presenter.
- Using the Web Control Lock
- Using the Projection Login Code
- Presenting From a USB Reader
- Preparation
- Remote Desktop Control through Q Presenter
- Menu operation
- Menu system
- Description of each menu
- Maintenance
- Care of the projector
- Cleaning the lens
- Cleaning the projector case
- Storing the projector
- Transporting the projector
- Lamp information
- Getting to know the lamp hour
- Extending lamp life
- Setting Lamp Mode as Economic
- Setting Auto Power Off
- Timing of replacing the lamp
- Replacing the lamp
- !
- Resetting the lamp timer
- Troubleshooting
- Specifications
- Optical
- Electrical
- Mechanical
- Output terminals
- Control
- Input terminals
- Environmental Requirements
- Dimensions
- Ceiling mount installation
- Timing chart
- Warranty and Copyright information
- Patents for SH910
- Limited warranty
- Copyright
- Disclaimer
- Regulation statements
- FCC statement
- EEC statement (for European users)
- WEEE directive
- Accessibility Requirements for Rehabilitation Act of 1973, Section 508
Brand : BENQ
Model : 9H.J4J77.35L
Category : Video projector