MK1200TPH - Uncategorized Cylinda - Free user manual and instructions
Find the device manual for free MK1200TPH Cylinda in PDF.


| Product Type | Mini Kitchen (Compact Kitchen) |
| Brand | Cylinda |
| Model | MK1200TPH |
| Dimensions (Height x Depth x Width) | 900 mm x 610 mm x 1200 mm |
| Power Supply | 230 V ~ 50 Hz, 10 A |
| Number of Hot Plates | 2 |
| Hot Plate 1 Diameter / Power | 145 mm / 1000 W |
| Hot Plate 2 Diameter / Power | 180 mm / 1200 W |
| Total Hot Plate Power | 2200 W |
| Timer | Up to 60 minutes with automatic shut-off |
| Controls | 7-position rotary switch |
| Refrigerator Net Volume | 102 L |
| Refrigerator Energy Class | F |
| Refrigerant | R600a / 21 g |
| Sink Material | Stainless Steel EN1.4301 (SS2333) |
| Installation Requirements | Firm foundation; do not install inside a cupboard |
| Safety Features | Automatic timer shut-off; child safety warnings |
| Cleaning Instructions | Use damp cloth with mild detergent; avoid chlorine and abrasive cleaners |
| Compliance | CE, Low Voltage Directive 73/23/EEC and EMC |
| Included Accessories | Adjustable feet, water trap, valves |
Frequently Asked Questions - MK1200TPH Cylinda
User questions about MK1200TPH Cylinda
0 question about this device. Answer the ones you know or ask your own.
Ask a new question about this device
Download the instructions for your Uncategorized in PDF format for free! Find your manual MK1200TPH - Cylinda and take your electronic device back in hand. On this page are published all the documents necessary for the use of your device. MK1200TPH by Cylinda.
USER MANUAL MK1200TPH Cylinda
natural_image
Simple line drawing of a kitchen appliance with oven, refrigerator, and washing machine (no text or symbols)MK1000TPV MK1200TPV
MK1000TPH MK1200TPH
Cylinda
år efter år
| SVENSKA | ENGLISH | ||
| Beskrivning | 3 Description | 4 | |
| Modeller | 4 | Models | 3 |
| Säkerhet | 6 | Safety | 12 |
| Uppackning | 8 | Unpacking | 14 |
| Installation | 8 | Installation | 14 |
| Användning | 9 | Use | 15 |
| Underhåll | 9 | Maintenance | 15 |
| Driftsproblem | 10 | Troubleshooting | 16 |
| Service | 10 | Service | 16 |
| Demontering | 10 | Demounting | 16 |
| Tekniska data | Technical data | 17 | |
| Återvinning | 11 | Recycling | 17 |
| Demontering av kylskåp 18 | Demounting the fridge | 18 | |
Beskrivning | Description
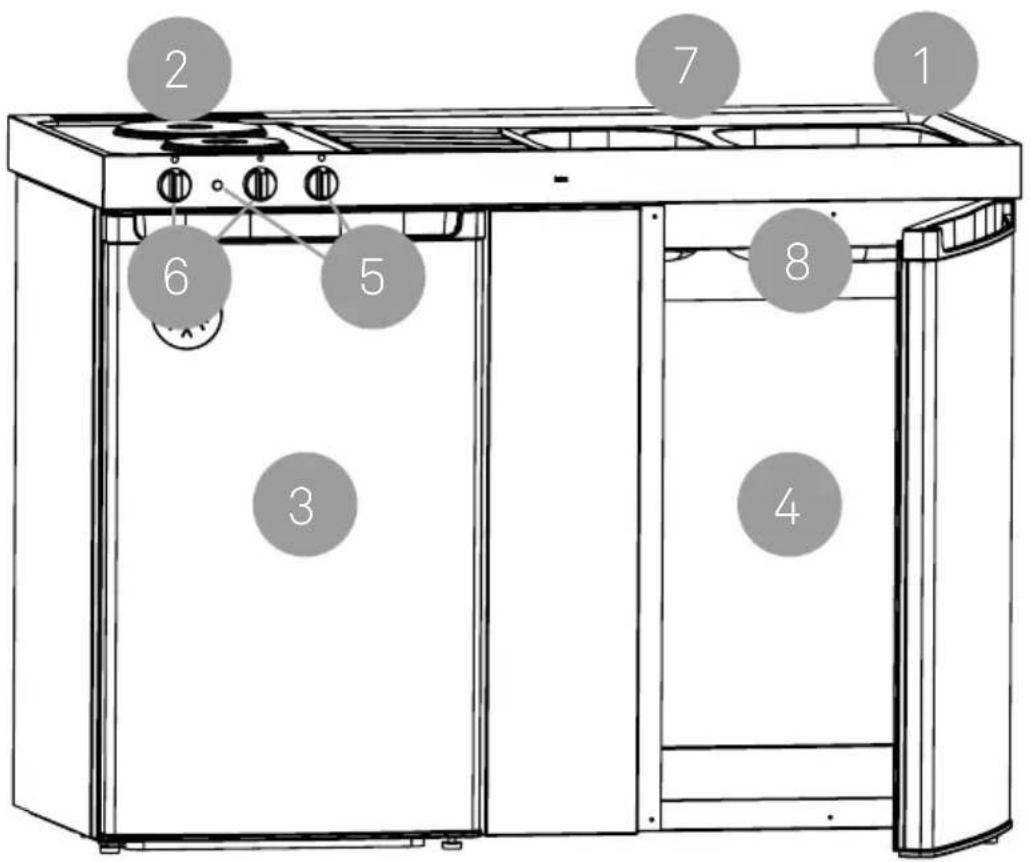
1 Rostfri diskbänk Stainless steel sink unit
2 Kokplattor Hot plates
3 Kylskåp/förvaring Fridge (or storage cupboard)
natural_image
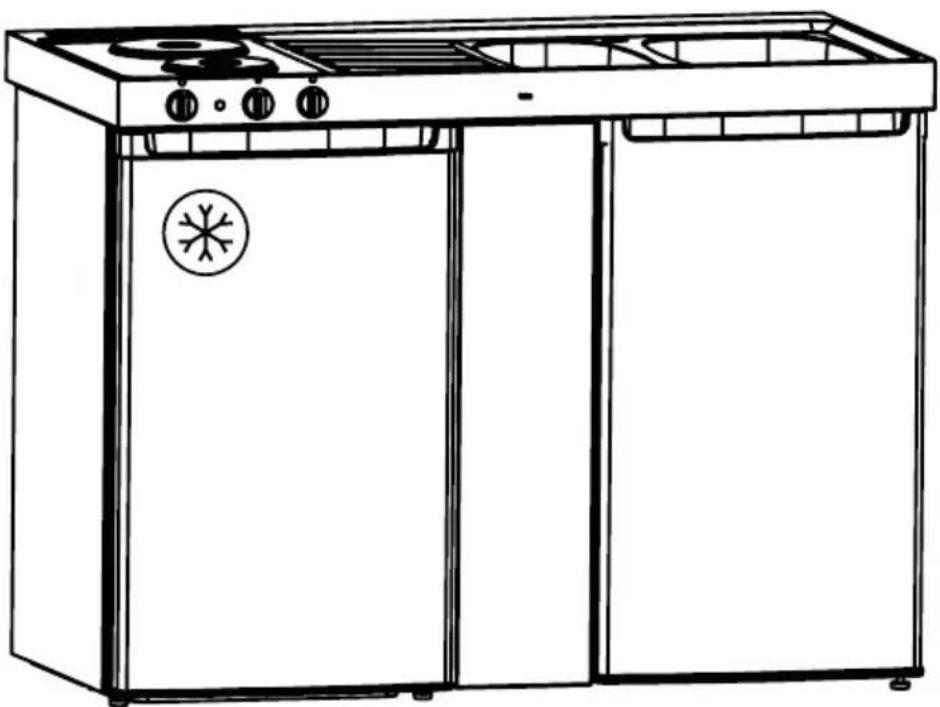
Line drawing of a two-door kitchen appliance with visible steamers and a snowflake logo, shown with a 900 mm scale indicator (no text or symbols on the device itself)MK1200TPV MK1200TPH
natural_image
Line drawing of a two-door kitchen appliance with a snowflake logo on the door (no text or symbols)900 mm
natural_image
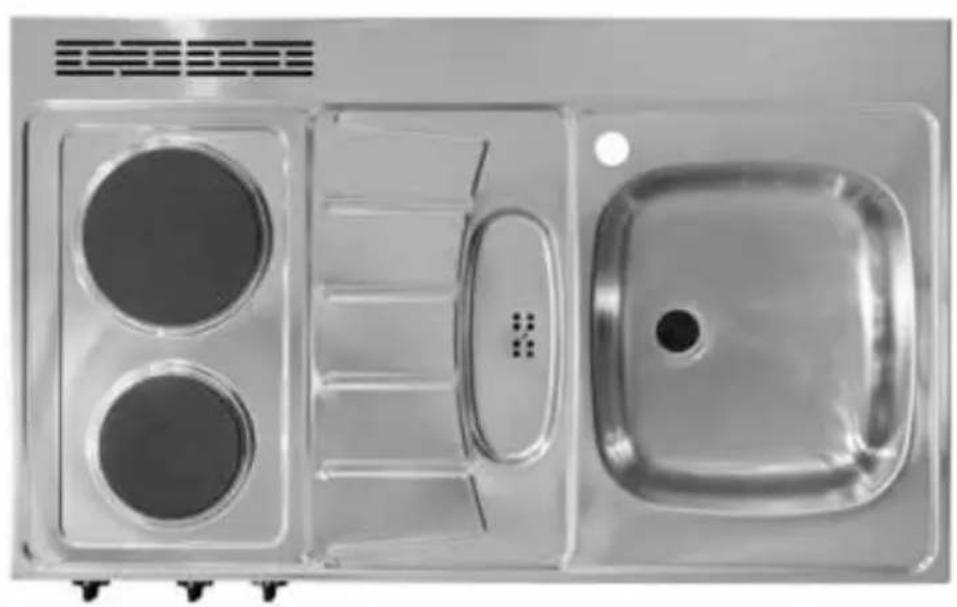
Top-down view of a transparent plastic tray with two circular cutouts and a central oval, alongside a square sink (no text or symbols visible)ww 009
1000 mm
natural_image
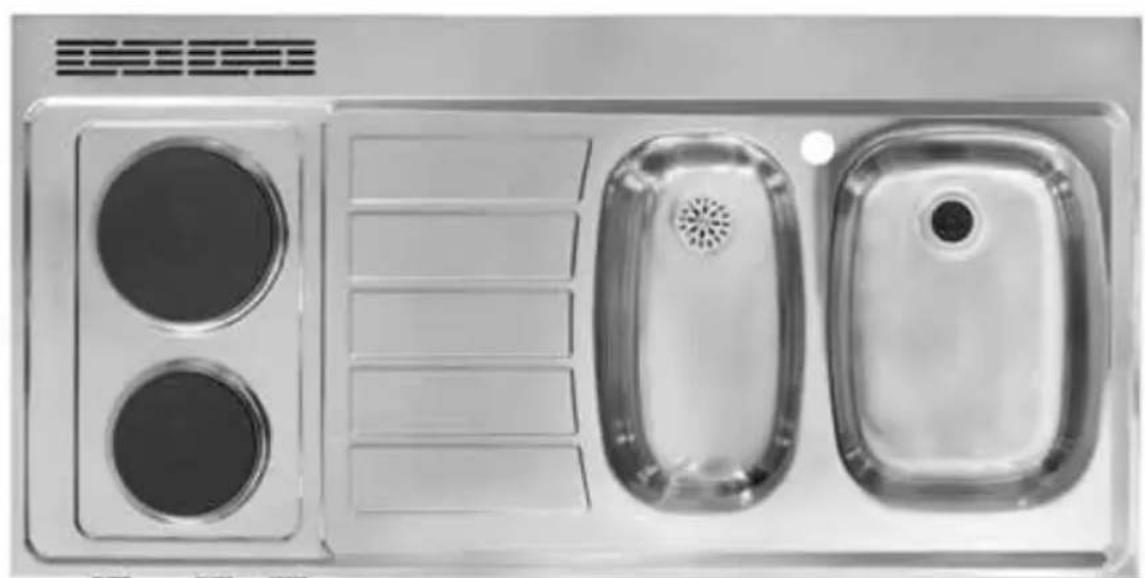
Top-down view of a stainless steel kitchen appliance showing two circular vented outlets and two empty sink compartments (no text or symbols visible)ww 009
1200 mm
Please read these instructions thoroughly. Ensure that your mini kitchen has been installed and is used correctly.
Safety
Safety for children and people with disabilities
- Appliance not to be used by children under the age of 8 without appropriate supervision.
- This appliance can be used by children 8 years and above, and persons with reduced physical, sensory or mental capabilities providing they are correctly supervised or given instructions concerning its use in a safe way, and also understand the potential hazards involved.
- Remember to always place pots and pans on the hot plates with the handles pointing towards the wall, out of reach for children.
- Do not allow children to play with the mini kitchen.
- Cleaning and user maintenance shall not be carried out by children without supervision.
- Keep children and pets away from the appliance when it is in use or while cooling. Accessible parts can be extremely hot.
General safety
- All work on the mini kitchen must be carried out by a professional.
- Be careful when moving the unit, as it is heavy!
- Take care with the electric cables and ensure that the unit is not placed on top of them.
- The appliance and its accessible parts become hot during use.
- The mini kitchen may not be used with an external timer or separate remote control system.
- WARNING: Unattended cooking with fat or oil may be dangerous and could cause a fire.
- NEVER try to extinguish a fire with water, switch off the appliance and then cover flame e.g. with a lid or a fire blanket.
- WARNING: Danger of fire; do not store items on the cooking surface.
- Do not use a steam cleaner for cleaning the product.
- Hazardous liquids should not be stored in the cupboard.
- The mini kitchen is designed for normal indoor use only. It may not be used as a heat source.
Unpacking
Check that the unit is undamaged and complete. Any transportation damage must be reported immediately to the delivery firm. If any part is missing on delivery, contact your dealer. Read all instructions carefully.
The unit should always be lifted by two people. Lift from underneath the cupboards. Alternatively, open the cupboard doors and grip inside the cupboards and in the galvanised section at the back of the sink unit. Avoid lifting the whole unit by the sink unit only, as this may result in damage.
Packaging
The packaging material is recyclable and should be taken to your local recycling centre.
Installation
Use
The mini kitchen is intended for normal household use only.
Location
The unit should be placed indoors at a temperature of 12–32°C. Mini kitchens must never, under any circumstances, be installed inside a cupboard. Make sure that any tiling work does not make it difficult to pull the unit out. Any damage arising from faulty installation is not covered by the warranty.
Mini Kitchen
The mini kitchen must be installed on a firm foundation. If the unit includes a fridge, there are two adjustable feet at the front. There are a further two adjustable feet in the end-piece of the storage cupboard. Adjust the feet to make the unit horizontally level, based on the fixed feet on the back of the refrigerator.
Hob/sink unit
The unit is mounted onto the base cupboard using the holes on the underside of the unit. Remember that the bottom of the hob unit gets hot. Therefore, make sure the base cupboard has a ceiling to prevent materials stored in the cupboard from coming into contact with the underside of the hob. The unit has one cable with an earthed plug.
Plumbing
The units are supplied with valves and water traps with flexible hosing. The sink unit is fitted with a ∅35 mm hole for taps.
NB:
The units must never, under any circumstances, be installed inside a cupboard. In most cases the sink unit comes with a protective plastic film, which must be removed before use. Compact kitchens with fridges have two cables (hot plates and fridge) with earthed plugs.
Use
Timer
For safety reasons the unit is fitted with a timer as standard. The hot plates switch off automatically after a pre-set time. The timer has to be turned on before the hot plates can be used. Always turn the timer up to the maximum and then back to the required time. Remember to set the knob for the hot plates and timer back to 0 after use.
The mini kitchen is not intended for operation by means of external timer or separate remote control.
Hot plates
The hot plates are controlled using a 7-position switch (six heat settings and 0). Only use pots and pans with a completely flat bottom and with a diameter suitable for each hot plate.
Fridge
See the separate instructions that come with the fridge.
Maintenance
Sink unit
Regular cleaning is recommended to help the sink unit, made of stainless steel EN1.4301 (SS 2333), maintain its finish for as long as possible.
- Wipe off the sink unit after use. Use a damp cloth with a small amount of washing-up detergent, and rinse carefully with clean water.
- Do not allow water or other liquids to
dry on as this may leave marks on the surface.
- Although stainless steel is very durable, sharp objects can easily scratch it.
- Never use scouring powder or steel wool to clean the surface. Apart from scratching, rust may also form.
- Do not allow chlorine solutions to come into contact with the sink unit.
• Silver polish may leave marks that cannot be removed. - Food products containing acids or other substances that can harm stainless steel should be wiped up as soon as possible (e.g. juices, salt, mustard, mayonnaise). If marks appear despite regular cleaning, this may be due to strong cleaning chemicals or liquids used in cooking. Stubborn marks can be removed using special polishes designed for stainless steel. We recommend Intra Shining Kit. Polishing with chalk powder on a soft cloth can restore the shine to dull areas.
- Do not place hot pots and pans directly on the stainless steel top. Use heat protection or place it on the hot plates.
Hot plates
Use cleaning products designed specially for hot plates.
Fridge
See the separate instructions that come with the fridge.
Troubleshooting | Service | Detaching the fridge
Troubleshooting
The hot plates does not work
Is the compact kitchen connected properly? (Two plugs, one each for the hob unit and one for the fridge.) Check the fuse in the main junction box. Ensure the timer and hot plate knob are turned on.
Fridge
Is the mini kitchen connected properly? (Two plugs, one each for the hob unit and the fridge.) See the separate instructions that come with the fridge.
If none of the above rectifies the problem, call a service engineer.
Service
Servicing and spare parts are available through our dealers. Always state the model designation when contacting the service workshop.
Detaching the fridge
The fridge can be detached without pulling the entire compact kitchen out. See separate picture at the end of this booklet.
Technical data for Mini Kitchen
| Mini kitchen according to technical data below | |
| Cupboard 1 metal cupboard | |
| Fridge Net volume: 102 L **** Energy class: F | Cooling media: R600a/21g |
| Dimensions Height: 900 mm | Depth: 610 mmWidth: 1000-1200 mm depending on model |
Technical data for Pantry
| Electricity connection 230V 50Hz 10A. Plug with protective ground | |
| Hot plates(1 or 2) | ∅145; power 1000 W∅180; power 1200 W |
| Power 1000–2200 W | |
| Timer < 60 min | |
| Controls 7-position switch | |
| Dimensions Depth: 610 mm | Width: 1000-1200 mm depending on model |
| CE | The unit fulfils the following standards:EN60335-1:94 and EN60335-2-6:99 in accordance with low voltage directives 73/23/EEC and 93/68/EEC.EN55014-1, EN61000-3-2 and EN61000-3-3 in accordance with directives on electromagnetic compatibility 89/336/EEC, 92/31/EEC and 93/68/EEC. |
Recycling
A large part of the material in the mini kitchen can be recycled. Destroy it according to the waste management regulations that apply in your country. Before scrapping the hob unit, cut off the power cord to make it unusable.
Detaching the pantry
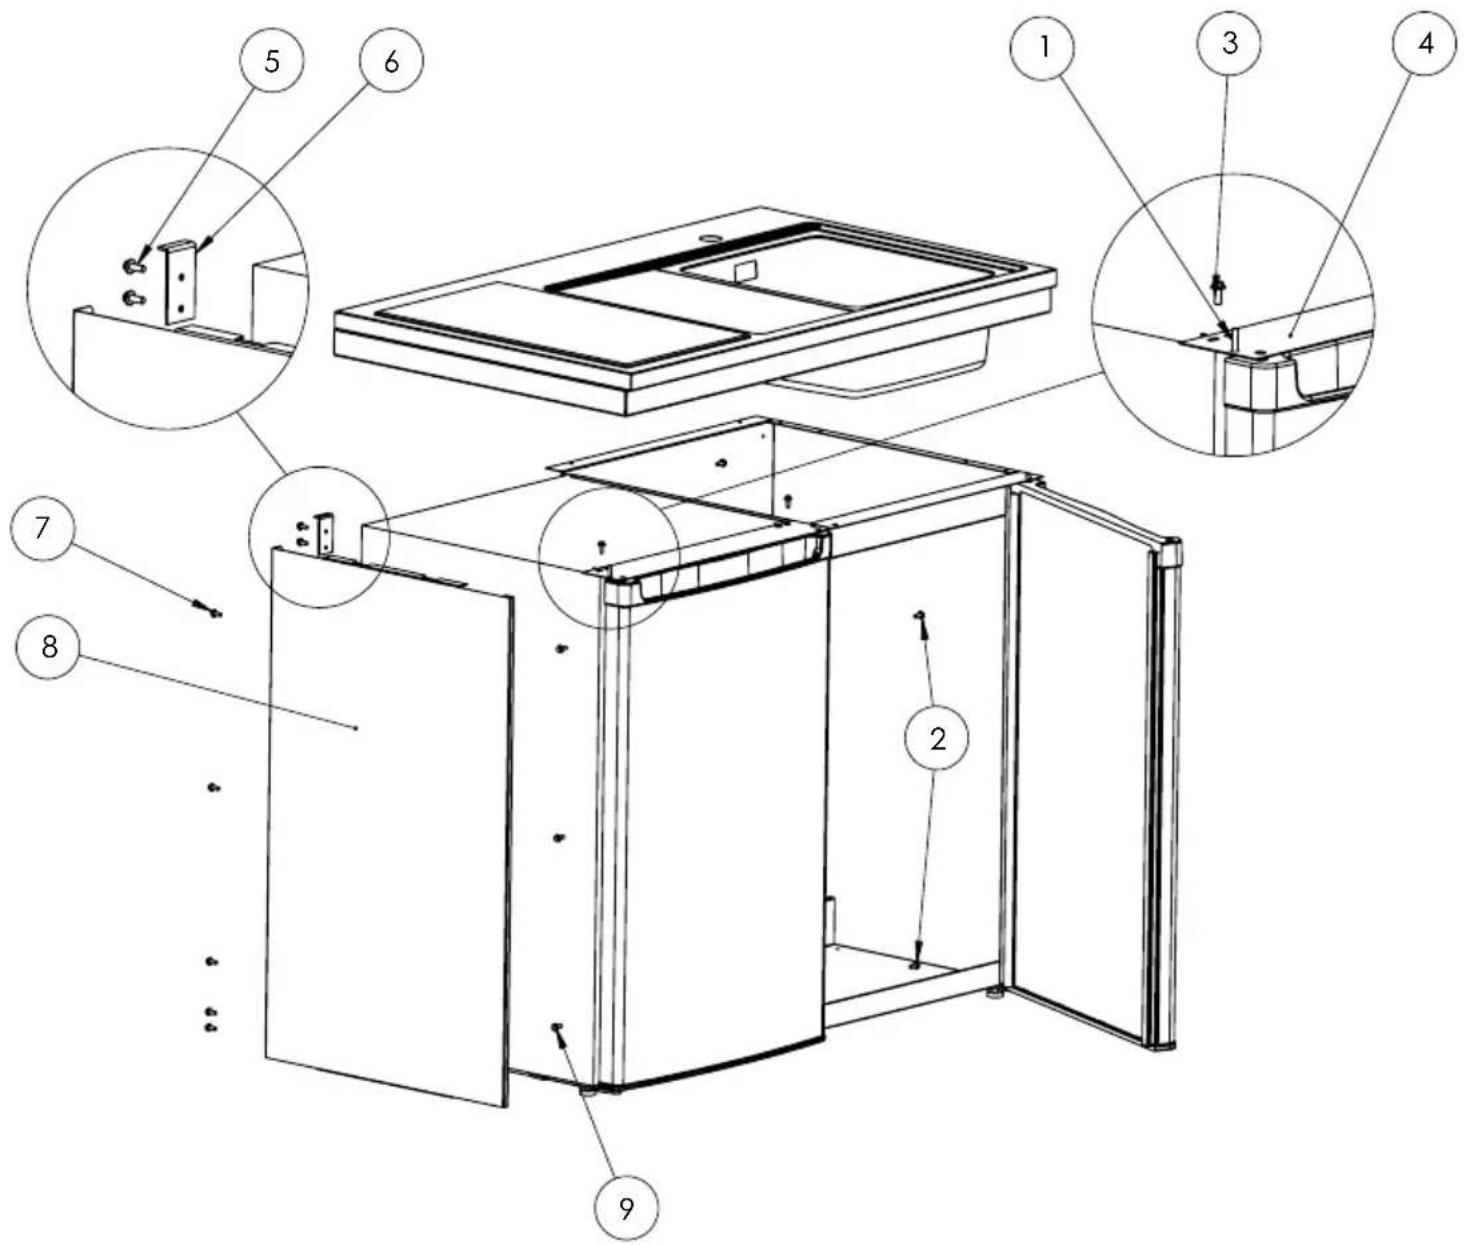
Remove the screw (1) and pull the pantry backwards to be able to lift it up.
Detaching the fridge
Remove the five screws (2) and pull out the fridge.
Remove the two screws (3) and move the plate (4).
Remove the two screws (5) and the bracket (6) to the new fridge.
Remove the five screws (7) and pull out the side plate (8).
Remove the three screws (9) and move them to the same position for the new refrigerator according to the template.
Remove the two rear feet as well as the two adjustable front feet and move them to the new fridge.
- Beskrivning | Description
- Safety
- Safety for children and people with disabilities
- General safety
- Unpacking
- Packaging
- Installation
- Use
- Location
- Mini Kitchen
- Hob/sink unit
- Plumbing
- NB:
- Timer
- Hot plates
- Fridge
- Maintenance
- Sink unit
- Troubleshooting | Service | Detaching the fridge
- Troubleshooting
- The hot plates does not work
- Service
- Detaching the fridge
- Recycling
- Detaching the pantry
Brand : Cylinda
Model : MK1200TPH
Category : Uncategorized