KIT-8VWT - Uncategorized ALPINE - Free user manual and instructions
Find the device manual for free KIT-8VWT ALPINE in PDF.

User questions about KIT-8VWT ALPINE
0 question about this device. Answer the ones you know or ask your own.
Ask a new question about this device
Download the instructions for your Uncategorized in PDF format for free! Find your manual KIT-8VWT - ALPINE and take your electronic device back in hand. On this page are published all the documents necessary for the use of your device. KIT-8VWT by ALPINE.
USER MANUAL KIT-8VWT ALPINE
Compatible with these Alpine navigation devices
INE-W928R
All installation work must be performed by a qualified professional installer only.
The manufacturer / dealer is not liable for any kind of incidental or indirect damages.
Škoda Fabia II / Octavia II / Roomster / VW Caddy / Touran
natural_image
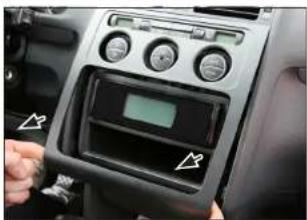
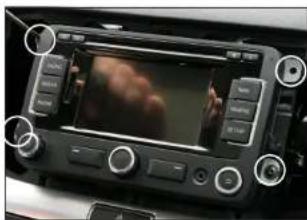
Interior view of a car dashboard with control panel and indicator lights (no visible text or symbols)- Unclip and remove OEM panel (see arrows)
natural_image
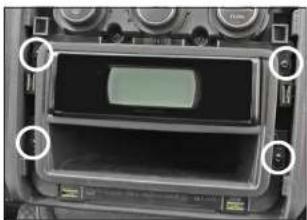
Interior view of a vintage electronic device showing a display screen and control knobs (no visible text or symbols)- Remove 4 screws
Remove head unit
natural_image
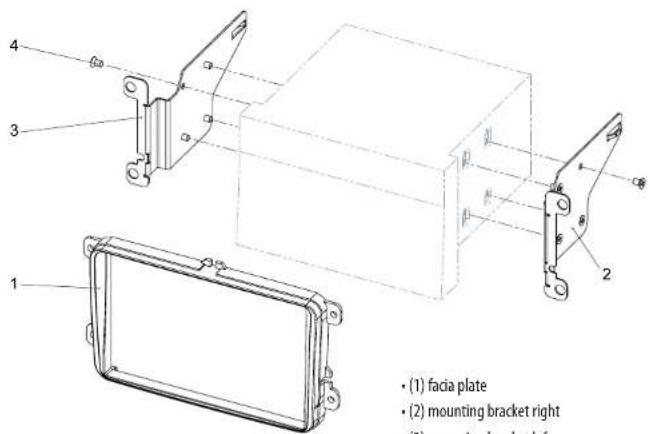
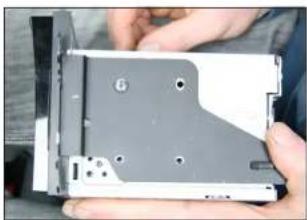
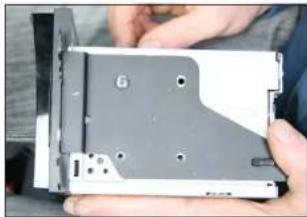
Close-up of hands holding a CD drive with visible slots and mounting holes (no text or symbols)- Attach mounting frames to Alpine INE-W928R
natural_image
Interior view of a vehicle dashboard with multiple gauges and a central touchscreen display (no visible text or symbols)- Connect all required circuit points
Place Alpine INE-W928R on dashboard
VW Tiguan
natural_image
Close-up of a mechanical component with no visible text or symbols- Connect all required circuit points Place Alpine INE-W928R on dashboard
natural_image
Close-up of a mechanical component with a highlighted circular feature and a green connector (no visible text or symbols)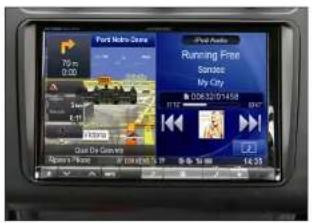
Place facia plate Put dome of facia plate exactly over the holes of mounting frames (see arrow above)
Install OEM panel to finish installation
VW Tiguan
natural_image
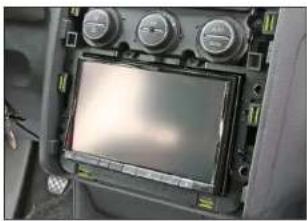
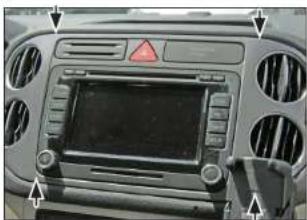
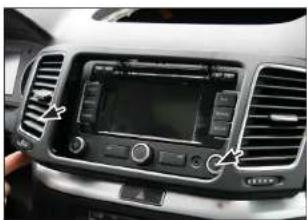
Front view of a car dashboard with ventilation grilles and a central touchscreen display (no visible text or symbols)- Unclip and remove OEM panel (see arrows)
Remove 4 screws of OEM head unit
natural_image
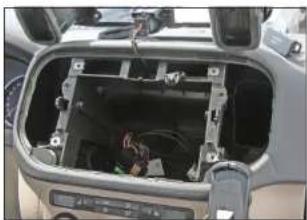
Interior view of a car showing the dashboard and airway compartment with visible wiring and control buttons (no text or symbols)- Remove 4 screws
Remove head unit
natural_image
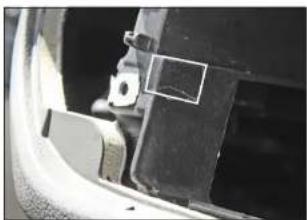
Close-up of a car's side panel showing a bracket and mounting bracket (no visible text or symbols)- Cut away plastic to clear space for Alpine INE-W928R
natural_image
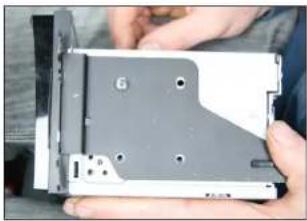
Close-up of hands holding a compact electronic drive chassis (no visible text or symbols)- Attach mounting frames to Alpine INE-W928R
Škoda Fabia II / Octavia II / Roomster / VW Caddy / Touran
natural_image
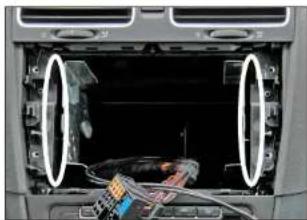
Interior view of a car dashboard showing exposed wiring and a cable inside (no visible text or symbols)- If necessary: Cut away plastic to clear space for Alpine INE-W928R
natural_image
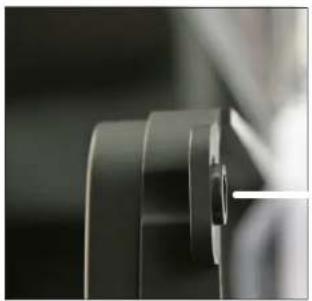
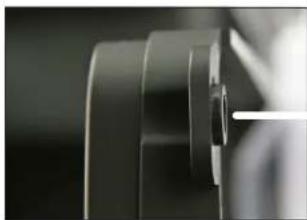
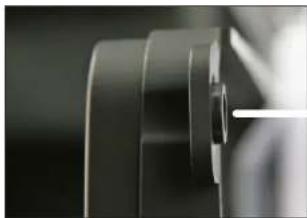
Close-up of a mechanical component with layered cylindrical parts (no visible text or symbols)- Place facia plate
natural_image
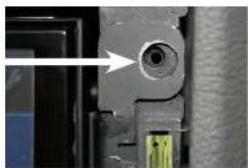
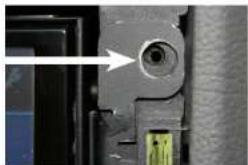
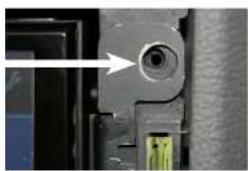
Close-up of a mechanical component with a circular hole and a green connector (no visible text or symbols)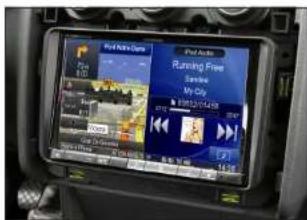
Put dome of facia plate exactly over the holes of mounting frames (see arrow above)
Fix facia plate with 4 screws
- Install OEM panel to finish installation
Seat Alhambra / VW Sharan Seat Alhambra / VW
natural_image
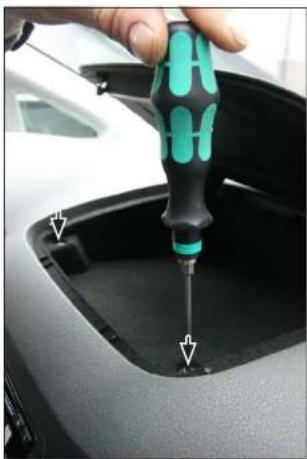
Close-up of a hand using a screwdriver to insert or install a car trunk component (no visible text or symbols)- Open top shelf
Remove 2 screws
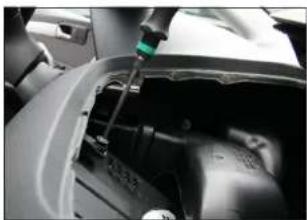
natural_image
Close-up of a mechanical device with a green sensor or probe inserted, showing internal components (no visible text or symbols)- Remove top shelf inlay
Remove 2 screws on top
natural_image
Interior view of a car showing the backrest grille, digital dashboard, and control panel (no visible text or symbols)- Remove OEM panel
n
natural_image
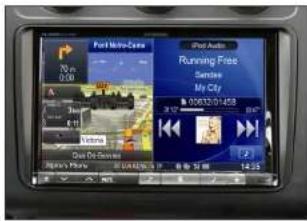
Interior view of a car dashboard with a digital display showing a red cloud image and control buttons (no readable text or symbols)- Remove 4 screws
Remove OEM head unit
If necessary:
Cut away plastic to clear space for Alpine INE-W928R
natural_image
Close-up of hands holding a computer drive casing with visible slots and mounting holes (no text or symbols)- Attach mounting frames to Alpine INE-W928R
natural_image
Close-up of a mechanical component with layered surfaces and a white line (no text or symbols visible)- Place facia plate
natural_image
Close-up of a mechanical component with a circular feature and a green connector (no visible text or symbols)
- Connect all required circuit points Place Alpine INE-W928R on dashboard
Fix facia plate with 4 screws Install everything in reverse order to finish installation