KAMN24F18CSA - Monitor Kogan - Free user manual and instructions
Find the device manual for free KAMN24F18CSA Kogan in PDF.

| Product Type | Monitor |
| Brand | Kogan |
| Model | KAMN24F18CSA |
| Screen Size | 24 inches (60.96 cm) |
| Resolution | Full HD 1920 x 1080 |
| Refresh Rate | 60 Hz |
| Contrast Ratio | 1000:1 (typical) |
| Brightness | 250 cd/m² |
| Response Time | 5 ms |
| Connectivity | 1x HDMI, 1x VGA, 3.5mm audio out |
| Power Supply | AC 100-240V, 50/60Hz |
| Power Consumption | ≤25W (typical) |
| Stand | Tilt adjustable |
| VESA Mount | 100 x 100 mm |
| Dimensions (with stand) | 540 x 400 x 180 mm |
| Weight (with stand) | ~3.5 kg |
| Compliance | CE, RoHS |
| Maintenance | Clean with dry soft cloth |
| Safety | Do not open casing; avoid liquid contact |
| Spare Parts | Power adapter, stand, VESA screws |
| Repairability | Contact Kogan support |
Frequently Asked Questions - KAMN24F18CSA Kogan
User questions about KAMN24F18CSA Kogan
0 question about this device. Answer the ones you know or ask your own.
Ask a new question about this device
Download the instructions for your Monitor in PDF format for free! Find your manual KAMN24F18CSA - Kogan and take your electronic device back in hand. On this page are published all the documents necessary for the use of your device. KAMN24F18CSA by Kogan.
USER MANUAL KAMN24F18CSA Kogan
24 CURVED FULL HD 180Hz FREESYNC GAMING MONITOR
1920 X 1080
KAMN24F18CSA
Safety & warnings 3
Components list 4
Overview 5
Assembly 7
Connectivity 10
Operation 12
Specifications 16
Cleaning & care 18
Notes 19
SAFETY & WARNINGS
- Read all instructions before using the appliance and retain for reference.
- This monitor is designed with ventilation holes on the back of the casing. Do not cover or block them.
- Do not insert any object or spray any liquid into the vents.
- Avoid placing the monitor near heaters, stoves, fireplaces or other sources of heat, as well as in rooms lacking adequate ventilation.
- Do not position the monitor in unsafe locations. If the monitor falls, it may be damaged and may injure nearby people.
- Unplug the monitor if it is not going to be used for an extended period.
- Do not place heavy objects on the monitor, its power cord or any connected cable.
- Do not open the back panel of the monitor, as it contains a high-voltage current even when not plugged in.

HIGH-DEFINITION MULTIMEDIA INTERFACE
The terms HDMI, HDMI High-Definition Multimedia Interface, HDMI Trade dress and the HDMI Logos are trademarks or registered trademarks of HDMI Licensing Administrator, Inc.
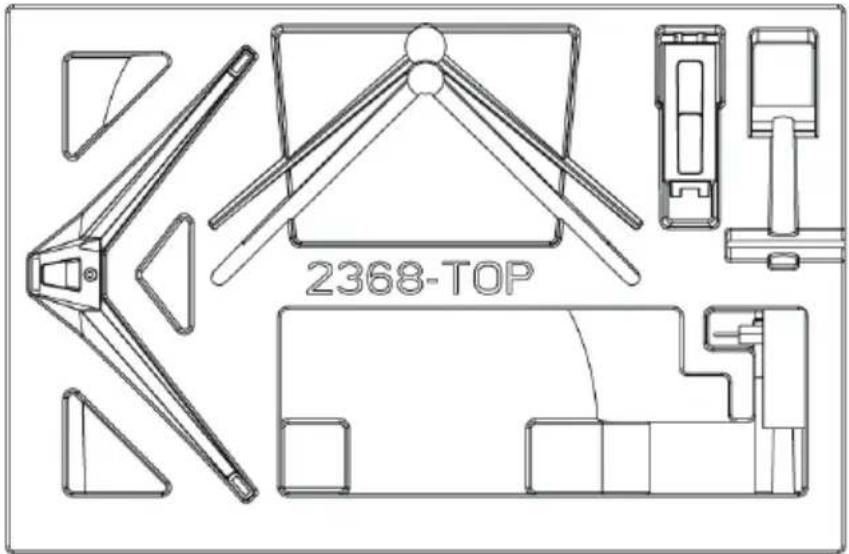
COMPONENTS
natural_image
Empty white rectangle with a thin gray border (no text or symbols)24 Monitor
natural_image
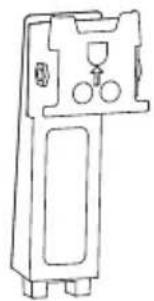
Line drawing of a mechanical component with ports and a central connector (no text or symbols)Stand connector
natural_image
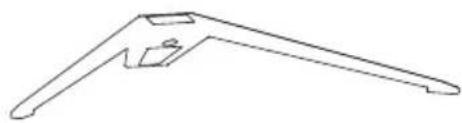
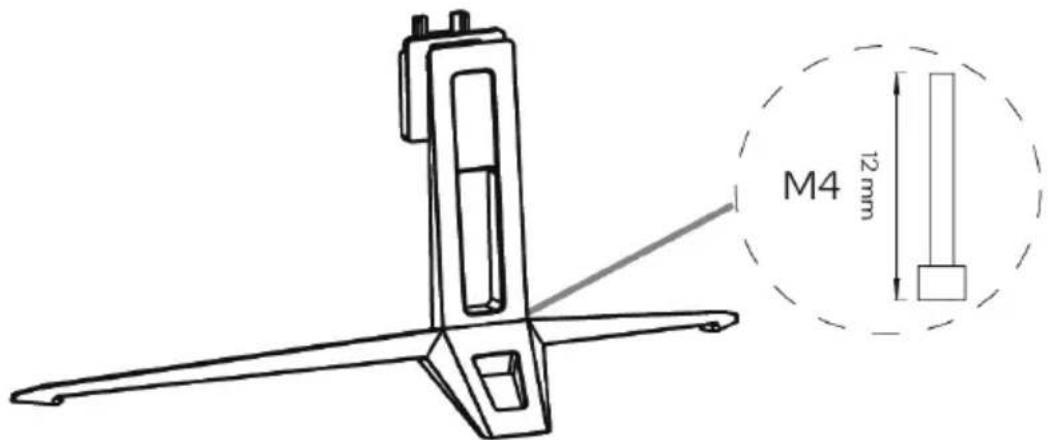
Line drawing of a mechanical lever or bracket (no text or symbols)Stand base

Stand base screw (M4 x 12mm) (x1)
natural_image
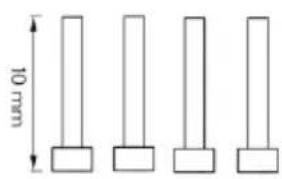
Four identical vertical cylindrical structures with a 10 mm height dimension labeled, no text or symbols present.VESA screws (x4)
natural_image
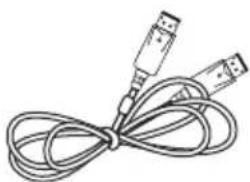
Illustration of two USB connectors tied together (no text or symbols)DP cable
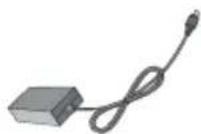
Power adapter
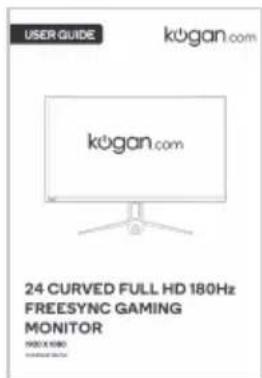
User guide
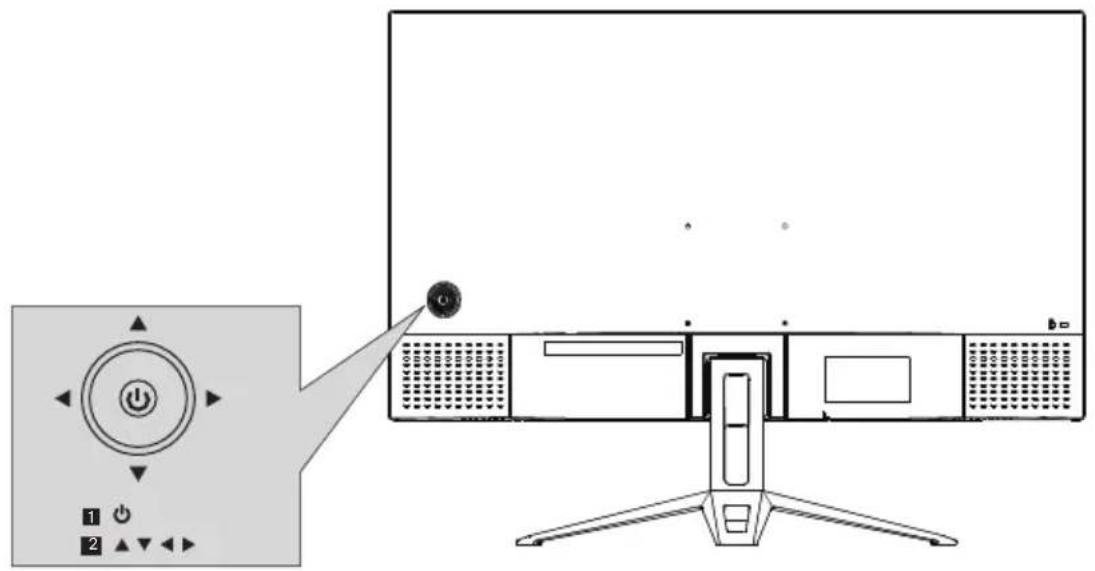
| Button | Action | Description | |
 | Press in | Press and hold the ⏻ button for 6 seconds to turn on and off.When the display is turned on, click ⏻ button to wake up the main menu for one second.Use the arrow buttons to select the items to be adjusted up and down in the main menu. After selecting the items, click ⏻ button to adjust.Click ⏻ button again to save and return to the upper menu. | |
 | Push left | Display mode shortcut.Enable the main menu or select the menu item. | |
| Push right | Source selection.Exit from the main menu or return to the upper menu. | ||
 | Push up | Game plus timer shortcut.Select menu items or increase the setting values of the selected menu item. | |
| Push down | Game plus sight shortcut.Select menu items or decrease the setting values of the selected menu item. | ||
Monitor Ports
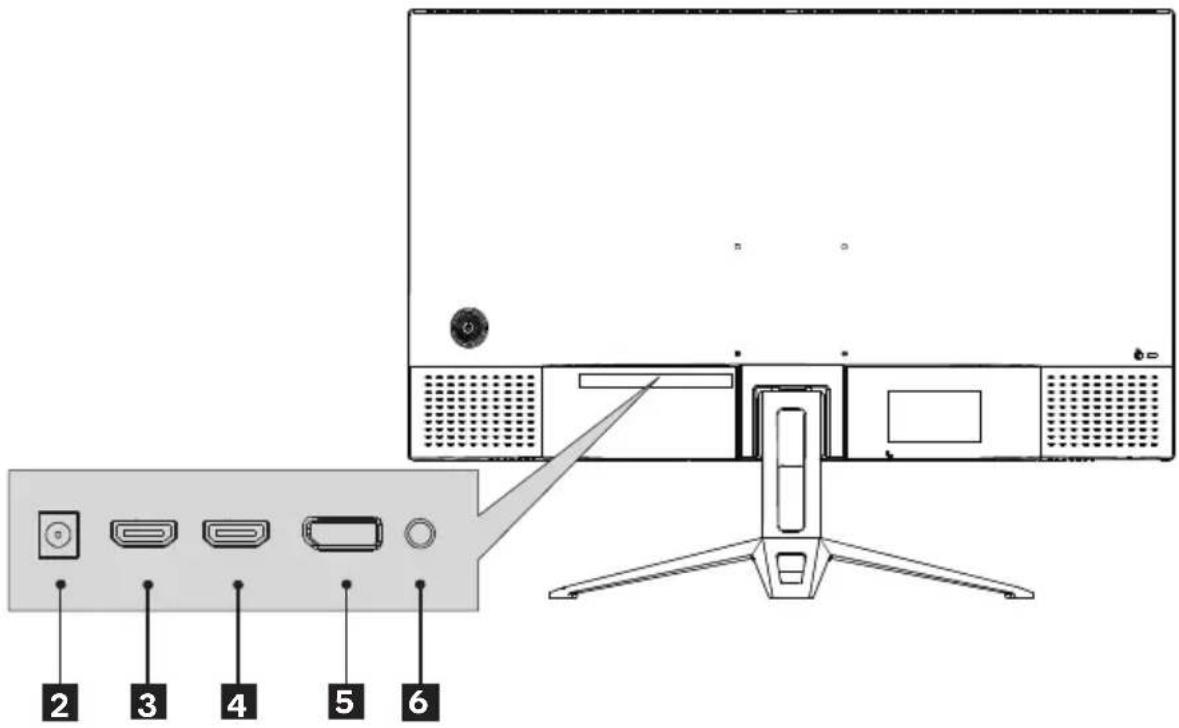
| 2 | Power port (DC 12V) |
| 3 | HDMI2 connector |
| 4 | HDMI1 connector |
| 5 | DP connector |
| 6 | AUDIO OUT |
ASSEMBLY
Assembling with stand
WARNING: Panel is fragile. Keep the foam underneath the monitor while assembling the stand.
- Carefully remove the monitor from the packaging with foam attached and place it face down on a soft cloth spread across a stable surface such as a table.
- Attach the stand base to the stand connector using the M4 screw provided.
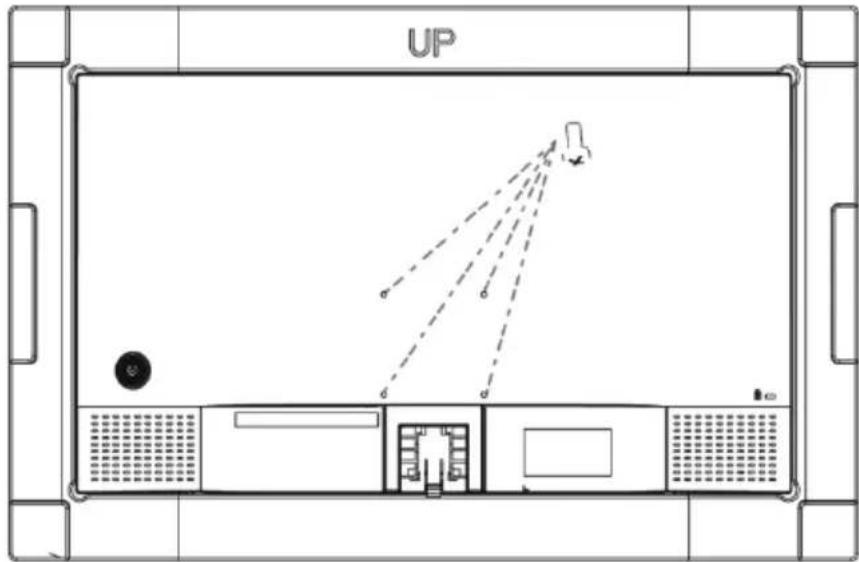
- Insert the top of the stand connector into the rear of the monitor and push down until firmly connected.
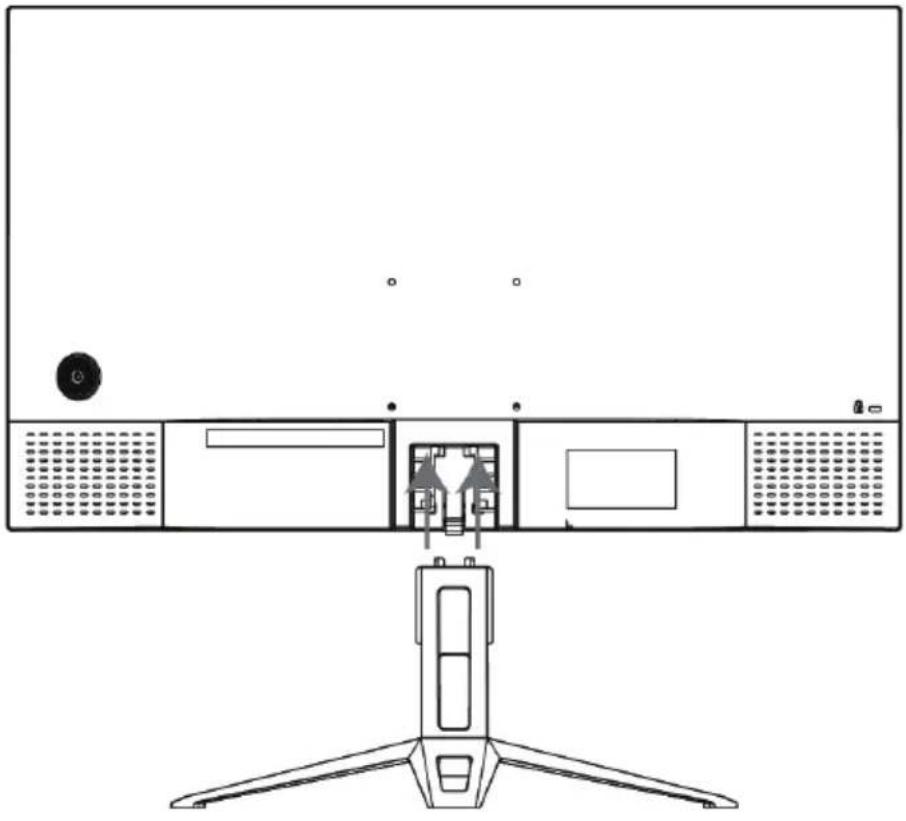
natural_image
Technical line drawing of a monitor or audio workstation with front panel and base mount (no text or symbols)- Lift monitor up straight and remove the bottom foam. Stand the monitor up on the installed base.
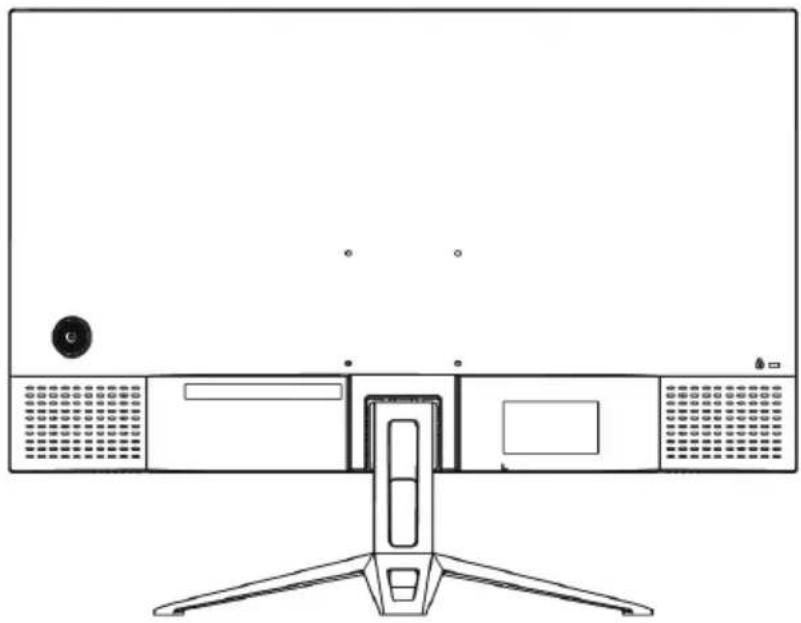
natural_image
Line drawing of a computer monitor with front panel and side podium (no text or symbols)Assembling with VESA Mount

VESA mounting pattern 75 x 75mm, screw size M4.
Note: VESA mount or mounting accessories are not included.
Open the box, take out the monitor with protection form attached and gently place it on a desktop or table. Ensure all components are removed from the foam covering. Press the release button to remove the stand plate.
If the monitor is already attached to the stand, remove the stand before proceeding with VESA mount assembly.

Instructions for attaching to the specific wall mount will be included with the mount.
CONNECTIVITY
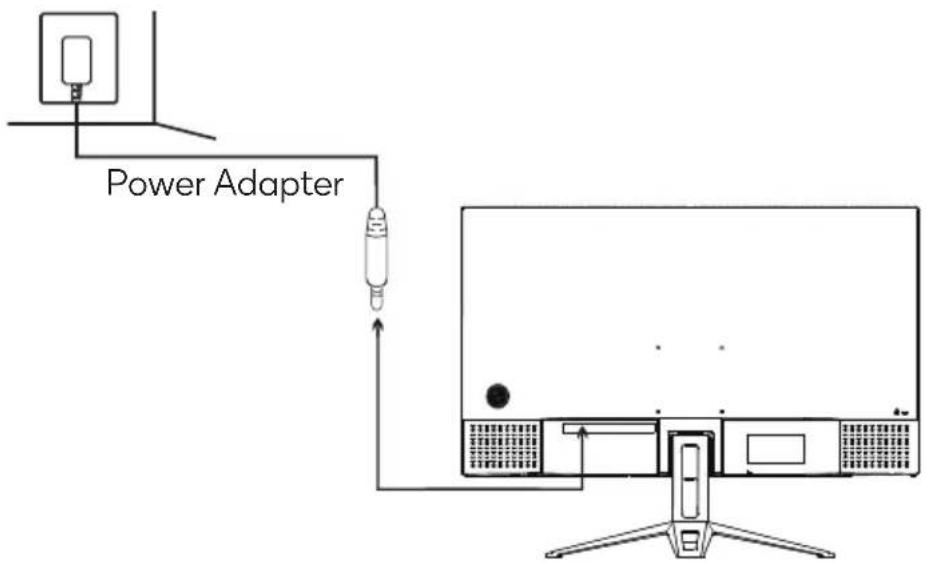
Power Cable
Connect the included Power Adapter to the monitor power port, then connect the other end to a power outlet.
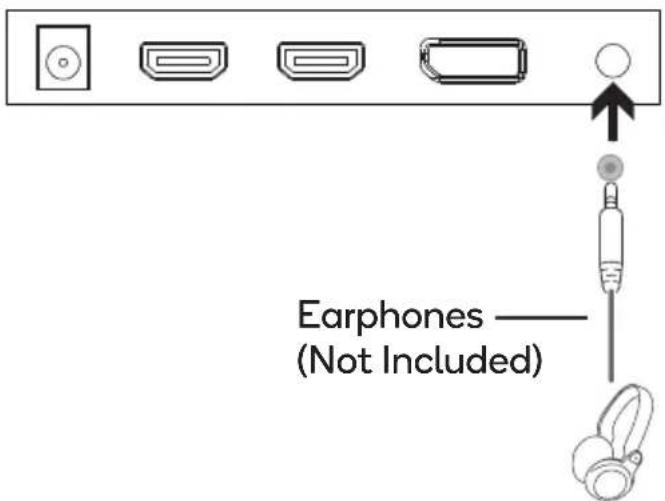
Earphones (Audio Out)
Earphones, headphones or other audio devices can be connected to the 3.5mm output on the monitor. The monitor may need to be set as the PC's default sound output device.
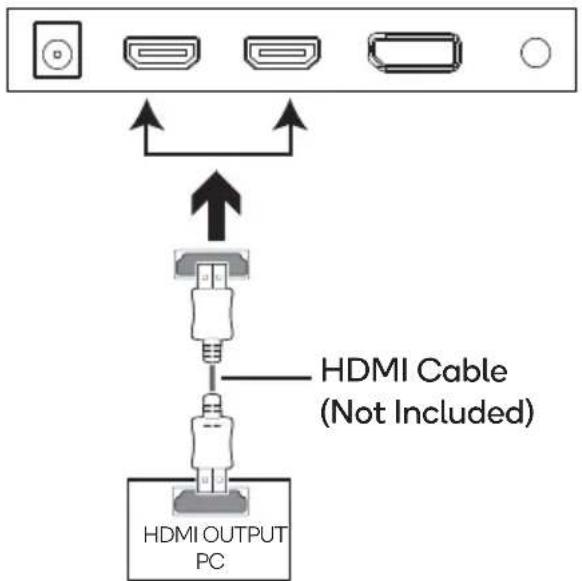
HDMI
In order for the monitor to receive HDMI signals from the computer, use the HDMI cable to connect the monitor to the computer.
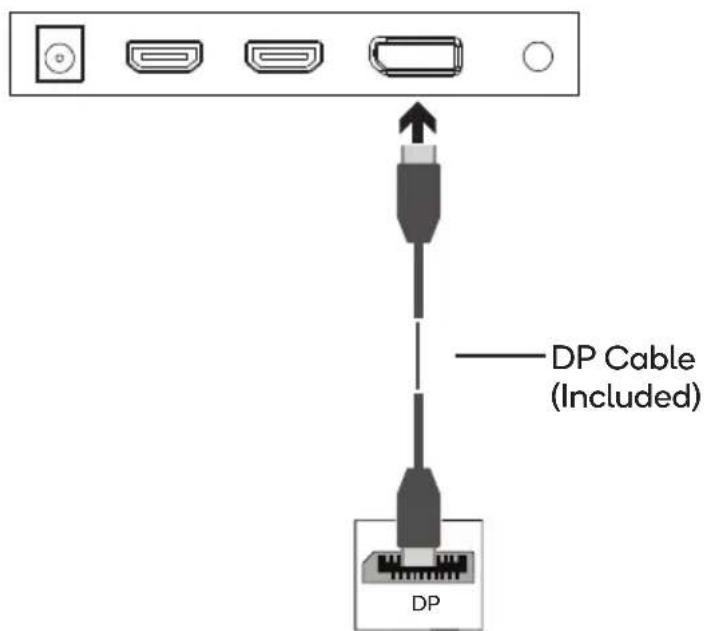
DisplayPort
In order for the monitor to receive DisplayPort signals from the computer, use the DisplayPort cable to connect the monitor to the computer.
OPERATION
- Connect the monitor to the input device via HDMI/ DisplayPort.
- Connect the power cable to the monitor, then connect the other end directly to a power socket.
- Use the power button to turn the monitor on.
FreeSync
- In order to use this feature, ensure your hardware has FreeSync capability and the graphics drivers are fully up to date.
• After connecting, you may receive a prompt to enable the feature on your computer. If you do not receive the prompt, you may need to enable the function in your graphics card menu. - See your graphics card manufacturer's documentation for instructions on how to turn on and/or enable FreeSync.
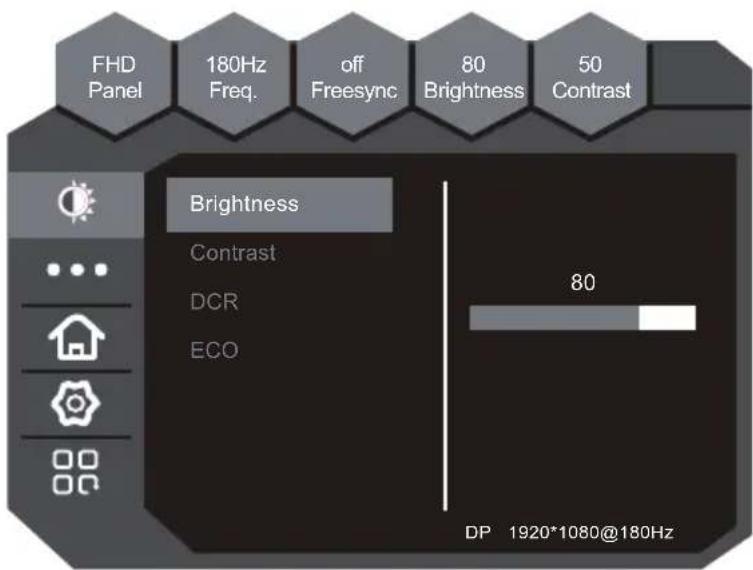
The On-Screen Display (OSD) Menu may be used to adjust your monitor's settings and appears on the screen after turning on the monitor and pressing the "OK key" button.
When using the monitor for the first time, it will configure optimal settings automatically.
- Press "OK key" touch right to activate the navigation window.

- Press " OK key " to enter the OSD menu.
- Select "direction key" to select the items to be adjusted up and down in the main menu. After selecting the items, click "OK key" to adjust. Click "OK key" again to save and return to the upper menu.
Refer to the following pages for a detailed list of the OSD menu functions.
| Menu | Sub-Menu | Options | Description |
 | Brightness | ~0-100 | Adjust display brightness |
| Contrast | ~0-100 | Adjust display contrast | |
| DCR On/ Off | Turns dynamic contrast ratio on/off | ||
| ECO | STANDARD/TEXT/GAME/MOVIE/FPS/RTS | Preset colour modes | |
 | Colour Temperature | Standard | Select colour temperature mode or allow manual colour configuration (USER) |
| Warm | |||
| Cool | |||
| sRGB | |||
| User Define | |||
| Red | ~0-100 | Adjust red value (USER mode only) | |
| Green | ~0-100 | Adjust green value (USER mode only) | |
| Blue | ~0-100 | Adjust blue value (USER mode only) | |
 | Language Set OSD language, Español, Français, 日本语 | English, 简体中文, 한국어, 意国, Español, Français, 日本语 | |
| OSD Horizontal | 0~100 | Adjust OSD horizontal position | |
| OSD Vertical | 0~100 | Adjust OSD vertical position | |
| OSD Transparency | 0~100 | Set OSD overall transparency | |
| OSD Time Out | 10-60 | Set how long the OSD remains open after last input | |
 | Input Source | Auto Source/DP/HDMI1/HDMI2 | Select input source or allow manual selection |
| Mute | ON/OFF | Enable or disable monitor speaker output | |
| Volume | 0-100 | Adjust monitor speaker volume | |
| Reset | / | Uptate monitor firmware via USB flash drive. | |
| Display Size | Full Screen | Select the display's aspect ratio | |
| Auto | |||
| 4:3 | |||
| Low blue | Off | Blue light reduction adjustment | |
| Weak | |||
| Strong | |||
| Over Drive | On/Off | Enable or disable overdrive for faster response time | |
| FreeSync | On/Off | Enable or disable AMD FreeSync | |
| HDR | On/Off /Auto | Enable or disable HDR |
ECO MODES
- Press "OK key" touch left button to switch ECO modes. These modes include Standard, Text, Movie, Game, FPS, RTS sRGB and can be used to optimise settings according to your activity. Standard mode is suitable for most activities.
ECO
Standard
SPECIFICATIONS
| Screen size | 24 |
| Aspect ratio | 16:9 |
| Brightness | 250cd/ m2 (Typ.) |
| Panel | VA |
| Resolution | 1920x1080 |
| Refresh rate | 180Hz |
| Response time | 12ms |
| Viewing angle | ≥178°(H) / 178°(V) |
| Contrast ratio | 3000:1 |
| VESA mounting | 75x75mm |
| Colours | 16.7M |
| Signal input | HDMI 1.4 x 2, DP 1.2 x 1 |
| Power | 12V = 3.0A |
| Audio | |
| Speakers | Yes |
| Audio Out | Yes |
| Accessories | |
| Power Adapter | Yes |
| DP Cable | Yes |
| Additional functions | |
| Low Blue Light | Yes |
| Flicker Free | Yes |
| Physical dimensions | |
| Dimensions (w. Stand) | 537.15 x 412.6 x 169.5mm |
| Dimensions (w/o Stand) | 537.15 x 315.97 x 67.6mm |
| Net weight | 3.0kg |
| Gross weight | 4.3kg |
CLEANING & CARE
- Unplug the monitor before cleaning it.
- Use a clean, slightly dampened cloth to wipe the main monitor body.
- To clean the screen: Turn the monitor off, unplug it and wait for it to cool completely, then wipe it with a dry micro-fibre cloth.
- Do not use cleaning alcohol, ammonia-based liquids or other harsh cleaners.
NOTES
Need more information?
We hope that this user guide has given you the assistance needed for a simple set-up.
For the most up-to-date guide for your product, as well as any additional assistance you may require, head online to help.kogan.com
kogan.com