FXTRL7N7NBNM023 - Câble pour ordinateurs et périphériques Panduit - Free user manual and instructions
Find the device manual for free FXTRL7N7NBNM023 Panduit in PDF.

User questions about FXTRL7N7NBNM023 Panduit
0 question about this device. Answer the ones you know or ask your own.
Ask a new question about this device
Download the instructions for your Câble pour ordinateurs et périphériques in PDF format for free! Find your manual FXTRL7N7NBNM023 - Panduit and take your electronic device back in hand. On this page are published all the documents necessary for the use of your device. FXTRL7N7NBNM023 by Panduit.
USER MANUAL FXTRL7N7NBNM023 Panduit
text_image
1 Squeeze Key Arc cut-outs aligned Key UpSqueeze both sides of outer housing at the back end evenly until you hear an audible click.
text_image
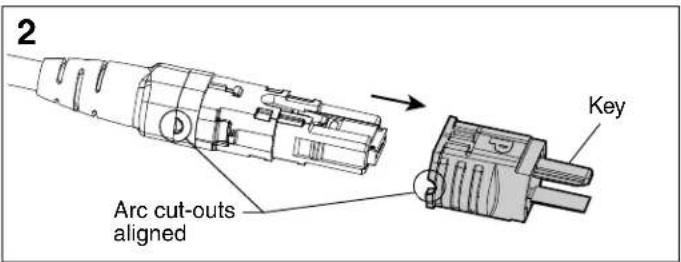
2 Arc cut-outs aligned KeyPull outer housing off connector.

text_image
3 Arc cut-out not aligned Arc cut-out not aligned 180° KeyRotate outer housing 180° so arc cut-out is on the opposite side.

text_image
4 Key Down Aligned Method A Aligned Method B AlignedNot AlignedRe-install outer housing until you hear a faint audible click.
For Technical Support: www.panduit.com/resources/install_maintain.asp
E-mail: techsupport@panduit.com
Phone: 866-405-6654
Gender Changeover
text_image
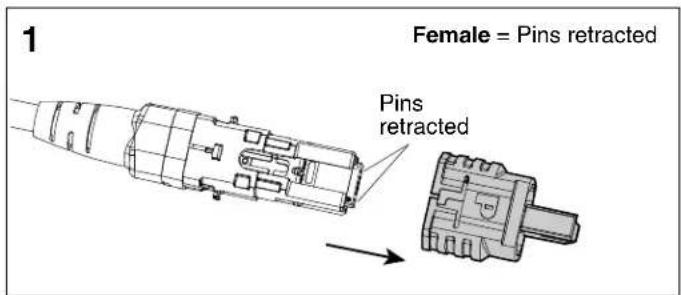
Female = Pins retracted Pins retractedRemove outer housing per polarity changeover instructions.

text_image
2 CAUTION! Only Panduit tool is to be used for gender change. Use of any other tool can cause fiber damage and will void the product warranty. Pin retraction tool holeLocate hole in the inner housing on the slotted side and position pin retraction tool over the hole.

text_image
3 Gently Male = Pins extracted Pins extractedInsert tool into hole, press down gently, and push forward to advance connector pins to the male state. Repeat process in opposite direction to retract pins for female state.

natural_image
Technical line drawing of a cable connector with an arrow indicating direction (no text or symbols)Re-install outer housing in the correct orientation. See polarity changeover instructions on page 1.