
ZB 260 - Cordless vacuum AEG-ELECTROLUX - Free user manual and instructions
Find the device manual for free ZB 260 AEG-ELECTROLUX in PDF.
| Product Type | Cordless Vacuum Cleaner |
| Brand | AEG-ELECTROLUX |
| Model | ZB 260 |
| Battery Life | Approximately 9 minutes |
| Initial Charging Time | 14 to 16 hours |
| Full Charging Time | 18 hours for a completely discharged battery |
| Dust Container Capacity | Approximately 2.5 dl (0.25 L) for liquids |
| Charger Power Supply | 230 V ~ 50 Hz |
| Battery Type | Rechargeable NiCd |
| Filter | Dust filter washable with soapy water |
| Included Accessories | Liquid nozzle, foldable crevice nozzle, wall bracket with charger |
| Dry Vacuuming Function | Yes |
| Liquid Vacuuming Function | Yes, with specific nozzle |
| Charge Indicator | Yes, light indicator on the device |
| Filter Cleaning | Wash with warm soapy water, rinse and dry completely |
| Tank Maintenance | Empty after each use, wash after vacuuming liquids |
| Important Safety Instructions | Do not use on wet surfaces (except with liquid nozzle), do not vacuum incandescent objects or flammable dust, do not expose to heat |
| Recommended Charging Temperature | Between 0 °C and 40 °C |
| Spare Parts | Filters available as spare parts |
| Compliance | EC Directives 73/23/EEC, 89/336/EEC |
| Disposal | NiCd battery to be recycled separately |
Frequently Asked Questions - ZB 260 AEG-ELECTROLUX
User questions about ZB 260 AEG-ELECTROLUX
0 question about this device. Answer the ones you know or ask your own.
Ask a new question about this device
Download the instructions for your Cordless vacuum in PDF format for free! Find your manual ZB 260 - AEG-ELECTROLUX and take your electronic device back in hand. On this page are published all the documents necessary for the use of your device. ZB 260 by AEG-ELECTROLUX.
USER MANUAL ZB 260 AEG-ELECTROLUX
natural_image
Line drawing of a vacuum cleaner blade with a circular vent and handle (no text or symbols)PAGE
D Gebrauchsanweisung......5
GB Instruction book 8
F Mode d'emploi .....11
NL Gebruiksaanwijzing 14
I Istruzioni per l'uso 17
E Instrucciones para el uso .....20

[Non-Text]
[Non-Text]
[Non-Text]
[Non-Text]
[Non-Text]
Gerätebeschreibung
natural_image
Diagram of a handheld electric shaver with plug, power outlet, and screwdriver (no text or labels)A


natural_image
Illustration of an electric iron on a wall socket connected to a power plug (no text or symbols present)B
natural_image
Line drawing of a hand using a handheld vacuum cleaner to lift a device (no text or symbols present)C

natural_image
Line drawing of a vacuum cleaner with a small component inserted, showing no text or symbolsD

natural_image
Illustration of a hand holding a handheld device with a curved arrow indicating motion (no text or symbols)E

natural_image
Illustration of a hand using a cleaner to cut a surface with a mesh filter (no text or symbols)F
natural_image
Illustration of a hand using a cleaver to clean food items, with a mesh cloth and a shoe nearby (no text or symbols)G
3


natural_image
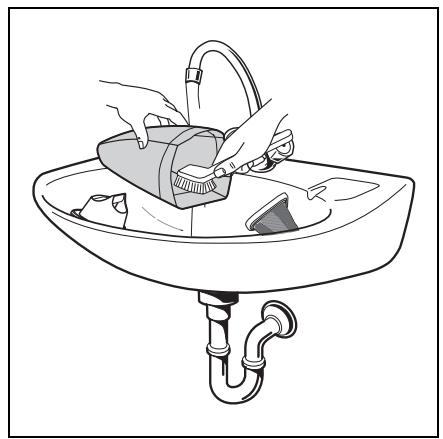
Line drawing of a hand cleaning a sink with a tool, pipe, and faucet (no text or symbols)H
natural_image
Line drawing of hands washing a sink with a washing machine (no text or symbols)J
natural_image
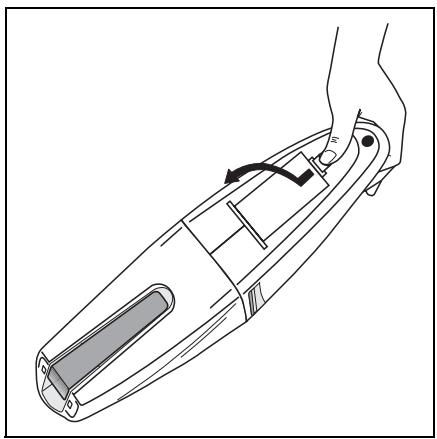
Line drawing of a handheld device with a handle and internal components, no text or symbols presentK
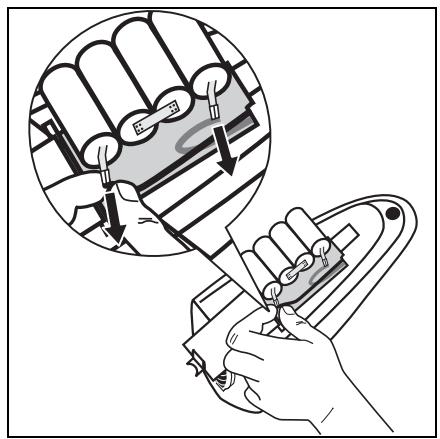
L
4


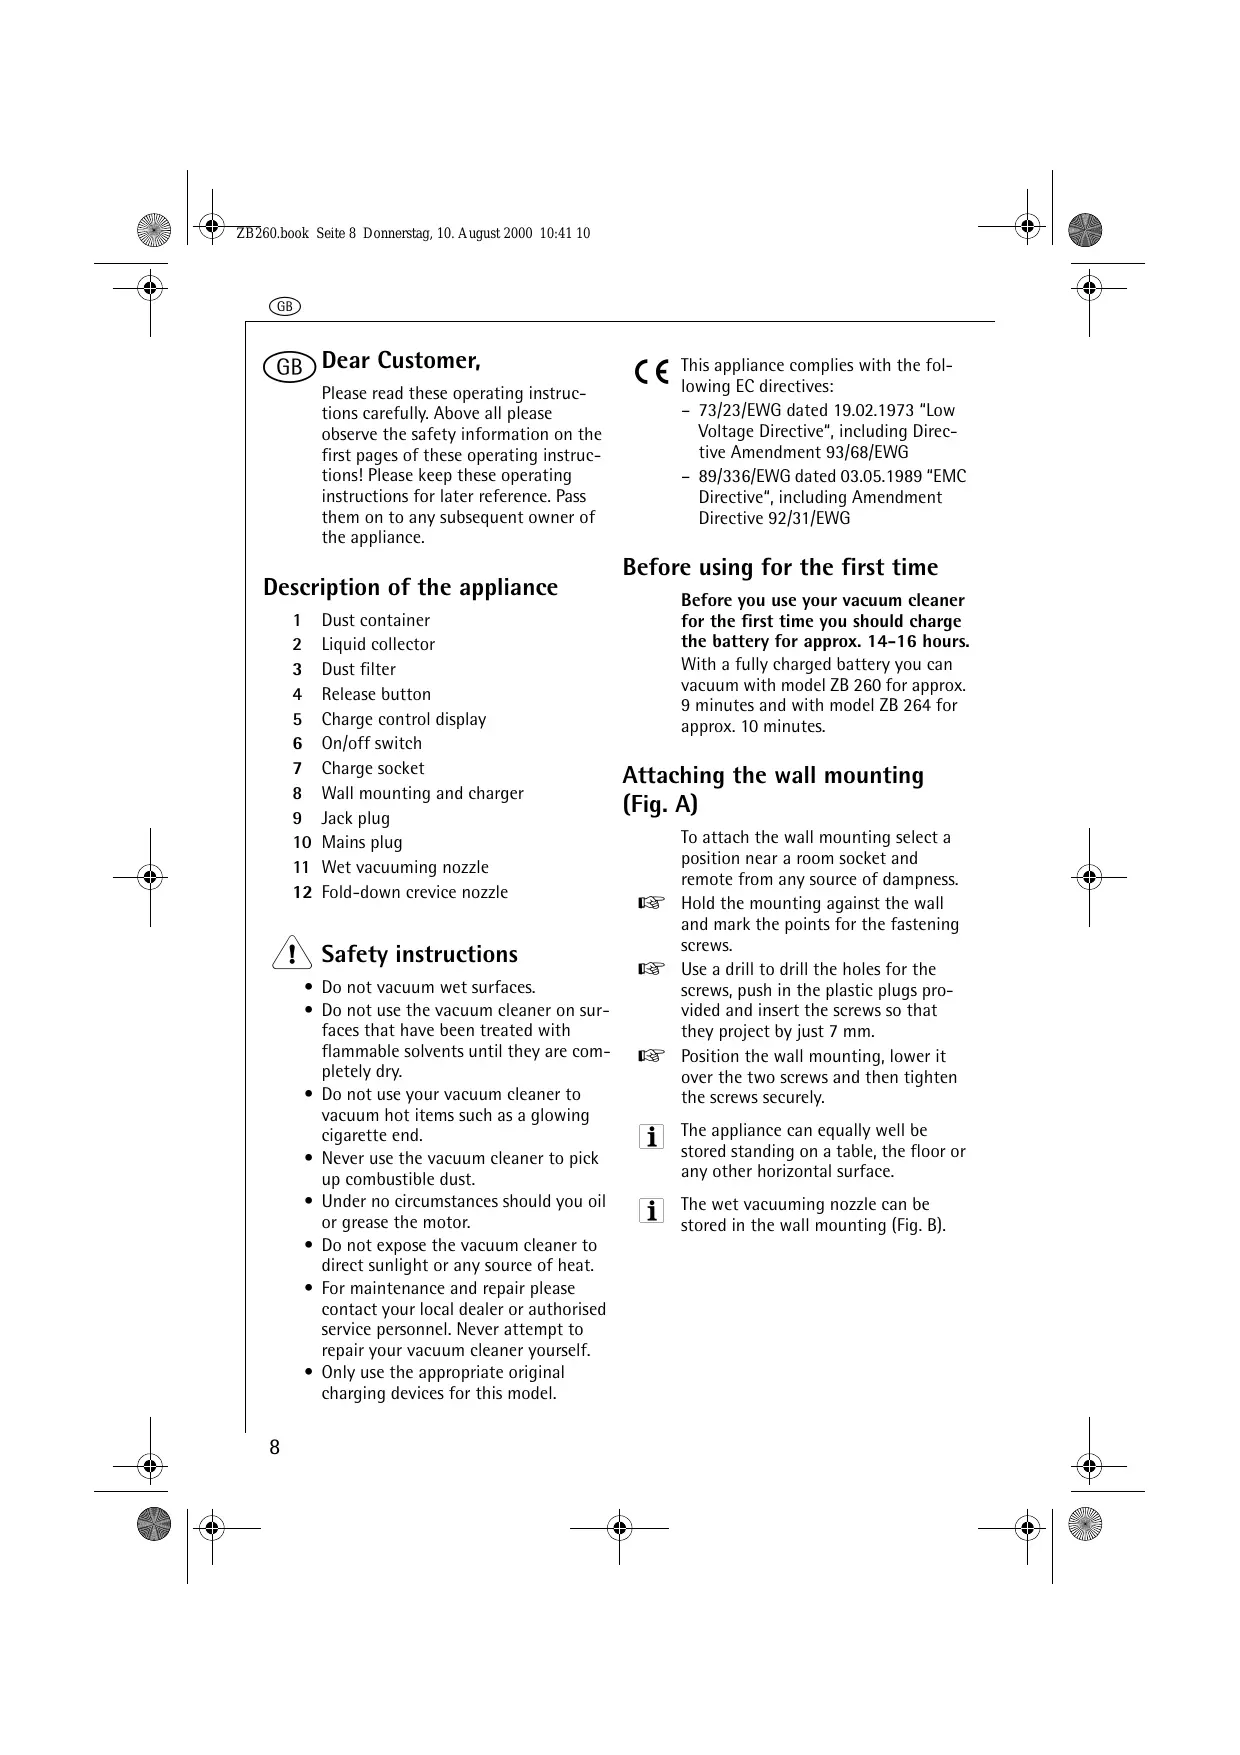
Please read these operating instructions carefully. Above all please observe the safety information on the first pages of these operating instructions! Please keep these operating instructions for later reference. Pass them on to any subsequent owner of the appliance.
Description of the appliance
1 Dust container
2 Liquid collector
3 Dust filter
4 Release button
5 Charge control display
6 On/off switch
7 Charge socket
8 Wall mounting and charger
9 Jack plug
10 Mains plug
11 Wet vacuuming nozzle
12 Fold-down crevice nozzle
!
Safety instructions
- Do not vacuum wet surfaces.
- Do not use the vacuum cleaner on surfaces that have been treated with flammable solvents until they are completely dry.
- Do not use your vacuum cleaner to vacuum hot items such as a glowing cigarette end.
- Never use the vacuum cleaner to pick up combustible dust.
- Under no circumstances should you oil or grease the motor.
- Do not expose the vacuum cleaner to direct sunlight or any source of heat.
- For maintenance and repair please contact your local dealer or authorised service personnel. Never attempt to repair your vacuum cleaner yourself.
- Only use the appropriate original charging devices for this model.
CE This appliance complies with the following EC directives:
- 73/23/EWG dated 19.02.1973 "Low Voltage Directive", including Directive Amendment 93/68/EWG
- 89/336/EWG dated 03.05.1989 "EMC Directive", including Amendment Directive 92/31/EWG
Before using for the first time
Before you use your vacuum cleaner for the first time you should charge the battery for approx. 14-16 hours.
With a fully charged battery you can vacuum with model ZB 260 for approx. 9 minutes and with model ZB 264 for approx. 10 minutes.
Attaching the wall mounting (Fig. A)
To attach the wall mounting select a position near a room socket and remote from any source of dampness.
Hold the mounting against the wall and mark the points for the fastening screws.
Use a drill to drill the holes for the screws, push in the plastic plugs provided and insert the screws so that they project by just 7 mm.
Position the wall mounting, lower it over the two screws and then tighten the screws securely.
The appliance can equally well be stored standing on a table, the floor or any other horizontal surface.
The wet vacuuming nozzle can be stored in the wall mounting (Fig. B).
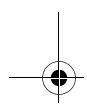
Charging (Fig. B)
The charger (8) may only be connected to a power source of 230V, 50Hz.
Insert the vacuum cleaner into the wall mounting (8) and check that the jack plug (9) on the wall mounting fits correctly into the charge socket (7) on the vacuum cleaner.
The charge control display (5) will come on and charging will begin. It will also come on if the battery is already fully charged. Always leave your vacuum cleaner in the wall mounting when not in use in order to guarantee optimal suction power.
To return to full suction capacity once a battery has been completely discharged requires a charging period of 18 hours.
If a fully charged battery works for less than 9 minutes it might be the result of a build up of resistance to charging which occurs if the vacuum cleaner is always used only for short periods. If this happens you should charge the battery fully and use the vacuum cleaner until the battery is empty. After this recharge the battery. Repeat this procedure if necessary.
Information: The battery should not be charged in room temperatures below 0 °C or above 40 °C.
The charger can heat up during charging.
Using the vacuum cleaner (Figs. C, D)
Remove your vacuum cleaner from the wall mounting by pushing it straight upwards.
Dry vacuuming
To switch on the appliance push the on/off switch (6) forwards. To switch the appliance off, push the on/off switch backwards (Fig. C).
Wet vacuuming (Fig. D)
Remove all dry dust from the dust container (1).
Insert the wet vacuuming nozzle (Fig. D).
When in use always hold the vacuum cleaner with the suction opening downwards.
The dust container can hold approx. 2.5 dl of liquid. Recharge your vacuum cleaner after use.
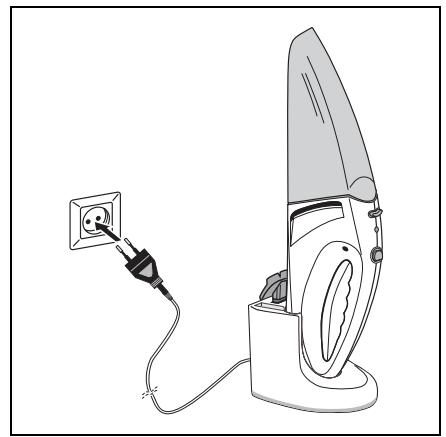
Using the crevice nozzle (Fig. E)
Pull out the crevice nozzle (12) and fold upwards.
To lock in place push the crevice nozzle in.
Care and maintenance
Hold the vacuum cleaner with the suction opening downwards.
Push in the release button (4) and lift the dust container out of the motor unit.
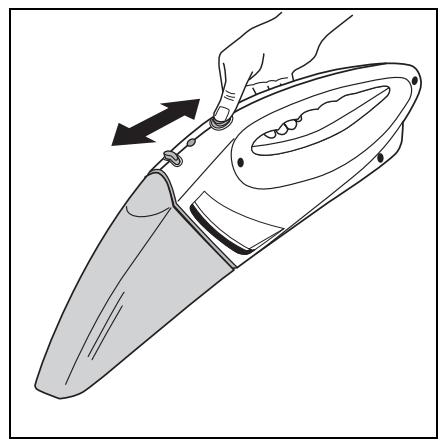
Remove the dust filter and liquid collector (Fig. F).
Empty the dust container (after dry vacuuming see Fig. G, after wet vacuuming see Fig. H).
After wet vacuuming clean the dust container, liquid collector and dust filter in the sink (Fig. J). After dry vacuuming you can use your normal household vacuum cleaner to clean these parts. If necessary, wash the filter in lukewarm soapy water and then rinse well.
Important: Do not wash synthetic parts of the vacuum cleaner in a machine.
Be careful that the dust filter is fully dry before you insert it again. After cleaning do not forget to put the dust filter back into the vacuum cleaner before using it again.
Damaged or excessively dirty dust filters should be replaced.
Filters can be obtained as spare parts.
GB

Your vacuum cleaner contains a re- chargable NiCd battery.
The vacuum cleaner can be re-charged many times and has a long life-span if the suction power is repeatedly topped up.
Should it nonetheless be necessary one day to replace your battery-powered vacuum, please dispose of it with due consideration for the environment.
Switch the vacuum cleaner on and let it run until the battery has run down completely.
Open the battery vacuum casing (Fig. K).
Ensure that the battery has not short-circuited. Remove the batteries and pull the connection leads off the battery connections (Fig. L).
Do not put the removed battery into the dustbin but hand it in at a repair workshop or at a public battery collecting point.
Customer Service
Our products are of the highest quality. Should you nevertheless have questions concerning the use of this appliance, please write to us. Only with your support can we be sure to develop appliances to suit your needs.
- PAGE
- Gerätebeschreibung
- Description of the appliance
- !
- Safety instructions
- Before using for the first time
- Attaching the wall mounting (Fig. A)
- Charging (Fig. B)
- Using the vacuum cleaner (Figs. C, D)
- Dry vacuuming
- Wet vacuuming (Fig. D)
- Using the crevice nozzle (Fig. E)
- Care and maintenance
- GB
- Customer Service
Brand : AEG-ELECTROLUX
Model : ZB 260
Category : Cordless vacuum