CM-S10055BK - Security Camera Zmodo - Free user manual and instructions
Find the device manual for free CM-S10055BK Zmodo in PDF.


| Product Type | Security Camera |
| Brand | Zmodo |
| Model | CM-S10055BK |
| Resolution | 1080p Full HD |
| Field of View | 110° wide angle |
| Night Vision | Up to 30 ft (9m) IR |
| Connectivity | Wi-Fi 2.4 GHz |
| Power | 5V DC via included USB adapter |
| Dimensions (H x W x D) | 3.5 x 2.5 x 2.5 inches |
| Weight | 0.3 lbs |
| Audio | Two-way audio with built-in microphone and speaker |
| Storage | microSD card up to 128GB (not included) and cloud subscription |
| Motion Detection | Yes, with push notifications via Zmodo app |
| Weatherproof Rating | Indoor use only |
| Mounting | Tabletop or wall mount (bracket included) |
| Compatibility | Zmodo app for iOS and Android |
| Security | Encrypted video transmission (SSL/TLS) |
| Maintenance | Clean lens with dry, soft cloth; keep ventilation slots clear |
| Spare Parts and Repairability | Integrated design, no user-serviceable parts; contact support for repairs |
| General Information | For home security monitoring; compatible with Zmodo ecosystem |
Frequently Asked Questions - CM-S10055BK Zmodo
User questions about CM-S10055BK Zmodo
0 question about this device. Answer the ones you know or ask your own.
Ask a new question about this device
Download the instructions for your Security Camera in PDF format for free! Find your manual CM-S10055BK - Zmodo and take your electronic device back in hand. On this page are published all the documents necessary for the use of your device. CM-S10055BK by Zmodo.
USER MANUAL CM-S10055BK Zmodo
natural_image
Interior view of an office or library space with furniture and display shelves (no visible text or symbols)
natural_image
Interior view of a modern office or control room with cubicles, desks, and ceiling lights (no visible text or symbols)
natural_image
Interior view of a modern office hallway with desks, chairs, and windows (no visible text or signage)7mode
Mini Hidden Pinhole Camera
User's Guide
CM-S10055BK
ZMODO TECHNOLOGY CORP. LTD.
1201-1205, Sangda Mansion, High Technology Park,
ShenZhen, Guangdong, China
Tel: 0755-3363-1636 Fax: 0755-3363-1639
SAFETY PRECAUTIONS
WARNING
- Be sure to use only the standard adapter that is specified in the specification sheet. Using any other adapter could cause fire, electrical shock, or damage to the product
- Incorrectly connecting the power supply or replacing battery may cause explosion, fire, electric shock, or damage to the product.
- Do not connect multiple cameras to a single adapter. Exceeding the capacity may cause abnormal heat generation or fire.
- Securely plug the power cord into the power receptacle. Insecure connection may cause fire.
- When installing the camera, fasten it securely and firmly. A falling camera may cause personal injury
- Do not place conductive objects (e.g. screwdrivers, coins, metal things, etc.) or containers filled with water on top of the camera. Doing so may cause personal injury due to fire, electric shock, or falling objects.
- Do not install the unit in humid, dusty, or sooty locations. Doing so may cause fire or electric shock.
- If any unusual smells or smoke come from the unit, stop using the product. In such case, immediately disconnect the power source and contact the service center. Continued use in such a condition may cause fire or electric shock.
- If this product fails to operate normally, contact the nearest service center. Never attempt to modify this product in any way. (ZMODO is not liable for problems caused by unauthorized modifications or attempted repair.)
- When cleaning, do not spray water directly onto parts of the product. Doing so may cause fire or electric shock.
CAUTION
- Do not drop objects on the product or apply strong shock to it. Keep away from a location subject to excessive vibration or magnetic interference.
- Do not install in a location subject to high temperature (over 120F), low temperature (below -5F), or high humidity. Doing so may cause fire or electric shock.
- If you want to relocate the already installed product, be sure to turn off the power and then move or reinstall it.
- Remove the power plug from the outlet when then there is a lightning. Neglecting to do so may cause fire or damage to the product.
- Keep out of direct sunlight and heat radiation sources. It may cause fire.
- Install it in a place with good ventilation.
- Avoid aiming the camera directly towards extremely bright objects such as sun, as this may damage the CCD image sensor.
- Apparatus shall not be exposed to dripping or splashing and no objects filled with liquids, such as vases, shall be placed on the apparatus.
- The Mains plug is used as a disconnect device and shall stay readily operable at any time.
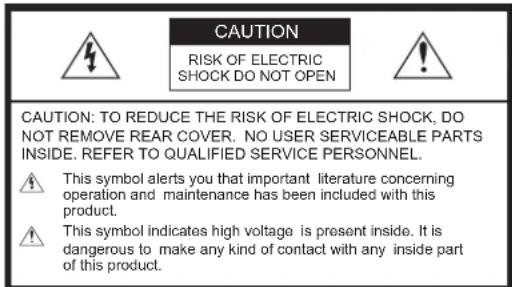

ZMODO TECHNOLOGY CORP. LTD. 1201-1205, Sangda Mansion, High Technology Park, Shenzhen, Guangdong, China Fax: Tel: 0755-3383-1638 0755-338
PRODUCT OVERVIEW
Product Overview
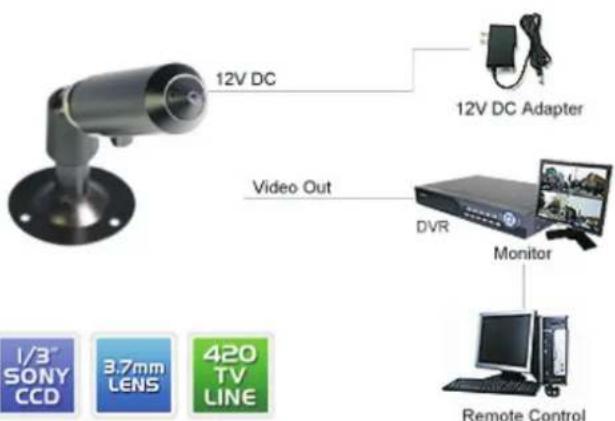
Discretely monitor your home or small business with this hidden camera. Featuring a clever styling as an easily overlooked common item, this camera includes imaging provided by a 1/3" Sony Color CCD, which delivers good video quality, reliable operation, a long operating life, and high value. This hidden camera is designed for indoor use, and can easily be mounted for the perfect viewing angle. BNC and RCA connections are used for video and power. Installation is easy and hassle free, just plug and play.
Main Features
• 1/3" Sony Color CCD Image Sensor
• 420 TV Lines, Horizontal
• 3.7mm Pinhole Lens
• Signal: NTSC
- Iris: Auto
• Night Vision Min. Light: 0.5 Lux (F1.2)
• Operation Temperature: -5F \~ 120F
- Mount: Wall or Ceiling
• Video Connector: BNC
• Power Connector: RCA 12V DC
Package includes
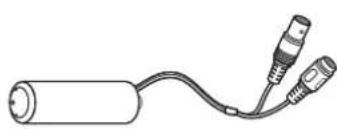
Please check your camera and accessories included in the package. Those components are as shown below:
natural_image
Simple line drawing of a battery connected to two cables (no text or symbols)Camera
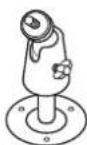
Mount Bracket

Screws Package Box
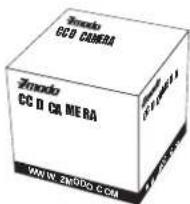
1) CM-S10055BK Mini Hidden Pinhole Camera
1) A Card
3) Screws
1) Package Box
SCHEMATIC DIAGRAM
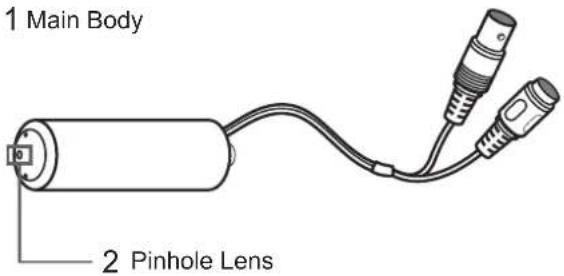
natural_image
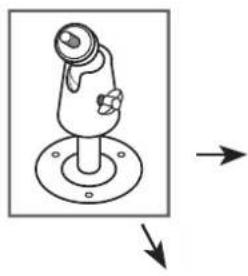
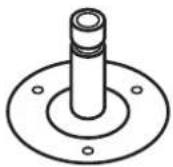
Diagram of a hand holding a knob with a base, showing directional arrows (no text or symbols)3 Mount Bracket

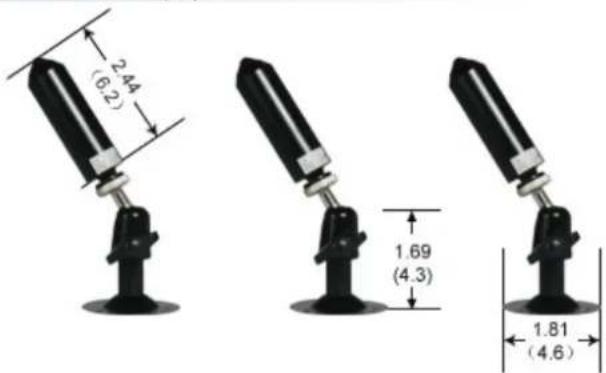
All Dimensions = in (cm)
Application Drawing
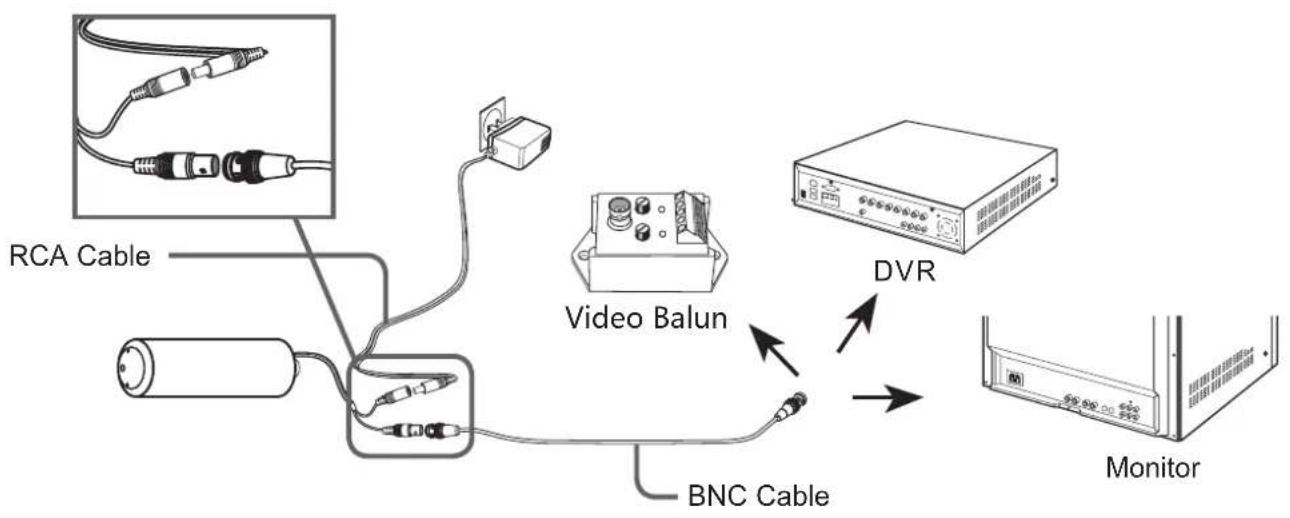
CONNECTING CABLES
flowchart
graph TD
    A["RCA Cable"] --> B["Video Balun"]
    C["BNC Cable"] --> B
    D["DVR"] --> B
    E["Monitor"] --> B
    B --> F["Switch"]
To connect cables
- Connect the BNC cable to the video connector attached on your camera
- Connect the BNC cable to the Video Input on a monitor, DVR or Video Balun.
- Connect the power adapter to the RCA Power connector attached on your camera. When the monitor is turned on, the camera image appears.
Note
It is very important that you identify these ends before installing the cable so that you have the correct ends at the correct location.
HOW TO INSTALL
Before installation
Please read the following instructions before installing your camera:
- You have to check whether the location (ceiling or wall) can bear five times the weight of your camera.
- Do not allow the cable to be caught in a pinched area, otherwise the electric line cover may be damaged. This may cause cable breakdown or fire.
- When installing your camera, don't allow anyone to walk or stand under your installation site, and remove all valuable items. A dropped camera may cause injury to bystanders or harm to valuable items.
Installation procedure
• To install your camera
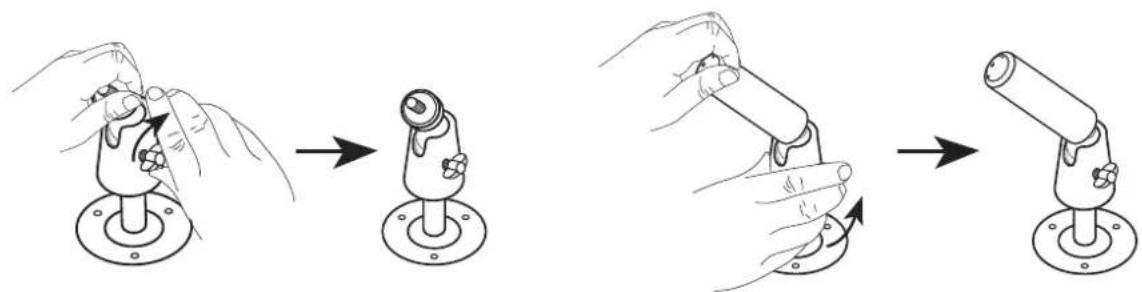
natural_image
Illustration of a hand using a tool to adjust a mechanical component, showing step-by-step assembly (no text or symbols)step

Rotate the Mount Bracket counterclockwise until it disconnects from the Main Body.
HOW TO INSTALL
step
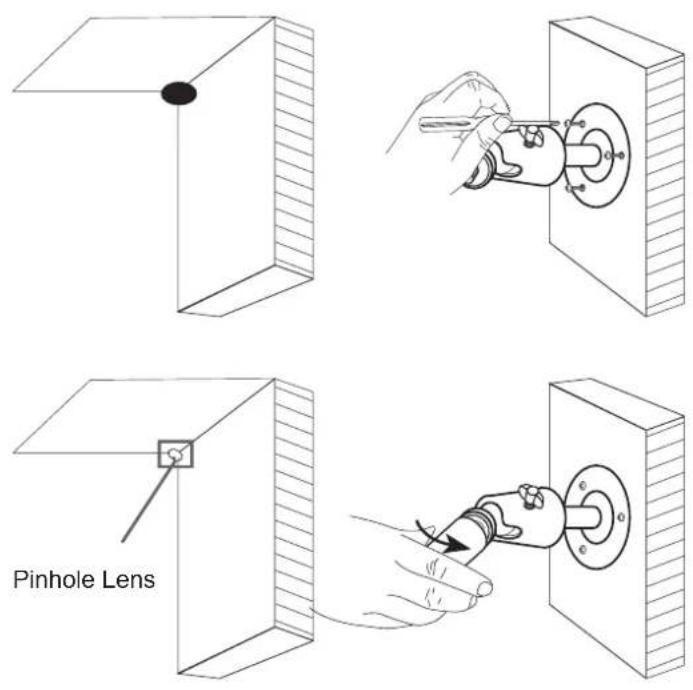
2 Attach the Mount Bracket to the mounting location using the 3 screws supplied in your package. As shown in the picture, push the three screws into the 3 holes on the bottom of the Mount Bracket, then twist in the screws into the wall using a screwdriver.
step
3 Attach the Main Body to the Mount Bracket by rotating the Main Body on clockwise until it becomes tight.
Note
As shown on the left, you can also put the whole Main Body into the wall or ceiling. Only left the pinhole lens outside. If mounted in this way, it will be more covert.
step
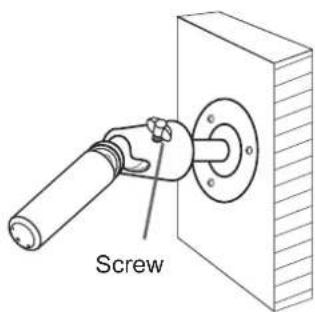
4 Last, adjust the slope of the lens by using the screw on the Mount Bracket. Make sure that the pinhole lens is facing the camera's monitoring area. The camera now is installed on the mounting location.
CAMERA SPECIFICATION
Specifications for NTSC & PAL Standard
| Item Details | |||
| Product type | Mini Pinhole Hidden Camera | ||
| Power input | DC 12V | ||
| Broadcast type | NTSC Standard color system PAL $standard color system | ||
| (525 Lines, 60 Fields) | (625 Lines, 50 Fields) | ||
| Power Consumption | Approx. 120mA | ||
| Image device | 1/3 inch SONY Color CCD | ||
| Effective Pixels | 510(H) x 492(V), 250,920 pixels | ||
| Scanning mode | NTSC Standard PAL Standard | ||
| 525 Lines 625 Lines | |||
| Synchronization mode | Internal Synchronization | ||
| Horizontal resolution | 420 TV Lines | ||
| Minimum illumination | 0.5Lux (F1.2) | ||
| Signal output | 1.0Vp-p, 75ohms | ||
| Lens | Focal Length | Zone | Limit of Viewing Angle |
| 3.7mm pinhole | Horizontal | 78° | |
| Vertical | 68° | ||
| S/N Ratio | >48dB | ||
| Controls | Auto Iris | ||
| Auto Gain Control | |||
| Auto Back Light Compensation | |||
| Auto Switching between Color and B&W by day and night change(D/N) | |||
| Product color | Black | ||
| Operation temperature | -5F—120F | ||
| Size (package) | 2.44"x 1.69"x 1.81" | ||
| Weight | 0.31 lbs | ||
| Mounting | Ceiling or Wall | ||
FCC Statement
This device complies with part 15 of the FCC Rules. Operation is subject to the following two conditions:
1) This device may not cause harmful interference.
2) This device must accept any interference received including interference that may cause undesired operation.
Note
This equipment has been tested and found to comply with the limits for a Class A digital device, pursuant to part 15 of FCC Rules. These limits are designed to provide reasonable protection against harmful interference when the equipment is operated in a commercial environment. This equipment generates, uses, and can radiate radio frequency energy and, if not installed and used in accordance with the instruction manual, may cause harmful interference to radio communications. Operation of this equipment in a residential area is likely to cause harmful interference in which case the user will be required to correct the interference at his own expense.
Correct Disposal of This Product

(Waste Electrical & Electronic Equipment) (Applicable in the European Union and other European countries with separate collection systems)
This marking shown on the product
or its literature, indicates that it should not be disposed with other household wastes at the end of its working life. To prevent possible harm to the environment or human health from uncontrolled waste disposal, please separate this from other types of wastes and recycle it responsibly to promote the sustainable reuse of material resources.
Household users should contact either the retailer where they purchased this product, or their local government office, for details of where and how they can take this item for environmentally safe recycling. Business users should contact their supplier and check the terms and conditions of the purchase contract. This product should not be mixed with other commercial wastes for disposal.

SKU: CM-S10055BK
CE FC

ZMODO TECHNOLOGY CORP. LTD. 1201-1205, Sangda Mansion, High Technology Park, Shenzhen, Guangdong, China Fax: Tel: 0755-3363-1636 0755-334
- 7mode
- User's Guide
- CM-S10055BK
- SAFETY PRECAUTIONS
- WARNING
- CAUTION
- PRODUCT OVERVIEW
- Main Features
- Package includes
- SCHEMATIC DIAGRAM
- CONNECTING CABLES
- To connect cables
- Note
- HOW TO INSTALL
- Before installation
- Installation procedure
- step
- CAMERA SPECIFICATION
- FCC Statement
- Correct Disposal of This Product
Brand : Zmodo
Model : CM-S10055BK
Category : Security Camera