Muv 1252 - Table BDI - Free user manual and instructions
Find the device manual for free Muv 1252 BDI in PDF.

User questions about Muv 1252 BDI
0 question about this device. Answer the ones you know or ask your own.
Ask a new question about this device
Download the instructions for your Table in PDF format for free! Find your manual Muv 1252 - BDI and take your electronic device back in hand. On this page are published all the documents necessary for the use of your device. Muv 1252 by BDI.
USER MANUAL Muv 1252 BDI
Product Registration
Registering your new BDI product allows us to send you important product updates, service information and helpful hints related to your BDI products. Register today, and you will be entered to win free a BINK table from BDI: www.bdiusa.com/register
Component List
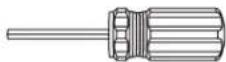
T1 Hex Driver x 1
Placement and Maintenance
Your Müv Table is designed for indoor use on level floors. Clean glass with glass cleaner and wood veneer with a moist cloth.

H1 M4 x 12mm Pan Head Screw x 32
Müv is engineered for easy assembly. Carefully follow this procedure to prevent any damage. Do not use power tools for assembly of this product.
Step 1
Unpack and identify the parts listed below. The assembly workspace should be a non-marring surface such as carpet. For missing hardware pieces, contact BDI Customer Service at: customerservice@bdiusa.com. For all other concerns, please contact your BDI retailer.

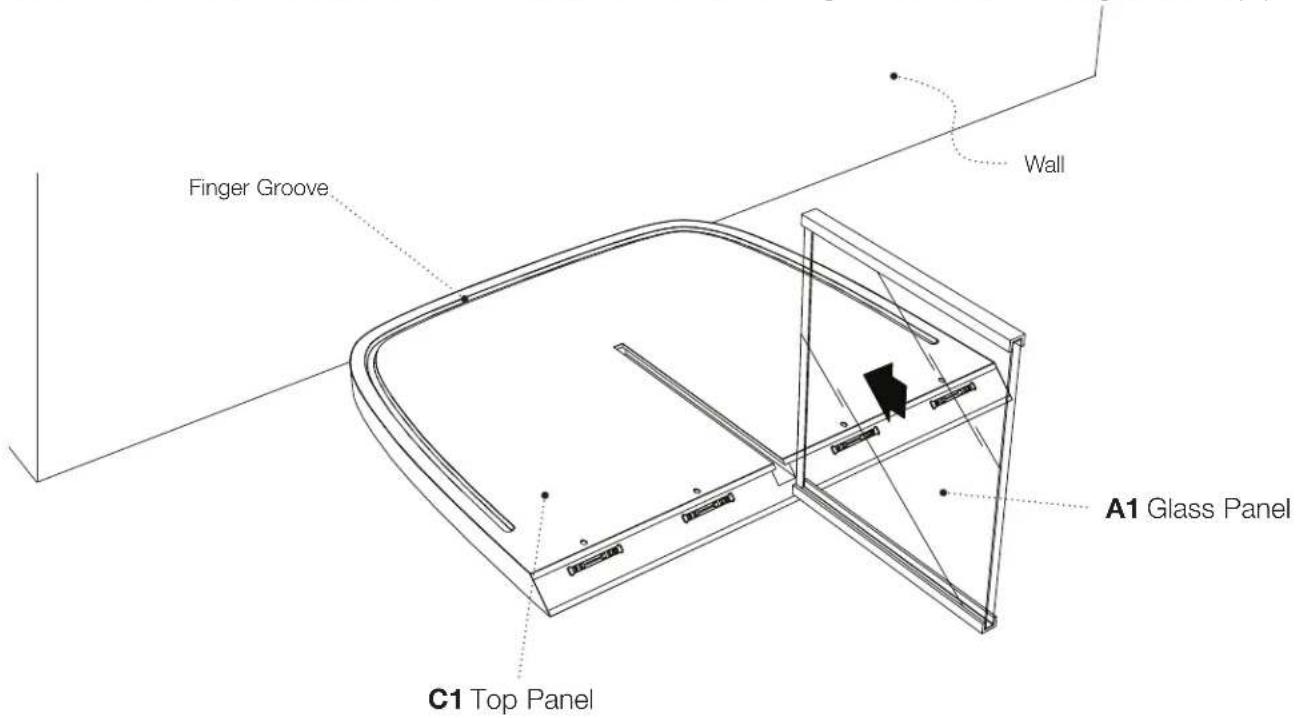
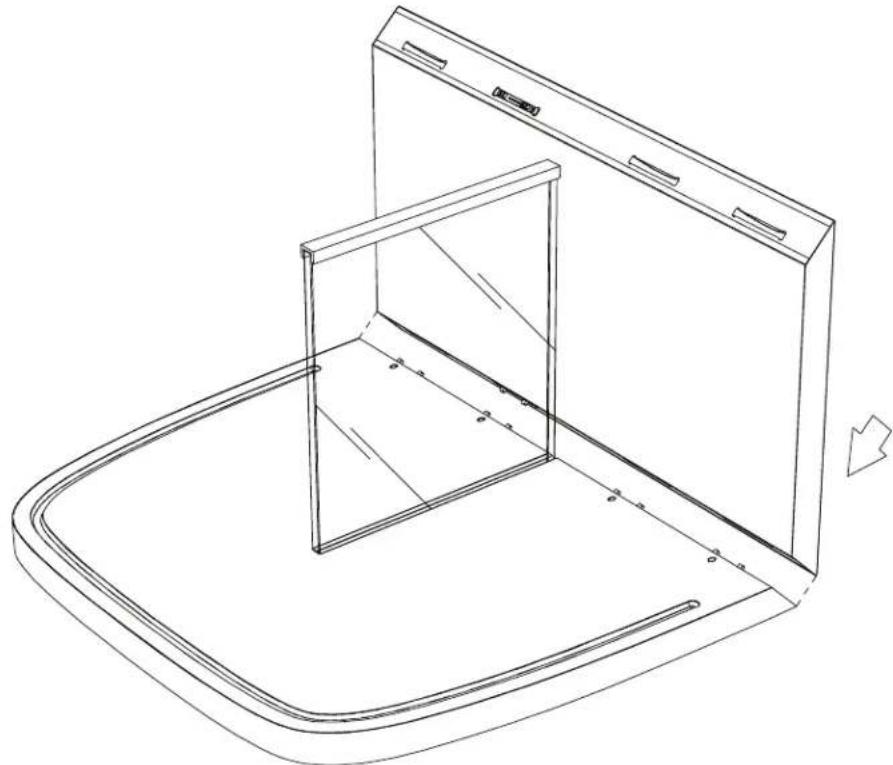
Step 2 - Place the top panel C1 (which has a finger groove around the bottom edge as shown). Remove the protective film from glass panel A1. Slide one edge of glass panel A1 (with aluminum rail) into the matching slot on bottom side of top panel C1. If the aluminum channel is tight, brace the front edge of the top panel.
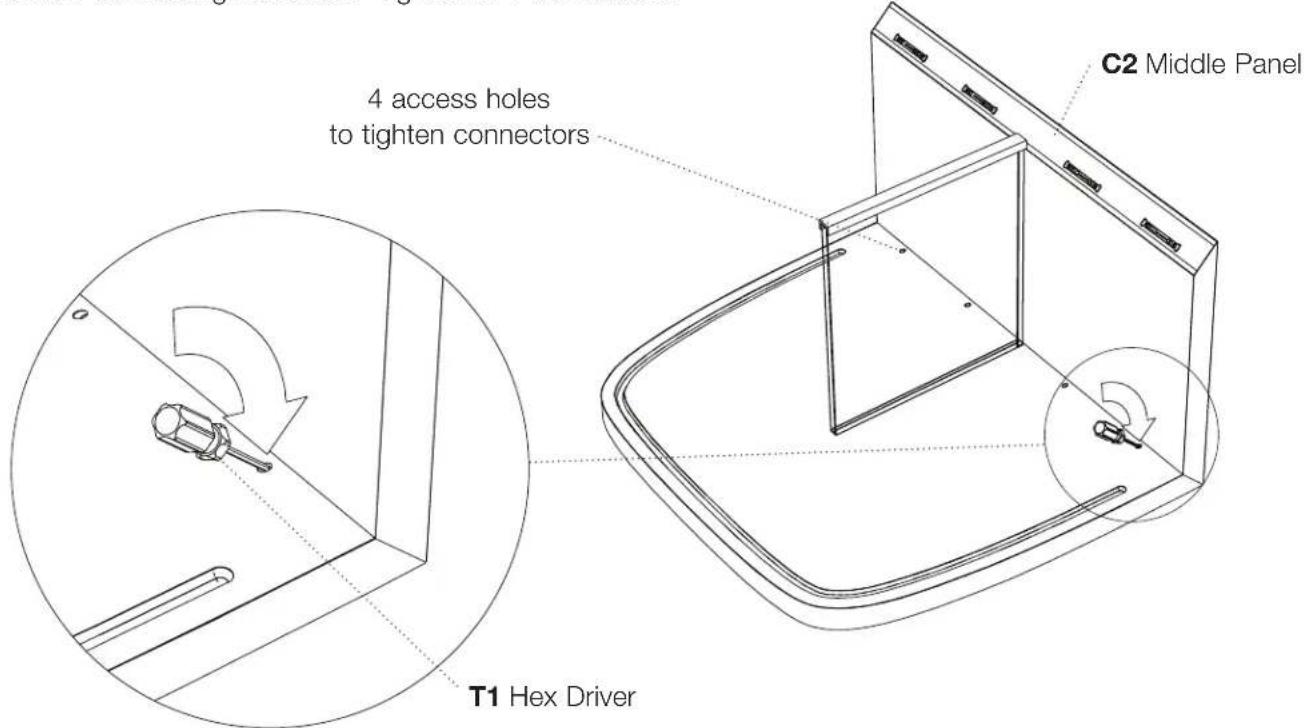
Step 3 - Take the middle panel C2 and position it as shown until the connectors engage with each other. Make sure the edges are flush.
natural_image
Line drawing of a 3D cabinet with an open door and internal frame, no text or symbols presentStep 4 - Place hex driver T1 into the access holes at a 45 degree angle and tighten the connectors by turning clockwise about 1/4 turn until tight. You may need to wiggle the hex driver until the end of the driver engages with the connecting hardware. Tighten all 4 connectors.
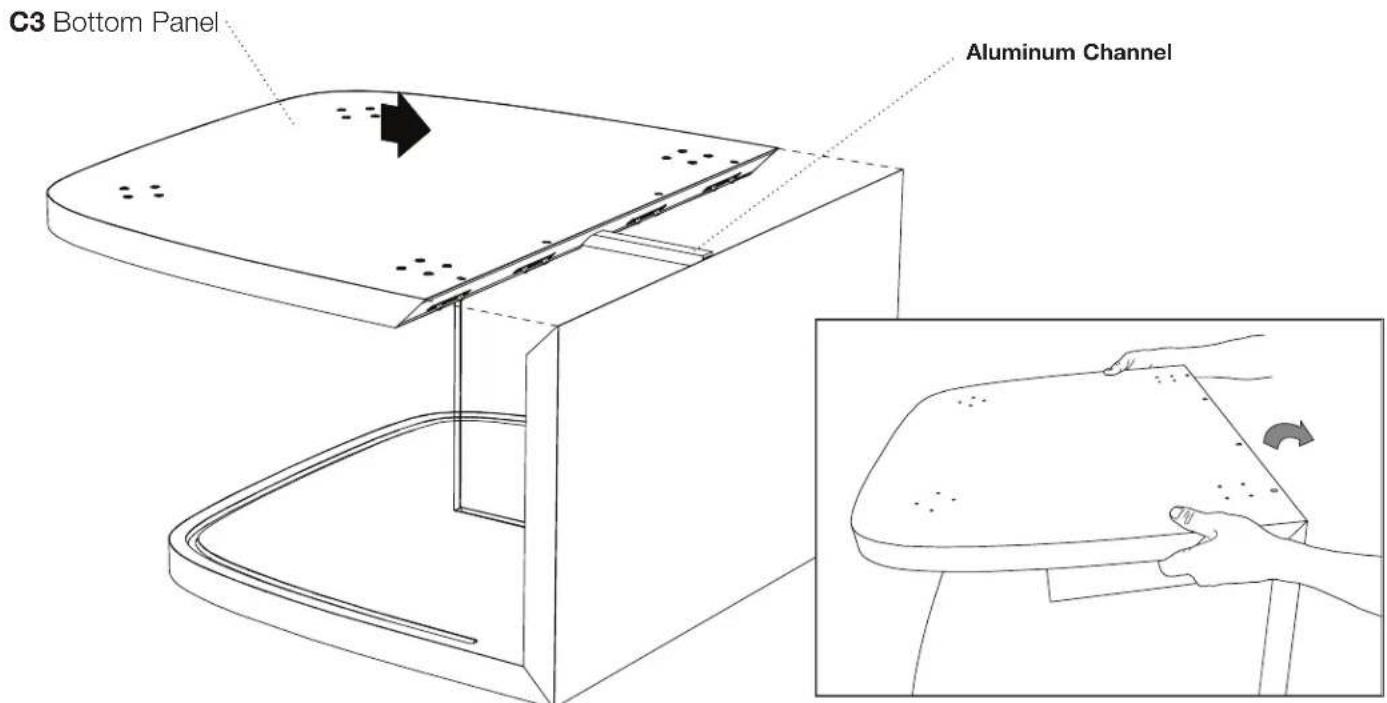
Step 5 - Orient the bottom panel C3 as shown and slide it so that the aluminum channel goes into the slot on bottom panel C3. Keep sliding until the mitered edges align and touch. Wiggle and lift bottom panel C3 to align the joint and close the seam.
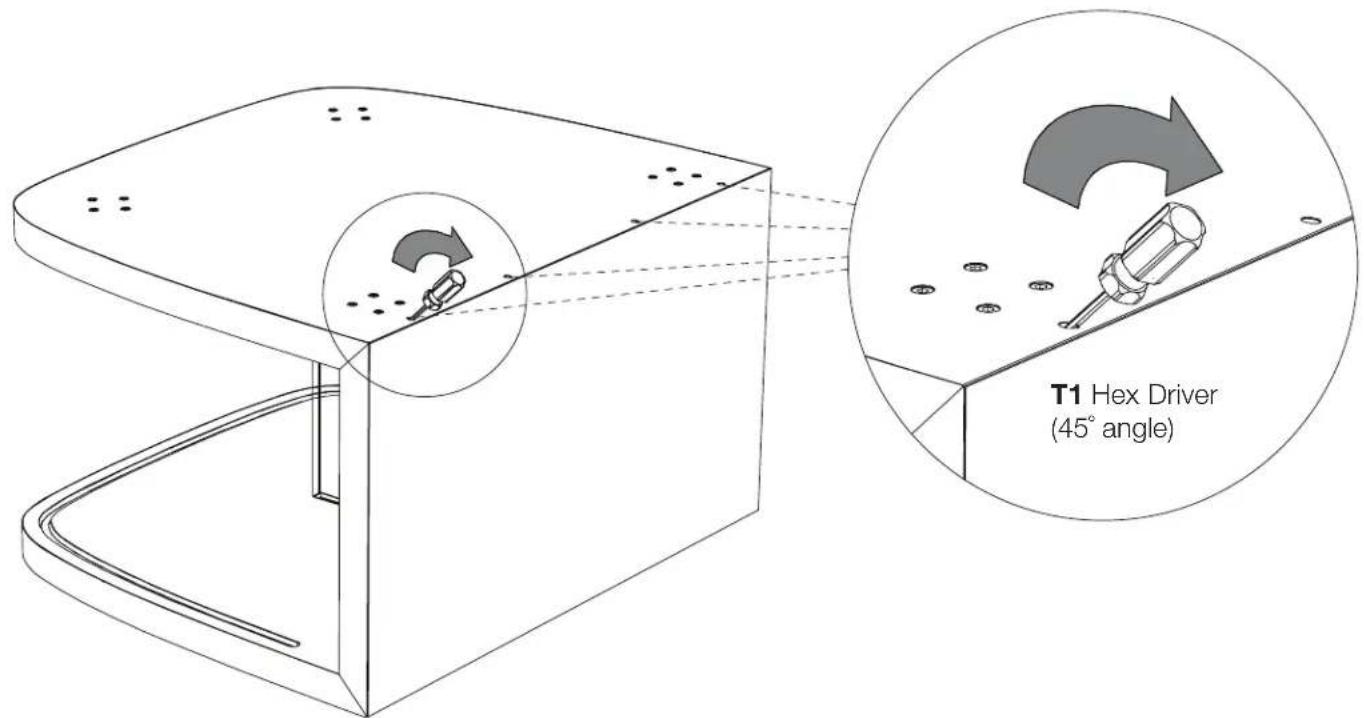
Step 6 - Tighten the 4 miter joint connectors by inserting hex driver T1 into the slanted holes and turning clockwise until tight.
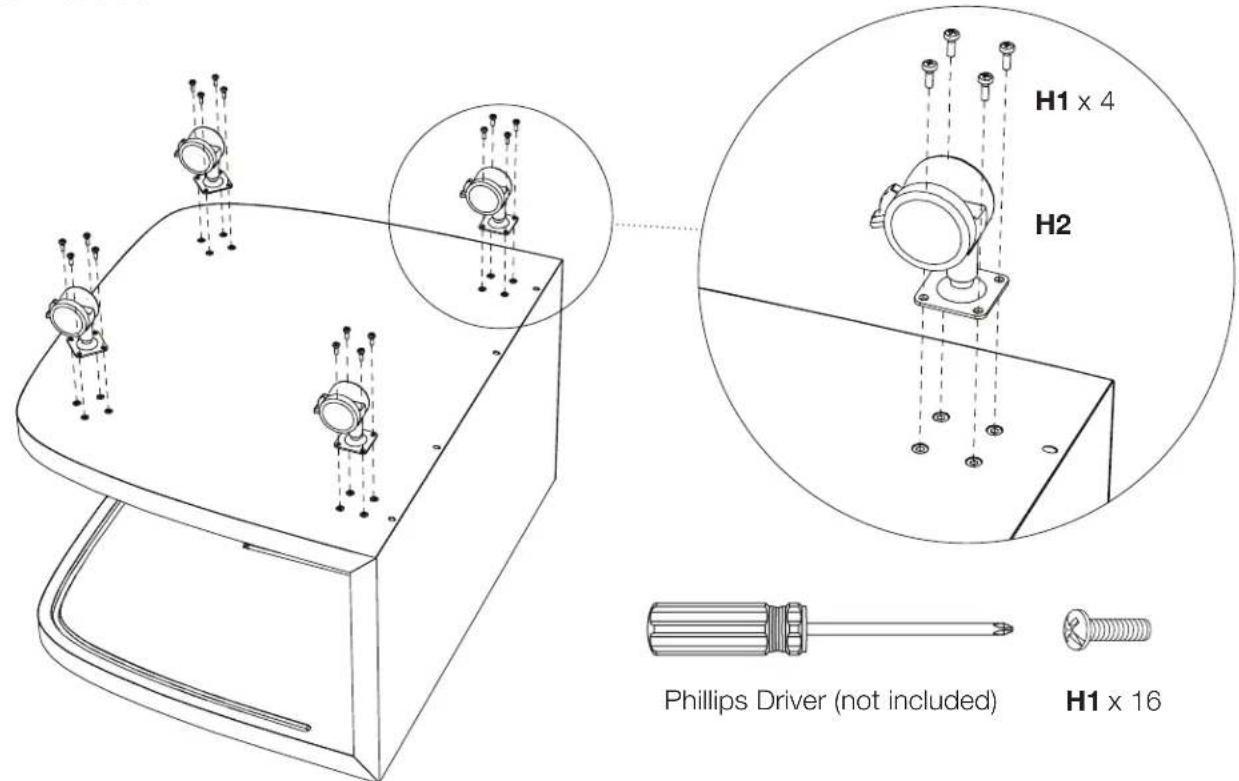
Step 7 - Attach each swivel locking caster H2 with pan-head screws H1 and a Phillips screwdriver. Repeat for all 4 casters.
Step 8 - Repeat steps 2-7 and assemble the other half of the table.
Step 9- With help from another person, carefully position the tables onto their wheels.
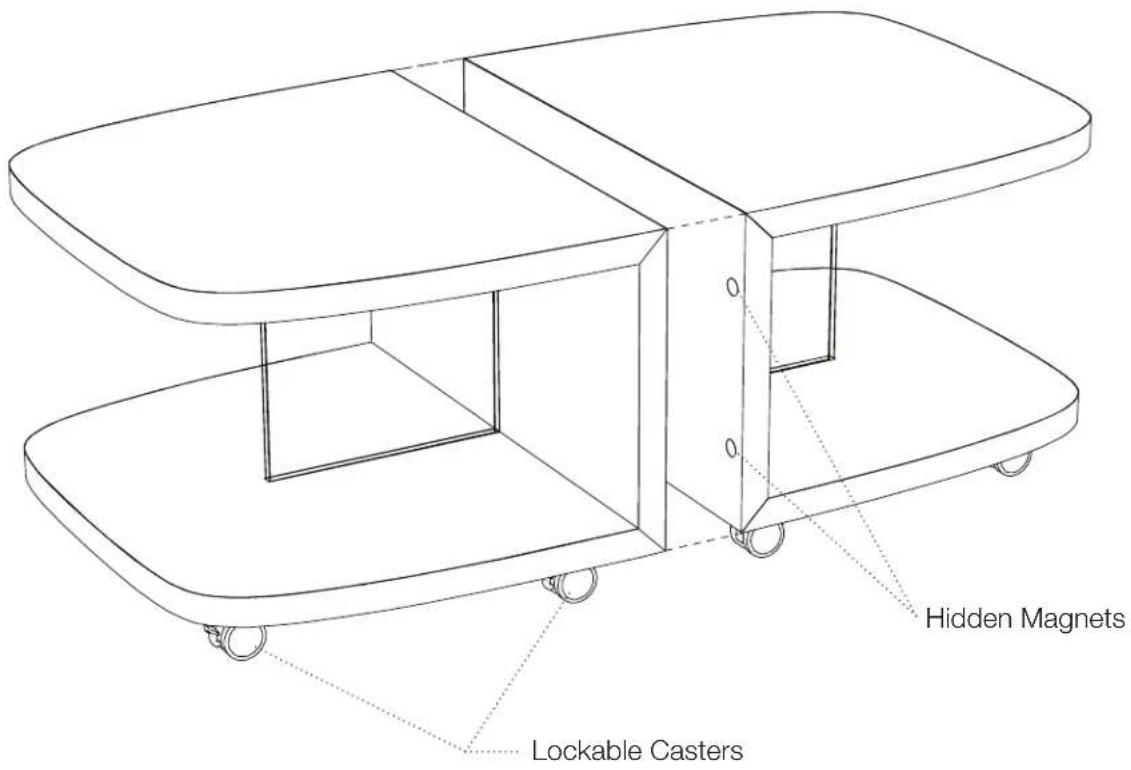
Step 10 - Your Müv Coffee Table comes with lockable casters. Raise the tab to lock, lower the tab to unlock.
Caution!
• The middle panels have hidden magnets to help align the 2 halves of your Müv table.
- Keep sensitive electronic equipment and fingers out of the path of the magnets.