ARTICULATION Evo - Audio software ANTARES - Free user manual and instructions
Find the device manual for free ARTICULATION Evo ANTARES in PDF.

User questions about ARTICULATION Evo ANTARES
0 question about this device. Answer the ones you know or ask your own.
Ask a new question about this device
Download the instructions for your Audio software in PDF format for free! Find your manual ARTICULATION Evo - ANTARES and take your electronic device back in hand. On this page are published all the documents necessary for the use of your device. ARTICULATION Evo by ANTARES.
USER MANUAL ARTICULATION Evo ANTARES
What is Articulator? 4
Control Signal and Audio Signal 5
Quick Start 6
Route Audio to Articulator 6
Set the Voice Type 6
Adjust the Input Level 6
Add Some Noise 6
Modify the Formants 6
Adjust the Amplitude Modulation 6
Add Some EQ 7
Dial in the Output Mix 7
Controls
Input Controls 8
Audio Signal Input Meter 8
Control Signal Input Meter 8
Sidechain Input LED 9
Audio Level 9
Compressor 9
Noise Level 9
Stereo Noise 10
Formant Extraction Controls 10
Voice Type 10
Tracking 10
Formant Modulation Controls 11
Throat Length 11
Throat Width 11
Amplitude Modulation Controls 12
Envelope Amount 12
EQ Controls 13
Frequency 13
Q 13
Contents 3
Gain 13
EQ Bypass 14
Output Controls 15
Output Gain Controls 15
Output Level Meters 15
Clip Indicators 16
Pan Sliders 16
Bypass 16
Introducing Articulator

flowchart
graph LR
    A["ARTICULATOR DIGITAL TALKBOX"] --> B["INPUT MIXER"]
    B --> C["FORMANT MODULATION"]
    C --> D["AMPLITUDE MOD"]
    D --> E["EQ"]
    E --> F["OUTPUT MIXER"]
    F --> G["Feedback to Chart"]
    G --> H["Sidechain Input"]
    I["CONTROL SIGNAL"] --> J["NOISE GENERATOR"]
    J --> K["FORMANT EXTRACTION"]
    K --> L["AMPLITUDE ENVELOPE EXTRACTION"]
    L --> M["Bypass"]
    N["INPUT ROUTING"] --> O["NOISE LEVEL Comp"]
    O --> P["FORMANT EXTRACTION"]
    P --> Q["Frequency Q Gain"]
    Q --> R["Bypass"]
    S["Audio Signal"] --> T["Audio Track"]
    U["Control Signal"] --> V["L C R Pan"]
    W["Bypass"] --> X["Output Signal"]
What is Articulator?
Articulator is a digital version of the classic talkbox, perfect for talking guitars, singing synths, and a wide range of special effects.
If you've ever seen a guitarist with a plastic tube in their mouth and a guitar that sounds like it's talking, you have a basic idea of what a talkbox is. A physical talkbox works by applying a filter (the human mouth) to an audio signal (usually a guitar or synth).
Articulator models this process by extracting the formant and amplitude information from a vocal track and applying it to another audio track or to its built-in noise generator in real time.
Articulator also features a built-in EQ, a formant modulation section, which lets you sculpt your vocal sound using our throat modeling technology, and an amplitude modulation control, which lets you dial in exactly how much of the effect you want on your track.
Control Signal and Audio Signal
Articulator uses two different audio sources to create the talkbox effect: a Control Signal and an Audio Signal.
The Control Signal is usually a voice. Articulator extracts its formant and amplitude envelopes and applies them to the Audio Signal to create a talkbox effect.
The Audio Signal is usually an instrument, such as a synth or guitar, which will be modulated by the Control Signal. Audio Signals with broad frequency spectrums and rich harmonic overtones work best for creating the talkbox effect.
You can also broaden the spectrum of the Audio Signal with Articulator's built-in noise generator. Or modulate the noise without any external Audio Signal for a whispering effect.
Quick Start
Follow these steps to get started with Articulator
Route Audio to Articulator
Place Articulator on a track that contains your Audio Signal (usually an instrument, like a guitar or a synth).
Then route the Control Signal (usually a voice) to Articulator's sidechain input. The steps for routing sidechain input to a plug-in depend on what DAW you're using.
Set the Voice Type
To optimize the formant extraction process, choose the setting from the Voice Type menu that best describes the audio you're using for the Control Signal.
Adjust the Input Level
Use the Audio Level control to set the input gain of the Audio Signal. Try turning on the Compressor to even out the levels of the Audio Signal before applying the Control Signal's dynamics to it.
Add Some Noise
Try adding some broadband noise to your Audio Signal with the Noise Level control, and turn on Stereo Noise, for a stereo effect.
Adding a small amount of noise can enhance the talkbox effect by broadening the spectrum of the Audio Signal. Add more noise for a breathy or raspy sound, or modulate the noise without any other Audio Signal, for a full-on whisper.
Modify the Formants
Try modifying the formants that are extracted from the Control Signal by adjusting the Throat Length and Throat Width controls.
Adjust the Amplitude Modulation
Experiment with the Envelope Amount control to change the amount of amplitude modulation applied to the Audio Signal by the Control Signal.
Add Some EQ
Use the EQ Controls to shape the sound of the Audio Signal and noise component.
Dial in the Output Mix
Keep an eye on the Output Level Meters and Clip Indicators and adjust the Audio Signal Gain as needed.
Try turning up the Control Signal Gain to mix in some unprocessed vocals alongside the talkbox effect. Use the Pan Sliders to position the Audio and Control Signals in the stereo field.
Controls
Input Controls
text_image
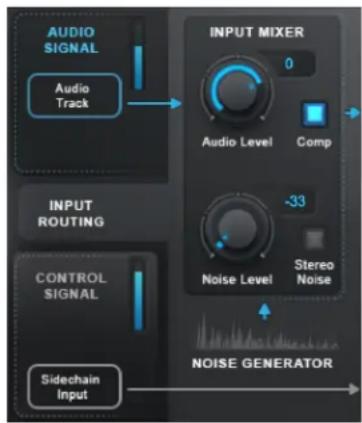
AUDIO SIGNAL Audio Track INPUT ROUTING CONTROL SIGNAL Sidechain Input INPUT MIXER 0 Audio Level Comp -33 Noise Level Stereo Noise Noise NOISE GENERATORThe Input Controls let you monitor the input levels of the Control and Audio signals, compress and adjust the level of the Audio Signal, and optionally add broadband noise to the signal.
The Audio Signal is usually an instrument, such as a synth or guitar, which is modulated by the Control Signal.
The Control Signal is usually a voice, which modulates the Audio Signal to create a talkbox effect.
Noise can be added to the Audio Signal to improve the intelligibility of the formants, or to create a whispery or breathy effect. You can even modulate the noise without any other Audio Signal for a full-on whisper.
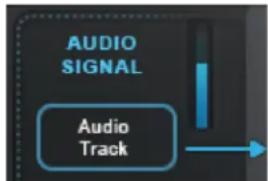
Audio Signal Input Meter
flowchart
graph LR
    A["Audio Track"] --> B["Output"]
The Audio Signal Input Meter shows the level of the Audio Signal before any processing by Articulator. The Audio Signal input comes from the track that Articulator is instantiated on.
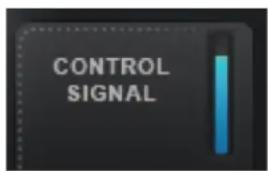
Control Signal Input Meter
text_image
CONTROL SIGNALThe Control Signal Input Meter shows the level of the Control Signal (routed from Articulator's sidechain input) before any processing by Articulator.
Sidechain Input LED
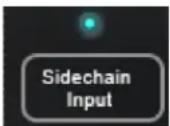
The Sidechain Input LED shows when a sidechain connection has been made to Articulator. The LED is enabled when audio is sent to Articulator via sidechain input.
Audio Level
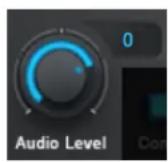
This Audio Level control sets the level of the Audio Signal at the input stage, before any processing by Articulator.
Compressor

This Compressor button lets you apply a compressor with fixed parameters to the Audio Signal.
This is useful for evening out the dynamics of the Audio Signal, so that the Control Signal's dynamics can be applied to it.
Noise Level
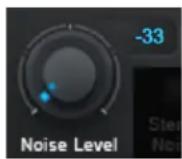
The Noise Level control lets you set the level of the internal noise generator.
Adding a small amount of noise can often enhance the talkbox effect, and make it easier to hear the phonemes and words that are extracted from the Control Signal and applied to the Audio Signal.
It does this by broadening the spectrum of the Audio Signal, so that the formant filters will have a more audible effect.
You can also add even more noise for a breathy or raspy sound, or use the noise generator on its own without any other Audio Signal, for a full-on whisper.
Stereo Noise

The Stereo Noise button lets you decouple the noise from the left and right channels to create a stereo breathiness effect.
Note: Stereo Noise is only available when Articulator is placed on a stereo track.
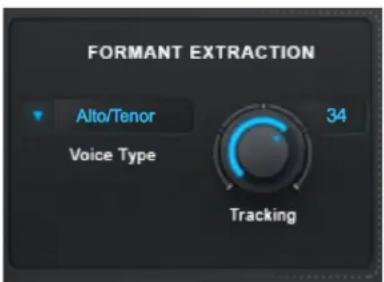
Formant Extraction Controls
text_image
FORMANT EXTRACTION Alto/Tenor 34 Voice Type TrackingThe Formant Extraction Controls let you optimize the formant extraction process for the specific audio that you're using as your Control Signal.
Voice Type

The Voice Type menu lets you select the type of voice that you're using for the Control Signal. Options include Soprano, Alto/Tenor, Baritone/Bass, and Instrument.
Tracking

In order to accurately analyze the Control Signal and extract formant information, Articulator requires a periodically repeating waveform.
The Tracking control determines how much variation is allowed in the
incoming waveform for Articulator to still consider it periodic.
If you're working with a well-isolated solo signal you can typically leave the Tracking control at its default value.
If your audio is noisy or not well-isolated, or if it's a particularly breathy voice, you may need to set it to a higher value. If you're encountering artifacts such as clicking or popping, try setting it to a lower value.
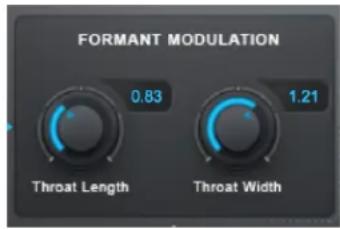
Formant Modulation Controls
text_image
FORMANT MODULATION 0.83 1.21 Throat Length Throat WidthThe Formant Modulation Controls let you modify the formants extracted from the Control Signal by adjusting the shape of a digital model of the human throat. The modified formants are then applied to the Audio Signal.
Throat Length
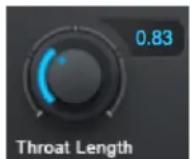
The Throat Length control lets you lengthen or shorten the throat model to adjust the formant frequencies extracted from the Control Signal.
Settings greater than 1.00 will lengthen the throat, resulting in lower formant frequencies. Settings less than 1.00 will shorten the throat, resulting in higher formant frequencies.
Throat Width
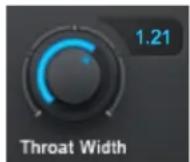
The Throat Width control lets you widen or narrow the throat model to adjust the formant frequencies extracted from the Control Signal.
Settings greater than 1.00 will widen the throat, resulting in lower formant frequencies. Settings less than 1.00 will narrow the throat, resulting in higher formant frequencies.
Amplitude Modulation Controls
Envelope Amount
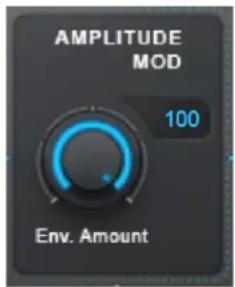
text_image
AMPLITUDE MOD 100 Env. AmountThe Envelope Amount control sets the amount of amplitude modulation applied to the Audio Signal by the Control Signal.
When Envelope Amount is set to 0, the Control Signal's amplitude envelope has no effect on the Audio Signal. In that case, the dynamics of the Audio Signal are preserved and only the formants from the Control Signal are applied to the Audio Signal.
When Envelope Amount is set to 100 the full effect of the Control Signal's amplitude envelope is applied to the Audio Signal.
EQ Controls
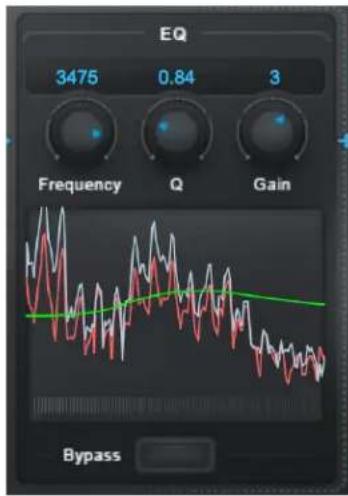
text_image
EQ 3475 0.84 3 Frequency Q Gain BypassThe EQ Controls let you apply a one-band parametric EQ to the Audio Signal, and to the output of the internal noise generator if that's being used
Frequency
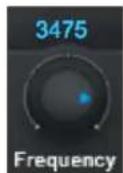
The Frequency control selects the center frequency of the band to be boosted or cut. The range is from 100 to 4000 Hz.
Q
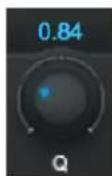
The Q control lets you adjust the width of the frequency band to be boosted or cut. Low Q values result in a wide bandwidth, and high values result in a narrow bandwidth.
Gain

The Gain control lets you set the amount of boost or cut that will be applied to the selected frequency band.
EQ Bypass

The Bypass button lets you bypass the EQ controls.
This is useful if you don't want to apply any EQ to the Audio Signal, or if you'd like to quickly compare the results of your EQ settings to the signal without any EQ.
Output Controls

text_image
OUTPUT MIXER -2 Clip Audio Signal 1 0 L C R Pan 3 Clip Control Signal 1 0 L C R Pan BypassThe Output Controls let you monitor and adjust the output levels and pan positions of both the processed Audio Signal and the Control Signal.
Output Gain Controls

The Audio Signal gain control lets you adjust the gain of the Audio Signal at the output stage, after processing and modulation by the Control Signal.

The Control Signal gain control lets you mix in some of the original Control Signal into the output.
For a more traditional talkbox effect, leave this control set to -inf. Or turn it up if you'd like to mix in the original unprocessed vocal along with the modulated Audio Signal.
Output Level Meters

The Audio Signal and Control Signal each have a Level Meter that displays the level of the signal at the output stage.
Clip Indicators

The Audio Signal and Control Signal each have a Clip Indicator that lights up when that signal has exceeded the maximum threshold.
If either the Audio or Control Signal Clip Indicators lights up, turn down the gain for that signal to avoid clipping.
Pan Sliders
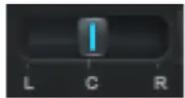
The Audio Signal and Control Signal each have a Pan Slider so you can set the stereo position of each signal independently.
Note: the Pan Sliders are only available when Articulator is placed on a stereo or mono-to-stereo track.
Bypass

The Bypass button lets you bypass Articulator and pass your audio through unprocessed.
Use it to quickly compare the processed and unprocessed audio, or automate it in your DAW to bring in the talkbox effect at certain times in your track.