
934-590 - Photo accessory Marquant - Free user manual and instructions
Find the device manual for free 934-590 Marquant in PDF.

| Product Type | Deep Fryer |
| Capacity | 3 liters |
| Power | 1800 W |
| Dimensions (W x D x H) | 30 x 25 x 35 cm |
| Weight | 2.5 kg |
| Temperature Control | Adjustable thermostat (150°C - 190°C) |
| Heating Element | Stainless steel, immersion type |
| Basket | Removable, with handle, non-stick coating |
| Lid | With viewing window and steam vent |
| Housing Material | Stainless steel and plastic |
| Indicator Light | Power and ready indicator |
| Safety Features | Overheat protection, automatic shut-off, cool-touch handle |
| Non-Slip Feet | Yes |
| Cleaning | Removable oil tank and basket dishwasher safe; exterior wipe with damp cloth |
| Spare Parts Available | Replacement basket, filter, and thermostat |
| Warranty | 2 years |
Frequently Asked Questions - 934-590 Marquant
User questions about 934-590 Marquant
0 question about this device. Answer the ones you know or ask your own.
Ask a new question about this device
Download the instructions for your Photo accessory in PDF format for free! Find your manual 934-590 - Marquant and take your electronic device back in hand. On this page are published all the documents necessary for the use of your device. 934-590 by Marquant.
USER MANUAL 934-590 Marquant
natural_image
Black selfie stick with attached orange clip and USB cable, isolated on white background (no text or symbols)EN - Operating instructions in original
Date of production: 2015-02-11
© Jula AB
SVENSKA....4
SÄKERHETSANVISNINGAR....4
TEKNISKA DATA 4
BESKRIVNING 5
SAFETY INSTRUCTIONS....19
TECHNICAL DATA....19
DESCRIPTION 20
Package contents 20
USE....21
Charging....21
Photographing....21
Status lights 22
SÄKERHETSANVISNINGAR
natural_image
Diagram showing a device with an arrow pointing to a component, and a magnified inset of the device (no text or symbols present)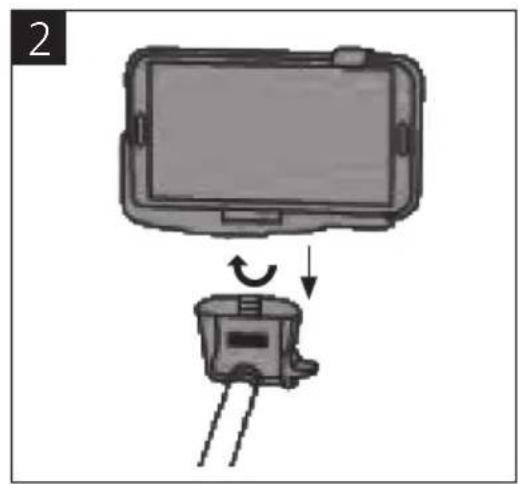
natural_image
Diagram showing a device with an open lid and a small device with a rotation arrow, no text or symbols present.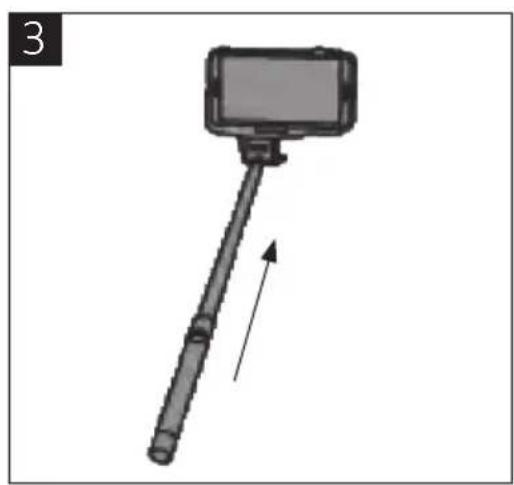
natural_image
Simple line drawing of a selfie stick with a smartphone mounted on a pole, no text or symbols present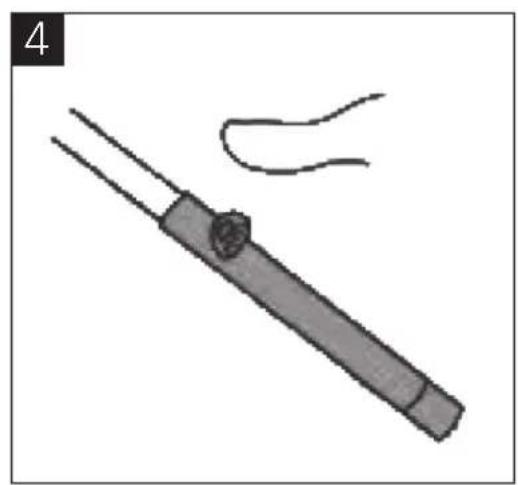
natural_image
Simple line drawing of a tool with a handle and curved tip, no text or symbols presentINDIKERINGSLAmpoR
natural_image
Simple line drawing of a trash bin with diagonal lines crossing it, no text or symbols present.Värna om miljön!
natural_image
Diagram showing a device with an inset close-up of its internal components (no text or symbols)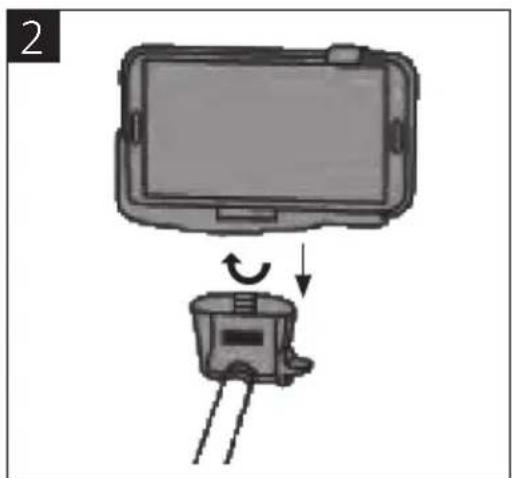
natural_image
Diagram showing a device with an open lid and a base device with a curved arrow indicating rotation (no text or symbols)
natural_image
Simple line drawing of a selfie stick with a smartphone mounted on a pole, no text or symbols present
natural_image
Simple line drawing of a pen-like object with a handle and a curved line above it, no text or symbols present.INDIKAToRLAmpER
- Blå lampe slukket: avslått
- Blå lampe blinker én gang: fotografering
- Blå lampe blinker raskt: Bluetooth-tilkobling lyktes/aktiveres
- Blå lampe blinker middels raskt: Bluetooth-tilkobling aktivert
- Blå lampe blinker sakte: utladet batteri
• Rød lampe lyser: lading
• Rød lampe slukt: fulladet
natural_image
Simple line drawing of a trash bin with diagonal lines crossing it, no text or symbols present.Värna om miljön!
natural_image
Diagram showing a device with an inset close-up of its internal components (no text or symbols)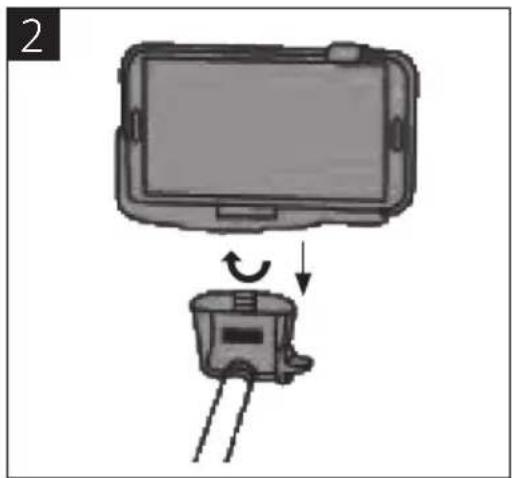
natural_image
Diagram showing a device with an open lid and a switch, no text or symbols present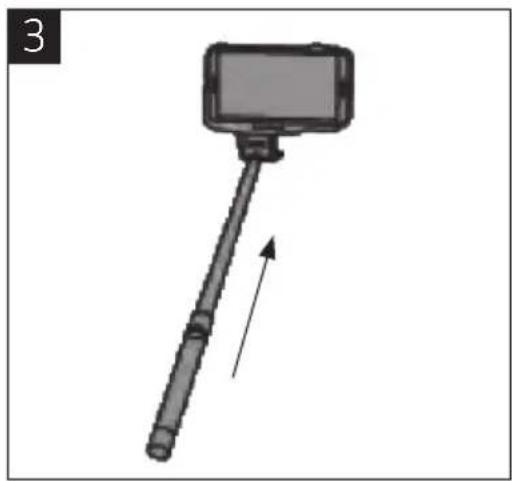
natural_image
Simple line drawing of a selfie stick with a smartphone mounted on a pole, no text or symbols present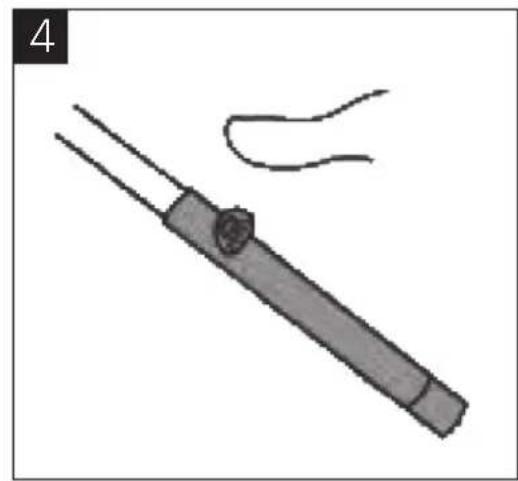
natural_image
Simple line drawing of a pen-like object with a handle and a curved line above it, no text or symbols present.LAmpKI KoNTRoLNE
natural_image
Pure electrical circuit lines without any symbolsDBAJ O ŚRODOWISKO!
Read the User Instructions carefully before use.
Save them for future reference.
- Never attempt to dismantle the product.
- Never use alcohol, solvents or the equivalent to clean the product.
- Do not expose the product to extreme temperatures.
- Do not use the product in the rain, or in damp areas.
- Keep the product away from naked flames and other sources of heat.
TECHNICAL DATA
| Max load capacity 500 g |
| Net weight 169 g |
| Telescopic sections 7 |
| Smartphone width 63–85 mm |
| Length 235–1005 mm |
| Tripod screw 1/4 inch |
| Charging voltage 5 v |
| Battery capacity 45 mAh |
| Charging time 1 hour |
| Standby time ≥ 100 hours |
| Autodyne frequency ≥ 500 Hz |
| Operative system ≥ Android 3.0, iOS 4.0 |
Support: Bluetooth compatible iOS (4.0 and above) most Android (2.2 and above) devices (excluding HTC/SONY) using the Camera 360 application.
DEScRIpTIoN
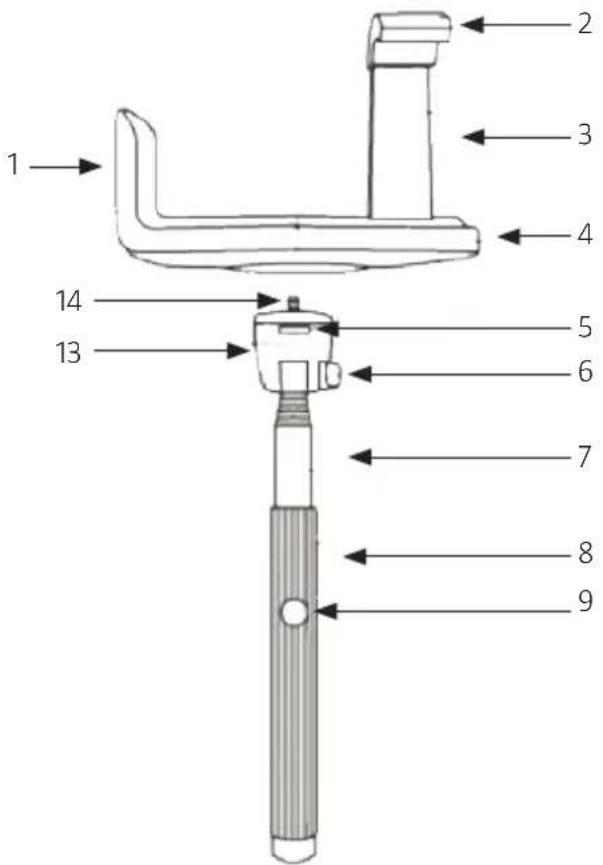
- Width adjustment phone holder
- Phone holder grip
- Height adjustment phone holder
- Phone holder
- Knob
- Side screw holder fastener
- Telescopic stick
- Rubber grip
- Trigger button for camera
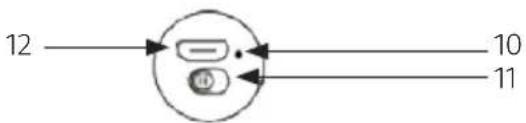
- Status light
- Power switch
- Micro USB port
- Holder fastener
- 1/4 inch tripod screw
pAcKAGE coCONTENTS
- Bluetooth selfie stick
- Micro USB cable
- Phone holder
- Phone holder grip
USE
CHARGING
- Connect the micro USB charging cable to the micro USB port at the bottom of the Bluetooth selfie stick. Connect the other end to a USB port on a computer or to a USB charger.
- The status light turns red during charging.
- The status light goes off when battery is fully charged.
pHoToGRApHING
NoTE:
- The Bluetooth selfie stick goes into standby mode after 2 hours of inactivity. Press the camera button to activate it.
-
The product can cause conflict with some smartphone keyboards. Disconnect or switch off the product in the event of problems.
-
Put the power switch in the ON position to start the product.
- Check that your smartphone is switched on and that Bluetooth is enabled.
- Open Bluetooth settings on the phone and connect to Julia Selfie Stick.
- Check that the selfie stick is in Bluetooth mode and that the status light is flashing blue.
- If the status light is not flashing blue, reset the selfie stick by switching it off and restarting it with the power switch.
- Open the camera program on the phone. Download and use the free app "Camera360" from the App store / Google Play if the camera in the phone is not working properly.
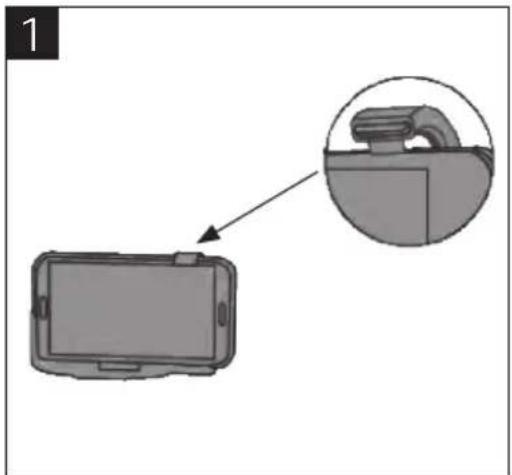
- Place the phone in the holder and lock firmly in place (diagram 1). Adjust the width setting.
- Screw the phone holder onto the 1/4 inch tripod screw on the Bluetooth selfie stick and tighten with the knob (diagram 2).
- Set the required angle on the holder fastener and tighten the side screw.
- Pull out the telescopic stick to the required length (diagram 3).
- Press the trigger button to take a photo (diagram 4).
- Switch off the product by moving the power switch to the OFF position.
natural_image
Diagram showing a device with an inset close-up of its internal components (no text or symbols)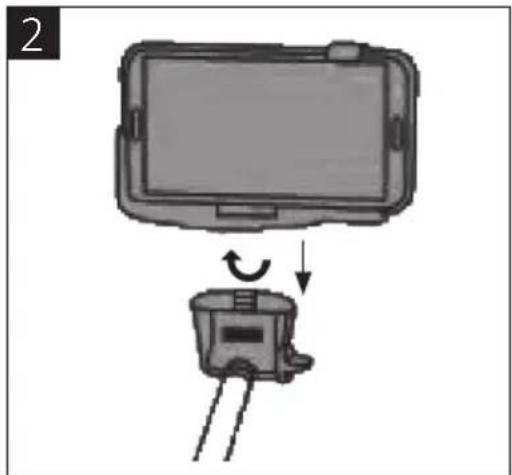
natural_image
Diagram showing a device with an open lid and a small device with a rotation arrow, no text or symbols present.
natural_image
Simple line drawing of a selfie stick with a smartphone mounted on a pole, no text or symbols present
natural_image
Simple line drawing of a tool with a handle and a curved handle, no text or symbols presentSTATUS LIGHTS
- Blue light off: switched off
• Blue light flashes once: photographing - Blue light flashing rapidly: Bluetooth connection successful/enabled
- Blue light flashing moderately: Bluetooth connection enabled
• Blue light flashing slowly: discharged battery - Red light on: charging
• Red light off: fully charged
Jula reserves the right to make changes. In the event of problems, please contact our service department. www.jula.com

Care for the environment!
Must not be discarded with household waste!
This product contains electrical or electronic components that should be recycled.
Leave the product for recycling at the designated station e.g. the clocal authority's recycling station.
- SVENSKA....4
- SÄKERHETSANVISNINGAR....4
- TEKNISKA DATA 4
- BESKRIVNING 5
- SAFETY INSTRUCTIONS....19
- TECHNICAL DATA....19
- DESCRIPTION 20
- Package contents 20
- USE....21
- Charging....21
- Photographing....21
- Status lights 22
- SÄKERHETSANVISNINGAR
- INDIKERINGSLAmpoR
- Värna om miljön!
- INDIKAToRLAmpER
- LAmpKI KoNTRoLNE
- DBAJ O ŚRODOWISKO!
- Read the User Instructions carefully before use.
- TECHNICAL DATA
- DEScRIpTIoN
- pAcKAGE coCONTENTS
- USE
- CHARGING
- pHoToGRApHING
- NoTE:
- STATUS LIGHTS
- Care for the environment!
Brand : Marquant
Model : 934-590
Category : Photo accessory