
H-MW2317 - Microwaves HYUNDAI - Free user manual and instructions
Find the device manual for free H-MW2317 HYUNDAI in PDF.


| Product Type | Microwave Oven with Grill |
| Model | H-MW2317 |
| Brand | Hyundai |
| Power Supply | 230 V, 50 Hz |
| Input Power | 1150 W |
| Microwave Power | 700 W |
| Grill Power | 800 W |
| Cavity Volume | 17 Liters |
| Unit Dimensions (L x W x H) | 424 mm x 342.3 mm x 262.8 mm |
| Net Weight | 11.2 kg |
| Gross Weight | 12.4 kg |
| Control Type | Digital with Knob and Buttons |
| Display | LED Digital Display |
| Modes | Microwave, Grill, Combi (C1, C2), Auto Defrost, Auto Cook (8 menus), Multi-Sequence |
| Power Levels | 5 levels: 20%, 40%, 60%, 80%, 100% |
| Timer | Up to 60 minutes |
| Child Lock | Yes, hold Stop/Reset for 3 seconds |
| Clock Setting | Yes, 12-hour format |
| Delayed Start | Yes |
| Auto Defrost | Yes, for meat, poultry, seafood |
| Accessories Included | Glass Tray, Roller Ring, Grill Rack |
| Safety Features | Door safety lock system, auto shut-off, child lock |
| Cleaning Instructions | Unplug, use damp cloth with mild detergent; avoid abrasives |
| Cookware Compatibility | Heat-proof glass, ceramic, microwave-safe plastics; no metal, foil, or melamine |
| Installation Clearance | At least 8 cm from sides, 10 cm from rear |
Frequently Asked Questions - H-MW2317 HYUNDAI
User questions about H-MW2317 HYUNDAI
0 question about this device. Answer the ones you know or ask your own.
Ask a new question about this device
Download the instructions for your Microwaves in PDF format for free! Find your manual H-MW2317 - HYUNDAI and take your electronic device back in hand. On this page are published all the documents necessary for the use of your device. H-MW2317 by HYUNDAI.
USER MANUAL H-MW2317 HYUNDAI
natural_image
Line drawing of a hybrid microwave oven with control panel and display (no text or symbols)MICROWAVE OVEN
Instruction manual
МИКРОВОЛНОВАЯ ПЕЧЬ
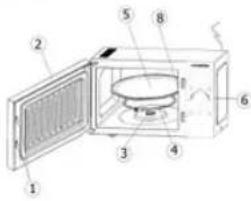
- Door safety lock system
- Oven window
- Shaft of roller ring and bottom
- Roltering
- Glass tray
- Control panel
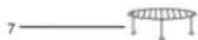
- Grill rack
Important safeguards
WARNING: To reduce the risk of burns, electric shock, fire, injury to persons.
- Read all instructions before using microwave oven.
- The microwave oven is for household use only. Do not use for industrial purposes.
- Some products such as whole eggs and sealed containers (for example, close glass jars and sealed baby bottles with teat) may explode and should not be heated in microwave oven.
• Use this microwave oven only for its intended use as described in this manual.
- Close supervision is necessary, when used by children.
- Do not operate this microwave oven, if it doesn't work properly.
• To reduce the risk of fire in the oven cavity it is necessary to follow the bellow rules:
- Do not overcook food. Carefully attend microwave oven if paper, plastic or other combustible materials are placed inside the oven.
- Remove wire twist-ties from bags before placing food into the oven.
- If materials inside the oven should ignite, keep oven door closed, turn oven off at the wall switch or shut off power at the fuse of circuit breaker panel.
• Always have the glass tray, roller arms, coupling and roller track in place when operating the oven.
- Do not use the oven for any reason other than food cooking. Never use it for drying clothes, paper or any other nonfood items or for sterilizing purposes.
- Do not operate the oven when empty. Do not keep any foreign object inside.
- Do not use the oven for home canning. Microwave ovens are not designed to permit proper canning.
- Do not cook eggs in the shell, as they will burst. Puncture eggs before cooking to prevent "explosion", occasionally a poached egg may burst during cooking. Be sure to cook covered and let stand one minute after cooking before removing the cover.
- Do not cook any food surrounded by a membrane, such as potatoes, chicken livers, etc without first piercing several times with a fork.
- Do not cook foods directly on the glass tray. Place food in/on proper cooking utensil before placing in the oven.
• Cookware not to use in your microwave oven
- Do not use metal pans or dishes with metal handles.
- Do not use anything with metal trim.
- Do not use paper covered with twist - ties on plastic bags.
- Do not use melamine dishes as they contain a material, which will absorb microwave energy. This way cause the dishes to crack or char and will slow down the cooking speed.
- Do not use burnable container such as paper, wooden, bamboo willow container.
- The glaze is not suitable for microwave use.
- Do not cook in a container with a restricted opening, such as a soft drink bottle or salad oil bottle, as they may explode if heating in a microwave
oven
- Do not use conventional meat or candy thermometers. These are thermometers available specifically for microwave cooking. These may be used.
- Microwave utensils should be used only in accordance with manufacturer's instructions.
- Please remember that a microwave oven heats the liquid in the container quicker that the container itself. Therefore, though the lid of a container is not hot to touch when removed from the oven please remember that the food/liquid inside will be hot.
• Always test the temperature of cooked food yourself especially if you are heating or cooking food/liquid for babies. It is advisable never to consume food/liquid straight from the oven, but allow it to stand for a few minutes and stir food/liquid to distribute heat evenly.
- Food containing a mixture of fat or water, e.g. should stand for 30-60 seconds in the oven after it has been turned off. This is to allow the mixture to settle and to prevent bubbling when a spoon is placed in the food/liquid or a stock cube is added.
• Always follow the cooking instructions, when preparing/cooking food/liquid and remember that there are certain food, e.g. Christmas puddings, jam and mincemeat, which heat up very quickly.
- The contents of feeding bottles and baby food jars are to be stirred and shaken and the temperature is to be checked before consumption, in order to avoid burns.
WARNING:
- If the door or door seals are damaged, the oven must not be operated, until, it is repaired by a trained person.
- It is hazardous for anyone other than a trained person to carry out any service or repair operation. Repair the unit only by qualified specialists,
Before you call for service
• If there is no light in the cavity:
- the bulb blown out;
the door of the oven is not closed.
• If the oven fails to operate:
check to ensure that the control panel is programmed correctly and the timer is set.
check to ensure that the door is securely closed engaging the door safety lock system. Otherwise, the microwave energy will not flow into the
oven
IF NONE OF THE ABOVE RECTIFY THE SITUATION, THEN CONTACT A QUALIFIED TECHNICIAN. DO NOT TRY TO ADJUST OR REPAIR
THE OVEN YOURSELF
Radio interference
• Operation of the microwave oven can cause interference to your radio, TV or similar equipment.
- When there is interference, it may be reduced or eliminated by taking the following measures:
- clean door and sealing surface of the oven.
- reorient the receiving antenna of radio or television.
- relocate the microwave oven with respect to the receiver.
- move the microwave oven away from the receiver.
plug the microwave oven into a different outlet so that microwave oven and receiver are on different branch circuits.
Installation
• Make sure that all the packing materials are removed from the inside of the door.
- Check the oven for any damage, such as misaligned or bent door, damaged door seals and sealing surface, broken or loose door hinges and latches and dents inside the cavity or on the door. If there is any damage, do not operate the oven and contact qualified service personnel.
• This microwave oven must be placed on a flat, stable surface to hold its weight and the heaviest food likely to be cooked in the oven.
- Do not place the oven where heat, moisture or high humidity are generated, or near combustible materials.
- For correct operation, the oven must have sufficient airflow. Keep the oven at least 8cm away from both side walls and 10cm away from rear wall to ensure the correct ventilation.
- Do not cover or block any openings on the appliance. Do not remove feet.
How to choose your microwave cookware
Applicable
| SORTS INSTRUCTIONS SORTS INSTRUCTIONS | |||
Heat-proof glassware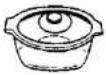 | It most suitable for microwave cooking. | Heat-resistant plastic container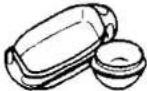 | Tightly closed containers are forbidden. Cannot be used for packing or containing foods with high fat or sugar contents. |
Earthenware or chinaware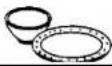 | Conventional utensils of these materials allowed unless firmed with gold,silver. | Film for freshment preservation and heat-resistant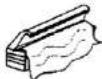 | Only suitable for packing vegetable or being used as a lid. Never apply to packing meat or frying foods. |
Inapplicable
| SORTS INSTRUCTIONS SORTS INSTRUCTION$ | |||
Metal wares (e.g. aluminum, stainless steel, etc.)  | May spark or ignite while touching the cavity wall during cooking. | Combustible plastic wares 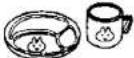 | Inapplicable. |
Lacquer ware 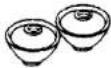 | May flaw or peel off. | Non-heat-proof glassware 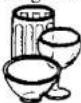 | May deform or flaw in a highly hot circumstance. Curved or strengthened glassware are not applicable. |
Paper, bamboo or wooden ware 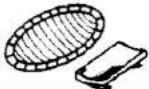 | May be burnt in a while of (cooking) heating. | Aluminum foil May spark or ignite while touching the cavity wall during cooking. 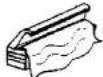 | |
How to identify if certain cookware is suitable for microwave cooking purpose?
- Put the intended cookware together with a glass of water (300 ml) inside the oven cavity, and then set the oven at the "HIGH" stage for one minute.
• Applicable microwave cookware will be as cool as ever, while the water will absorb the energy and become warmer.
Operation
Before cooking
The LED will flash 3 times when plugged in power supply. Then it will flash : , prompt you to input the cooking menu and time.
You can select auto cooking menu, increase or decrease cooking time and weight during operation by turning. Время/Вес/Автоменю knob
Стоп/Сброс
At the initial or input stage: press once to cancel input programs and resume initial stage.
During cooking: press once to stop oven operation, press twice to cancel cooking programs.
Auto reminder
When your preset cooking procedure have finished, the LED Display will show "End" and three beeps sound will be heard to prompt you to take out food.
If you do not press Cton/C6poc button once or open the door the beep will be sounded at an interval of 3 minutes.
Setting the time.
1) Press Часы/Установка button.
2) Turn Время/Вес/Автоменю knob to set hours, and hours will be flashed.
3) Press Часы/Установка button again
4) Turn Время/Вес/Автоменю knob to set minutes, and minutes will be flashed.
5) Press Часы/Установка button to confirm or wait for 5 seconds until the numbers go steadily.
Child lock function
Use this feature to lock the control panel when you are cleaning or so that children cannot use the oven unsupervised. All the buttons are rendered inoperable
in this mode.
To set child lock, depress and hold Cron/C6poc button about 3 seconds until LED appears "OFF".
To cancel child lock, depress and hold Cron/C6poe button about 3 seconds until LED appears colon
Microwave cooking
Press Mukpo button, LED will cycle to show 100P-80P-60P-40P-20P
100P--- High power, 100% microwave power. Applicable for quick and thorough cooking, such as meat, vegetable
SOP --- Medium High power, 80% microwave power. Applicable for medium express cooking, such as eggs, fish, congee, rice, soup
60P --- Medium power, 60% microwave power. Applicable for steaming food
40 P — Medium Low power, 40% microwave power. Applicable for defrosting food
20P -- Low power, 20% microwave power. Applicable for keeping warm
Example: to cook 80P for 10 and half minutes.
-
After power-up, the colon "-" flashes at the display or press Cron/C6poc button once
-
Select the desired microwave power by depressing Mukpo button consecutively. Display will indicate then 80P
-
Set the cooking time by turning the Bpeme/Bec/Avtomeno knob. The display will indicate then "10:30"
-
Press Crapt button to start, and LED will count down to show running time
You may change the cooking time during cooking. And it is recommended turning the food halfway, after you turn the food, press Crapt button once to
continue
NOTE:
1) The max time which can be set is 60minutes
2) Never use the grill rack during microwave cooking.
3) Never operate the oven empty.
4) If you turn the food during operation, press the Ctrapt button once and the preset cooking procedure will continue.
5) If you intend to remove the food before the preset time, you must press Cton/C6poc button once to clear the preset procedure to avoid unintended
operation of next time use.
Grill/Combi cooking.
Press Гриль/Комби button LED will cycle to show G.-C1-C2.
G—Grill, the heat element will be energized during operation time. Which is applicable for grilling thin meats or pork, sausage, chicken wing as good
brown color can be obtained.
C1—Combination of grill and microwave cooking. Heat element and magnetron is energized in an alternate way. Utilizing the properties of microwave
penetration thick food is suggested to cook in this mode, as the center of food can be done and brown crust still can be obtained.
C2--Same as C1 except more heating element working time.
Note: It is not necessary to preheat for grill cooking.
Example: To grill food with C2 for 10 and half minutes
-
After power-up, the colon "1" flashes or press button Cron/C6poc once
-
Select the desired cooking menu by pressing Гриль/Комбн button, display will indicate then C2
-
Set cooking time by turning Bpem/Bec/Автоменю knob, the display will then indicate "10:30"
-
Press Ctrpr button to start, and LED will count down to show running time.
Warning:
In the mode of Grill/Combi, oven parts as well as the rack and cooking containers, may become very hot. Use caution when removing any item from the
oven. Use heavy potholders or oven mitts to PREVENT BURNS.
Auto defrost.
This function allows to defrost food depending on it's kind, one just should choose the necessary mode and enter the weight of the food, the defrost time will be then set automatically.
1) Press the Автораморолка button and the LED display will cycle to show d.1 d.2 d.3:
d.1 — for defrosting meat, the weight range from 0.1Kg to 2.0 Kg.
d.2 — for defrosting poultry, the weight range from 0.2 to 3.0Kg.
d.3 --- for defrosting seafood, the weight range from 0.1 to 0.9 Kg.
2) Enter the weight of the food by turning Время/Вес/Автоменю knob.
3) Start cooking by pressing C-rapt button.
Example: To defrost 0.2kg poultry
-
Select the food kind by pressing Авторазморолка button, the display will indicate d2
-
Set defrosting weight by turning the Bpema/Bec/Avtemenio knob, the display will indicate 0.2
-
Start cooking by pressing Ctrapt button. LED will count down to show running time.
-
Half way during defrosting 3 beep sound will be heard two times to prompt you turn over the food. Open the door and turn over the food and shield the warm portion. Press Crapri button again to continue the defrosting. If you do not stop the process when an audible signal sounds, the defrosting cycle will continue until the time count down to 0.
Note:
-
It is necessary to turn over the food during operation to obtain uniform effect.
-
Usually defrosting will need longer time than that of cooking the food.
-
If the food can be cut by knife, the defrosting process can be considered completed.
-
Observe the below Defrost guide to achieve best performance
Defrost guide
Steak chops
- shield thin end of chops or steaks with foil.
- position the food with thinner parts in the center in a single layer on a shallow dish. If pieces are stuck together, try to separate as soon as possible.
- turn over the food in the middle course. Then rearrange and shield the defrosted portions.
- Close the door to continue defrosting.
- After defrost time, stand covered with aluminum foil for 5-15 minutes.
Minced Beef
- Place frozen minced beef on a shallow dish. Shield edges.
- turn over the food in the middle course. Remove defrosted portions, turn over and shield edges with
foil strips.
- Close the door to continue defrosting.
- After defrost time, stand covered with aluminum foil for 5-15 minutes.
Roast Meat (Beef/pork/lamb)
- Shield the edges with foil strips.
- Place joint with lean side face upwards (if possible) on a shallow dish.
- turn over the food in the middle course. And then shield the defrosted portions.
- Close the door to continue defrosting.
- After defrost time, stand covered with aluminum foil for 10-30 minutes.
Poultry
- Remove from original wrapper. Shield wing and leg tips with foil.
- Place breast side down on a shallow dish
- turn over the food in the middle course. And then shield the defrosted portions.
- Close the door to continue defrosting.
- After defrost time, stand covered with aluminium foil for 15-30 minutes.
Note: After standing run under cold water to remove giblets if necessary.
Chicken pieces ( chicken wings and drumstick)
- shield the exposed bone with foil.
- Place chicken pieces on a shallow dish.
- turn over the food in the middle course. And then rearrange and shield the defrosted portions.
- Close the door to continue defrosting.
- After defrost time, stand covered with aluminum foil for 5-30 minutes
9. Auto Cooking
The oven has default cooking menu for simple operation. When the LED flash colon, turn Bremia/Bec/Автомено knob and LED
will cycle to show A.1,A.2 ... A.8. Choose the appropriate menu according to the food type and weight and strictly observe the
directions of below table, otherwise the cooking effect will be largely influenced.
Example: Steam 0.45kg fish
-
Choose the appropriate menu by turning Bремя/Вес/Автоменю knob, display will indicate A 8
-
Start cooking by pressing Ctrapt button, and LED will count down to show running time.
Auto cook table.
| Display | Category | Direction |
| A 1 | Popcorn | Suitable for popping a bag of corn, which is available in the market, weighted 85g. Popcorn prior to completing, if the popping speed has been decreased to 1 time per 1-2 seconds you should press Crom/Cópoc button to stop the popping process |
| A 2 | Popcorn | Same as A.1 except 100g weight |
| A 3 | Pizza | Warm a piece of chilled pizza of 0.15Kg |
| A 4 | Beverage | Heating a cup of 250 ml liquid. The liquid temperature is about 5 · 10^ C . Use a big mouth cup and do not scal |
| A 5 | Beverage | Heating a cup of 500 ml liquid. The liquid temperature is about 5 · 10^ C . Use a big mouth cup and do not scal |
| A 6 | Potato | Cooking the potato strips, cut into 5mm width and height, length. Total weight is about 0.45kg. Place the strips on a large dish and cover the dish with a thin film to prevent water loss |
| A 7 | Potato | Same as A.6 except the weight of potato strips is about 0.65 |
| A 8 | Fish | Suitable for steaming a fish of 0.45Kg. After the fish washed and scales removed, make a slits on the skin of fish. Put the fish on a shallow dish of 22-27cm diameter sprinkle lightly with some ingredient and cover the dish with a thin film to prevent water loss. After cooking, stand for 2 minutes. |
Note:
-
The cook time above is based on the food which of the room temperature is 20-25°C. Results will vary from the food in different temperature.
-
The temperature, weight and shape of food will largely influence the cooking effect. If any deviation has been found to the factor noted on above menu, you can adjust the cooking time for best result.
Pre-set automatic function (delayed start).
If you do not want the menu be started immediately, you can preset the cooking menu and time and the preset menu will be automatically started at your set time. The setting will consist of 2 steps: 1. Setting the current clock(if it's already set before, then there is no need more to do it); 2. Setting the cooking menu and time.
Example: Now it is 12:30 clock, if you hope that the microwave oven will automatically start cooking with 100P microwave power for 9 minutes and 30 seconds at 14:20
1) Set the current time (if not set before) – the instructions please see in the chapter "Setting the time"
2) Select cooking power by pressing Muxpo button, display will indicate "100P"
3) Turn Bpemi/Bec/Antomenio knob to set cooking time, display will indicate "9:30"
4) To return to current clock., hold Часы/Установка button for 3 seconds, then a short beep sound will be heard
5). Set the time you expect to start (the instructions please see in the chapter "Setting the time")
6). Depress Часы/Установка button to confirm the delayed menu. Now the program has been activated. And the menu will be started at 14:20
You may check the preset starting time by depressing Часы/Установка button
Note: Delayed function is not applicable for Auto Cooking and Auto Defrost.
Multi-sequence cooking
To obtain best cooking result, some recipes call for different cook and time. You may program your personalized menu as follow:
Example: You want cook food with 100P microwave for 3 minutes then grill food for 9 minutes. This is 2 sequence setting.
-
Press Mnkpo button to select desired menu, display will indicate "100P"
-
Turn Bremn/Bec/Automeno knob to set cooking time, display will indicate "3:00"
-
Press Гриль/Комби button to select desired menu
-
Turn Bpema/Bec/Automero knob to set cooking time display will indicate "9:00"
-
Start cooking by pressing Cnapt.
When microwave power cooking is finished, microwave oven will begin grilling operation automatically.
Note: max 4 sequences can be set per time by repeating step1 and step2 optionally if you like to set more
Microwave cooking tips.
1) Arranging food
Place thicker areas toward outside of dish and the thinner meat in the center and spread them evenly. Do not overlap if possible.
2) Cooking time
Start cooking with the shorter period of time and extend it according to the actual need. Overcooking may result in smoking and burning.
3) Cover foods before cooking refer to the recipe
Use paper towels, microwave plastic wrap or a cover to cover food so that prevent sputtering and help foods to cook evenly. (Helps keep oven clean).
4) Partial shielding of food
Use small pieces of aluminum foil to cover thin areas of meats or poultry to avoid overcooking.
5) Stir foods
From outside to center of dish once or twice during cooking, if possible.
6) Turn foods
Foods such as chicken, hamburgers or steaks should be turned over once during cooking.
7) Rearrange foods
Please change the positions of food in half way during cooking such as: from top to bottom and from the center of the dish to the outside.
8) Allow standing time
After cooking ensure adequate standing time. Remove food from oven and stir if possible. Cover for standing time which allows the food to finish cooking
without overcooking.
9) Check for doneness
Observe the food color and hardness to determine whether the food is cooked. Doneness signs include:
-Stearns throughout food, not just at edge part.
- Joints of Poultry move easily.
- Pork and poultry show no evidence of blood.
- Fish is opaque and flakes easily with a fork.
10) Condensation
It is a normal case of microwave cooking. The humidity and moisture of food will influence the amount of moisture in the oven. Generally, covered foods will not cause as much condensation as uncovered foods. Ensure that the ventilation openings are not blocked.
Care and cleaning
• Always unplug oven and be sure oven is cool before cleaning.
• To maintain the appearance of your oven, never use abrasive cleaning agents (such as cleaning powders, scouring pads or steel wool pads), spray. Also,
never use commercial oven cleaners on any part or your microwave oven.
• If the microwave is very dirty, otherwise, use a damp cloth.
Outside surfaces
Cover
- Clean the outside of the oven with a glass-cleaning agent, a liquid cleaner or mild detergent and water. Use a damp cloth or sponge, rinse and dry.
Plastic
- Use a liquid or glass-cleaning agent and a sponge or cloth. To prevent scratching the plastic surface, do not use paper toweling.
Door and control panel
- Clean with a damp cloth or sponge. Use dishwashing detergent and water or liquid glass-cleaning agent to remove soil. Rinse with a damp cloth and dry with a soft cloth to prevent scratching the plastic outer door panel. Some paper towels can scratch the plastic door panel, therefore, use a soft cloth to dry the door. When cleaning the control panel, keep oven door open to prevent oven from accidentally turning on.
Power cord
- Be sure oven is unplugged. Wipe cord with a damp sudsy cloth, rinse and dry thoroughly before plugging cord back into outlet.
Interior surfaces
- Wash with hot sudsly water, rinse and dry. Do not use excessive amounts of water when cleaning the oven.
- Never use abrasive cleaner on any part of your microwave oven.
Oven walls
- Use a mild liquid dishwashing detergent and water, rinse and dry. To loosen microwave on HIGH for 3 minutes. Leave hot water in the oven and allow the steam to soften the soil. Then, wash with hot suddy water, rinse and dry.
• To keep oven clean and odor free, open oven door for a few minutes after cooking. Allow moisture to evaporate or wipe interior with dry clothes.
• Occasionally, wipe walls with a solution of baking soda and water to keep interior fresh.
Oven floor and turntable
• Especially around turntable. Do not allow water or cleaning agents to seep into turntable gears located underneath.
- If a stain should still remain, remove stain with a paste of two parts braking soda and three parts water. Apply paste to stain, let stand one or two hours, then wipe with a clean damp cloth, rinse and dry.
Specification
| Power supply | 230 V, 50 Hz |
| Input power | 1150W |
| Microwave power | 700 W |
| Grill power | 800 W |
| Net/ Gross Weight | 11.2 kg /12.4 kg |
| Inner volume | 17 litres |
| Unit dimension (L x W x H) | 424 mm x 342.3 mm x 262.8 mm |
| Gift box dimension (L x W x H) | 448 mm x 374 mm x 289 mm |

АИ49
Описание
- Important safeguards
- WARNING:
- Before you call for service
- Radio interference
- Installation
- How to choose your microwave cookware
- How to identify if certain cookware is suitable for microwave cooking purpose?
- Operation
- Before cooking
- Стоп/Сброс
- Auto reminder
- Setting the time.
- Child lock function
- Microwave cooking
- NOTE:
- Grill/Combi cooking.
- Auto defrost.
- Defrost guide
- Roast Meat (Beef/pork/lamb)
- Auto Cooking
- Pre-set automatic function (delayed start).
- Multi-sequence cooking
- Microwave cooking tips.
- Care and cleaning
- Outside surfaces
- Cover
- Plastic
- Door and control panel
- Power cord
- Interior surfaces
- Oven walls
- Oven floor and turntable
- Описание
Brand : HYUNDAI
Model : H-MW2317
Category : Microwaves