L12i - Battery charger AVer - Free user manual and instructions
Find the device manual for free L12i AVer in PDF.


| Product Type | Battery Charger |
| Brand | AVer |
| Model | L12i |
| Input Voltage | 100–240V AC, 50/60Hz |
| Output Voltage | 12V DC |
| Charging Current | 2A |
| Number of Charging Slots | 1 |
| Compatible Batteries | AVer L-series rechargeable batteries |
| Charging Time | Approximately 4 hours (depending on battery capacity) |
| LED Indicators | Red (charging), Green (fully charged) |
| Protection Features | Overcharge, short circuit, overcurrent, overvoltage protection |
| Dimensions (W x D x H) | 100 x 60 x 30 mm |
| Weight | 200 g |
| Operating Temperature | 0°C to 40°C |
| Storage Temperature | -20°C to 60°C |
| Certifications | CE, FCC, RoHS |
| Usage | Indoor use only |
| Maintenance | Clean with a dry cloth; do not use liquids or solvents |
Frequently Asked Questions - L12i AVer
User questions about L12i AVer
0 question about this device. Answer the ones you know or ask your own.
Ask a new question about this device
Download the instructions for your Battery charger in PDF format for free! Find your manual L12i - AVer and take your electronic device back in hand. On this page are published all the documents necessary for the use of your device. L12i by AVer.
USER MANUAL L12i AVer
natural_image
Line drawing of a laboratory or industrial device with a door and control panel (no text or symbols)L12i
User Manual
FCC NOTICE (Class A)

This device complies with Part 15 of the FCC Rules. Operation is subject to the following two conditions: (1) this device may not cause harmful interference, and (2) this device must accept any interference received, including interference that may cause undesired
operation.
Federal Communications Commission Statement
NOTE- This equipment has been tested and found to comply with the limits for a Class A digital device, pursuant to Part 15 of the FCC Rules. These limits are designed to provide reasonable protection against harmful interference in a residential installation. This equipment generates uses and can radiate radio frequency energy and, if not installed and used in accordance with the instructions, may cause harmful interference to radio communications. However, there is no guarantee that interference will not occur in a particular installation. If this equipment does cause harmful interference to radio or television reception, which can be determined by tuning the equipment off and on, the user is encouraged to try to correct the interference by one or more of the following measures:
■ Reorient or relocate the receiving antenna.
■ Increase the separation between the equipment and receiver.
■ Connect the equipment into an outlet on a circuit different from that to which the receiver is connected.
■ Consult the dealer or an experienced radio/television technician for help.
Class A ITE
Class A ITE is a category of all other ITE which satisfies the class A ITE limits but not the class B ITE limits. Such equipment should not be restricted in its sale but the following warning shall be included in the instructions for use:
Warning -This is a class A product. In a domestic environment this product may cause radio interference in which case the user may be required to take adequate measures.
European Community Compliance Statement (Class A)

This product is herewith confirmed to comply with the requirements set out in the Council Directives on the Approximation of the laws of the Member States relating to Electromagnetic Compatibility Directive 2014/30/EU.
Warning - This is a Class A product. In a domestic environment this product may cause radio interference in which case the user may be required to take adequate measures to correct this interference.
DISCLAIMER
No warranty or representation, either expressed or implied, is made with respect to the contents of this documentation, its quality, performance, merchantability, or fitness for a particular purpose. Information presented in this documentation has been carefully checked for reliability; however, no responsibility is assumed for inaccuracies. The information contained in this documentation is subject to change without notice.
In no event will AVer Information Inc. be liable for direct, indirect, special, incidental, or consequential damages arising out of the use or inability to use this product or documentation, even if advised of the possibility of such damages.
TRADEMARKS
“AVer” is a trademark owned by AVer Information Inc. Other trademarks used herein for description purpose only belong to each of their companies.
COPYRIGHT
©2015 AVer Information Inc. All rights reserved.
All rights of this object belong to AVer Information Inc. Reproduced or transmitted in any form or by any means without the prior written permission of AVer Information Inc. is prohibited. All information or specifications are subject to change without prior notice.
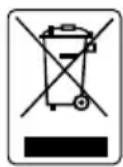
The mark of Crossed-out wheeled bin indicates that this product must not be disposed of with your other household waste. Instead, you need to dispose of the waste equipment by handing it over to a designated collection point for the recycling of waste electrical and electronic equipment. For more information about where to drop off your waste equipment for recycling, please contact your household waste disposal service or the shop where you purchased the product.
CAUTION
■ To reduce risk of electric shock use only indoors.
■ Only adults should move the L12i cabinet.
■ Do not allow anyone to sit, stand, or climb on the L12i cabinet.
■ Do not block the ventilation holes used for air circulation.
■ Do not overload objects on the L12i cabinet (maximum loading is 130lb).
■ Before moving L12i cabinet, disconnect the power from the wall outlet.
■ It is recommended to use at least two people and lift from the bottom when moving the L12i cabinet.
Contents
I. INTRODUCTION .... 1
Package Contents....1
Cabinet Dimensions....1
Cabinet Diagram 2
Door Lock....3
LED Status 3
II. SETUP 4
III. SPECIFICATIONS 9
I. Introduction
Package Contents
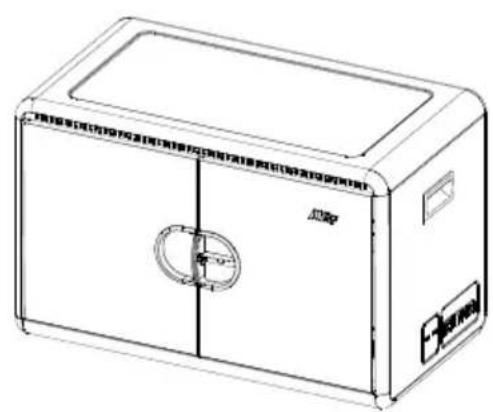
natural_image
Line drawing of a rectangular electronic device with a central door and label (no readable text or symbols)L12i Cabinet
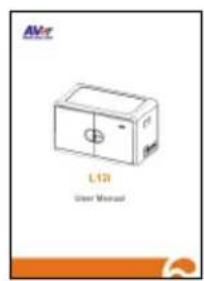
User manual
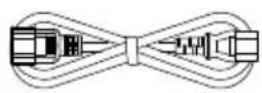
Daisy chain cable
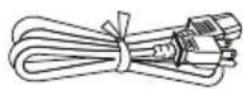
Power cord
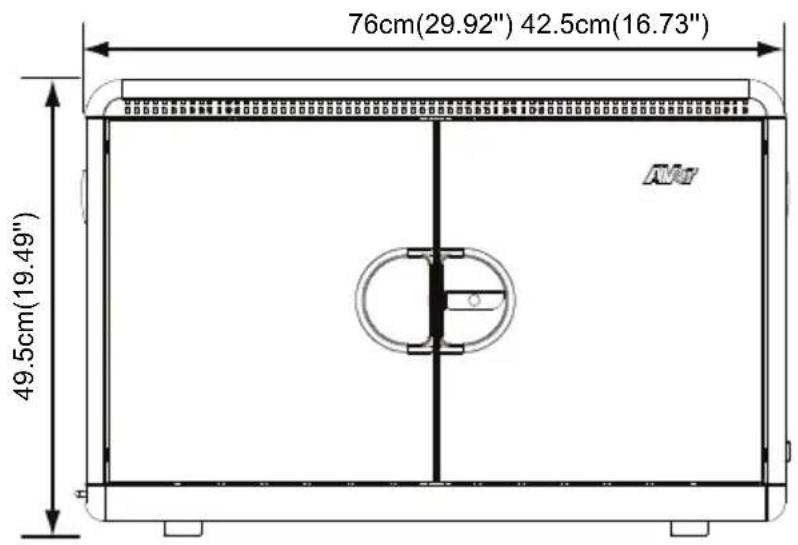
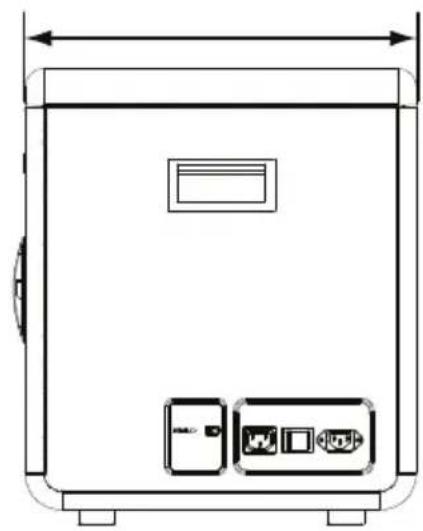
Cabinet Dimensions
natural_image
Technical line drawing of a rectangular electronic device with ports and a central panel (no text or symbols)Cabinet Diagram
Front
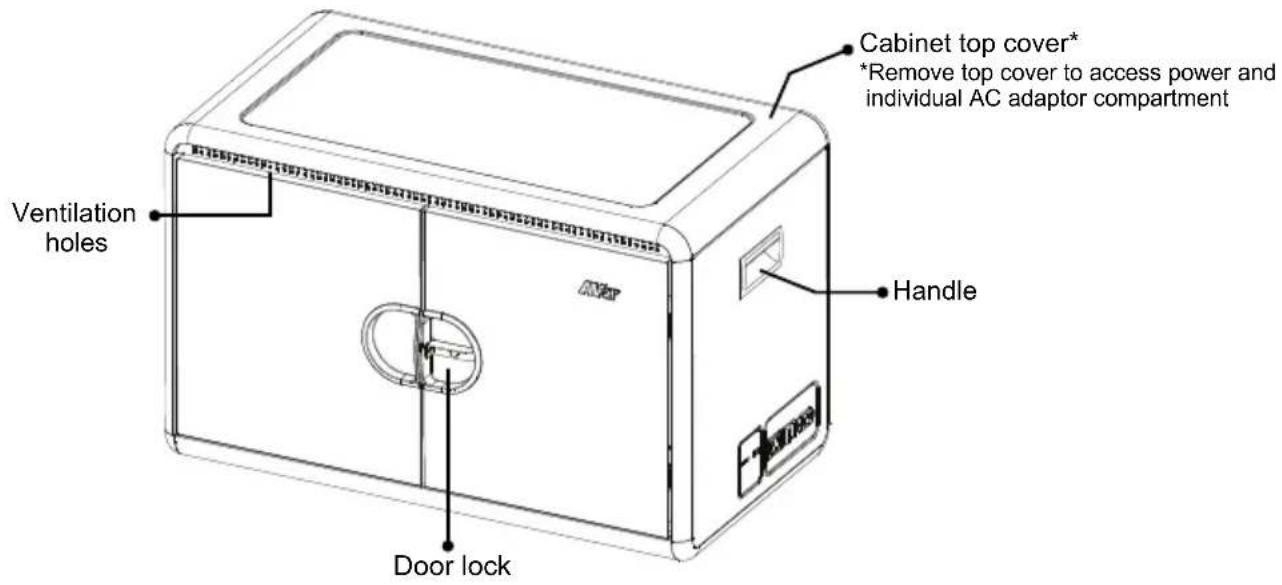
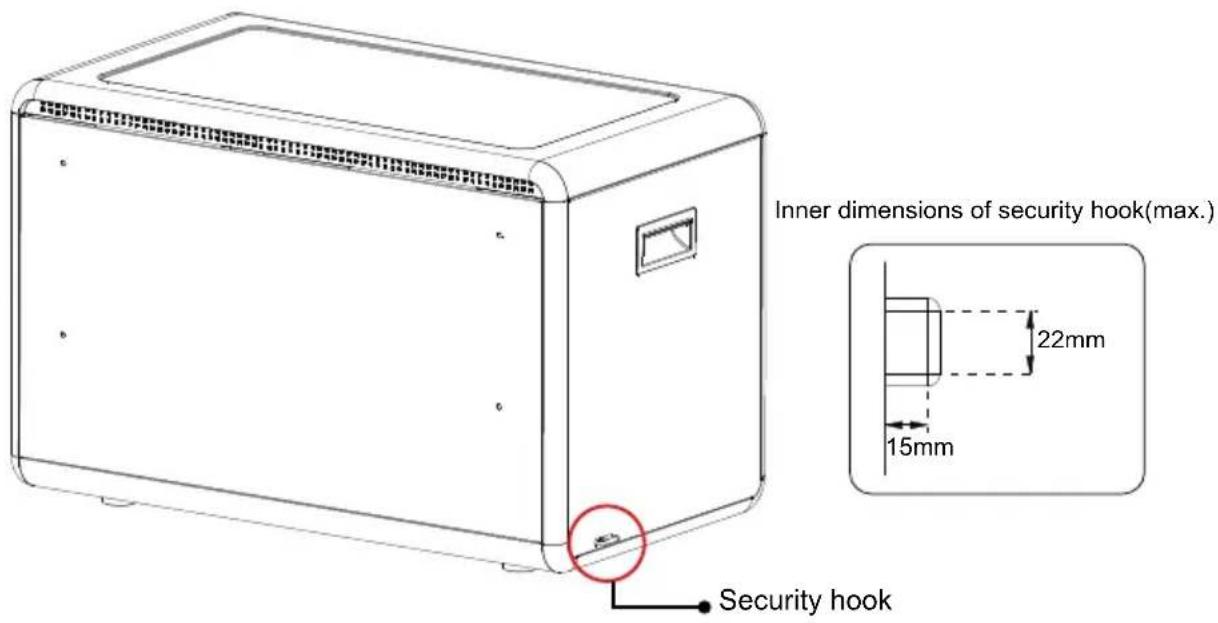
Side
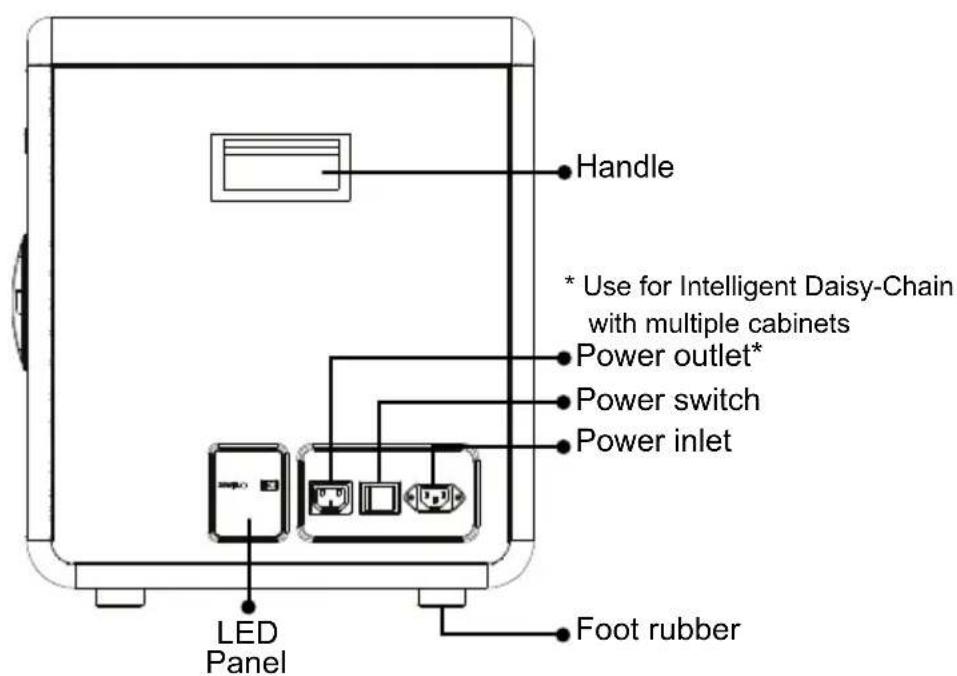
Back
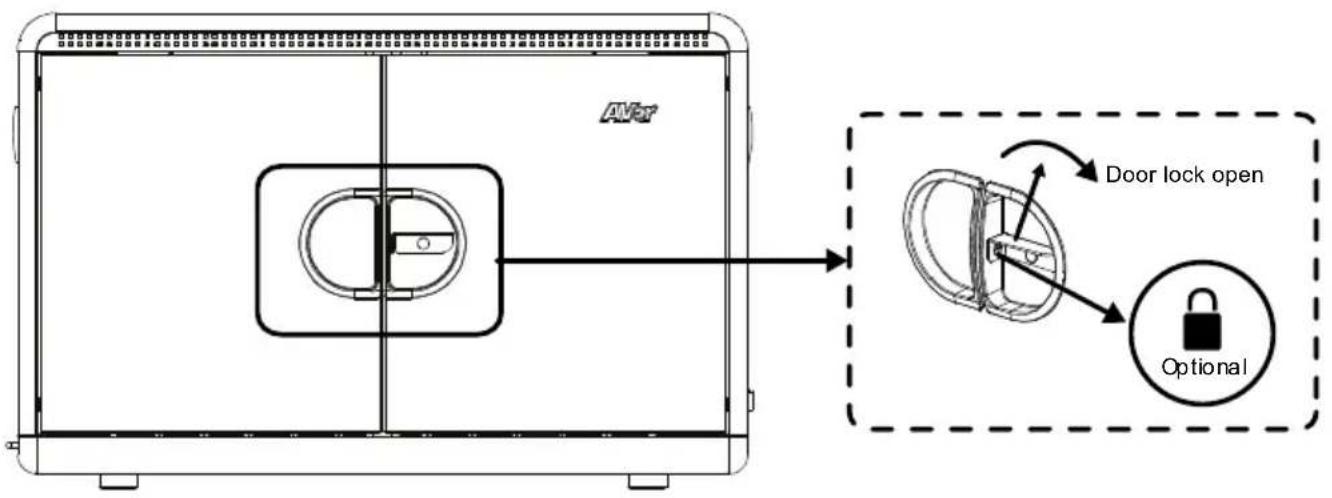
Door Lock
[Note] The shackle dimension is limited to ∅8mm (0.31").
LED Status
LED Description
Cabinet Status (x1)
■ OFF: Power off
■ Solid Blue: Devices are charging
II. Setup
○1 Open the front doors.
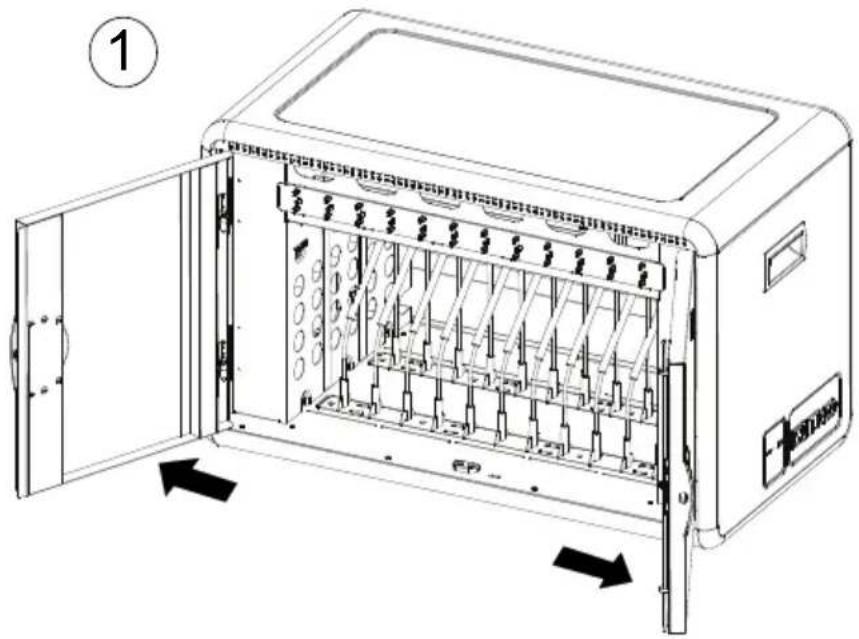
○2 Remove the screws.
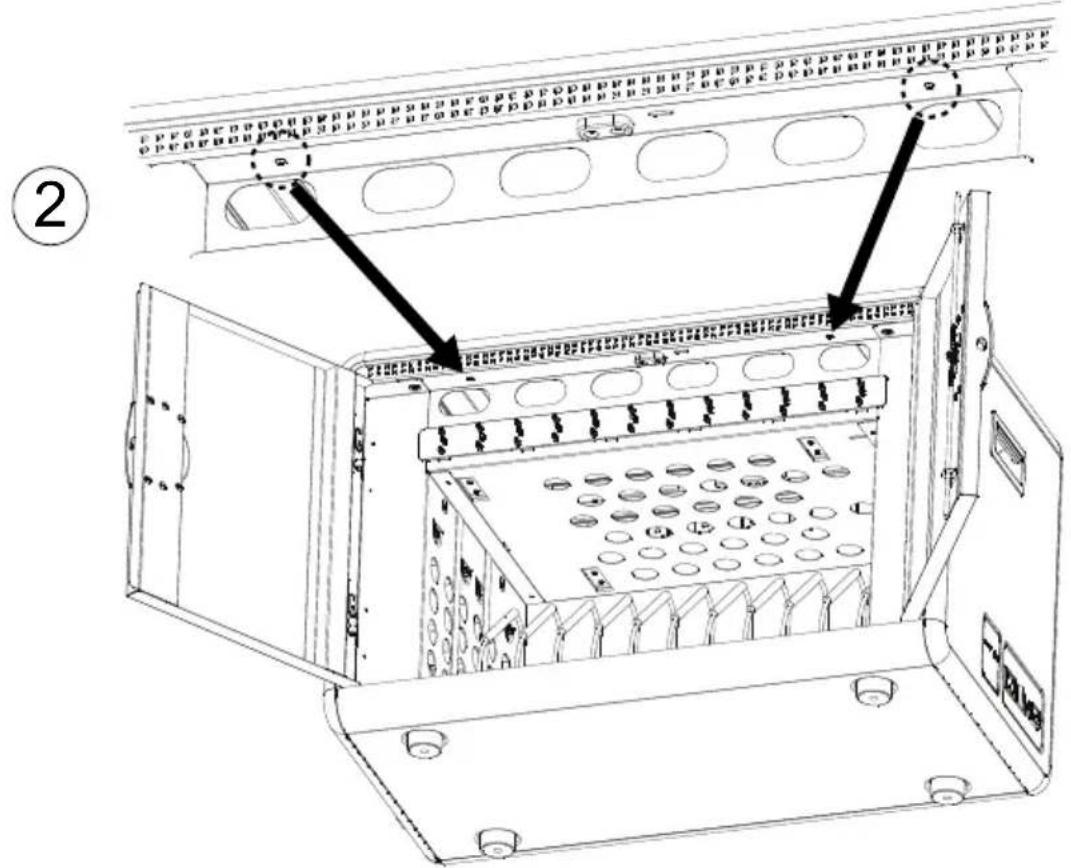
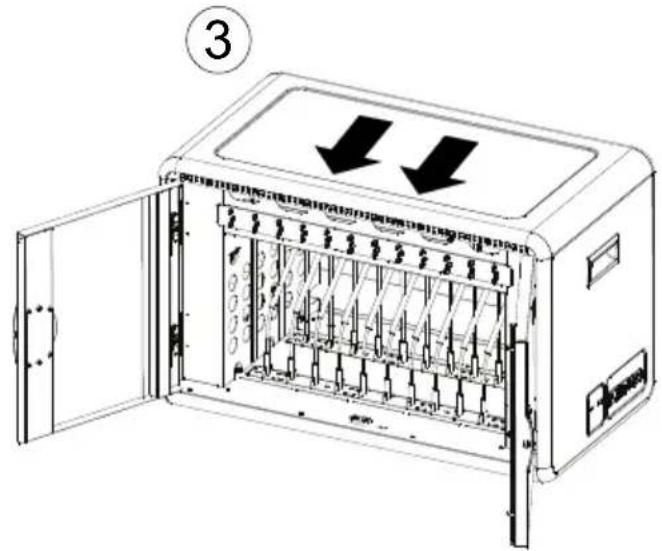
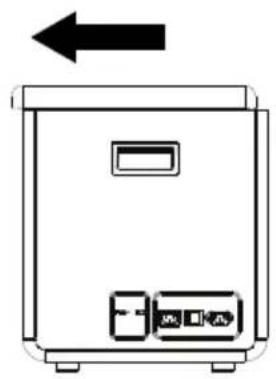
③ Slide the top cover of the cabinet forward as far as it can. It is recommended to hold the front of the cabinet in place and pull the top cover forward from the back
○4 Lift up the top cover from both sides and set it to the side
natural_image
Simple line drawing of a refrigerator with an arrow pointing to the top panel (no text or symbols)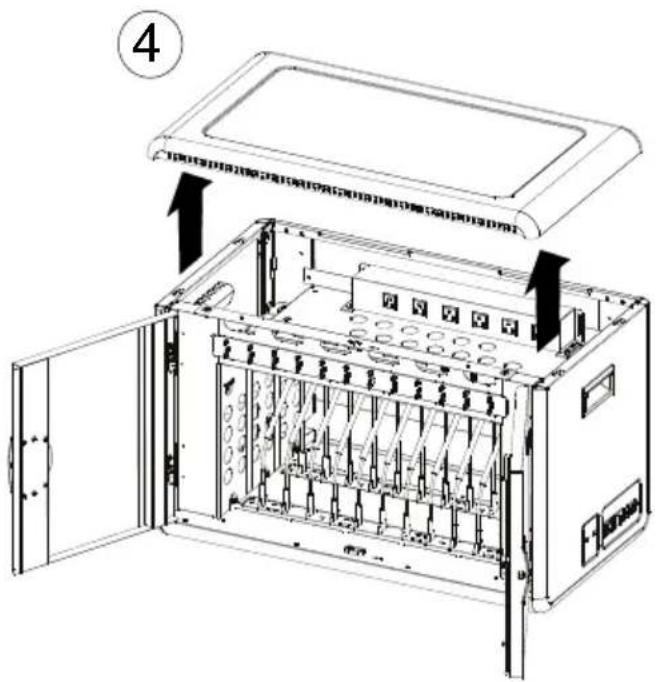

Connecting your devices
(1) Insert the power plug of your device into the power strips located in the top of the L12i. [Note] The power strips can be rotated 90^ to accommodate odd shaped power adapters if needed by removing the 4 screws located on the ends of each power strip.
(2) Store the AC Adapter brick from your device in the individual adapter holder located on the sides of the cabinet. There are 6 adapter compartment on each side.
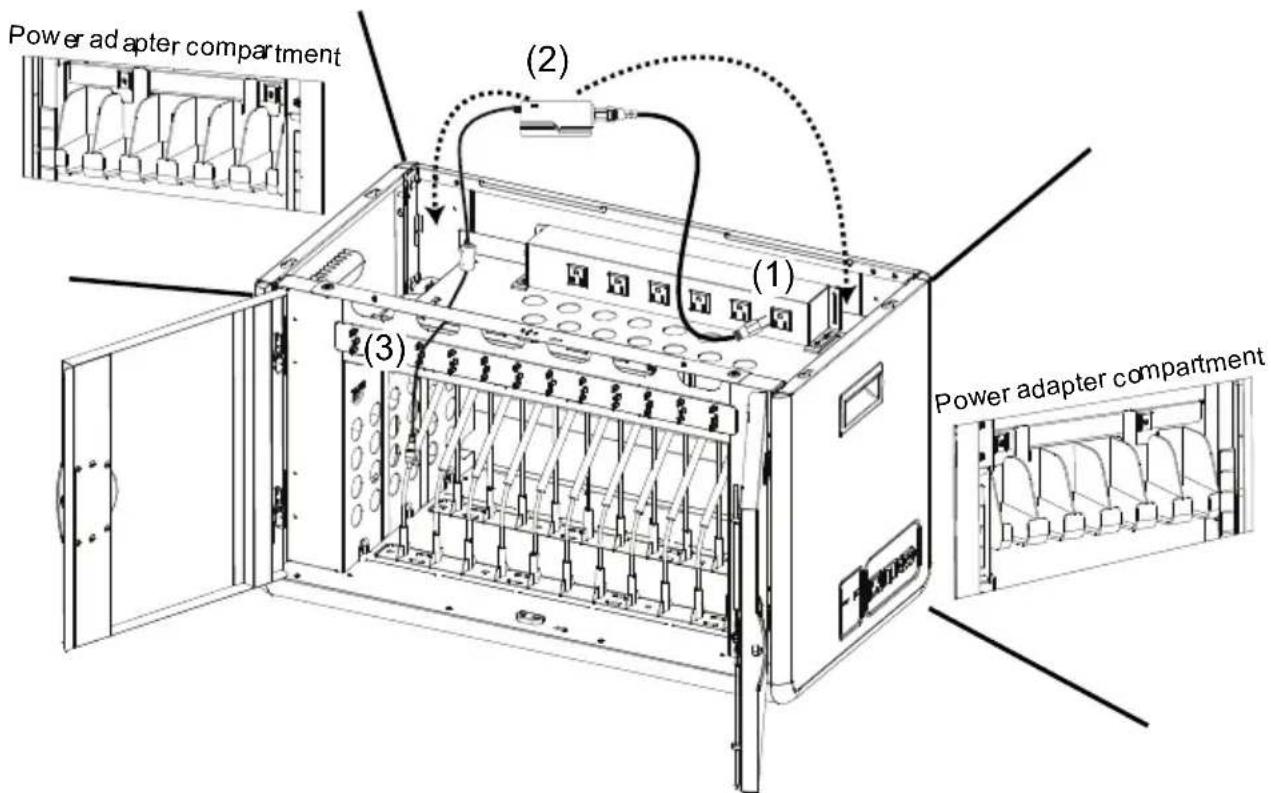
(3) Pass the DC-end of the adapter to the front of the cabinet through the holes located at the front.
(4) Adjust the length of the cables to provide enough slack to easily plug in to each device and use the cable hooks above to secure the cable in place.
[Note] It is recommended to use cable ties (not included) to secure any excess cable to either the side of the cart or to the perforated top
(5) Once all if your devices and cables are properly in place, connect all of your devices and power on the L12i to make sure all devices are receiving a charge.
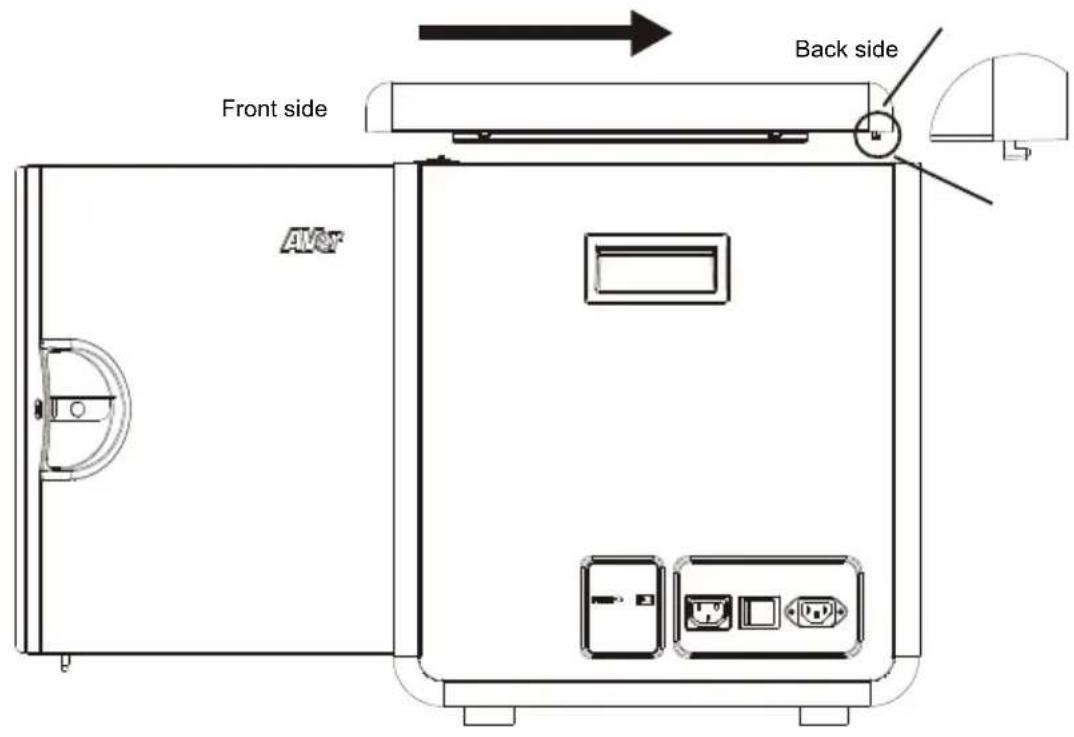
(6) Replace the top cover by aligning the slotted grooves in the forward position until the top rests firmly on the cabinet. Slide or push the top towards the back as far as possible. Please hold the cabinet in place while pushing the top cover in place. Secure the top in place with the 2 screws and close the front doors.
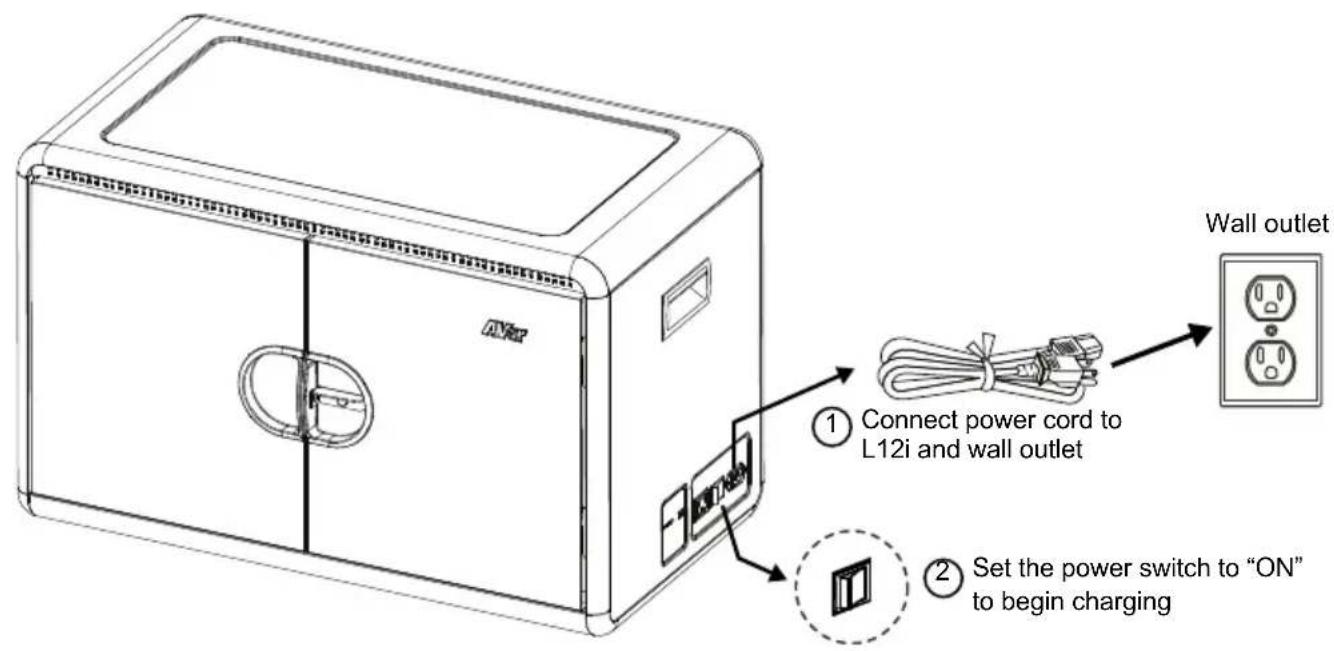
Charging L12i cabinet
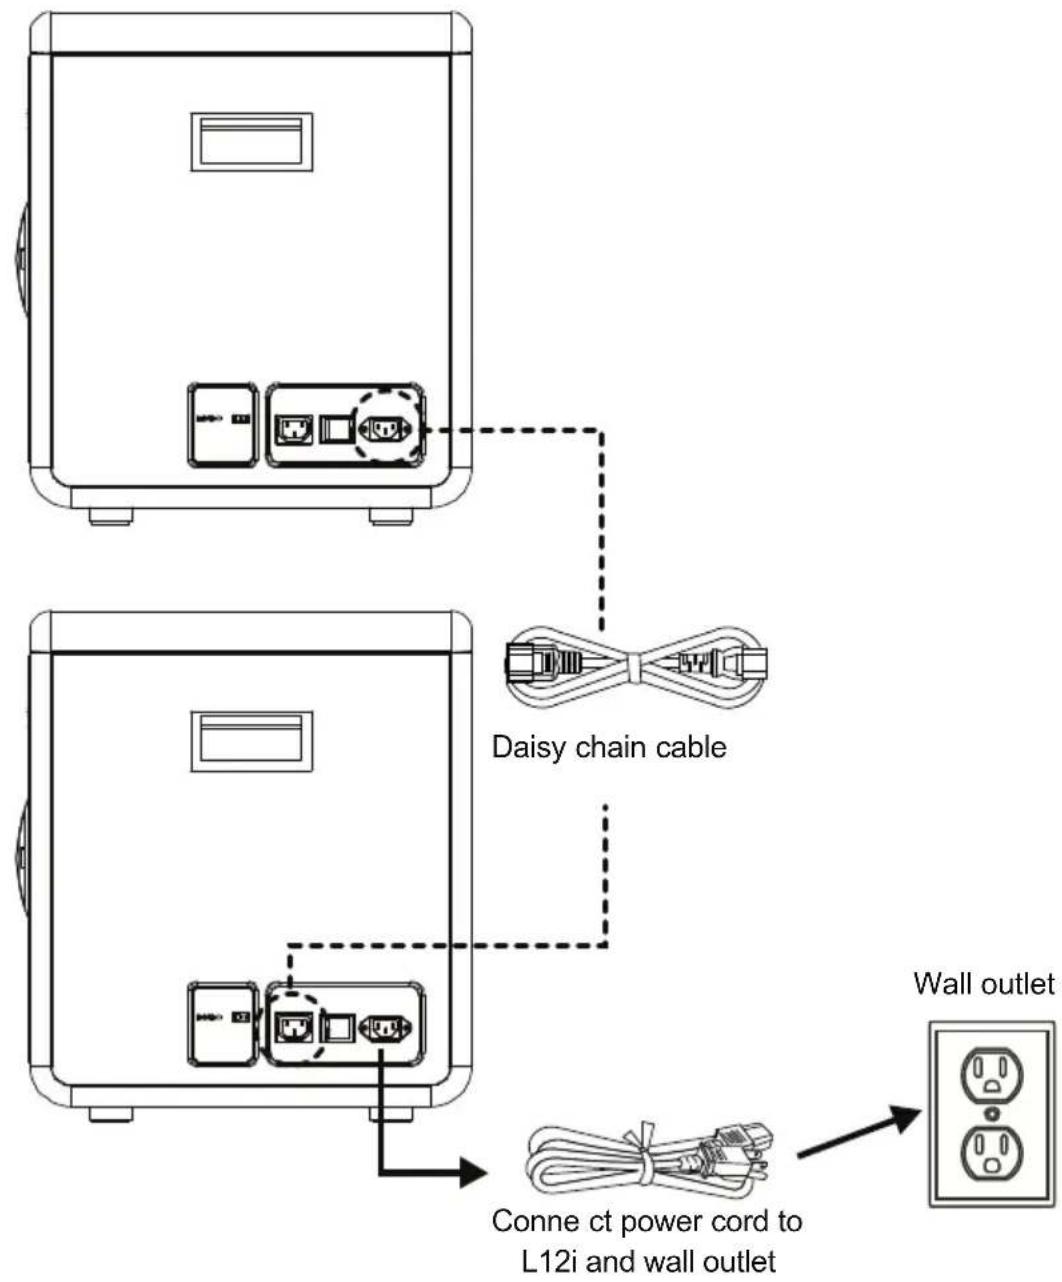
Intelligent Daisy-Chaining
The L12i cabinet supports our patented Intelligent Daisy-Chain technology which enables multiple L12i cabinets to charge through a single wall outlet. Whether you are charging tablets, chromebooks or laptops, Intelligent Daisy-Chain will dynamically monitor the power consumption and intelligently allocate the electrical current to utilize the charging efficiency and to prevent circuit overload.
The configuration of Intelligent Daisy-Chain is illustrated below.
III. Specifications
| Capacity 12 | |
| Device support | All devices up to 15" |
| Slot Dimension (W x D x H) | 3.6(W) x 36.4(D) x 28.5(H) cm1.42"(W) x 14.33"(D) x 11.22"(H) |
| LED status indicators Yes | |
| Charging type Power receptacle | |
| Power specification | AC:100-120V ~ 50/60Hz, 12A220-240V ~ 50/60Hz, 8A |
| Security | Front door |
| Security hook Yes | |
| Working temp. 0 ~ 30°C | |
| Working RH 10% ~ 90% | |
| Storage temp. | -40°C ~ 60°C |
| Storage RH 5% ~ 95% | |
| Warranty | 10-year limited warranty for cabinet and tray5-year limited warranty for electrical parts |
| Dimensions(W x D x H) | 76(W) x 42.5(D) x 49.5 (H)cm29.92"(W) x 16.73"(D) x 19.49"(H) |
3-point locking
- L12i
- User Manual
- FCC NOTICE (Class A)
- Federal Communications Commission Statement
- Class A ITE
- European Community Compliance Statement (Class A)
- DISCLAIMER
- TRADEMARKS
- COPYRIGHT
- CAUTION
- Contents
- INTRODUCTION .... 1
- SETUP 4
- SPECIFICATIONS 9
- Introduction
- Cabinet Diagram
- Door Lock
- LED Status
- LED Description
- Setup
- Connecting your devices
- Intelligent Daisy-Chaining
- Specifications
Brand : AVer
Model : L12i
Category : Battery charger