
KASHTNHSELA - Measurement Kogan - Free user manual and instructions
Find the device manual for free KASHTNHSELA Kogan in PDF.


| Product Type | Laser Distance Measurer |
| Brand | Kogan |
| Model | KASHTNHSELA |
| Measurement Range | 0.05 m to 40 m |
| Accuracy | ±1.5 mm |
| Units | m, ft, in |
| Display | LCD with backlight |
| Battery | 2 x AAA (included) |
| Auto Shut-off | Yes (30 seconds idle) |
| Memory | Last 10 measurements |
| Laser Class | Class II (eye safe) |
| Wavelength | 635 nm |
| Dimensions | 110 x 50 x 25 mm |
| Weight | 100 g |
| Operating Temperature | 0 °C to 40 °C |
| Storage Temperature | -20 °C to 60 °C |
| Waterproof Rating | IP54 (splash resistant) |
| Material | ABS plastic |
| Included Accessories | Carrying case, batteries, user manual |
| Certifications | CE, FCC, RoHS |
| Warranty | 2 years |
Frequently Asked Questions - KASHTNHSELA Kogan
User questions about KASHTNHSELA Kogan
0 question about this device. Answer the ones you know or ask your own.
Ask a new question about this device
Download the instructions for your Measurement in PDF format for free! Find your manual KASHTNHSELA - Kogan and take your electronic device back in hand. On this page are published all the documents necessary for the use of your device. KASHTNHSELA by Kogan.
USER MANUAL KASHTNHSELA Kogan
KOGAN SMARTERHOME™ TEMPERATURE & HUMIDITY SENSOR
KASHTNHSELA
OVERVIEW

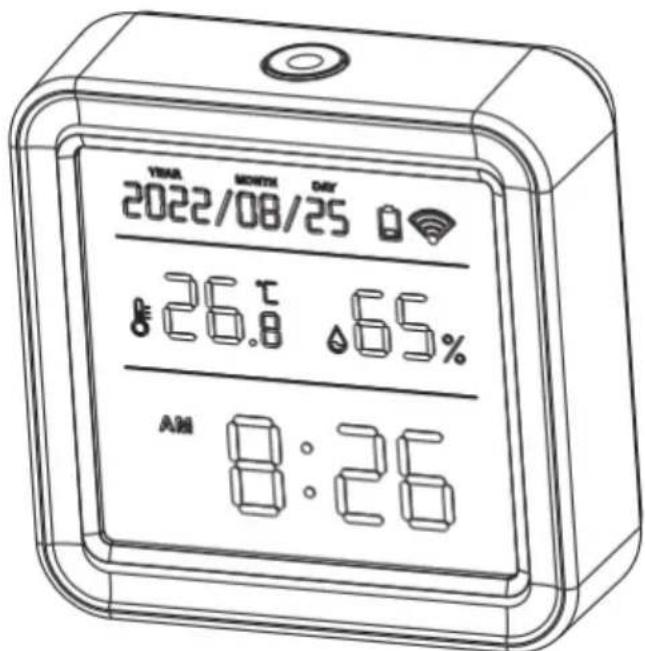
(12-Hour mode)
Rear

CONNECT TO SMARTERHOME™ APP
Install App
Download the "Kogan SmarterHome" app from the Play Store (Android) or App Store (iOS).

Play Store (Android)

App Store (iOS)

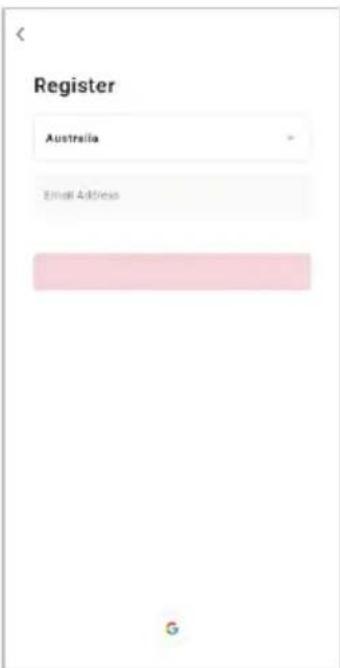
To register:
- If you already have a SmarterHome account, select 'Log In'. To register a new account, select 'Sign Up'.
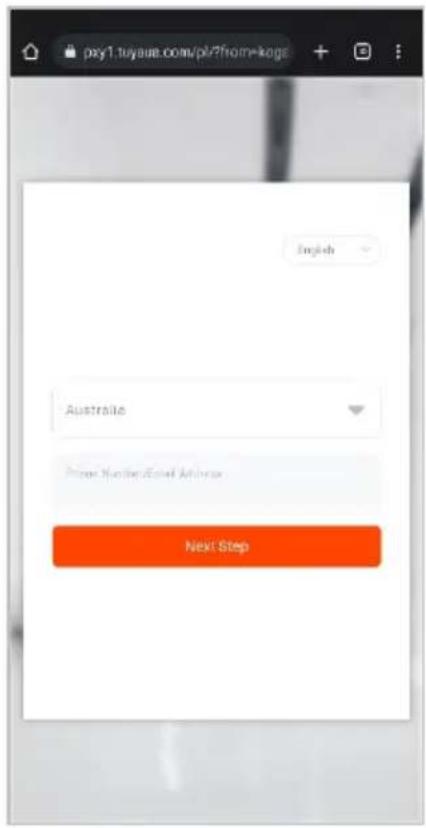
- The system will automatically recognise your country. If needed, you can manually select your country from the drop-down box. Enter your email address and tap 'Get Verification Code' to continue.
- A 6-digit code will be sent to the submitted email address. Enter this code before the one-minute timer expires.
- Continue to the next page and complete your SmarterHome profile.


Set device in pairing mode
When the device is first turned on, it may automatically enter pairing mode (Wi-Fi indicator will be flashing rapidly).
If not automatically in pairing mode when powered on, you can manually set the device in pairing mode by pressing and holding the backlight button for 5 seconds until the Wi-Fi indicator is flashing rapidly.
Add device through network
- Once registered, tap "Add Device" on the app's home page, or the "+" in the upper right corner, to add a new device through the network.
- Select the product type from the list of options in the app (Temp & Humidity Sensor → Temp & Humidity Sensor).
- Enter your Wi-Fi details. It is important that your SmarterHome™ device and the app are connected to the same Wi-Fi network during setup.


Notes:
• The device and the app have to use the same Wi-Fi network.
• The device is only compatible with 2.4Ghz networks.
• Depending on the product, Steps 3 and 4 may be in opposite order.
-
Ensure that the device is in pairing mode, with the Wi-Fi indicator flashing rapidly, and tap "Confirm light is rapidly flashing".
-
The device will commence the pairing process and connect to the app. Ensure your Wi-Fi router, mobile phone, and the SmarterHome™ device are kept close until connection is complete.
-
After successfully being added, you will have the option to rename the device and assign it to a location. It will now be listed on the app's home page. Tap the device listing to enter its control page.


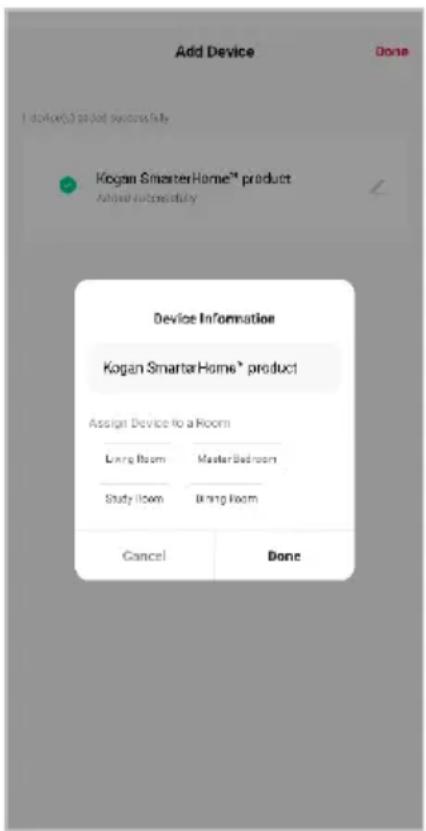
Note:
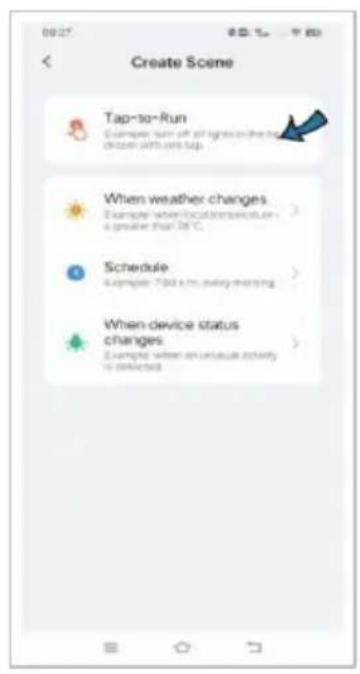
Once connected, you can select Create Scene from the “+” in the upper right corner (or from the Scene tab) to group connected SmarterHome™ products and automate their functions.
Having trouble connecting?
The prior steps detail the process for “EZ Mode” connection. If that does not work for your connection, we suggest trying it again, and if still no success, attempting the following method for AP Mode connection.
Set device in AP pairing mode
Set the device in pairing mode by pressing and holding the backlight button for 5 seconds until the LED indicator begins flashing slowly.
Using AP Mode to add device
- Follow the previous steps to select your product type (Temp & Humidity Sensor → Temp & Humidity Sensor).
- Adjust your connection method by tapping on the mode type in the top-right corner of the screen. Select "AP Mode" for the set-up type.
- Ensure that the device is in pairing mode, with the LED indicator flashing slowly, and tap "Confirm light is slowly flashing".
- Enter your Wi-Fi details. It is important that your SmarterHome™ device and the app are connected to the same Wi-Fi network during setup.


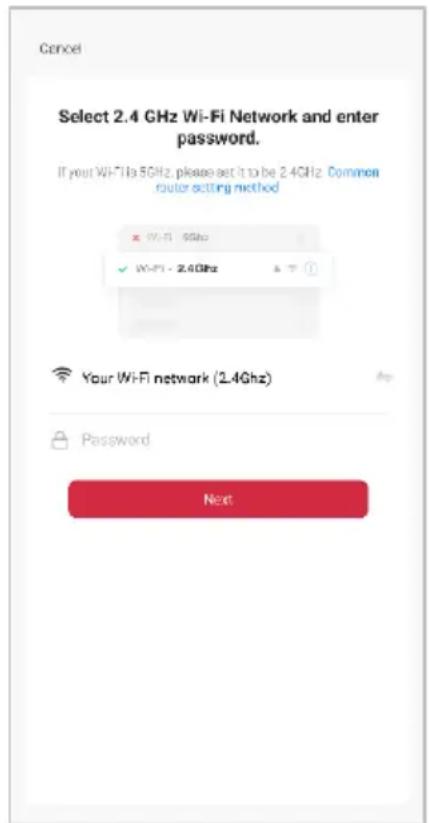
Notes:
• The device and the app have to use the same Wi-Fi network.
• The device is only compatible with 2.4Ghz networks.
• Depending on the product, Steps 3 and 4 may be in opposite order.
- Follow the in-app prompts to continue AP Mode connection, which will pair your mobile phone to the device's Wi-Fi hotspot to ensure a connection. This may be named "SL-KoganSmart", "SmartLife-XXXX", or another similar name.
Note:
If the Wi-Fi hotspot does not appear on your phone in the list of available networks, your device may not be set in AP Pairing Mode correctly. Try repeating the steps outlined above to ensure your device is ready for connection.
- The device will commence the pairing process and connect to the app. Ensure your Wi-Fi router, mobile phone, and the SmarterHome™ device are kept close until connection is complete.
- After successfully being added, you will have the option to rename the device and assign it to a location. It will now be listed on the app's home page. Tap the device listing to enter its control page.

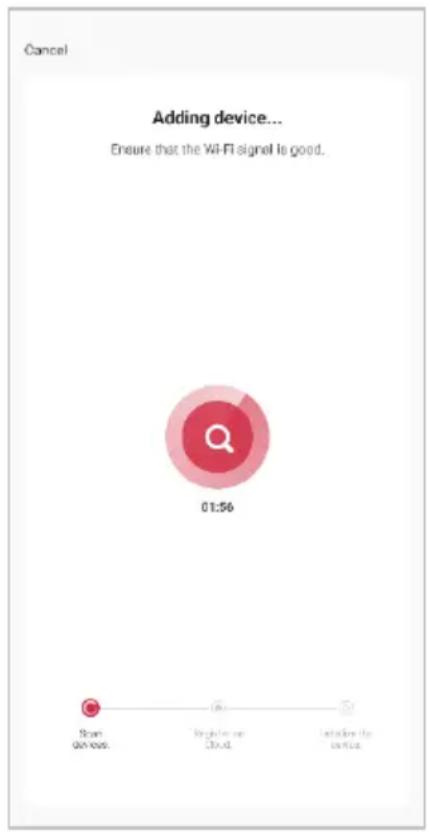

Note:
Once connected, you can select Create Scene from the “+” in the upper right corner (or from the Scene tab) to group connected SmarterHome™ products and automate their functions.
GOOGLE HOME CONTROL
Note:
You will need to have set up a Google Home account prior to linking your Kogan SmarterHome™ device.
Adding "SmarterHome" to the Google Home app
- From the home page of the Google Home app, select the “+” icon (top left corner, see arrow in the below screenshot) to access the ‘Add and manage’ page.
- Select 'Set up device', then select the 'Works with Google' option.


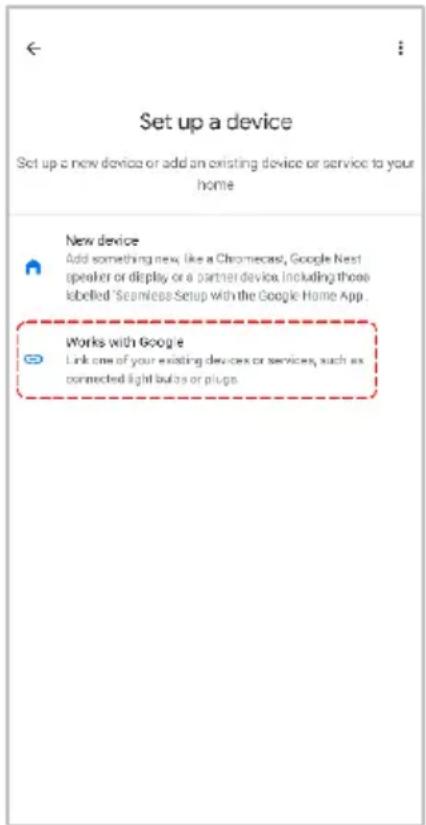
- Select the search bar and type 'Smarter Home' to locate the Kogan SmarterHome™ service.
- From here, you will be prompted to sign into your SmarterHome™ account using either your email or mobile phone number, depending on which method you used to register your account.
- Select "Kogan SmarterHome™" from the app options.


- Tap 'Authorise' to grant Google permission to access the SmarterHome™ app and your devices.
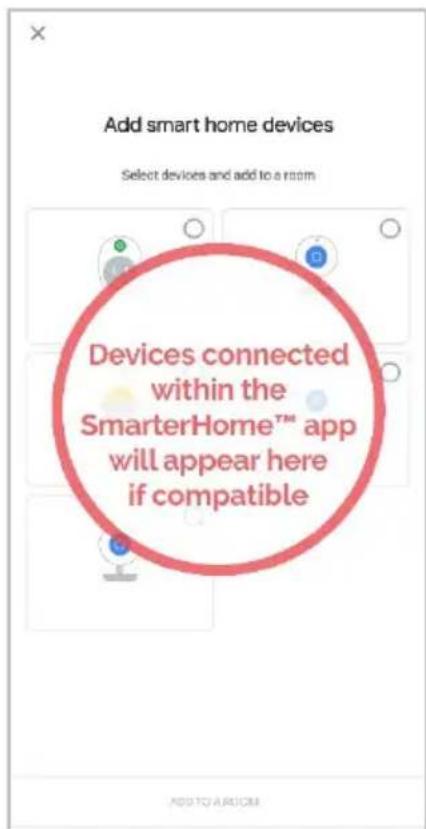
- Once connected, the app will display any compatible devices linked to your SmarterHome™ account. From here you can assign them to rooms and set up any routines. Tap on any of the devices to view a list of available commands.

Note:
Please note that Google Home can only control the base/core functions of any compatible SmarterHome™ devices. To make full use of this product's smart functionality, please use the Kogan SmarterHome™ app.
AMAZON ALEXA CONTROL
Note:
You will need to have set up an Alexa account prior to linking your Kogan SmarterHome™ device.
Adding "SmarterHome" to the Alexa app
- From the home page of the Alexa app, select the “≡” icon in the bottom-right and select “Skills & Games” from the sidebar.
- Select the search bar and type 'Smarter Home' to locate the Kogan SmarterHome™ skill.


- Tap 'Enable to Use' to add the Kogan SmarterHome™ skill to Alexa.
- From here, you will be prompted to sign into your SmarterHome™ account using either your email or mobile phone number, depending on which method you used to register your account.
- Select "Kogan SmarterHome™" from the app options.


OPERATION
Install Batteries
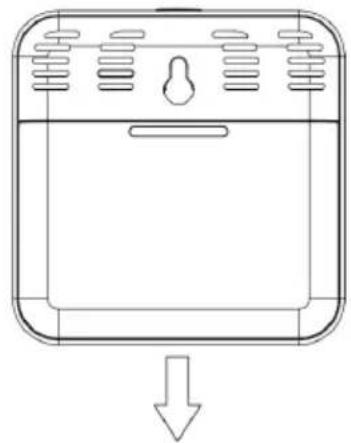
Remove the cover of battery compartment downwards, install x3 AAA batteries paying attention to the orientation of positive and negative polarity.
Replace the battery compartment cover.
natural_image
Line drawing of a rectangular appliance with ventilation grilles and a downward arrow indicating motion (no text or symbols)
Backlight
Press the backlight button on the top once, the backlight will be triggered and stay on for approximately 10 seconds.

Smart Scenes
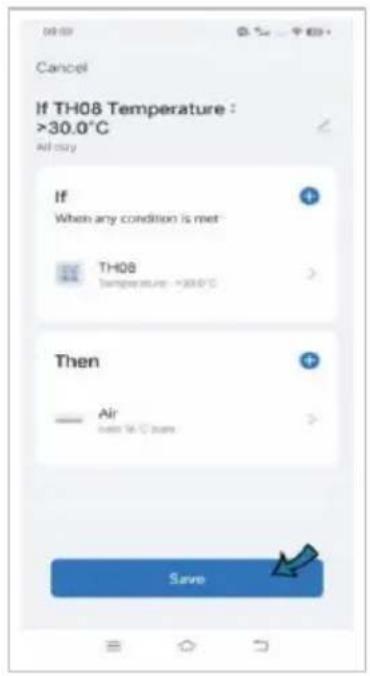
You can create smarts scene with other devices. For example, when the indoor temperature >30 Celsius, the Air conditioner will turn on automatically.

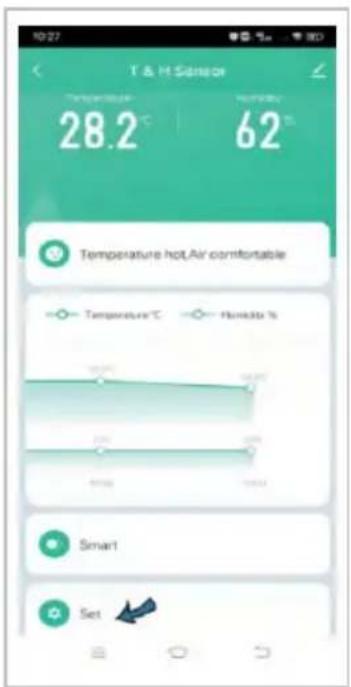
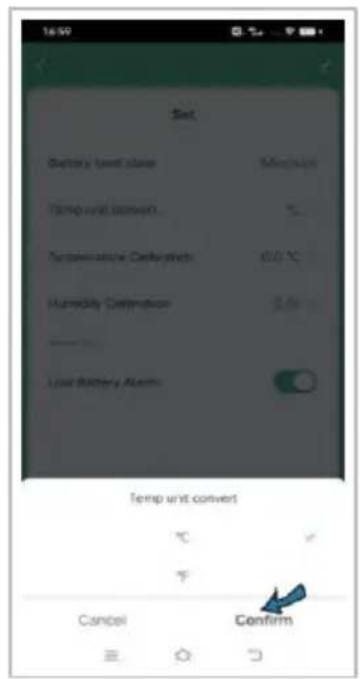
Temperature Unit
You can switch the temperature unit between Fahrenheit and Celsius in the settings, then press the backlight button once, it will sync both on the screen and in the app.

Temp & Humidity Records
You can view the data of temp and humidity stored for up to 1 year. This data can be exporter directly to your email address.


Temp & Humidity Alarm
You can set the range for temperature and humidity alarm in the scene page, when the temperature or humidity reaches the range, it will push a notification to your phone.
Temp & Humidity Calibration
You can calibrate the temperature and humidity in the settings menu, select the calibration value, then press the backlight button once, the temperature or humidity will sync on the screen and in the app.
Voice commands for Alexa and Google Home
• OK Google, what is the humidity?
- OK Google, what is the temperature?
• Alexa, what is the humidity?
• Alexa, what is the temperature of?
SPECIFICATIONS
Size 56 x 56 x 23mm
Battery LR03-1.5V/AAA x3 (Alkaline battery)
Wi-Fi Protocol 2.4GHz IEEE 802.11b/g/n
Temperature Measure Range -9.9°C \~ 60°C
Temperature Accuracy +-1°C
Humidity Measure Range 0% RH\~99% RH
Humidity Accuracy +- 5% RH
FAQ
Temperature and Humidity on the screen is out of sync with the data in app?
- When deviation between temperature display on screen and in app is ≤ ± 0.5ircC .
- When deviation between humidity display on screen and in app is ≤ ± 5% .
- When device detects the environmental temperature change is ≥ 0.5ircC or humidity change is ≥ 5% , the temp and humidity will be updated every 2 mins.
- When device detects the environmental temperature change is < 0.5ircC or humidity change is < 5% , the temp and humidity will be updated every 1 hour.
- When the backlight is triggered, the temp and humidity on the screen will be locked for 2 mins, if the backlight is triggered again within 2 mins, the temperature and humidity will be locked for no more than 15 mins.
How do I calibrate Fahrenheit?
You need calibrate Celsius firstly, then switch to Fahrenheit.
Need more information?
We hope that this user guide has given you the assistance needed for a simple set-up.
For the most up-to-date guide for your product, as well as any additional assistance you may require, head online to help.kogan.com
kogan.com


- KOGAN SMARTERHOME™ TEMPERATURE & HUMIDITY SENSOR
- OVERVIEW
- CONNECT TO SMARTERHOME™ APP
- Install App
- To register:
- Set device in pairing mode
- Add device through network
- Notes:
- Note:
- Having trouble connecting?
- Set device in AP pairing mode
- Using AP Mode to add device
- GOOGLE HOME CONTROL
- Adding "SmarterHome" to the Google Home app
- AMAZON ALEXA CONTROL
- Adding "SmarterHome" to the Alexa app
- OPERATION
- Install Batteries
- Backlight
- Smart Scenes
- Temperature Unit
- Temp & Humidity Records
- Temp & Humidity Alarm
- Temp & Humidity Calibration
- Voice commands for Alexa and Google Home
- SPECIFICATIONS
- FAQ
- Temperature and Humidity on the screen is out of sync with the data in app?
- How do I calibrate Fahrenheit?
- Need more information?
Brand : Kogan
Model : KASHTNHSELA
Category : Measurement