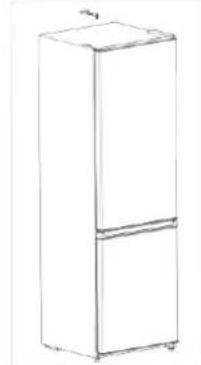
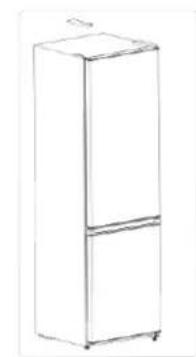
BEC200WE - Fridge Benavent - Free user manual and instructions
Find the device manual for free BEC200WE Benavent in PDF.

User questions about BEC200WE Benavent
0 question about this device. Answer the ones you know or ask your own.
Ask a new question about this device
Download the instructions for your Fridge in PDF format for free! Find your manual BEC200WE - Benavent and take your electronic device back in hand. On this page are published all the documents necessary for the use of your device. BEC200WE by Benavent.
USER MANUAL BEC200WE Benavent
natural_image
Simple line drawing of a rectangular frame with two vertical panels, no text or symbols present.natural_image
Pure technical line drawing of a door or panel with no text, numbers, or symbolsnatural_image
Pure technical line drawing of a door or cabinet with no text, numbers, or symbolsnatural_image
Pure technical line drawing of a door or cabinet with no text, numbers, or symbolsnatural_image
Line drawing of a door with handle and side panel, no text or symbols presentnatural_image
Simple line drawing of a two-panel door or cabinet with no text or symbolsnatural_image
Line drawing of a double door with attached clamps and connectors (no text or symbols)natural_image
Line drawing of a refrigerator with two doors and one frontrest (no text or symbols)
natural_image
Line drawing of a refrigerator with two doors, no text or symbols presentnatural_image
Line drawing of a refrigerator with open doors and shelves (no text or symbols)natural_image
Line drawing of a refrigerator with open shelves and a door, no text or symbols presentnatural_image
Line drawing of a refrigerator with multiple shelves (no text or symbols)natural_image
Line drawing of a tall cabinet with shelves and drawers (no text or symbols)natural_image
Line drawing of a stainless steel refrigerator with multiple shelves (no text or symbols)natural_image
Technical line drawings of two vertical panels with internal shelves, no text or symbols presentnatural_image
Line drawing of a single refrigerator with two doors and a front panel (no text or symbols)natural_image
Line drawing of a three-tier refrigerator with lid and frontrest (no text or symbols)natural_image
Line drawing of a refrigerator interior showing front and side views (no text or symbols)text_image
Freezer Control NORMAL COLD (summer) COLDER (winter)Please read the user manual carefully before operating the Refrigerator
Contents
- SAFETY WARNINGS.... 1
- INSTALLATION.... 2
2.1 Locaon.... 2
2.2 Door Handle Install Illuminaon(oponal).... 2
2.3 Reversing the Door Swing.... 4
2.4 Door Space Requirements....6
2.5 Levelling the Unit....6
2.6 Cleaning Before Use....6
2.7 Before Using Your Unit....6
2.8 Interior Accessories 7
- PRODUCT OVERVIEW 8
- OPERATION....8
4.1 Operaon Instrucons....8
4.2 Noise Inside the Unit! 10
4.3 Tips for Keeping Food in the Unit 10
4.4 Change the Light Bulb.... 11
- CLEANING 11
5.1 Defrosng.... 11
5.2 Cleaning the Interior and the Exterior of the Unit 11
5.3 Cleaning Tips.... 11
- MAINTENANCE 11
6.1 Changing the Internal Light 11
6.2 Care When Handling / Moving Your Unit 11
6.3 Servicing 11
6.4 Switching O for Long Periods of Time 11
6.5 Do not shield posions of air outlet and return air inlet of the refrigerator ..... 12
- Trouble shoong.... 12
7.1 Warm ps: 12
8. TIPS FOR ENERGY SAVING.... 12
9. DISPOSAL 13
1. SAFETY WARNINGS
1) WARNING—Keep ventilation openings, in the appliance enclosure or in the built-in structure, clear of obstrucon.
2) WARNING—Do not use mechanical devices or other means to accelerate the defrosting process, other than those recommended by the manufacturer.
3) WARNING—Do not damage the refrigerant circuit.
4) WARNING—Do not use electrical appliances inside the food storage compartments of the appliance, unless they are of the type recommended by the manufacturer.
5) The appliance has to be unplugged aer use and before carrying out user maintenance on the appliance.
6) This appliance can be used by children aged from 8 years and above and persons with reduce physical sensory or mental capabilities or lack of experience and knowledge if they have been given supervision or instruction concerning use of the appliance in a safe way and understand the hazards involved. Children shall not play with the appliance. Cleaning and user maintenance shall not be made by children without supervision.
7) If the supply cord is damaged, it must be replaced by the manufacturer, its service agent or similarly qualified persons in order to avoid a hazard.
8) Please abandon the refrigerator according to local regulators for it use ammable blowing gas and refrigerant.
9) Please according to local regulations regarding disposal of the appliance for its ammable refrigerant and blowing gas. Before you scrap the appliance, please take o the doors to prevent children trapped.
10) This appliance is intended to be used in household and similar applications such as
– sta kitchen areas in shops, oces and other working environments;
– farm houses and by clients in hotels, motels and other residential type environments;
– bed and breakfast type environments;
- catering and similar non-retail applicaons.
11) Do not store explosive substances such as aerosol cans with a ammable propellant in this appliance.

IT IS HAZARDOUS FOR ANYONE OTHER THAN AUTHORISED SERVICE PERSONNEL TO CARRY OUT SERVICING OF REPAIRS WHICH INVOLVE THE REMOVAL OF COVERS.

TO AVOID THE RISK OF AN ELECTRICAL SHOCK DO NOT ATTEMPT REPAIRS YOURSELF.
2. INSTALLATION
2.1 Locaon
When selecng a position for your unit you should make sure the oor is at and firm, and the room is well ventilated. Avoid locating your unit near a heat source, e.g. cooker, boiler or radiator. Also avoid direct sunlight as it may increase the electrical consumpon. Extreme cold ambient temperatures may also cause the unit not to perform properly. This unit is not designed for use in a garage or outdoor installaon. Do not drape the unit with any covering.
When installing the unit, ensure that 10 cm of free space is le at both sides, 10 cm at the rear and 30 cm at the top of the unit. This will allow cold air to circulate around the wine cooler and improve the eciency of the cooling process.
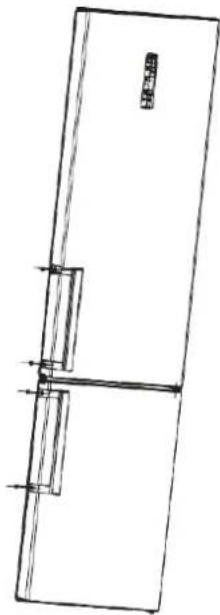
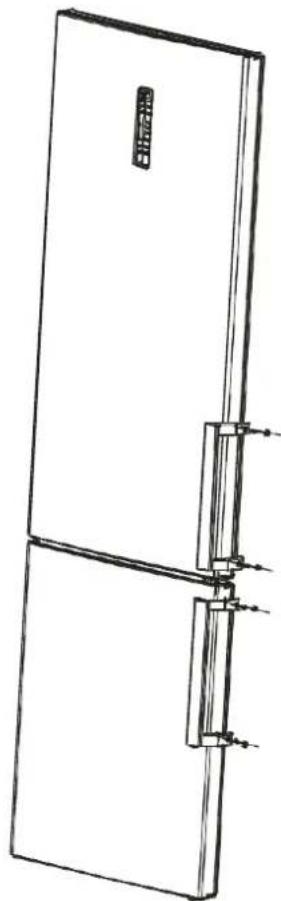
2.2 Door Handle Install Illuminaon(oponal)
1) Take out the screw caps from the door handle holes.
natural_image
Simple line drawing of a two-panel door or cabinet (no text or symbols)2) Put the handles into the screw holes and then hit them to fix.

natural_image
Pure technical line drawing of a door or panel with no text, numbers, or symbols3) Cap the screw caps on the handle screws.

natural_image
Pure technical line drawing of a door or panel with no text, numbers, or symbols4) Take out the screw caps from the handle screw holes.
natural_image
Pure technical line drawing of a door or cabinet with no text, numbers, or symbols5) Remove the screws and take the handles down.

natural_image
Line drawing of a door with a handle and internal components (no text or symbols)6) Cap the screw caps on the door handle holes again.

natural_image
Simple line drawing of a rectangular frame with two vertical panes and a small label on the top (no text or symbols)7) Install the handles into the door handle holes of the other side in accordance with the handle installation instructions.
natural_image
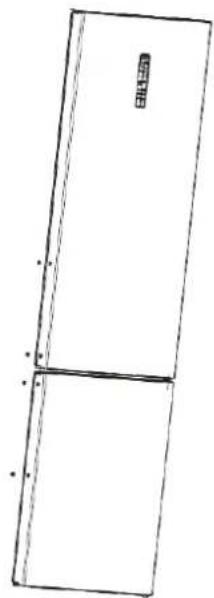
Line drawing of a double door with attached clamps and a label on the front panel (no text or symbols present)2.3 Reversing the Door Swing
1) Take off knuckle guard. 2) Take off top hinge.

natural_image
Line drawing of a double refrigerator with front and back panels (no text or symbols)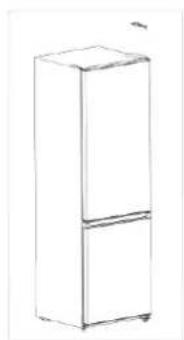
natural_image
Line drawing of a single refrigerator with two doors and a frontrest (no text or symbols)3) Take off the door of refrigerating chamber.

natural_image
Line drawing of an open refrigerator with shelves and doors (no text or symbols)4) Take off middle hinge with a screw driver.
natural_image
Line drawing of a refrigerator with open doors and shelves (no text or symbols)5) Take off the door of freezing chamber.

natural_image
Line drawing of a tall rectangular cabinet with multiple shelves (no text or symbols)6) Take off hinge assembly with a screw driver, Assemble lower hinge assembly to left side of the cabinet with a screw driver.
natural_image
Line drawing of a tall cabinet with multiple shelves and drawers (no text or symbols)7) Assemble the door of freezer chamber on the lower hinge.
natural_image
Line drawing of a refrigerator with multiple shelves (no text or symbols)8) Assemble middle hinge assembly to left side of the cabinet.
natural_image
Technical line drawings of two vertical panels with internal shelves, shown from different angles (no text or symbols)9) Assemble the door of refrigerating.
natural_image
Line drawing of a two-tier refrigerator with lid and frontrest (no text or symbols)10) Take on knuckle guard.
natural_image
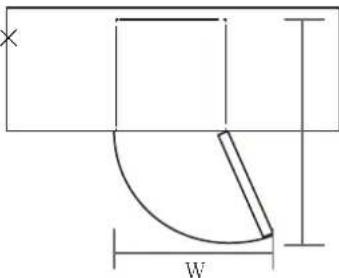
Line drawing of a double refrigerator with lid and frontrest (no text or symbols)2.4 Door Space Requirements
The unit's door must be able to open fully as shown. W×D≥990×1025mm
text_image
W2.5 Levelling the Unit
To do this adjust the two levelling feet at the front of the unit. If the unit is not level, the door and magnec seal alignments will not be covered properly.
Make sure that the foot touches the ground before use.
Look down from the top, clockwise and counterclockwise loosening, ghtening.

text_image
Two labeled diagrams showing a checkmark and an 'X' symbol inside water containers, likely indicating inspection or cancellation.2.6 Cleaning Before Use
Wipe the inside of the unit with a weak soluon of bicarbonate soda. Then rinse with warm water using a 'Wrung-out' sponge or cloth. Wash the shelves and salad bin in warm soapy water and dry completely before replacing in the unit. Clean the exterior of the unit with a damp cloth. If you require more informaon refer to the Cleaning secon.
2.7 Before Using Your Unit
The refrigerator adopts 220\~240V/50Hz AC power, voltage octuaons over the range of 187 \~ 264V will cause malfuncon or even damage.
Do not damage the power cord under any condition so as to ensure safety use, do not use when the power cord is damaged or the plug is worn.
Do not put ammable, explosive, volatile and highly corrosive items in the refrigerator to prevent damages to the product or fire accidents.
Do not place ammable items near the refrigerator to avoid fires.
This product is household refrigerators and shall be only suitable for the storage of foods.
According to naonal standards, household refrigerators shall not be used for other purposes, such as storage of blood, drugs or biological products.
Do not place items such as boled or sealed container of uid such as boled beers and
beverages in the freezer to prevent bursts and other losses.
Before placing any food in your unit, turn it on and wait for 24 hours, to make sure it is working properly and to allow it me to fall to the correct temperature. Your unit should not be overfilled. Do not damage the power cord under any condion so as to ensure safety use, do not use when the power cord is damaged or the plug is worn.
Do not put ammable, explosive, volatile and highly corrosive items in the refrigerator to prevent damages to the product or fire accidents.
Do not place ammable items near the refrigerator to avoid fires.
This product is household refrigerators and shall be only suitable for the storage of foods.
According to naonal standards, household refrigerators shall not be used for other purposes, such as storage of blood, drugs or biological products.
Do ot place items such as boled or sealed container of uid such as boled beers and beverages in the freezer to prevent bursts and other losses.
Before placing any food in your unit, turn it on and wait for 24 hours, to make sure it is working properly and to allow it me to fall to the correct temperature. Your unit should not be overfilled.

Before Plugging in
You must check that you have a socket which is compatible with the plug supplied with the unit.
Before Turning On!
Do not turn on unl two hours aer moving the unit.
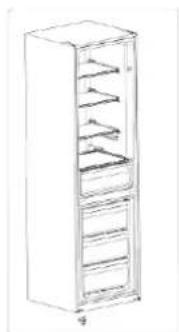
2.8 Interior Accessories
Various glass or plasc storage shelves are included with your appliance - dierent models have dierent combinaons.
You should always slide one of the full size glass storage shelves into the lowest set of guides, above the fruit and vegetable containers, and keep it in this posion. To do this, pull the storage shelf forward until it can be swivelled upwards or downwards and removed.
Please do the same in reverse to insert the shelf at a dierent height.

In order to make the most of the volume of the fresh food storage compartment and frozen-food storage compartment, the user can remove one or more shelves, drawers, out of the appliance, according to your daily use.
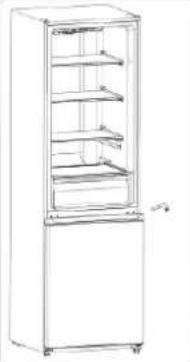
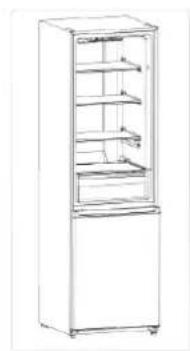
3. PRODUCT OVERVIEW
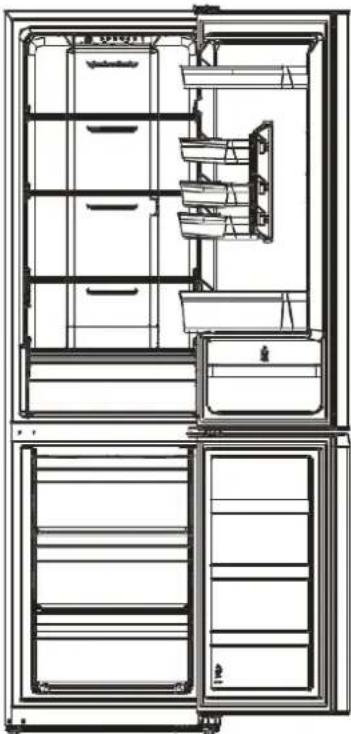
natural_image
Line drawing of a refrigerator interior showing front and rear doors, shelves, and storage compartments (no text or labels)*Doed line represents the posion of air outlet and return air inlet.
*All images in this instrucon manual are for indicaon only; please refer to your individual unit for details.
4. OPERATION
4.1 Operaon Instrucons
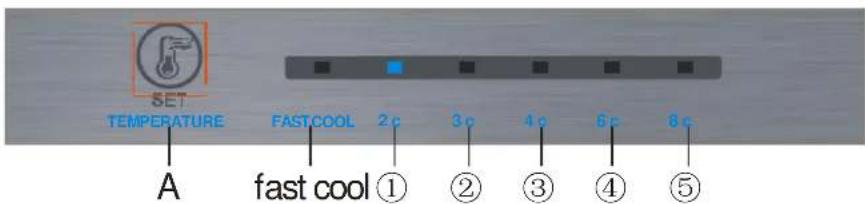
Temperature control
● Temperature control of fresh food storage compartment.
text_image
SET TEMPERATURE FASTCOOL 2c 3c 4c 6c 8c A fast cool ① ② ③ ④ ⑤(Built-in)

text_image
°C 8 —— ⑤ 6 —— ④ 4 —— ③ 3 —— ② 2 —— ① Super — fast cool Total No Frost A(External display)
Key
A.S ET: gear setting key.
Display screen
1 Gear 1
2 Gear 2
3 Gear 3
4 Gear 4
5 Gear 5
Display
For the first power-on, the display screen (including the key light) will be displayed in full for 3s, and then the gear in the middle displays the state of running.
Display of normal running
On the occurrence of a failure, the corresponding LED light will give a combined display of failure code (loop display);
Where there is no failure, the LED light will display the current running gear of the refrigerator.
Gear seng
The gear will be changed once every me when you press the key SET. Then, the refrigerator will run under the setting value after 15s.

flowchart
graph LR
    A["Gear 1"] --> B["Gear 2"]
    B --> C["Gear 3"]
    C --> D["Gear 4"]
    D --> E["Gear 5"]
    E --> F["End"]
Fast cool function
Enter: Circulang modulaon rapid cooling mode.
Operate: Indicator of rapid cooling lights up, and the refrigerator operates at 2°C.
Exit: 1. Operate 150min under the rapid cooling mode.
- Temperature adjustment can exit from the rapid cooling mode.
● Temperature control of freezing chamber
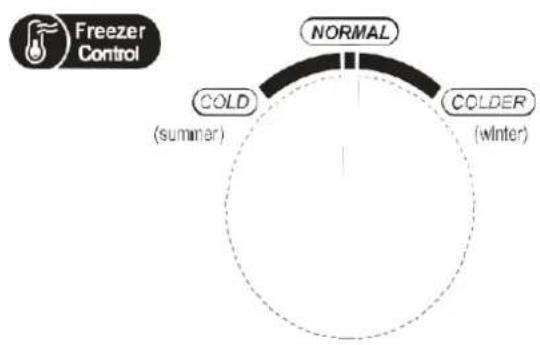
text_image
Freezer Control NORMAL COLD (summar) COLDER (winter)The freezing temperature is relatively low in "COLDER" posion, while the freezing temperature is relatively high in "COLD" posion, thus, "NORMAL" posion is generally used.
When ambient temperature is high in summer, the temperature shall be in the range from "NORMAL" to "COLD". If the ambient temperature is above 35°C, then "COLD" posion shall prevail.
When ambient temperature is low in winter, the temperature shall be in the range from "NORMAL" to "COLDER". If the ambient temperature is below 10^ , then "COLDER" posion shall prevail.
4.2 Noise Inside the Unit!
You may noce that your unit makes some unusual noises. Most of these are perfectly normal, but you should be aware of them!
These noises are caused by the circulaon of the refrigerant liquid in the cooling system. It has become more pronounced since the introduction of CFC free gases. This is not a fault and will not act the performance of your unit. This is the compressor motor working, as it pumps the refrigerant around the system.
4.3 Tips for Keeping Food in the Unit
◆ Cooked meats/fishes should always be stored on a shelf above raw meats/fishes to avoid bacterial transfer. Keep raw meats/fishes in a container which is large enough to collect juices and cover it properly. Place the container on the lowest shelf.
Leave space around your food, to allow air to circulate inside the unit. Ensure all parts of the unit are kept cool.
◆ To prevent transfer of favours and drying out, pack or cover the food separately. Fruit and vegetables do not need to be wrapped.
◆ Always let pre-cooked food cool down before you put in the unit. This will help to maintain the internal temperature of the unit.
◆ To prevent cold air escaping from the unit, try to limit the number of mes you open the door. We recommend that you only open the door when you need to put food in or take food out.
4.4 Change the Light Bulb
Lamp replacement by professionals
5. CLEANING
5.1 Defrosng
Auto-defrost for Frost-free Refrigerator
5.2 Cleaning the Interior and the Exterior of the Unit
◆ Remove all the shelves and the salad bin. To remove the salad bin first remove the lower door shelf.
Wipe the inside of the unit with a weak solution of bicarbonate soda and then rinse with warm water using a “wrung-out” sponge or cloth. Wipe completely dry before replacing the shelves and salad bin.
Use a damp cloth to clean the exterior, and then wipe with a standard furniture polish. Make sure that the door is closed to avoid the polish geng on the magnec door seal or inside the unit.
◆ The grille of the condenser at the back of the unit and the adjacent components can be vacuumed using a so brush eachment.
5.3 Cleaning Tips
Condensation may appear on the outside of the unit. This may be due to a change in room temperature. Wipe of any moisture residue. If the problem connues, please contact a qualified technician for assistance.
6. MAINTENANCE
6.1 Changing the Internal Light
Lamp replacement by professionals.
6.2 Care When Handling / Moving Your Unit
Hold the unit around its sides or base when moving it. Under no circumstances should it be lied by holding the edges of the top surface.
6.3 Servicing
The unit should be serviced by an authorized engineer and only genuine spare parts should be used. Under no circumstances should you aempt to repair the unit yourself. Repairs carried out by inexperienced persons may cause injury or serious malfuncon. Contact a qualitatively technician.
6.4 Switching O for Long Periods of Time
When the unit is not in use for a long period of me, disconnect it from the mains supply, empty all food and clean the appliance, leaving the door ajar to prevent unpleasant smells.
6.5 Do not shield posions of air outlet and return air inlet of the refrigerator
6.6 Do not keep foods of higher temperature close to temperature sensor
6.7 Take out drawer of freezing chamber of refrigerator and put foods directly on the glass paron
7. Trouble shoong
The following simple issues can be handled by the user. Please call the aer-sale service department if the issues are not seled.
| Inoperaon | Whether the freezer is plugged and connected to power;Low voltage;Failure power or tripping circuit |
| Odor | Odorous foods should closely wrapped;Whether foods are roen;Whether the interior shall be cleaned. |
| Long-term operaon of compressor | It is normal that refrigerator operates for longer me in summer when the ambient temperature is higher;Do not put too much food in the freezer at one me;Do not put foods unl they are cooled;Frequent opening of refrigerator door. |
| Illuminang light does not shine | Whether the refrigerator is connected to power,whether the illuminating light is damaged. |
| The refrigerator door can not be properly closed. | The freezer door is stuck by food packages;Too much food;Tilt refrigerator. |
| Loud noises | Whether the food is leveled, whether the refrigerator is balanced;Whether the refrigerator parts are properly placed. |
7.1 Warm ps:
◆The refrigerator enclosure may emit heat during operaon specially in summer, this is caused by the radiaon of the condenser, and it is a normal phenomenon.
◆ Condensaon: condensation phenomenon will be detected on the exterior surface and door seals of the freezer when the ambient humidity is large, this is a normal phenomenon, and the condensaon can be wiped away with a dry towel.
◆Buzz: Buzz will be generated by running compressor specially when starng up or shung down.
8. TIPS FOR ENERGY SAVING
Try not to open the door too oen, especially when the weather is wet and hot. Once you open the door, close it as soon as possible.
Every now and then check if the appliance is sufficiently ventilated (adequate air circulation behind the appliance).
In normal temperature condions, please arrange the thermostat at the middle seng.
Before loading the appliance with packages of fresh food, make sure they are cooled to ambient temperature.
Ice and frost layer increase energy consumption, so clean the appliance as soon as the layer is 3-5 mm thick.
If it is the outer condenser, the rear wall should be always clean free of dust or any impurities.
◆ The appliance should be located in the coolest area of the room, away from heat producing appliances or heang ducts, and out of the direct sunlight.
Let hot foods cool to room temperature before placing in the appliance. Overloading the appliance forces the compressor to run longer. Foods that freeze too slowly may lose quality, or spoil.
◆ Be sure to wrap foods properly, and wipe containers dry before placing them in the appliance. This cuts down on frost build-up inside the appliance.
◆ Appliance storage bin should not be lined with aluminum foil, wax paper, or paper toweling. Liners interfere with cold air circulaon, making the appliance less ecient.
Organize and label food to reduce door openings and extended searches. Remove as many items as needed at one me, and close the door as soon as possible.
9. DISPOSAL
Old units still have some residual value. An environmentally friendly method of disposal will ensure that valuable raw materials can be recovered and used again. The refrigerant used in your unit and insulation materials require special disposal procedures. Ensure that none of the pipes on the back of the unit are damaged prior to disposal. Up to date information concerning opons of disposing of your old unit and packaging from the new one can be obtained from your local council oce.
When disposing of an old unit break of any old locks or latches and remove the door as a safeguard.
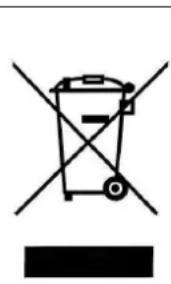
Correct Disposal of this product
natural_image
Symbol of a trash bin with crossed lines indicating no waste or discharge (no text or labels)Correct Disposal of this product
This marking indicates that this product should not be disposed with other household wastes throughout the EU. To prevent possible harm to the environment or human health from uncontrolled waste disposal, recycle it responsibly to promote the sustainable reuse of material resources. To return your used device, please use the return and collection systems or contact the retailer where the product was purchased. They can take this product for environmental safe recycling
For more informaon, please contact the local authority or your retailer where you purchased the product.