
NID-7004 - Radio Naxa - Free user manual and instructions
Find the device manual for free NID-7004 Naxa in PDF.


| Product Type | Portable Radio |
| Brand | Naxa |
| Model | NID-7004 |
| Color | Black |
| Dimensions | Approx. 200 x 120 x 50 mm |
| Weight | Approx. 0.5 kg |
| Power Source | 2 x AA batteries (not included) or AC adapter (optional) |
| Battery Type | AA alkaline |
| Frequency Range | AM: 520-1710 kHz, FM: 87.5-108 MHz |
| Tuning Type | Digital |
| Preset Stations | 20 |
| Speaker | Built-in 3-inch |
| Output Power | 2W |
| Headphone Jack | 3.5mm |
| Antenna | Built-in FM / AM |
| Display | LCD with backlight |
| Controls | Volume, tuning, preset, power |
| Additional Features | Alarm clock, sleep timer, aux input |
| Care | Wipe with soft dry cloth. Avoid liquids. |
| Safety | Keep away from water and heat. Dispose batteries properly. |
| Warranty | 1 year limited |
| Spare Parts | Not specified, contact support |
Frequently Asked Questions - NID-7004 Naxa
User questions about NID-7004 Naxa
0 question about this device. Answer the ones you know or ask your own.
Ask a new question about this device
Download the instructions for your Radio in PDF format for free! Find your manual NID-7004 - Naxa and take your electronic device back in hand. On this page are published all the documents necessary for the use of your device. NID-7004 by Naxa.
USER MANUAL NID-7004 Naxa
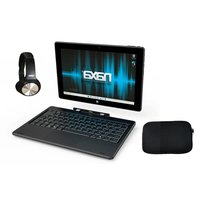
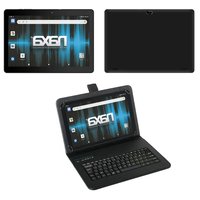
Tablet PC
User Manual
Before using the product, Please be sure to read this user manual and keep this manual for future reference.
Contents
- Status bar....1
- Widgets....3
- Settings.....10
- Setting for network connection....12
- Google services....13
- Customize your product settings....19
- Troubleshooting....21
- Safety information....22
1. Status bar
| Icins on Status Bar | Definition | |
 | Home screen | Click it to return to the home screen |
 | Screen rotation | when the screen rotation state is disabled, a related icon will appear on the status bar. You can click it to rotate the screen. |
 | SD card preparation | It indicates the SD card is preparing |
 | SD card uninstalled | It indicates the SD card has been uninstalled, but still in the device. |
 | SD card removed | It indicates the SD card has been safely removed from the device. |
 | Download | It indicates the system is engaged in a downloading process. |
 | Clock | It indicates the alarm clock is in an enabledstate. |
 | Wireless | It shows the strength of the wireless signals. |
 | Charge | It indicates the battery is being charged. |
 | Charge over | It indicates the battery has been fully charged. |
| 12:20 | Time | It shows the current time of the system. |
 | Capture | Click it to capture the current interface, and then save it in the SD card with, jpg format. |
 | Vol+ | Click it to turn the volume up |
 | Vol- | Click it to turn the volume down. |
 | Menu | Click it to display the menu. |
 | Back | Click it to go back to the previous interface. |
2. widgets
Calendar
Two displaying modes are available in this widget, namely. Simple and Detailed. To switch over between these two modes, just click the widget. With the simple mode, the device can only display the current date and day. With the Detailed mode, the current date is displayed in red, while the information on date for the whole month can be seen.
Weather
It tells the weather information of the location, including weather, temperature and humidity.
Weather forecast
You can click the component of weather forecast to set the items below:
City;
Update time;
Temperature unit;
2.1 Adding/deleting widget
Add a widget
Press Menu on the home screen, and select " add desktop plugin" in the popped-up menu.
Select the wedget you desire to add in the list of the window, and then the addedwidget will appear on the upper left corner of the home screen.
Delete a widget
Press the wedget to be deleted in the home screen and hold it till it is zoomed in and vibrates, and then draw it to the dustbin 🔒 at the right side. When the dustbin icon turns pink like 🔒, the widget will disappear from the screen.
2.2 Moving a widget
Press the widget to be removed in the home screen and hold it till it is zoomed in and vibrates, and then drao it to change its position.
2.3 Dock
You can place frequently used app (i,e.application) icons on Dock (max.6 icons), so that you can open the app faster. In default state, apps placed on Dock are MyPad, Dolphin Browser, iReader, Audio Player, Video and Setup.
Customizing Dock
In default state, Dock is fully occupied. If you want to change some app icon on it, you have to first delete one and add a new one on to it. Delete an app on Dock: Press the icon on it and hold it till the icon is zoomed in and vibrates, and then draw the icon to the dustbin 📋 at the right side of the screen. When the two return red, stop pressing, and the app on Dock will be deleted successfully.
Add an app to Dock: Only when space is available on Dock can an app be added onto it. to do that, access to app interface, press the app to be added and hold it till the icon is zoomed in and vibrates and then draw it to Dock and stop pressing. At the time, the app on Dock will be added to Dock successfully app.
2.4 Interface of app

You can click 📄 on the Dock to access to the interface for app and at the time, 📄 will change to 🔗 , to return to the home screen, click 🔗 .
2.5 Customizing the app interface:
You can customize the interface of app, like adding/deleting an app icon, sorting them or creating a new interface.
Add an app icon: Ian the app interface, shout press the key Menu and select" add app" in the popped-up menu and then the app you want to add in the list, It will be successfully added to the app interface.
Delete an app icon: in the app interface, press the icon and hold it till the icon is zoomed in and vibrates, and then draw the icon to the dustbin at the right side of the screen. When the two return red, stop pressing, and the app icon will be deleted successfully.
Move an app icon: In the app interface, press the icon and hold it till the icon is zoomed in and vibrates and then draw the icon to change its position.

Extend the app interface: In the app interface, press the icon to be moved and hold it till the icon is zoomed in and vibrates, draw it toward the right edge of the screen and release it when it jumps to the new screen. At the time ,the icon •• on the upper part of Dock change to •••, which means the two-screen interface has changed to three-screen interface.
2.6 Extending the home screen

The home screencan be extended beyond its width, to that more space can be provided to allow you to add more widgets. In the home screen, slide your finger quickly, and you can extend the home screen to left or right edge (depending on direction your finger moves to). There will be two extended interfaces on the home screen, but only the right one can be used to add widgets.

You can click the app icon to open it, Once opened, you can find the installed aoo on the related interface.
【Tip】 In default state,the app interface doesn’t include all apps.You can click Menu(Add an App)select an App to add those not appearing to the interface.
Widgets
In default state, the widgets include ES Task Manager, You Tube, Calendar, Analog Clock, Power Control, Photo Frame and Google Latitude, in addition to Calendar and Weather on the home screen.
Their functions can be defined in the table below:
| Widget | Function |
| Es Task Manager | To display the currently running progress bar and space available |
| YouTube | To display the video contents most viewed in a scrolled way ,to fast play the video contents.You click the thumbnail to play the video contents;To search the video contents. |
| Calendar | To remind you of your recent schedule as arranged(it is consistent with that in the calendar app) |
| Analog Clock | To display the current time of the system. |
| Power Control | Main function:To save the powerl |
Click to  enable/disable Wi-FiClick to enable/disable Wi-FiClick to  enable/disable GPS.Click to enable/disable GPS.Click to  enable/disable synchronous mode.Click to enable/disable synchronous mode.Click to  adjust the brightness. adjust the brightness. | |
| Photo Frame | To set the picture as the photo frame and place it onto the home screen |
| Google Latitude | To synchronize with Google. |
3. settings
You can control the system through customized settings. To access to the setup interface, you can use either of the two ways said below: Click the app icon on Dock(in default state,the setup app is acaliable on Dock); Or return to the home screen and click on Dock to enter the app interface. And then click the app icon.
In the table below are the details of all settings:
| Item | Function |
| Wireless operation and network | with it you can set the wireless Wi-Fi,virtual network and mobile netwoke. For details, please refer to the part “setting for network connection” |
| Cable network | To enable or disable the cable network, It supports static IP. |
| Sound and display | With it you can set the system’s sound effect, screen brightness and standby time. |
| Location and safety | You can locate yourself through the wireless network and GPS too. To ensure the safety of the information you can also set a password. |
| App | To manage the apps and install new apps. |
| Account and synchrony | To synchronously set the Google app between product and the network. |
| Privacy | To manage the information on position and personal data. |
| SD card and memory | With it you can view the remaining space of the external memory device, and uninstall the device so as to ensure the integrality of the data in the device. You can also view the memory space available in the pad. |
| Search | With it you can set the Google search tool as well as the items which can be searched in the fast search box. |
| OSD language and keypad | To set the OSD language (covering IME (inputting method editor)). |
| Date and time | To set the date and time for the system. |
| Screen calibration | To calibrate the touch screen. |
| System update | If a new version is available in the server, you can use this item to update the system. For details, please refer to the section “customize your product setting.” |
| About | You can view the information about the system. |
4. Setting the item for network connection
Connecting to wireless Wi-Fi.
Select Wi-Fi in the item “wireless operation and network” to reach the Wi-Fi setup interface, and make sure the item “network notifier” is selected.
Among the items for Wi-Fi network, you can select the name of Wi-Fi network. If this network is encrypted, a password box will pop up after your selection. You can enter the password here and then click the connection button. After a while, your system will be connected to Wi-Fi (when the network signal is strong enough).
4.1 Connecting to 3G
First insert the 3G NIC. when the system indentifies the 3G NIC, it will open the app for 3G network setup. At the time, you can select 3G network to open the gateway.
4.2 ADSL dial-up
Enable the cabled connection: Access to the related interface to set the cable network and make sure this item is selected. Open the ADSL dial-up app and enter the user name and password in the respective fields. Then click the item for connection.
5.Google services
5.1 Log on through Google account
After you Log on through the Google account, you can synchronize your product with Gmail/Google mail, calendar and contact person of the network. Besides, only when you Log on through Google account can you use other Google apps such as Google Talk and E-Market.
If you receive Google services for the first time, you need to register a Google account or use a registered one to log in the network. Once you log in successfully, you can use all Google apps without the need of repeated login.
5.2 Using Gmail
Gmail is a web page-based email services provided by Google, and has been set when you use a Google account for the first time. Based on the set synchrony, the Gmail your product will automatically synchronize with the Gmail account on the network.
a. Enabling Gmail
Click 🔗 on the status bar to return to the home screen
Click 📁 on Dock to access to the app interface, and click the Gmail icon to enable the Gmail.
b. Writing and sending an email
Enable Gmail, press Menu in the inbox interface and click Write in the popped-up menu list. After that, enter the text in the corresponding field and click Send to send it out.
c. Reading and replying an email
Enable Gmail, click the mail you want to read in the inbox interface. To reply an email, you can click Reply to access to the interface for email writing. After writing the text, click Send to send it out.
5.3 Setting Gmail
Enable Gmail, press Menu an select Setup, and then complete the settings.
Using Google Talk
Google Talk is an app of instant message service provided by Google, which can allow you to communicate with those who use Google Talk too.
【Tip】The set Google Talk account is based on the Gmail account you used when you set product.
5.4 Logging in/off
a. Log in
Click 🔗 on the status bar to return to the home screen.
Click 📁 on Dock to access to the app interface, and click the Gmail icon to enable the Gmail.
b. Log off
Press Menu and select the item of more menus : Then click to log off.
c. Online chat
Log on Google Talk. Select the person you want to talk to, and click it to pop up the chatting window. Then enter what you want to say in the text field and click Send to send it out.
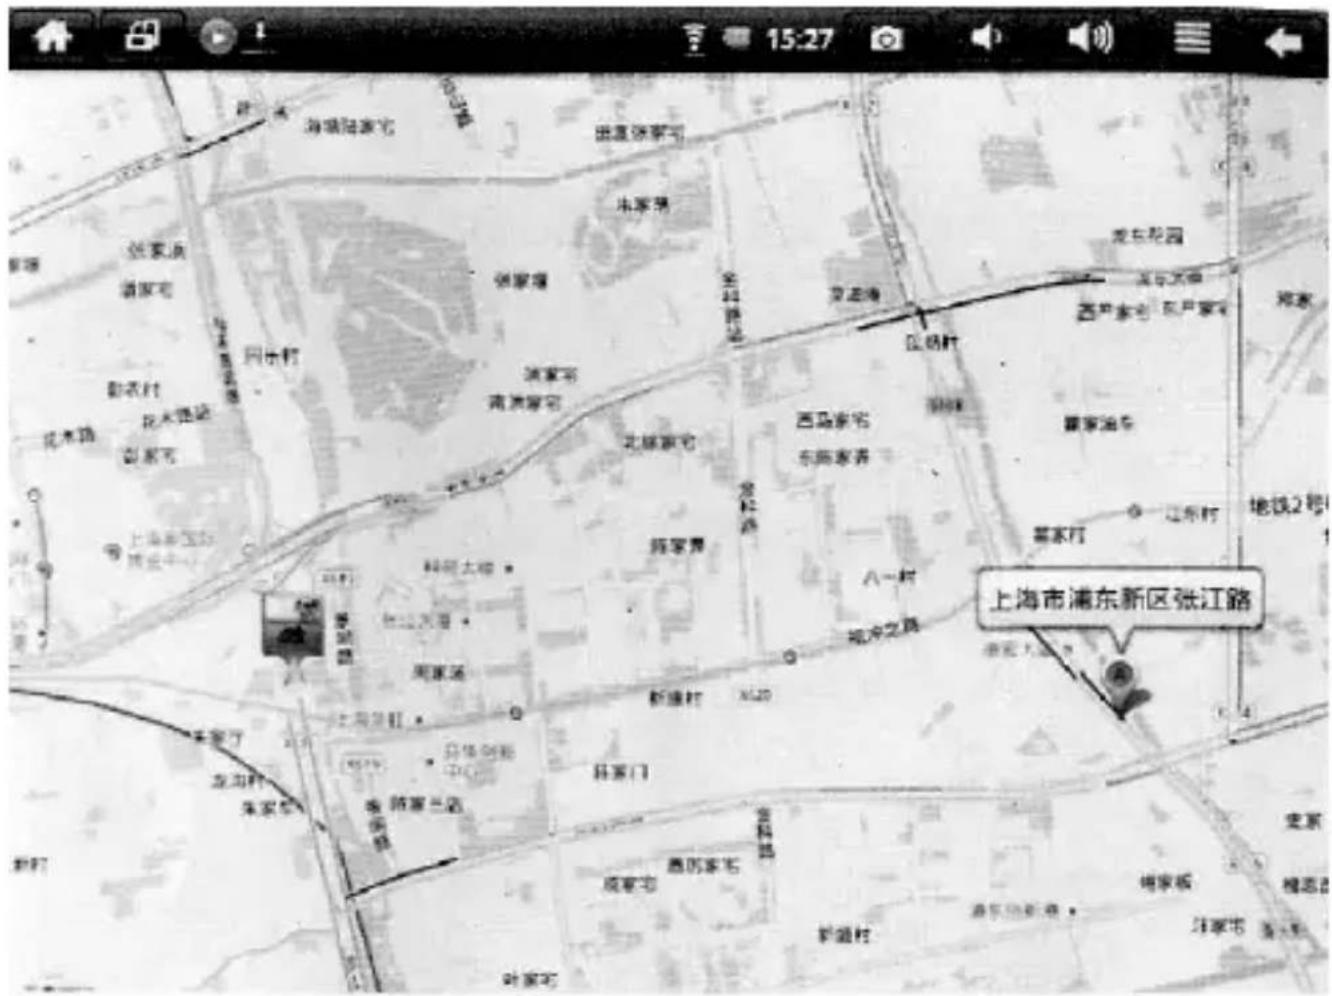
5.5 Using the map
With the map you can be ware of your current position, search the route and view the traffic condition. With the search tool, you can obtain the satellite road map of the place you want to go.
【Tip】Only after Wi-Fi or 3G is enabled can you use the map. The map app covers only some of the countries and cities.
a. Search
Run the map app, press Menu and select Search in the popped-up list. Enter the name of the pace into the search field(it can be an address, city or building), and click 🔒. The search results will appear on the map.
b. Viewing the map
To view the map, you can use the zoom and navigation technology.
Zoom the map: Click zoom-in/out button.
Navigate: Put your finger on the search and slide it to the area you want to view.

Change the map mode: When you view the map, you switch over between the map modes. To do that, press Menu, click the map layer and select your desired mode.
c. Finding out the route
You can use the map to find out the route to your destination.
- In any mode where you are viewing the map, you can press Menu to select the route.
- Enter the starting point into the first text field, and press Menu to select the route.
- Select in what way you will arrive at the destination: Car, public transport or on-foot.
5.6 Using the E-market

a. Log on E-market
Click 🔗 on the status bar to return to the home screen.
Click 📁 on Dock to access to the app interface, and click the E-market icon to enable the E-market.
【Tip】When you run the E-market for the first time, an interface with information defining the service will appear. Only after you select Acceptance can you access to the E-market.
b. Downloading apps
Log on the E-market. Click the app you want to download and then click Install. In the confirmation interface, click OK, and the system will start downloading the app.
【Tip】1. The system will automatically install the app once the downloading is completed.
- Make sure your system has been logged in the network before you use the E-market.
6. Customizing the settings
6.1 Set the date and time
After you access to the date and time interface, you can set the items below: Use the value provided by the network: Select Auto in the setup interface, and the system will obtain the time the network.
Set the date: Disable the item Auto, and then click to set the date.
You can set it manually.
Select a time zone: Select the time zone of your location. For example, if you are in China, you can select China’s standard time (Beijing time).
Use 24-hour system: Tick the 24-hour format. If not ticked, it means the system employs 12-hours system.
Selecting a format of date: Display settings
Automatic rotation
In default state, the automatic rotation mode is disabled in the system, You can follow the steps below to enable the automatic rotation state: Open the setup interface and access to the for setting of sound and display. Select the item for direction in the displaying settings. At the time, the rotation button on the status bar disappears.
Adjust brightness
In the interface for settings of sound and display, you can adjust the brightness of the screen. Follow the steps below:
Access to Setup->Sound and Display. Click the item Brightness, and the brightness-adjusting tool will appear on the screen. Then move the slide block to adjust the value.
Standby mode
In default state, the system will enter the standby mode when there is no operation within one minute. You can set time for standby mode by yourself. To do that, follow the steps below:
In the interface for settings of sound and display, click the item Standby and select time you prefer for standby mode. For example, if you choose 10 minutes, it means the system will enter the standby mode when there is no operation within 10 minute.
6.2 OSD language
Access to Setup->OSD Language and Keypad, select the language region and the OSD language you desire in it. After that, the system's OSD language will change to the one you selected.
6.3 System update
If a new version of the system is available, you can install it through the item System Update. Before update, make sure you system has been connected to the net work. If the battery indicates low power, you can use the AC power source, so that the system updating can proceed smoothly. Backup the data(like Google Account)you need before updating, for the process can delete them.
7. Troubleshooting
7.1 App doesn't respond, or crashes
If some app does not respond to some operations, you should wait. If no response even after the waiting, you can close the app and open it again.
If a dialogue box for error pops up, you should select compulsory shut-off or wait. If no response even after the waiting, you can select compulsory shut-off again.
If the app can't be closed, you can click the button Home and open ES Task Manager, and then eliminate the app.
If when the app crashes, you fail to open it after it is eliminated through ES Task Manager, you should reboot the system.
7.2 System crashed
If the system crashes, operations in all interfaces will become ineffective. In this case, you should power off the device or reset it.
7.3 Factory defaults
If your product runs extremely slow, you can restore the factory defaults. Remember to backup the data before restoration, for it will delete the Google account, data of system and its apps and the downloaded apps.
8. Safety information
To avoid personal injury, you should read the information on safety and operation before use this product. Please keep this safety information and product’s User’s Guide for reference in the future.
【Warning】Negligence of this safety information may lead to file, electric shock or other accidents that can result in personal injury or property damage.
Never attempt to drop your off, dismantle, open, squeeze, bend, penetrate, cut or burn your product, nor make it deformed, bake it in micro-wave oven or insert foreign objects into it.
Keep your product away from water, rain and other sorts of liquid, food and places with high humidity. If your product is wetted, you should unplug the power cord and power off it. Only after it is fully dried can it be used again. Never attempt to use external heat sources(like the micro-wave oven or drier)to dry your product. The warranty clauses will become ineffective if your product is damaged because of exposure to liquid.
No user-serviceable parte are in your product, so never attempt to repair the device. If your product is wetted by water, pierced or dropped off violently, you shall not use unless it is checked by the authorized repair center. To charge your product, you should use the recommended power adapter.
Before using the accessories of your product, you should read the related safety information. product shall never bear any responsibilities for the safety and legality of the parts provided by the third party.
In normal use, the power adapter may become warm. You should keep the environment well ventilated and handle the part gently.
Under any of the circumstance below, you should unplug the adapter.
The power cord or plug is damaged;
The adapter is wetted by water or other sort of liquid, or overly humid;
The shell of the adapter is damaged;
Anytime you think the adapter needs to be repaired;
At times when you want to clean the adapter.
Protecting your hearing

If the volume of an embedded speaker, earplug or headset, when they are used, is turned up too high, your hearing may be hurt. Users who often listen to music may unconsciously turn the volume high, which can hurt their hearing. So you should adjust the volume to a proper level.
Whenever you feel tinnitus or are not able to hear things clearly, you may see the doctor. You may follow the suggestions below, as experts say:
Never listen to the contents with the volume turned up too high; Do not adjust the volume high in an attempt to avoid the surrounding noise.
The screen of product is made of glass, which can be easily damaged if it is dropped off or stricken by other objects. Remember never touch the broken glasses. When the screen of your product is broken, don’t use it until it is repaired. If the screen is broken due to misuse, the warranty clauses will become ineffective subsequently.


- Tablet PC
- User Manual
- Contents
- Status bar
- widgets
- Calendar
- Weather
- Weather forecast
- Adding/deleting widget
- Add a widget
- Delete a widget
- Moving a widget
- Dock
- Customizing Dock
- Interface of app
- Customizing the app interface:
- Extending the home screen
- Widgets
- settings
- Setting the item for network connection
- Connecting to 3G
- ADSL dial-up
- 5.Google services
- Log on through Google account
- Using Gmail
- a. Enabling Gmail
- b. Writing and sending an email
- Using the map
- a. Search
- b. Viewing the map
- c. Finding out the route
- Using the E-market
- Customizing the settings
- Set the date and time
- Adjust brightness
- Standby mode
- OSD language
- System update
- Troubleshooting
- App doesn't respond, or crashes
- System crashed
- Factory defaults
- Safety information
- Protecting your hearing
Brand : Naxa
Model : NID-7004
Category : Radio