MSE50S - Stove Montpellier - Free user manual and instructions
Find the device manual for free MSE50S Montpellier in PDF.

| Product Type | Electric Hotplate / Stove |
| Brand | Montpellier |
| Model | MSE50S |
| Dimensions (W x D x H) | Approx. 50 x 35 x 8 cm |
| Weight | Approx. 3.5 kg |
| Power Source | 220-240 V, 50/60 Hz |
| Power Consumption | 2000 W |
| Number of Cooking Zones | 1 |
| Heating Element Type | Cast iron or ceramic |
| Temperature Control | Adjustable thermostat |
| Indicator Light | Yes |
| Overheat Protection | Yes |
| Non-slip Feet | Yes |
| Surface Material | Easy-clean stainless steel / plastic |
| Certification | CE, RoHS |
| Warranty | 2 years |
| Cleaning | Wipe with damp cloth after cooling; avoid abrasive cleaners |
| Repairability | Spare parts available; contact Montpellier service |
Frequently Asked Questions - MSE50S Montpellier
User questions about MSE50S Montpellier
0 question about this device. Answer the ones you know or ask your own.
Ask a new question about this device
Download the instructions for your Stove in PDF format for free! Find your manual MSE50S - Montpellier and take your electronic device back in hand. On this page are published all the documents necessary for the use of your device. MSE50S by Montpellier.
USER MANUAL MSE50S Montpellier
Installation and Operating Instructions
natural_image
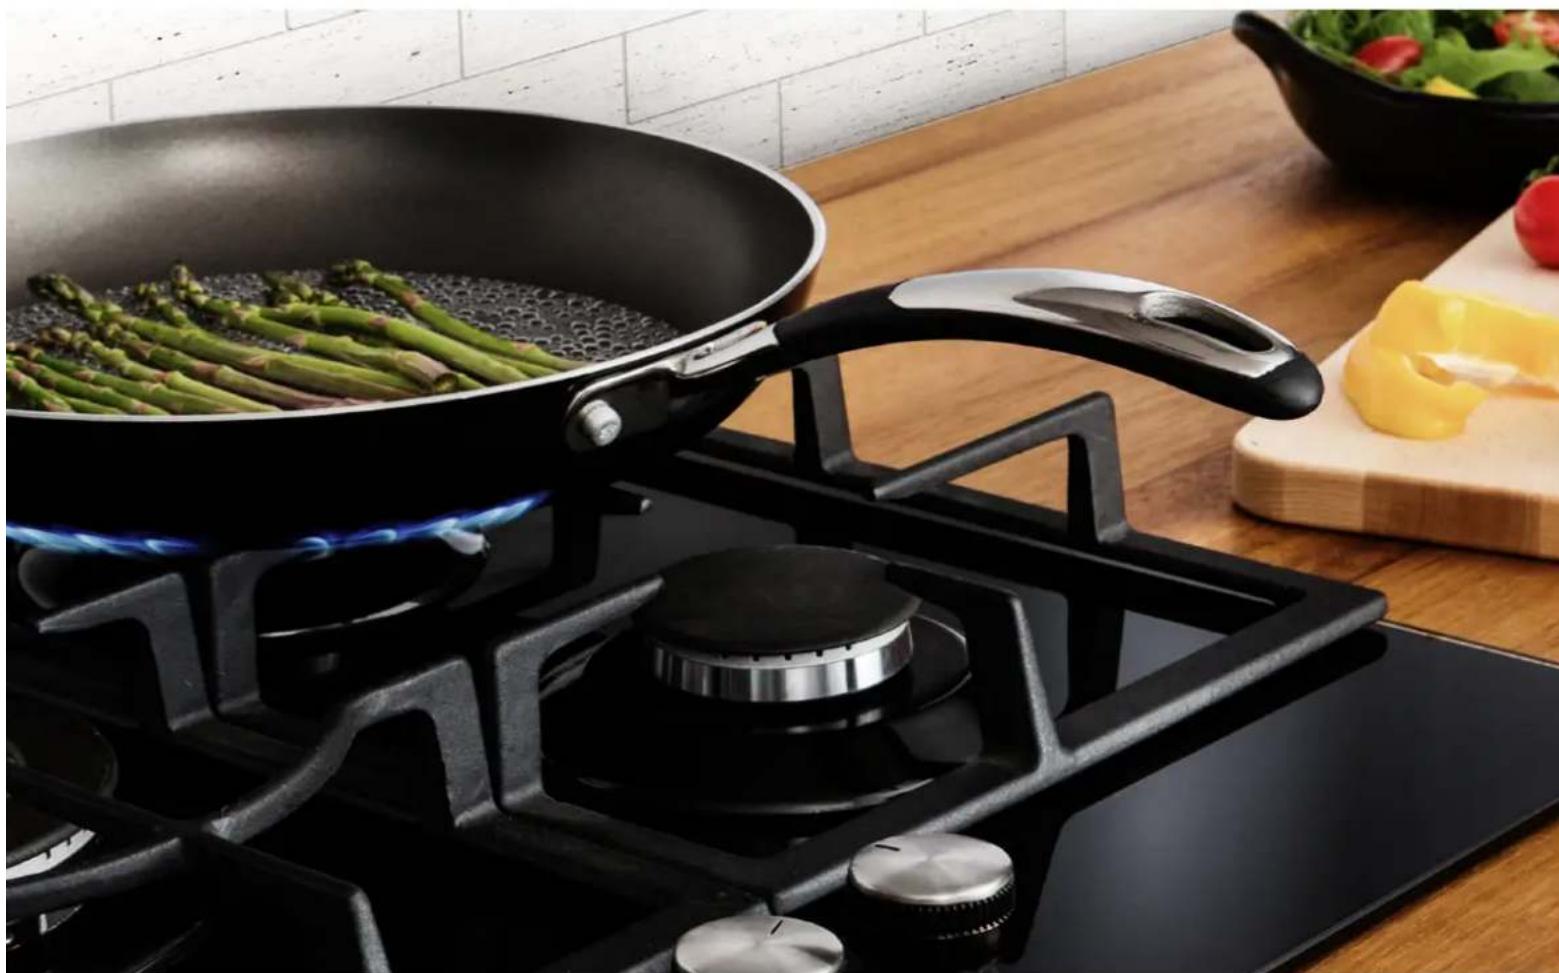
Close-up of a black gas stove with asparagus being heated, placed on a wooden table with fresh vegetables and a bowl in the background (no text or symbols visible)Freestanding 50cm Cooker
MSE50 - All Colours
Thank you for choosing this Montpellier Freestanding Cooker.
Our Cookers has been designed to provide you with the best combination of style, reliability and performance to give you years of trouble-free use.
You may be familiar with a similar product, but please take time to read these instructions carefully before installing or using your Freestanding Cooker to ensure you get the most from your purchase.
We recommend that you keep this manual in a safe place for future reference.

Your Freestanding Cooker is covered by a comprehensive two year Parts & Labour Guarantee. In the unlikely event that you experience a problem with your Cooker, you can rest assured that you are fully protected against the cost of repairs for the first 24 months. Please note that any claim must be accompanied by the model reference number, serial number and proof of purchase.
To activate your guarantee, you will need your product serial number. This can be found on the rear of the machine.
There are two ways to register your Guarantee:
- Online: Visit the Support page on our website and complete the online Product Registration form. www.montpellier-appliances.com
- By Post: Simply detach and fill in the form provided, attach a stamp and send it in the post. Don't forget to include your e-mail address so that we can send confirmation through to you.

Note: We are unable to take registrations over the phone.
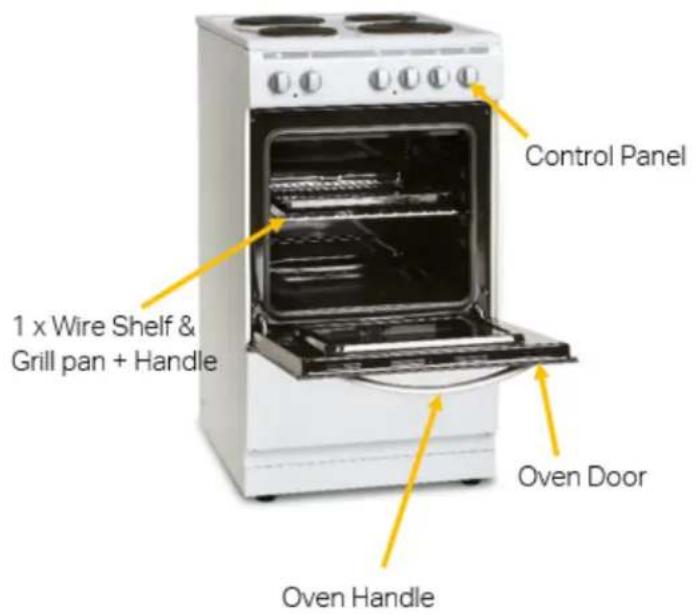
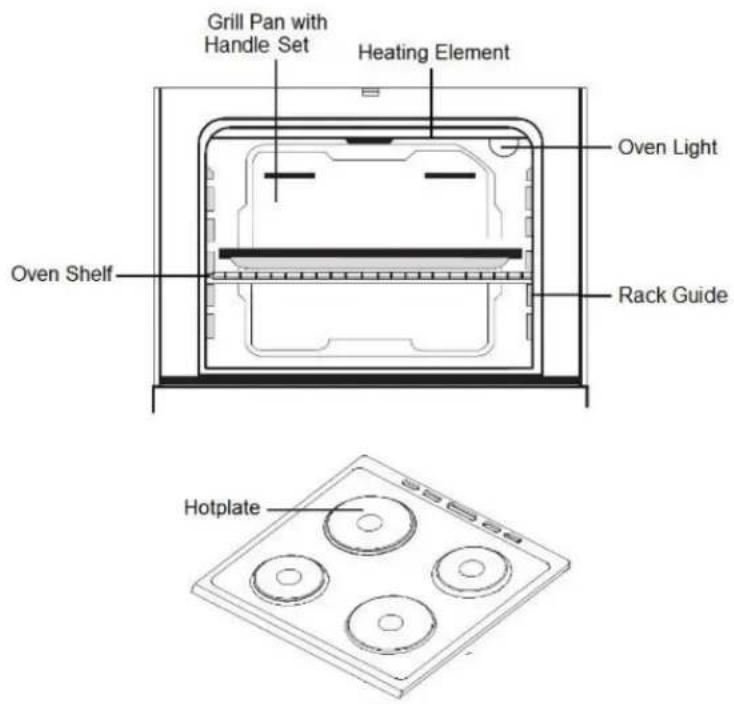
Description of the Appliance
CONTENTS:
Section 1. Installation
Section 2. Safety Advice
Section 3. Operating the Appliance
Section 4. Maintenance
Section 1: Installation
- Remove all packaging and protective film from the appliance.
- Position the appliance in a dry atmosphere.
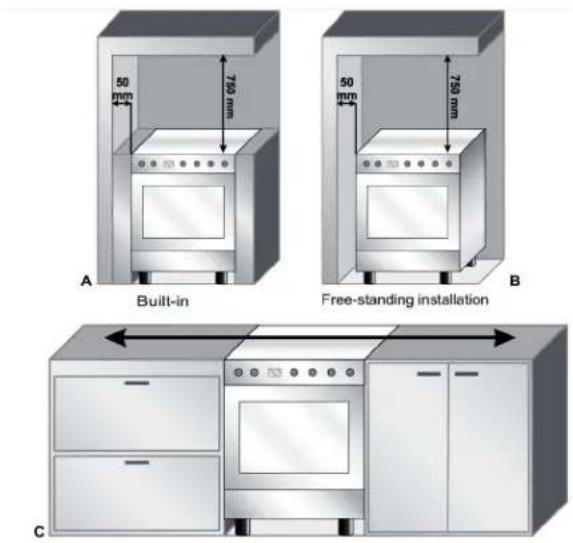
- The following image is provided as a guide for installation – your installer will carry out the installation in accordance with the current regulations.
- Your installer will connect a power cable (not supplied) to your appliance in accordance with the current regulations.
To install this appliance, please proceed as follows:
1.1. Choosing a location for your oven
When choosing a location for your oven, ensure that there are no flammable or combustible materials in the close vicinity, such as curtains. You may be required to make changes to the area surrounding your oven.
You must ensure a minimum gap of 50mm between the edge of the hotplate and an adjacent wall. You must ensure a minimum distance of 750mm between the hotplate and overhanging cupboards or a cooker hood (see below image).
Note: Do not site your oven next to a cooling appliance.
POWER OUTPUT:
| Oven Bottom Element Oven | ||
| Top Element | - | 1000W |
| - | 1000W | |
| Grill Element | - | 1600W |
| 2 x 145mm Hotplates | - | 2 x 1000W |
| 1 x 180mm Hotplate | - | 1500W |
| 1 x 180mm Rapid Hotplate | - | 2000W |
This appliance has a power rating in excess or 3000W and therefore must be 'hard wired' to a suitable fused point adjacent to the appliance housing and protected with a 32 amp fuse. Please note that a switchable spur should be accessible above the work surface to allow the power to be turned off by the consumer.
Your installer will connect this appliance in accordance with current regulations using a correct grade of electrical cable (not supplied) and making a suitable connection between the fused spur and the electrical connection block on the rear of the appliance.
Section 2. Safety Advice
- Please read this booklet thoroughly before installing and switching on the appliance. The manufacturer accepts no responsibility for incorrect installation and usage.
- This appliance is guaranteed for Domestic Use Only.
- The appliance is not intended for use by persons (including children) with reduced physical, sensory or mental capabilities, or lack of experience and knowledge, unless they have been given supervision or instruction concerning the use of the appliance by a person responsible for their safety. Children should be supervised to ensure that they do not play with the appliance.
- This appliance must only be used for cooking/heating foods and liquids. Do not use it for any other purpose.
- If using an adaptor, this must be used in accordance with the manufacturers instructions and ensure that the electrical circuit is not overloaded as this could cause overheating.
- Do not twist or bend the cables, and keep them away from hot surfaces.
- Following installation, please make sure that the power cable is not trapped underneath the appliance.
- Keep the appliance surfaces clean. Failure to do this could lead to the appliance malfunctioning.
- The surface of this appliance will get hot during use. The surface of this appliance will remain hot after it has been turned off.
Section 3. Operating the Appliance
3.1. Control Panel
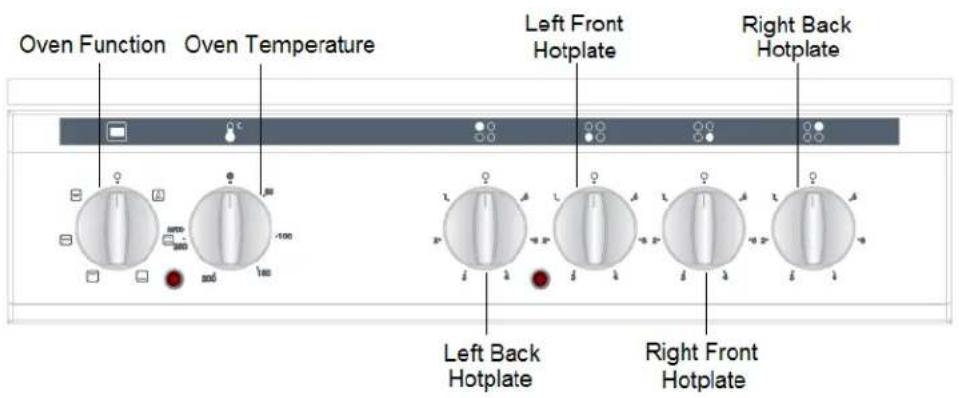
3.2. Oven Functions
You are able to select various difference Oven Functions (explained below) by adjusting the Oven Function knob on the control panel (shown above).
| Oven Lamp | |
| Only the oven light will be turned on. This light will remain on until turned off. | |
| Static Cooking Function | |
| The oven's thermostat and warning lights will be turned on, the lower and upper heating elements will start to heat. | |
| Lower Heating Function | |
| The oven's thermostat and warning lights will be turned on, the lower heating element will start to heat. | |
| Upper Heating Function | |
| The oven's thermostat and warning lights will be turned on, the upper heating element will start to heat. | |
3.2 Oven Functions continued.
| Grilling Function | |
| The oven's thermostat and warning lights will be turned on, the grill heating element will start to heat.This function is used for grilling and toasting foods, use the upper shelves of the oven. Lightly brush the wire grid with oil to stop foods sticking and place food in the center of the grid. Always place a tray beneath to catch any drips of oil or fat. It is recommended to pre-heat the oven about 10 minutes.Warning: When grilling, the oven door must be closed and the oven temperature should be adjusted to 190°C. | |
| Faster Grilling Function | |
| The oven's thermostat and warning lights will be turned on, the grill and upper heating elements will start to heat.The function is used for faster grilling and for covering a larger surface area, such a grilling meats, use the upper shelves of oven. Lightly brush the wire grid with oil to stop foods sticking and place foods in the center of the grid. Always place a tray beneath to catch any drips of oil or fat. It is recommended to pre-heat the oven about 10 minutes.Warning: When grilling, the oven door must be closed and the oven temperature should be adjusted to 190°C. | |
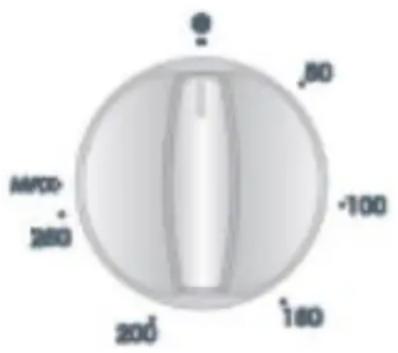
3.3. Selecting a Temperature
Once you have selected an Oven Function, simply adjust the oven temperature knob to the desired temperature.
Montpellier
Gas Mark to °F & °C – Temperature Conversion
| GAS MARK | °F | MAIN FAN OVEN | TOP CONVENTIONAL OVEN | MAIN CONVENTIONAL OVEN |
| 12 | 250 | 100°C | 110°C | 120°C |
| 1 | 275 | 120°C | 130°C | 140°C |
| 2 | 300 | 130°C | 140°C | 150°C |
| 3 | 325 | 140°C | 150°C | 160°C |
| 4 | 350 | 160°C | 170°C | 180°C |
| 5 | 375 | 170°C | 180°C | 190°C |
| 6 | 400 | 180°C | 190°C | 200°C |
| 7 | 425 | 200°C | 210°C | 220°C |
| 8 | 450 | 210°C | 220°C | 230°C + |
All timings given are purely as a guide. Timings may always vary due to personal methods, size of food being prepared and the temperature of said food stuffs. We always recommend following the cooking guidelines on your meat products and packets. For additional information, please call Montpellier on 03333 234 474.
| Food Type | Rack Position | Temperature Cooking Time | |
| Small Cakes | 1 to 3 | 180 - 200°C | 15-20 mins |
| Biscuits | 3 | 180 - 200°C | 12-15 mins |
| Fruit Cakes | 3 | 135-145°C | 4hrs - 4hrs 45 mins |
| Sponge Cakes | 2 | 180 - 200°C | 50 mins |
| Bread | 2 or 3 | 190°C | 20-30 mins |
| Rolls | 3 | 200°C (5) 180°C (15-20) | 5 mins/15-20 mins |
| Beef Rib (Bone in/out) - 4 - 8 pounds (lb) | 3 140-150°C | 23-30/39-43 mins min per lb - Allow to rest for 3-5 mins. | |
| Beef - Eye round roast - 2 - 3 pounds (lb) | 3 140-150°C | 20-22 mins min per lb - Allow to rest for 3-5 mins. | |
| Beef Tenderloin Roast - 4 - 6 pounds (lb) | 3 | 200°C | 35 - 45 mins Total |
| Roast Lamb | 3 | 140-145°C | 20 - 26 mins per lb - Allow to rest for at least 3 mins |
| Roast Chicken (Whole Chicken) 4 - 8 pounds (lb) | 3 | 170°C | 20 - 30 mins per lb - Check the internal temperature in the innermost part of the thigh, innermost part of the wing & thickest part of the breast. |
| Roast Turkey | 3 | 170°C | 20 - 30 mins per lb - Check the internal temperature in the innermost part of the thigh, innermost part of the wing & thickest part of the breast. |
| Roast Pork: Loin, Shoulder, Leg - Bone In | 3 | 140°C | 20-25 mins per lb - Allow to rest for at least 3 mins |
| Roast Pork: Loin, Shoulder, Leg - Boneless | 3 | 140°C | 22-33 mins per lb - Allow to rest for at least 3 mins |
| Roast Potatoes | 2 or 3 | 180°C | 55 mins |
| Roasted Vegetables | 2 or 3 | 160°C | 25 - 35 mins |
| Casseroles/Bakes | 2 or 3 | 140-150°C | 2 - 3 hours |
| Fish (Whole) | 3 | 180°C | 20-30 mins |
| Pasta Bake | 2 or 3 | 180°C | 25-35 mins |
| We always recommend Pre-Heating. Firstly, set the required temperature and allow the oven to get to temperature (up-to 15 minutes) before placing food in the cavity. | |||
3.4. Hotplates Usage
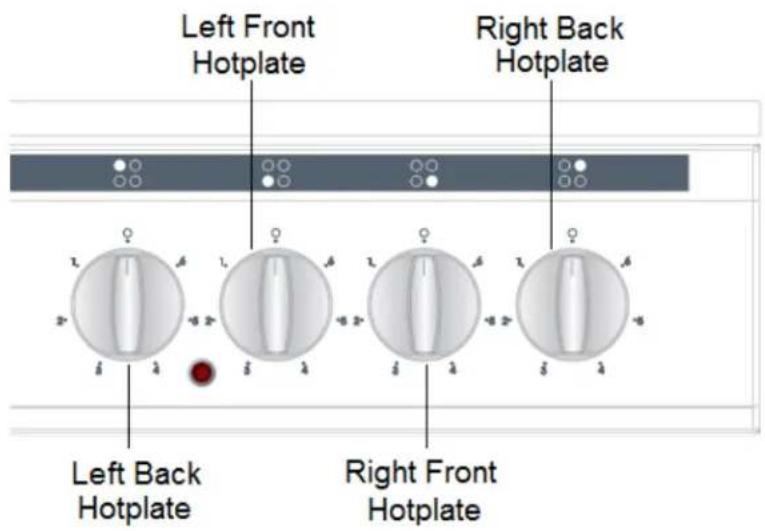
The four hotplates are controlled by individual knobs on the ovens control panel.
Each hotplate offers 7 different levels of heat, which are as follows:
| 0 | - Off |
| 1 | - Keeps hotplate warm |
| 2/3 | - Low cooking temperature |
| 4/5/6 | - High cooking temperature |
To operate, turn the hotplate control knob clockwise to the required heat level. When finished, turn the control knob to the off position.
Section 4. Maintenance
Before any maintenance or cleaning work is carried out, DISCONNECT the appliance from the ELECTRICITY supply and ensure that the appliance is completely cool.
4.1. Cleaning the interior of the oven
Clean spillages from inside the oven as soon as possible after use.
Ensure the oven is turned off before cleaning. You will obtain the best cleaning results if you clean the oven interior while it is slightly warm. To clean, wipe your oven with a soft piece of cloth dampened with soapy water. After this wipe the oven with another soft piece of cloth, dampened with water, once complete, dry the oven interior.
Do not use other abrasive cleaners and/or wire wool etc as this may damage the interior of your oven.
4.2. Replacing the Oven Bulb
Warning!
Only ever remove/replace the oven bulb when the oven is cold and turned off!
The oven bulb can be replaced and should be done so with a "like for like" 230V 25 watt bulb having the same fitment.
4.3. What to do if something goes wrong
There is no power to the appliance:
- Check there is not a power cut
- Check there is power to the electric socket/appliance
The oven does not heat:
- Check that the temperature of the oven thermostat has been correctly set.
The oven is not cooking food evenly:
- Adjust the shelf locations, cooking time and heat values accordingly.
After-sales assistance
If you continue to experience problems with your Integrated Dishwasher, please call the Montpellier customer service helpline on: 03333 234 473.
Please have all your product details available, including the model number, serial number, date of purchase, and your retailer's details before registering a fault.
The service call cannot progress without this information.
Your 2 year Manufacturer's guarantee
THIS DOES NOT AFFECT YOUR STATUTORY RIGHTS.
Your new Montpellier appliance carries a free guarantee which protects you against the cost of repairs during the first 24 months from date of purchase provided that:
Any claim is accompanied by evidence of the model reference, model serial number and proof of purchase, such as a Sales Receipt, showing that the appliance was purchased within the 24 months prior to the date of claim.
What is not covered under the Guarantee
- Any appliance not correctly installed and operated in accordance with the manufacturer's instructions.
- Any appliance that is used for anything other than domestic purposes.
- Any defect caused by accident, misuse, unauthorised modification or inexpert repair.
- Cost of Call-out where a fault cannot be found with the appliance.
- Cost of Call-out for work covering routine maintenance, such as, but not exclusively, cleaning of filters or defrosting.
- Cost of Call-out for work required to correct the alignment of doors following door reversal procedures carried out by you.
• Use of the appliance by anyone other than the Householder.
• Use in any commercial environment. - Consumable items, such as, but not exclusively, fuses in plugs, bulbs and breakable items which require routine replacement.
- Repair costs incurred that have not been authorised by Repairtech and/or carried out by a non-approved Repairtech engineer.
YOUR GUARANTEE IS VALID ONLY IN THE UK & ROI.
To register your appliance simply complete the card in your appliance pack and return it with a stamp affixed or alternatively you can register online at www.montpellier-appliances.com/support
SERVICE HELP-LINE
Should your appliance develop a fault, please call the Montpellier customer service helpline on: 03333 234 473.
Please remember to have all your product details available, including the model number, serial number, date of purchase and your retailer's details before registering a fault.
Your service call cannot progress without this information.
Montpellier Domestic Appliances Ltd.
Unit 1, Tewkesbury Retail Park, Northway Lane,
Tewkesbury, Gloucestershire GL20 8JU
www.montpellier-appliances.com
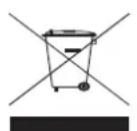
The symbol on the product or on its packaging indicates that this product may not be treated as household waste. Instead it shall be handed over to the applicable collection point for the recycling of electrical and electronic equipment. By ensuring this product is disposed of correctly, you will help prevent potential negative consequences for the environment and human health, which could otherwise be caused by inappropriate waste handling of this product. For more detailed information about recycling of this product, please contact your local city office, your household waste disposal service or the shop where you purchased the product.