
ACC-DTRSK - Mounting bracket Peerless-AV - Free user manual and instructions
Find the device manual for free ACC-DTRSK Peerless-AV in PDF.

| Product Type | Mounting Bracket |
| Brand | Peerless-AV |
| Model | ACC-DTRSK |
| Mounting Style | Desk Clamp / Grommet Base |
| Compatible Screen Sizes | 17 to 32 inches |
| Maximum Weight Capacity | 22 lbs (10 kg) |
| VESA Compatible Patterns | 75x75 mm, 100x100 mm |
| Material | Steel and Aluminum |
| Color | Black |
| Tilt Adjustment | -5° to +15° |
| Swivel Adjustment | ±90° |
| Rotation (Landscape/Portrait) | 360° |
| Height Adjustment Range | 10 inches (25.4 cm) |
| Arm Reach | Up to 20 inches (50.8 cm) |
| Product Dimensions (WxHxD) | 4.5 x 4.5 x 22 inches |
| Net Weight | 5.5 lbs (2.5 kg) |
| Warranty | 5-Year Limited Warranty |
| Included Hardware | Mounting bracket, desk clamp, screws, and cable management clips |
| Safety Certification | UL Listed, TUV Approved |
| Cleaning Instructions | Wipe with a soft, dry cloth; avoid harsh chemicals |
| Maintenance | Periodically check and tighten all screws and bolts |
Frequently Asked Questions - ACC-DTRSK Peerless-AV
User questions about ACC-DTRSK Peerless-AV
0 question about this device. Answer the ones you know or ask your own.
Ask a new question about this device
Download the instructions for your Mounting bracket in PDF format for free! Find your manual ACC-DTRSK - Peerless-AV and take your electronic device back in hand. On this page are published all the documents necessary for the use of your device. ACC-DTRSK by Peerless-AV.
USER MANUAL ACC-DTRSK Peerless-AV
ACC-DTLSK, ACC-DTRSK

Fully assembled sidekick shown
NOTE: Read entire instruction sheet before you start installation and assembly.
WARNING
- Do not begin to install your Peerless product until you have read and understood the instructions and warnings contained in this Installation Sheet. If you have any questions regarding any of the instructions or warnings, for US customers please call Peerless customer care at 1-800-865-2112, for all international customers, please contact your local distributor.
- This product should only be installed by someone of good mechanical aptitude, has experience with basic building construction, and fully understands these instructions.
- Make sure that the supporting surface will safely support the combined load of the equipment and all attached hardware and components.
• Always use an assistant or mechanical lifting equipment to safely lift and position equipment. - Tighten screws firmly, but do not overtighten. Overtightening can damage the items, greatly reducing their holding power.
natural_image
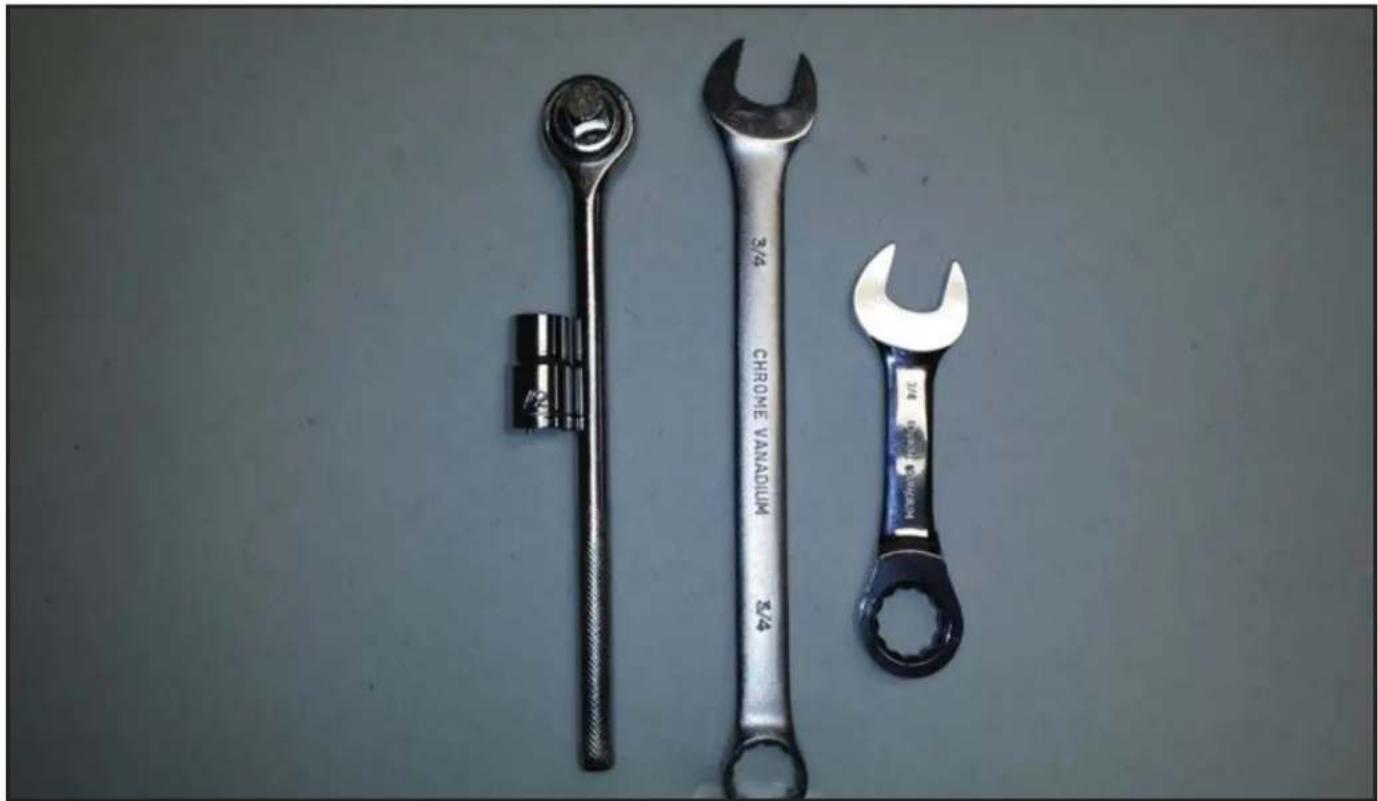
Three wrenches laid out on a plain surface, no text or symbols visibleTools Needed for Assembly
- 1/2" socket
- Ratchet
• 3/4" combination wrench - 3/4" "stubby" combination ratchet wrench
Before you begin, make sure all parts shown are included with your product.
| Parts List | Part #ACC-DTLSK | Part #ACC-DTRSKDescription Qty |
| A sidekick 1 150-T1294 150-T1296 | ||
| B gusset 2 150-T1304 150-T1304 | ||
| C 5/16" - 18 nut 6 530-0090 530-0090 | ||
| D 5/16" sealing washer 6 540-0663 540-0663 |
Parts may appear slightly different than illustrated.
A (1)
sidekick

natural_image
Simple line drawing of a 3D rectangular panel with corner holes and mounting holes (no text or symbols)B (2)
gusset

natural_image
Simple line drawing of a 3D rectangular bracket with a curved cutout and two mounting holes (no text or symbols)C (6
5/16" nut

D (6)
5/16" washer

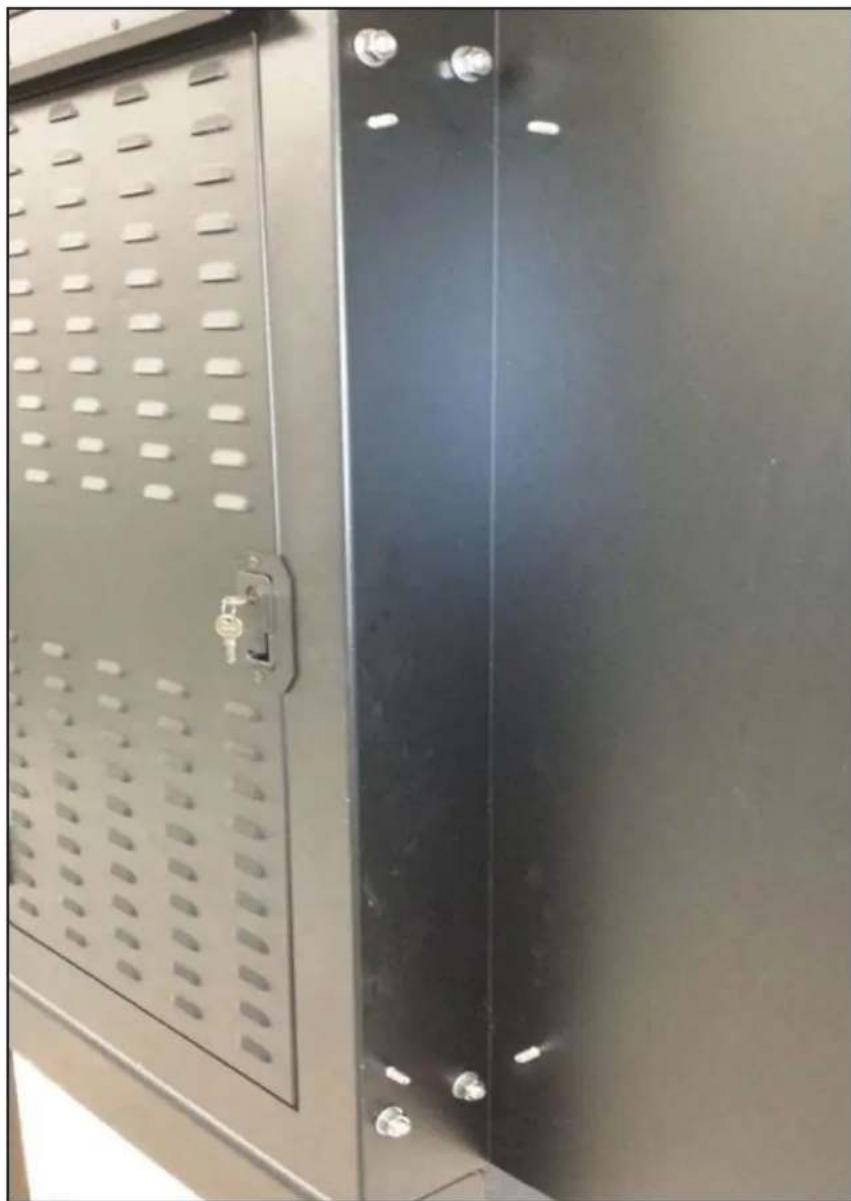
1 Install sidekick (A)
Remove the (4) 12 " bolts and (4) 12 " sealing washers from the side of the existing cabinet. Place the sidekick against the cabinet side, line up all (4) holes and bolt together using the existing (4) 12 " bolts and (4) 12 " sealing washers. Use the 34 " combination wrench on the outside of the cabinet and use the 34 " stubby combination ratchet wrench on the inside of the cabinet. See Illustration "A".
natural_image
Close-up of a black metal cabinet with perforated door and side rails (no visible text or symbols)Illustration "A"
2
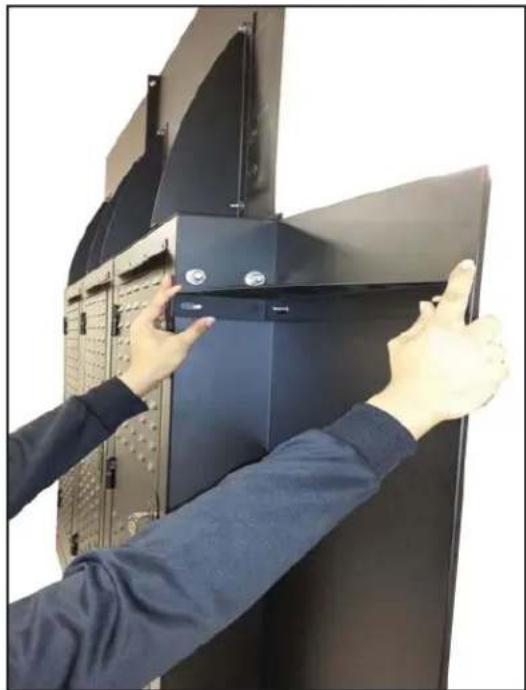
Install sidekick gussets (B)
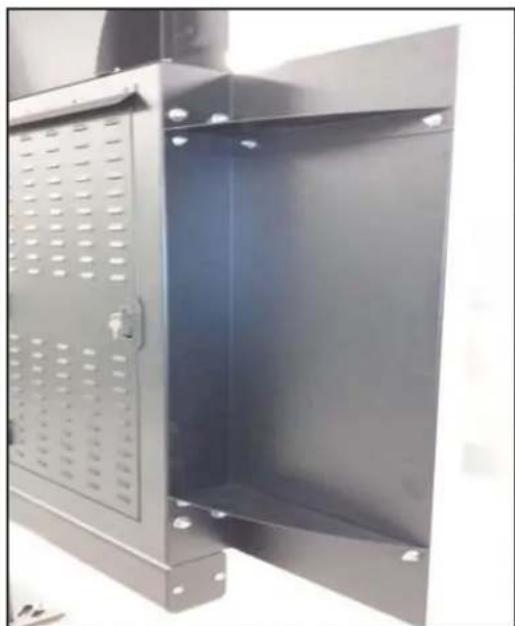
Install the (2) sidekick gussets by starting from either the top or bottom ends. Push the back of the sidekick forward to make room for the slots in the gusset. Slide the gusset over the (3) 5/16" threaded studs mounted on the sidekick and loosely secure using 5/16" nuts and washers (see illustration "B"). Once both gussets are in place tighten the 5/16" nuts securely using the 12 " socket and ratchet. See Illustrations "B" and "C".
natural_image
Person installing or adjusting a black server rack cabinet with a door open (no visible text or symbols)Illustration "B"
natural_image
Interior view of a metal enclosure with perforated door and mounting feet (no text or symbols visible)Illustration "C"
The installation is complete. Repeat these instructions to install the opposite sidekick if applicable.
peerless-AV®
Peerless-AV
2300 White Oak Circle
Aurora, IL 60502
Email: tech@peerlessmounts.com
Ph: (800) 865-2112
Fax: (800) 359-6500
www.peerless-av.com
© 2016, Peerless Industries, Inc.
Peerless-AV Europe
Unit 3 Watford Interchange,
Colonial Way, Watford, Herts,
WD24 4WP, United Kingdom
Customer Care
44 (0) 1923 200 100
www.peerless-av.com
© 2016, Peerless Industries, Inc.
Peerless-AV de Mexico
© 2016, Peerless Industries, Inc.


Brand : Peerless-AV
Model : ACC-DTRSK
Category : Mounting bracket