
QMP1TB - Unknown Chief - Free user manual and instructions
Find the device manual for free QMP1TB Chief in PDF.


| Product Type | Music Stand Table Top |
| Brand | Chief |
| Model | QMP1TB |
| Color | Black (standard) |
| Material (Table Top) | Wood (MDF or plywood) |
| Material (Bracket) | Steel with powder coat finish |
| Compatibility | Chief QMP1FB Fixed Music Stand, QMB1MB Mobile Music Cart |
| Weight Capacity | 50 lbs (22.7 kg) |
| Mounting Type | Clamp-on (to vertical column) |
| Cable Management | Yes, 4 cable tie slots |
| Included Components | Table top, table bracket, attachment plate, table brace, array clamps (inner & outer), screws, nuts, washers, cable ties |
| Hardware Types | 10-24, 1/4-20, #10 wood screws, nylon lock nuts |
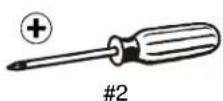
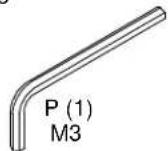
| Tools Required | Phillips screwdriver, hex-head wrench |
| Assembly Required | Yes, instructions provided |
| Installation Location | On compatible music stand or cart with 1.5" column (typical) |
| Safety Information | Must be installed on structure supporting 5x total weight; do not exceed 50 lbs |
| Intended Use | Holding sheet music, tablets, or light equipment |
| Cleaning Instructions | Wipe with damp cloth, do not use abrasive cleaners |
| Manufacturer | Milestone AV Technologies |
Frequently Asked Questions - QMP1TB Chief
User questions about QMP1TB Chief
0 question about this device. Answer the ones you know or ask your own.
Ask a new question about this device
Download the instructions for your Unknown in PDF format for free! Find your manual QMP1TB - Chief and take your electronic device back in hand. On this page are published all the documents necessary for the use of your device. QMP1TB by Chief.
USER MANUAL QMP1TB Chief
INSTALLATION INSTRUCTIONS

natural_image
Isometric line drawing of a rectangular metal shelf mounted on a vertical support structure (no text or symbols)Music Stand Table Top
DISCLAIMER
Milestone AV Technologies and its affiliated corporations and subsidiaries (collectively "Milestone"), intend to make this manual accurate and complete. However, Milestone makes no claim that the information contained herein covers all details, conditions or variations, nor does it provide for every possible contingency in connection with the installation or use of this product. The information contained in this document is subject to change without notice or obligation of any kind. Milestone makes no representation of warranty, expressed or implied, regarding the information contained herein. Milestone assumes no responsibility for accuracy, completeness or sufficiency of the information contained in this document.
Chief® and Centris® are registered trademarks of Milestone AV Technologies. All rights reserved.

IMPORTANT WARNINGS AND TIONS!

WARNING: A WARNING alerts you to the possibility of serious injury or death if you do not follow the instructions.

CAUTION: A CAUTION alerts you to the possibility of damage or destruction of equipment if you do not follow the corresponding instructions.

WARNING: Failure to read, thoroughly understand, and follow all instructions can result in serious personal injury, damage to equipment, or voiding of factory warranty! It is the installer's responsibility to make sure all components are properly assembled and installed using the instructions provided.

WARNING: Failure to provide adequate structural strength for this component can result in serious personal injury or damage to equipment! It is the installer's responsibility to make sure the structure to which this component is attached can support five times the combined weight of all equipment. Reinforce the structure as required before installing the component.

WARNING: Exceeding the weight capacity can result in serious personal injury or damage to equipment! It is the installer's responsibility to make sure the combined weight of all components attached to the QMP1T does not exceed 50 lbs (22.7 kg). Use with products heavier than the maximum weight indicated may result in collapse of the mount and its accessories causing possible injury.
DIMENSIONS

LEGEND
 | Tighten Fastener |  | Phillips Screwdriver |
| Apretar elemento de fijación | Destornillador Phillips | ||
| Befestigungsteil festziehen | Kreuzschlitzschraubendreher | ||
| Apertar fixador | Chave de fendas Phillips | ||
| Serrare il fissaggio | Cacciavite a stella | ||
| Bevestiging vastdraaien | Kruiskopschroevendraaier | ||
| Serrez les fixations | Tournevis à pointe cruciforme | ||
 | Loosen Fastener |  | Hex-Head Wrench |
| Aflojar elemento de fijación | Llave de cabeza hexagonal | ||
| Befestigungsteil lösen | Sechskantschlüssel | ||
| Desapertar fixador | Chave de cabeça sextavada | ||
| Allentare il fissaggio | Chiave esagonale | ||
| Bevestiging losdraaien | Zeskantsleutel | ||
| Desserrez les fixations | Clé à tête hexagonale |
TOOLS REQUIRED FOR INSTALLATION


PARTS

natural_image
Simple black-and-white icon of an open box with a curved arrow indicating rotation or delivery (no text or symbols)

![C (1) [Table bracket]](/content/2026/05/1143729/images/e0e12f9e3241063f0f5a87c23d88f413ca147357f2462ca43a8cb5e65bc214e0.jpg)
[Array clamp, outer]
![D (1) [Table brace]](/content/2026/05/1143729/images/0903bb15cc8922381d95ff12ff0e3e4e0fcc7dd8d3530a303eb08ce76d00bf62.jpg)

natural_image
Technical drawing of a rectangular plate with four bolt holes and a labeled section (E(1), no text or symbols on the plate itself)![F (1) [Table top]](/content/2026/05/1143729/images/eceb3783ad750f2cf58140b9dafa8b440af8d57cd357b79068c591b9b1e434c8.jpg)
![G (6) [Cable tie, 5-1/2"] H (1) 10-24 x 1/2"](/content/2026/05/1143729/images/a8ccb4d05146387f622019ef3a33b7417b2f2653d659c4fe8e36396f3cd0ce76.jpg)


J (6)
10-24 x 3/8"

K (4)
1/4-20 × 3/4"

L (6)
10 x 5/8"

M (4)
10-24

N (2)
10
ASSEMBLY
The QMP1T is designed to be attached to the Chief QMP1FB fixed music stand or the QMB1MB mobile music cart.
- Attach column to cart/stand base (not included) following instructions included with cart/stand (not included).
- Attach table bracket (C) to attachment plate (E) using one 10-24 x 1/2" Phillips undercut machine screw (H), two 10-24 x 3/8" button head cap screws (J), two #10 flat washers (N), and four 10-24 nylon lock nuts (M). (See Figure 1)

Figure 1
- Fasten table brace (D) to bracket assembly using four 10-24 x 3/8" button head cap screws (J). (See Figure 2)

Figure 2
- Fasten the table top (F) to the table bracket assembly using six #10 x 5/8" Phillips wood screws (L). (See Figure 3)

Figure 3
- Fasten the table top assembly to the cart/stand using four 1/4-20 x 3/4" button head cap screws (K) through two array clamps-inner (B) or two array clamps-outer (A). (See Figure 5)
![(K) x 4 Table top assembly (A or B) x 2 [B shown] (Back of column - QMP1FB/ QMP1MB)](/content/2026/05/1143729/images/2b980baa2d921800e550e384cd0f9944beac8a98ad7d84c64525bfadc4f78a51.jpg)
Figure 4
Cable Management
NOTE: There are four cable tie holes in the table bracket. Cable ties (G) may be added for cable management of keyboard cables, mouse cables and other miscellaneous cables. (See Figure 5)

Figure 5
Installation Instructions


Brand : Chief
Model : QMP1TB
Category : Unknown