Aquience 1200 R - Aquarium Aqua One - Free user manual and instructions
Find the device manual for free Aquience 1200 R Aqua One in PDF.

User questions about Aquience 1200 R Aqua One
0 question about this device. Answer the ones you know or ask your own.
Ask a new question about this device
Download the instructions for your Aquarium in PDF format for free! Find your manual Aquience 1200 R - Aqua One and take your electronic device back in hand. On this page are published all the documents necessary for the use of your device. Aquience 1200 R by Aqua One.
USER MANUAL Aquience 1200 R Aqua One
natural_image
Exterior view of a modern office building (no signage)Congratulations, you have purchased one of the fi nest quality aquariums available. This product will give you many years of excellent service when installed and maintained correctly.
Getting started:
WARNING: the aquarium alone even when empty may weigh up to 150KG. It must be lifted by at least two capable people. Please read all instructions for all appliances before commencing installation.
Step 1: Cabinet set up: please follow the set up instructions for the cabinet enclosed.
Step 2: Preparing the aquarium: remove all packaging from aquarium. Check carefully for any signs of damage to glass and structure. We suggest cleaning the tank inside before positioning on the cabinet. (see cleaning instructions below). NOTE: the aquarium has a protective mat underneath the tank. This must stay there to protect the glass aquarium. Non use of this mat invalidates the guarantee.
Step 3: Setting up the lighting system: once aquarium is in position. (see set up of lighting) Check lighting functions correctly. If you have chosen to change the colour spectrum of your light tubes see (changing your light tubes), do this while the lights are not positioned on the aquarium.
TOP TIP: we suggest removing the lighting when filling and landscaping the aquarium to avoid possibilities of accidental damage.
GENERAL SAFETY NOTICE
It is absolutely imperative that you ensure this cabinet and aquarium is installed upon level fl ooring. It is also a prerequisite that, you ensure the fl ooring upon which it is positioned is able to support the weight of this aquarium which could be up to 1000kg including water and decorations. Installation upon uneven fl ooring will result in poor distribution of weight. Damages to the aquarium, cabinet or equipment and damages caused by leaks due to improper or uneven installation are not covered by the guarantee with this product. We recommend against aquariums above 150KG being installed on 2nd story fl oorboards.
Connecting your appliance to the mains electricity supply - Country specific instructions.
United Kingdom Only
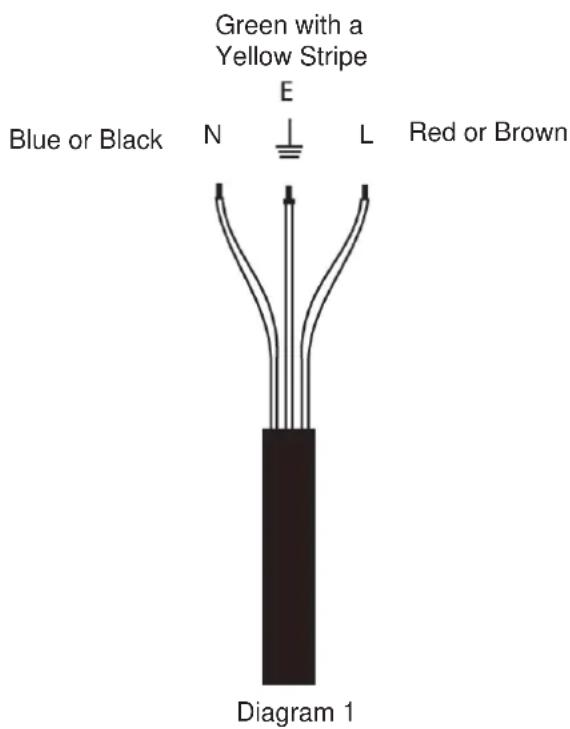
The plug supplied with this product is a sealed plug and we do not recommend removing or changing it. However, should the need arise, only a suitable plug should be connected using the following diagram 1. An approved earth leakage circuit breaker (RCCB) or otherwise known as an Residual circuit current device (RCCD) must be also fitted in the supply line.
IF YOU ARE IN ANY DOUBT ABOUT INSTALLING YOUR APPLIANCE YOU SHOULD CONSULT A QUALIFIED ELECTRICIAN.
To guard against injury, basic safety precautions should be observed, including the following:
- Read and follow all safety instructions and important notices in these instructions as well as on the product itself.
- This appliance is not intended for use by children or infi rm persons without supervision. Young children should be supervised to ensure that they do not play with the appliance.
- To avoid possible electric shocks, special care should be taken since water is employed in the use of aquarium equipment. For each of the following situations do not attempt repairs yourself. Return the appliance to an authorised service facility for service or discard the appliance.
a. If the appliance or any electrical component of the appliance (non-immersible equipment only) falls into the water or gets wet, do not reach for it. Unplug it and then retrieve it.
b. If the appliance shows any sign of abnormal water leakage, immediately unplug it from the power source.
c. Carefully examine the appliance after installation. It should not be plugged in if there is water on parts which are not intended to be wet.
d. Do not operate the appliance if it has a damaged cord or plug, or if it is malfunctioning, or dropped or damaged in any manner.
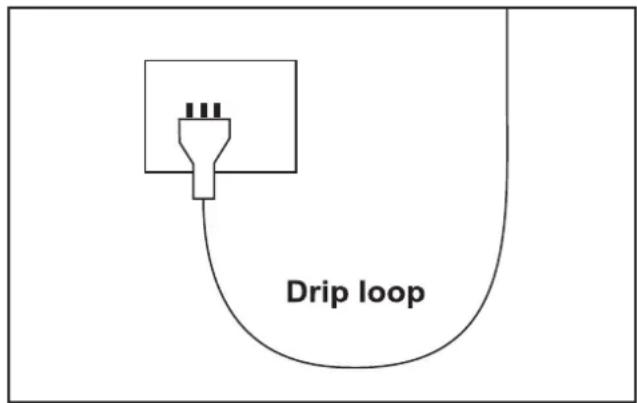
4. A "drip loop" (see graphic) should be arranged for each cable connecting an aquarium to a power supply. The drip loop is the part of the cable below the level of the power supply. It prevents water travelling down the cable and coming into contact with the power supply. If the plug or the socket does get wet, do not unplug the appliance. Disconnect the fuse or circuit breaker that supplies the power to the appliance, then unplug and examine for presence of water in the socket.
5. Always unplug the appliance from the electrical outlet when not in use, before putting on or taking off parts, before any type of maintenance or cleaning.
- Never yank the cable to pull it from the socket. Pull the plug carefully to disconnect.
- Do not use the appliance for reasons other than the intended use. The use of attachments that are not recommended or sold by the manufacturer may cause the product to be unsafe. This is not recommended.
- Do not install or store the appliance where it will be exposed to weather or temperatures below freezing.
- Make sure any component mounted on a tank is securely installed before operating it.
- Ensure input voltage is the same voltage as your local power supply.
- If an extension cable is used it should have the proper rating. Care should be taken to arrange the cord so that it will not be tripped or pulled.
- A G.F.C.I (Ground fault circuit interrupter) & surge protector is recommended for all electrical appliances.
- Ensure your hands are dry when turning the power switch on/off and when inserting/removing the power cable from the socket.
- If you are in any doubt about the electrical installation or safety of this product you must consult a qualified electrician.
For Guarantee Conditions, please refer to the Guarantee form that is enclosed with this product.
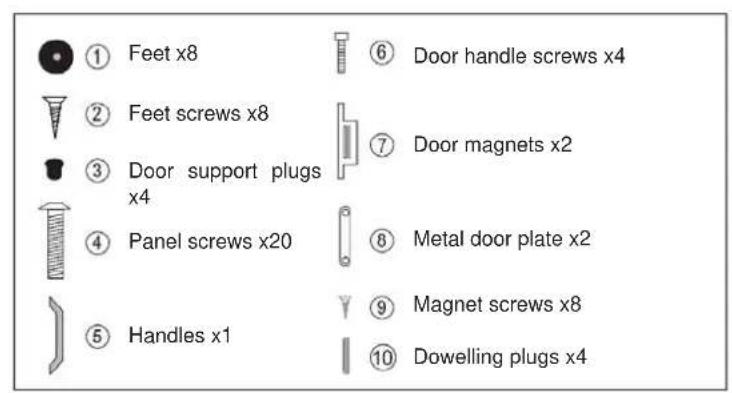
Parts Required Contents:
Tools Required:

natural_image
Illustration of a screwdriver with a pointed tip (no text or symbols)Glass Aquarium
natural_image
Line drawing of a rectangular box with a handle and a small oval hole on top (no text or symbols)Top Panel
Side Panels x4
natural_image
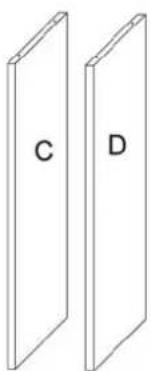
Two identical 3D rectangular panels labeled C and D, shown side by side without any text or symbols.Centre panels x2
Door panels x2
Back panel
Back plastic hood strip
natural_image
Simple line drawing of a light fixture with two horizontal plates and a small rectangular component (no text or symbols)Front plastic hood strip
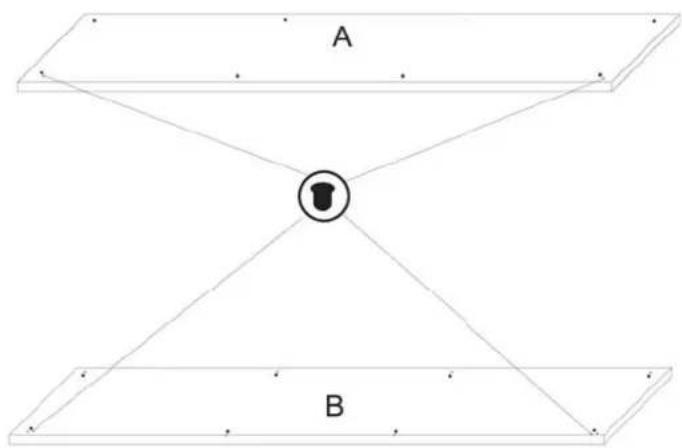
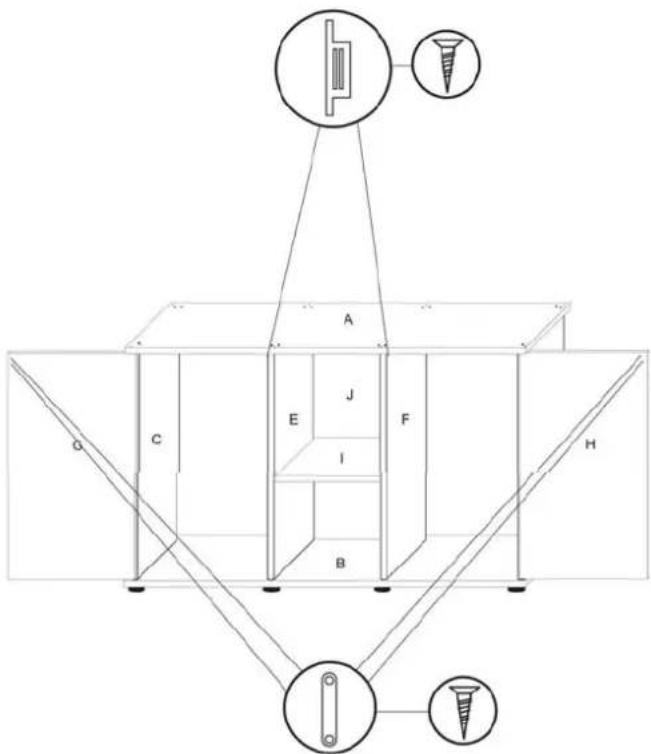
Step 1: Insert the 4 door support plugs, part ③ into the top and bottom panel A & B.
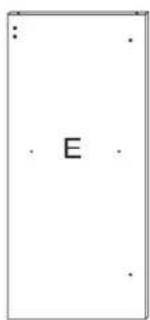
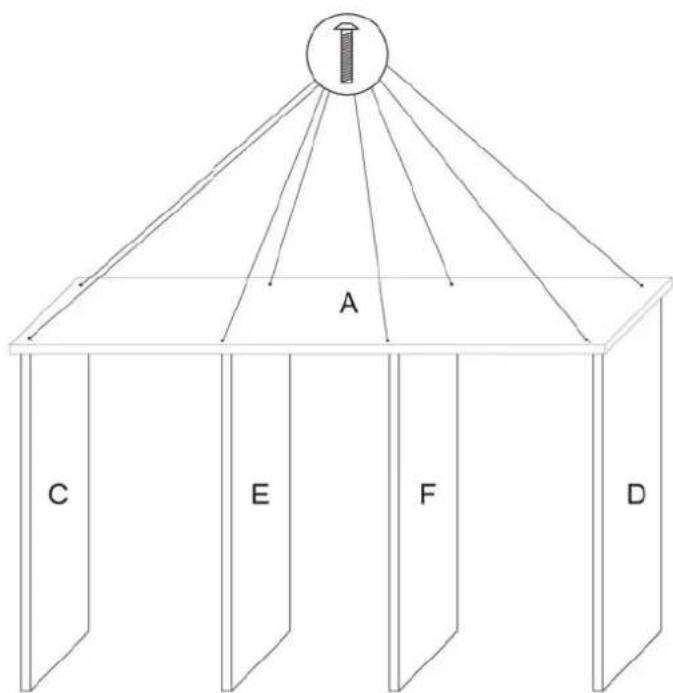
Step 2: Install panels C, D, E & F using screws ④
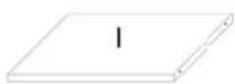
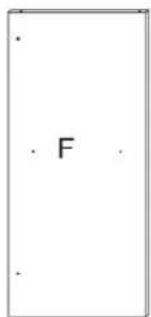
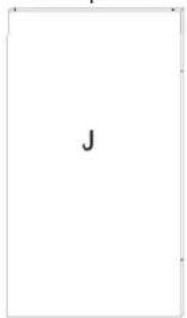
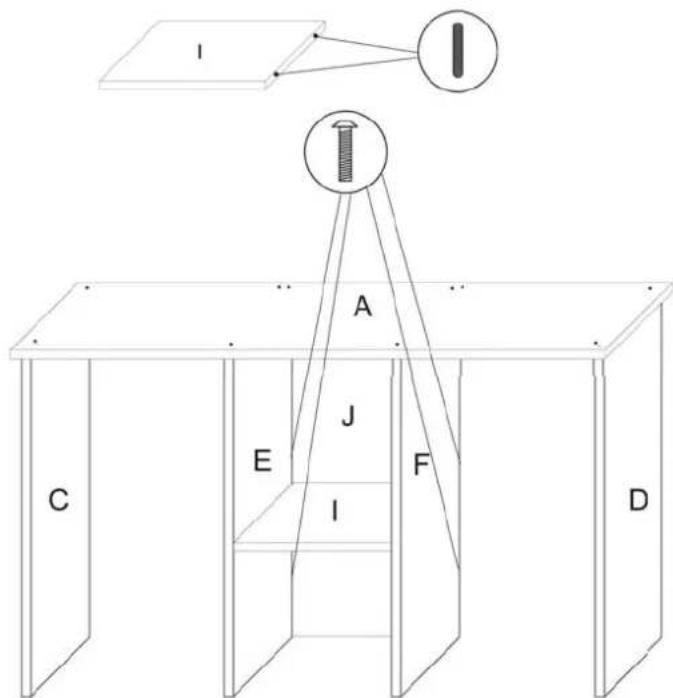
Step 3: Attach dowelling plugs⑩ to shelf panel I. Attach shelf to panels E & F, then attach back panel J using screws. ④
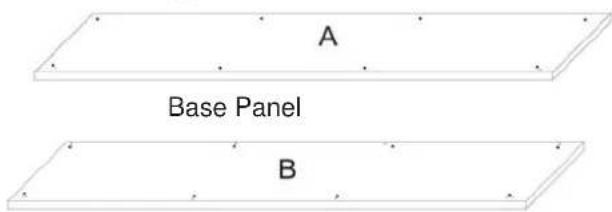
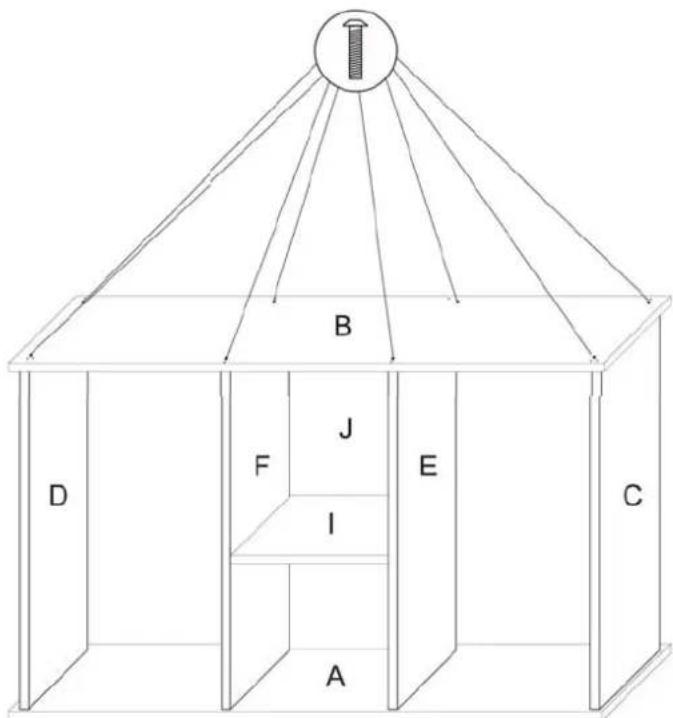
Step 4: Turn the cabinet over. Now attach base panel B using screws ④ Insert the screws loosely but do not fasten them yet.
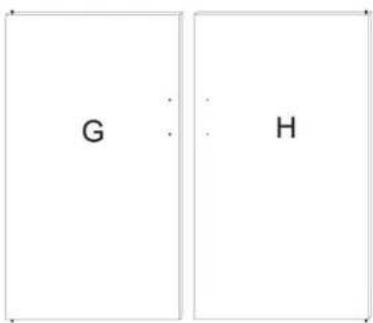
Step 5: Install the door panels G & H, push the little knobs attached to the top & bottom of the door into the door support plugs. Now fasten the screws ④ in the base panel. Remember to install the doors upside down.
Step 6: Install feet ① to the base panel B using screws ②
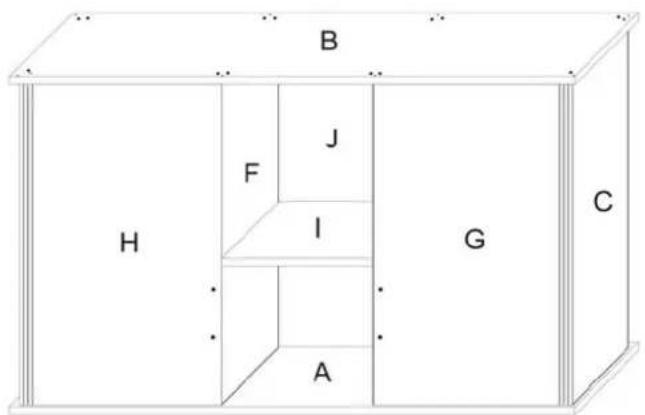
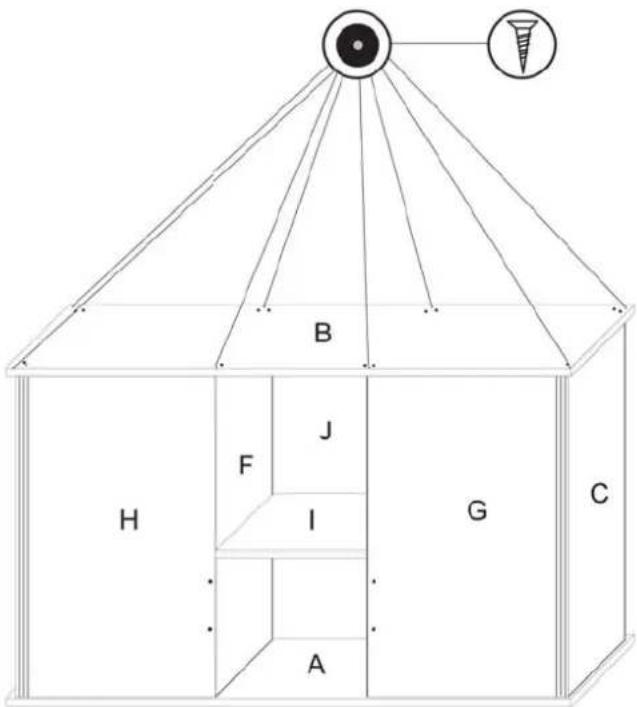
Step 7: Turn the cabinet back over on it's feet. Attach door handles ⑤ with screws. ⑥
Step 8: Install door magnet ⑦ centre panel using screws ⑨ Install door magnet centre part ⑧ to doors G & H using screws ⑨

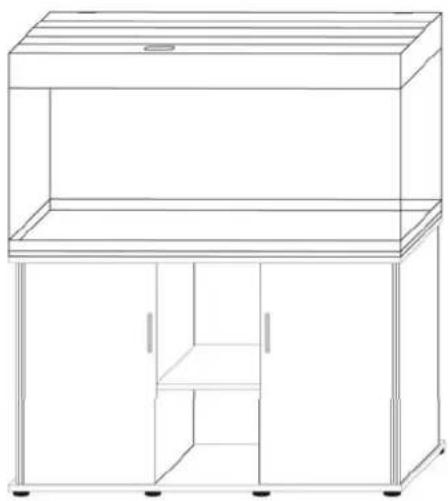
Installing the Aquarium:
Step 9: Place the Aquarium on top of the cabinet. Important: Do not remove the polystyrene from under the tank. Removing the polystyrene will invalidate your warranty.
natural_image
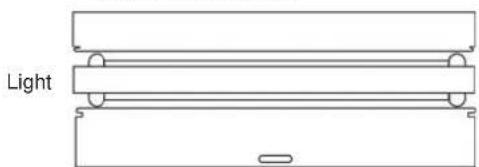
Line drawing of a multi-tiered indoor enclosure or storage unit with no text or symbolsStep 10: Put the lights & plastic strips on top of the tank in the order indicated below. Lights first then other covers hooking into the lights working towards the back.
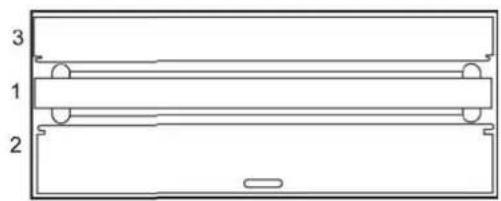
natural_image
Pure technical diagram of a rectangular frame with three horizontal bars and circular cutouts, no text or symbols present.Step 11:
Install Filter (see filter instructions for details)
Install Heater (see heater instructions for details)
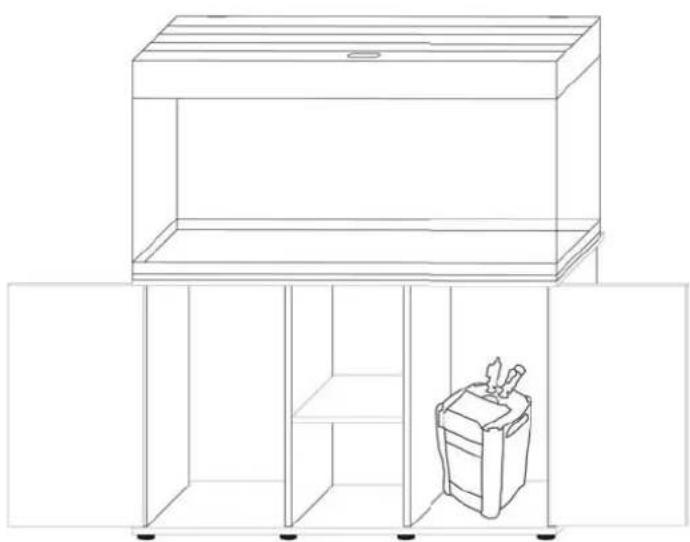
natural_image
Line drawing of a simple indoor space setup with a cabinet and storage unit (no text or symbols)Care and Maintenance of your Aqua One Aquarium Glass:
It is recommended that you use a good quality glass cleaner and a non abrasive lint free cloth. Glass cleaner should only be used on the outside of the aquarium.
To clean the glass on the inside of the aquarium, it is recommended that you use an Aqua One Scraper or Magnetic Cleaner (available from your local Aqua One dealer).
Cabinet and Hood: The use of a damp cloth is recommended, do not use any detergents or harsh chemicals to clean the cabinet and hood as damage may occur.
Lighting Maintenance
Light tubes (please read the general electrical safety instructions before installing the lights, filter or heater) Your new aquarium uses standard tubes (supplied). They are available as replacement parts from your local Aqua One dealer. Light tubes are not covered by the guarantee. Life expectancy is generally 10 months or more, however tubes loose their output gradually over time. To maintain the health of plant and aquatic life effected by the amount of light available we suggest changing them every 6 months.
Locating the lights
Positioning of lights on aquarium (note some models have twin light units). The black end caps have brackets which slide over the aquarium trim. Please ensure light unit is firmly in place before switching on. The black hood covers help secure the lights in place.
Removing Light Tubes
Switch light off, remove from mains supply and tank before disassembly of lights at any time. Unscrew the white end caps of the tube holders by turning anti clockwise (1). Both caps should be removed before the tube is slid out. Keep end caps as these are required for re-installing (2).
Installing new tubes
With the light unit unplugged and removed from the tank, slide the end caps over the tube both ends (1). Gently slide the tube pins into the end cap receptacles (3). Fully tighten the caps back on their threads (4). Be careful not to cross thread as this is a water tight seal. Only use hand tight. Ensure they are fully tightened. Test before re-installing on to the tank.
1.
2.
3.
4.
NOTE: Your light unit is tested to IPx7. This means that it can withstand temporary submersion. However, IT IS NOT A SUBMERSIBLE LIGHT
DAILY Feed your fish as per instructions on your fish food container.
WEEKLY Test and adjust pH levels if needed
Use Aqua One quality pH test kit, available from your local Aqua One Dealer. pH is a measure of how acidic or alkaline the water is. It is measured on a scale of 0-14 in which 7 is neutral, less than 7 is acidic and more than 7 is alkaline.
Some species require specifi c pH levels please seek advice from your aquarium specialist.
FORTNIGHTLY 25% Water Change
What you will need: A Bucket, Gravel Cleaner, Towel, Water Conditioner, Filter Supplement and clean hands. All items are available from your local Aqua One Dealer.
-
Unplug the Light Unit and remove it from the aquarium. Place it somewhere safe away from water & where it will not be broken / damaged.
-
Turn the Filter off.
-
The fi sh and plants do not need to be removed when doing any maintenance.
-
Place the towel on the floor in front of the aquarium to guard from water spillage.
-
Use an Aqua One 4 in 1 algae scraper (Sold separately) and gently scrape away any algae growing on the glass or filter pipes.
-
Using an Aqua One Gravel Cleaner* (Sold separately) empty approximately 25% of the aquarium water into the bucket. Take note of how much water is emptied.
-
Fill the bucket up with the same amount of water that was removed from the aquarium.
-
Treat the tap water with Aqua One Water Conditioner (Sold separately) as per the instructions on the bottle.
-
Let the bucket sit for 10 minutes.
-
Fill the aquarium up slowly to the level just underneath the glass brace.
-
Turn the Filter back on and ensure that water is flowing out of the Spray Bar.
- Test and adjust pH levels.
- Add a fi iter supplement.
- Replace the Light Unit.
* Refer to the instructions on the back of your Gravel Cleaner to ensure correct use.
If you are in any doubt about the electrical installation or safety of this product you must consult a qualified electrician.
LIGHT UNIT DOES NOT WORK
- Ensure switch is in the on position on the lead of the light unit.
- Check light is plugged into power supply and the switch is on.
- Check the globe/s are in good condition. Replace if needed.
FILTER WORKING BUT NO / SLOW WATER FLOW (Refer to the instructions supplied with your Filter)
- Check Impeller is in good condition and replace if needed.
- Clean Impeller, Power Head and all Inlet and outlet pipes.
- Check that the Spray Bar is inserted correctly with the end cap at the opposite end to the elbow.
- Make sure water level is not to high it should be no higher than the glass brace.
- If an air stone is being used check it is not bubbling water over the rim of the aquarium if so turn the air pump down.
- Make sure the aquarium is sitting on a level surface.
- If it is a salt water aquarium remove any salt creep as it can drain water from the aquarium.
5a. Remove the Light Unit from the top of the aquarium. Mark the water level. Remove any excess water that may be sitting on the edge of the aquarium. Leave for an hour. If water level drops proceed to step 5b.
5b. Remove the fi sh, decorations and gravel. Empty the aquarium and clean the glass DO NOT WASH IN SOAP OR DETERGENT. Place a piece of newspaper on a fi at level solid surface. Carefully fi ll the aquarium ensuring not to spill any water on to the newspaper. Leave the aquarium for several hours and then inspect the newspaper for wet patches.
Disposal of used Electrical & Electronic Equipment (Applicable in the European Union and other European countries with separate collection systems)
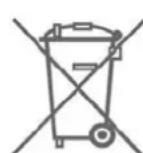
This symbol on the product or on its packaging indicates that the product must not be disposed of with normal household waste. Instead, it is your responsibility to dispose of your waste equipment by arranging to return it to a designated collection point for the recycling of waste electrical and electronic equipment. By separating and recycling your waste equipment at the time of disposal you will help to conserve natural resources and ensure that the equipment is recycled in a manner that protects human health and the environment. For more information about recycling this product, please contact your local city offi ce, your household waste disposal service or the shop where you have purchased the product.

KONG'S
Aqua One®
www.aquaone.com.au
® Aqua One and Kong's are registered trademarks.