
M56-190AWFX - Lawn mower MC CULLOCH - Free user manual and instructions
Find the device manual for free M56-190AWFX MC CULLOCH in PDF.
Download the instructions for your Lawn mower in PDF format for free! Find your manual M56-190AWFX - MC CULLOCH and take your electronic device back in hand. On this page are published all the documents necessary for the use of your device. M56-190AWFX by MC CULLOCH.
USER MANUAL M56-190AWFX MC CULLOCH
M46-160AWRPX
M53-160AWRPX
M53-190AWRPX
M53-190RP 2012-10-19 14:43
KEY TO SYMBOLS
Key to symbols Explanation of warning levels WARNING! The machine can be a dangerous tool if used incorrectly or carelessly, which can cause serious or fatal injury to the operator or others. The warnings are graded in three levels. Please read the operator’s manual carefully and make sure you understand the instructions before using the machine. Keep people and animals well away from the working area. Prevent unintentional starting by removing the ignition cable from the spark plug. Watch out for thrown objects and ricochets.
Warning: rotating cutter. Keep hands
Warning: rotating parts. Keep hands and
feet clear. This product is in accordance with applicable EC directives. Noise emission to the environment according to the European Community’s Directive. The machine’s emission is specified in the Technical data chapter and on the label. Never use the machine indoors or in spaces lacking proper ventilation. Exhaust fumes contain carbon monoxide, an odourless, poisonous and highly dangerous gas. Risk of explosion Always shut off the engine before refuelling. Hot surface. 2 – English WARNING!
WARNING! Used if there is a risk of serious injury or death for the operator or damage to the surroundings if the instructions in the manual are not followed. IMPORTANT!
IMPORTANT! Used if there is a risk of injury to the operator or damage to the surroundings if the instructions in the manual are not followed. CAUTION! CAUTION! Used if there is a risk of damage to materials or the machine if the instructions in the manual are not followed. Thank you for choosing a McCulloch product. You are thereby part of a story that started long ago, when the McCulloch Corporation started its manufacturing of engines during World War II. In 1949, when McCulloch introduced its first light one-man chainsaw, woodworking would never be the same again. The line of innovative chainsaws would continue over the decades, and business was expanded, first by airplane and kart engines in the 1950s, then by mini chainsaws in the 1960s. Later, in the 1970s and 80s, trimmers and blower vacs were added to the range. Today, as a part of the Husqvarna group, McCulloch continues the tradition of powerful engines, technical innovations, and strong designs that have been our hallmarks for more than half a century. Lowering fuel consumption, emissions and noise levels are of top priority to us, as is improving safety and user-friendliness. We certainly hope that you will be satisfied with your McCulloch product, as it is designed to be your companion for a long time. By following this operators manual’s advice on usage, service, and maintenance, its lifespan can be extended. If you should need professional help with repair or service, please use the Service Locator at www.mcculloch.com. McCulloch has a policy of continuous product development and therefore reserves the right to modify the design and appearance of products without prior notice. This manual can also be downloaded at www.mcculloch.com.
English – 3 WHAT IS WHAT?
M46-160AWRPX
M53-160AWRPX
M53-190AWRPX
What is what on the lawn mower?
Engine brake handle 10 Air filter
Propulsion bar 11 Cutting cover
Starter handle 12 Fuel valve
Catcher 13 Water connector
Handle, handle height 14 Refuelling
Cutting height control 15 Cutter
Dipstick/oil filler 16 Spring washer
Muffler 17 Cutter bolt
Spark plug 18 Operator′s manual 4 – English
MACHINE´S SAFETY EQUIPMENT
General Muffler This section describes the machine´s safety equipment, its purpose, and how checks and maintenance should be carried out to ensure that it operates correctly.
WARNING! Never use a machine that has faulty safety equipment! If your machine fails any checks contact your service agent to get it repaired. The muffler gets very hot during and after use. This also applies during idling. Be aware of the fire hazard, especially when working near flammable substances and/or vapours. Prevent unintentional starting by removing the ignition cable from the spark plug. Cutting cover
The cutting cover is designed to reduce vibration and to reduce the risk of cuts. Checking the cutting cover Make sure the cutting cover is not damaged and that there are no visible defects such as cracks. WARNING! Never use a machine without a muffler, or with a faulty muffler. A damaged muffler may substantially increase the noise level and the fire hazard. Keep fire fighting equipment handy. The muffler is designed to keep noise levels to a minimum and to direct exhaust fumes away from the user. Inspecting the muffler
Check regularly that the muffler is complete and secured correctly. Engine brake handle
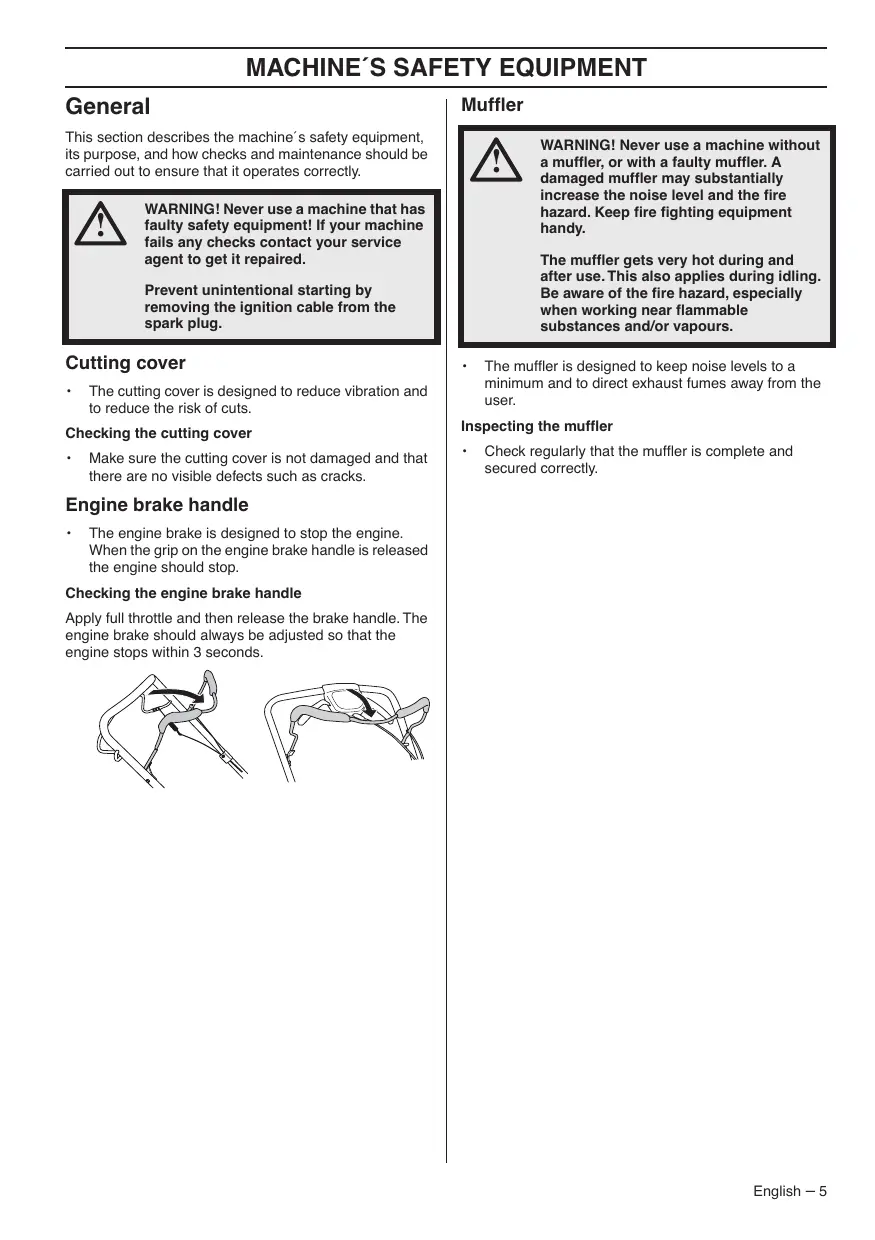
The engine brake is designed to stop the engine. When the grip on the engine brake handle is released the engine should stop. Checking the engine brake handle Apply full throttle and then release the brake handle. The engine brake should always be adjusted so that the engine stops within 3 seconds. English – 5
ASSEMBLING AND ADJUSTMENTS
IMPORTANT! Prevent unintentional starting by removing the ignition cable from the spark plug. Catcher
Fit the catcher bag.
Attach the hooks in the upper edge of the chassis.
Fit the bagger bottom in the discharge hole. Handle Assembly Top handle Place the handlebar’s tubular construction in direct opposite to the lower part of the handlebar. Tighten the knobs properly. Raise the discharge guard to mount / dismount the mulch plug. Handle height
Loosen the lower knobs. Hook the spring in the frame.
Adjust the height. Tighten the knobs properly. Cutting height NOTICE! Do not set the cutting height too low as there is a risk that the cutters might hit ground with unevenness. Move the lever to the back for higher cutting height and to the front for lower cutting height. 6 – English Filling with oil
The oil tank is empty at delivery. Fill the oil slowly. See instructions under the heading Maintenance. The engine oil should be changed the first time after 5 hours running time. FUEL HANDLING General
Fueling WARNING! Running an engine in a confined or badly ventilated area can result in death due to asphyxiation or carbon monoxide poisoning.
Use a petrol can at all times to avoid spillage. Fuel and fuel fumes are highly inflammable and can cause serious injury when inhaled or allowed to come in contact with the skin. For this reason observe caution when handling fuel and make sure there is adequate ventilation. Clean the area around the fuel cap. Tighten the fuel cap carefully after refuelling. Negligence may lead to the start of a fire. Do not smoke and do not place any hot objects in the vicinity of fuel. Move the machine at least 3 m from the refuelling point before starting it. NOTICE! The machine is equipped with a four-stroke engine. Make sure that there is always sufficient oil in the oil tank. Petrol
Use good quality unleaded or leaded petrol.
The lowest octane recommended is 90 (RON). If you run the engine on a lower octane grade than 90 socalled knocking can occur. This gives rise to a high engine temperature, which can result in serious engine damage. Never start the machine:
If you have spilt fuel or engine oil on the machine. Wipe off the spill and allow the remaining fuel to evaporate.
If you have spilt fuel on yourself or your clothes, change your clothes. Wash any part of your body that has come in contact with fuel. Use soap and water.
If the machine is leaking fuel. Check regularly for leaks from the fuel cap and fuel lines. Transport and storage
Store and transport the machine and fuel so that there is no risk of any leakage or fumes coming into contact with sparks or naked flames, for example, from electrical machinery, electric motors, electrical relays/ switches or boilers.
When storing and transporting fuel always use approved containers intended for this purpose. Use low-emission petrol, also known as alkylate petrol, if it is available. Engine oil NOTICE! Check the oil level before starting the lawn mower. A too low oil level can cause serious damage to the engine. See instructions in the section "Maintenance".
When refuelling, open the fuel cap slowly so that any excess pressure is released gently. The exhaust fumes from the engine are hot and may contain sparks which can start a fire. Never start the machine indoors or near combustible material! Fuel
WARNING! Always stop the engine and let it cool for a few minutes before refuelling. Long-term storage
When storing the machine for long periods the fuel tank must be emptied. Contact your local petrol station to find out where to dispose of excess fuel. The engine oil should be changed the first time after 5 hours running time. Refer to Technical Data for recommendations on which oil type to use. Never use oil intended for two-stroke engines. English – 7 OPERATING Personal protective equipment You must use approved personal protective equipment whenever you use the machine. Personal protective equipment cannot eliminate the risk of injury but it will reduce the degree of injury if an accident does happen. Ask your dealer for help in choosing the right equipment.
Never allow children or other persons not trained in the use of the machine to use or service it. Always wear:
Use ear muffs if the noise level exceeds 85 db.
Sturdy, non-slip boots or shoes.
Heavy, long pants. Do not wear shorts, sandals or go barefoot.
Gloves must be worn when required, for example when fitting, inspecting or cleaning cutting attachments. The machine should not be used by people with reduced physical or mental capacities or people who are unsuitable for health reasons to operate the machine, without supervision of a person responsible for their safety. Never allow anyone else to use the machine without first ensuring that they have read and understood the contents of the operator’s manual. General safety precautions This section describes basic safety directions for using the machine. This information is never a substitute for professional skills and experience.
Please read the operator’s manual carefully and make sure you understand the instructions before using the machine.
Keep in mind that the operator is responsible for accidents or hazards occuring to other people or their property.
The machine must be kept clean. Signs and stickers must be fully legible. Always use common sense It is not possible to cover every conceivable situation you can face. Always exercise care and use your common sense. If you get into a situation where you feel unsafe, stop and seek expert advice. Contact your dealer, service agent or an experienced user. Do not attempt any task that you feel unsure of!
8 – English WARNING! This machine produces an electromagnetic field during operation. This field may under some circumstances interfere with active or passive medical implants. To reduce the risk of serious or fatal injury, we recommend persons with medical implants to consult their physician and the medical implant manufacturer before operating this machine. WARNING! The machine can be a dangerous tool if used incorrectly or carelessly, which can cause serious or fatal injury to the operator or others. Never use the machine if you are fatigued, while under the influence of alcohol or drugs, medication or anything that could affect your vision, alertness, coordination or judgement.
WARNING! Unauthorized modifications and/or accessories may lead to serious injury or death to the user or others. Under no circumstances may the design of the machine be modified without the permission of the manufacturer. Do not modify this product or use it if it appears to have been modified by others. Never use a machine that is faulty. Carry out the checks, maintenance and service instructions described in this manual. Some maintenance and service measures must be carried out by trained and qualified specialists. Always use genuine accessories. OPERATING Work area safety
The engine should be switched off when moving over ground that is not to be mowed. For example, gravel paths, stone, shingle, asphalt, etc.
Never run with the machine when it is running. You should always walk with the lawn mower.
Do not use the machine in bad weather, such as dense fog, heavy rain, strong wind, intense cold, etc. Working in bad weather is tiring and can lead to dangerous conditions, e.g. slippery surfaces. Shut down the engine before changing the cutting height. Never make adjustments with the engine running.
Observe your surroundings to ensure that nothing can affect your control of the machine. Never leave the machine unsupervised with the motor running. Turn off the motor. Ensure the cutting attachment has stopped rotating.
Beware of roots, stones, twigs, pits, ditches etc. Tall grass can hide obstacles. If any foreign object is hit or if vibrations occur stop the machine immediately. Disconnect the HT lead from the spark plug. Check that the machine is not damaged. Repair any damage.
Mowing slopes can be dangerous. Do not use the lawn mower on very steep slopes. The lawn mower should not be used on inclines greater than 15 degrees.
Branches, twigs, stones, etc. should be removed from the lawn before you start to mow.
Objects hitting against the cutting attachment could be thrown and cause damage to people and objects. Keep people and animals well away.
On sloping ground you should work along the slope. It is much easier to work along a slope than it is to work up and down it.
Always cut with a sharp blade for optimal results. A dull blade gives an uneven cut and the grass becomes yellow on the surface of the cut.
Never mow more than 1/3 of the length of the grass. This especially applies during dry periods. Mow first with the cutting height set high. Then check the result and lower to an appropriate height. If the grass is really long, drive slowly and mow twice if necessary.
Cut in different directions each time in order to avoid stripes in the lawn. Be careful when you are approaching hidden corners and objects that could block your view. Work safety
A lawn mower is only designed to mow lawns. All other use is forbidden.
Wear personal protective equipment. See instructions under the ”Personal protective equipment” heading.
Do not start a lawn mower unless the cutter and all covers are fitted correctly. Otherwise the cutter could come loose and cause personal injuries.
Basic working techniques Make sure the cutter does not hit foreign objects such as stones, roots or the like. This can make the cutter dull and bend the engine shaft. A bent axle gives imbalance and heavy vibration, which results in a great risk of the cutter becoming loose.
The brake handle must never be permanently anchored in handle when the machine is running.
Place the lawn mower on firm, flat surface and start it. Make sure that the cutter cannot come into contact with the ground or other objects.
Always place yourself behind the machine. Allow all the wheels to remain on the ground and keep both hands on the handle when mowing. Keep your hands and feet away from the rotating blades.
Do not tilt the machine when the engine is running.
Pay particular attention when pulling the machine towards you during work.
Never lift up the lawn mower or carry it around when the engine is running. If you must lift the lawn mower, first switch off the engine and disconnect the ignition lead from the spark plug. Transport and storage
Secure the equipment during transportation in order to avoid transport damage and accidents.
Store the equipment in a lockable area so that it is out of reach of children and unauthorized persons.
Store the machine and its equipment in a dry and frost proof place.
For transport and storage of fuel, see the section "Fuel handling". English – 9 OPERATING Starting and stopping Before starting
Stop the engine by releasing the engine brake handle.
Close the fuel valve. WARNING! Please read the operator’s manual carefully and make sure you understand the instructions before using the machine. Wear personal protective equipment. See instructions under the ”Personal protective equipment” heading.
Keep people and animals well away from the working area.
Perform daily maintenance. See instructions in the section "Maintenance".
Ensure the ignition lead sits correctly on the spark plug. Starting Open the fuel valve.
The engine brake handle must be held against the handlebar when the engine is started.
Position yourself behind the machine.
Grip the starter handle, slowly pull out the cord with your right hand until you feel some resistance (the starter pawls grip). Pull with force to start the engine. Never twist the starter cord around your hand. Drive
Push the propulsion bar in towards the handle in order to start the drive.
Before pulling the machine towards you, disengage the drive and push the machine forward approx. 10 cm. 10 – English MAINTENANCE General
Oil level WARNING! The user must only carry out the maintenance and service work described in this Operator’s Manual. More extensive work must be carried out by a service workshop. Prevent unintentional starting by removing the ignition cable from the spark plug. The life span of the machine can be reduced and the risk of accidents can increase if machine maintenance is not carried out correctly and if service and/or repairs are not carried out professionally. If you need further information please contact your nearest service workshop. The lawn mower should stand on flat ground when you check the oil level. Check the oil level with the dipstick on the oil filler cap.
Remove the oil cap and wipe the dipstick clean.
Put the dipstick back in. The oil filler cap must be completely screwed down to give a correct picture of the oil level.
If the oil level is low, fill using engine oil up to the upper level on the dipstick. Cutting equipment
Check the cutting attachment for damage or cracks. A damaged cutting attachment should always be replaced.
Always ensure the cutter is well ground and balanced correctly. CAUTION! The blades should be balanced after sharpening. Balancing, replacing or sharpening the blades should be conducted by a service workshop. CAUTION! When the machine is tilted, make sure the air filter always is placed in the highest position.
Always use genuine accessories. Damaged blades should be replaced when hitting obstacles that result in a breakdown. Let the service centre assess whether the blade can be sharpened or must be replaced. Maintenance schedule In the maintenance schedule you can see which parts of your machine that require maintenance, and with which intervals it should take place. The intervals are calculated based on daily use of the machine, and may differ depending on the rate of usage. Weekly maintenance Monthly maintenance General inspection Spark plug Air filter External cleaning Muffler* Fuel system Before starting WARNING! Always wear heavy-duty gloves when servicing and maintaining the cutting equipment. The cutters are very sharp and cuts can occur very easily. Oil level Dismantling Cutting equipment
Unscrew the bolt holding the cutter.
Remove the old blade. Make sure the blade bracket is free of damage. Also check that the cutter bolt is undamaged and that the engine shaft is not bent. Cutting cover* Adjusting the clutch wire Engine brake handle* *See instructions in the section "Machine’s safety equipment". General inspection
Check that nuts and screws are tight. External cleaning Assembly
Brush leaves, grass and the like off of the lawn mower. Do not use a high pressure washer to clean the machine. Never flush water directly on the engine. Clean the air intake on the starter. Check the starter and starter cord. When cleaning under the cutting deck, turn the machine with the spark plug upwards. Empty the fuel tank. Make sure the cutter centres correctly on the shaft. English – 11 MAINTENANCE
Fit the washer and tighten the bolt correctly. The bolt should be tightened with a torque of 45-60 Nm. M46-160AWRPX, M53AWRPX,
M53-190AWRPX
Finely adjust the wire using the adjuster screw.
Pull the blade around by hand and make sure it rotates freely. Test run the machine. Spark plug NOTICE! Always use the recommended spark plug type! Use of the wrong spark plug can damage the piston/cylinder.
If the machine is low on power, difficult to start or runs poorly at idle speed: always check the spark plug first before taking other steps.
If the spark plug is dirty, clean it and check that the electrode gap is 0.5 mm. Replace if necessary. Air filter
Remove the air filter cover and take out the filter.
An air filter that has been in use for a long time cannot be cleaned completely. The filter must therefore be replaced with a new one at regular intervals. A damaged air filter must always be replaced.
When reassembling, make sure that the filter completely seals against the filter holder. Clean the paper filter
Clean the filter by knocking the filter against a flat surface. Never use solvent with petroleum, for example, kerosene, or compressed air to clean the filter. Cleaning the foam plastic filter
Adjusting the clutch wire M53-190RP
Finely adjust the wire using the adjuster screw. Remove the foam plastic filter. Wash the filter well in tepid soapy water. After cleaning, rinse the filter well in clean water. Squeeze out and allow the filter to dry. NOTE! High pressure compressed air can damage the foam. After cleaning the filter should be oiled using engine oil. Wipe away excess oil by pressing a clean cloth against the filter. Oil change
Roughly adjust the cluch wire when the fine adjustment is not enough.
Extend the wire using the fine adjustment screw.
Roughly adjust the cluch wire by attaching it to the different brackets on the clutch bar. Then adjust the wire finely.
Empty the fuel tank.
Unscrew the oil filler cap.
Place a suitable vessel to collect the oil in.
Drain the oil by tipping the engine so that the oil runs out through the filler pipe. When the machine is tilted, make sure the air filter always is placed in the highest position. Ask where you can dispose of surplus engine oil at your local petrol station.
Fill with new engine oil of a good quality. See instructions in the section "Technical data". Fuel system 12 – English
Check that the fuel cap and its seal are not damaged.
Check the fuel hose. Replace if necessary. Engine Engine manufacturer Honda Honda Honda Honda Nominal engine output, kW (see note 1) 2,9 2,9 3,8 3,8 Spark plug
NGK BPR6ES
NGK BPR6ES
NGK BPR6ES
NGK BPR6ES
Electrode gap, mm 0,5 0,5 0,5 0,5 Fuel tank capacity, litre 0,9 0,9 0,9 0,9 *Engine oil SAE 30/SAE 10W-30 SAE 30/SAE 10W-30 SAE 30/SAE 10W-30 SAE 30/SAE 10W-30 39,3 43,2
Ignition system Fuel and lubrication system Weight Machine with empty tanks, kg Noise emissions (see note 2) Sound power level, measured dB (A)
Sound power level, guaranteed LWA dB (A)
3,3 4,0 4,0 4,0 Cutting height, mm 30-80 30-70 30-70 30-70 Cutting width, cm
Cutter Combi 40 Combi 46 Combi 46 PX3 Bagger capacity, litre
Sound levels (see note 3) Sound pressure level at the operators ear, dB(A) Vibration levels, a hveq (see note 4) Handle, m/s2 Cutting system Note 1: The power rating of the engine indicated is the average net output (at specified rpm) of a typical production engine for the engine model measured to SAE standard J1349/ISO1585. Mass production engines may differ from this value. Actual power output for the engine installed on the final machine will depend on the operating speed, environmental conditions and other values. Note 2: Noise emissions in the environment measured as sound power (LWA) in conformity with EC directive 2000/14/ EC. Note 3: Noise pressure level according to EN 836. Reported data for noise pressure level has a typical statistical dispersion (standard deviation) of 1.2 dB(A). Note 4: Vibration level according to EN 836. Reported data for vibration level has a typical statistical dispersion (standard deviation) of 0.2 m/s2. *Use engine oil of quality SF, SG, SH, SJ or higher. See the viscosity chart in the engine manufacturer’s manual and select the best viscosity based on the expected outside temperature. English – 13 TECHNICAL DATA EC-declaration of conformity (Applies to Europe only) Husqvarna AB, SE-561 82 Huskvarna, Sverige, tel: +46-36-146500, declares under sole responsibility that the lawn mowers McCulloch M46-160AWRPX, M53-160AWRPX, M53-190AWRPX, M53-190RP from the serial numbers 13XXXXXXX and onwards comply with the requirements of the COUNCIL’S DIRECTIVE:
of May 17, 2006 ”relating to machinery” 2006/42/EC
of December 15, 2004 ”relating to electromagnetic compatibility” 2004/108/EC.
of May 8, 2000 ”relating to the noise emissions in the environment” 2000/14/EC. For information relating to noise emissions, see the Technical data chapter. The following standards have been applied: EN 836, ISO 11094, EN 55012. Notified body: 0404, SMP Svensk Maskinprovning AB, Fyrisborgsgatan 3, SE-754 50 Uppsala, has issued reports regarding the assessment of conformity according to annex VI of the COUNCIL’S DIRECTIVE of May 8, 2000 ”relating to the noise emissions in the environment” 2000/14/EC. Huskvarna, 29 November 2012 Bengt Ahlund, Development manager (Authorized representative for Husqvarna AB and responsible for technical documentation.) 14 – English SYMBOLFÖRKLARING Symbolförklaring VAD ÄR VAD?
M46-160AWRPX
M53-160AWRPX
M53-190AWRPX
M46-160AWRPX
M53-160AWRPX
M53-190AWRPX
M46-160AWRPX, M53AWRPX,
M53-190AWRPX
Finjuster kablet vha. justeringsskruen.
M46-160AWRPX
M53-160AWRPX
M53-190AWRPX
Ruohonleikkurin osat?
Moottorijarrusanka 10 Ilmansuodatin
Käyttövipu 11 Leikkuukotelo
Käynnistyskahva 12 Polttoaineventtiili
Kerääjä 13 Vesiliitäntä
M46-160AWRPX
M53-160AWRPX
M53-190AWRPX
Attention: projections et ricochets. QUELS SONT LES COMPOSANTS?
M46-160AWRPX
M53-160AWRPX
M53-190AWRPX
M46-160AWRPX
M53-160AWRPX
M53-190AWRPX
M46-160AWRPX
M53-160AWRPX
M53-190AWRPX
M46-160AWRPX
M53-160AWRPX
M53-190AWRPX
M46-160AWRPX
M53-160AWRPX
M53-190AWRPX
M46-160AWRPX
M53-160AWRPX
M53-190AWRPX
„„š†Š M46-160AWRPX, M53AWRPX,
M53-190AWRPX
M46-160AWRPX
M53-160AWRPX
M53-190AWRPX
M46-160AWRPX
M53-160AWRPX
M53-190AWRPX
M46-160AWRPX
M53-160AWRPX
M53-190AWRPX
TEHNILISED ANDMED Tehnilised andmed M46160AWRPX M53160AWRPX M53190AWRPX M53-190RP Mootori tootja Honda Honda Honda Honda KAS IR KAS?
M46-160AWRPX
M53-160AWRPX
M53-190AWRPX
TEHNISKIE DATI Tehniskie dati M46160AWRPX M53160AWRPX M53190AWRPX M53-190RP Dzinïja raÏotÇjs Honda Honda Honda Honda KAS YRA KAS?
M46-160AWRPX
M53-160AWRPX
M53-190AWRPX
Îoliapjovòs detalòs:
StabdÏi˜ svirtis 10 Oro filtras
Varanãioji juosta 11 Pjovimo gaubtas
Starterio rankenòlò 12 Kuro voÏtuvas
Surinktuvas 13 Vandens prijungimas
M46-160AWRPX
M53-160AWRPX
M53-190AWRPX
M46-160AWRPX
M53-160AWRPX
M53-190AWRPX
M46-160AWRPX
M53-160AWRPX
M53-190AWRPX
Regulator vi‰ine reza 15 Rezalo
M46-160AWRPX
M53-160AWRPX
M53-190AWRPX
PÂRÖILE COMPONENTE
M46-160AWRPX
M53-160AWRPX
M53-190AWRPX
Capacitate colector, litri
M46-160AWRPX
M53-160AWRPX
M53-190AWRPX
™À¡Δ∏ƒ∏™∏ M46-160AWRPX,M 53AWRPX,