
DP-42WP - Television DAEWOO - Free user manual and instructions
Find the device manual for free DP-42WP DAEWOO in PDF.


| Product Type | Plasma Television |
| Brand | Daewoo |
| Model | DP-42WP |
| Screen Size | 42 inches (diagonal) |
| Aspect Ratio | 16:9 |
| Display Resolution | 1366 x 768 pixels |
| Weight (approx.) | 35 kg (77 lbs) |
| Dimensions (W x H x D) | 1100 x 700 x 100 mm |
| Power Consumption | 350 W (typical) |
| Power Supply | AC 100-240V, 50/60Hz |
| Video Inputs | Component (Y/Pb/Pr), Composite (AV), S-Video |
| Audio Inputs | Stereo RCA (L/R) |
| Speaker Output | 2 x 10 W |
| Remote Control | Included (batteries not supplied) |
| On-Screen Display (OSD) | Multi-language support |
| Cleaning Instructions | Wipe with a soft, dry cloth. Do not use abrasive cleaners. |
| Safety Warning | Do not block ventilation slots. Avoid exposure to rain or moisture. |
| Spare Parts Availability | Contact Daewoo customer service or authorized service centers. |
| Repairability | Limited repairability; recommend professional service. |
Frequently Asked Questions - DP-42WP DAEWOO
User questions about DP-42WP DAEWOO
0 question about this device. Answer the ones you know or ask your own.
Ask a new question about this device
Download the instructions for your Television in PDF format for free! Find your manual DP-42WP - DAEWOO and take your electronic device back in hand. On this page are published all the documents necessary for the use of your device. DP-42WP by DAEWOO.
USER MANUAL DP-42WP DAEWOO
PLASMA DISPLAY USER'S MANUAL
DP-42GP
DP-42SP
DP-42WP
natural_image
Two dandelion seed heads against a clear blue sky background (no text or symbols)Features
- 106cm (42")super-wide, 8.0cm Ultra Slim Wall-mounting Monitor
DAEWOO PLASMA opens a new era Monitor era with advanced plasma technology – 8cm ultra slim Monitor. Light weight of only 30kg allows installation in a narrow space.
- DVD Direct Connection / Outstanding Picture Quality Digital Broadcasts Receive (SD Grade)
DVD can be directly connected to the unit so that you can view clear digital images. You can enjoy even higher quality images. by connecting digital broadcasting receiver with which digital broadcasts can be viewed.
- PC Direct Connection
PC can be connected to the PDP without a separate device, and can be used as a monitor so that the effect of presentation gets maximized, making it more popular in various events and exhibitions.
• PDP Monitor with Minimized Noise
Although the PDP Monitor had an outstanding picture quality, there was a problem with the noise caused by the cooling fan until now. The DAEWOO PLASMA does not use a cooling fan any more, since it adopts a self air circulation method with excellent heat transfer, eliminating the fan noise.
• 160°Wide-Angle Viewing Area
- Flat Panel with No Distortion and Colour Blurring
Since Plasma Monitor has no problems such as distortion, blurring, flickering unlike existing CRT type, you can enjoy Home Theatre Quality Pictures.
- Various Video Control
- 11 Languages OSD - 20 Step screen zooming function - Full-screen still function
- Various aspect ratio (16:9, Panorama, Normal, Enlarge LB, Enlarge LBS)
- Accepts Worldwide: VGA, SVGA, XGA, UXGA.
- Unlimited Voltage Restriction(100-240V\~ 50/60Hz)
This Owner's Manual presents safety precautions and how to use the product. After reading it thoroughly, use the product safely. Keep this manual where the user can see it easily.
Failure to comply with warnings and cautions for the safe use of electric appliances may cause fire or human injury.
FCC RF INTERFERENCE STATEMENT
NOTE :
This equipment has been tested and found to comply with the limits for a Class B digital device, pursuant to Part 15 of the FCC Rules. These limits are designed to provide reasonable protection against harmful interference in a residential installation.
This equipment generates, uses and can radiate radio frequency energy and, if not installed and used in accordance with the instructions, may cause harmful interference to radio communications. However, there is no guarantee that interference will not occur in a particular installation.
If this equipment does cause harmful interference to radio or television reception which can be determined by turning the equipment off and on, the user is encouraged to try to correct the interference by one or more of the following measures.
- Reorient or relocate the receiving antenna.
- Increase the separation between the equipment and receiver.
- Connect the equipment into an outlet on a circuit different from that to which the receiver is connected.
- Consult the dealer or an experienced radio, TV technical for help.
- Only shielded interface cable should be used.
Finally, any changes or modifications to the equipment by the user not expressly approved by the guarantee or manufacturer could void the users authority to operate such equipment,
Safety Precautions
Power
Always obey all safety messages.
- All the safety and operating instructions should be read before the product is operated. If anything strange happens, unplug this product from the wall outlet.
- Do not disassemble or replace any parts of the monitor. Refer to a qualified service personnel for repair.

WARNING
You can be killed or seriously injured if you do not follow instructions.
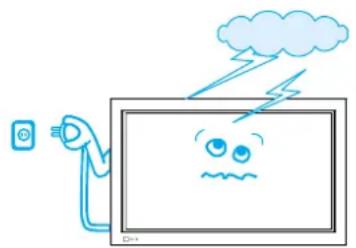
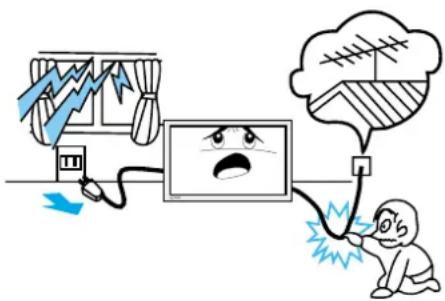
During a lightning storm, or when it is left unattended and unused for a long period of time, unplug it from the wall outlet.
It can result in fire.
natural_image
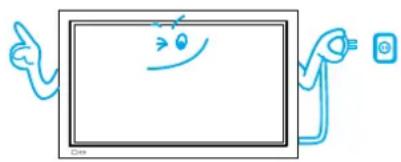
Cartoon illustration of a person holding a phone with a cloud and lightning bolt above, next to a distressed face (no text or symbols)When unplugging your monitor, always grip plug firmly and pull straight out from the receptacle.
It can result in fire or electric shock due to a damaged power cord.
natural_image
Cartoon illustration of two hands pointing at a blank rectangular board with a smiling face (no text or symbols)This product must be properly grounded.
- Improper grounding may cause malfunction or electric shock.
- When proper grounding is not possible, install circuit breaker.
- Do not ground to gas pipe, water pipe, lightning rod, and telephone line.
natural_image
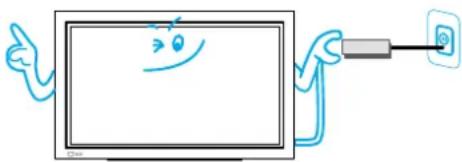
Cartoon illustration of a smiling computer monitor with hands pointing at it and a connected screen (no text or symbols)During a lightning storm, unplug the monitor from the wall outlet, and do not touch the antenna.
It can cause fire or electric shock.
Installation
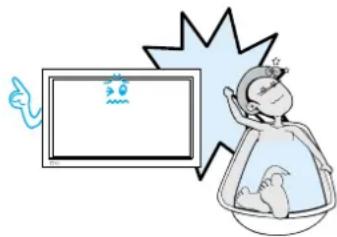
Do not use this product in the neighborhood of a bath or shower.
It can result in electric shock or fire.
natural_image
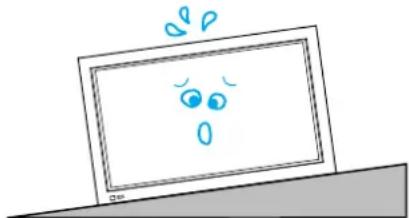
Illustration of a child in a bowl looking at a blank sign with a water droplet and starburst background (no text or symbols)Do not place this monitor on an unstable cart, stand, or table
It may cause the product and cart to overturn, damaging equipment or causing possible injury.
natural_image
Simple line drawing of a cartoon face on a laptop with sweat drops above (no text or symbols)
natural_image
Two dandelion seed heads against a soft blue sky background (no text or symbols)While Using Monitor
Do not open the cover (or back) because high voltage is present within the monitor's enclosure.
It may cause electric shock.
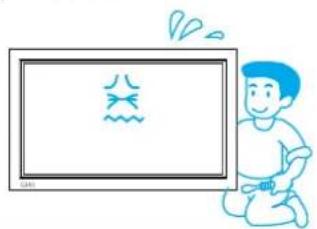
natural_image
Illustration of a child kneeling beside a blank screen with a small fish icon and water splashing (no text or symbols)Never push objects of any kind into this product through openings at the back of the monitor.
It may cause fire or electric shock.
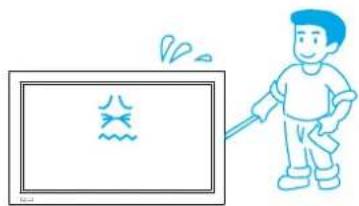
natural_image
Illustration of a person cleaning a rectangular board with a water splash symbol (no text or labels)No objects filled with liquids, such as vases, shall be placed on the monitor.
Spilled liquids may cause electric shock or fire.
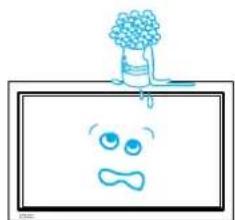
natural_image
Simple line drawing of a sad face with a broccoli head above it, no text or symbols present.Do not allow children to play or hang on the monitor.
These actions may tip it over, causing personal injury.
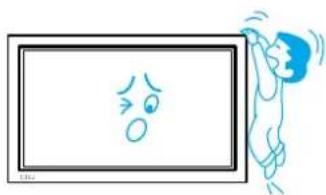
natural_image
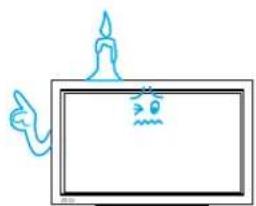
Simple line drawing of a surprised face inside a rectangular frame with a person climbing the side (no text or symbols)Do not place a candle or a lighted cigarette on the monitor.
If these fall into the inside of the monitor, it may cause a fire or explosion.
natural_image
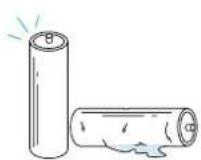
Simple line drawing of a cartoon character pointing at a screen with a flame above his head (no text or symbols)Do not disassemble batteries, and do not allow children to swallow them.
Heavy metal may contaminate environment, and can be harmful or detrimental to human health. (If children swallow the batteries, go to the hospital and consult with a doctor.)
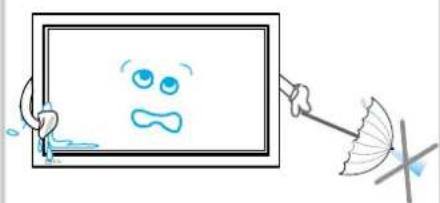
Do not spray water to the monitor or wipe with damp cloth.
It may cause electric shock or fire.
natural_image
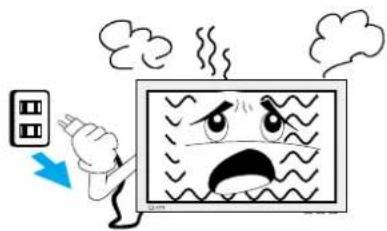
Cartoon illustration of a sad face inside a frame with a bird holding a feather, next to a bird in flight (no text or symbols)Unplug the monitor from the wall outlet when smoke or a strange smell occurs, then refer servicing to your a service personnel.
If continued to be used, it may cause fire or electric shock.
natural_image
Cartoon illustration of a person reacting to a distressed monitor with steam rising, next to an electrical outlet (no text or symbols)Safety Precautions
Power
Always obey all safety messages.
- All the safety and operating instructions should be read before the product is operated.
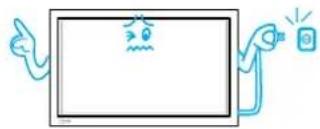
When moving your monitor, remove the power plug, antenna, and cables, and let at least two people move it by more than two people..
Failure to follow this instruction can result in electric shock or personal injury.
natural_image
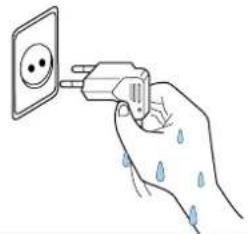
Cartoon illustration of a computer monitor with a surprised face and two hands pointing at it, next to a small phone icon (no text or symbols)Do not touch the power plug with wet hands when plugging or unplugging.
It can result in a risk of electric shock.
natural_image
Hand holding a power outlet plug with water droplets, no text or symbols present
CAUTION
You can be injured or this product or any other of your property can be damaged if you don't follow instructions.
Installation
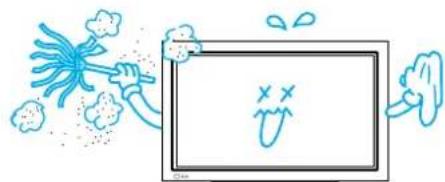
Do not install where there is oil, smog, moist, and dust
It may cause malfunction.
natural_image
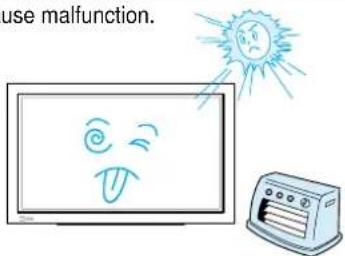
Illustration of a cartoon character with wings and cloud motifs, no text or symbols presentDo not install the product where it will be exposed to the direct sunlight, and the product should not be near heat sources such as radiators, stoves, etc.
It may cause malfunction.
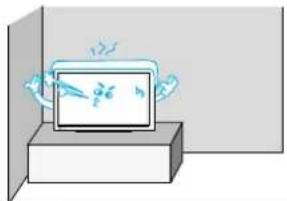
For proper ventilation, separate the product from the wall, and keep a distance of more than 10cm.
Due to the increase of temperature inside the Monitor, it may cause fire.
natural_image
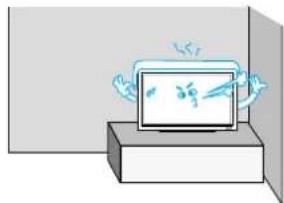
Illustration of a computer monitor with a cartoon character inside, no text or symbols presentDo not place the monitor where ventilation is not ensured.
Due to the increase of temperature inside the Monitor, it may cause fire.
natural_image
Illustration of a computer monitor with a screen showing abstract graphics, no text or symbols presentIf you wish to install this product on the wall or ceiling, refer to a professional.
Failure to do so may cause damage to the products and injury to human.

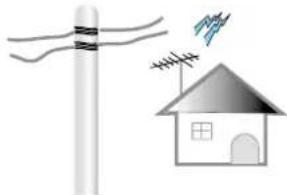
When using an outside antenna system, do not install it in the vicinity of overhead power lines.
When antenna touches such power lines, it may cause electric shock.
natural_image
Illustration of a utility pole with power lines and a house with antenna (no text or symbols)During Use

CAUTION
You can be injured or this product or any other of your property can be damaged if you do not follow instructions.
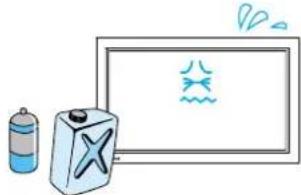
Do not wipe the monitor using a cloth damped with chemicals (benzene, thinner, etc.).
Monitor appearance may be marred. (Unplug the power plug and wipe with soft cloth.)
natural_image
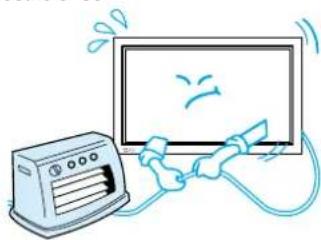
Illustration of a battery, a water drop meter, and a cartoon character on a white board (no text or symbols)Do not place heavy objects or heat sources on the power cord.
It may damage the power cord, causing fire or electric shock.
natural_image
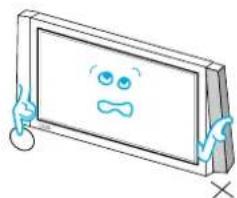
Illustration of a toaster connected to a monitor with sound waves, no text or symbols presentDo not grip speakers when moving the monitor attached with speakers.
When moving the monitor while gripping the speakers, the speakers may be fallen away from the monitor due to its weight, causing personal injury.
natural_image
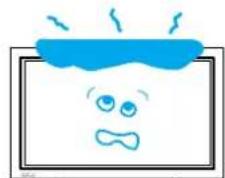
Cartoon illustration of a smiling computer monitor with arms and legs, holding a small object (no text or symbols)Do not place any object or cover on the monitor.
In an event of improper ventilation, the monitor will be overheated causing fire.
natural_image
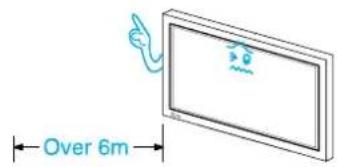
Cartoon illustration of a sad face on a computer monitor with steam rising above (no text or symbols)When watching the TV, the distance between the Monitor screen and your eye should be as 5\~7 times far as the diagonal distance of the Monitor.
Watching the TV for a long time may hurt your eye sight.
When cleaning of the inside of the monitor is required, consult to the qualified service personnel.
When the monitor is not cleaned for a long period of time, dust in it may cause fire or malfunction.

natural_image
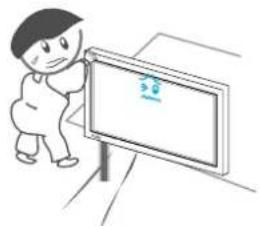
Cartoon character wearing a helmet and holding a backpack, depicted in dynamic motion (no text or symbols)When the monitor is placed on a cart or table, the front side of the Monitor should not project outward.
Unbalance may cause the monitor to drop, resulting in personal injury or equipment malfunction and damage.
natural_image
Cartoon illustration of a person standing next to a whiteboard with a blue icon (no text or symbols on the board)Checking Accessories

Note
* Check to be sure that the following items are packed with your Monitor.
* You require a scart to A/V cable in the U,K.
Supplied Accessories
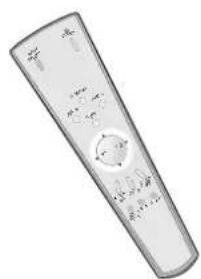
Remote Control
1 UNT
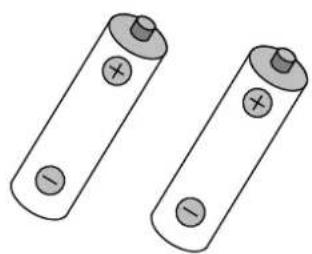
Batteries (AAA)
2 UNITS
natural_image
Two cylindrical batteries with battery caps and negative terminals, shown side by side (no text or symbols)Audio Cable
1 UNT
natural_image
Coiled cable with multiple connectors (no text or symbols visible)PC(15pin) Cable
1 UNT
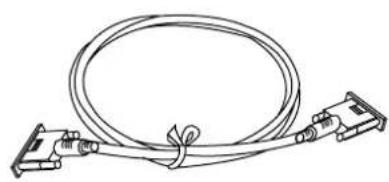
natural_image
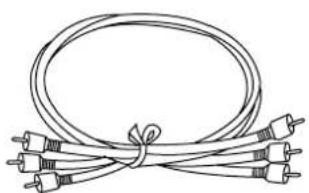
Pure diagram of a coiled cable or wire between two connectors (no text or symbols)A/V Cable
2 UNITS
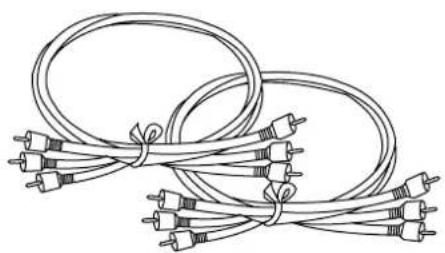
natural_image
Illustration of multiple bundled electrical cables with terminal connectors (no text or symbols)AC Cable 1 UNIT
natural_image
Two dandelion seed heads against a soft blue sky background (no text or symbols)
Note
Optional Accessories
The following items are optional accessories. Refer purchasing optional accessories from Daewoo Electronics Local Dealer or the dealer from where you purchased the unit.
Speakers
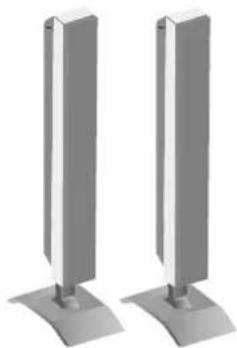
natural_image
Two identical gray vertical bars with base supports, no text or symbols visibleDSP-SP20/SP21/SP22
- Speaker Main Unit
Dimension : 100(W) x 628(H) 83(D)mm - Including Speaker Stand
Dimension : 170(W) x 729(H) x 194(D)mm - Audio Amplifier : 8W + 8W
- Impedance : 8Ω
- Weight : 7.5kg
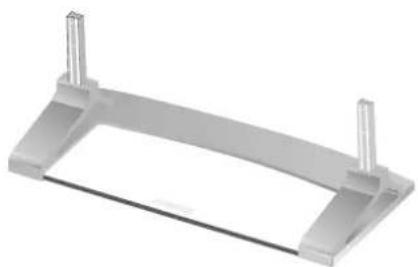
Table Top Stand
natural_image
3D rendering of a gray metal bracket with two vertical posts (no text or symbols)DSP-ST20/ST21/ST22
- Dimension : 667(W) x 238(H) x 320(D)mm
- Weight : 7kg
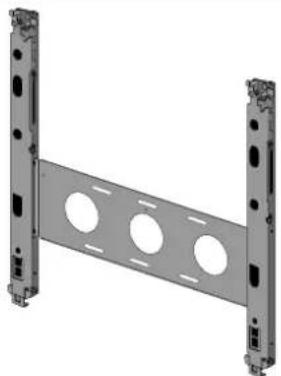
Wall Mounting Unit
natural_image
Metal structural frame with three circular holes and vertical supports (no text or symbols)DSP-HG10
- Variable Angles: 0^ , 10^ , 15^ , 20^
Speaker Main Unit - Dimension : 601(W) x 592(H) x 35(D)mm
Including Stand - Weight : 4.5kg.
CONTENTS

PREPARATION
4 • Safety Precautions
12 · Panel Controls
13 • Remote control

BASICS
14 • Installation Instructions
15 • Connecting Speaker to PDP

CONNECTION
16 • Connecting PC

APPLICATION
20 • Selecting Auto Picture Mode
22 • Adjusting Screen Size
24 • Adjusting Screen Position and Size
26 • Enlarging Screen Size
28 • Watching a Still Image
29 • Adjusting Auto Sound Mode
30 • Customizing Sound Mode
32 • Selecting MENU Background Screen and Languages
44 • Setting Sleep Timer

MISCELLANY
35 • Before Requesting Service
36 • SPECIFICATIONS
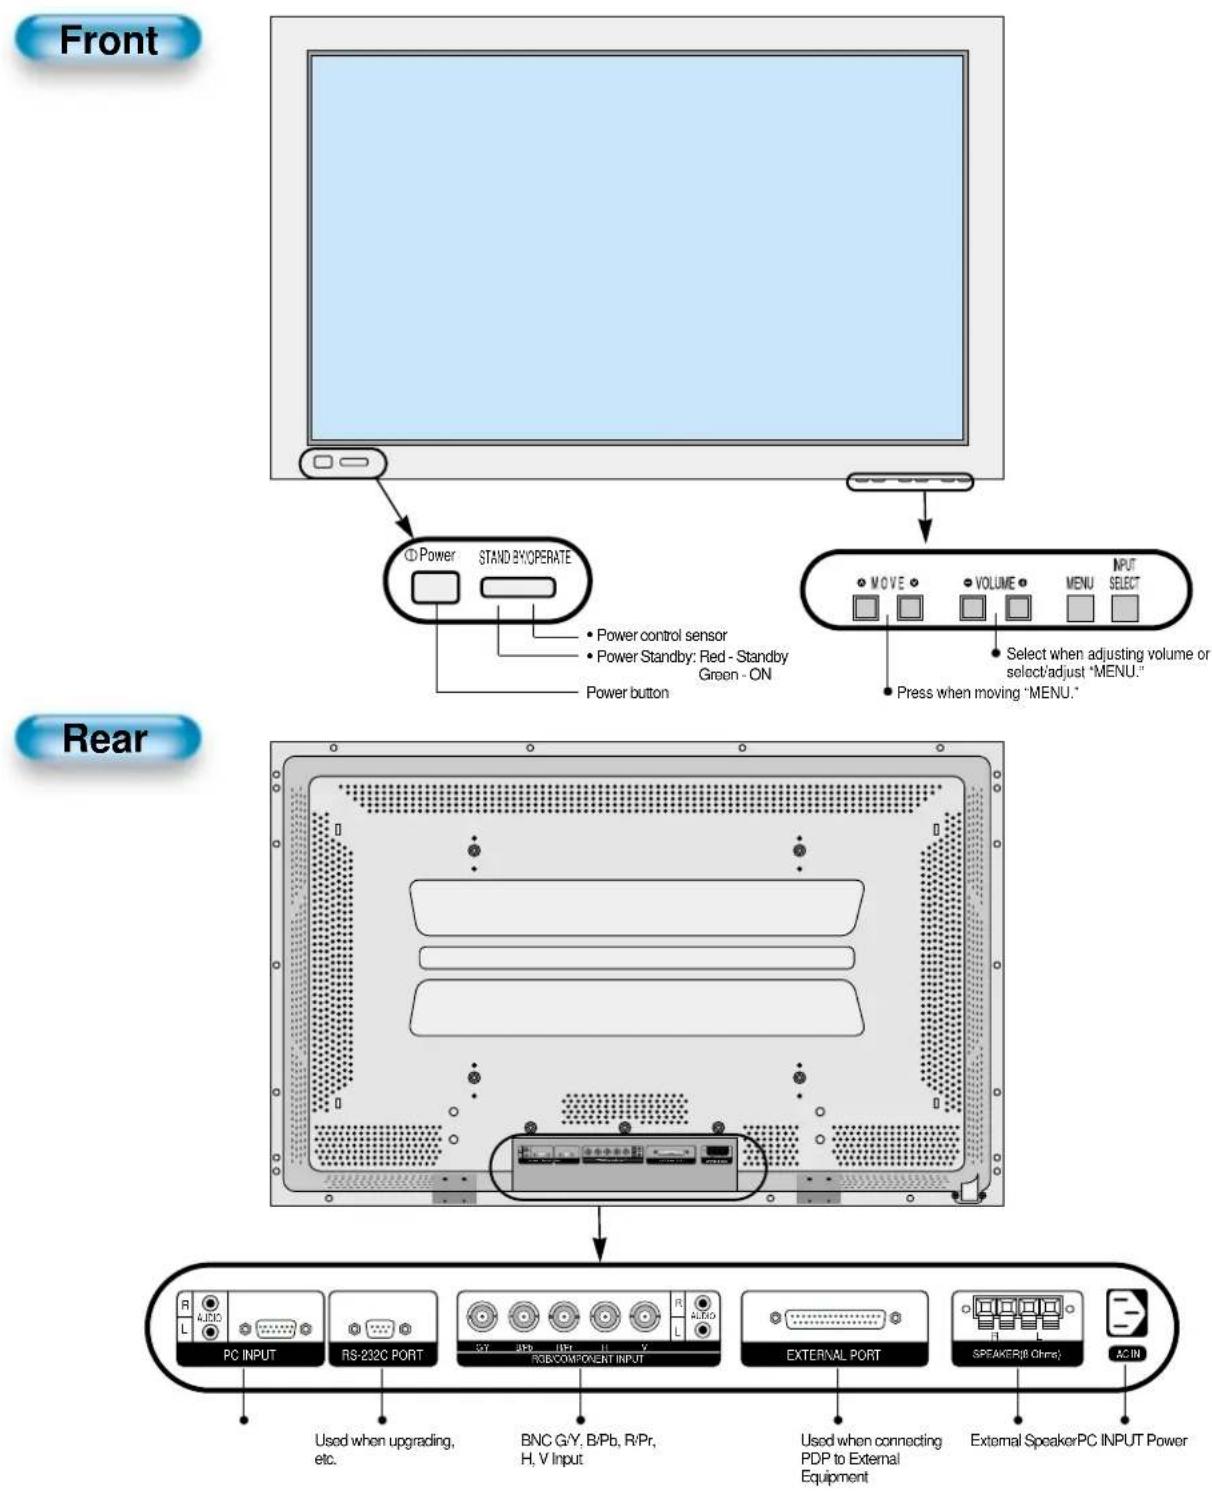
Panel Controls

* Parts having same names in Plasma Display and Remote Control would function in exactly the same way.
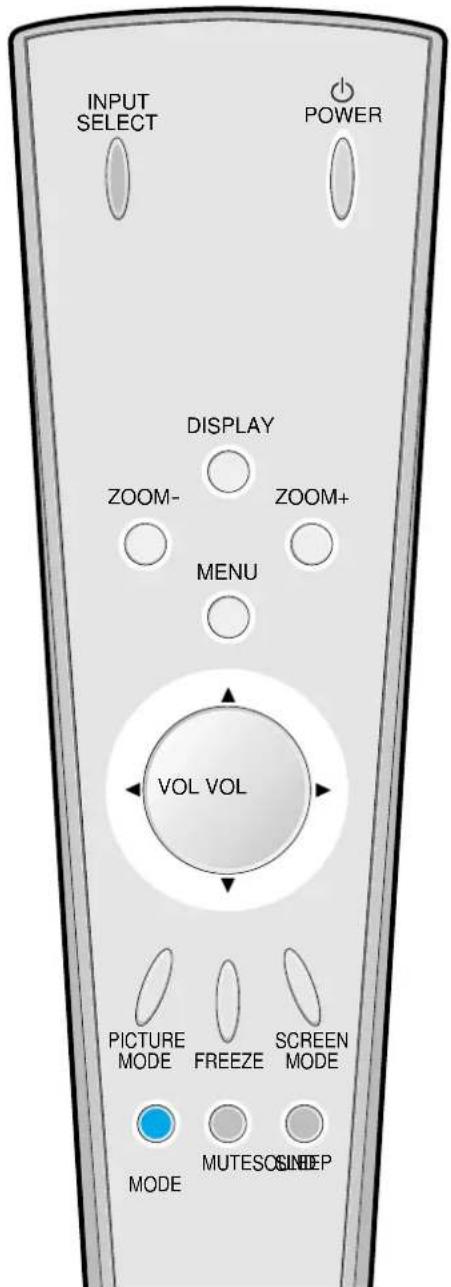
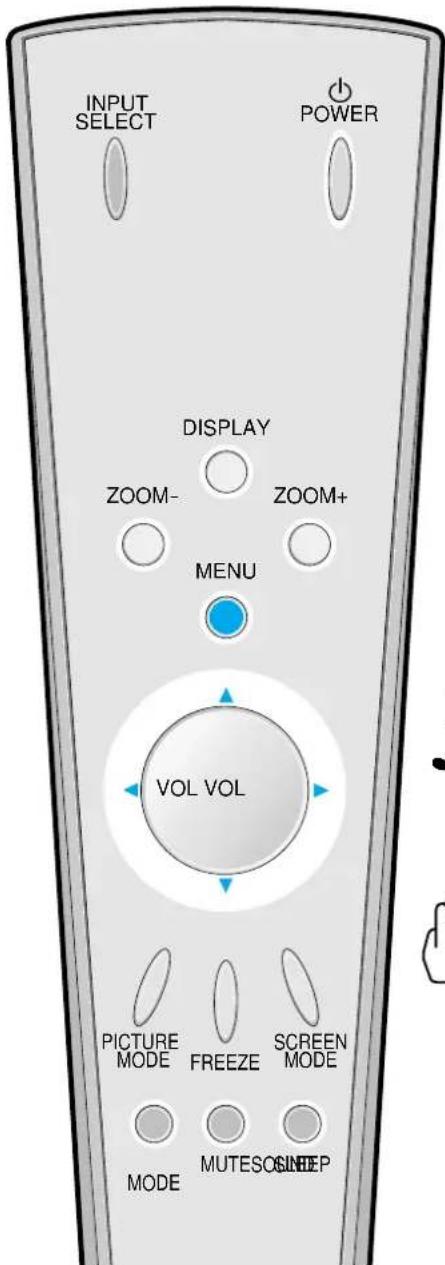
Remote Control
* The number in ( ) indicates the page in which the function of each button is explained in detail.

Note
- Use two "AAA" batteries.
- Be sure to use replacement batteries of the same type as the original ones.
- The life of a battery depends on how much it has been used.
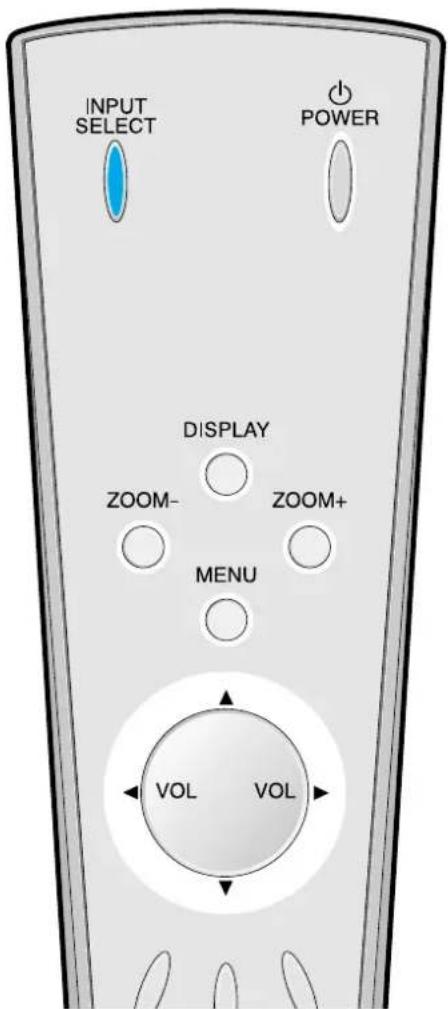
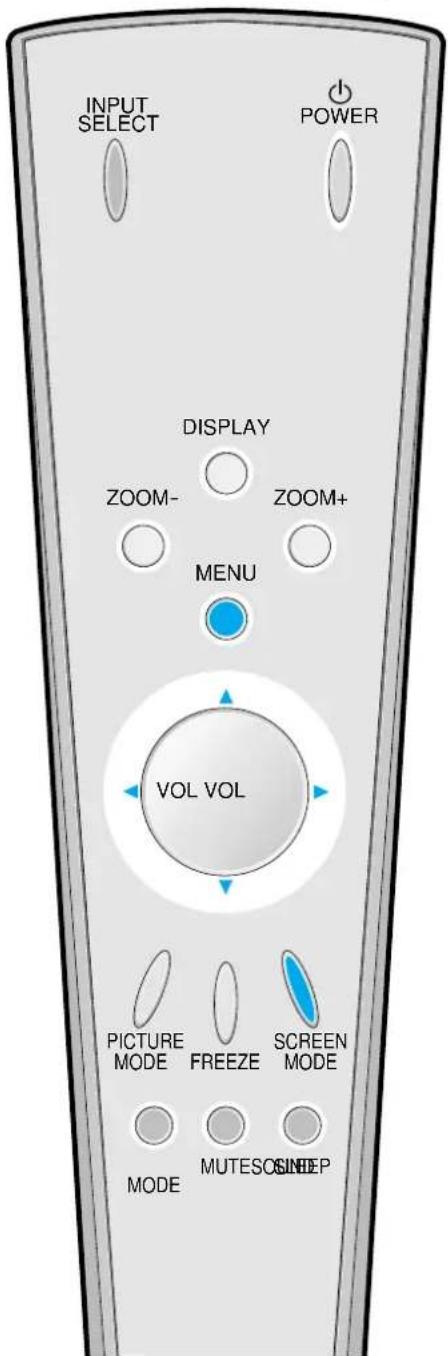
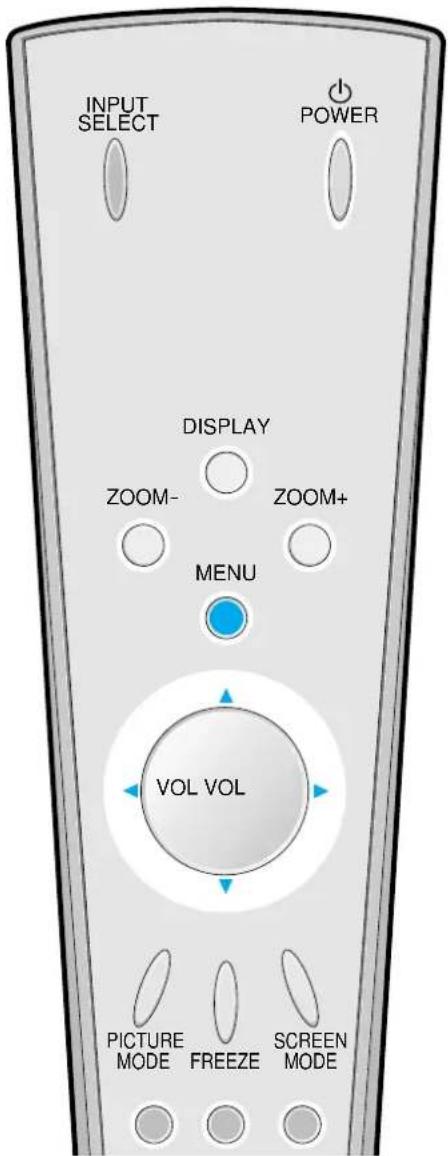
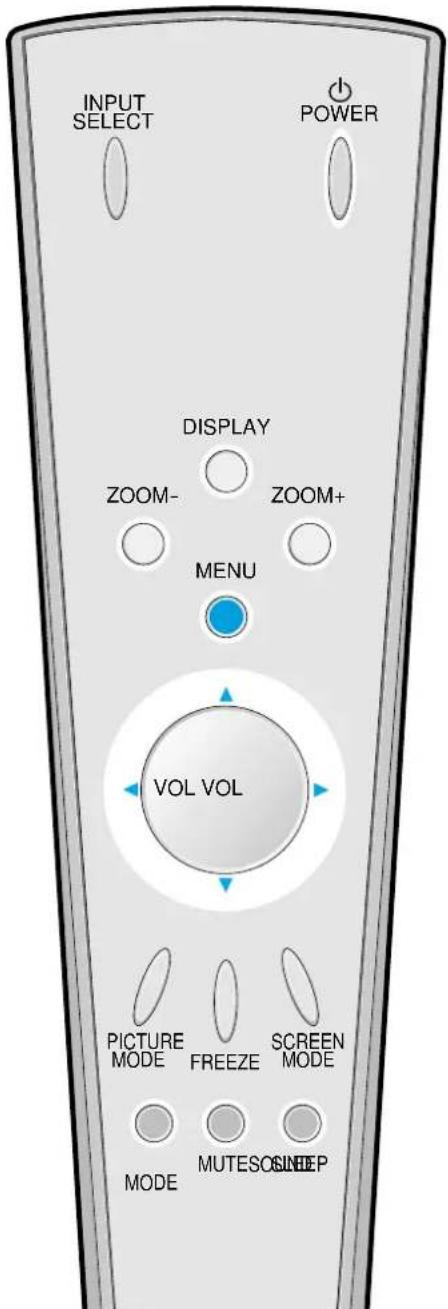
Input Select button
Used to select a desired input. Every press of the button cycles through the five different modes: PC --> Component 1(RGB H/V) --> Component 1
ZOOM button
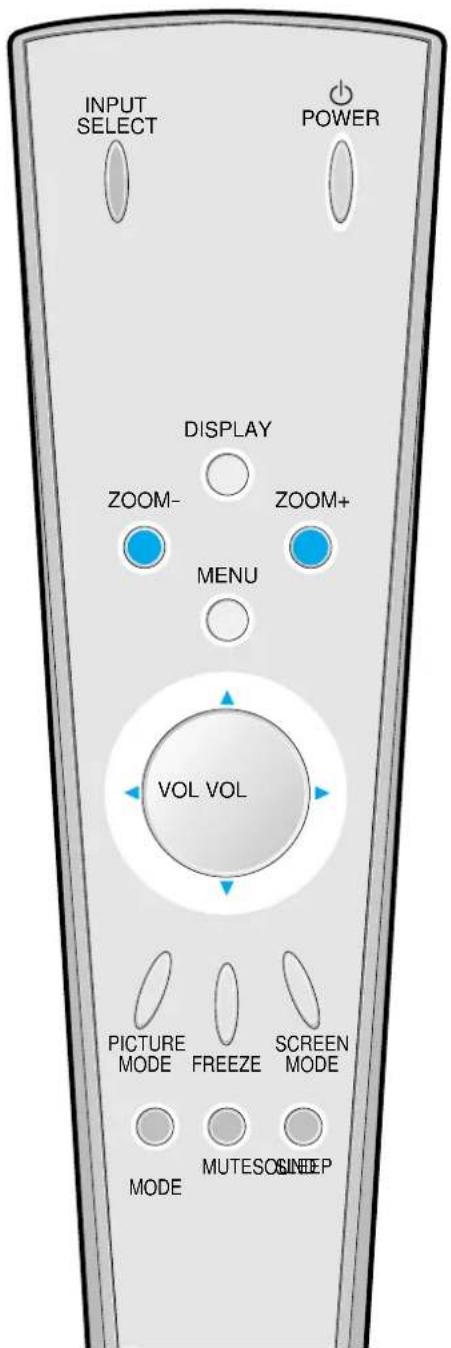
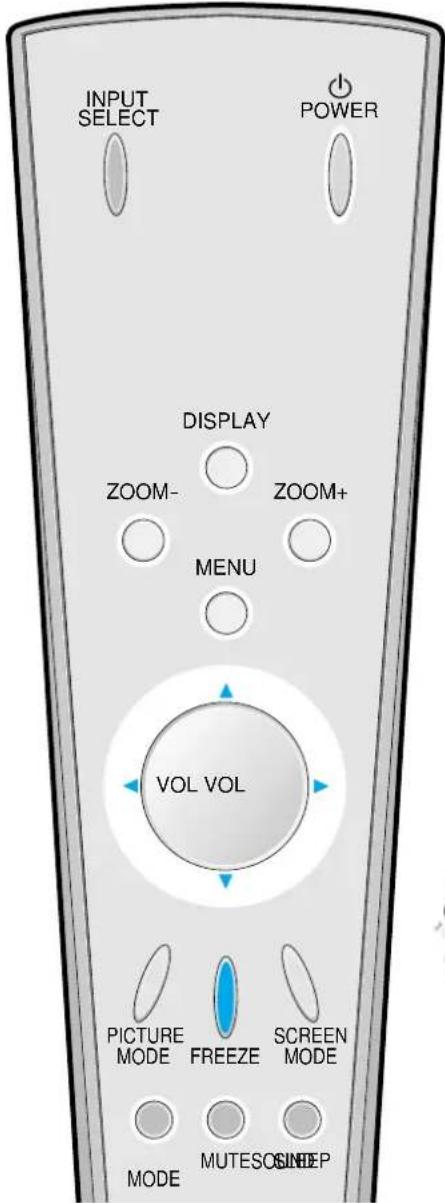
Used to zoom the screen. To enlarge, press the (+) button, and to return to the previous condition, press the (-) button. (ZOOM Mode: Zoom 0\~20)
Menu Select button
Select Menu by pressing (Up), ▼ (Down), ◀(Left), ▶(Right) buttons.
Screen Select button
Every press of the button cycles through the four different modes: Normal --> Dynamic --> Cinema -> User.
Sound Mode button
Every press of the button cycles through the five different modes: Normal -->Movie -->Music -->News -->User.
Mute button
Mutes sound.
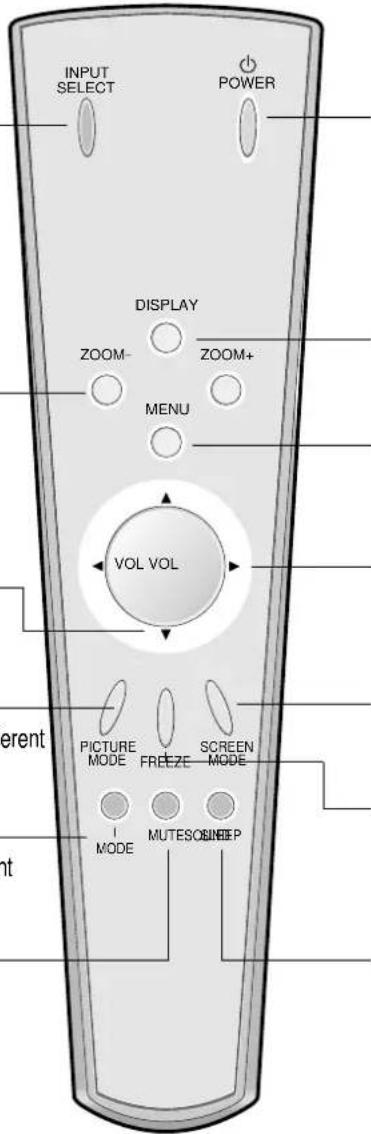
Power button

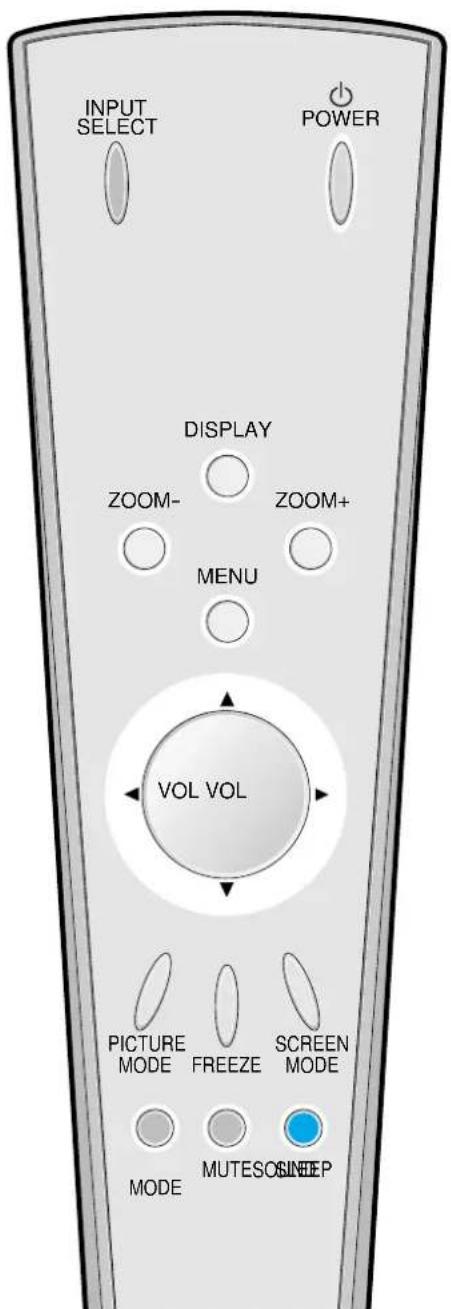
Pressing the Power button of the Monitor allows the Display to be in standby. (Red light is shown in the Remote Control Sensor.) At this time, if you press the Power button of the Remote Control, the Display is turned ON (Green light in the Sensor).
Display button

Indicates the current state and resolution.
Menu button

Used to display a desired menu.
Volume button

Adjusts the volume.
Aspect Ratio

Adjusts the size of the screen (Normal, 16:9, etc.)
Still

Used to view a still picture during watching moving images. (Sound can be heard.)
Sleep Timer

Each time you press this button, a different input mode appears.
The sequence is as follows: 15 Min. -->30 Min. -->60 Min. -->90 Min. -->120 Min. -->OFF After the time is selected, it automatically goes standby when the selected time elapsed.
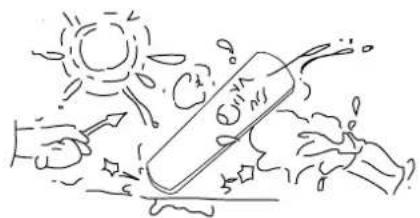
■ When Using Remote Control:
- Be sure not to allow the Remote Control to drop or to become wet.
- Keep it away from hot or moist locations.
natural_image
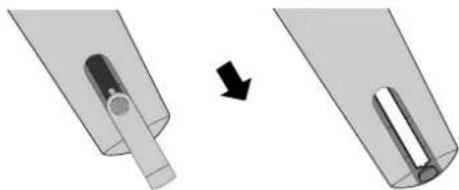
Hand-drawn sketch of a sun and clouds with a pencil, no text or symbols present■ Installing the Batteries in your Remote Control:
- To remove the cover, slide it outwards while pressing it down.
- Place two batteries in the remote control by properly orienting them, then close the cover.
natural_image
Diagram showing a mechanical component being cut with an arrow indicating rotation (no text or symbols present)Installation Instructions
When Using the Stand
* When installing PDP Main Unit, be sure it is done by more than 2 professionals.
* For detailed installation information, refer to the User's Manual, "STAND".
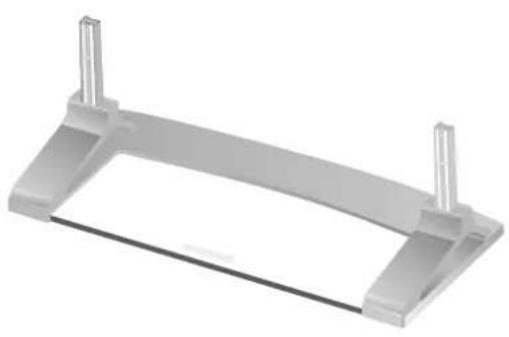
1 Take out the STAND from the package.
natural_image
3D rendering of a gray plastic mechanical bracket with two vertical posts (no text or symbols)2 Smoothly fit the Stand to the Plasma Display Panel
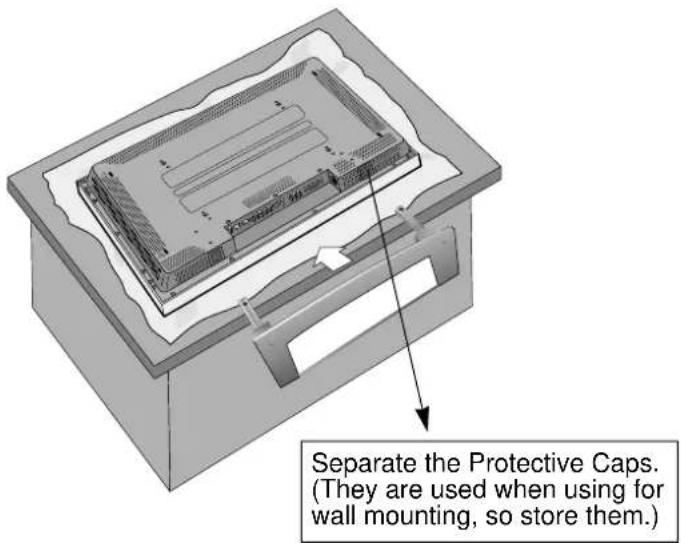
3 Engage the assembled stand with 4 screws (M5) enclosed.
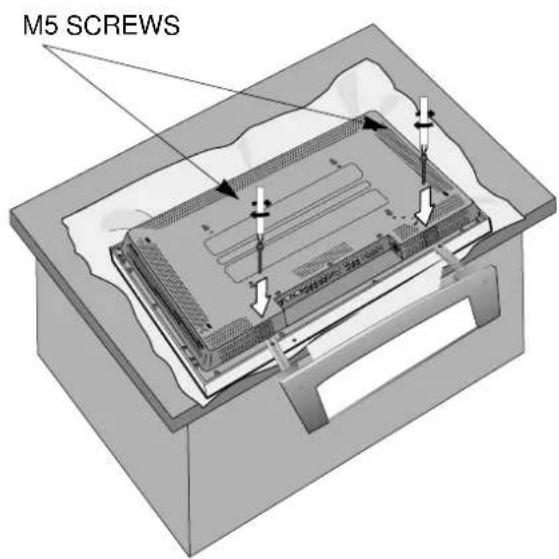
4 Erect the Display
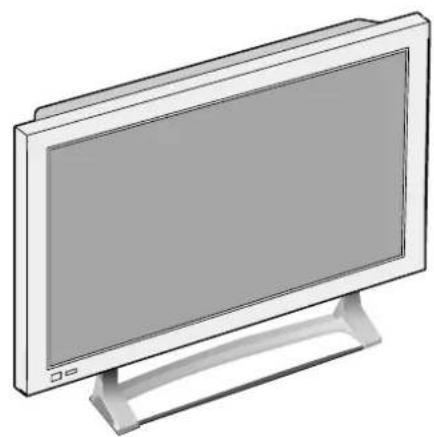
natural_image
Illustration of a flat-screen computer monitor with a blank screen and support bracket (no text or symbols)(Assembled Picture)
Connecting the Speaker to the PDP
1 Connecting the Speaker to the Stand
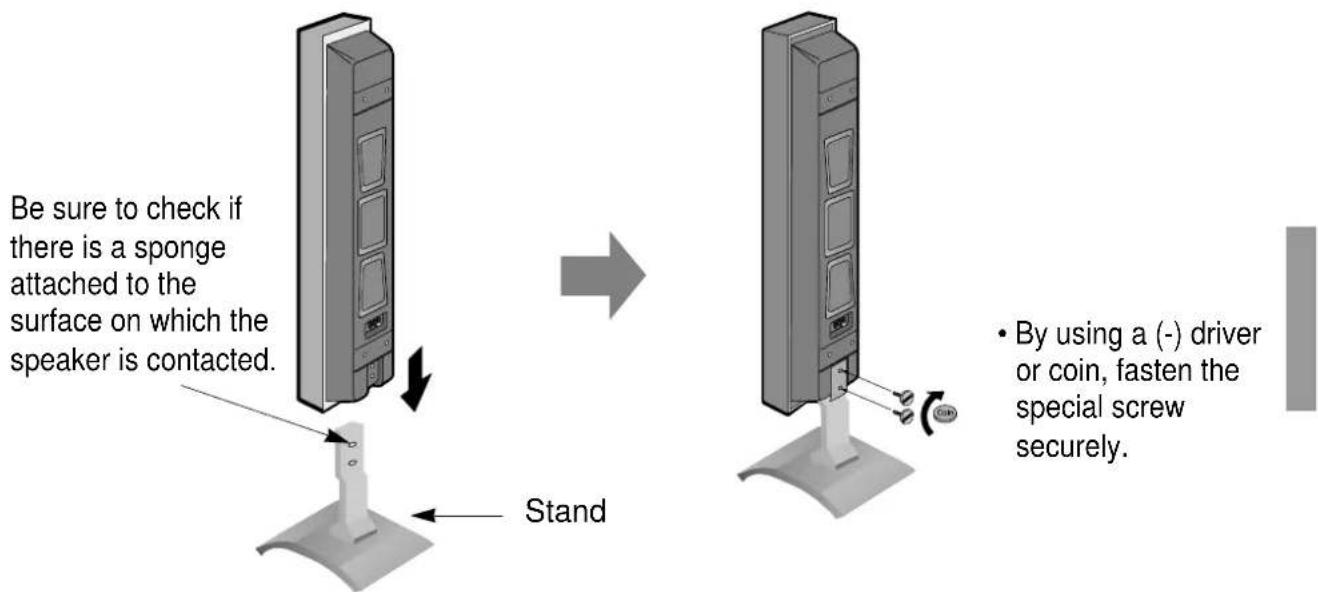
2 Connecting the Speaker Cable
- Connect one set (two cables) of the cable to the terminals on the back of the speaker in the way that red cable is for (+) terminal and black cable for (−) terminal.
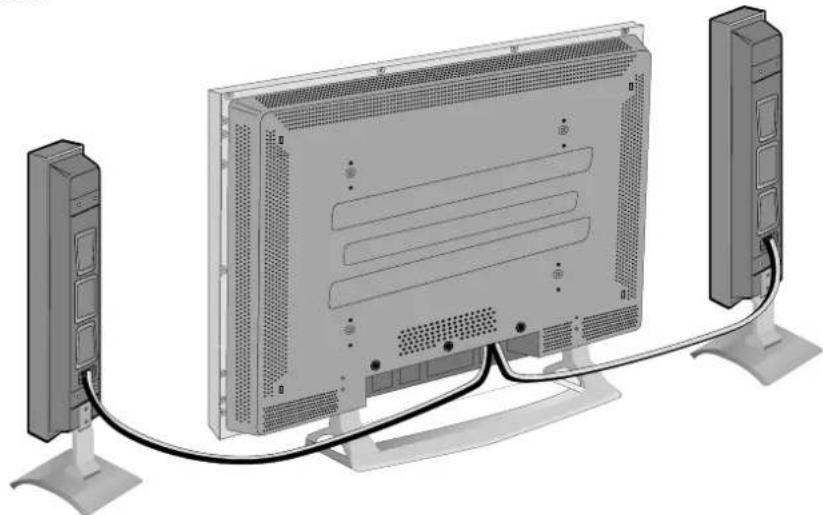
natural_image
Diagram of a flat-screen TV with two monitors connected by cables (no text or symbols visible)Connecting PC
Connecting PC
• DAEWOO PLASMA supports resolution of VGA, SVGA, XGA, SXGA, UXGA.
- Before connecting a PC to the PDP, be sure to adjust the resolution of PC.
- This product is not supported by Plug and Play, so select Standard Monitor when setting PC monitor.
1
Before connecting to the PDP, set the resolution of the PC.
- Go to SETUP-CONTROL PANEL-DISPLAY PROPERTIES in Window Screen.
- Choose the SETTINGS tab in the DISPLAY Menu.
- In the SETTINGS Menu, select 640x480 or 800x600.
2 Connect the PC to the PDP. • Prepare the PC cable (D
- Prepare the PC cable (D-sub 15pin) and the PC audio cable(Sold separately).
- Connect the PC(Output) to the PDP(Input) as shown below.
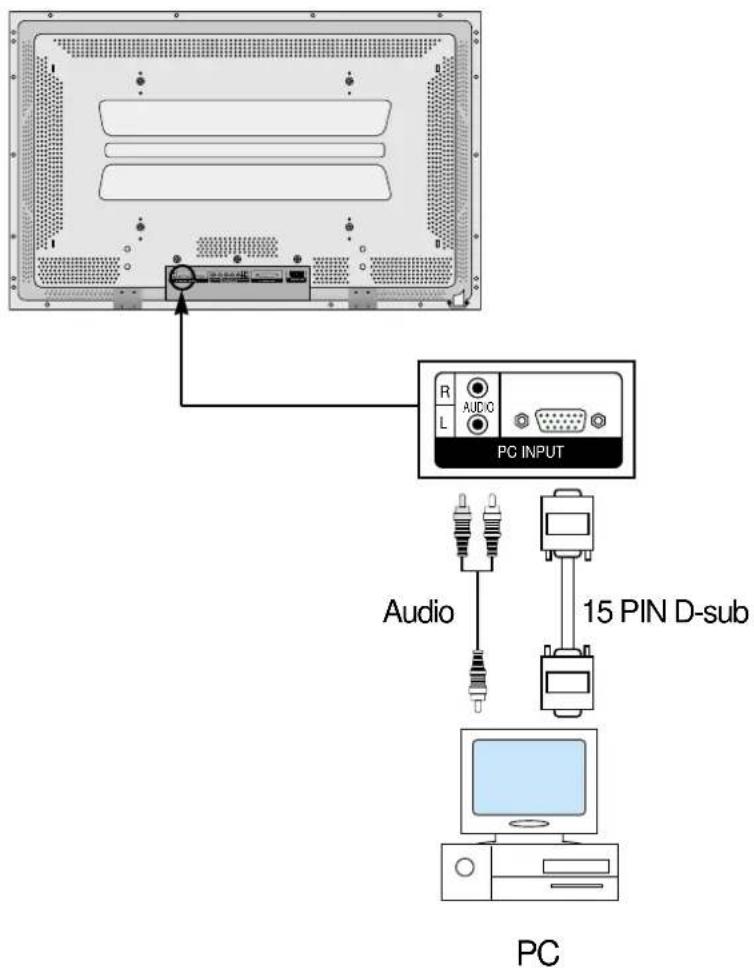
3 Press the Power button. • Turn on the PDP a
4 Input Select
INPUT SELECT
- Select [PC] by pressing the INPUT SELECT button of the Remote Control or PDP unit.
• Each time you press the INPUT SELECT button, a different input mode appears. The sequence is as follows:
PC --> Component 1(RGB H/V) --> Component 1.
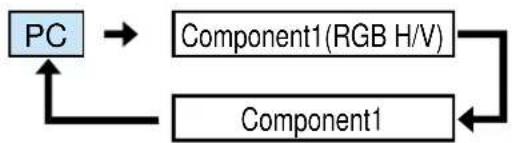
flowchart
graph TD
    PC["PC"] --> Component1(RGB H/V)
    Component1 --> Component1
    Component1 --> PC
5
Enjoy Dynamic Ultra Screen Monitor by Using PC's Keyboard or Mouse.
NOTES:
• The resolution of the PC monitor is best at 640 x 480 (VGA).
- If there is a [Vertical Frequency] setting menu in the [Display] Menu of the PC, adjust the frequency to 60Hz.
- If the PC resolution is too high, it may be hard to read letters. Select a suitable resolution.
PC Input Resolution Available in PDP
| Resolution | Horizontal Frequency(KHz) Vertical Frequency(Hz) Remark | ||
| 640x350 | 31.469 | 70.1 | IBM |
| 37.861 | 85.1 | VESA | |
| 640x400 | 24.823 | 56.4 | NEC |
| 30.48 | 60.0 | PGA | |
| 31.469 | 70.1 | IBM (DOS) | |
| 37.861 | 85.1 | VESA | |
| 640x480 | 31.469 | 59.9 | DOS |
| 35 | 66.7 | Macintosh | |
| 37.861 | 72.8 | VESA | |
| 37.5 | 75.0 | VESA | |
| 39.375 | 75.0 | IBM | |
| 43.269 | 85.0 | VESA | |
| 720x400 | 31.47 | 60.1 | VGA |
| 31.469 | 70.1 | IBM | |
| 37.927 | 85.1 | VESA | |
| 720x480 | 31.54 | 60.0 | 480P |
| 720x576 | 15.63 | 25.0 | PAL |
| 800x600 | 35.156 | 56.3 | VES |
| 35.16 | 57.2 | VESA | |
| 37.879 | 60.3 | VESA | |
| 48.077 | 72.2 | VESA | |
| 46.875 | 75.0 | VESA | |
| 53.674 | 85.1 | VESA | |
| 832x624 | 49.726 | 74.0 | Macintosh |
| 1024x768 | 48.193(48.077) | 59.3(59.8) | Macintosh (OAK) |
| 48.363 | 60.0 | VESA | |
| 53.95 | 66.1 | XGA | |
| 56.476 | 70.1 | HP & VESA | |
| 60.241 | 74.9(74.6) | Macintosh | |
| 60.023 | 75.0 | VESA | |
| 68.677 | 85.0 | VESA | |
| 80.66 | 100.0 | Fujitsu | |
| 70.84 | 84.0 | SUN | |
| 1152x864 | 54 | 60.0 | VAX |
| 63.851 | 70.0 | VESA | |
| 67.5 | 75.0 | VESA | |
| 77.094 | 85.0 | VESA | |
| 1152x900 | 61.796 | 66.0 | SUN |
| 71.713 | 76.0 | SUN | |
| 1280x720 | 45 | 60.0 | 720P |
| 1280x960 | 60 | 60.0 | VESA |
| 75 | 75.0 | VESA | |
| 85.938 | 85.0 | VESA | |
| 1280x1024 | 46.433 | 43.4 | VESA |
| 63.981 | 60.0 | VESA | |
| 70.66 | 66.5 | VAX | |
| 74.88 | 70.0 | NEC | |
| 78.125 | 72.0 | HP & HITA | |
| 78.855 | 74.0 | Sony & NEC | |
| 79.976 | 75.0 | VESA | |
| 81.13 | 76.1 | SUN | |
| 91.416 | 85.0 | VESA | |
| 1600x1200 | 62.5 | 48.0 | VESA |
| 75 | 60.0 | VESA | |
| 81.25 | 65.0 | VESA | |
| 87.5 | 70.0 | VESA | |
| 93.75 | 75.0 | VESA | |
| 100 | 80.0 | VESA | |
Selecting Auto Picture Mode
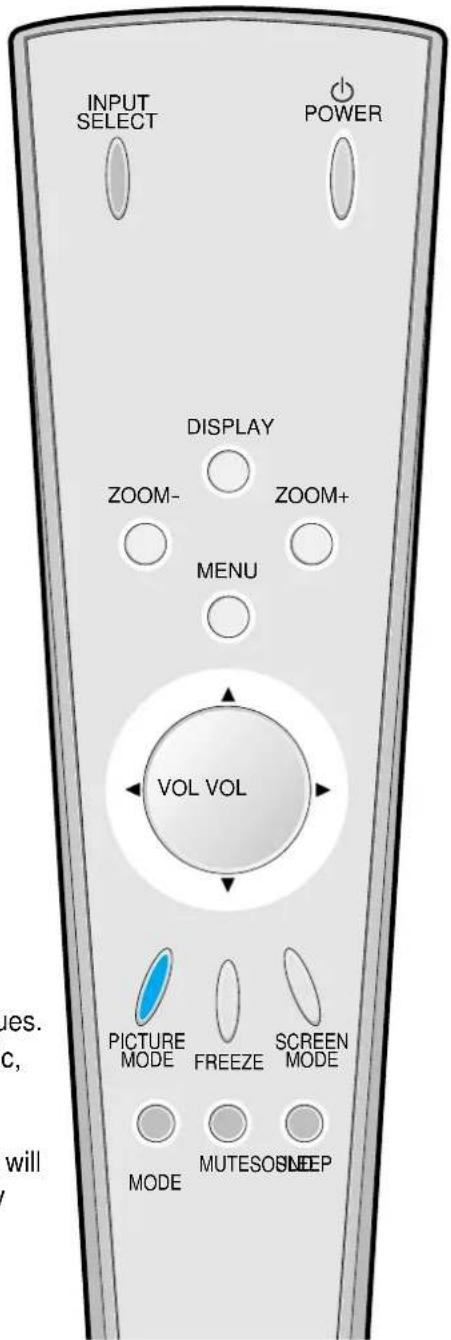
1 Selecting Picture Mode

PICTURE MODE
- Press the [PICTURE MODE] on the Remote Control.
- Pressing the [PICTURE MODE] first time will display the current PICTURE MODE.
Each Press of the Button Will Select One of Four Picture Modes.


PICTURE MODE
• Each time you press the button, a different Picture mode appears. The sequence used is as follows:

* Normal : For a highly defined image in a normally bright room
* Dynamic: For a clear-cut image emphasizing high contrast for sports viewing
* Cinema: For a movie
* User: Allows the user to customize settings as desired.
2 Menu on the Screen Will Disappear.
• After selecting a desired Picture mode, the menu on the screen will disappear.
- Normal, Dynamic, and Cinema Modes are factory preset values.
If you want to customize the Picture modes, refer to the following page.

NOTES:
- Normal, Dynamic, and Cinema Modes are factory preset values.
- When adjusting sub-menus while you are in Normal, Dynamic, and Cinema Modes, the Picture Mode will be automatically converted to User Mode, and the adjustments will be made.
- Pressing of the [INITIALIZATION] button in the [Utility] Menu will allow for the Brightness, Contrast, etc. to return to the factory preset values.
• The SHARP Menu adjusts the picture sharpness. - Adjusting the Colour Temperature makes the mood warm or cold.
Selecting Auto Picture Mode
- Select the Picture modes that are automatically set depending on the kinds of pictures, and enjoy them.
Customizing Picture
Customizing Picture
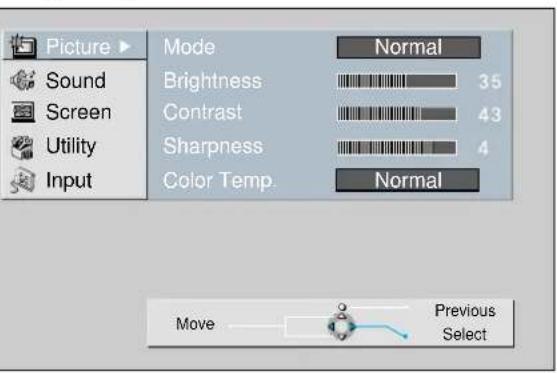
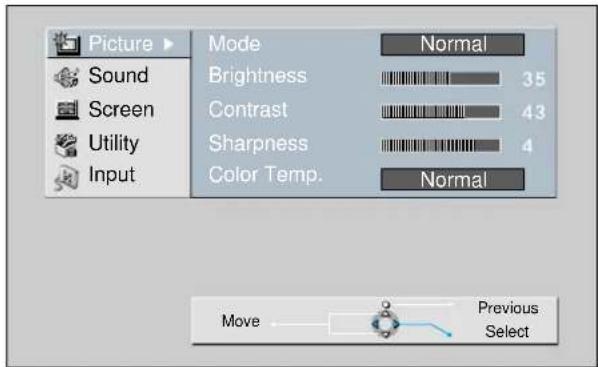
• You can adjust the colour tone and brightness to your preference.
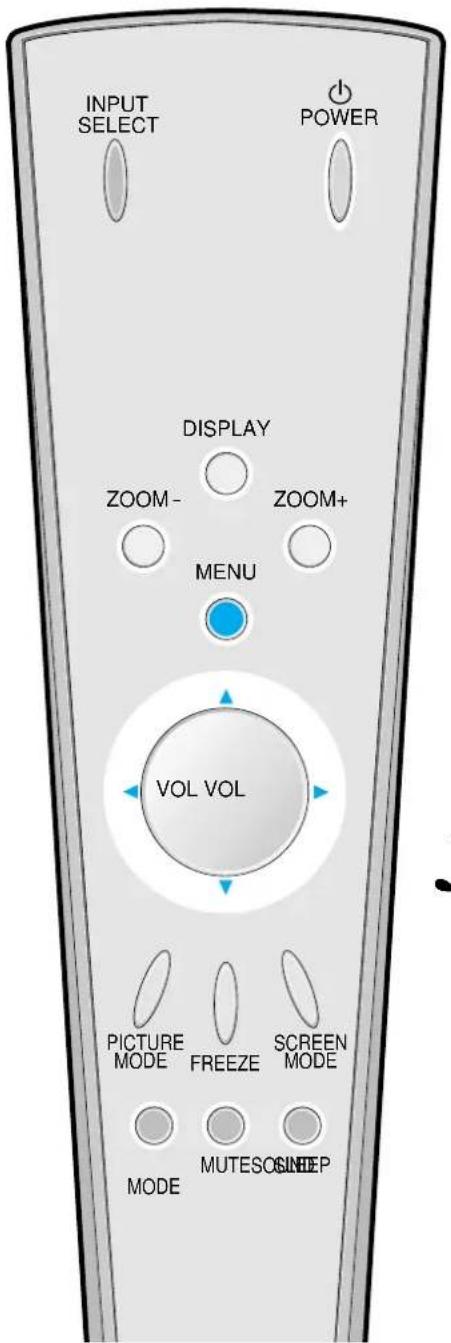
1 Press the MENU Button. • The MENU shown
MENU

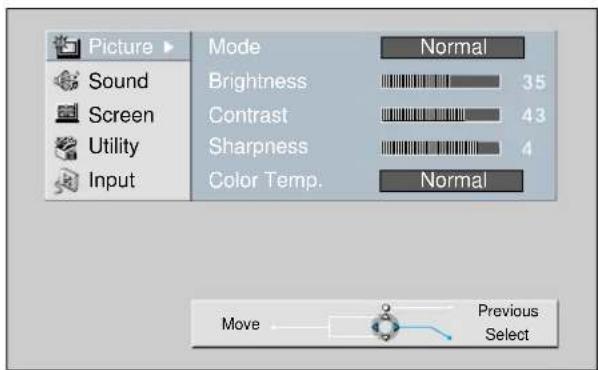
- The MENU shown below will display on the screen.
2 Press the ▲Button. • After selecting [F]
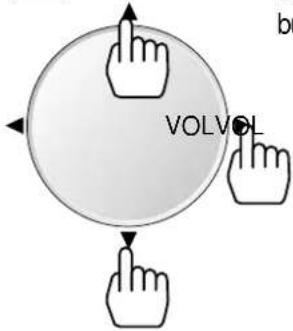
- After selecting [Picture] by the ▲buttons, press the button that will display the following.
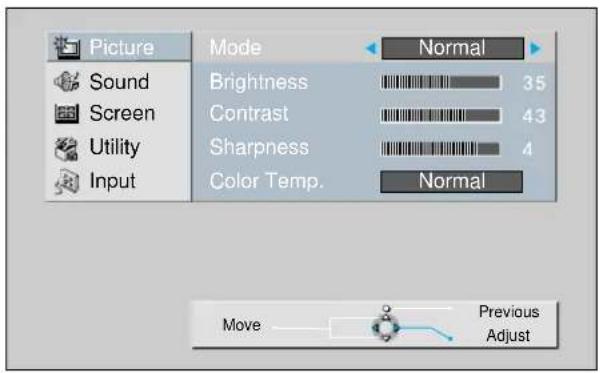
3 Select the Custom Mode. • Select [User] by the
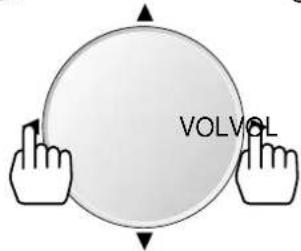
- Select [User] by the 🔊 buttons.
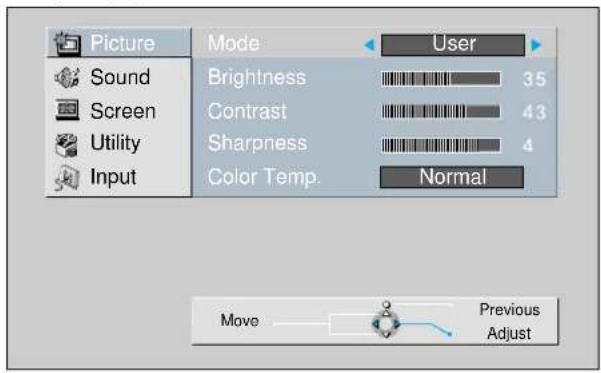
4
Select User Mode Adjustments
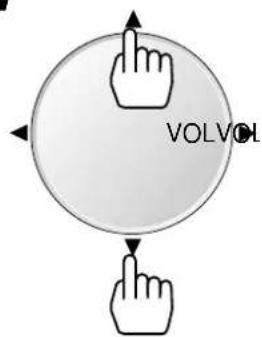
- While you are in [Picture Mode - User], press the ▲/▼ buttons to select a specific adjustment item.
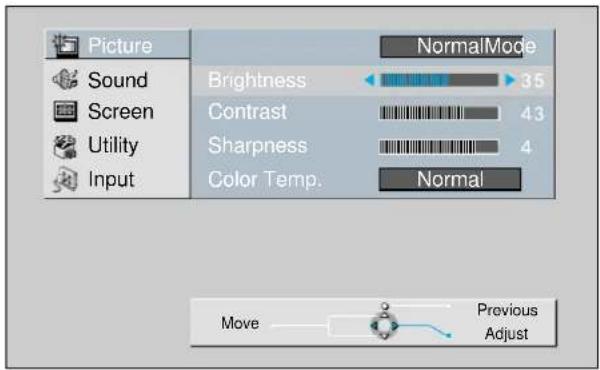
5
Picture Condition Adjustments
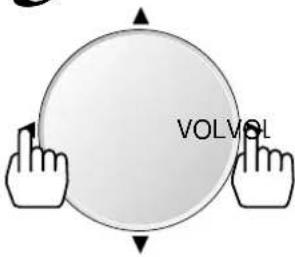
- Press the ◀ buttons to adjust the picture of your preference.
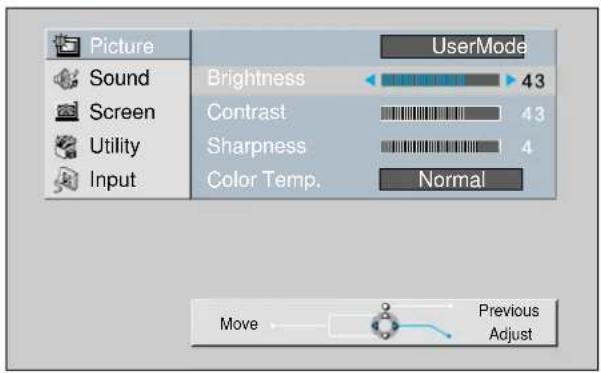
NOTES:
- While you are in the PC INPUT mode, you can only adjust brightness, contrast, sharpness and colour temperature.
- When you adjust Brightness, Contrast, Colour, Tint in the PC mode, the picture is adjusted finely.
- The adjusted Values are memoried in each mode separately.
Adjusting Screen Size
Adjusting Screen Size
• You can adjust screen size or aspect ratio as desired.
1 Press the SCREEN MODE Button. Each time you press the SCREEN

SCREEN MODE
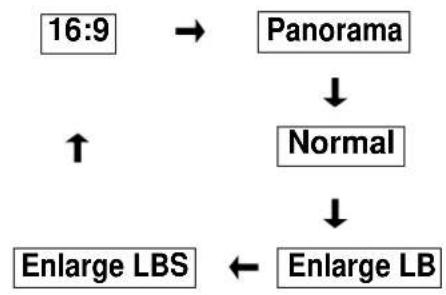
• Each time you press the SCREEN MODE button on the Remote Control, a different SCREEN MODE appears. The sequence used is as follows: • The MENU shown below will display on the screen.
1) Component 1 select and DVD Input.
flowchart
graph TD
    A["16:9"] --> B["Panorama"]
    B --> C["Normal"]
    C --> D["Enlarge LB"]
    D --> E["Enlarge LBS"]
    E --> F["↑"]
2) Component 1 select and DTV Input.

3) PC select.


NOTES:
- When the INPUT SIGNAL is DTV [COMPONENT 1], only the aspect ratios of 16:9 and 4:3(Normal) will be applied by Input signal. Etc) If input signal is 16:9, PDP displays in 16:9 mode.
- The digital broadcasting (720p, 1080i) is fixed at the aspect ratio of 16:9.
- Displaying a picture in a normal mode (4:3) for a long time may cause phosphor of the PDP to be burned. So avoid displaying a picture in a normal mode for a long time.
- 16:9 : Theatre-like 16:9 picture formats Panorama : 16:9 picture formats with panorama effect Normal : Displays pictures of normal size (i.e., a 4:3 aspect ratio)
Enlarge LB : Enlarges the screen as to fill the black part of up and down, top and bottom of the picture.
Enlarge LBS : Enlarges the screen, and shifts up as to see the subtitles in case you are watching video with subtitles.
1 Press the MENU Button. • Press the [MENU] bu
MENU
![DAEWOO DP-42WP - Press the MENU Button. • Press the [MENU] bu - 1](/content/2026/05/1135539/images/1542f279cd8bf939d2212f98c571c32a7acb323467ad6f4610f28ab6c2379c69.jpg)
- Press the [MENU] button on the Remote Control.
2 Select "Screen". • Press th
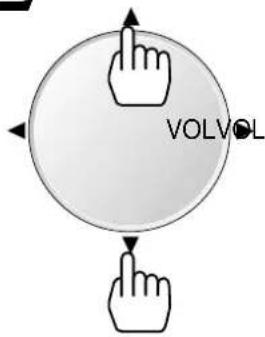
- Press the Channel ▲/▼ buttons to select "Screen."
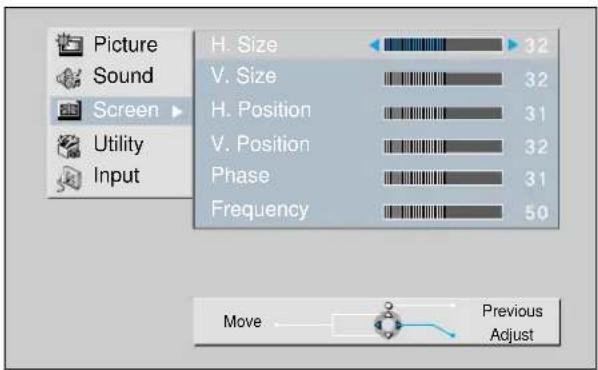
3 Select the Screen Size. • Press the Volume
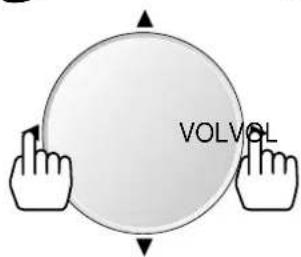
- Press the Volume ◀/▶ buttons to select "Screen Size".
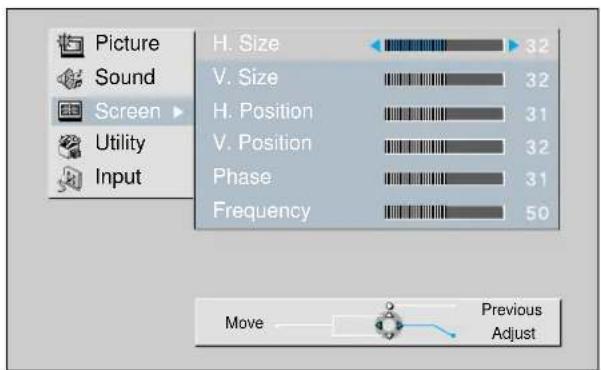
Adjusting from MENU Screen
Adjusting Screen Position and Size
Adjusting Screen Position and Size
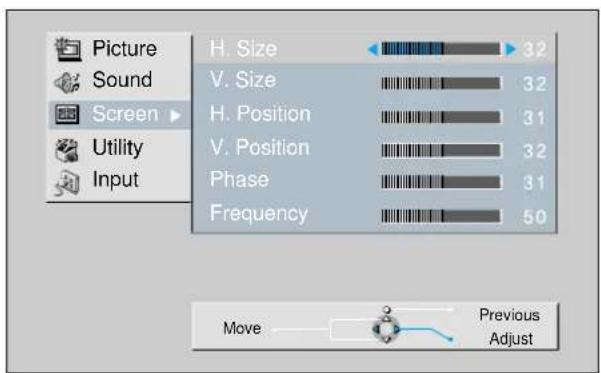
• You can adjust the screen position and size as desired.
• This function is only used when adjusting the screen position and size on the PDP monitor by using the PC input signal.
1 Press the MENU Button. • The MENU screen
- The MENU screen as shown below will appear.
MENU

2 Press the ▲Button. • Press the ▲/▼
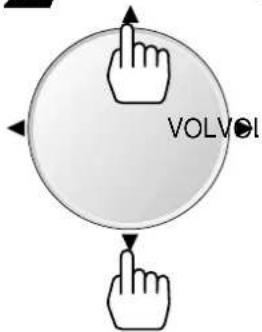
- Press the ▲/▼ buttons to select 'Screen'.
3 Press the Volume ▶Buttons. • Press the Volume ▶/▶ button
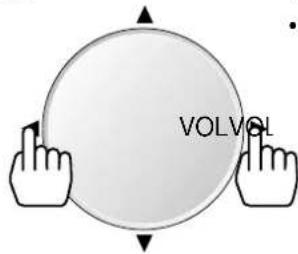
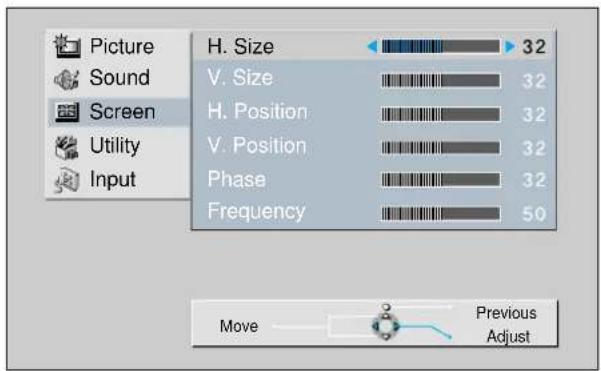
- Press the Volume ◀/▶ buttons to select "Screen".
- While you are in 'Screen' mode, press the
▲ or ▼ button to select a desired item, and then, adjust the value by pressing the ◀r . ▶
NOTES:
- Horizontal/Vertical size and position values can be adjusted only in the [PC] input mode.
• H. Size: As the value increases, the screen width increases
• V. Size: As the value increases, the screen height increases.
• H. Position: Increasing value moves screen to the right.
• V. Position: Increasing value moves screen up. - Phase: When there is jitter or blurring in the image, adjust this value.
- Frequency: When there is jitter or blurring in the image, adjust this value.
Enlarging Screen Size
Enlarging Screen Size
• You can view an enlarged size of the screen with this function
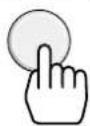
1 Press the 'ZOOM+/ZOOM-' Button. • Press the 'ZOOM+' button to show
ZOOM+
ZOOM-
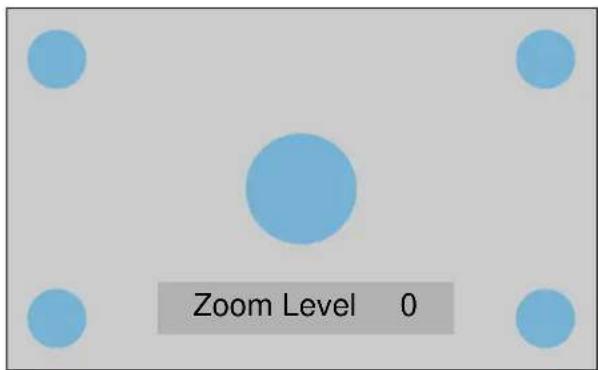
- Press the 'ZOOM+' button to show currently selected screen size.
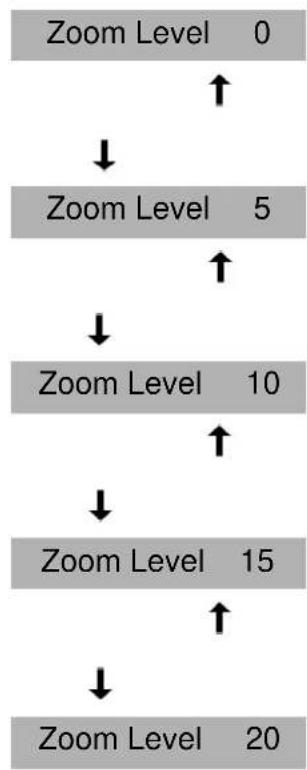
- Each time you press the 'ZOOM+' button, the screen size will increase stepwise in 0 \~ 20 scale.
• To reduce the screen size, press the [ZOOM-] button.
flowchart
graph TD
    A["Zoom Level 0"] --> B["Zoom Level 5"]
    B --> C["Zoom Level 10"]
    C --> D["Zoom Level 15"]
    D --> E["Zoom Level 20"]
    A -->|↑| F
    B -->|↓| G
    C -->|↑| H
    D -->|↓| I
    E -->|↓| J
natural_image
Two dandelion seed heads against a soft blue sky background (no text or symbols)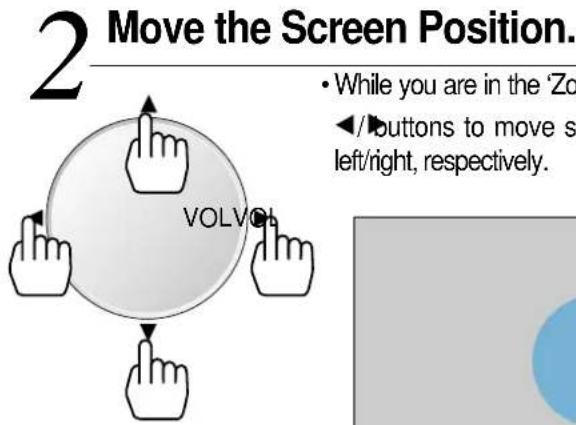
- While you are in the 'Zoom' mode, press the ▲ /▼, ◀/buttons to move screen stepwise up/down, left/right, respectively.
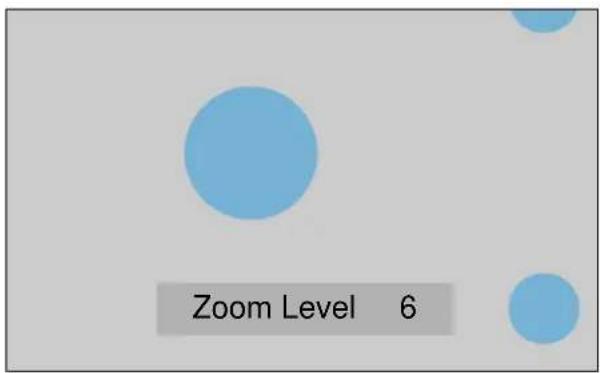

NOTES:
- When the screen is enlarged, the pixel of the screen can become thick and dim.
- When only subtitle of zoom level remains, you can scroll the image.
If subtitle of zoom level disappears, press zoom key, and scroll the image.
Watching a Still Image
Watching a Still Image
- You can view still images temporarily with this function. However, displaying the same images such as still images for a long time may cause after-image lagging.
1 Press the 'FREEZE' Button. • If you wish to freeze a pict

FREEZE
- If you wish to freeze a picture, press the 'FREEZE' button. You can still hear the sound.
- Press FREEZE button to cancel the 'FREEZE' function.
• To view the enlarged images, press the [ZOOM+] button.
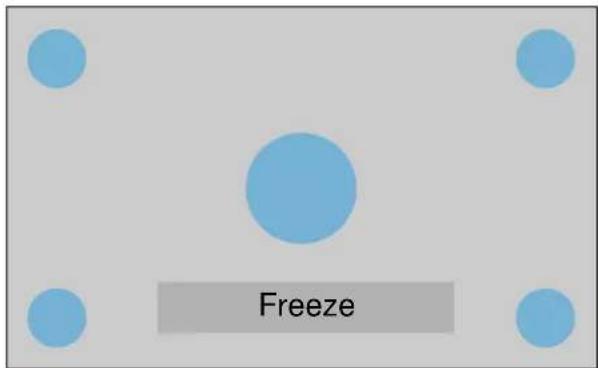
2 Move the Screen Position. • While you are in 'FREEZE'
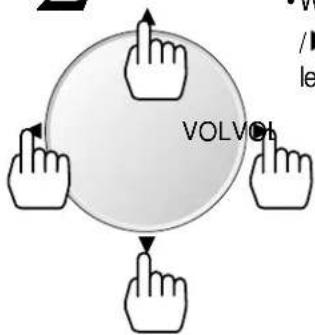
- While you are in 'FREEZE' mode, press the ▲/▼, ◀/▶buttons to move screen stepwise up/down and left/right.
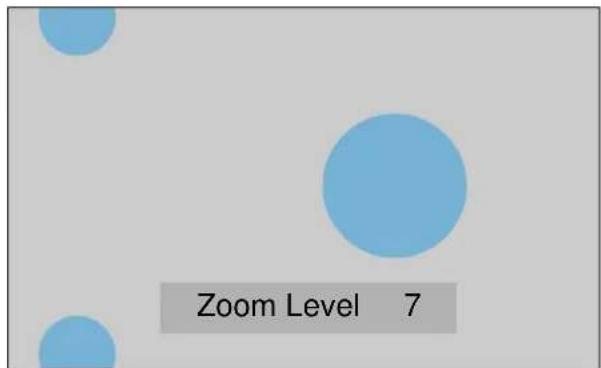

NOTES:
- Displaying the same images such as still images for a long time may cause after-image lagging.
- In this case, such "after-image" may become less noticeable if moving images are later displayed for a long time.
- However, an after-image may become a permanent one, damaging the Plasma Display; therefore, avoid displaying the same images for a long time.
Adjusting Auto Sound Mode
1 Select SOUND Mode. • Press the [SC

SOUND MODE
- Press the [SOUND MODE] on the Remote Control.
- Press of the [SOUND MODE] for the first time will display the current SOUND MODE.
Adjusting Auto Sound Mode
- Enjoy various sound modes by selecting your favorite Sound Mode depending on the kinds of moving pictures.
2 Every Press of the Button Changes Modes.

SOUND MODE
• Each time you press the button, a different sound mode appears. The sequence used is as follows:

flowchart
graph LR
    A["Normal"] --> B["Movie"]
    B --> C["Music"]
    C --> D["News"]
    D --> E["User"]
* Normal : Suitable for watching any motion picture
* Movie : Select this mode to simulate being at a movie theater
* Music : Ideal for listening to music
* News : Allows human voice to be heard more clearly
* User : Allows the user to adjust as desired.
3 MENU will Disappear. • After selecting
- After selecting a desired SOUND Mode, on-screen menu will disappear in about 2\~3 seconds.
- Normal, Movie, Music, News Modes are factory preset values.
If you want to customize the sound modes at your preference, refer to the following page.
Customizing Sound Mode
Customizing Sound Mode
• This feature allows the user at adjust at his preference.
1 Press the MENU Button. • The MENU Screen
MENU
• The MENU Screen as below will be displayed.
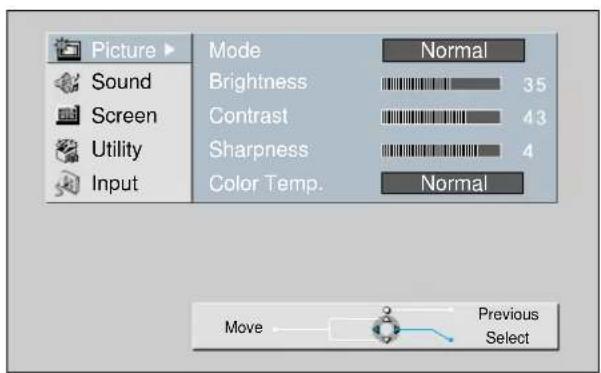
2 Press the ▲Button. • Select [SOUND
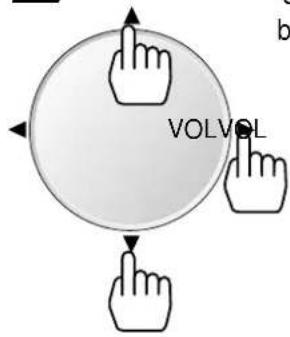
- Select [SOUND] by the ▲ buttons, then press the button to display the following.
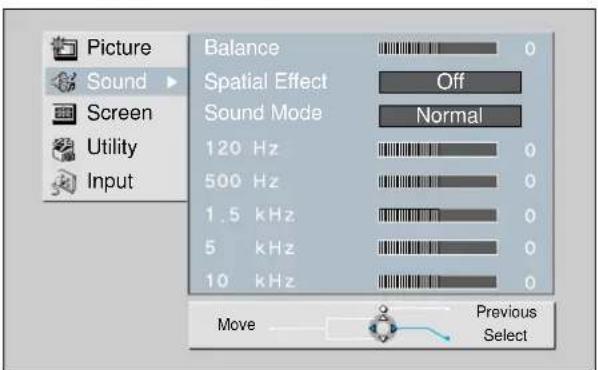
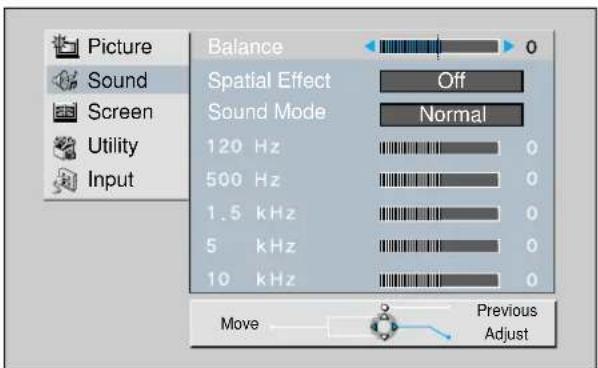
3 Select SOUND BALANCE. • Select [SOUND BALA
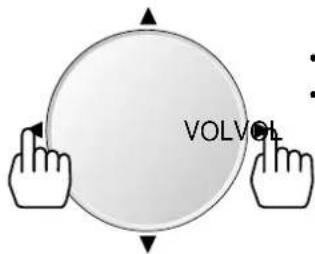
- Select [SOUND BALANCE] by the ◀ Buttons, then adjust it.
• Sound balance is best at '0'. - Sound Balance: Adjusts sound balance of left and right speaker.
natural_image
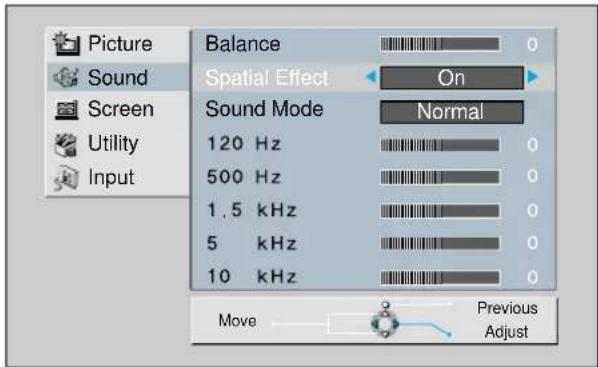
Close-up of dandelion seed pods against a soft blue sky background (no text or symbols)4 Select the Spatial Effect Mode. • Select Spatial Effect by press
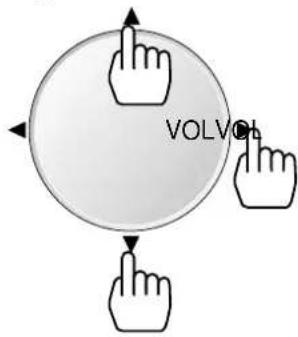
- Select Spatial Effect by pressing the ▲buttons, then select ON/OFF by pressing the ▶button.
- Spatial Effect: Used for emphasizing their stereo effect.
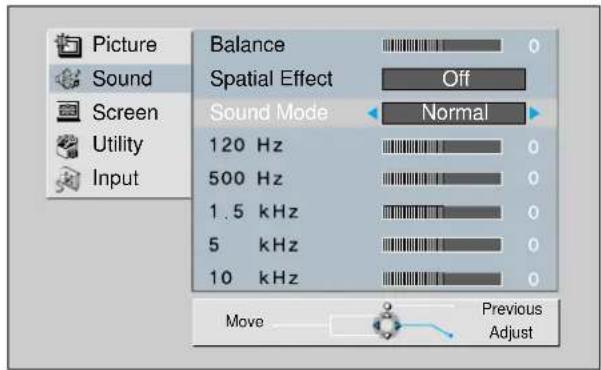
5 Select the SOUND Mode. • Select the Sound Mode
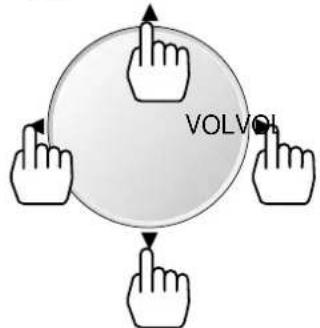
- Select the Sound Mode by pressing the ▲ buttons, then adjust it by pressing the ▶ buttons.

flowchart
graph LR
    A["Normal Movie"] --> B["News"]
    B --> C["Music User"]
    C --> D["→"]
* Normal : Suitable for watching any motion picture.
* Movie : Select this mode to simulate being at a movie theatre.
* Music : Suitable for listening to music.
* News : Allows human voice to be heard more clearly.
* User : Allows the user to adjust as desired.

NOTES:
- Custom Mode: Used as an Equalizer with which the user can adjust the sound frequency as desired.
- If you modify the sound frequency in auto Sound Mode (News, Movie, Music, etc.), it is automatically switched to the User Mode.
- Low sound is emphasized as the frequency is lowered to 120 Hz, and high sound as raised to 10 KHz.
- When INPUT is MONO and if you make connection to the Left Audio Input, you can hear from both
Selecting MENU Background Screen and Language
Selecting Languages
• Used to select transparency of the background screen and language used in MENU.
1 Press the MENU Button. • The MENU screen v
MENU

• The MENU screen will be displayed as below.
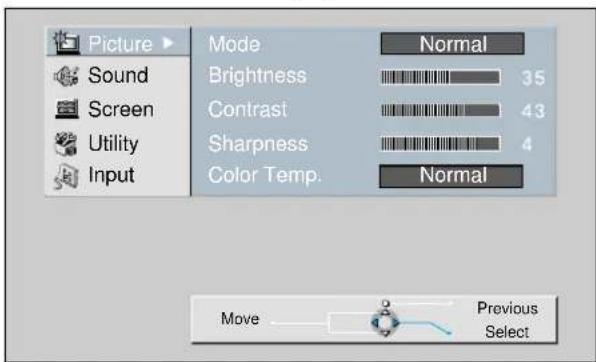
2 Press the ▲Button. • Select [Uti
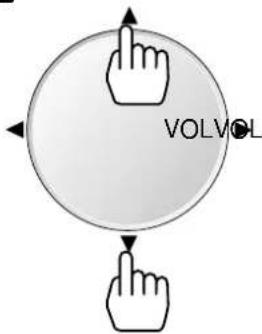
- Select [Utility] by the ▲button.
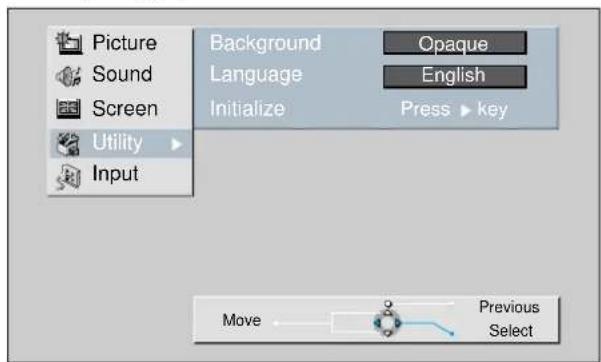
3 Select the MENU BACKGROUND SCREEN. • Select the MENU [Background Screen] by pressing the button.
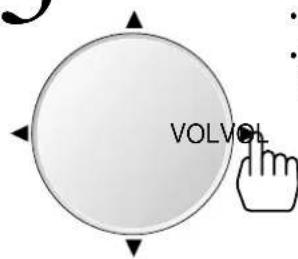
- Select the MENU [Background Screen] by pressing the button. - Every press of the button while you are in the [MENU Background Screen] would switch between Transparent/Opaque.
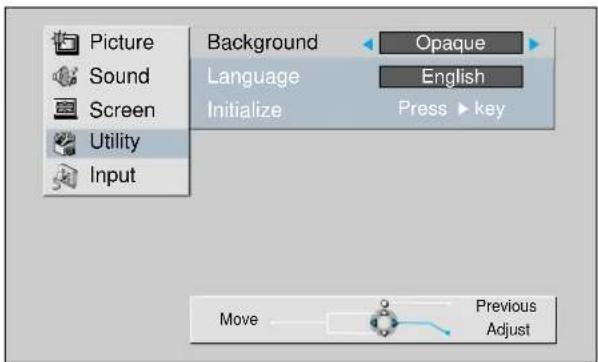
![DAEWOO DP-42WP - Select the MENU BACKGROUND SCREEN. • Select the MENU [Background Screen] by pressing the button. - 3](/content/2026/05/1135539/images/f5f75c575d96406fff7c80293a111fd78140795ee07e4f46f73e82829960eada.jpg)
natural_image
Two dandelion seed heads against a soft blue sky background (no text or symbols)Select MENU LANGUAGE SELECT by the ▲▼ Button.

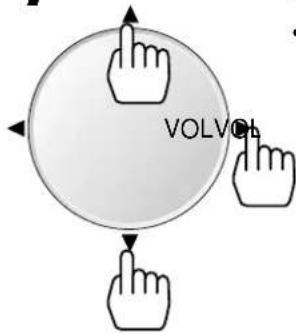
- Select LANGUAGE by the ▲button. - Every press of the ▶button while you are in the [LANGUAGE] mode would cycle through the different languages.
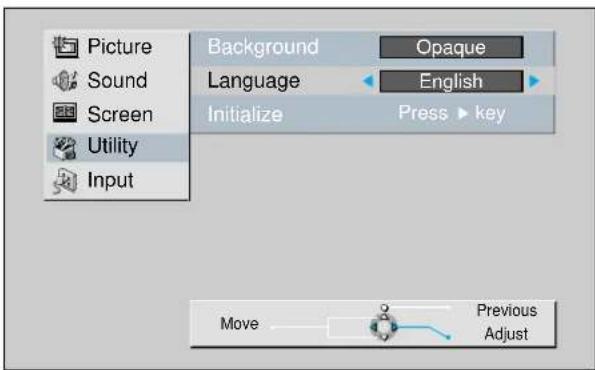
NOTES:
* When Power is turned ON first time, 'SELECT LANGUAGE' Mode will be displayed, then, select a desired language by button. (Displayed only once)
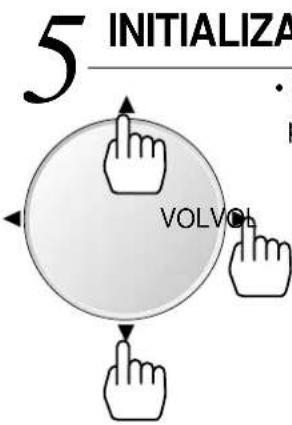
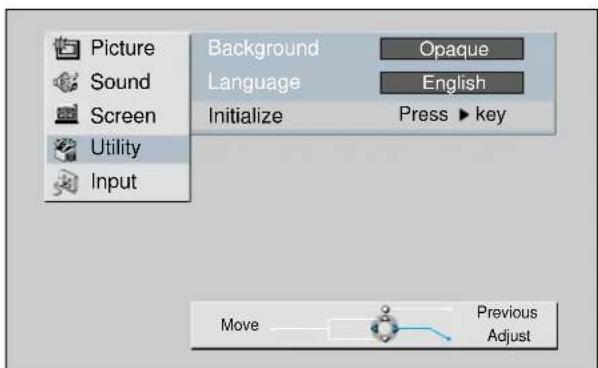

When [INITIALIZATION] is completed:
- When [INITIALIZATION] is completed, those values that have been set in the User Mode of [SCREEN MODE] and [SOUND MODE] will be returned to the factory preset values.
- When you try to initialize, be advised that you should think it over.
- The items in the [SCREEN] Menu in PC INPUT are also initialized (i.e., H. Size, V. Size, H. Position, V. Position, Phase, Frequency, etc.)
- Language, volume, OSD background, input mode are not initialized.
Back to Initialization
- You can restore the values of the adjustment/setting made in the MENU to factory settings.
Setting Sleep Timer
Setting Sleep Timer
• SLEEP TIMER turns the Monitor off after a preset time.
1 Press the SLEEP Button. • Press the [SLEEP] bu
![DAEWOO DP-42WP - Press the SLEEP Button. • Press the [SLEEP] bu - 1](/content/2026/05/1135539/images/4a0ed6162d7d6aa07cf6284b1c5aba1d12b1a5b9511ea09f9e490b6febec0ab4.jpg)
- Press the [SLEEP] button on the Remote Control.
- Pressing the [SLEEP] button first time will display the current setting for the SLEEP TIMER.
- To cancel the SLEEP TIMER, press the [SLEEP] button to select 'OFF'.
Sleep Timer Off
![DAEWOO DP-42WP - Press the SLEEP Button. • Press the [SLEEP] bu - 3](/content/2026/05/1135539/images/0b9b12f5b2ac8a538206a1cb53c3f6c596fc276380f633b3529d61a5f516a6d9.jpg)
flowchart
graph TD
    A["Sleep Timer Off"] --> B["Sleep Timer 15 Minutes"]
    B --> C["Sleep Timer 30 Minutes"]
    C --> D["Sleep Timer 60 Minutes"]
    D --> E["Sleep Timer 90 Minutes"]
    E --> F["Sleep Timer 120 Minutes"]
    F --> G["←"]
    G --> H["↑"]
    H --> I["→"]
![DAEWOO DP-42WP - Press the SLEEP Button. • Press the [SLEEP] bu - 4](/content/2026/05/1135539/images/19bfd2fb68bd0226f414e6d924efcf36bdc5bfe6dc2a200e8d6a35c3a38e3a92.jpg)
NOTES:
- On-screen information disappears if you do not take any action for about two seconds after pressing the SLEEP button.
- If you turn the Monitor off after setting SLEEP, the setting is erased.
Before Requesting Service
Before requesting for a service, check the following points once again.
St y o mm p s
Checks
- Remote control does not function properly.
- Check for any obstacle between the Remote Control and the Display.
- Check for dead batteries and incorrect battery orientation.
- Check if the Remote Control is the right one.
- Remove any obstacle between the Remote Control and the Display.
- Replace batteries and use the correct polarity (+) or (-) of the batteries.
-
Use the pertinent Remote Control proper to the model.
-
The Display makes a snapping sound.
- Check if the pictures and sound are normal.
• This sound is produced due to variations in room temperature. -
This sound does not indicate that the Display has a problem if the pictures and sound can be viewed and heard properly.
-
There are empty sections at the top and the bottom area of the screen.
- Check if the screen size of an image is wider than 16:9 aspect ratio (theater screen size).
- When the video screen is wider than 16:9 aspect ratio, you may see dark areas at the top and the bottom of the screen.
A c t i o n
Before
Requesting for a
Service
St y o mm ps
• There are spots on the screen or screen rolls.
- Check if your product is affected by any interference from automobiles, high-voltage transmission lines, neon signs or other potential sources.
- Screen size is suddenly changed.
- The screen size of a video image may not be matched to the size of the dark initial screen.
- Check by using other video tape.
Checks
A c t i o n
DISPLAY UNIT
| Model DP-42GP, DP-42SP, DP-42WP |
| Diagonal Size 106cm (42") |
| Screen Aspect Ratio 16 : 9 |
| Display Resolution 853(H) X 480(V) dots |
| Pixel Pitch 1.08(H) X 1.08(V) mm |
| Output Colour 16,770,000 Colors |
| Contrast Ratio 3000 : 1 |
| Video Signal VGA, SVGA, XGA, SXGA, UXGA |
| Dimension 1039(W) X 628(H) X 80(D) mm |
| Weight 47Kg (with Stand) |
| Power Consumption 320W |
| Power Requirement AC 100-240V, 50/60Hz, 3.2-1.3A |
* Appearance and specifications of this product are subject to change for improving the product without prior notice.
INPUT/OUTPUT TERMINAL
| INPUT/OUTPUT ITEMS | VIDEO | AUDIO |
| EXTERNAL | RGB / COMPONENT INPUT | BNC G/Y, B/Pb, R/Pr, H,V INPUT |
| INPUT | COMPUTER(PC) | one 15 pin D-sub jack (R, G, B, H, V) |
| AUDIO OUTPUT | SPEAKER OUTPUT(sold separately) 16W (two 8W) | |
| Model Name | Front Mask Colour |
| DP-42GP | Dark Gray |
| DP-42SP | Silver |
| DP-42WP | White Pear |
- PLASMA DISPLAY USER'S MANUAL
- Features
- - 106cm (42")super-wide, 8.0cm Ultra Slim Wall-mounting Monitor
- - DVD Direct Connection / Outstanding Picture Quality Digital Broadcasts Receive (SD Grade)
- - PC Direct Connection
- • PDP Monitor with Minimized Noise
- • 160°Wide-Angle Viewing Area
- - Flat Panel with No Distortion and Colour Blurring
- - Various Video Control
- FCC RF INTERFERENCE STATEMENT
- NOTE :
- Safety Precautions
- Power
- Always obey all safety messages.
- WARNING
- This product must be properly grounded.
- Installation
- While Using Monitor
- CAUTION
- During Use
- Do not wipe the monitor using a cloth damped with chemicals (benzene, thinner, etc.).
- Do not place heavy objects or heat sources on the power cord.
- Do not grip speakers when moving the monitor attached with speakers.
- Do not place any object or cover on the monitor.
- When watching the TV, the distance between the Monitor screen and your eye should be as 5\~7 times far as the diagonal distance of the Monitor.
- When cleaning of the inside of the monitor is required, consult to the qualified service personnel.
- When the monitor is placed on a cart or table, the front side of the Monitor should not project outward.
- Checking Accessories
- Note
- Supplied Accessories
- Optional Accessories
- Speakers
- DSP-SP20/SP21/SP22
- Table Top Stand
- DSP-ST20/ST21/ST22
- Wall Mounting Unit
- DSP-HG10
- CONTENTS
- PREPARATION
- BASICS
- CONNECTION
- APPLICATION
- MISCELLANY
- Panel Controls
- Remote Control
- Input Select button
- ZOOM button
- Menu Select button
- Screen Select button
- Sound Mode button
- Mute button
- Power button
- Display button
- Menu button
- Volume button
- Aspect Ratio
- Still
- Sleep Timer
- ■ When Using Remote Control:
- ■ Installing the Batteries in your Remote Control:
- Installation Instructions
- When Using the Stand
- Connecting the Speaker to the PDP
- Connecting the Speaker to the Stand
- Connecting the Speaker Cable
- Connecting PC
- 1
- Before connecting to the PDP, set the resolution of the PC.
- Connect the PC to the PDP. • Prepare the PC cable (D
- Press the Power button. • Turn on the PDP a
- Input Select
- 5
- Enjoy Dynamic Ultra Screen Monitor by Using PC's Keyboard or Mouse.
- NOTES:
- PC Input Resolution Available in PDP
- Selecting Auto Picture Mode
- Selecting Picture Mode
- Each Press of the Button Will Select One of Four Picture Modes.
- Menu on the Screen Will Disappear.
- Customizing Picture
- Press the MENU Button. • The MENU shown
- Press the ▲Button. • After selecting [F]
- Select the Custom Mode. • Select [User] by the
- 4
- Select User Mode Adjustments
- Picture Condition Adjustments
- Adjusting Screen Size
- Press the SCREEN MODE Button. Each time you press the SCREEN
- Press the MENU Button. • Press the [MENU] bu
- Select "Screen". • Press th
- Select the Screen Size. • Press the Volume
- Adjusting from MENU Screen
- Adjusting Screen Position and Size
- Press the MENU Button. • The MENU screen
- Press the ▲Button. • Press the ▲/▼
- Press the Volume ▶Buttons. • Press the Volume ▶/▶ button
- Enlarging Screen Size
- Press the 'ZOOM+/ZOOM-' Button. • Press the 'ZOOM+' button to show
- Watching a Still Image
- Press the 'FREEZE' Button. • If you wish to freeze a pict
- Move the Screen Position. • While you are in 'FREEZE'
- Adjusting Auto Sound Mode
- Select SOUND Mode. • Press the [SC
- Every Press of the Button Changes Modes.
- MENU will Disappear. • After selecting
- Customizing Sound Mode
- Press the ▲Button. • Select [SOUND
- Select SOUND BALANCE. • Select [SOUND BALA
- Select the Spatial Effect Mode. • Select Spatial Effect by press
- Select the SOUND Mode. • Select the Sound Mode
- Selecting MENU Background Screen and Language
- Selecting Languages
- Press the MENU Button. • The MENU screen v
- Press the ▲Button. • Select [Uti
- Select the MENU BACKGROUND SCREEN. • Select the MENU [Background Screen] by pressing the button.
- Select MENU LANGUAGE SELECT by the ▲▼ Button.
- When [INITIALIZATION] is completed:
- Back to Initialization
- Setting Sleep Timer
- Press the SLEEP Button. • Press the [SLEEP] bu
- Before Requesting Service
- Before
- Requesting for a
- Service
Brand : DAEWOO
Model : DP-42WP
Category : Television