
KR21D7 - Television DAEWOO - Free user manual and instructions
Find the device manual for free KR21D7 DAEWOO in PDF.


| Product Type | CRT Television |
| Brand | Daewoo |
| Model | KR21D7 |
| Screen Size | 21 inches (diagonal) |
| Power Supply | AC 110-250V, 50/60Hz |
| Power Consumption | Approximately 80-120W (typical for 21" CRT) |
| Dimensions (Approx.) | 20.5 x 19.5 x 19.0 inches (W x H x D) |
| Weight (Approx.) | 28 kg |
| Remote Control | Yes, with full function keys |
| Teletext | Yes (Level 1.5) |
| Sleep Timer | Yes, up to 120 minutes |
| Child Lock | Yes, prevents operation without remote |
| Built-in Game | Othello |
| AV Inputs | Front and rear (RCA), SCART (rear) |
| Headphone Jack | Yes, 3.5mm |
| Picture Modes | Normal I, Normal II, Favorite |
| Cleaning Instructions | Unplug, clean with soft dry cloth |
| Safety Precautions | Avoid water, heat, cover ventilation; disconnect during storms |
| Working Life | 7 years from production date |
| Spare Parts Availability | Contact Daewoo service centers |
Frequently Asked Questions - KR21D7 DAEWOO
User questions about KR21D7 DAEWOO
0 question about this device. Answer the ones you know or ask your own.
Ask a new question about this device
Download the instructions for your Television in PDF format for free! Find your manual KR21D7 - DAEWOO and take your electronic device back in hand. On this page are published all the documents necessary for the use of your device. KR21D7 by DAEWOO.
USER MANUAL KR21D7 DAEWOO
21V1M/14K8MT/20K8MT/21K8MT
14V4M/20V4M/21V4M/14V4T
20V4T/21V4T/14U1T/20U1T/21U1T
14V1T/20V1T/21V1T/14D4T
21D7N/14K8M/20K8M/21K8M
14S2/20S2/21S2/14D4/20D4
21D4/14V5TB/14V5TS/14V5TW
14Q1N/20Q1N/21Q1N
KR14E5 / KR20E5 / KR21E5
KR14E5M / KR20E5M / KR21E5M
KR14U1T / KR20U1T / KR21U1T
KR14U2T / KR20U2T / KR21U2T
KR14U3T / KR20U3T / KR21U3T
KR14V1T / KR20V1T / KR21V1T
KR14V4T / KR20V4T / KR21V4T
KR21FL6M/ KR2131FL/ KR2132FL
KR2134FL/ KR2132NT/ KR2134NT
KR2130N/ KR2131N/ KR2132N
KR2134N/ KR2130NT/ KR2131NT
KR21FL6N/ KR15U7FL/ KR15U7T
KR15U5FL/ KR15U5T/ KR14V5T
KR20V5T/ KR21V5T/ KR14D4TS
KR14D3TS/ KR20D3TS/ KR21D3TS
KR14D4TS/ KR20D4TS/ KR21D4TS
KR14D4Z/ KR20D4Z/ KR21D4Z
KR1420Z/ KR2020Z/ KR2120Z
KR21FL6/ KR15A1FL/ KR15U7FL
KR15U5FL-2T/ KR15U7FL-2T
Contents
Important safeguards 1
Before Operation 2
Connecting external equipment 3
Identification of Controls 5
Daily use 6
Menus 8
Teletext (Option) 14
The othello game 16
Specifications 18
Troubleshooting 19
This information is placed by The law of RF on Protection of the Consumer Rights and the Governmental Resolution of RF No.720.
The working life of this set is 7 years since its production date. After the working life, this set may be not work properly and cause damage to the life of the customer or his property.
Important safeguards

WATER AND MOISTURE
Never install the set in the following places: In a wet basement, bathroom. Do not place any container with liquid on the set.
The apparatus shall not be exposed to dripping or splashing water and that no objects filled with liquids, such as vases, shall be placed on the apparatus.

HEAT
Never place the set near heat sources.

VENTILATION
Do not cover the ventilation openings in the cabinet and never place the set in a confined space such as a bookcase or built-in unless proper ventilation is provided. Leave a minimum 10cm gap all around the unit.

OBJECT ENTRY
Do not insert foreign objects, such as needles and coins, in the ventilation openings.

LIGHTNING STRIKING
You should disconnect the set from the mains and the aerial system during thunderstorms.

CLEANING
Unplug the set from the mains during cleaning.

AFTER MOVING THE SET
If the set is moved in a different direction, the MAIN POWER button must be switched off for at least 15 minutes in order to take out a colour strain on the screen.
Before Operation
Battery options
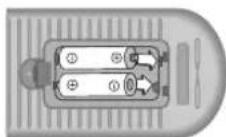
INSERTING BATTERIES INTO THE REMOTE CONTROL UNIT.(OPTION)
Insert the batteries (two 1.5V, type AAA)
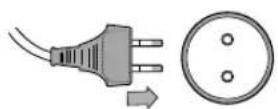
MAINS CONNECTION
Plug the mains cable into the power socket with 110V-250V, 50/60Hz AC.
natural_image
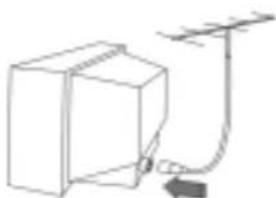
Simple line drawing of a box connected to a vertical pole with an arrow indicating direction (no text or symbols)AERIAL CONNECTION
When using an outdoor aerial, it is usually connected to the set by means of 75 ohm.
natural_image
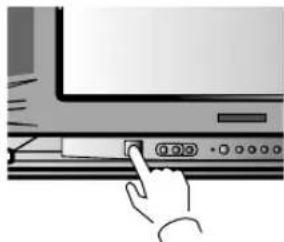
Hand pressing a button on a computer monitor (no text or symbols visible)SWITCHING ON AND OFF
Switching on
Switch the set on with the MAIN POWER button(ON/OFF), and then PR UP button on the front of the set.
Or button or the PR UP button or one of the NUMBER buttons on the remote control.
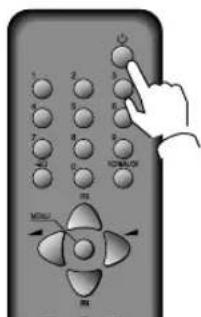
Switching off
Press button, on the remote control to return the set to its stand by mode.
If you don't use the set for an extended period of time, turn it off with MAIN POWER button on the set.
Connecting external equipment
TV AND AV
Use the TV/AV( ) button on the remote control or on the front of the set to select one of the three options. Whenever the TV/AV ( ) button is pressed, the on-screen display will be changed as shown: AV(S-VHS is Russia only) → GAME → TV If you push the PR UP/DOWN buttons in AV mode, the on-screen display will be changed TV mode.
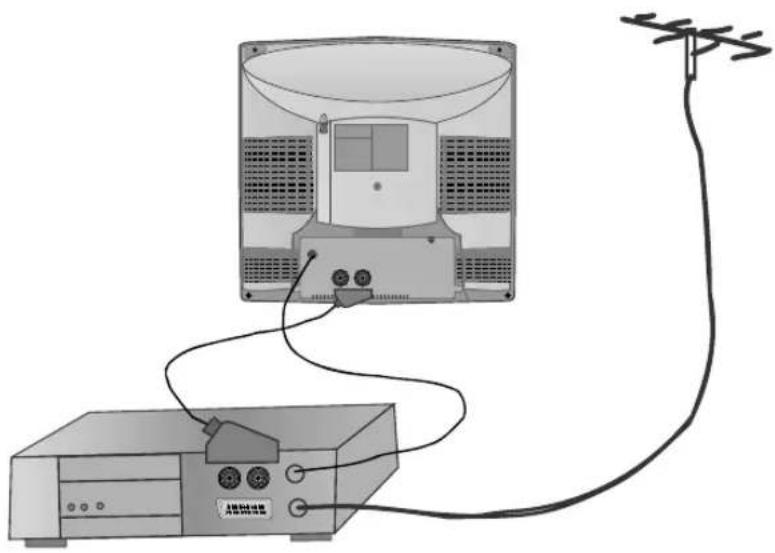
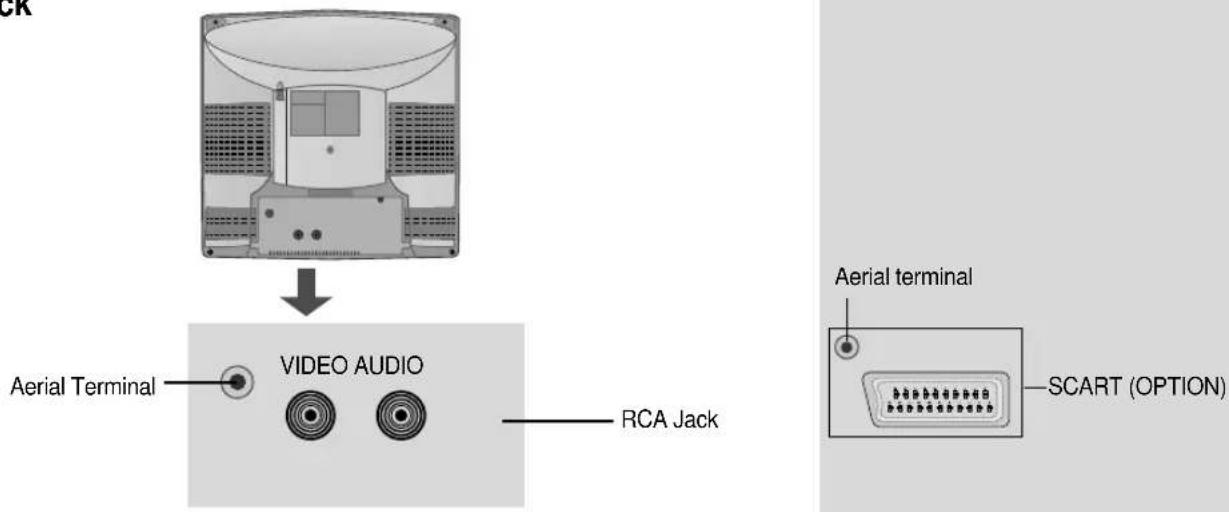
RCA JACK AV (BACK)
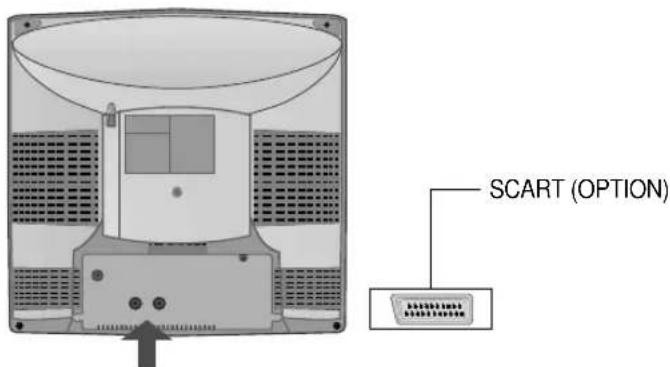
This is used to connect a VCR, a Camcorder, a S-VHS VCR, a PERI-TV decoder or a video game console.
In most cases, the set changes automatically to AV when the VCR connected is in display mode. If not, press the TV/AV(☐/☐) button on the remote control unit or on the front of the set.
You must turn the external equipment off or press the TV/AV button to return to the TV mode.
natural_image
Diagram of a TV power supply connected to an antenna via cable (no text or symbols)RCA JACK AV (FRONT)
Connect the AV (Audio/Video) socket with an appropriate cable to the corresponding socket of the external equipment. Select AV mode by pressing the TV/AV( ) button.
Press the TV/AV() or PR UP/DOWN buttons to return to the TV mode.
NOTE: If two apparatus are connected, one to the front AV Jack and the other to the rear SCART Jack, you can play only one apparatus. one of the them must be switched off.
natural_image
Illustration of a flat-screen TV connected to an earphone (no text or symbols present)HEADPHONE JACK
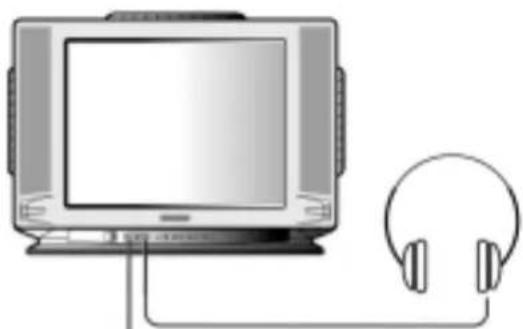
Insert the headphone plug(3,5mm) into the headphone socket. The sound from the speaker will be cut off.
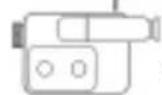
CAMCORDER
OR
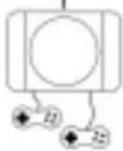
VIDEO GAME
LOCAL CONTROL
Front
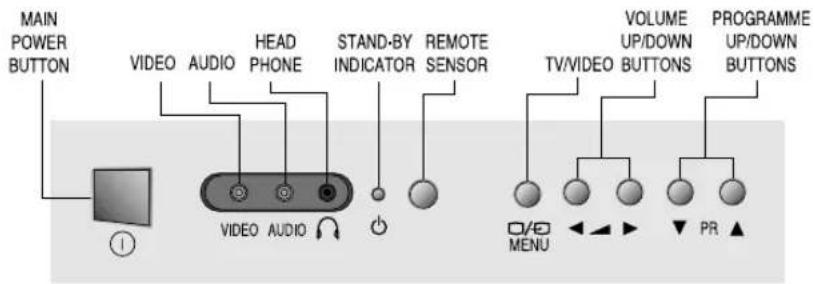
ON/OFF

VIDEO AU
[Non-Text]
-
1
MENU
O/E
◀
▶
▼
R ▲
ON/OFF


0/8


VIDEO AUDIO
U
m = 311
MAIN
POWER
BUTTON
PROGRAMME
DOWN/UP
BUTTONS
VOLUME
DOWN/UP
BUTTONS
TV/AV
MENU
BUTTO
STAND-BY
INDICATOR
REMOTE
SENSOR
VIDEO
INPUT
AUDIO
INPUT
HEAD
HONE
Identification of Controls
Back
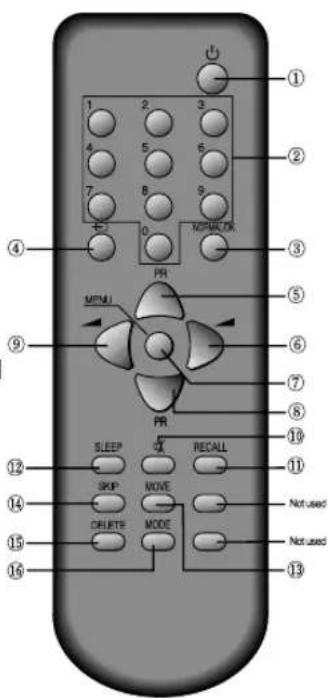
REMOTE CONTROL
TTW mode
① POWER
② NUMBER 0-9
③ NORMAL/OK
④ AV
⑤ PR (CURSOR) UP
⑥ VOLUME UP (CURSOR RIGHT)
⑦ MENU
⑧ PR (CURSOR) DOWN
⑨ VOLUME DOWN
(CURSOR LEFT)
⑩ MUTE
⑪ RECALL
⑫ SLEEP
⑬ MOVE
⑭ SKIP
⑮ DELETE
⑯ Not used
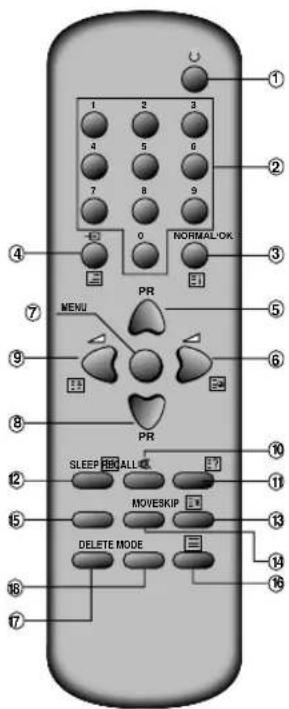
T E L E T E X T m o d e ( ( O p t i i o n ) )
① ON/OFF
② NUMBER 0-9
③ INDEX
④ MIX
⑤ PAGE UP
⑥ SUBPAGE
⑦ MENU
⑧ PAGE DOWN
⑨ HOLD
⑩ MUTE
⑪ REVEAL
⑫ SIZE
⑬ CANCEL
⑭ Green Key
⑮ Red Key
⑯ TV/TEXT
⑰ Yellow Key
⑱ Cyan Key
PROGRAMME SELECTION
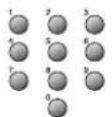
Direct selection
Use remote control NUMBER 0...9 buttons. For two or three digits programme numbers, press the button for the next digit within 2.5 seconds.
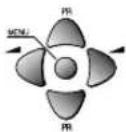
Up/Down moves
Use PR UP/DOWN buttons of the remote control unit or on the front of the set.
SOUND CONTROL
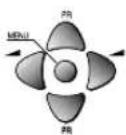
Volume adjustment
Use VOLUME UP/DOWN buttons of the remote control unit or on the front of the set.

Mute
Get sound off by pressing the remote control MUTE (✗) button. Then, logo (✗) is displayed. Sound returns by pressing the same button again.
PICTURE CONTROL

You can choose between three picture settings, using repeatedly remote control NORMAL/OK button :
Normal I (standard hard picture) Normal II (standard soft picture) Favourite (you can adjust picture setting as you want, using Picture menu).
For other adjustments : Brightness, contrast, colour, sharpness, see Picture menu. (page 9)
SLEEP FUNCTION

Pressing repetitively the remote control SLEEP button, you can enter one of the following settings :
OFF > 30 min > 60 min > 90 min > 120 min > OFF
The set will be turned off after the time you set.
The remaining time before TV turn-off is displayed on programme status.
PROGRAMME STATUS DISPLAY

Accessed by the Remote Control RECALL button.
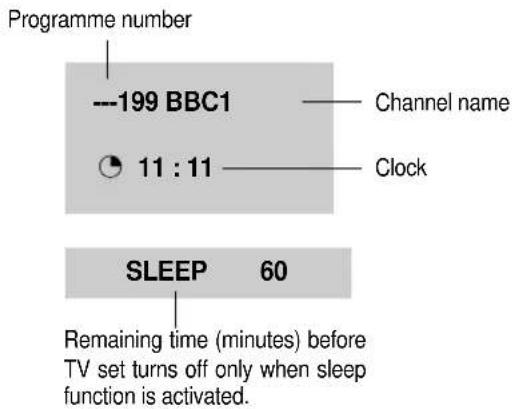
Pressing repetitively the RECALL button, you can change channel digit as follow.

\* NOTE
Language selection
Child lock, Clock setting and wake time setting are available in features menu.
MAIN MENU
All menus are removed within 25 seconds if you don't press any button.
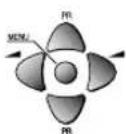
Direct selection
Press remote control MENU button to display main menu.
Then, you have the choice among several sub-menus.
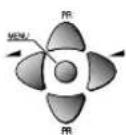
If you want to cancel immediately main menu, press MENU button once more.
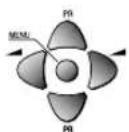
To select one of the sub-menus, use remote control CURSOR buttons UP, DOWN, LEFT, RIGHT.

To enter the selected sub-menu, press remote control NORMAL/OK button.
HOW TO USE SUB MENUS
* The following is applied to all of the sub-menus.
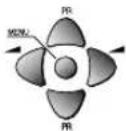
Select the function you want to change using Remote control CURSOR UP or DOWN button.

Confirm (if needed) by pressing Remote control NORMAL/OK button.
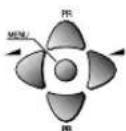
Adjust the function using Remote control CURSOR LEFT or RIGHT button.
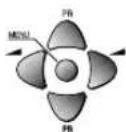
Then Return to main menu pressing MENU button.
PICTURE
FEATURES
INSTALL
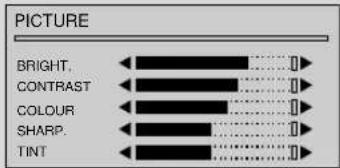
PICTURE MENU
Enter PICTURE in the main menu.
You can select each function with the UP/DOWN buttons.
Use the LEFT/RIGHT buttons to adjust each function.
Explanation for each function will be displayed in the lower screen whenever you select the function. (Tint control for AV NTSC only)
FEATURES MENU
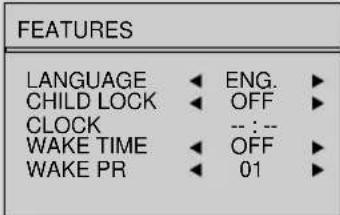
LANGUAGE
Language selection.
CHILD LOCK
Child lock prevent the use of the TV set without remote control unit.
Select this value ON or OFF:
- When switched ON: the stand-by indicator is orange lighted, child lock is operating.
- The set can only be switched ON with the remote control unit.
CLOCK
TV clock setting.
- Set TV clock with remote control 0...9 NUMBER buttons, then clock starts.
- Note that if you turn off the set with the MAIN POWER button, the clock setting is lost and must be reset if necessary.
WAKE TIME
Wake up function.
- The TV set turns on at the time and with the programme chosen by the customer. This function is only available when clock is set and when TV set is switched to stand -by mode.
- Switch "wake up" function ON/OFF with remote control CURSOR LEFT or RIGHT button.
- Enter wake up time with remote control 0...9 NUMBER buttons.
WAKE PR
Select TV turn-on programme number.
INSTALL MENU
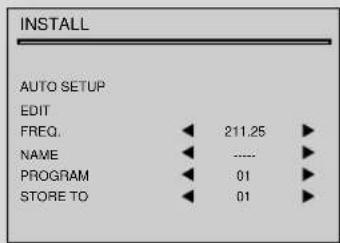
AUTO SETUP
Automatic search system.
EDIT
Programme list edition.
FREQ.
Channel Frequency.
NAME
Channel name.
PROGRAM
Programme number.
STORE TO
Programme storage number.
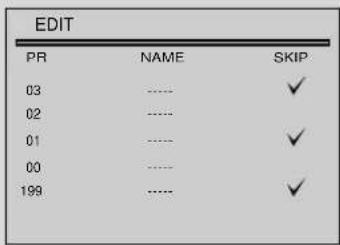
EDIT MENU
PR
Programme number.
NAME
Station name.
Skip
√ : programme skipped.
AUTO SETUP

Select "AUTO SETUP" and Press remote control "NORMAL/OK" button more than 3 seconds to start automatic searching.
PROGRAMME LIST EDITION

Select "EDIT" function and confirm with the remote control "NORMAL/OK" button :
Edit menu appears and shows existing recorded programmes.
The recorded programmes can be modified as follows :

Channel skipping
You can select skip "YES" or "NO" using the remote control SKIP button.
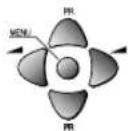
A programme with skip " doesn't appear on screen when changing programmes with PR UP/ DOWN buttons.
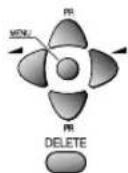
Channel deleting
Select the programme to delete using remote control CURSOR UP/ DOWN buttons.
Press the remote control DELETE button.
The deleted programme is moved to the programme number 199 with skip " √
The existing 199 programme is moved to programme number 198 and so on.
MANUAL CHANNEL SETTINGS
Choose starting point
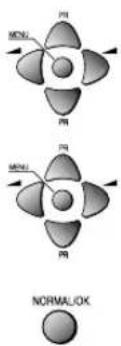
Select with "PROGRAM" function the programme from which you want to start manual tuning. Then, the channel number, the frequency, the name and the programme number of this programme are displayed in the install menu.
chemical
Molecular orbital diagrams showing normal/ok and MGN orbitals with labeled protons (P1, P2, P3)Channel searching
Select "FREQ." function.
Press the remote the remote control CURSOR RIGHT / LEFT buttons for more than 3 seconds to start (up / down) manual tuning.
After searching, tuning will stop automatically to the next channel. (To stop searching press the remote control MENU button)
Fine Tuning
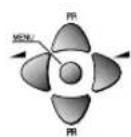
If you are unable to get a good picture or sound because of a poor broadcasting signal, it is possible to fine tune a signal.
Select channel frequency ("FREQ.") function.
Press and release the remote control CURSOR RIGHT/LEFT buttons to fine tune a signal.
Enter station name
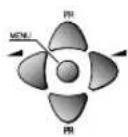
Select "NAME" function.
Use the CURSOR RIGHT/LEFT buttons to select the character (letter) you want to modify.
To modify this letter press the CURSOR UP/DOWN buttons until the desired letter is displayed.

Store programme in memory
Select "STORE TO" function
Adjust the programme number you want to store and confirm by pressing the remote control "NORMAL/OK" button.
Remarks: This function can be also used if you want to copy a programme already memorized to another programme number.
MANUAL CHANNEL SETTINGS
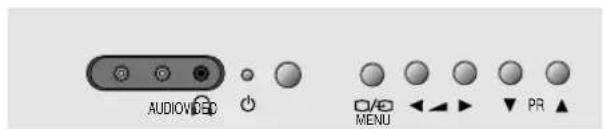
You can call up the MENU without the remote control unit. You can enter the MENU directly by pressing the MENU button. If you press the ( ) button over 1 sec, the MENU will be displayed on the screen. : If you press the ( ) button less than 1 sec, the screen will be converted to AV mode.
Move the cursor to the SUB MENU you want by using the PR UP/DOWN buttons and press the VOL UP button, then the SUB MENU will be displayed on the screen. When the SUB MENU is displayed on the screen you can set it by using the PR UP/DOWN or the VOL UP/DOWN buttons. Press the MENU button to return to the previous Menu.
At the EDIT mode, you can't use the MOVE function and DELETE function
Remarks: This function can't be AUTO SETUP.
Teletext (Option)
SWITCHING TELETEXT ON/OFF
Press the TELETEXT button ( ) The index page viewed last will appear.
Press the TELETEXT button to return to the TV mode.
Note that theTELETEXT at this TV set is operated to Level 1.5.
SELECTING PAGES
The NUMBER button 0..9 are used to enter a page
number.
The selected page number appears at the top of the screen and the page appears after a short time.
The UP/DOWN buttons increase or decrease the current page number step by step.
PAGE HOLD
Several sub pages can be combined under a page number and are scrolled at an interval determined by the television station.
The presence of sub pages is indicated by, for example, 3/6 beneath the time, which means that you are looking at the 3rd page of a total of 6 pages.
If you want to look at a subpage for a longer period of time, press the HOLD( ) button. The contents of the subpage shown are kept on the screen and no longer updated or switched to other subpages.
Pressing the HOLD button again, the current subpage appear.
COLOUR BUTTONS IN TOP/FLOF TELETEXT
A red, green, yellow and cyan field is shown at the bottom of the screen.
If TOP or FLOF teletext (FASTEXT) is transmitted by the station, pressing the corresponding colour button on the remote controller, you can select the desired page easily.
INDEX PAGE
You can switch directly to the programme preview (with TOP text) or the overview page of the station you are currently viewing by pressing the
INDEX( )Button
CALLING UP SUBPAGE DIRECTLY
Pressing the SUBPAGE (☐) button, "Page No. / Subpage No." appears at the bottom of the screen.
Press RED / GREEN button or 0....9 number button directly to enter the Subpage you want, then the subpage is sought and displayed.
To exit, press SUBPAGE ( ) button again.
WATCHING TELEVISION DURING TELETEXT MODE
Some pages are continually updated, for example, stock market reports, sports announcements, and the latest news.
If you want to watch television and stay informed at the same time, press CANCEL ( ) button.
The regular programme is still visible and the teletext programme number appears at the top of the screen.
Pressing the CANCEL button again, the teletext page appears with the updated information.
IDOUBLING CHARACTER SIZE
Repeatedly pressing the SIZE( ) button doubles the character size in the following order: Upper half of the page Lower half of the page Return to normal size.
MIX
Pressing the MIX button( ) in teletext mode, you can see an aerial channel also in the back ground. If you control bright and contrast in the Mix mode also TV mode is controlled at the same time.
REVEAL ANSWER
This function can be used on certain pages to reveal the solution of riddles.
Press the REVEAL( EButton to reveal a hidden answer and press again to hide it.
VOLUME, BRIGHTNESS CONTROL
Repeatedly pressing the MENU button in teletext mode, VOLUME or BRIGHTNESS appears at the bottom of the screen.
You can control it with the LEFT/RIGHT button.
The othello game
1. Introduction
Othello is a two player strategy game. Othello is player on an 8 x 8 square board, one taking yellow while the other taking green. The object of Othello is to flip as many of your opponents discs to your color as possible without opponent flipping your discs.
2. The Rules
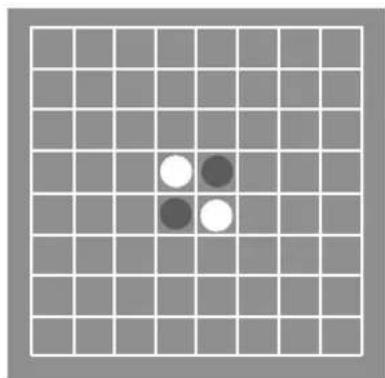
The initial configuration, before the game starts, is:
natural_image
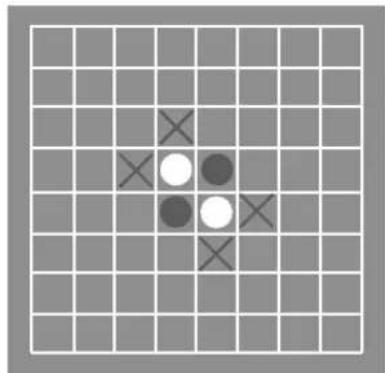
Grid pattern with four white and two dark circles in the center (no text or symbols)Green starts playing first. Each player puts one disc on the board at each turn, unless either no one can move, or one player cannot move, and then the other player can play again. The game ends when no player can move, and the one who has the most discs of his own colors has won. Now how to put a disc on the board? The idea is one can put a disc of his own color at a square, if and only if there is at least one disc of the opposite color immediately surrounding it, and at the extension of this line there is a disc of his own color. For example, at the beginning of the game, green can play at the following squares marked with an X:
3. How to Play
-
Press the TV/AV(€) button to open the Game mode RF → AV → S-VHS(Russia option) → GAME
-
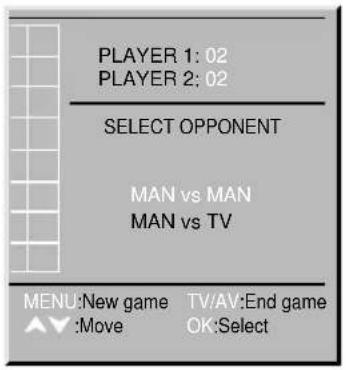
Select Opponent This option allows you to choose opponent. You can select Man vs Man or Man vs TV. If you choose Man vs Man, game start directly.
-
Move to your choice :
-
Select your opponent :OK button
-
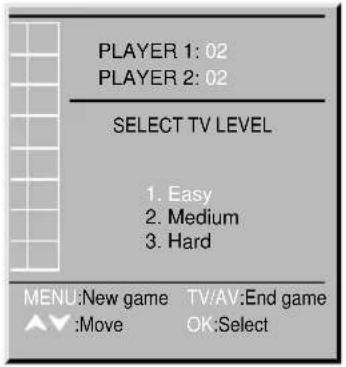
Select TV level (When opponent is TV) You can change the difficulty level of the TV player. You can select Easy, Medium or Hard.
-
Move to your choice :
-
Select level of the TV :OK button
-
Start game When game is started, the player1(Man) plays green and the player2(Man or TV) yellow. The player1 plays first.
-
Move to your disc :
Use the Program Up/Down & Volume Up/Down button. - Place your disc : Press the OK button.
- Restart game : Press the MENU button.
- Quit game : Press the TV/AV button.
※Owing to our policy of continuous product improvement, specifications may change.
Troubleshooting
Sometimes some performance problems can be easily solved by checking seemingly apparent but often overlooked possibilities. Before asking for service, to check these items could save your time and money.
| SYMPTOM CHECK | |
| No picture or sound. • Check the TV set is plugged in.• Check the volume, Brightness and Contrast controls are set to the minimum positions. | |
| Picture is OK, but No Sound • Check the Volume control is set to the minimum position. | |
| Sound is OK, but No Picture • Check the Brightness and Contrast controls are set to the minimum position. | |
| No Colour • Check the Colour control is set to the minimum position. | |
| Excessive noise in picture • Check the Antenna Cable is broken or disconnected or damaged. | |
| Diagonal stripes appear on • It may be affected by interfering signal.picture (ex. from nearby amateur radio transmitter or another TV set.)• The interference can be reduced to some extent by adjusting the direction or height of the antenna.(If the twin lead antenna cable is used, replace it with a coaxial cable.) | |
| Picture has "Snow" | • Check the Antenna cable is broken or disconnected or damaged.• Small dot on the screen caused by a weak aerial signal. |
| Ghost images appear. • Check the Antenna direction has changed after storm or strong wind etc..• Ghost images are caused by a signal reflected from a hill or large building etc..• The direction or height of the antenna should be chosen well in order to minimize the ghost images. | |
DAEWOO ELECTRONICS
- Contents
- Important safeguards
- WATER AND MOISTURE
- HEAT
- VENTILATION
- OBJECT ENTRY
- LIGHTNING STRIKING
- CLEANING
- AFTER MOVING THE SET
- Before Operation
- INSERTING BATTERIES INTO THE REMOTE CONTROL UNIT.(OPTION)
- MAINS CONNECTION
- AERIAL CONNECTION
- SWITCHING ON AND OFF
- Switching on
- Switching off
- Connecting external equipment
- TV AND AV
- RCA JACK AV (BACK)
- RCA JACK AV (FRONT)
- HEADPHONE JACK
- LOCAL CONTROL
- Identification of Controls
- REMOTE CONTROL
- TTW mode
- T E L E T E X T m o d e ( ( O p t i i o n ) )
- PROGRAMME SELECTION
- Direct selection
- Up/Down moves
- SOUND CONTROL
- Volume adjustment
- Mute
- PICTURE CONTROL
- SLEEP FUNCTION
- PROGRAMME STATUS DISPLAY
- \* NOTE
- MAIN MENU
- HOW TO USE SUB MENUS
- PICTURE MENU
- FEATURES MENU
- LANGUAGE
- CHILD LOCK
- CLOCK
- WAKE TIME
- WAKE PR
- INSTALL MENU
- AUTO SETUP
- EDIT
- FREQ.
- NAME
- PROGRAM
- STORE TO
- EDIT MENU
- PR
- Skip
- PROGRAMME LIST EDITION
- MANUAL CHANNEL SETTINGS
- Choose starting point
- Channel searching
- Fine Tuning
- Enter station name
- Store programme in memory
- Teletext (Option)
- SWITCHING TELETEXT ON/OFF
- SELECTING PAGES
- PAGE HOLD
- COLOUR BUTTONS IN TOP/FLOF TELETEXT
- INDEX PAGE
- CALLING UP SUBPAGE DIRECTLY
- WATCHING TELEVISION DURING TELETEXT MODE
- IDOUBLING CHARACTER SIZE
- MIX
- REVEAL ANSWER
- VOLUME, BRIGHTNESS CONTROL
- The othello game
- Introduction
- The Rules
- How to Play
- Troubleshooting
- DAEWOO ELECTRONICS
Brand : DAEWOO
Model : KR21D7
Category : Television