
EWF 1280 IDA+++ - Washing machine ECG - Free user manual and instructions
Find the device manual for free EWF 1280 IDA+++ ECG in PDF.


| Product type | Freestanding front-loading washing machine |
| Model | ECG EWF 1280 IDA+++ |
| Energy class | A+++ |
| Load capacity (max) | 8 kg |
| Max spin speed | 1200 rpm |
| Number of programs | 15 |
| Drum volume | 64 L |
| Motor type | Inverter |
| Water consumption per cycle (cotton 60°C full load) | 47 L |
| Energy consumption per cycle (cotton 60°C full load) | 0.79 kWh |
| Annual energy consumption | 175 kWh |
| Annual water consumption | 10400 L |
| Washing noise level | 54 dB(A) |
| Spin noise level | 75 dB(A) |
| Residual moisture | 52% |
| Power supply | 220-240 V~ / 50 Hz, 2000 W |
| Product dimensions (H x W x D) | 850 x 600 x 580 mm |
| Product weight | 63 kg |
| Water pressure (min/max) | 0.03 MPa / 1 MPa |
| Water supply type | Cold water only |
| Display | Digital display with remaining time, error codes |
| Features | Child lock, delayed end, extra rinse, sound setting, Eco-Logic system |
| Maintenance | Clean pump filter monthly, detergent drawer every 2 months |
| Safety | Child proof door lock, overheating protection, emergency door opening |
| Accessories included | Operating manual, inlet hose, plastic plugs, spanner |
Frequently Asked Questions - EWF 1280 IDA+++ ECG
User questions about EWF 1280 IDA+++ ECG
0 question about this device. Answer the ones you know or ask your own.
Ask a new question about this device
Download the instructions for your Washing machine in PDF format for free! Find your manual EWF 1280 IDA+++ - ECG and take your electronic device back in hand. On this page are published all the documents necessary for the use of your device. EWF 1280 IDA+++ by ECG.
USER MANUAL EWF 1280 IDA+++ ECG
natural_image
White and black front-loading washing machine with digital display (no visible text or symbols)EWF 1280 IDA+++
CZ
AUTOMATICKÁ PRAČKA
NÁVOD K OBSLUZE
DE
WASCHMASCHINE
BEDIENUNGSANLEITUNG
SK
AUTOMATICKÁ PRÁČKA
NÁVOD NA OBSLUHU
GB
AUTOMATIC WASHING MACHINE
INSTRUCTION MANUAL
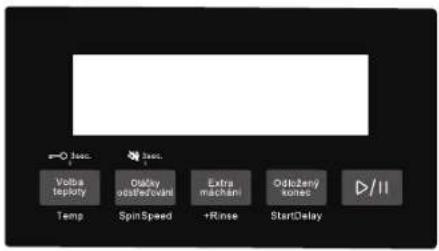
Displej

natural_image
Simple line drawing of a container with two blocks inside and an arrow indicating direction (no text or symbols)natural_image
Line drawing of a person washing a refrigerator (no text or symbols)natural_image
Simple line drawing of an electrical outlet with a plug and cable (no text or symbols)
natural_image
Illustration of a hand using a tool to clean or adjust a component (no text or symbols visible)Filtr čerpadla
natural_image
Line drawing of a hand inserting a small component into a wall socket (no text or symbols)Displej

natural_image
Simple line drawing of a container with two blocks inside, no text or symbols presentnatural_image
Line drawing of a person washing a washing machine (no text or symbols)Zapojenie do elektriny
natural_image
Two-step diagram showing a cable being charged into an electrical outlet and then using a tool to clean electrical wiring (no text or symbols present)Filter čerpadla
natural_image
Line drawing of a hand inserting a small component into a rectangular panel (no text or symbols)Display

natural_image
Pure mechanical diagram showing a container with internal components and an arrow, no text or symbols present.natural_image
Line drawing of a person washing a washing machine (no text or symbols)natural_image
Two-step diagram showing a plug inserted into an electrical outlet and a hand using a power tool on a surface (no text or symbols)DE
Punmpenfi Iter
natural_image
Line drawing of a hand holding a small object near a wall (no text or symbols)Washing machine....75
Accessories....76
WASHING MACHINE INSTALLATION....76
Removal of the packaging material 76
Removal of the locking screws 76
Location of the washing machine 77
Setting the adjustable feet....77
Connecting electricity....77
Connecting the water supply....78
Connecting the drain hose....78
OPERATING INSTRUCTIONS....79
Detergent drawer 79
CONTROL....79
Preparation before washing 79
Starting washing....81
Program selection....81
Programs table....81
Start/Pause button....81
OFF position 82
Program selector....82
Display 82
Temperature setting button 82
Spin speed button....82
Delayed end button....82
EXTRA rinse button 82
Program completion....82
Using additional functions....82
Sound notification setting....83
Child safety lock 83
Child protection function 83
CLEANING AND MAINTENANCE....83
Pump filter....83
Detergent drawer 83
PRACTICAL INFORMATION....84
Clothing care symbols 84
Removing stains....85
TROUBLESHOOTING....86
AUTOMATIC SYSTEM FOR DETECTION OF MALFUNCTIONS....89
TECHNICAL SPECIFICATIONS....90
INFORMATION SHEET OF THE WASHING MACHINE....92
SAFETY INSTRUCTIONS
Read carefully and keep for future use!
GB
Warning: The safety measures and instructions contained in this manual do not include all conditions and potential situations. The user must be aware that common sense, caution, and care are factors that cannot be integrated into a product. These factors must be therefore secured by the user/users using and operating this device. We are not liable for any damages caused during shipping, by incorrect use, voltage fluctuation or the modification or adjustment of any part of the appliance.
To protect against the risk of fire or electric shock, basic precautions must be taken while using electrical appliances, including the following:
- Make sure the voltage in your outlet corresponds to the voltage provided on the appliance label and that the socket is correctly grounded. The outlet must be installed according to valid safety instructions.
- Do not operate the device if the cord is damaged. All repairs or adjustments including cord replacements must be carried out by a professional service centre! Do not remove the protective covers from the appliance; there is a risk of electric shock!
- Do not plug and unplug the power cord from the outlet using wet hands. You will avoid risk of electric shock.
- Do not touch the appliance with wet hands or feet.
- The power cord must remain accessible once the device is installed. Do not shorten the cable or use a power strip or extension cord. Do not allow the cord to touch hot surfaces or place the cord over sharp edges.
- Do not turn the device on or off by plugging or unplugging the power cord. Do not remove the power cord from the outlet by yanking the cord. Unplug the power cord from the outlet by grasping the plug.
-
Do not place the machine on carpets or similar surface that could block the ventilation openings in the base.
-
Do not insert any objects into the device or place any objects on the device (e.g. vases, cups, etc.).
-
Do not place the drain hose of your machine in the sink, buckets or basins.
-
Children younger than 3 years old should be prevented from access to the appliance unless they are constantly under supervision.
-
Do not allow children to play with the appliance. Protect access to the machine from children and animals.
-
Remember that packaging materials can be dangerous to your children. Keep packaging materials out of the reach of children or dispose of them ecologically in accordance with the instructions.
-
Keep away from children the small parts supplied in the bag with documentation.
-
Do not expose the appliance to direct sunlight, do not use it outside, and do not expose it to rain.
-
Do not keep fl ammable liquids close to the appliance.
-
Do not touch the washing machine with wet hands when it is running, and never open the detergent compartment or washing machine door during operation.
-
During discharge, do not touch the drain hose and the discharged water. Water may reach high temperatures during the operation of the washing machine.
-
In case of malfunction first unplug it from power and then close the water tap. Do not try to repair the appliance by yourself, contact an authorized service center.
-
Before first use, remember to REMOVE THE LOCKING SCREWS securing the drum during transport. Damage cause by starting the washing machine with installed locking screws is not covered by the warranty.
-
The appliance is intended for household use. Commercial use will void the warranty.
-
This appliance can be used by children aged 8 or older and by the physically and mentally impaired or by individuals with insufficient experience and knowledge if supervised or trained to use the appliance safely and if they understand the potential dangers. Cleaning and
maintenance by the user must not be done by children unless they are older than 8 years old and under supervision. Children under the age of 8 must keep away from the appliance and the power supply.
- Any intervention in the appliance by a person other than an authorized service provider results in loss of warranty.
- The warranty does not cover damage caused by outside effects (fl ood, chemicals, fi re, etc.).
- The manufacturer is not liable for any damage caused by improper grounding/use.
- Do not allow children to play with the washing machine or climb on it.
- Do not put clothes soaked with any fl ammable material in the washing machine - there is a risk of fi re.
GB

- Before you begin to use your new washing machine, ask your nearest authorized service center for assistance with installation and putting it into operation.
• Install the washing machine in a well ventilated area with adequate air circulation. Place the appliance so that it can fully open the washing machine door.
• The ideal ambient temperature for the washing machine operation is 15^ C to 25^ C. - Frozen hoses can rot and break. In areas where the temperature drops below freezing, the temperature may jeopardize the safe operation of electronic circuits.
- We recommend that you carry out the first wash cycle without clothing in the "Cotton" program so that you pour into the detergent compartment a 12 cup of detergent.
- Since long term contact with air can lead to deposition of detergent or fabric softener, pour the detergent and fabric softener into the compartment until just before the intended wash.
- The amount of laundry loaded into the washing machine must not exceed the maximum permitted amount. Otherwise, the washing machine will run in the safe mode.
- Use the washing machine only for laundry that is labelled by the manufacturer as suitable for machine washing.
- When using fabric softener and similar products in your machine, follow the manufacturer's recommendations for detergent/fabric softener.
- Make sure that there are no foreign objects in the pockets of the laundry pieces put in the washing machine (nails, needles, coins, lighters, matches, clips, etc). These foreign objects could damage the washing machine.
- Washing very dusty clothing damages your washing machine. Shake heavily dusty clothing before placing it in the washing machine.
- Never open the detergent drawer while the machine is running.
- Never force open the door of the washing machine while it is running.
- Sulphur in decolourants may cause corrosion. Therefore never use decolourants in the washing machine. Never use substances containing solvents (e.g. benzine) in the washing machine.
- If you are not using the washing machine for longer time, unplug it, close the water supply and leave the door open. The interior of your machine will stay dry and free of odours.
- After testing at the end of the manufacturing process in the machine might remain a small amount of water, which does not constitute a risk of damage to your machine.
Danger of flooding
- Before placing the drain hose in the sink or wash basin, make sure that the water drains quickly.
• Take necessary measures to prevent slippage of the hose. - Recoil of an incorrectly placed hose could cause its slippage. Make sure that the plug cannot close the sink drain opening.
Danger of fall or injury
- Do not stand on the washing machine. The top plate could break and you could injure yourself.
- Arrange safely the hoses and power cable after installation. Trip and fall could cause injuries.
- Do not turn the washing machine upside down or on its side.
- Do not lift the washing machine by its protruding parts (detergent drawer, door). They could be damaged and cause injury.
- Handling the washing machine requires cooperation of at least two people.
Children's safety
- Do not leave children without supervision close to the washing machine. Children might lock themselves in the machine, with fatal consequences.
- During the operation the glass door and the washing machine surfaces can be very hot. Protect small children from touching these surfaces.
- Keep the packaging materials away from the children.
- Ingestion of detergents can cause poisoning and contact with skin or eyes can cause irritation. Keep detergents away from the children.
DESCRIPTION
Washing machine
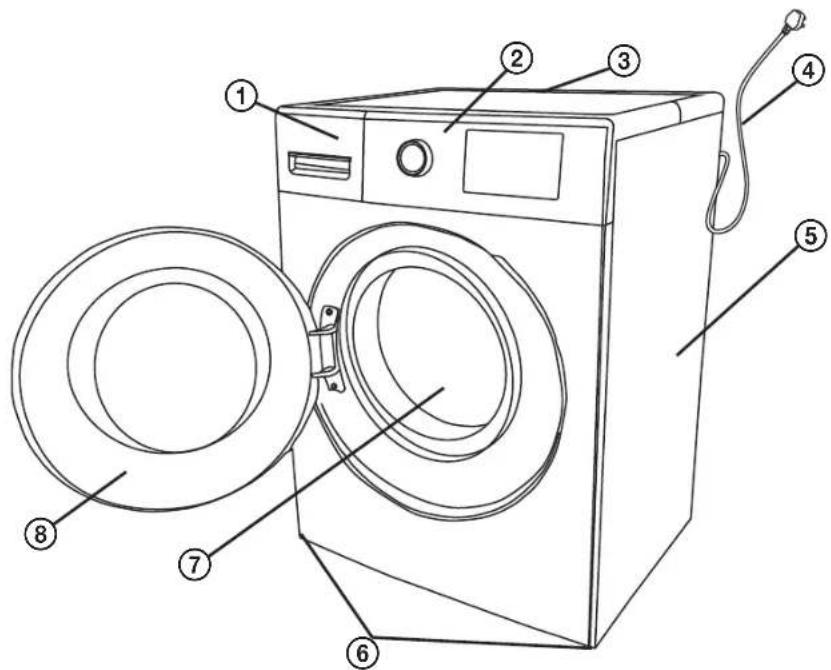
-
Detergent drawer
-
Top plate
-
Control panel
-
Power cable
-
Washing machine cabinet
-
Drum
-
Adjustable feet
-
Drum door
Front panel and controls
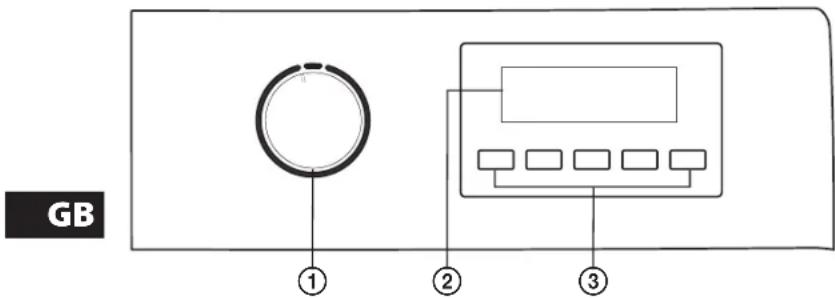
Display

- Programs switch
- Display
- Additional function buttons
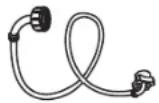
Accessories
| Operating manual Inlet hose Plastic plugs (4 pcs) Spanner | |||
 |  |  |  |
WASHING MACHINE INSTALLATION
Removal of the packaging material
Packaging material protects your washing machine during transportation. Packaging materials are environmentally friendly and recyclable. Recycling saves raw material resources and protect the environment.
Removal of the locking screws
Before you start using the machine, it is ESSENTIAL that you remove the locking screws at the rear of the machine which protect the drum during transport. Damage cause by starting the washing machine with installed locking screws is not covered by the warranty.
- Use the wrench to loosen the locking screws by turning them counterclockwise.
- Remove the loosened locking screws.
- Insert the supplied plastic plugs in the holes from the locking screws.
- Keep the locking screws for possible future transportation.
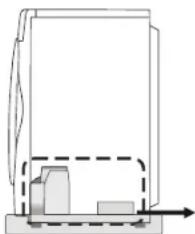
Before first switching on, be sure to remove the base unit protection on the underside of the washing machine when unpacking – see figure. Operation with residues of packaging material may adversely affect the functioning of the washing machine.

natural_image
Pure diagram of a mechanical or electrical component with no text, numbers, or symbols visibleBase unit protection
Location of the washing machine
- The washing machine can not be placed on a sloping surface, on uneven floors or on different steps and platforms.
- Do not place the machine on carpets or similar surface that would prevent ventilation beneath the washing machine.
• To ensure quiet operation vibration-free, position the machine on a firm non-slip surface.

GB
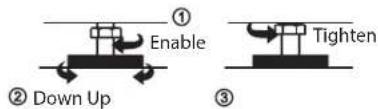
Setting the adjustable feet
- You can balance the washing machine even using the front adjustable feet. You can verify the correct balance by using a plumb or a spirit level.
- Loosen the locking nut.
- Turn to adjust the feet up or down.
• After alignment, tighten the locking nut again. - Grasp the washing machine and verify that it does not move.
- Never compensate for uneven floor by inserting cardboard, wood or similar materials under the washing machine.
- When cleaning the floor under the machine, be careful not to change the level of the washing machine.
1.

2.
3.

natural_image
Line drawing of a person washing a large refrigerator (no text or symbols)Connecting electricity
- This appliance is designed for 220 \~ 240 V / 50 Hz power supply.
- The power cable of your washing machine is equipped with special plug with grounding pin. This plug should only be connected to a grounded outlet in an outlet circuit with a 10 A fuse. If you do not have such an outlet with 10 A fuse, ask a qualified electrician for the installation.
• We are not liable for damages caused by use without proper grounding.
Note: Use of the appliance at low voltage will result in shortening the service life and lower efficiency.
GB
Connecting the water supply
- Depending on the particular specifications of your machine it has either a single water inlet (cold) or double water inlet (cold / hot). Hose with white cap is connected to the cold water inlet, hose with a red cap is connected to the hot water inlet (valid for appliances with two water inlets).
- To prevent water leakage at the connection points, we supply along with packaging one or two nuts (for washing machines with two inlets). Attach the nuts on the supply hoses on the side of the water tap.
- Screw on the new water inlet hose onto the tap with thread 34 inches.
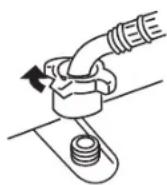
- Connect the white end of the supply hose, equipped with an elbow, to the white inlet with filter on the back of the machine. Do the same with the hose equipped with red end (for washing machines with two inlets). Tighten the plastic connecting nuts manually. If you are unsure about the connection, entrust it to a qualified installer.
- The water flow pressure of 0.03 \~ 1 MPa allows your machine to work more efficiently. (0,1 MPa pressure means that through a fully open tap flows more than 8 litres of water per minute.)
• After connecting, open the tap fully and check that there are no leaks at joints. - Make sure that the new supply hoses are not bent, broken or pinched and that they have the original length.
- If your machine is equipped with a second inlet for hot water, the hot water temperature should not exceed 50^ .
Note: When connecting the washing machine, use only the new inlet hoses supplied with the washing machine. Never use old, used or damaged water hoses.

Connecting the drain hose
- End of the drain hose can be attached to a special facility for sewage drain or a special outlet on the sink siphon.
- Never try to extend the length of the drain hose using clamps.
- Make sure that the drain hose is not folded, twisted, pinched and that it has the original length.
- Fix the drain hose to a height of 60 \~ 120 cm above the floor.
-
Do not put the drain hose into the sink, bucket or basin with no outlet.
-
If you do not attach the drain hose permanently to a drain outlet, keep the drain hose in the time of inactivity of the washing machine at the rear according to fig. ① below.
-
When washing put the end of the hose in the sink (see fig. ② below). You can also put the hose directly into the drains, but leave room for easy drainage of water between the end of the hose and the drains.
-
Clean the filter regularly to ensure optimum operation of the washing machine.
Note: Do not remove the hose fastening clamp (fig. 1), as this could lead to problems with draining water.

OPERATING INSTRUCTIONS
Detergent drawer
Detergent compartment

- When you use washing powder or ground soap, dissolve the detergent first and then pour the solution into the compartment.
Washing gel

- Use only low foam detergents. - When using concentrated detergents, dilute the detergent with water in a 1:1 ratio, then pour the solution into the compartment.

GB
Fabric softener compartment.

• Pour fabric softener into the softener compartment before washing. The fabric softener will be automatically used with the last rinse.
• In the case of concentrated products, dilute the fabric softener before dispensing to ensure that the compartment is adequately filled.
- Never fill the fabric softener above the maximum mark.
Pre-wash compartment

• Used to dispense the detergent for pre-washing heavily soiled laundry (use the appropriate program for pre-washing).

Notes
- It is prohibited to use highly foaming detergents.
- Dispense the detergents according to the instructions given on the detergent package.
- Excessive amount of the detergent causes excessive foaming and can cause insufficient rinsing of the laundry or damage the washing machine.
- When washing use a suitable detergent depending on the laundry type, the selected temperature and the degree of soiling.
CONTROL
Preparation before washing
Sorting laundry
- Garments are labelled, with the indication of the recommended maintenance procedures (see "Useful information"). Follow these recommendations when washing and drying the laundry.
- Divide the clothing by type (cotton, synthetic, fi ne linen, wool, etc.), washing temperatures and soiling (slightly dirty, dirty, heavily soiled).
- Do not wash the white and the coloured laundry together.
ECG
79

- Wash coloured laundry separately at first wash, it could bleed colour.
- Make sure there are no metal objects in the pockets.
Warning: Malfunctions caused by foreign objects in the washing machine are not covered by warranty.
- Close all the zippers and button up all the buttons of the clothing.
- Remove the plastic or metal hooks of the curtains and drapes, or place them in a washing net or bag and lace up.
- Turn the garments like pants, knitwear, T-shirts and tracksuits inside out.
- Wash socks, handkerchiefs and similar small pieces in the washing net.
GB
Putting the laundry in the washing machine
- Open the washing machine door.
- Arrange the laundry in the drum.
Note: The maximum capacity may vary depending on the laundry type, the degree of soiling and the selected program. Do not exceed the maximum capacity of dry clothes for the program, see the table of programs.

The following approximate table may serve as an example:
| Type of laundry Weight (g) | |
| Towel 200 | |
| Bedding 500 | |
| Bathrobe 1200 | |
| Blanket 700 | |
| Pillow case 200 | |
| Underwear 100 | |
| Tablecloth | 250 |

- Place the laundry in individually.
- When closing the appliance door, make sure that the laundry does not get caught between the door and sealing.
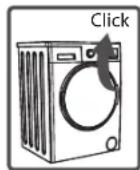
- Push to close the door so that it clicks into place.
- Close the door properly. If the door is not properly closed, the washing machine will not start.
Adding detergent
The amount of detergent will depend on the following factors:
- Use of detergent is determined by the degree of soiling.
- Use detergents intended for automatic washing machines. A suitable amount of detergent is indicated on the detergent packaging.
- Heavier soiled laundry and harder water require larger amounts of detergent.
- The necessary amount of detergent increases with the amount of laundry to be washed.
- Add softener to the softener compartment. Do not exceed the MAX mark so that the softener would not overflow in the wash when the machine uses washing detergent.
- It is necessary to dilute very thick softeners before adding them in the compartment. Too thick fabric softener could clogg the opening and could prevent softener from flowing from the compartment.
Adding laundry function
If you decide to add laundry after starting the program, stop the washing machine by pressing and holding the Start/Pause button. The lock icon on the display goes out.
Then you can open the door and add the required laundry items. Do not attempt to open the door by force, since this may cause damage. If there is too much foam and water in the drum, water may leak out when it is opened. Restart the washing machine by pressing the button "Start/Pause".
The door can not be opened when the drum is moving and there is great amount of water inside.
Starting washing
- Plug the washing machine in the outlet.
- Open the water tap.
- Open the washing machine door.
- Place the laundry evenly in the washing machine.
- Close the door and push until it clicks.


GB
Program selection
Select the appropriate program for the type of laundry; see "Table of programs".
Programs table
Program duration may vary depending on the type and weight of the laundry loaded, selected additional functions, water inlet temperature and ambient temperature.
| Programme Temperature | Spin speed (rpm.) | Program length (min.) | Max. load (kg) | Type of laundry | |
| COTTON ECO | Def.: 40°C (40-60°C) | 1200 293 8 | Cotton laundry. | ||
| COTTON | Def.: 30°C (cold-80°C) | Def.: 800 (400-1200) | 68 8 Cotton laundry. | ||
| SPORT | Def.: 30°C (cold-60°C) | Def.: 800 (400-1000) | 63 6 Cotton, synthetic | and semi-synthetic clothing | |
| JEANS, DENIM | Def.: 30°C (cold-40°C) | Def.: 800 (400-1000) | 68 5 Denim clothes. | ||
| WOOL | Def.: cold (cold-40°C) | Def.: 600 (400-800) | 64 | 2 | Woollens, which is machine washable. Use detergent for washing wool. |
| SYNTHETIC | Def.: 30°C (cold-60°C) | Def.: 1000 (400-1200) | 78 5 Synthetics | ||
| WINTER OUTERWEAR | Def.: 30°C (cold-40°C) | Def.: 800 (400-1200) | 91 | 2 | Coats and winter jackets that can be washed in a washing machine. |
| QUICK | Def.: cold (cold-30°C) | Def.: 800 (400-1200) | 16 1 Slightly soiled and infrequently worn clothing | ||
| COLOURED 15°C | Def.: 600 (400-800) | 60 3 Coloured clothing. | |||
| UNDERWEAR | Def.: 30°C (cold-60°C) | Def.: 800 (400-1000) | 81 3 Men's and women's underwear. | ||
| T-SHIRTS/ BLOUSES | Def.: 30°C (cold-60°C) | Def.: 800 (400-1000) | 65 | 3 | Soiled cotton, synthetic and semi-synthetic T-shirts and blouses can be washed together. |
| KIDSWEAR | Def.: 30°C (cold-80°C) | Def.: 800 (400-1000) | 143 4 | Children's clothing, one rinse in addition to regular programs. | |
| RINSE - | Def.: 800 (400-1200) | 21 | 6 | if you want to rinse clothes after washing again, you can use this program for any type of laundry. | |
| SPIN - | Def.: 800 (400-1200) | 12 | 6 | If you want to spin the clothes after washing again, you can use this program for any type of laundry. | |
| CLEANING THE DRUM | 80°C 800 | 139 - | Cleaning of the inside of the washing machine, no laundry is added. | ||
Start/Pause ▶ II button
Press Start/Pause button to start a selected program or to pause a running program. When you switch the washing machine to standby mode, the Start/Standby light will flash.
OFF position
Set to OFF position to turn the washing machine off.
Program selector
Use the program selector to choose the appropriate program according to the degree of soiling and for the type of laundry, see "Program table".
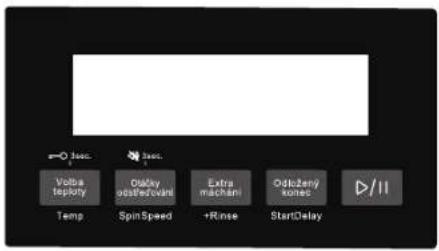
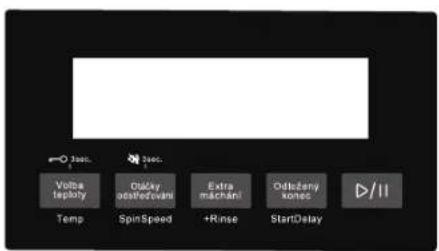
Display
- When the washing machine is switched on, the display shows the spin speed and additional information about the selected program.
- During washing, the remaining time is displayed on the display until the washing is over.
- In the event of a malfunction, the display shows the error code.
GB
Temperature setting button
Use the temperature setting button to set the desired washing temperature.
Spin speed button
Use the spin speed button to set the maximum spin speed, see the programs table above.
Delayed end button
Use this button to delay the start of the program.
- Use the Start/Delay end button to set the desired end of washing interval.
- Use the Start/Pause button to start the countdown.
Note: The set time must be always longer than the length of the set program.

WARNING: The display data shows in how long the program will be completed.
To cancel the delayed start function, press the power button. Then the delayed start can be set again.
To start the delayed start countdown, the machine must be started by pressing the Start/Pause ▶ II button.
You can not use the delayed start function when selecting the "Spinning" program.
EXTRA rinse button
Use this button to add an extra rinse to the program.
Note: The number of additional rinses is limited in some programs.
Program completion
When the selected program is completed the washing machine stops automatically.
- The program completion light flashes on the panel.
- You can open the washing machine door and remove the laundry.
- Leave the door of the washing machine open to dry the interior of the washing machine after you remove the laundry.
- Turn the program switch to OFF.
- Unplug the washing machine.
- Close the water supply.
Using additional functions
Before starting the program, you can select an additional function as needed.
- Press the additional function button.
- If the additional function symbol lights up on the display, the selected function will be activated.
- If the additional function symbol flashes, the selected function cannot be activated.
Sound notification setting
If you want to change the sound signal setting of program completion, turn on the machine and press the Start/Pause button until the signal is heard. This will turn the sound signal off after washing is complete. Repeat the above steps to turn on the signal again.
Child safety lock
The washing machine is equipped with a child lock feature that prevents the program from being changed by accidentally pressing the buttons or turning the program selector. If the function is activated, the door can not be opened.
You can activate the child safety lock by long pressing (at least 3 seconds) the temperature setting button while the washing machine is switched on.
Repeat the steps above to turn off the child lock.
GB
Child protection function
If you open the washing machine door repeatedly before you start washing, the child protection program is automatically activated. When the door is open, the motor rotates the drum of the washing machine, then the door remains unlocked for a while before starting the wash cycle. If you open the door at this time, the washing machine stops.
CLEANING AND MAINTENANCE
- Unplug the machine before maintenance or cleaning.
- Close the water tap before starting maintenance or cleaning.
Warning: If you use cleaners containing solvents, you could damage parts of the washing machine. Do not use agents containing solvents for cleaning.

natural_image
Simple line drawing of an electrical outlet with a plug and socket (no text or symbols)
natural_image
Illustration of a hand using a tool to adjust or install a mechanical component (no text or symbols visible)Pump fi Iter
Pump fi ltration system prevents penetration of textile fi bres and small objects from water discharged into the pump and thus prolongs its lifespan. We recommend cleaning the pump fi lter every month.
Pump fi Iter cleaning:
- Use a coin to open the pump cover, insert it into the groove and push it.
- Before opening the filter cover, place in front of the lid a container to avoid leaking any water from the washing machine on the floor.
- Release the filter by turning it counterclockwise and drain the water.

natural_image
Line drawing of a hand inserting a small component into a wall socket (no text or symbols)Note: Depending on the amount of water in the washing machine you might have to empty the container several times.
- Remove foreign objects from the filter using a brush and wash it with water.
- Insert and screw the filter back clockwise after cleaning it. Tighten the filter sufficiently to prevent water leaks.
- Do not remove the fi Iter during washing!

WARNING!
The water in the pump may be hot, wait until it cools down.
Detergent drawer
Unused detergent may collect in the detergent drawer or its cover. Therefore from time to time remove the detergent drawer and remove this build-up. We recommend that you clean the drawer every two months.
Removing the detergent drawer:
- Pull out the drawer until it stops.
- Pull the drawer while pressing the part marked in the picture. Pull out the drawer entirely.
- Clean the drawer using brush and rinse thoroughly.
- Remove the excess detergent around the drawer so that it would not get into the machine.
- Insert the drawer back the same way after drying.
- Do not wash the detergent drawer in the dishwasher!

GB
Washing machine cover
Clean the outside of the machine with warm water and mild detergent that will not damage the surface finish of the washing machine. After rinsing with clean water, wipe the washing machine with a soft dry cloth.

Drum
Do not leave any metal objects, such as needles, staples or coins etc. in the washing machine. These objects may cause rust stains on the drum. If you want to eliminate these stains, use a cleaner without chlorine and follow the instructions of the cleaner's manufacturer. Never use pot scourers or similar abrasives to clean the rust stains.

During the long-term use of the washing machine, dirt residue can remain in the drum. We recommend using the "drum cleaning" program once a month to avoid dirt deposits.
PRACTICAL INFORMATION
Clothing care symbols
  Normal wash Maximum washing temperature is 90°C Normal wash Maximum washing temperature is 90°C |  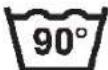 | 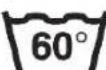 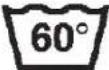 Maximum washing temperature is 60°C Maximum washing temperature is 60°C |
  Maximum washing temperature is 30°C Maximum washing temperature is 30°C |  Manual washing Manual washing |  Washing prohibition Washing prohibition |
 Can be bleached Can be bleached |  No bleach No bleach |  Maximum ironing temperature 110 °C Maximum ironing temperature 110 °C |
 Maximum ironing temperature 150 °C Maximum ironing temperature 150 °C |  Maximum ironing temperature 200 °C Do not iron Maximum ironing temperature 200 °C Do not iron |  |
 Can be dry cleaned Can be dry cleaned |  Dry cleaning prohibition Dry cleaning prohibition |  Unfold fl at Unfold fl at |
 Hang when wet Hang when wet |  Hang to dry Do not dry in the dryer Hang to dry Do not dry in the dryer |  |
 Can be cleaned with benzene, alcohol and trifluorochloretane Can be cleaned with benzene, alcohol and trifluorochloretane |  Can be cleaned with benzene, perchlorethylene Can be cleaned with benzene, perchlorethylene |  Can be cleaned with perchlorinetylene, R11, R113 and benzene Can be cleaned with perchlorinetylene, R11, R113 and benzene |
Removing stains
GB


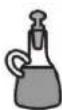

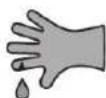

Alcoholic beverages: The stain should first be washed with cold water, then rubbed with glycerine and water and rinse it in water with vinegar.
Shoe polish: Scrape the stain gently, without damaging the fabric, rub in water with detergent and rinse. If it persists, rub it in 1 unit of pure alcohol (96 %) mixed with 2 units of water and then wash with lukewarm water.
Tea and coffee: Stretch the stained portion on top of a container and pour over it water as hot as the type of fabric allows. If the fabric can withstand it, wash it with a bleaching agent.
Chocolate and cocoa: Soak in cold water and rub it in water and soap or detergent, then wash at as high a temperature as the fabric allows. If there is still greasy stain on the fabric, wipe it with oxide (3%).
Ketchup: After scraping the dried pieces without damaging the fabric, leave in cold water for about 30 minutes and wash in water with detergent.
Meat broth, egg: Remove the dried stain and wipe with a sponge or soft cloth dipped in cold water. Wash manually with detergent and wash with diluted bleach.
Grease and oil stains: First wipe the residue. Rub the stain in water and detergent and then wash it in warm soapy water.
Mustard: First apply glycerine on the stain. Rub with cleaning agent and then wash it. If the stain has not disappeared, wipe with alcohol (for synthetic and colored fabrics mixture of 1 unit alcohol, 2 units of water).
Blood: Soak the laundry in cold water for 30 minutes. If the stain has not disappeared, soak for 30 minutes in a solution of water and ammonia (3 spoons of ammonia in 4 litres of water).
Cream, ice cream and milk: Soak the clothes in cold water and rub the part with the stain with water and detergent. If the stain has not disappeared, use bleach in the correct concentration (Do not use bleach on colored fabrics).
GB

Soil: Soil stains must be removed as soon as possible. Stains must be washed in detergent, if they do not disappear, it is necessary to wipe them with oxide (3%).

Ink: Hold the part of the stained area under cold water and wait until inky water stops flowing. Then rub with water with lemon juice and detergent, wash after 5 minutes.

Fruit: Stretch the stained portion on top of a container and pour cold water over it. Do not pour hot water over it. Wipe with cold water and apply glycerine. Wait 1-2 hours, wipe with a few drops of white vinegar and rinse.

Grass: Rub the stain with water with detergent. If the fabric can withstand it, wash it with a bleaching agent. Rub woollen clothes with alcohol (for colored fabrics mixture of 1 unit alcohol, 2 units of water).

Oil paints: Stains must be removed by applying a solvent before they dry. The rub with water with detergent and wash it.
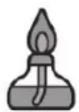
Burn: If the fabric can withstand it, wash it with bleach, you can add it into the washing machine. For woollen fabrics, spread over the satins cloth dampened in water with oxide and iron over a dry cloth. Rinse and wash thoroughly.
TROUBLESHOOTING
All repairs must be performed by authorized service centre only. When the machine requires repair, or if you cannot solve the problem using the instructions below:
- Unplug the washing machine.
- Close the water tap.
- Contact the closest authorized service.
| Problem Possible cause Troubleshooting | ||
| The washing machine does not start. | The washing machine is not plugged in. | Plug the washing machine in the outlet. |
| Blown fuse. Replace fuse. | ||
| There was power outage. Check the power status. | ||
| You did not press ▶ II (Start/Pause). | Press ▶ II (Start/Pause). | |
| The program selector is in the “Stop” position. | Switch the program selector to the required program. | |
| The door is not properly closed. Close | carefully the washing machine door. | |
| No water is coming in the washing machine. | The water tap is closed. Open the water tap. | |
| The inlet hose may be twisted. Check the inlet hose. | ||
| Clogged inlet hose. Clean the fi Iters of the inlet hose. (*) | ||
| The inlet fi Iter is clogged. Clean the fi Iter of the inlet valve. (*) | ||
| The door is not properly closed. Close carefully the washing machine door. | ||
| The washing machine does not drain water. | The drain hose is clogged or twisted. | Check the drain hose. |
| Pump fi Iter is clogged. Clean the pump fi Iter. (*) | ||
| The laundry is not distributed evenly in the washing machine. | Distribute the laundry evenly. | |
| The washing machine vibrates. | The feet of the washing machine are not adjusted. | Adjust the feet. (**) |
| You did not remove the lock screws. Remove the lock screws. (**) | ||
| There is small amount of laundry in the washing machine. | Does not prevent washing machine operation. | |
| Overloading the washing machine or uneven distribution of laundry. | Do not exceed the recommended quantity of laundry and spread it in the washing machine evenly. | |
| The washing machine touches surrounding surfaces. | Install the machine so that it does not touch the surrounding surfaces. Allow at least 2 cm between the washing machine and wall or other surfaces. | |
| Excessive foam in the detergent drawer. | You used too much detergent. | Press ▶ II (Start/Pause). To prevent foaming, mix one teaspoon of fabric softener in half litre of water and pour it into the detergent drawer. After 5 – 10 minutes press ▶ II (Start/Pause). Use correct amount of detergent in the next washing. |
| Unsuitable detergent. Use only detergents intended for automatic washing machines. | ||
GB
GB
| Problem Possible cause Troubleshooting | ||
| Unsatisfactory washing results. | Your laundry was too soiled for the selected program. | Select suitable program (see Program table). |
| Insufficient amount of detergent. Use more laundry detergent. | ||
| Load size exceeds the maximum capacity of your washing machine. | Do not exceed the maximum load capacity of your washing machine. | |
| The water may be too hard. Dispense | the detergent in accordance with the recommendation of the detergent manufacturer. | |
| Uneven distribution of the laundry in the washing machine. | Distribute the laundry in the washing machine evenly. | |
| The water is discharged immediately after fi lling. | The end of the drain hose is too low. | Place the drain hose in correct height (**). |
| There is no water visible during washing in the drum. | This is not a malfunction. The water is in the bottom part of the drum. | |
| There is detergent residue on the laundry. | Undissolved powder residues in the form of white dots may appear on the clothing. | Rinse the laundry again using the "Rinse" or after drying the laundry, clean the spots from clothing using a brush. |
| There are gray spots on the laundry. | These stains may be caused by oil, cream or ointment. | The next time you wash, use the maximum amount of detergent recommended by the detergent manufacturer. |
| The spin did not start or started belatedly. | This is not a malfunction. The control system of even distribution of laundry was activated. | The control system tries to achieve a more even distribution of laundry. The spin starts after rearranging the laundry. The next time you wash, load the laundry evenly. |
| Can not open the door of the washing machine. | The water temperature is too high. Wait until the water cools down. | |
| There was power outage. Check the power status. | ||
| There is a smell. With a new w | washing machine, smell of rubber sealing may be smelt after heating during operation. | This is not a malfunction. |
(*) See section on maintenance and cleaning of the washing machine.
(**) See section on installation of the washing machine.
Emergency door opening
If you need to open the door, e.g. in the event of a malfunction, disconnect the washing machine from the socket and wait for the drum to stop. Then pull the emergency washing machine rod located at the bottom right of the washing machine. You will hear a slight click, then the door can be opened. Before opening, make sure the water temperature is below 60^ C.
AUTOMATIC SYSTEM FOR DETECTION OF MALFUNCTIONS
Your machine is equipped with systems which are due to the continuous monitoring of the washing process capable in the event of any failure to take necessary measures and warn of abnormal condition.
| Error code Possible problem What to do | ||
 | The washing machine is not working. | · Check the power status.· Make sure that the washing machine has not been switched off automatically due to water leakage. |
 | No water is coming in the washing machine. | · Open the water tap.· Check the inlet hose.· Clean the fi lters of the inlet hose.· Clean the fi lter of the inlet valve. |
 | Water does not drain. · Check the drain hose.· Clean the pump fi lter.· Distribute the laundry evenly. | |
| [7AAS] | Can not open the door. The water temperature is too high, wait until the water cools down. After completing the program, the door is blocked against opening for safety reasons for a short period of time, wait. | |
| [XSDT] | Spinning does not start. · Make sure the washing machine is stable in place.· Make sure that the washing machine is not overloaded. If yes, remove part of the laundry load.· There could be tangled laundry. Add about 2 suitable laundry pieces and press ▶ II (Start/Pause). | |
| [SBHW] | The door is not closed. | Close the door and push it a little if necessary, the door lock indicator light must come on. Then continue washing by pressing ▶ II (Start/Pause). |
| Another code | Alarm signal sounds. | · Press the ▶ II (Start/Pause) button and try to start the selected program again.· If the problem persists, close the water supply, disconnect the appliance from the socket, and contact the nearest authorized service. |
DESCRIPTION LABEL AND ENERGY SAVING
Water and energy consumption may vary depending on the water temperature and water hardness, ambient temperature, load size, the additional features and voltage fluctuations.
You can reduce the costs of water and energy if you will always wash in the washing machine the recommended load for the selected program, wash the less soiled and daily laundry using short programs, if you will regularly carry out cleaning and maintenance and if you will wash in the hours when you pay a lower rate for electricity.

GB
- Model
- Brand
- Energy class
- Energy consumption
- Noise during washing
- Noise during spin
- Spin efficiency class
- Dry laundry capacity
- Annual water consumption
TECHNICAL SPECIFICATIONS
| Manufacturer | ECG |
| Model EWF 1280 IDA+++ | |
| EAN | 8592131238954 |
| Type Free standing - front loading | |
| Energy class A+++ | |
| Max. spin 1200 rev. / min | |
| Water pressure Max: 1 MPa | Min: 0,03 MPa |
| Load capacity 8 kg | |
| Washing effi ciency class A | |
| Spinning effi ciency class B | |
| Water consumption/cycle | 47 l |
| Water consumption/annual(**) | 10400 l |
| Energy consumption/cycle | 0.79 kWh |
| Energy consumption/annual | 175 kWh |
| Washing noise level | 54 dB (A) |
| Noise during spinning | 75 dB (A) |
| Residual moisture *** | 52 % |
| Voltage/Frequency | 220-240 V~ / 50 Hz |
| Lid latch | 10 A |
| Power input | 2000 W |
| Product Dimensions (H x W x D) | 850 × 600 × 580 mm |
| Dimensions with packaging (H × W × D) | 890 × 656 × 695 mm |
| Product weight | 63 kg |
| Product weight including packaging | 67 kg |
| Accessories | |
| Drum volume 64 l | |
| Motor type inverter | |
| Eco-Logic system yes | |
| Control of foam formation yes | |
| Stability equalization system yes | |
| Type of control digital | |
| Malfunction detector yes | |
| Child lock yes | |
| Water supply type cold | |
| Diameter of the drum opening 310 mm | |
| Door diameter 485 mm | |
| Pump- with fi liter yes | |
| Drum material stainless steel | |
| Tank material | polypropylene |
| The number of compartments in the detergent drawer | 3 |
| Replaceable top cover | no |
| Adjustable feet yes | |
| Number of programs | 15 |
GB
USE AND DISPOSAL OF WASTE
Wrapping paper and corrugated paperboard – deliver to scrapyard. Packing foil, PE bags, plastic elements – throw into plastic recycling containers.

DISPOSAL OF PRODUCTS AT THE END OF LIFETIME
Disposal of electric and electronic equipment (valid in EU member countries and other European countries with an implemented recycling system)
The represented symbol on the product or package means the product shall not be treated as domestic waste. Hand over the product to the specified location for recycling electric and electronic equipment. Prevent negative impacts on human health and the environment by properly recycling your product.
Recycling contributes to preserving natural resources. For more information on the recycling of this product, refer to your local authority, domestic waste processing organization or store, where you purchased the product.
This product complies with EU directive requirements on electromagnetic compatibility and electrical safety.


08/05

The instruction manual is available at website www.ecg-electro.eu.
Changes in text and technical parameters reserved.
GB
INFORMATION SHEET OF THE WASHING MACHINE
| Manufacturer | ECG |
| Model | EWF 1280 IDA+++ |
| Load capacity (cotton 60°C full load) | 8 kg |
| Energy class | A+++ |
| Energy consumption/annual* | 175 kWh |
| Energy/water consumption (cotton 60°C full load) / cycle | 0.79 kWh / 47 l |
| Energy/ water consumption (60°C cotton lesser load) / cycle | 0.71 kWh / 41 l |
| Energy/ water consumption (40 °C cotton lesser load) / cycle | 0.70 kWh / 42 l |
| Energy consumption in standby mode | 0.49 W |
| Energy consumption in off mode | 0.49 W |
| Water consumption/annual** | 10400 l |
| Spinning effi ciency class | B |
| Max. spin speed | 1200 rev. / min |
| Residual moisture *** | 52 % |
| Duration of the reference program (cotton 60°C full load) | 293 min. |
| Duration of the reference program (cotton 60°C lesser load) | 308 min. |
| Duration of the reference program (cotton 40 °C lesser load) | 289 min. |
| Washing noise level | 54 dB(A) |
| Noise during spinning | 75 dB(A) |
- Program No. 2 (Standard 60°C cotton program) and the program number 1 (Standard 40°C cotton program) are the standard washing programs, which correspond to the information on the labels; these programs are suitable for washing cotton clothing and are the most efficient in energy and water consumption.
- The actual water temperature may differ from the temperature declared in the program title.
- Program length, energy and water consumption may vary depending on the wash load, the weight and type, choice of extra functions, water and ambient temperature.
- When using wash programs with lower temperature we recommend to use liquid detergents.
- A suitable amount of detergent will depend on the degree of soiling and the amount of laundry. Please follow the instructions of the detergent manufacturer. * Based on 220 standard washing cycles using programs cotton 60°C and 40°C at full and half load, and using cheaper energy rates. Actual power consumption depends on how you use the appliance. ** Based on 220 standard washing cycles and programs of cotton 60°C and 40°C at full and lesser load. Actual water consumption depends on how you use the appliance. *** Based on the results of tests using standard program at 60°C cotton at full load and smaller load and using standard program 40°C Cotton with lesser load.










www.ecg-electro.eu
CZ
K+B Progres, a.s.
U Expertu 91 tel.: +420 272 122 111
250 69 Kličany e-mail: ECG@kbexpert.cz
SK
Distributor pre SR: K+B Progres, a. s., organizacná zložka
Mlynské Nivy 71
821 05 Bratislava e-mail: ECG@kbexpert.cz
DE


- EWF 1280 IDA+++
- Filtr čerpadla
- Zapojenie do elektriny
- Filter čerpadla
- Display
- Punmpenfi Iter
- SAFETY INSTRUCTIONS
- Read carefully and keep for future use!
- GB
- Danger of flooding
- Danger of fall or injury
- Children's safety
- DESCRIPTION
- Washing machine
- WASHING MACHINE INSTALLATION
- Removal of the packaging material
- Removal of the locking screws
- Location of the washing machine
- Setting the adjustable feet
- Connecting electricity
- Connecting the water supply
- Connecting the drain hose
- OPERATING INSTRUCTIONS
- Detergent drawer
- Detergent compartment
- Washing gel
- Fabric softener compartment.
- Pre-wash compartment
- Notes
- CONTROL
- Preparation before washing
- Sorting laundry
- Putting the laundry in the washing machine
- Adding detergent
- Adding laundry function
- Starting washing
- Program selection
- Programs table
- Start/Pause ▶ II button
- OFF position
- Program selector
- Temperature setting button
- Spin speed button
- Delayed end button
- EXTRA rinse button
- Program completion
- Using additional functions
- Sound notification setting
- Child safety lock
- Child protection function
- CLEANING AND MAINTENANCE
- Pump fi Iter
- WARNING!
- Removing the detergent drawer:
- Washing machine cover
- Drum
- PRACTICAL INFORMATION
- Removing stains
- TROUBLESHOOTING
- Emergency door opening
- AUTOMATIC SYSTEM FOR DETECTION OF MALFUNCTIONS
- DESCRIPTION LABEL AND ENERGY SAVING
- USE AND DISPOSAL OF WASTE
- DISPOSAL OF PRODUCTS AT THE END OF LIFETIME
- www.ecg-electro.eu
- CZ
- SK
- DE
Brand : ECG
Model : EWF 1280 IDA+++
Category : Washing machine