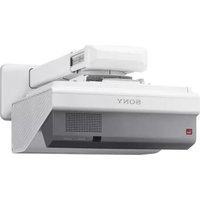
VPLSX631M - Projector SONY - Free user manual and instructions
Find the device manual for free VPLSX631M SONY in PDF.


| Product Type | 3LCD Video Projector |
| Model | VPLSX631M |
| Brand | Sony |
| Resolution | WUXGA (1920 x 1200) |
| Brightness | 6,000 lumens |
| Contrast Ratio | 3,000:1 |
| Lamp Life | 4,000 hours (standard), 6,000 hours (low mode) |
| Dimensions (W x H x D) | approx. 19.7 x 7.9 x 17.7 inches (500 x 200 x 450 mm) |
| Weight | approx. 33 lb (15 kg) |
| Power Consumption | max. 500 W (standby: 0.5 W) |
| Power Supply | AC 100-240V, 50/60 Hz |
| Key Functions | Input: HDMI, VGA, S-Video, Composite; Output: VGA; Network: RJ45, optional wireless; Lens shift, zoom, image flip, keystone correction; 3D capability (optional); Brightness uniformity adjustment; Multiple picture modes; Closed captioning; Security bar and password protection |
| Maintenance & Cleaning | Clean air filter every 500 hours; replace lamp when warning appears; use mild detergent for casing; avoid liquid ingress; keep vents clear |
| Safety | Class 1 laser product (if applicable); do not stare into beam; ensure proper ventilation; use only grounded outlets; keep away from water |
| Spare Parts & Repairability | Replacement lamp: Sony LMP-V330; filter kit: Sony VK-PS400; parts available through authorized service centers; user replaceable lamp and filter |
| General Information | Professional installation projector suitable for large venues; suports 24/7 operation; optional lenses available; 5-year warranty (lamp 1 year); RoHS compliant |
Frequently Asked Questions - VPLSX631M SONY
User questions about VPLSX631M SONY
0 question about this device. Answer the ones you know or ask your own.
Ask a new question about this device
Download the instructions for your Projector in PDF format for free! Find your manual VPLSX631M - SONY and take your electronic device back in hand. On this page are published all the documents necessary for the use of your device. VPLSX631M by SONY.
USER MANUAL VPLSX631M SONY
Operating Instructions
Before operating the unit, please read this manual and supplied Quick Reference Manual thoroughly and retain it for future reference.
VPL-SW636C/SW631C/SW631 VPL-SX631
Not all models are available in all countries and area. Please check with your local Sony Authorized Dealer.
Table of Contents
Overview
Location and Function of Controls .... 4
Main Unit ....4
Terminals 5
Remote Commander and Control Panel Keys 6
Interactive Pen Device (VPL-SW636C/SW631C only) 8
Preparation
Connecting the Projector 9
Connecting a Computer ......9
Connecting a Video equipment .... 11
Connecting a microphone ..... 13
Connecting a USB memory device 13
Connecting an External Monitor and Audio Equipment 13
Projecting an Image
Projecting an Image 14
Adjusting the Projected Image ... 16
Turning Off the Power ...... 20
Adjustments and Settings Using a Menu
Using a MENU 21
The Picture Menu ....22
The Screen Menu 23
The Function Menu 27
The Operation Menu 29
The Connection/Power Menu ...... 30
The Installation Menu ....33
The Information Menu ....34
Notes When Using PC Free Interactive Function (VPL-SW636C only) .....35
Network
Using Network Features ....36
Displaying the Control Window of the Projector with a Web Browser ....36
Confirming the Information regarding the Projector ....37
Operating the Projector from a Computer ....38
Using the e-mail report Function ....38
Setting the LAN Network of the projector ....39
Setting the WLAN Network of the projector ....40
Setting the Custom Labels for the Input Terminals of the Projector ....42
Setting the Control Protocol of the Projector ....42
Interactive Function
Using Interactive Presentation Utility 2 (VPL-SW636C/SW631C only) ...46
Connecting a Computer with a USB Cable ....47
For Windows ......47
For Mac ....50
Using the PC Free Interactive Function (VPL-SW636C only) ....52
Setting the PC Free Interactive Function ....52
Toolbars and icons ....52
Retrieve the Data Saved in the Projector ....57
Add/delete template images to/from the projector ....57
Using the Mouse Mode Function (VPL-SW636C only) ....58
Setting the Mouse Mode ....58
Operations of Interactive Pen Device While Using Mouse Mode ....58
Presentation Function via Network
Using Presentation Function via Network ....59
Installing Projector Station for Network Presentation ....59
Starting Projector Station for Network Presentation ....59
Projecting an Image ....60
Connection Settings ......61
Using the Controller ....62
One-Click projecting function ....62
Option format 63
Use Projector Station for Network Presentation without installing it to the computer. 64
Error code list of Projector Station for Projector Station for Network Presentation ....65
Displaying Images or Files Sent from a Tablet PC/Smartphone ....66
Playing Video and Audio using USB Connection
Playing Video and Audio using USB Connection 67
Starting USB Display 67
Playing Video and Audio ...... 68
Using the Controller 68
USB Media Viewer
Using USB Media Viewer ...... 69
Thumbnail Mode 70
Display Mode 71
Slideshow Mode 71
Others
Indicators 73
Messages List 75
Troubleshooting 76
Replacing the Lamp 80
Cleaning the Air Filter 82
Specifications 84
Projection Distance and Lens Shift Range 91
Dimensions 95
END USER LICENSE AGREEMENT 97
Index 103
Location and Function of Controls
Main Unit
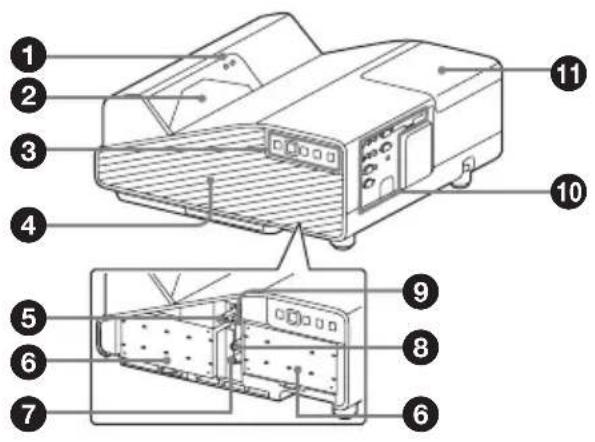

① Interactive Pen detector (VPL-SW636C/SW631C only)
②Projection window
③Control panel keys (page 6)
④Side cover/Ventilation hole (intake)
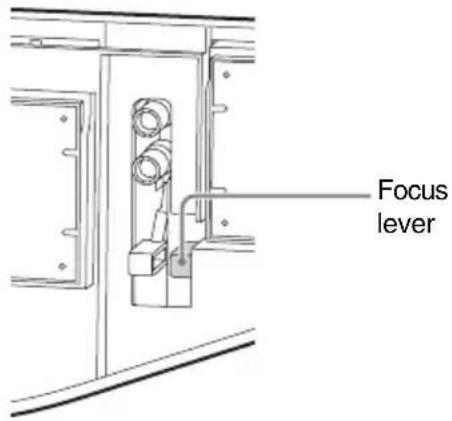
⑤ Focus lever (page 16)
⑥ Air filter (page 82)
⑦ Lens shift dial H (page 17)
⑧Lends shift dial V (page 17)
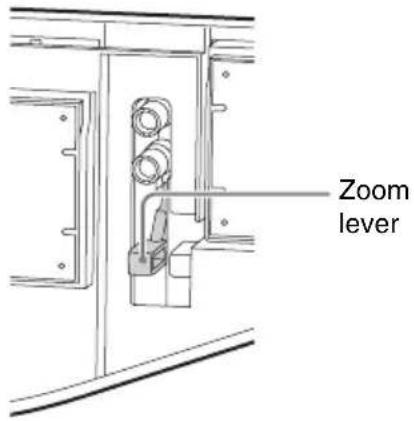
⑨Zoom lever (page 16)
⑩ Terminals (page 5)
⑪ Lamp cover (page 80)
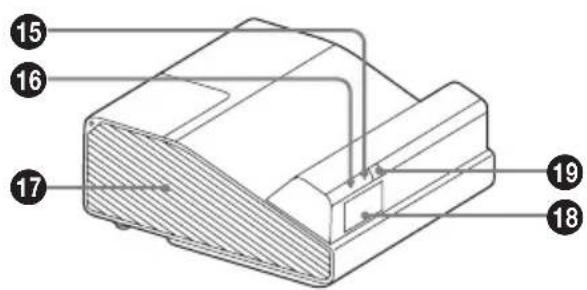
12 Foot (page 17)
⑬Security bar
Connects to a commercially available security chain or wire.
⑭Security lock
Connects to an optional security cable manufactured by Kensington. For details, visit Kensington's web site. http://www.kensington.com/
⑮ON/STANDBY indicator (page 73)
16 WARNING indicator (page 73)
⑰Ventilation holes (exhaust)
Caution
Do not place anything near the ventilation holes as this may cause internal heat buildup. Do not place your hand near the ventilation holes and the circumference as this may cause injury.
18Speaker
19 Remote control receiver
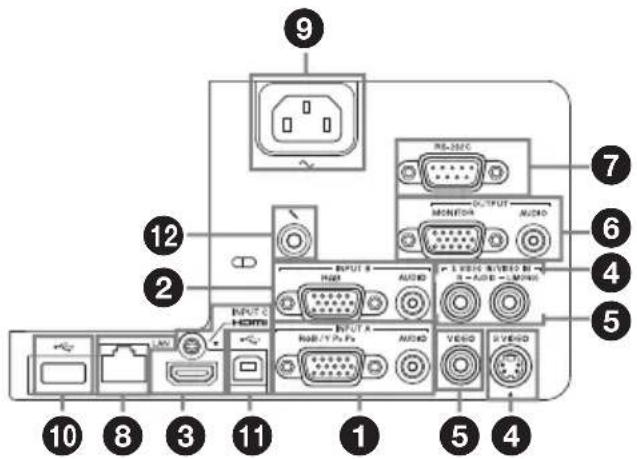
Input (pages 9, 11)
①INPUT A
Video: RGB/YPBPR input terminal (RGB/YPBPR)
Audio: Audio input terminal (AUDIO)
②INPUT B
Video: RGB input terminal (RGB)
Audio: Audio input terminal (AUDIO)
③ INPUT C
Video: HDMI input terminal (HDMI)
Audio: HDMI input terminal (HDMI)
The audio inputs of S VIDEO and VIDEO are shared.
Output (page 13)
6 OUTPUT
Video: Monitor output terminal (MONITOR)
Audio: Audio output terminal (AUDIO)
Note
This terminal outputs the projected image only when INPUT A or INPUT B is used.
Others
⑦RS-232C terminal (RS-232C)
RS-232C compatible control terminal. Connects the computer's RS-232C terminal and the RS-232C cross cables.
⑧ LAN terminal (page 36)
⑨ AC IN (\~) socket
Connects the supplied AC power cord.
⑩USB terminal (Type A) ()← (pages 13, 69)
⑪USB terminal (Type B) ( )← (page 67)
⑫Microphone input ()
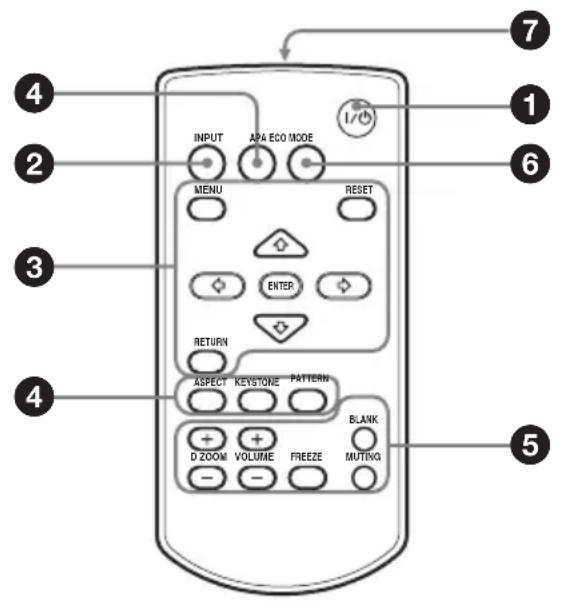
Remote Commander and Control Panel Keys
Remote Commander
Control Panel Keys
![graph TD A["1"] --> B["I/O"] C["2"] --> D["INPUT"] E["3"] --> F["MENU"] F --> G["ENTER"] G --> H["ECO MODE"] style F fill:#f9f,stroke:#333 style G fill:#ccf,stroke:#333 style H fill:#cfc,stroke:#333](/content/2026/05/1127222/images/74ee2cb80256bf490480d2f619d30e88867c4378d952629dcf64f3d65b86e641.jpg)
①Turning on the power/Going to standby mode
I/⏻ (On/Standby) key
②Selecting an input signal (page 14)
INPUT key
③Operating a menu (page 21)
MENU key
RESET key
ENTER /↑/↓/←/→ (arrow) keys
RETURN key
④Adjusting the image (page 16)
ASPECT key (page 23)
KEYSTONE key (page 18)
PATTERN key (page 19)
APA (Auto Pixel Alignment) key *1 (page 19)
Note
*1: Use this key when inputting a computer signal via the RGB input terminal (INPUT A or INPUT B).
⑤ Using various functions during projecting
D ZOOM (Digital Zoom) +/- key *1 *3
Enlarges a portion of the image while projecting.
1 Press the D ZOOM + key to display the digital zoom icon on the projected image.
2 Press the //←/→ keys to move the digital zoom icon to the point on the image you want to enlarge.
3 Press the D ZOOM + key or the D ZOOM – key repeatedly to change the enlargement ratio. The image can be enlarged up to 4 times.
1 Press the D ZOOM + key to display the digital zoom icon on the projected image. 2 Press the ↑/↓/↔ keys to move the digital zoom icon to the point on the image you want to enlarge. 3 Press the D ZOOM + key or the D ZOOM – key repeatedly to change the enlargement ratio. The image can be enlarged up to 4 times.
Press the RESET key to restore the previous image.
BLANK key
Cuts off the projected image temporarily. Press again to restore the previous image. Picture muting helps reduce power consumption.
MUTING key
Mutes the audio output temporarily. Press again to restore the previous volume.
VOLUME +/- key
Adjusts the volume output.
FREEZE key *2 *3
Pauses a projected image. Press again to restore the image.
Notes
*1: Use this key when inputting a computer signal. But it may not be used depending on the resolution of the input signal.
*2: Use this key when inputting a computer signal. You cannot use this key when “Type A USB”, “Type B USB” or “Network” is selected as the input.
*3: This does not work for data drawn with the Interactive Pen Device using the PC Free Interactive function. This works only for background images from an external device. (VPL-SW636C only)
⑥ Setting the energy-saving mode easily
ECO MODE key
Energy-saving mode can be set easily. Energy-saving mode consists of “Lamp Mode,” “With No Input,” “With Static Signal” and “Standby Mode.”
1 Press the ECO MODE key to display the ECO Mode menu.

2 Press the ↑/↓ key or ECO MODE key to select “ECO” or “User” mode.
ECO: Sets each mode to the optimum energy-saving value.
Lamp Mode: Low
With No Input: Standby
With Static Signal: Lamp
Dimming
Standby Mode: Low
User: Sets each item of the ECO Mode menu as you desire (go to step 3).
3 Select "User" then press the → key. The setting items appear.
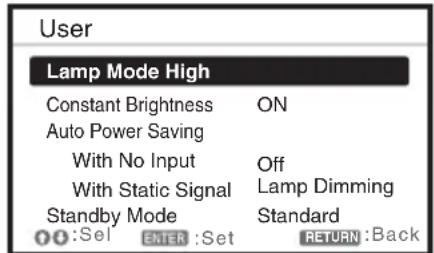
4 Press the ↑/↓ key to select the item then press the ENTER key.
5 Press the / key to select the setting value.
6 Press the ENTER key.
The screen returns to the User screen. For details on ECO Mode settings, see “Lamp Mode,” “Constant Brightness,” “With No Input,” “With Static Signal” and “Standby Mode” on the Connection/Power menu (page 30).
Note
If you set “ECO Mode” to “ECO,” or “Standby Mode” (in “User”) to “Low,” the network control function will be disabled in standby mode. If the external control is being performed by using the network or network control function, do not select “ECO,” or do not set “Standby Mode” (in “User”) to “Low.”
⑦Infrared transmitter
About remote commander operation
- Direct the remote commander toward the remote control receiver.
- The shorter the distance between the remote commander and the projector is, the wider the angle within which the remote commander can control the projector becomes.
- Make sure that nothing obstructs the infrared beam between the remote commander and the remote control receiver on the projector.
Interactive Pen Device (VPL-SW636C/SW631C only)
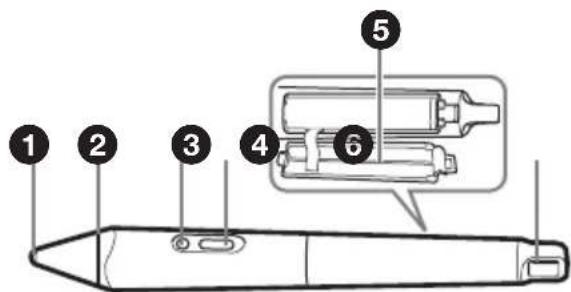
① Pen tip switch
Functions as the left button of a mouse.
②Color ring
main (IFU-PN250A): red sub(IFU-PN250B): blue
③Indicator
This indicator flashes when the button is pressed and lights up when the pen tip touches the screen. It will not light up if battery power is low. In this case, replace the batteries.
④Button
Main: Switches between drawing and mouse functions. When using mouse mode, you can use this button as a right-click (page 58). Sub: Displays the sub pen toolbar.
⑤Battery cover
The battery cover is attached to the Interactive Pen Device by a small strap. Be careful not to break the strap when opening the battery cover.
⑥Strap attachment hole
Connecting the Projector
Notes
- Make sure all the equipment is powered off when connecting the projector.
- Use the proper cables for each connection.
- Insert the cable plugs firmly; Loose connections may reduce performance of picture signals or cause a malfunction. When pulling out a cable, be sure to grip it by the plug, not the cable itself.
- For more information, refer also to the instruction manuals of the equipment you are connecting.
- Use a no-resistance audio cable.
Connecting a Computer
Connection with a computer is explained for each input signal.
INPUT A/INPUT B
For connecting a computer with an RGB output terminal.
![graph TD A["Computer"] --> B["Mini D-sub 15-pin cable (not supplied)"] B --> C["RGB output terminal"] B --> D["Audio output terminal"] C --> E["Audio cable (Stereo mini plug) (not supplied)"] D --> E style A fill:#f9f,stroke:#333 style B fill:#ccf,stroke:#333 style C fill:#cfc,stroke:#333 style D fi…](/content/2026/05/1127222/images/8fb323c0a3da29316dafe492173439adfc12db0d9a5e5ebd8a44a2d65ae853e4.jpg)
Note
It is recommended that you set the resolution of your computer to 1280 × 800 pixels (VPL-SW636C/SW631C/SW631) or 1024 × 768 pixels (VPL-SX631) for the external monitor.
INPUT C
For connecting a computer with an HDMI output terminal.

Notes
- Use HDMI-compatible equipment which has the HDMI Logo.
- Use a high speed HDMI cable(s) on which the cable type logo is specified. (Sony products are recommended.)
- The HDMI terminal of this projector is not compatible with DSD (Direct Stream Digital) Signal or CEC (Consumer Electronics Control) Signal.
USB terminal (Type B) ()
For connecting to a computer with a USB terminal (“Playing Video and Audio using USB Connection” (page 67)).

LAN terminal
For connecting to a computer, tablet PC, or smartphone via a hub or router (“Presentation Function via Network” (page 59)).
![graph TD A["Computer"] -->|Wired connection| B["LAN terminal"] B --> C["LAN cable (straight type) (not supplied)"] D["Tablet PC/Smartphone"] --> E["Computer Wireless connection"] E --> F["Hub, Wireless router, etc."] G["Client"] --> H["LAN"] H --> I["Client"] style A fill:#f9f,stroke:#333 style D fi…](/content/2026/05/1127222/images/8c9100975e5aec8663c715acb11d9e80d51e25e95a232d17873689c84b5e3920.jpg)
USB terminal (Type A) ()
For connecting a USB wireless LAN module IFU-WLM3 (not supplied) (“Presentation Function via Network” (page 59)).
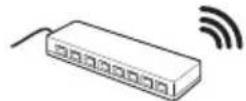
Wireless router, access point

Tablet PC/Smartphone

Computer

Notes
- Undesignated USB wireless LAN modules do not work.
- When connecting/disconnecting the USB wireless LAN module, make sure that the projector is in Standby mode (Standby Mode: "Low"), or the AC power cord is unplugged from the wall outlet.
- When wirelessly connecting a tablet PC/smartphone to the projector via USB wireless LAN module IFU-WLM3 (not supplied), set “WLAN Network” to “Access Pt.” in the projector’s “WLAN Settings” (page 30).
- For connecting to the access point, access to the Web browser, and input the settings for the access point to connect. For details, see “Setting the WLAN Network of the projector” (page 40).
Connecting a Video equipment
Connections with a VHS video deck, DVD player, or BD player are explained for each input signal.
S VIDEO IN
For connecting video equipment with an S-video output terminal.
![graph TD A["Video equipment"] --> B["Audio output terminal"] B --> C["S video output terminal"] C --> D["Audio cable (Phono plug x 2) (not supplied)"] D --> E["S video cable (not supplied)"] E --> F["Device"]](/content/2026/05/1127222/images/6ad295864a4a2d4128e095597c84466eeecb423be47cbb6f5beb9ea7cf5d7852.jpg)
VIDEO IN
For connecting video equipment with a video output terminal.
![graph LR A["Video equipment"] --> B["Audio output terminal"] A --> C["Video output terminal"] B --> D["Audio cable (Phono plug × 2) (not supplied)"] C --> D D --> E["Video cable (not supplied)"] F["Video cable (Phono plug × 2) (not supplied)"] --> D](/content/2026/05/1127222/images/60c9a6d38bff71f75b79a74a09e976c8a9ebdbb14289a0457f2a2f090d908d5c.jpg)
INPUT A
For connecting video equipment with a YPBPR output terminal.
![graph TD A["Video equipment"] --> B["Audio cable (Phono plug x 2 – stereo mini plug) (not supplied)"] B --> C["Component – Mini D-sub 15-pin cable (not supplied)"] C --> D["Audio output terminal"] C --> E["YP BPR output terminal"] C --> F["RGB/PTA/PSA"] C --> G["AUDIO"]](/content/2026/05/1127222/images/4278af11e80e5fd244d43ad60e915ee508606019271657080f69c356e6534c0d.jpg)
INPUT C
For connecting video equipment with an HDMI output terminal.
![graph LR A["Video equipment"] --> B["HDMI output terminal"] B --> C["HDMI cable (not supplied)"] C --> D["Output device with HDMI cable"]](/content/2026/05/1127222/images/d74ce2e6041c8665a2e9258e8fa0ffb4deffd822b93977a80112ea871e20d2e5.jpg)
Notes
- Use HDMI-compatible equipment which has the HDMI Logo.
- Use a high speed HDMI cable(s) on which the cable type logo is specified. (Sony products are recommended.)
- The HDMI terminal of this projector is not compatible with DSD (Direct Stream Digital) Signal or CEC (Consumer Electronics Control) Signal.
Connecting a microphone
Microphone ( )
For connecting a microphone.

Note
Only dynamic microphones are supported.
Connecting a USB memory device
USB terminal (Type A) ()
For connecting a USB memory device (“Using USB Media Viewer” (page 69)).

Connecting an External Monitor and Audio Equipment
OUTPUT
Projected images or input audio can be output to display equipment such as a monitor or audio equipment such as speakers with a built-in amplifier.
![graph TD A["Audio equipment"] --> B["Audio input terminal"] C["Display equipment"] --> D["RGB input terminal"] B --> E["Audio cable (stereo mini plug) (not supplied)"] D --> F["Mini D-sub 15-pin cable (not supplied)"] E --> G["OUTPUT MONITOR"] F --> H["Audio"]](/content/2026/05/1127222/images/ddee76aa4c8f55959883d5b5e7723df4fe35c0f9b615ee1603fc01d1cec0e133.jpg)
Note
Projected images and audio can be output.
Projecting an Image
The size of a projected image depends on the distance between the projector and screen. Install the projector so that the projected image fits the screen size. For details on projection distances and projected image sizes, see “Projection Distance and Lens Shift Range” (page 91).
Notes
- Project the image on a flat surface.
- Due to the characteristics of ultra short throw projector, the image may appear uneven on a projection surface that is not absolutely flat. This is not a malfunction of the projector.
![graph TD A["Projector"] -->|1| B["Wall outlet"] A -->|2| C["Video equipment"] A -->|3| D["Computer"] A -->|4| E["Video device"] style A fill:#f9f,stroke:#333 style B fill:#ccf,stroke:#333 style C fill:#cfc,stroke:#333 style D fill:#fcc,stroke:#333 style E fill:#ffc,stroke:#333](/content/2026/05/1127222/images/d6c0b75a0da6a0c3d1470faa3325aca69aef253abd6695d795441d12a142e81d.jpg)
1 Plug the AC power cord into the wall outlet.
2 Connect all equipment to the projector (page 9).
3 Press the I/⏻ key to turn on the unit.
4 Turn on the connected equipment.
5 Select the input source.
Press the INPUT key on the projector to display the menu for switching input signal on the screen. Press the INPUT key repeatedly, or press the / key to select an image to be projected.
6 When projecting a computer image, switch your computer's output to external display.
The method to switch the output varies depending on the type of computer.
(Example)

To project image files stored in a USB memory device, see “USB Media Viewer” (page 69). To play video and audio using USB Connection, see “Playing Video and Audio using USB Connection” (page 67). To use Presentation Function via Network, see “Presentation Function via Network” (page 59).
7 Adjust the focus, size and position of the projected image (page 16).
Open the side cover, and adjust the lens shift dials, focus lever and zoom lever.
Open the side cover
Press A and open the side cover in the direction of the arrow shown on the illustration below.

Adjusting the Projected Image
| Focus Size (Zoom) | |
 ↓ ↓ |  |
 |  |
| Position (Lens shift) | Position |
 |  |
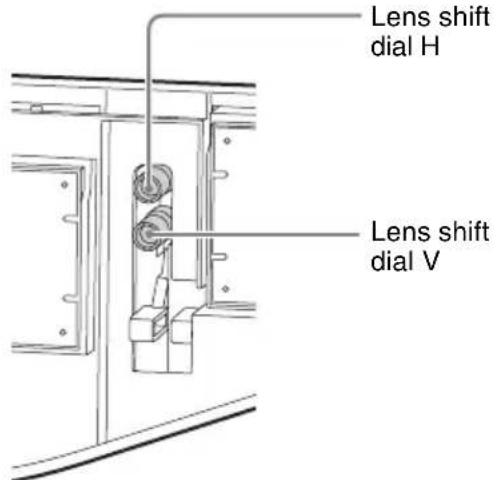 For adjusting lens shift, turn each dial with your hand, screwdriver, etc. For adjusting lens shift, turn each dial with your hand, screwdriver, etc. | 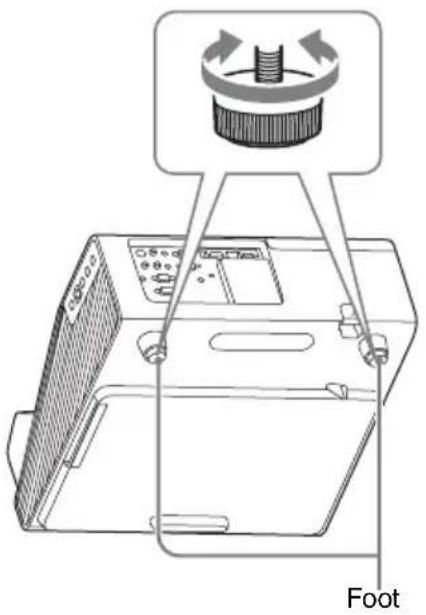 Adjusting the tilt of the projector with the feetYou can adjust the height of the projector using the feet.By changing the tilt of the projector with feet, you can adjust the position of the projected image.Be careful not to let the projector down on your fingers.Do not push hard on the top of the projector with the foot extended. Adjusting the tilt of the projector with the feetYou can adjust the height of the projector using the feet.By changing the tilt of the projector with feet, you can adjust the position of the projected image.Be careful not to let the projector down on your fingers.Do not push hard on the top of the projector with the foot extended. |
Changing the aspect ratio of the projected image
Press the ASPECT key on the remote commander to change the aspect ratio of the projected image. You can also change the setting in Aspect of the Screen menu (pages 23, 25).
Correcting trapezoidal distortion of the projected image (Keystone feature)
If the image becomes trapezoidal, set the keystone manually.
1 Press the KEYSTONE key on the remote commander or select V Keystone in the Installation menu.
2 Use the /// keys to set the value. The higher the value, narrower the top of the projected image. The lower the value, the narrower the bottom.
Notes
- Since the Keystone adjustment is an electronic correction, the image may be deteriorated.
- Depending on the position adjusted with the lens shift feature, the aspect ratio of the image may change from the original or projected image may be distorted with Keystone adjustment.
- If you perform keystone adjustment and use mouse mode, the position of the Interactive Pen Device and the computer cursor may not match. In this case, perform the calibration again. (VPL-SW636C only)
![graph TD A["Increase the number towards plus"] --> B["Increase the number towards minus"]](/content/2026/05/1127222/images/5ef753722ccd0d899d8b2f7fb92a6afdf119ff8ca987d58ba63fd84080054ae4.jpg)
Fitting the projected image to the screen (Digital Shrink adjustment)
If the projected image exceeds the size of the screen, you can shrink and adjust the position of it.
1 Select "Rid. digitale" in the Installation menu.
2 Set the shrinking rate.
Press the //↔ key to adjust the value. The more the value increases towards the plus side, the smaller the projected image becomes.
3 Press the ENTER button to display the shift adjustment menu and adjust the display position of the projected image.
Press the //←/→ key to adjust the display position.
![graph TD A["Rectangular Block"] --> B["Downward Arrow"] B --> C["Rectangular Block with Downward Arrow"] style A fill:#ccc,stroke:#333 style C fill:#ccc,stroke:#333](/content/2026/05/1127222/images/ddd32d8bdfe169d9e1dc57f6bc89a97e691d063d26318d9804756a5f76930230.jpg)
Notes
- If the shrinking rate is set to “0,” you cannot move the image. If the projector is projecting an image with a resolution that is different from the panel display resolution of this projector, it may not be possible to move the image.
- When you use the PC Free Interactive function or mouse mode, do not perform Digital Shrink adjustment. The position of the Interactive Pen Device may slip off out of the image (VPL-SW636C only).
Displaying a pattern
You can display a pattern for adjusting the projected image or a grid pattern with the PATTERN key on the remote commander. Press the PATTERN key again to restore the previous image. You can use a grid pattern as a guide to write text or to draw lines and shapes on the whiteboard or blackboard without using a computer.
Note
You cannot use this key when “Type A USB”, “Type B USB” or “Network” is selected as the input.
Automatically adjusting Phase, Pitch, and Shift of the projected image while a signal is input from a computer (APA (Auto Pixel Alignment))
Press the APA key on the remote commander. Press again to cancel adjusting during the setting. You can also set APA in the Screen Menu (page 24). If Smart APA in the Function menu is set to “On”, executes APA automatically when a signal is input (page 27).
Turning Off the Power
1 Press the I/⏻ key on the unit or the remote commander.
The projector starts shutdown and turns off. If you press the I/⏻ key within 10 seconds again, shutdown is cancelled.
Note
Do not turn off the projector soon after the lamp lights. It may cause a malfunction of the lamp (does not light, etc.).
2 Unplug the AC power cord from the wall outlet.
Turning off without displaying the confirmation message
Press and hold the I/ key on the unit for a few seconds (page 75).
Note
If you turn off the unit soon after the lamp is turned on, the confirmation message will be displayed and may take a longer time for the unit to turn off.
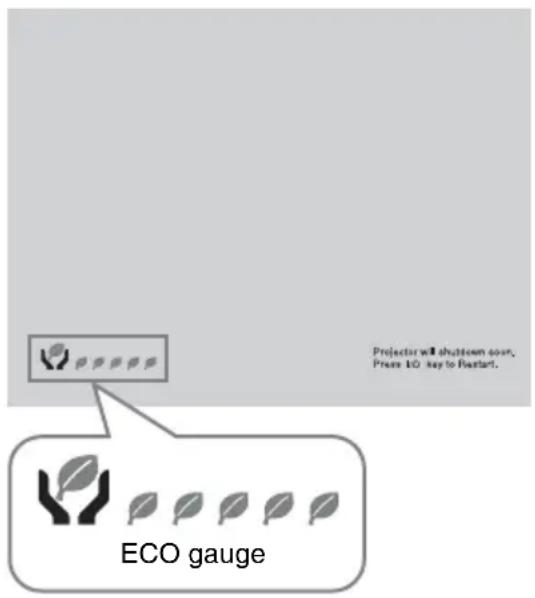
ECO gauge
This gauge indicates the current effectiveness of the projector's ECO function. (For details on the ECO function, see “ECO MODE key” (page 7) and “ECO” (page 31).)
The leaf icons are displayed when the projector is shut down. The number of displayed icons varies according to how much energy is saved as a result of using the ECO function.
Using a MENU
Note
The menu displays used for the explanation below may be different depending on the model you are using.
1 Press the MENU key to display the menu.
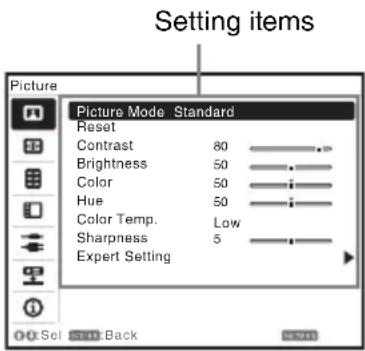
2 Select the setting menu.
Use the / key to select the setting menu then press the key or ENTER key.
Setting menu

3 Select the setting item.
Use the / key to select the setting menu then press the → key or ENTER key.
To return to the selection screen of the setting menu, press the ◀ or RETURN key.
4 Make the setting or adjustment for the selected item.
The setting method varies, depending on the setting item.
If the next menu window is displayed, select the item according to the
operations in step 3 and then press the ENTER key to register the setting. To return to the selection screen of the setting items, press the ◀ or RETURN key. You can press the RESET key to reset an item to its factory setting value to aid setting.
Using a pop-up menu
Press the /// key to select an item. A selected item takes effect immediately, except "Language", which will take effect after you press the ENTER key.

Using the setting menu
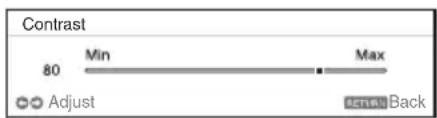
Press the ↑/↓ key to select the item. Press the ENTER key to register the setting and return to the previous screen. Using the adjustment menu
To increase the value, press the / key and to decrease the number, press the / key. Press the ENTER key to register the setting and return to the previous screen.
5 Press the MENU key to clear the menu.
The menu disappears automatically if no operation is performed.

The Picture Menu *1
The Picture is used to adjust the picture for each input signal.
Items Item descriptions
| Picture Mode | Dynamic: Emphasizes the contrast to produce a dynamic and vivid picture. Standard: Provides an image which is natural and well balanced. Presentation: Provides a bright image, suitable for presentations. Blackboard: Provides an image suitable for displaying on a blackboard. Whiteboard: Provides an image suitable for displaying on a whiteboard. Cinema: Provides an image suitable for viewing movies. |
| Reset*2 | Resets the factory setting. |
| Contrast The higher the value, the greater the contrast. The lower the value, the lower the contrast. | |
| Brightness The higher the value, the brighter the picture. The lower the value, the darker the picture. | |
| Color *3 *4 | The higher the value, the greater the intensity. The lower the value, the lower the intensity. |
| Hue *3 *4 *5 | The higher the value, the more greenish the picture becomes. The lower the value, the more reddish the picture becomes. |
| Color Temp.*6 | High/Middle/Low: The higher the value, the more bluish the picture. The lower the value, the more reddish the picture. |
| Sharpness *7 | The higher the value, the sharper the picture. The lower the value, the softer the picture. |
| Expert Setting | |
| Gamma Mode*8 | Graphics1: Gamma correction to make halftones brighter. This setting is suitable when projecting highly colorful images, such as photos, in a bright place.Graphics2: Gamma correction to improve the reproduction of halftones. Highly colorful images, such as photos, can be reproduced in natural tones.Graphics3: Selects gamma correction to emphasize bright parts. Projects images explicitly. |
Notes
*1: For VPL-SW636C, only “Color Temp.” is available for the data drawn with the Interactive Pen Device using the PC Free Interactive function and in whiteboard mode. For the background image from the external device, all the setting items work (page 35).
*2: The settings in the Picture return to their factory defaults, except for Picture Mode.
*3: When a video signal is input, this option is available.
*4: When the signal without color burst signal is input after selecting “Video” or “S-Video”, this option is unavailable.
*5: When an analog TV signal is input, this option may not available, depending on the color system.
*6: When “Picture Mode” is set to the item other than “Presentation” or “Blackboard,” this option is available.
*7: Not available if "Input" is set to "Type A USB."
*8: When “Picture Mode” is set to “Blackboard,” this option is unavailable.

The Screen Menu *1
The Screen menu is used to adjust the size, position and aspect ratio of the projected image for each input signal.
Items Item descriptions
| Aspect*2 | Changes the aspect ratio of the projected image (page 25). |
| VPL-SW636C/SW631C/SW631:When the computer signal is input | 4:3: Displays the image to fit the maximum projected image size with an aspect ratio fixed to 4:3.16:9: Displays the image to fit the maximum projected image size with an aspect ratio fixed to 16:9.Full 1: Displays the image to fit the maximum projected image size without changing the aspect ratio of the input signal.Full 2: Displays the image to fit the maximum projected image size changing the aspect ratio of the input signal.Full 3: Displays the image to fit the maximum width or height, up to 1280 × 720 pixels, without changing the aspect ratio of the input signal.Normal: Displays the image on the center position of the projected screen without changing the resolution of the input signal or enlarging the image. |
| VPL-SW636C/SW631C/SW631:When the video signal is input | 4:3: Displays the image to fit the maximum projected image size with an aspect ratio fixed to 4:3.16:9: Displays the image to fit the maximum projected image size with an aspect ratio fixed to 16:9.Full: Displays the image to fit the maximum projected image size changing the aspect ratio of the input signal.Zoom: Zooms the center area of a projected image. |
| VPL-SX631: When the computer signal is input | 4:3: Displays the image to fit the maximum projected image size with an aspect ratio fixed to 4:3.16:9: Displays the image to fit the maximum projected image size with an aspect ratio fixed to 16:9.Full 1: Displays the image to fit the maximum projected image size without changing the aspect ratio of the input signal.Normal: Displays the image on the center position of the projected screen without changing the resolution of the input signal or enlarging the image. |
| VPL-SX631: When the video signal is input | 4:3: Displays the image to fit the maximum projected image size with an aspect ratio fixed to 4:3.16:9: Displays the image to fit the maximum projected image size with an aspect ratio fixed to 16:9.Zoom: Zooms the center area of a projected image. |
Items Item descriptions
| Adjust Signal Adjusts the image of computer signal. Use this item if the edge of the image is cut and reception is bad. | |
| APA*3*4 | Automatically adjusts the projected image to an optimum quality when you press the ENTER key (page 6). |
| Phase*3 | Adjusts the dot phase of the display pixel and the input signal. Set to the value where looks clearest. |
| Pitch*3*6 | The higher the value, the wider the horizontal image elements (pitch). The lower the value, the narrower the horizontal image elements (pitch). |
| Shift*5 | H (Horizontal): The higher the value, the farther right the image is projected on the screen. The lower the value, the image farther left.V (Vertical): The higher the value, the farther up the image is projected on the screen. The lower the value, the image farther down. |
Notes
*1: For VPL-SW636C, this setting is not available for the drawing data drawn with the Interactive Pen Device of PC Free Interactive function and whiteboard mode. This works only for the background image from the external device (page 35).
*2: • Note that if the projector is used for profit or for public viewing, modifying the original picture by switching to the aspect mode may constitute an infringement of the rights of authors or producers, which are legally protected.
- Depending on the input signal, setting items for aspect ratio or some other setting items cannot be set in some cases, or changing the aspect ratio setting may have no effect.
- A part of the image may be displayed in black, depending on the setting item.
*3: Available when a computer signal is input from the RGB input terminal (INPUT A/INPUT B).
*4: If the projected image includes large amount of black portion around it, the APA function will not work properly and a part of the image may not be displayed on the screen and also optimum image cannot be obtained, depending on the type of input signal. In this case, adjust the “Phase,” “Pitch,” and “Shift” items manually.
*5: Available when a computer or a video signal is input from the RGB/YP BPr input terminal (INPUT A).
*6: When “APA” (page 24) or “Smart APA” (page 27) is performed, the adjusted value for “Pitch” will return to its factory default. If you want to continue using the adjusted value, set “Smart APA” to “Off.”
Aspect
VPL-SW636C/SW631C/SW631
| Input signal Recommended setting value and projected image | ||
| Computer signal | 4:3 Full1 | *1 *2 *3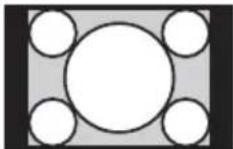 |
16:9 Full1 | *1 *2 *3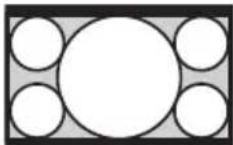 | |
16:10 Full1 | *3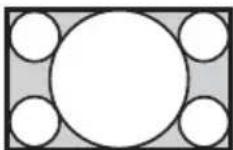 | |
| Video signal | 4:3 4:3 | *4 *5 |
16:9 16:9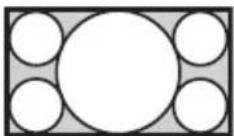 |  | |
*1: If you select “Normal,” the image is projected in the same resolution as the input signal without changing the aspect ratio of the original image.

*2: If you select "Full2," the image is projected to fit the projected image size, regardless of the aspect ratio of the image.

*3: If you adjust the projected image position using an image with 16:9 aspect ratio and then switch the input source to 4:3 image, the top and bottom edge of the image may be hidden. In this a case, select "Full3."

*4: Depending on the input signal, the projected image may be projected as illustrated below. In this a case, select "16:9."

*5: Depending on the input signal, the image may be projected as illustrated below. In this a case, select "Zoom."
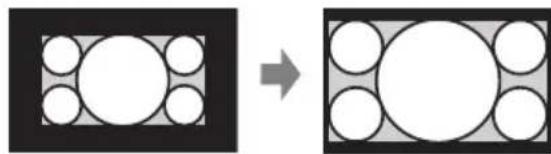
VPL-SX631
| Computer signal | Input signal Recommended setting value and projected image | input signal without changing the aspect ratio of the original image. | |
| 4:3 | Full1*1 | ||
| 16:9 | Full1*1*2 | *2: If you select “4:3,” the image is projected to fit the projected image size, regardless of the aspect ratio of the image. | |
| 16:10 Full1 | *1*2 | *3: Depending on the input signal, the projected image may be projected as illustrated below. In this a case, select “16:9.” | |
| 4:3 4:3 | *3 | *4: Depending on the input signal, the projected image may be projected as illustrated below. In this a case, select “Zoom.” | |
| Video signal | 16:9 16:9 | *4 | |

The Function Menu
The Function menu is used for setting various functions of the projector.
| Items Item descriptions | |
| Interactive (VPL-SW636C only) | |
| Interactive Mode | PC Free/PC Interactive/OFF(Data Export): If you select “PC Free,” you can use the PC Free Interactive function. Once you select it, the PC Free Interactive toolbar will be displayed. *6If you select “PC Interactive,” you can operate the PC that is connected to the projector with the attached Interactive Pen Device as a mouse, or use Interactive Presentation Utility 2. *7 *8If you do not use the Interactive function, or to export white board data (that is saved with PC Free interactive function) from the computer (connected via USB connector), select “OFF(Data Export).” *9 |
| Calibration | Auto/Manual (Main)/Manual (Sub): Performs calibration for the PC Free Interactive function (page 52) and the mouse mode function (page 58). If you select “Auto”, the projector performs the calibration automatically. If you select “Manual (Main),” the calibration for the main pen will be performed manually. If you select “Manual (Sub),” the calibration for the sub pen will be performed manually. *3 *4 *5 |
| Volume The higher the value, the louder an audio volume and the lower the value, the lower the audio volume. | |
| Mic Volume Adjust the volume of the microphone. *2 | |
| Speaker | On/Off: When set to “On,” speaker outputs sound. To not output sound from the speaker, select “Off.” |
| Smart APA | On/Off: When set to “On,” APA functions automatically when a signal is input. *1 |
| CC Display | CC1/CC2/CC3/CC4/Text1/Text2/Text3/Text4: Select the closed caption service (captions or text).Off: Closed caption does not appear. |
| Lamp Timer Reset When replacing the lamp, resets the lamp timer (page 80). | |
| Start Up Image | On/Off: When set to “On,” the Start Up Image is displayed on the screen when the projector is powered on. |
| All Reset | Resets all settings to their factory defaults. |
Notes
*1: APA functions when a computer signal is input via the RGB input terminal (INPUT A/INPUT B).
*2: The maximum available mic volume is set by the value of “Volume.”
*3: Before performing the calibration, the message “Do you wish to start calibration?” will be displayed. If you select “Yes”, the projector performs the calibration.
*4: If you already have started the Interactive Presentation Utility 2 on the computer, perform the calibration of Interactive Presentation Utility 2.
*5: If you display the menu or the warning/caution messages etc., are displayed during the calibration, calibration will stop. In addition, if you stop operating the calibration for more than 20 seconds, the manual calibration will also stop.
*6: When you display the menu while using the PC Free Interactive function, the PC Free Interactive function cannot be used for a while and the toolbars and drawing data will not be displayed. If you hide the menu, you can use the PC Free Interactive function again. If warning or notification messages etc. appear, you cannot use the PC Free Interactive function. For the settings of PC Free Interactive, see page 52.
*7: Images may not be projected properly depending on the operating environment or the application. Use Input-A, Input-B, or Input-C to project the images properly.
*8: Do not operate while the screen of the computer you are operating is not displayed when using Interactive Presentation Utility 2 or mouse mode. (The operation performed by the Interactive Pen Device is still effective even while the images from other input connectors are displayed.)
*9: When accessing the whiteboard data in the projector, do not remove the USB cable, or select options other than “OFF(Data Export)” in “Interactive Mode.” The files may be damaged.

The Operation Menu
The Operation menu is used for setting for the operations by using the menu or the remote commander.
Items Item descriptions
| Language Selects the language used in the menu and messages. | |
| Status On: All on-screen statuses are enabled.Off: Turns off the on-screen displays, except for menus, warning messages and messages from the message list. | |
| Security Lock*1 | On/Off: This function enables restriction of the projector to authorized users by password. The setting procedures for security locking are as follows:1 Select “On” and press the ENTER key to display the setting menu.2 Input the password with the MENU, ↑/↓/←/→ and ENTER keys. (The default setting password is “ENTER, ENTER, ENTER, ENTER.”)3 Input a new password with the MENU, ↑/↓/←/→ and ENTER keys.4 Enter the password again to confirm.Enter the password when you turn on the projector after disconnecting and reconnecting the AC power cord.When it is set to “Off,” you can cancel the security lock. You are required to input the password again.If you fail to enter the correct password after three consecutive times, the projector cannot be used. In this case, press the I/⏻ key to go Standby mode then turn on the power again. |
| Control Key Lock | On/Off: When set to “On,” locks all the control panel keys of the projector.However, you can operate the following when set to “On”:Press and hold the I/⏻ key for approximately 10 seconds during Standby mode.→ The projector turns on.Press and hold the MENU key for approximately 10 seconds during power on.→ “Control Key Lock” is set to “Off” and enables operation of all keys on the projector. |
Note
*1: You will not be able to use the projector if you forget your password. If you call qualified Sony personnel because you have forgotten the password, you will be asked to verify the projector's serial number and your identity. (This process may differ in other countries/regions.) Once your identity has been confirmed, we will provide you with the password.

The Connection/Power Menu
The Connection/Power menu is used for setting for the connections and power.
| Items Item descriptions | |
| LAN Settings | |
| IP Address Setup*9 | Auto (DHCP): The IP address is assigned automatically from the DHCP server such as a router.Manual: To specify the IP Address manually. |
| WLAN Settings*10 | |
| WLAN Connection*8 | On/Off: Set the wireless output of the USB wireless LAN module (not supplied) to On/Off. |
| WLAN Network*14 | Access Pt./Client*11: Changes modes for WLAN.*12 |
| Network Presentation | |
| Connection CODE | On/Off: This is the presentation function via the network. It controls the connection using the displayed number (CODE) on the right bottom of the screen. During the image transmission, using the ENTER key on the remote commander makes Connection CODE display again. |
| Display Setting | |
| LAN Mode Displays the LAN settings of the projector or the settings of the USB wireless LAN module that operates as a client at the bottom right of the screen.Wired: Displays the IP address of LAN preferentially.Wireless: Displays the IP address of the USB wireless LAN module preferentially. | |
| AP Mode Displays the SSID of the USB wireless LAN module that operates as an access point at the bottom right of the screen. | |
| Dynamic Range*18 | Sets the image input level of the INPUT C terminal.Auto: Distinguishes the image input level automatically.Limited: Set when the image input level is 16-235.Full: Set when the image input level is 0-255. |
| Input-A Signal Sel. | Auto/Computer/Video GBR/Component: When set to “Auto,” selects the type of video signal input automatically when “Input-A” is selected.*1 |
Items Item descriptions
| ECO | |
| Lamp Mode High/Standard/Low/Auto *5*7*15: When set to “High,” the image becomes brighter, and power consumption becomes higher. When set to “Low,” power consumption is minimized; however, the image will be darker. When set to “Auto,” brightness is adjusted automatically according to image content. Dark images are projected with brightness adjusted, leading to energy-saving. Bright images are projected brightly, without adjusting brightness. | |
| Constant Brightness On/Off: Available when the lamp mode is set to High. Outputs light at a certain brightness. *13 | |
| Auto Power Saving | |
| With No Input *16 Lamp Cutoff: The lamp turns off automatically and power consumption is reduced if no signal is input for approx. 10 minutes. The lamp lights again when a signal is input or any key is pressed. In Lamp Cutoff, the ON/STANDBY indicator lights in orange. (page 73) Standby*6: If no signal is input to the unit for approx. 10 minutes, the power turns off automatically, and the unit enters standby mode. Off: You can deactivate the With No Input. | |
| With Static Signal *17 Lamp Dimming *4*5*7: If an image does not change for about 10 seconds, lamp output is gradually reduced (approximately 10% to 15%*3) from that set in the Lamp Mode. Automatically the lamp slowly darkens to approximately 30% of its lamp output according to the selected time (with no change to input signal) “5,” “10,” “15,” “20” minutes or “Demo,” While dimming the lamp, the message “Lamp Dimming” appears. If you select “Demo,” the image will start to darken about 40 seconds later. When any change in signal is detected, or an operation (remote control or control panel) is performed, normal brightness is restored. Off: You can deactivate the With Static Signal. | |
| Standby Mode*2 Standard/Low: When set to “Low,” lowers power consumption in Standby mode. | |
| Direct Power On On/Off: When set to “On,” you can turn the power on without going to Standby mode when the AC power cord is connected to a wall outlet. With the projector turned off, you can also unplug the AC power cord without going to Standby mode, regardless of the Direct Power On setting. *19 |
Notes
*1: This may not be optimum depending on the input signal. In this case set manually according to the connected equipment.
*2: When “Standby Mode” is set to “Low,” the network and network control function cannot be operated while the projector is in standby mode.
*3: This varies depending on the “Lamp Mode” setting.
*4: As the lamp is dimmed gradually, you may not notice any change in brightness. You might only notice that the lamp has dimmed when its brightness is restored after there is a change in input signal.
*5: This mode does not work for about three minutes after the lamp lights. A change in signal may not be detected depending on the input image. The lamp may become brighter at intervals during lamp dimming. However, this is not a malfunction. If With No Input is set, it takes priority.
*6: Select "Off" to avoid entering standby mode when there is no input signal.
*7: Does not function when “Type A USB”, “Type B USB” or “Network” is selected as the input. In this case, it becomes equivalent to “Standard.”
*8: Reflecting changes in WLAN settings may take a few moments.
*9: To set the IP address manually, select "Manual", press "Apply", then enter the IP address.
*10: When you send images or files from a tablet PC/smartphone and display them (page 66), set “WLAN Network” to “Access Pt.” to use the IFU-WLM3 USB wireless LAN module (not supplied) as a wireless access point.
*11: To change the settings for “Access Pt.,” go to the Web page.
For details, see “Setting the WLAN Network of the projector” (page 40).
If “Access Pt.” is set, it is more convenient that you set “Display Setting” in “Network Presentation” of the projector to “AP Mode” (page 30) in advance when you use Presentation Function via the network (page 59).
*12: For changing the settings for “Client,” use the Web browser for change. For details, see “Setting the WLAN Network of the projector” (page 40).
*13: Constant Brightness mode will be enabled for about 2,000 hours after it is activated at early usage. After this period, it will be disabled automatically. Activated time and brightness may vary depending on the usage conditions.
*14: If the projector cannot connect wirelessly, click [Apply] once again to make sure the connection is established. For details, see “Setting the WLAN Network of the projector” (page 40).
*15: This mode does not function while “Interactive Mode” is set to “PC Free” (VPL-SW636C only). In this case, “Lamp Mode” becomes equivalent to “Standard” (page 35).
*16: This mode does not function while “Interactive Mode” is set to “PC Free” (VPL-SW636C only). In this case, “With No Input” will be “Off” (page 35).
*17: This mode does not function while “Interactive Mode” is set to “PC Free” (VPL-SW636C only). In this case, “With Static Signal” will be “Off” (page 35).
*18: If the image output settings of the HDMI device are not appropriate, the bright parts in the image may become too bright, or the dark ones may become too dark.
*19: Do not turn off the projector soon after the lamp lights. It may cause a malfunction of the lamp (does not light, etc.).

The Installation Menu
The Installation menu is used for installing the projector.
| Items Item descriptions | ||||
| Image Flip | HV/H/V/Off: Flips the projected image horizontally or vertically according to the installation method.*5 | |||
| Installation Attitude | Right Side Up/Upside Down/Front Up/Front Down/Link to Image Flip: Change the cooling setting to suit to the installation attitude. When set to “Link to Image Flip,” the cooling setting changes based on the setting of “Image Flip.”*1 Continuing to use the wrong setting may affect component reliability. | |||
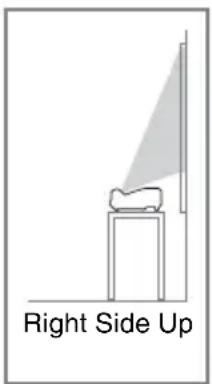 | 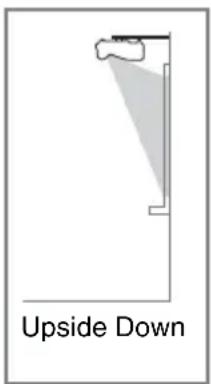 |  |  | |
| Horizontal installation | Vertical installation | |||
| High Altitude Mode *2 | On/Off: Set to “On” when using the projector at an altitude of 1,500 m or higher. Continuing to use the wrong setting may affect component reliability. | |||
| V Keystone*3 *4 | The higher the value, the narrower the top of the projected image. The lower the value, the narrower the bottom. | |||
| Rid. digitale *6 *7 | Shrinks or adjusts the size of the projected image (Digital Shrink). Rid. digitale: Adjusts the size of the projected image. If you set the value to “0”, the image is set to the original size. The shrinking rate is 100% to 90%. Shift: Adjusts the position of the projected image. The adjustable range varies from the shrinking rate. | |||
Notes
*1: Select “Link to Image Flip” only for horizontal installation. Be sure to select “Front Up” or “Front Down” for vertical installation, according to the installation direction of the projector. (Refer to the figures.)
*2: When “High Altitude Mode” is set to “On,” the speed of the fan increases, and the fan noise becomes slightly louder.
*3: Since the Keystone adjustment is an electronic correction, the image may be deteriorated.
*4: For VPL-SW636C, if you perform keystone adjustment and use mouse mode, the position of the Interactive Pen Device and the cursor may not match. In this case, perform calibration, again.
*5: If you select “H” or “V,” the Interactive function is not available.
*6: Since Digital Shrink uses electronic correction, the image may deteriorate.
*7: If you press the ENTER button while adjusting with Digital Shrink, the projector switches to the shift adjustment.
The Information Menu
The Information menu is used to check projector status, such as total usage time of the lamp.
Items Item descriptions
| Model Name Displays the model name. | |
| Serial No. Displays the serial number. | |
| fH/fV*1 | Displays the horizontal/vertical frequency of the current input signal. |
| Signal Type Displays the type of the current input signal. | |
| Lamp Timer Indicates the total usage time of a lamp. | |
Note
*1: These items may not be displayed depending on the input signal.
Notes When Using PC Free Interactive Function (VPL-SW636C only)
When using the PC Free Interactive function, the items of the Picture menu and the Screen menu work to the background images from the external devices. However, they do not work to the drawing data with Interactive Pen Device or the whiteboard mode. For details, see the list below.
| Items | Enabled, or disabled for the drawing data and the whiteboard mode | ||
| Picture menu(page 22) | Picture Mode Disabled | ||
| Reset Disabled | |||
| Contrast Disabled | |||
| Brightness Disabled | |||
| Color Disabled | |||
| Hue Disabled | |||
| Color Temp. Enabled | |||
| Sharpness Disabled | |||
| Expert Setting Gamma Mode | Disabled | ||
| Screen menu(page 23) | Aspect Disabled | ||
| Adjust Signal | APA Disabled | ||
| Phase Disabled | |||
| Pitch Disabled | |||
| Shift | Disabled | ||
When “Interactive Mode” is set to “PC Free,” the functions of the items listed below are also limited.
| Items | Descriptions | ||
| Connection/Power menu(page 30) | ECO | Lamp Mode | When you select “Auto,”the effectiveness of it becomes equivalent to “Standard.” |
| Auto Power Saving | With No Input | Even when you select an option other than “Off,” the effectiveness becomes equivalent to “Off.” | |
| With Static Signal | |||
| Installation Menu(page 33) | Digital Shrink | Disabled for PC Free Interactive or mouse mode. | |
Using Network Features
Connection to the network allows you to operate the following features:
- Checking the current status of the projector via a Web browser.
- Remotely controlling the projector via a Web browser.
- Receiving the e-mail report via the projector.
- Making the network settings for the projector.
- Displaying messages on the projected image using an application.
- Supports network monitoring, control protocol (Advertisement, PJ Talk, PJ Link, AMX DDDP [Dynamic Device Discovery Protocol], Crestron RoomView).
Notes
- When connecting this projector with the network, consult with the network administrator. The network must be secured.
- The content communicated via a wireless LAN communication may be intercepted due to the use of radio waves. To protect the communication content, implement security measures properly according to the connection environment (page 40).
- When using this projector connected with the network, access the Control window via a Web browser and change the access limitation of the factory preset values (page 37). It is recommended to change the password regularly.
- When the setting on the Web browser is completed, close the Web browser to log out.
- The menu displays used for the explanation below may be different depending on the model you are using.
- Supported Web browsers are Internet Explorer 8/9/10/11.
- The menu displays only in English.
- If the browser of your computer is set to [Use a proxy server] when you access to the projector from your computer, click the check mark to set accessing without using a proxy server.
- To display messages, specific application Projector Station for Network Control (Version 1.1 or later) is necessary. For download or detailed method of using Projector Station for Network Control, please access the following URL.
http://pro.sony.com/bbsc/ssr/cat-projectors/resource.downloads Contact your local Sony dealer for detailed information of Projector Station for Network Control.
Displaying the Control Window of the Projector with a Web Browser
1 Connect the LAN cable (page 10).
2 Set the network settings for the projector using “LAN Settings” on the Connection/Power menu (page 30).
3 Start a web browser on the computer, enter the following in the address field, then press the Enter key on your computer.
http://xxx.xxx.xxx.xxx
(xxx.xxx.xxx.xxx: IP address for the projector)
You can confirm the IP address of the projector in the “LAN Settings” on the Connection/Power menu (page 30).
The following window appears in the Web browser:
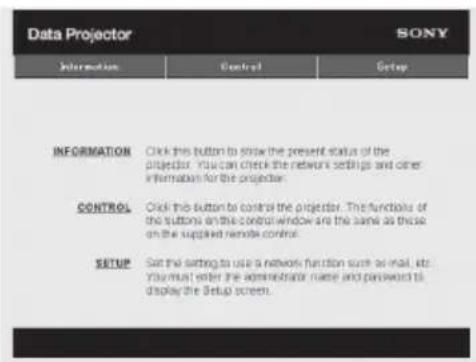
Once you make the network settings, you can open the Control window only by performing step 3 of this procedure.
How to operate the Control window
Switching the page
Click one of the Page Switching buttons to display the desired setting page.
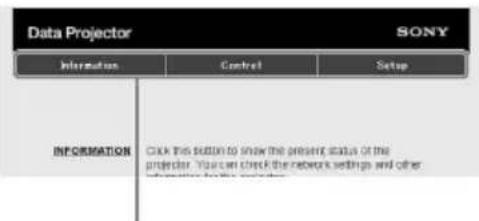
Page Switching buttons
Setting the access limitation
You can limit a user for accessing any particular page.
Administrator: Allowed access to all pages
User: Allowed access to all pages except the Setup page
Set the access limitation from [Password] of the Setup page.
When you access the Setup page for the first time, enter "root" in the Name box and enter "Projector" in the Password box of User.
The Name box of the Administrator is preset to "root."
![Data Projector SONY Information Control Setup Owner Information Network W ALL Setting Password Mail Report Advanced Name Administrator Name: not Password: Confirm Password: User Name: Password: Confirm Password: Apply Entry area for [Administrator] Entry area for [User]](/content/2026/05/1127222/images/d599d430e745388845b350b10a391cdbc838cfb2e4227aa8337fac7f2edcb260.jpg)
When you change the password, input a new password after deleting the password (***** ) that was set.
Note
If you forget your password, consult with qualified Sony personnel.
Confirming the Information regarding the Projector
You can confirm the current settings for the projector on the Information page.

Operating the Projector from a Computer
You can control the projector from the computer on the Control page.

The functions of the buttons shown in the operation area are the same as the keys on the remote commander.
Using the e-mail report Function
Set the e-mail report function on the Setup page.
Entered values will not be applied unless you click on [Apply].
1 Click on [Owner information] to enter the owner information recorded in the e-mail report.

2 Set the timing of the e-mail report. Click on [Mail Report] to open the Mail Report page.
Lamp Reminder (Lamp1): Set the timing of the email report for lamp replacement. To reset Lamp Reminder, execute “Lamp Timer Reset” on the projector (page 27).
Maintenance Reminder: Set the timing of the email report for maintenance. To reset Maintenance Reminder, check the RESET check box and then click on [Apply].
Mail Report button
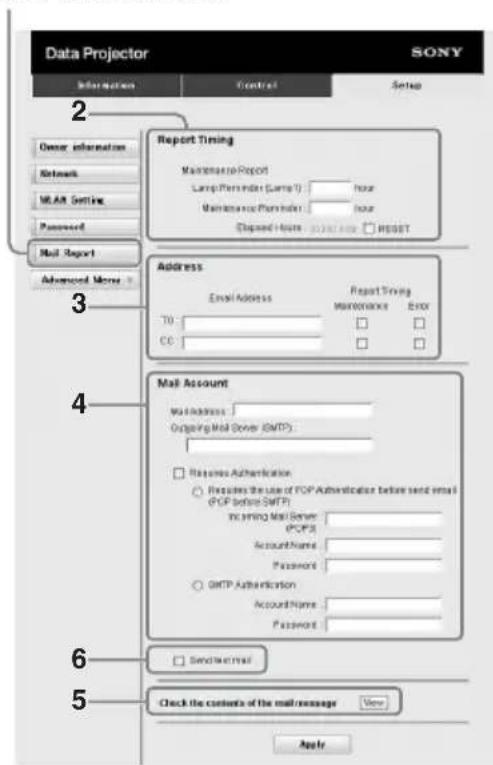
3 Enter the outgoing e-mail address in the Email Address box then check the Report Timing check box of the e-mail report to be sent.
4 Set the mail account for sending e-mail reports.
Mail Address: Enter the e-mail address. Outgoing Mail Server (SMTP): Enter the address of outgoing mail server (SMTP).
Required Authentication: Check this check box if authentication is required for sending e-mail.
Requires the use of POP Authentication before sending email (POP before SMTP): Check this check box to arrange for POP authentication to be performed before sending e-mail.
Incoming Mail Server (POP3): Enter the address of the incoming-mail server (POP3) to be used for POP authentication.
Account Name: Enter the mail account name.
Password: Enter the password.
SMTP Authentication: Check this check box to arrange for SMTP authentication to be performed before sending e-mail.
Account Name: Enter the mail account name.
Password: Enter the password.
5 Confirm the contents of the e-mail report.
When you click on [View], the contents of the e-mail report are displayed.
6 Send the test mail.
Check on the Send test mail check box then click on [Apply] to send your test mail to the e-mail address you set.
Notes
- The email report function will not work if the network uses Outbound Port25 blocking, which prevents access to the SMTP server.
- You cannot use the following characters to enter the characters in the text box: “‘”, “‘”, “\”, “&”, “<”, “>”
Setting the LAN Network of the projector
Set the LAN network function on the Setup page.
Entered values will not be applied unless you click on [Apply].
1 Click on [Network] to open the Network page.
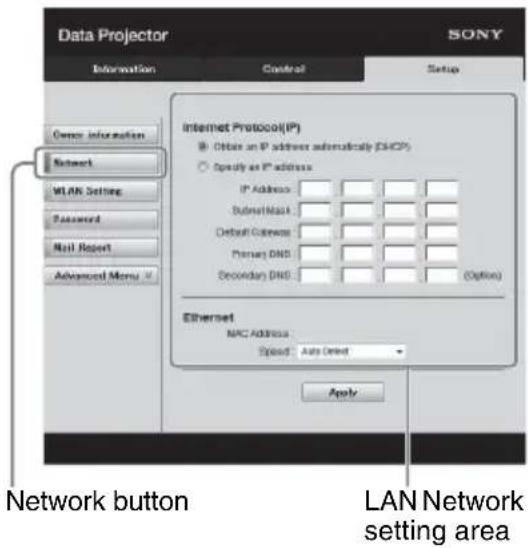
2 Set the items for internet protocol.
Obtain an IP address automatically: Automatically provides the network settings by a DHCP server function, such as the router. The IP Address, Subnet Mask, Default Gateway, Primary DNS, and Secondary DNS display the values provided by a DHCP server.
Specify an IP address: Set the network manually.
-IP Address: Input the IP address of the projector.
-Subnet Mask: Input the subnet mask of the projector.
-Default Gateway: Input the default gateway of the projector.
-Primary DNS: Input the primary DNS server of the projector.
-Secondary DNS: Input the secondary DNS server of the projector.
3 Set the items for Ethenet.
MAC Address: Displays the MAC address of the projector.
Speed: Select the network speed of the projector.
Setting the WLAN Network of the projector
Set the WLAN network function on the Setup page.
Entered values will not be applied unless you click on [Apply].
To use the wireless LAN network, a USB wireless LAN module IFU-WLM3 (not supplied) is necessary.
1 Click the [WLAN Setting] to open the WLAN Setting page.
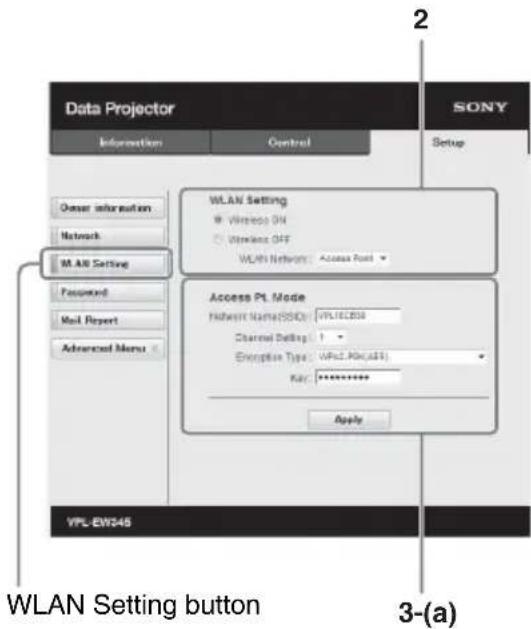
2 Enable or disable the radio wave output of USB wireless LAN module.
Wireless ON: Enables radio wave output of USB wireless LAN module.
Wireless OFF: Disables radio wave output of USB wireless LAN module.
WLAN Network: Set the modes for USB wireless LAN module.
| Items Descriptions | |
| Access Point A | activates USB wireless LAN module as an access point. Set the items for WLAN manually. |
| Client Activates | USB wireless LAN module as a client. |
3 (a) Input the settings for Access Point Mode.
When the USB wireless LAN module is activated as an access point, set the items for the access point.
Network Name (SSID): Input the SSID of the access point if "WLAN
Network" is set to "Access Point" (page 40).
The factory setting is "VPL + the MAC address of the LAN."
Channel Setting: Select the channel of the access point if “WLAN Network” is set to “Access Point” (page 40).
Encryption Type: Select the security method of the access point from the followings if “WLAN Network” is set to “Access Point” (page 40).
| Encryption Type | Descriptions |
| Open Sets the set | security method of the access point to open system authentication. |
| WEP 64bit Sets | the security method of the access point to WEP (64bit). |
| WEP 128bit Sets | sets the security method of the access point to WEP (128bit). |
| MIX (WPA-PSK/WPA2-PSK (TKIP/AES)) | Sets the security method of the access point to MIX. (corresponding to both WPA-PSK (TKIP/AES) and WPA2-PSK (AES) security methods). |
| WPA2-PSK(AES) | Sets the security method of the access point to WPA2-PSK (AES). |
Key: Input the password for security method of the access point according to the selected encryption type as below;
| Encryption Type | Password |
| Open The password cannot be input. | |
| WEP 64bit Input 5 ASCII characters for a password. | |
| WEP 128bit Input 13 ASCII characters for a password. | |
| MIX (WPA-PSK/WPA2-PSK (TKIP/AES)) or WPA2-PSK (AES) | Input 8-63 ASCII characters for a password. |
The factory setting of the security method and its password are set as follows.
Security method: WEP 64bit
Password: sony1
(b) Input the settings for Client Mode.
When the USB wireless LAN module is activated as a client, set the items for the client (set the items for the access point the projector tries to connect to).

Connection Status: Displays the connecting status between the access point and projector.
SSID: Input the SSID of access point the projector tries to connect to.
Encryption Type: Select the security method of access point the projector tries to connect to from the following list.
| Encryption Type | Descriptions |
| Open Sets the set | security method of the access point to open system authentication. |
| WEP 64bit Sets | the security method of the access point to WEP (64bit). |
| WEP 128bit Sets | s the security method of the access point to WEP (128bit). |
| MIX (WPA-PSK/WPA2-PSK (TKIP/AES)) | Sets the security method of the access point to MIX. (corresponding to both WPA-PSK (TKIP/AES) and WPA2-PSK (AES) security methods). |
| WPA2-PSK (AES) | Sets the security method of the access point to WPA2-PSK (AES). |
Key: Input the password for security method of the access point according to the selected encryption type as below;
| Encryption Type | Password |
| Open The password cannot be input. | |
| WEP 64bit Input 5 ASCII characters for a password. | |
| WEP 128bit Input 13 ASCII characters for a password. | |
| MIX (WPA-PSK/WPA2-PSK (TKIP/AES)) or WPA2-PSK (AES) | Input 8-63 ASCII characters for a password. |
Obtain an IP address automatically: Automatically provides the network settings by a DHCP server function, such as the router. The IP Address, Subnet Mask, Default Gateway, Primary DNS, and Secondary DNS display the values provided by a DHCP server.
Specify an IP address: Set the network manually.
-IP Address: Input the IP address of the projector.
-Subnet Mask: Input the subnet mask of the projector.
-Default Gateway: Input the default gateway of the projector.
-Primary DNS: Input the primary DNS server of the projector.
-Secondary DNS: Input the secondary DNS server of the projector.
MAC Address: Displays the MAC address for USB wireless LAN module.
Setting the Custom Labels for the Input Terminals of the Projector
Change the label names for the input terminals that will be displayed on the projected screen on the Setup page. The entered label names will not be applied unless you click on [Apply].
1 Click on [Advanced Menu] to open the Setup page.

Advanced Menu button
2 Click on [Input Label] and open the Input label setting window.
Clear the check box for the label that you want to change and input the label name. You can input up to 20 of the following letters.
Alphabets: "a" to "z", "A" to "Z"
Numbers: "0" to "9"
3 Click on [Apply] to apply the set label names.
The label name will be reflected on the screen when the input of the projector is changed.

Input Terminal Label Display Screen
Setting the Control Protocol of the Projector
Change the settings for the control protocol on the Setup page. Entered values will not be applied unless you click on [Apply].
1 Click on [Advanced Menu] to display the buttons for more settings.

2 (a) Set Advertisement.
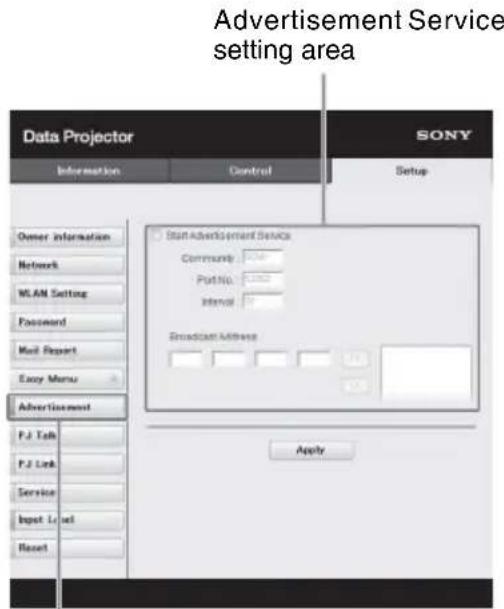
Advertisement button
Start Advertisement Service:
Set Advertisement to enabled or disabled. Items for Advertisement are enabled only when this function is enabled. The function is disabled at the factory default.
-Community:
Input the community name for Advertisement and PJ Talk. If the community name for Advertisement is changed, the one for PJ Talk will also be changed. Only four alphanumeric characters can be input. The factory
default setting is “SONY.” It is recommended that the community name be changed from the factory setting to avoid unnecessary access to the projector from other computers.
-Port No.:
Input the transmit port of Advertisement. The factory default setting is “53862.”
-Interval:
Input the transmission interval (seconds) of Advertisement. The factory default setting is “30.”
-Broadcast Address:
Input the destination of data via Advertisement. If nothing is input, the data will be broadcast in the same subnetwork.
(b) Set PJ Talk.
PJ Talk Service setting area

Start PJ Talk Service:
Set PJ Talk to enabled or disabled. Items for PJ Talk are enabled only when this function is enabled. The function is disabled at the factory default.
-Community:
Input the community name of Advertisement and PJ Talk. If the community name for PJ Talk is changed, the one for Advertisement will also be changed. Only four alphanumeric characters can be input. The factory default setting is “SONY.” It is recommended that the community name
be changed from the factory setting to avoid unnecessary access to the projector from other computers.
-Port No.:
Input the server port of PJ Talk. The factory default setting is "53484."
-Timeout:
Input the time until PJ Talk communication is terminated in the case that it is disconnected. The factory default setting is “30.”
-Host Address:
Input the IP address that the PJ Talk server is allowed to receive. If no IP address is input, receiving commands will be allowed from any IP address. From the moment the IP address is input, access will be allowed only from that input IP address. For security reasons, it is recommended to input an IP address to restrict access.
(c) Set PJ Link.
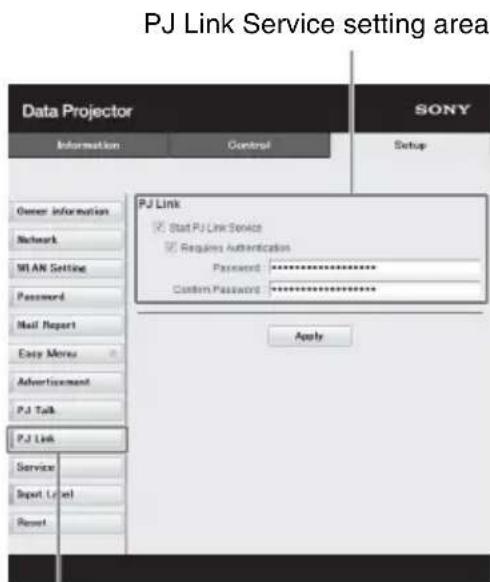
PJ Link button
Start PJ Link Service:
Set PJ Link to enabled or disabled. Items for PJ Link are enabled only when this function is enabled. This function is disabled at the factory setting.
-Requires Authentication:
Set the authentication for PJ Link to enabled or disabled.
-Password:
Input the authentication password for PJ Link. For the factory default password, refer to the PJ Link specifications.
(d)Set the system service.
System service setting area

Service button
Start DDDP Service:
Set DDDP to enabled or disabled. For details, refer to the DDDP specifications in the reference from AMX Corporation. The function is disabled at the factory default.
Crestron Control:
For details, refer to the specifications in product catalogues, etc., from Crestron Corporation.
-IP Address:
Input the Crestron system server.
-IP ID:
Input the IP ID for the CIP protocol.
-Port No.:
Input the port number for the CIP protocol server.
(e)Reset the network settings.
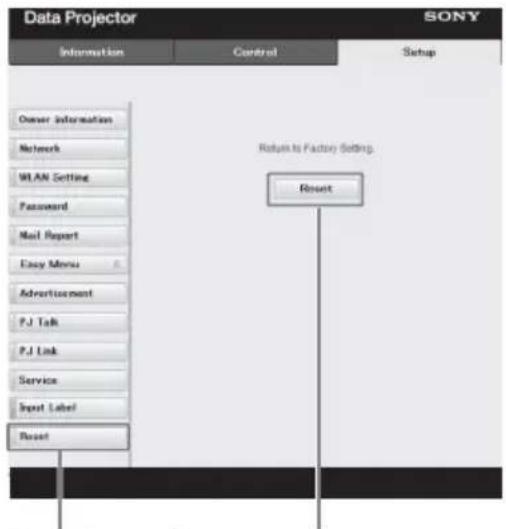
Reset button Reset
Reset:
Reset all Web browser settings to their factory defaults.
Using Interactive Presentation Utility 2 (VPL-SW636C/SW631C only)
Using the mouse function of the Interactive Pen Device (main only), you can control a computer and applications on the projected screen just like a mouse. Also when employing the drawing function of a different application, you can use the Interactive Pen Device to directly draw onto the projected file, and save the drawings.
Desktop mode

Whiteboard mode

How to operate the mouse function of the Interactive Pen Device (main only)
- Left-click: tap the screen with the tip of the Interactive Pen Device.
- Double-click: tap the screen twice with the tip of the Interactive Pen Device.
- Drag and drop: move the Interactive Pen Device while touching the screen.
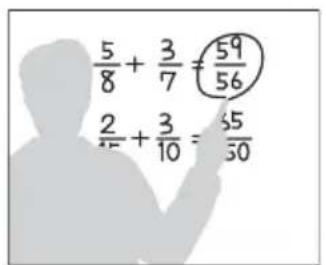
By starting Interactive Presentation Utility 2, you can use the Interactive Pen Device to draw lines and shapes on the projected screen. In the whiteboard mode, the projected screen can be used as an electronic whiteboard and you can select the background image from your photo library or the template.
draw Erase Save


By using both the main and sub Interactive Pen Device, two people can draw on the projected screen simultaneously. The main device can use all the functions, whereas the sub device can use only the drawing function.
Use of these functions requires installation of Interactive Presentation Utility 2. For Interactive Presentation Utility 2 software update, visit Sony's web site.
https://www.servicesplus.sel.sony.com/
http://pro.sony.eu/InteractiveUtility
Notes
- The interactive function works by a detector in the projector, which picks up infrared rays emitted from the tip of the Interactive Pen Device. Observe the precautions noted below.
- Avoid placing the projector where the Interactive Pen detector is directly exposed to fluorescent light or other strong light.
- Do not cover the pen tip of the Interactive Pen Device or the Interactive Pen detector.
- Infrared data communication or noise from another device may cause improper operation.
- Observe the precautions noted below during the calibration.
- Avoid placing obstacles between the interactive detector and the screen.
- Do not move the projector and the screen.
- If Calibration Auto does not calibrate properly, try the following methods.
- Shield the screen from strong, direct outside light.
- Reduce the ambient light while Calibration Auto is performed.
- If Calibration (Auto) still does not calibrate properly after reducing the lighting as suggested above, click Calibration (Manual(Main)) or Calibration (Manual(Sub)), then calibrate manually.
- If you use a screen which is not white, Calibration Auto may be inaccurate.
- The maximum screen size at which the Interactive function works is 100 inches.
- Images may not be projected properly depending on the operating environment or the application. Use Input-A, Input-B, or Input-C to project the images properly.
Connecting a Computer with a USB Cable
Make sure the computer and projector are connected with an AV cable. For details on connecting the AV cables, see “Connecting the Projector” (page 9).
![graph LR A["Computer"] --> B["USB terminal (Type A)"] B --> C["USB A-B cable (not supplied)"] C --> D["AV cable"] D --> E["Computer"]](/content/2026/05/1127222/images/1235bbb779358f8af9aae1f895c14efa74ba7aea9e782ecbadaefee7961ce9bc.jpg)
For Windows
Installing Interactive Presentation Utility 2
System Requirements
• CPU: Celeron 2.1GHz or faster
• Memory: 256MB or more (512MB recommend)
• Available hard drive space: 1GB or more
- OS:
Windows XP/Vista/Windows 7*1/Windows 8*1
*1: 32bit edition and 64bit edition
1 Close all running applications.
2 Insert the supplied CD-ROM into the CD-ROM drive of the computer. Open the CD-ROM and double-click “Interactive Presentation Utility 2.exe”.
3 Follow the on-screen instructions to install the software.
To uninstall Interactive Presentation Utility 2, click [Start]-[All Programs]-[Interactive Presentation Utility 2]-[Uninstall].
Setting Interactive Presentation Utility 2
1 Connect the projector and computer with the AV cable and USB cable (page 47), and project the image with the projector.
For details on connecting the AV cable (Mini D-sub 15-pin cable or HDMI cable) for image signals (VGA), see page 9.
2 Set "Interactive Mode" to "PC Interactive" in "Interactive." (VPL-SW636C only)
3 Start Interactive Presentation Utility 2.
To start Interactive Presentation Utility 2, click [Start]-[All Programs]-[Interactive Presentation Utility 2]-[Interactive Presentation Utility 2].
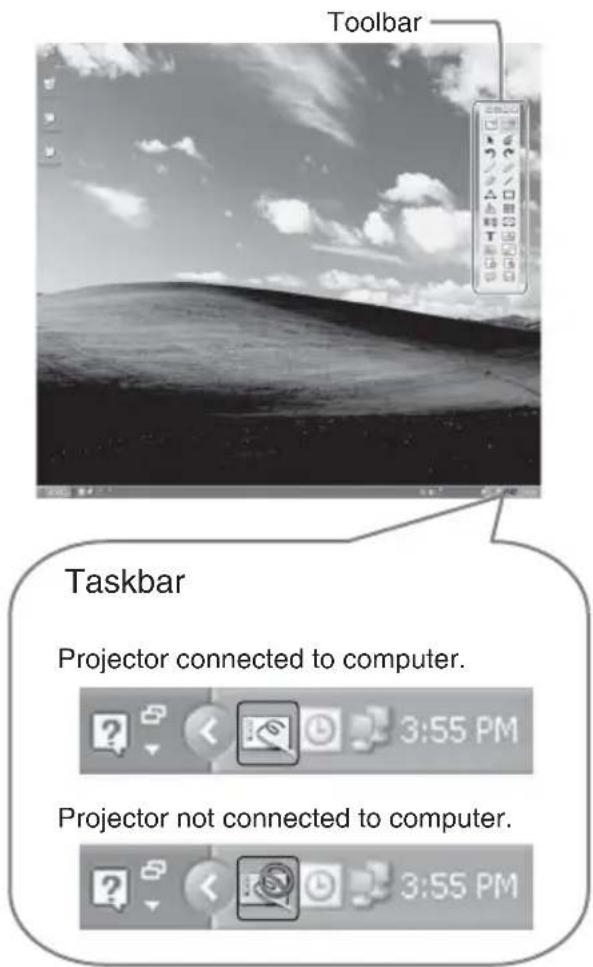
After the application starts, the icon appears in the taskbar, and the toolbar appears on the screen.
Calibration Auto/Manual
Calibration aligns the points where the pen (Main and Sub) is pointing and where the projector displays the cursor on the screen. "Calibration Auto" allows you to execute the calibration automatically.
Main Pen toolbar

① Calibration (Auto)
② Calibration (Manual (Main))
③ Calibration (Manual (Sub))
④ Saving calibration data
Click “Calibration” to select “Calibration (Auto).” The calibration starts automatically.
Operating with the Interactive Pen Device
With the Interactive Pen Device, you can use the functions of the toolbar on the screen. See “User’s Guide of Interactive Presentation Utility 2” for details.
Closing Interactive Presentation Utility 2
Click the icon in the Taskbar to display the pop-up menu, then select [Exit].
Installing Interactive Presentation Utility 2
System Requirements
• CPU: Pertium III or faster
• Memory: 256MB or more (512MB Recommend)
• Available hard drive space: 250MB
- OS: Mac OS X 10.6.x/10.7.x/10.8.x/10.9.x/10.10.x
Use of the interactive function requires installation of Interactive Presentation Utility 2.
1 Close all running applications.
2 In the CD-ROM, double-click [Interactive Presentation Utility 2.pkg].
3 Follow the on-screen instructions to install the software.
To uninstall Interactive Presentation Utility 2, from the Application folder move the [Interactive Presentation Utility 2] folder into the Trash, then empty it.
Setting Interactive Presentation Utility 2
1 Connect the projector and computer with the AV cable and USB cable (page 47), and project the image with the projector.
For details on connecting the AV cable (Mini D-sub 15-pin cable or HDMI cable) for image signals (VGA), see page 9.
2 Set "Interactive Mode" to "PC Interactive" in "Interactive." (VPL-SW636C only)
3 Start Interactive Presentation Utility 2.
Open the folder [Application] - [Interactive Presentation Utility 2] and double-click [Interactive Presentation Utility 2.app].
After application starts, each icon appears in the Dock and the toolbar appears on the screen.

Icon for Interactive Presentation Utility 2
Calibration Auto/Manual

Calibration aligns the points where the pen (Main and Sub) is pointing and where the projector displays the cursor on the screen. "Calibration Auto" allows you to execute the calibration automatically.
Main Pen toolbar

① Calibration (Auto)
② Calibration (Manual (Main))
③ Calibration (Manual (Sub))
④ Saving calibration data
Click “Calibration” to select “Calibration (Auto).” The calibration starts automatically.
Operating with the Interactive Pen Device
With the Interactive Pen Device, you can use the functions of the toolbar on the screen. See "User's Guide of Interactive Presentation Utility 2" for details.
Closing Interactive Presentation Utility 2
Click the icon in the Dock to display the pop-up menu, then select [Exit].
Using the PC Free Interactive Function (VPL-SW636C only)
The PC Free Interactive function enables you to draw on the screen with the Interactive Pen Device with only the projector. The data you draw in the whiteboard mode can be saved in the projector. In the desktop mode, you can draw with the Interactive Pen Device, using an image from the external device as a background.
Setting the PC Free Interactive Function
1 Set “Interactive Mode” to “PC Free” in “Interactive” (page 27).
2 Perform calibration.
Perform with “Calibration” in “Interactive” (page 27) or the toolbar (page 53).
Notes
- For notes regarding usage of the Interactive Pen Device and performing calibration, see page 53.
- The PC Free Interactive function cannot be used under the following conditions even though “Interactive Mode” is set to “PC Free” in “Interactive.”
- When you display the menu
- When the warning, notification, or other messages are displayed
- The maximum screen size at which the Interactive function works is 100 inches.
Toolbars and icons

①Switching Desktop mode/Whiteboard mode
Click the icon to switch the desktop mode and whiteboard mode.
②Hopping tool
The arrow for switching the main pen and sub pen toolbar is displayed on the opposite side of the main pen toolbar. If you click this arrow, the main pen and sub pen toolbars move to the opposite side. You can easily operate the toolbars on the big screen using this function.
③Go to the next page
Skips to the previous or the next page. You can skip up to 32 pages.
Dual-user (Dual pen) Calibration Auto/Manual

Main Pen toolbar

• The main pen toolbar is displayed when the PC Free Interactive function is activated.
- Usable tools are different between desktop mode and whiteboard mode. The icons of the unavailable tools are not displayed.
Note
This is for the main pen only.
Sub Pen toolbar

• The sub pen toolbar is displayed when the PC Free Interactive function is activated.
Note
This is for the sub pen only.
Calibration aligns the points where the pen (Main and Sub) is pointing and where the projector displays the cursor on the screen.
“ Calibration (Auto) ” allows you to perform the calibration automatically. If you select “Calibration (Manual (Main)) ” or “Calibration (Manual (Sub)) ” you can perform the calibration manually. If you display the menu or the warning/ caution messages etc., are displayed during the calibration, calibration will stop. In addition, if you stop operating the calibration for more than 20 seconds, the manual calibration will also stop. If the calibration fails, will be displayed on the calibration icon. In this case, perform manual adjustment as needed.
Notes
Observe the precautions noted below during the “Calibration (Auto)”.
- Avoid placing obstacles between the interactive detector and the screen.
- Do not move the projector and the screen. If “Calibration (Auto)” does not calibrate properly, try the following methods.
- Shield the screen from strong, direct outside light.
- Reduce the ambient light while “Calibration (Auto)” is performed.
- If “Calibration (Auto)” does not work properly even though the ambient light is reduced a little, select “Calibration (Manual (Main))” or “Calibration (Manual (Sub))” to make adjustments manually.
- If you use a screen which is not white, "Calibration(Auto)" may be inaccurate.
Pen tracking speed adjustment

Tracking speed of the Interactive Pen Device can be adjusted. If you are concerned about shakes in drawn lines, set it toward "Slow". However, setting toward "Slow" results in a slow response when you draw fast. If you set "Auto," the pen tracking speed is automatically adjusted according to the drawing speed.

Pen detection sensitivity adjustment
If you are using the Interactive Pen Device in too bright a room, the pen position may not be detected accurately and may cause drawing errors. This function adjusts the pen detection sensitivity to optimize the system to the brightness of the room.
While using the Interactive Pen Device, the pen may not be able to draw or the lines may cut intermittently under the following conditions. In this case, click this button to improve the symptoms.
- A bright light is used or there is sunlight and the entire environment is bright.
- The screen is directly exposed to a bright light or sunlight.
Note
During adjustment, the picture will turn black. Please wait a while.
Management Tools
Save □(whiteboard mode only)
Saves the drawings as PNG files. The file is named based on the page number of the whiteboard mode and the time displayed on the clock on the main pen toolbar.
pXX_yyyymmddHHMMSS.png page year month day hour minute second
Notes
- If the capacity of the projector is 500KB or less, the save button turns gray and is disabled. Delete unnecessary files from the projector (page 57).
- You cannot save the annotation that is added on the screen in desktop mode.
- If you turn off the projector during drawing, the whiteboard data will not be saved and disappear. Save necessary data before you turn off the projector.
Display/delete files (whiteboard mode only)
Displays/deletes the selected file. If you click the folder icon, the image data that is saved in the projector will be displayed in the list. You can select the files to display or delete. Click the Apply button to display the files. To delete the files (you can also select multiple files), click .Click "Yes" in the confirmation dialogue box to delete the files.
Select the file that you want to delete (you can also select multiple files), then click to open the confirmation dialogue box. Click "Yes" to delete the file.
Notes
- If the file is opened, only the opened file will be displayed on the page.
- You can only use alphanumeric characters for the file name. If other characters than alphanumeric characters is input for the file name, the file name will not be displayed on the Saved Pictures window. (Then, a warning message will be displayed.)
Restore to the saved data ↗ (whiteboard mode only)
Restores the drawing data to the data that was saved the last time. If you click the icon, the confirmation dialog box will appear. Click “Yes.”
Hide drawings (desktop mode only)
Hides the drawing data and toolbars. You cannot draw while it is hidden.
Close X
Hides the toolbars. You can draw while it is hidden.
Display toolbar
If the toolbar is hidden and you click this icon, the toolbar will be displayed. When the drawings are hidden and you click this icon, the drawings will be displayed.
Select Template (whiteboard mode only)
Changes the whiteboard mode background. There are eight default templates. If you click the template folder icon, the saved templates will be displayed in the list. Click the image template to set as a background. To add the templates, see “Add/delete template images to/from the projector” (page 57).
Notes
- The files displayed in the Saved Templates window are the images that are saved in the template folder of the projector.
- You can only use alphanumeric characters for the template file name. If characters other than alphanumeric characters are input for the file name, the file name will not be displayed on the Saved Templates window. (Then, a warning message will be displayed.)
Drawing Tools
Undo, Redo

If you click the redo icon, you can restore to the status before you performed the operation. If you click the undo icon, the previous status can be restored. You can restore the status up to 3 operations back.
Freehand Drawing Tools
You can write phrases and draw pictures. Freehand Drawing Tools include Pencil1, Pencil2, and Magic Pen. Objects drawn by Magic Pen will fade out in 8 seconds.
Notes
- The maximum length of the line you can draw with the pen is 2,560 dots (equivalent to the length of a line drawn twice in crosscuts on the screen)
- If you draw many dots and lines, it will gradually be harder to draw.
- You can use the magic pen when in whiteboard mode only.
Color, Thickness, Transparency, Style
Click the icons for color, thickness, transparency, and style to set.
Notes
- You cannot select the transparency with the magic pen.
- When in whiteboard mode, you cannot select the transparency.

Shapes □
14 kinds of shapes are provided. You can select shapes from the "Shapes" tool.
Color, Thickness, Transparency, Shapes
Click the icons for color, thickness, transparency, and shapes to set.

Note
When in desktop mode, you cannot select the transparency.
Line /
Draws a line. Click the icons for color, thickness, and style to set.
Point to Point △
This tool allows you to create a Polygon or a Polyline. To create a polygon or a polyline, click the icon, and click different points to create a polygon or polyline. Double-click the last point to end the polygon or polyline. You can also overlap the last point with the first one to make a shape. All the points can be removed. Point to Point tool can also be customized.
Overlap the last point to the first point.

Eraser
Two erasing methods are provided - Object Eraser and Erase All.
Object Eraser

If you want to erase with the Interactive Pen Device (Main), select the icon and click the object to erase. If you want to erase with the Interactive Pen Device (Sub), select the icon and click the object to erase. Only objects drawn by the sub pen will be erased. If you directly drag on the object with the pen, these parts will be deleted.
Erase All

If you want to erase with the Interactive Pen Device (Main), select the icon and click the screen to erase all the objects on the page. If you want to erase with the Interactive Pen Device (Sub), select the icon and click the screen to erase all the objects drawn by the Interactive Pen Device (Sub) only.
Note
The sub pen cannot delete the objects that are selected with the main pen.
Select objects /Delete

If you drag the pen to frame objects, you can select objects in a rectangle that is created from the point where you started dragging to where you finished dragging. If you click the displayed delete icon, the selected objects will be deleted at once.
To cancel the selection, select the objects again or click where there is no object.
Note
You cannot delete the objects that are drawn with the Magic pen.
Clock Display 18:28
Click to adjust the clock.
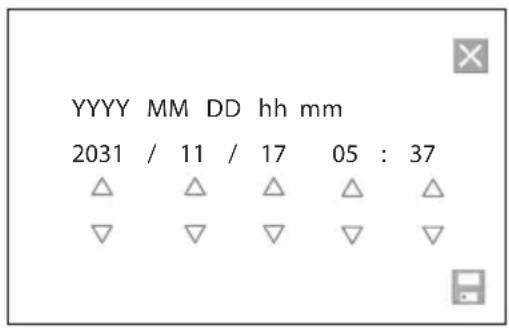
Adjust △ ▽
Click the up or down button to adjust the date and time.
Save
You can save the date and time you set.
Cancel ✗
Click to cancel the clock adjustment.
Note
If the projector is turned off for a long time, or the projector is left in the standby mode with “Standby Mode” set to “Low” for a long time, the clock display setting may return to the factory setting. In this case, set the clock again.
Retrieve the Data Saved in the Projector
You can move the whiteboard data saved in the projector to the computer by connecting the computer and projector with a USB cable.
1 Set “Interactive Mode” to “OFF(Data Export)” in “Interactive” (page 27).
2 Connect the computer and projector with a USB cable (page 47).
After a while, the projector will be recognized as a hard disc drive.
3 Open the SavedPng folder in the hard disc drive to copy the necessary files to the computer.
Delete unnecessary files from the projector if necessary.
Notes
- Do not remove the USB cable while you are accessing the whiteboard data. The file may be damaged.
- If you set “Interactive Mode” to a setting other than “OFF(Data Export)” while accessing the whiteboard data in the projector, the files may be damaged. Do not operate while accessing the whiteboard data.
- Even if you directly put the image or movie files into the drive of the projector, you cannot project them with the projector.
Add/delete template images to/from the projector
1 Set “Interactive Mode” to “OFF(Data Export)” in “Interactive” (page 27).
2 Connect the computer and projector with the USB cable (page 47).
After a while, the projector will be recognized as a hard disc drive.
3 Open the Templates folder to add/delete the PNG file.
Note
See “Notes” in “Retrieve the Data Saved in the Projector” (page 57).
Using the Mouse Mode Function (VPL-SW636C only)
You can directly operate the Interactive Pen Device as a mouse on the screen by connecting the projector and computer with a USB cable. You can directly operate the applications, etc. on the computer screen.
Note
This is for the main pen only.
System Requirements
- OS: Windows 7/Windows 8/Windows 8.1
Setting the Mouse Mode
1 Connect the projector and computer with the AV cable and USB cable (page 47), and project the image with the projector.
For details on connecting the AV cable (Mini D-sub 15-pin cable or HDMI cable) for image signals (VGA), see page 9.
2 Set "Interactive Mode" to "PC Interactive" in "Interactive" (page 27).
3 Perform the calibration.
Select “Auto” or “Manual (Main)” in “Calibration” of “Interactive” (page 27), or the calibration icon on the toolbar of the PC Free Interactive function (page 53) to perform calibration.
Note
For notes regarding usage of the Interactive Pen Device and performing calibration, see page 53.
Operations of Interactive Pen Device While Using Mouse Mode
| Corresponding mouse operations Operations of Interactive Pen Device | |
| Left-click Touch the screen once with the pen tip. | |
| Double-click Touch the screen twice with the pen tip. | |
| Drag and drop Move the pen with the pen tip to touched on the screen then release it. | |
| Right-click Push the button. | |
Notes
- If the projected image includes a large amount of black portions around it, the image will not be displayed properly, and the positions of pen tip and the computer cursor may not match. In this case, adjust “Pitch” and “Shift” manually (page 24).
- If the resolution of the image signal of the computer and the “Signal Type” (page 34) on the Information menu do not match, the positions of the pen tip and computer cursor may not match.
- The maximum screen size at which the Interactive function works is 100 inches.
Using Presentation Function via Network
The Presentation Function via Network enables you to do the following:
- Connect a maximum of eight computers to the projector.
- Project images from a maximum of four computers simultaneously.
- Connecting a USB wireless LAN module (not supplied) to the projector as an access point, allows the projector to connect to up to seven computers simultaneously.
Presentation Function via Network requires installation of Projector Station for Network Presentation (supplied CD-ROM). For information on updates of Projector Station for Network Presentation, visit Sony's web site: https://www.servicesplus.sel.sony.com/System requirements for using the application are as follows.
os
Windows XP: Home/Professional
Windows Vista: Home Premium/Business/Ultimate/Enterprise
Windows 7: Home Premium/Professional (Recommended)/Ultimate/Enterprise
Windows 8/8.1
Mac OS X: 10.6.x/10.7.x/10.8.x/10.9.x/10.10.x
CPU
Pentium4 2.8GHz or faster
Notes
- To install the application, administrative rights are required.
- If you do not have administrative rights, the application may not run properly.
- If firewall or security software is installed, the application may not run properly.
- Depending on the type of network adapter, the application may not run properly.
- Images may not be projected properly depending on the operating environment or the application.
Installing Projector Station for Network Presentation
1 Close all running applications.
2 Insert the supplied CD-ROM into the CD-ROM drive of the computer.
3 Open the CD-ROM.
Double-click the .exe file. When the message “User Account Control” is displayed, click “Allow” or “Yes.”
Double-click the .pkg file.
4 Follow the on-screen instructions to install the software.
For Windows:
For Mac:
Starting Projector Station for Network Presentation
1 Connect the projector to a network. For a wired connection, connect the projector by a LAN cable, then make the network settings. For details, see “LAN Settings” (page 30) or “Setting the LAN Network of the projector” (page 39). For a wireless connection, see “LAN terminal” (page 10) or “USB terminal (Type A) ( page 2 )” (page 11). Also check “WLAN Settings” (page 30).
2 Turn on the projector. Select “Network” as the input source (page 14).
3 Start Projector Station for Network Presentation.
For Windows:
Select [Start]-[All Programs]-[Projector Station for Network Presentation] on the computer.
For Mac:
Double-click [Projector Station for Network Presentation] in Applications folder.
Projecting an Image
When you start Projector Station for Network Presentation for the first time after installing to your computer, the connection guidance window will be displayed. This window gives you the information for the necessary settings for connection. Be sure to read it thoroughly. When starting the application after the first time, the connection method selection window will be displayed first. You can check the connection guidance window anytime from the connection method selection window.
For Windows
Connection guidance window
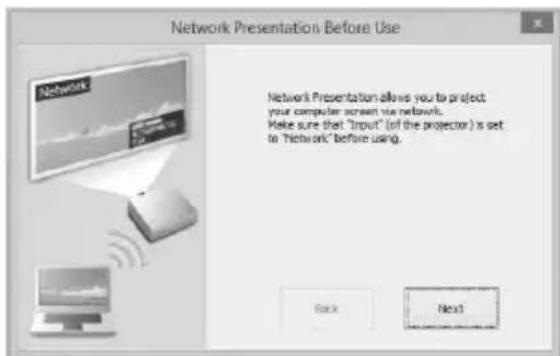
1 Select the connection method.
Refer to the network information on the projected screen of the projector and select “LAN Mode” or “AP Mode.”
LAN Mode: Select this mode if "Display Setting" in "Network
Presentation" is set to "LAN Mode" on the projector's menu. In this mode, the computer connects to the wired LAN of the projector or the USB wireless LAN module of the projector that operates as a client ("WLAN Network" page 30).
AP Mode: Select this mode if “Display Setting” in “Network Presentation” is set to “AP Mode” on the projector’s menu. In this mode, the computer connects to the USB wireless LAN module of the projector that operates as an access point (“WLAN Network” page 30).
For Windows:
Connection method selection window
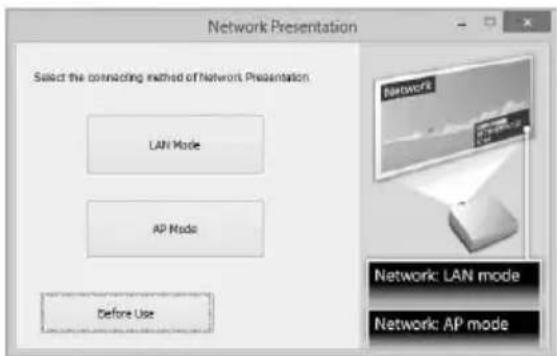
Note
The appearance of the application on the screen is subject to change without notice.
2 Set the projector an image will be projected to.
a) For LAN Mode
Refer to the network information on the projected screen of the projector that you want the computer connect to, and input the IP address and the Connection CODE. If “CODE” is “----”, “Connection CODE” (page 30) is set to “Off.” The computer can connect without inputting “CODE”.
b) For AP Mode
Refer to the network information on the projected screen of the projector that you want the computer connect to, and input the SSID and the Connection CODE. If “CODE” is “----”, “Connection CODE” is set to “Off.” The computer can connect without inputting “CODE”. If the wireless password is set for the SSID (“Setting the WLAN Network of the projector” on page 40), the wireless password input window will be displayed while the computer is trying to connect. Input the password to connect. To prevent information leaks, the wireless password is not displayed on the projected screen.
Network Presentation LAN mode

Network Presentation AP mode
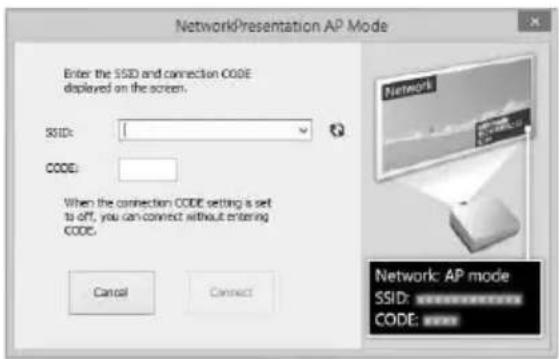
Wireless password input window
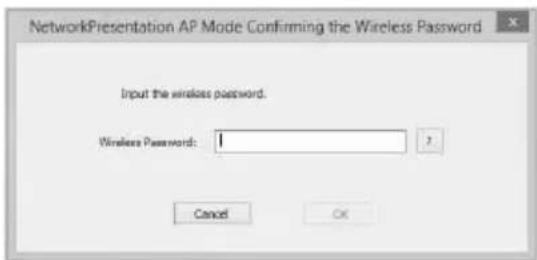
Notes
- When a projector is connected to a network via a wireless connection, if the “SSID” is changed from the factory default, it may not be found.
- When a projector is connected to a network via a wired connection, depending on the network environment, it may not be found.
3 Click "Connect".
When you click the “Connect” button, a controller will be displayed on the screen of the computer and the computer starts projecting an image (page 62). If another user is projecting an image, click to start projecting.
If no users are projecting an image, the controller appears on the screen and starts projecting an image.
Notes
- Display related settings (such as your computer's resolution) change when the image projection is started.
- If “Input” is set to other than “Network” (page 14), the image will not start being projected even after you press the “Connect” button. If you want to project the image, select “Network” to change the display status.
Connection Settings
| Item Item | descriptions |
| IP Address Input | the IP Address.List the IP addresses of the projectors on the network and IP addresses of projectors connected so far, as candidates. |
| SSID Input SSID | List the peripheral SSIDs and SSIDs of projectors connected to the computer so far, as candidates. |
b  | Search the network again and update the candidate list of the projectors. |
| Wireless Password | Input the wireless password of the SSID. If open system Authentication is used, input of the wireless password is unnecessary. |
| CODE Input the | Connection CODE displayed on the screen of the projector. |
| Connect Connect | to the projector that is set in the items above and start to project an image. |
Using the Controller
For Windows:
Network Presentation   | |||
| CODE: 1234 | |||
 |  | ||
User 000001   | |||
| 8 = ▼ | |||
For Mac:
| Items Functions | |
 | Start projecting an image. |
 | Pause projecting an image. |
 | Stop projecting an image (screen turns black). |
 | Change the application settings. |
 | Disconnect from the projector. |
 | Select a projection method then start projecting an image. |
 | ||
| Projection method | Not projecting an image. | |
| Project in full screen. | ||
| Project in the left half of the screen. | ||
| Project in the right half of the screen. | ||
| Project in the upper left quadrant of the screen. | ||
| Project in the upper right quadrant of the screen. | ||
| Project in the lower left quadrant of the screen. | ||
| Project in the lower right quadrant of the screen. | ||
 | Display the strength of the wireless signal. | |
| CODE | Display the Connection CODE of the projector that is connected to the computer. | |
| Display the number of users connected to the projector. | ||
 | Display the users' status. | |
One-Click projecting function
Projector Station for Network Presentation allows you to create a shortcut that registers the connection setting.
By starting the application with the shortcut, you can project the image to the registered projector.
1 Create a file.
For Windows
Create a shortcut to the
NetworkPresentation.exe. Copy the shortcut to the Projector Station for Network Presentation, or right-click the NetworkPresentation.exe in the installed folder to select “Create shortcut” from the pop up menu.
For Mac
Create a text file with any name with a text editor. Set the format to “Plain Text.”
2 Register the connection setting.
For Windows
Register the settings. Right-click the created shortcut and select “Properties” from the pop up menu.
Input the settings of the projector that you want the computer to connect to in "Target" from the "Shortcut" tab and save. For the format for the settings, refer to the command formats in the option format.
For Mac
Input the settings of the projector that you want the computer to connect to in the created text file and save.
Refer to the command format in the option format to input settings.
Right-click the created text file and select "Get Info" from the context menu.
Change the extension of the filename that is displayed on “Name & Extension” to “.npr”.
Option format
Command format
For LAN Mode
- connect [IP address]:[CODE]:[Display Setting]
For AP Mode
- wifi [SSID]:[Wireless password]:[CODE]:[Display Setting]
| Item Description | |
| IP address Assign | n the IP address of the projector that you want the computer to connect to. |
| SSID Assign the | SSID of the projector that you want the computer to connect to. |
| Wireless password | Assign the wireless password for the SSID. If the security method is Open System authentication, input “open.”If the USB LAN wireless module setting is set to “Access Pt. (Auto),” input “auto.”*1 |
| Item Description | |
| CODE Assign the | settings of theConnection CODE of the projector.on: Displays the dialogues for inputting the Connection CODE when the computer is trying to connect to the projector.off: Does not display the dialogues for inputting the Connection CODE when the computer is trying to connect to the projector. If “Connection CODE” of the projector is set to “On”, an authentication error occurs. |
| Display setting S | Sets the status for when the projector starts projecting an image.0:Does not display an image when the computer starts projecting an image. You need to start projecting an image with the controller.1:Displays an image when the computer starts projecting an image. |
*1: “Access Pt. (Auto)” can be selected on the compatible models only. This model is not compatible for the settings of “Access Pt. (Auto).”
Command Examples
Example 1)
If the settings of the projector that you want the computer to connect to are set as below and you want to display an image when the computer starts connecting to it
Network:LAN Mode
IP address:192.168.1.187
Connection CODE: On
For Windows
| C:\Program Files (x86)\Sony\ProjectorStation for Network Presentation\NetworkPresentation.exe -connect 192.168.1.187:on:1 |
For Mac
-connect 192.168.1.187:on:1
Example 2)
If the settings of the projector that you want the computer to connect to are set as below and you want to display an image when the computer starts connecting to it
Network: AP Mode
SSID: VPL012ABC
Wireless password: sony1
Connection CODE: Off
For Windows
C:\Program Files (x86)\Sony\Projector Station for Network Presentation\Network Presentation.exe -wifi VPL012ABC:sonyl:off:1
For Mac
-wifi VPL012ABC:sony1:off:1
Use Projector Station for Network Presentation without installing it to the computer.
Projector Station for Network Presentation also has a portable version that can be used with external media, such as a USB mass storage device. Although some functions are limited, you can put and carry the Projector Station for Network Presentation in the external media, and use it on other computers.
1 Open the supplied CD-ROM.
For Windows
Double-click the
"PJS_NetworkPresentationP_XXX.exe" file. If the User Account Control window is displayed, click "Allow" or "Yes."
For Mac
Double-click the
"PJS_NetworkPresentationP_XXX.pkg" file.
2 Follow the instructions in the wizards to install the application software.
3 Start the Projector Station for Network Presentation.
For Windows
Double-click the shortcut icon of Projector Station for Network Presentation that is created in the folder in which the application is installed.
For Mac
Double click “Projector Station for Network Presentation” in the folder in which the application is installed.
Notes
- You can use this application only on the OS that supports this application.
- Make sure Projector Station for Network Presentation is not operating before installing the application.
- Make sure the external media that the application will be installed to has access rights and all files in the external media are closed.
Error code list of Projector Station for Projector Station for Network Presentation
| Error code Meaning/Measure Page | |
| NPR-E1701 Failed while opening the WLAN device of the computer.Check that the WLAN function of the computer operates normally. | 40 |
| NPR-E1702 Failed while scanning the access point.Check that the WLAN function of the computer operates normally. | 40 |
| NPR-E1703 Failed while getting information of the access point. Check the WLAN function of the computer, and if multiple WLAN networks exist. | 10,40 |
| NPR-E1704 Cannot find the access point.Check if devices are connected correctly, the input SSID is correct and the projector is turned on. | 14,63 |
| NPR-E1705 Tried but failed while connecting using WEP64 bit or WEP128 bit. Check that the security setting of the WLAN function of the projector is correct. | 63 |
| NPR-E1706 Tried but failed while connecting using MIX (WPAPSK/WPA2-PSK (TKIP/AES)), WPA2-PSK (AES). Check that the security setting of the WLAN function of the projector is correct. | 63 |
| NPR-E1707 A security setting other than WEP 64bit, WEP 128bit, MIX (WPAPSK/WPA2-PSK (TKIP/AES)), WPA2-PSK (AES) is applied. Check that the input SSID and the security setting of the WLAN function of the projector are correct. | 10,63 |
| NPR-E1708 Failed to acquire the network profile. Check if the WLAN function of the computer operates normally. | - |
| NPR-E1709 Succeeded in authenticating the access point, but failed while associating. Check if multiple WLAN networks exist, or if the status of the projector changed while the computer tried to connect to the projector. | - |
| NPR-E1802 Failed while getting the IP address after connecting to the access point. Check the input SSID, security password and the setting of the security software of the computer. | - |
| NPR-E1803 Succeed in connecting to the access point, but failed while getting the information. Check the setting of the security software of the computer. | - |
| NPR-E1804 Connected to a different SSID (access point) from the one you assigned.Start from the connection setting again. | 61 |
| NPR-E2101 Cannot receive a response from the projector.The response may be blocked or the network may have been disconnected from the projector while communicating. Check the setting of the security software of the computer, the power status and the network composition of the projector. | - |
Displaying Images or Files Sent from a Tablet PC/ Smartphone
You can project JPEG images, PDF files, etc. stored in a tablet PC/smartphone wirelessly by using a specific application. *1
For downloading *2 or detailed method of using the application, access the following URL.
http://PWPresenter.pixelworks.com

*1: To use the application, one of the following conditions is required.
- Connected to network where wireless connection can be established (page 10).
- Connected to a wireless network via USB wireless LAN module IFU-WLM3 (not supplied) that is connected to the projector (page 11).
*2: Depending on your Internet connection, a data communication fee may apply.
Playing Video and Audio using USB Connection
You can also play video and audio simply by connecting the projector and computer with a USB A-B cable (not supplied).
Playing video and audio using USB connection requires to start USB Display.
System requirements for using the application are as follows.
os
Windows XP: Home/Professional (recommended)
Windows Vista: Home Premium/Business/Ultimate/Enterprise
Windows 7: Home Premium/Professional (Recommended)/Ultimate/Enterprise
Windows 8/8.1
Mac OS X: 10.6.x/10.7.x/10.8.x/10.9.x/10.10.x
CPU
Pentium4 2.8GHz or faster
Starting USB Display
1 Connecting the projector and your computer with a USB A-B cable (not supplied) (page 10).
2 Turn on the projector.
Select “Type B USB” as the input source (page 14). After a short time, the projector is recognized as a CD-ROM drive in the computer.
3 Open "USB Display" in the CD-ROM drive.
Notes
- The resolution of your computer changes when the application is started.
- Depending of the computer's setting, the application may start automatically.
- When you are finished using the projector, you can simply disconnect the USB cable without using the Safely Remove Hardware option.
- Images may not be projected properly depending on the operating environment or the application.
- If your OS is Windows Vista, Windows 7 or Windows 8, turning off the Windows Aero is recommended.
Playing Video and Audio
After starting USB Display, the controller appears on the screen, and projection playback starts automatically.
Using the Controller
For Windows:
| USB Display | |||
| ▶ | || | ■ | i |
For Mac:
| ○ ○ ○ | |||
| ▶ | || | ■ | i |
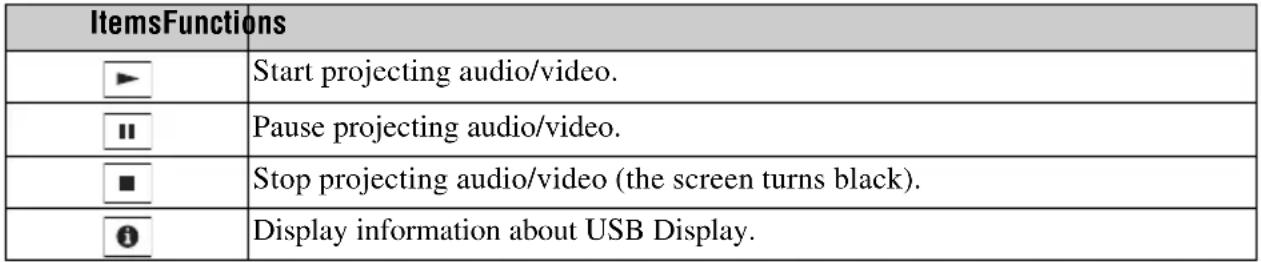 |
Using USB Media Viewer
You can browse image files stored in a USB memory device inserted in the USB terminal of the projector, without using a computer.
Supported storage media and file format:
• Supported storage media: USB flash memory
• Supported format of storage media: FAT format
- Supported file format: JPEG (.jpg/.jpeg), Bitmap (.bmp), PNG (.png), GIF (.gif), TIFF (.tif/.tiff)
Notes
• exFAT, NTFS are not supported.
- TIFF files containing EXIF information are not supported.
- Image files in a USB memory device connected to the projector via a USB hub may not be displayed.
- Security protected USB memory may not function correctly.
- A USB memory card reader that is recognized as more than one drive may not function correctly.
- Display of image files that are larger than 4092 × 3072 pixels is not guaranteed. It may take a long time to display, or may not be displayed.
- A folder with a deep folder structure or with a very long folder name may not be displayed.
- An image may not be displayed, depending on its file type.
- Files or folders with names including non-alphanumeric characters may not be displayed.
- When displaying an image file, do not disconnect the USB memory device. It may cause a malfunction of the USB memory device or the projector. Disconnect the USB memory device when the USB Memory device selection screen is displayed.
1 Connect a USB Memory device to the projector (page 13).
2 Select "Type A USB" as the input source (page 14).
3 Select the USB Memory device.

Press the ENTER key to display in the thumbnail mode.
USB Media Viewer has three display modes: “thumbnail mode,” “display mode” and “slideshow mode.”
Thumbnail Mode
The image files in the folder are displayed as a thumbnail list.

Press the //←/→ key on the remote commander to select an image, then press the ENTER key. The option menu appears in the lower part of the screen.
Option Menu
You can select the display order of thumbnails and display method of image files.
| Items Item descriptions | |
 | Hide the option menu. |
 | Switch to the display mode, and display the selected image in full screen view. (page 71) |
 | Switch to the slideshow mode, and start the slideshow from the selected image. (page 71) |
 | Sort image files. |
| Sort by name in alphabetical order. | |
| Sort by name in reverse alphabetical order. | |
| Sort by date in chronological order. | |
| Sort by date in reverse chronological order. | |
Notes
- Files without thumbnail data (including those created by an application) appear as blank icons.
- Cannot display more than 200 image files and folders in one folder.
Display Mode
In display mode, you can view a selected image in full screen view.

Option menu
Press the ENTER key on the remote commander. The option menu appears in the lower part of the screen.
Option Menu
| Items Item descriptions | |
| × | Hide the option menu. |
| Return to the thumbnail mode (page 70). | |
| Rotate the image 90 degrees counter-clockwise. | |
| Rotate the image 90 degrees clockwise. | |
| Switch to the slideshow mode, and start the slideshow from the selected image. (page 71) | |
| Display the previous image. | |
| Display the next image. | |
Slideshow Mode
In slideshow mode, you can view images as a slideshow.
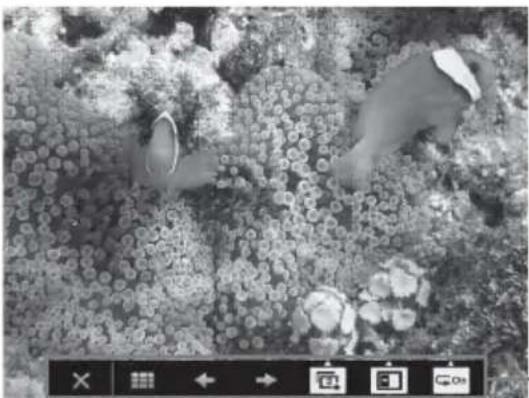
Option menu
Press ENTER key on the remote commander. The slideshow pauses and the option menu appears in the lower part of the screen.
Option Menu
Items Item descriptions
| Hide the option menu. | |
| Return to the thumbnail mode (page 70). | |
| Display the previous image. | |
| Display the next image. | |
| Press the ↑/↓ key to change the slideshow time interval. | |
| After 3 seconds, display the next image. | |
| After 5 seconds, display the next image. | |
| After 10 seconds, display the next image. | |
| Press the ↑/↓ key to change the slideshow effect. | |
| The next image appears with tile transition effect. | |
| The next image appears from the left side of the screen. | |
| The next image appears from the right side of the screen. | |
| The next image appears from the top of the screen. | |
| The next image appears from the bottom of the screen. | |
| Press the ↑/↓ key to change the slideshow repeat setting. | |
| After displaying the last image, the slideshow starts from the first image again. | |
| After displaying the last image, the slideshow ends and returns to the thumbnail mode. |
Indicators
You can check the projector status or abnormality by checking the lighting/flashing status of the ON/STANDBY indicator and WARNING indicator on the front. If the indicators flash in red, address the problem in accordance with “Warning indicators and remedies” (page 74).
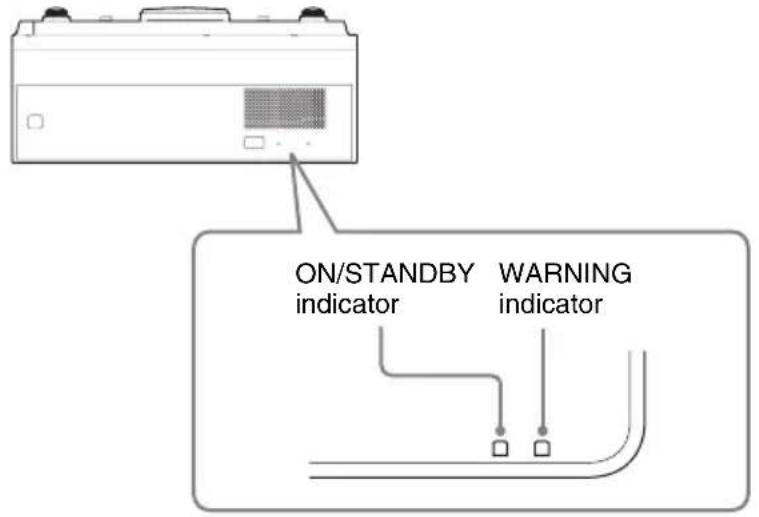
Operating status indication
| Indicator status Operating status Meaning | ||
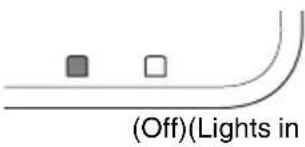 red) red) | Standby The power is supplied to the projector and the projector is in a standby mode according to the setting. | |
 in green) in green) | Warm-up/Cool-down | The projector is warming up after it is turned on, or cooling down after turned off. |
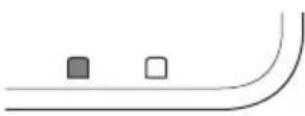 (Off)(Lights in green) (Off)(Lights in green) | Power on The projector is ready for projection. | |
 orange) orange) | Other standby status | The projector is in With No Input (Lamp Cutoff). |
Warning indicators and remedies
| Indicator status The number of flashes | Meaning Remedies | |
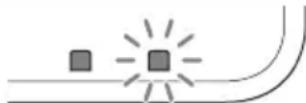 | Twice The lamp cover is not attached securely. | Check how the lamp cover is attached and install securely. |
| (Lights (Flashes in red) in red) | Three times The lamp does not light properly. | The temperature of the lamp is unusually high. Turn off the projector and turn it on again after the lamp has cooled. If the same symptom occurs, turn off the projector again and remove the lamp (page 80), then check if the lamp is not broken.If the lamp is not broken, reattach the lamp and turn on the projector again.If the symptom occurs again, the lamp may be exhausted.In this case, replace the lamp with a new one (page 80).If the lamp is broken, do not exchange the lamp by yourself. Consult a qualified Sony consultant. |
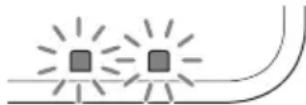 (Flashes (Flashes in red) in red)Both indicators flash (Flashes (Flashes in red) in red)Both indicators flash | Twice The temperature in the projector is abnormal. | • Check if the air filter is clogged, then clean or replace it (page 82).• Check if the ventilation holes (intake/exhaust) are not blocked by the wall or an object and secure a sufficient gap.• Check the ambient temperature and use the projector within the range of operating temperature. |
If the indicators flash in a manner other than described above, unplug the AC power cord and make sure the ON/STANDBY indicator turns off, then plug the AC power cord into the wall outlet and turn on the projector.
If the problem still persists, consult with qualified Sony personnel.
Messages List
When any of the messages listed below appears on the projected image, address the problem in accordance with the table below.
| Messages Meaning/Remedy Page | ||
| High temp.! Lamp off in 1 min. | Check the items below.• Check if nothing is blocking the ventilation holes.• Check if the air filter is not clogged.• Check if the Installation Attitude in the Installation menu is set correctly. | 4, 33, 82 |
| Frequency is out of range! | Change the output setting of the connected equipment to one for signals supported by the projector. | 90 |
| Please check Input-A Signal Sel. | Set “Input-A Signal Sel.” to “Auto” or select the input signal type to suit to the input signal. | 30 |
| Please clean the filter. Clean the air filter. 82 | ||
| Please replace the Lamp and clean the Filter. | Replace the lamp with a new one and clean the air filter. The message appears whenever you turn on the power until you replace the lamp and reset the lamp timer. | 80, 82 |
| Projector temperature is high. High Altitude Mode should be “On” if Projector is being used at high altitude. | When not using the projector at an altitude of 1,500 m or higher, check the items below.• Check if nothing is blocking the ventilation holes.• Check if the air filter is not clogged.• Check if Installation Attitude in the Installation menu is set correctly. | 4, 33, 82 |
| Not applicable! Invalid key was pressed. - | ||
| The control keys are locked! | “Control Key Lock” is set to “On.” 29 | |
| Projector lamp will cut off soon. Press I/↓ key to restart. | The I/↓ key was pressed and the projector lamp will be cut off soon. To cancel lamp cut off, press the I/↓ key again (the projector will return to the on status). To cut off the lamp immediately, press and hold the I/↓ key for several seconds. | 20 |
| Lamp Dimming Reduces lamp output when “With Static Signal” is set. When any change in signal is detected, or an operation (remote control or control panel) is performed, normal brightness is restored. | 31 | |
| Unsupported USB device. | Connect the designated USB device (USB wireless LAN module IFU-WLM3 (not supplied)). | 11 |
| Unsupported USB hub. | The projector does not support USB hubs. Connect the designated USB device (USB wireless LAN module IFU-WLM3 (not supplied)). | 11 |

Troubleshooting
Before asking to have the projector repaired, try to diagnose the problem, following the instructions below.
VPL-SW636C/SW631C/SW631/SX631
| Symptoms Remedy Page | |||
| The power is not turned on. | Check if the AC power cord is firmly connected. - | ||
| When the “Control Key Lock” is set to “On,” you cannot turn on the projector using the I/O key on the projector. | 29 | ||
| If the lamp or lamp cover is not attached securely, the projector cannot be turned on. | 80 | ||
| No image. Check if the connecting cable is connected to external equipment firmly. | 9 | ||
| Check the computer signal is set for output to an external monitor only. If you set your computer to output to both the computer's display and an external monitor, the external monitor image may not be displayed properly. Set your computer to output to only an external monitor. | |||
| Check if the application “USB Display” or “Projector Station for Network Presentation” is running. | 59, 67 | ||
| Check if the USB memory device connected to the projector is compatible with the projector. | 69 | ||
| Check if the input source is correctly selected. 14 | |||
| Check if the picture is muted by pressing the BLANK key. 6 | |||
| The application “USB Display” or “Projector Station for Network Presentation” does not start. | Check if the computer connected to the projector meets the system requirement for the applications. | 59, 67 | |
| The computer cannot connect to the projector. | · Check “LAN Settings” of the projector. · Check the condition of the wireless connection. | 30 | |
| On-screen display does not appear. | The on-screen display does not appear when “Status” in the Operation menu is set to “Off.” | 29 | |
| The aspect ratio of the display is not right/the image is displayed smaller /a portion of image does not appear. | The image may not display correctly because the input signal cannot be judged correctly. In this case, set “Aspect” manually. | 6, 23, 25 | |
| The image is a trapezoid. | The images become trapezoidal because of the projection angle. In this case, you can correct the trapezoidal distortion, using a Keystone feature. | 6, 18, 33 | |
| Symptoms | Remedy | Page |
| The image is dark/too bright. | The settings for “Brightness,” “Contrast,” and “Lamp Mode” affect brightness of the image. Check if the value is appropriate. | 22, 31 |
| The image will be dark when the lamp is burnt out. Check “Lamp Timer,” and replace the lamp with a new one if necessary. | 34, 80 | |
| “With Static Signal” is set to “On.” 31 | ||
| During picture muting, the lamp is dimmed to reduce power consumption. | 31 | |
| When video signal is not input, the lamp is dimmed to reduce power consumption. | - | |
| The image becomes darker or brighter. | When the lamp is dimmed for a long time, brightness may increase temporarily, but this is not malfunction. | - |
| When the “Lamp Mode” is set to “Auto,” the luminance of the lamp changes according to the input image. | 30 | |
| The image is not clear. Check if the projector is in focus. 16 | ||
| The image is noisy. Check if the connecting cable is connected to the external equipment properly. | 9 | |
| No sound. Check that the connecting cables between the projector and external video or audio equipment are securely connected. | 9 | |
| The remote commander does not work. | Check if the batteries are installed correctly. - | |
| Check if the batteries are not exhausted. - | ||
| The fan is noisy. The sound from the fan is often greater than normal to cool the lamp, etc. in the following cases.• “Lamp Mode” is set to “High.”• The unit is used at a high altitude. “High Altitude Mode” is set to “On.”• The unit is used in the location where the temperature is high. | 31, 33 | |

| Symptoms Remedy Page | ||
| PC Free Interactive function does not work. | Check if “Interactive Mode” is set to “PC Free.” 27 | |
| Hide the menu. 21 | ||
| Check if the warning, notification, or other messages appear. - | ||
| Cannot draw with the PC Free Interactive function. | Perform calibration with “Calibration” in the Function menu. | 27 |
| Cannot use Mouse Mode. | Check if the projector and the computer are connected with a USB cable. | 10 |
| Check if “Interactive Mode” is set to “PC Interactive.” 27 | ||
| Check that Interactive Presentation Utility 2 is not running. 48, 50 | ||
| Cannot use Interactive Presentation Utility 2. | Check if the projector and computer are connected with a USB cable. | 10 |
| Check if “Interactive Mode” is set to “PC Interactive.” 27 | ||
| Check that Interactive Presentation Utility 2 is running. 48, 50 | ||
| Cannot save the whiteboard data. | If the capacity of the projector is 500 KB or less, no more data can be saved. Save the necessary data to the computer and delete unnecessary files from the projector. | 57 |
| The correct time is not displayed on the clock display. | If the projector is turned off for a long time, or not operated in standby mode for a long time with“Standby Mode”set to “Low,” the clock display may be restored to the factory setting. In this case, click the clock display icon to set the clock again. | 31, 57 |
| Cannot retrieve the whiteboard data saved in the projector. | Check if the projector and computer are connected with a USB cable. | 10 |
| Check if “Interactive Mode” is set to “OFF(Data Export).” 27 | ||
| The positions of the computer cursor and pen do not match. | Select “Auto” or “Manual (Main)” in “Calibration,” and perform calibration. | 27 |
| Adjust “Pitch”and “Shift” of the screen. 24 | ||
| If the resolution of the image signals of the computer and “Signal Type” on the Information menu do not match, the positions of pen tip and the computer cursor may not match. In this case, set the resolution of the image signals of the computer to match the one of “Signal Type.” | 34 | |
| Even though “Lamp Mode” is set to “Auto,” it does not work. | If “Interactive Mode” is set to “PC Free,” and “Lamp Mode” is set to “Auto” at the same time, “Lamp Mode” will automatically become equivalent to “Standard.” Set “Interactive Mode” to other than “PC Free” if necessary. | 27 |
| Even though “With No Input” is set to “Lamp Cutoff” or “Standby,” it does not work. | When “Interactive Mode” is set to “PC Free,” “With No Input” will automatically become equivalent to “Off.” Set “Interactive Mode” to other than “PC Free” if necessary. | 27, 31 |
| Even though “With Static Signal” is set to “Lamp Dimming,” it does not work. | When “Interactive Mode” is set to “PC Free,” “With Statistic Signal” will automatically become equivalent to “Off.” Set “Interactive Mode” to other than “PC Free” if necessary. | 27, 31 |
| The PC that is connected via USB connector is operated by someone. | Do not operate while the screen of the computer you are operating is not displayed when using Interactive Presentation Utility 2 or mouse mode. (The operation performed by the Interactive Pen Device is still effective even while the images from other input connectors are displayed.) | - |
Replacing the Lamp
Replace the lamp with a new one if a message displayed on the projected image (page 90). Use an LMP-E220 projector lamp (not supplied) for replacement.
Caution
- The lamp remains hot after the projector is turned off. If you touch the lamp, you may burn your finger. When you replace the lamp, wait for at least an hour after turning off the projector for the lamp to cool sufficiently.
- Do not allow any metallic or inflammable objects into the lamp replacement slot after removing the lamp, otherwise it may cause electrical shock or fire. Do not put your hands into the slot.
Notes
- If the lamp breaks, contact qualified Sony personnel. Do not replace the lamp yourself.
- When removing the lamp, be sure to pull it out straight, by holding the designated location. If you touch a part of the lamp other than the designated location, you may be burned or injured. If you pull out the lamp while the projector is tilted, the pieces may scatter if the lamp breaks any may cause injury.
1 Turn off the projector, and disconnect the AC power cord from a wall outlet.
2 When the lamp has cooled sufficiently, open the lamp cover by loosening 1 screw.
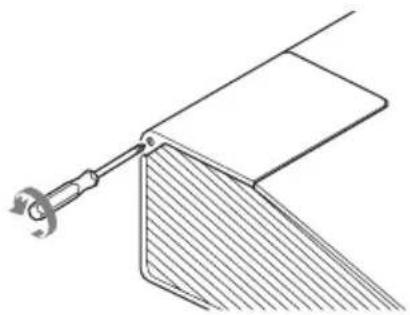
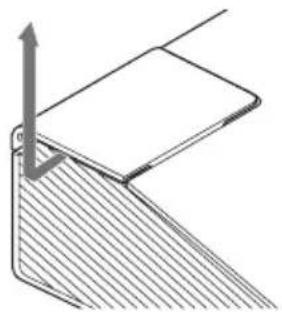
3 Loosen the three screws on the lamp (1) then pull out the lamp by its grab (2).

4 Insert the new lamp all the way in until it is securely in place (1). Tighten the three screws (2).
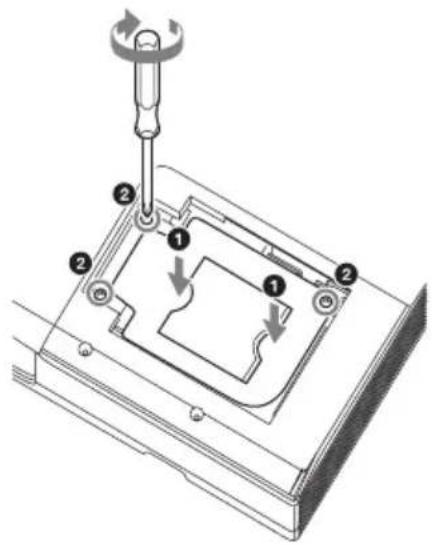
Note
The power will not turn on if the lamp is not secured properly.
5 Close the lamp cover and tighten the 1 screw.

6 Connect the AC power cord to a wall outlet and turn on the projector.
7 Reset the lamp timer for notification of the next replacement time. Select “Lamp Timer Reset” on the Function menu then press the ENTER key. When a message appears, select “Yes” to reset the lamp timer (page 27).
Caution
For the customers in the U.S.A. and Canada
Hg Lamp contains mercury. Dispose according to applicable local, state/province and federal laws. For additional information, see www.sony.com/mercury
Cleaning the Air Filter
When a message appears on the projected image indicating time for a filter cleaning, clean the air filter (pages 73, 59).
If the dust cannot be removed from the air filter even after cleaning, replace the air filter with a new one. For details on a new air filter, consult with qualified Sony personnel.
Caution
If you continue to use the projector even after the message is displayed, dust may accumulate, clogging it. As a result, the temperature may rise inside the unit, leading to a possible malfunction or fire.
1 Turn off the projector, and disconnect the AC power cord from the AC outlet.
2 Open the side cover. Press A and open the side cover in the direction of the arrow shown on the illustration below.
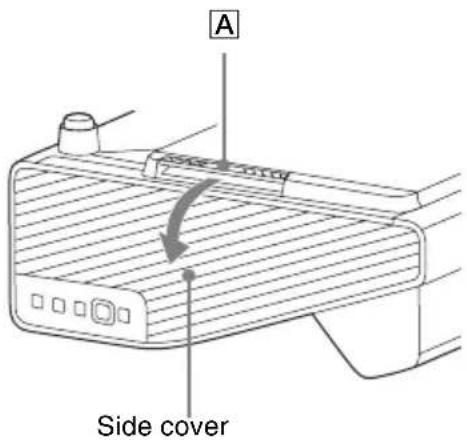
3 Remove the air filter holders. Push B and remove the two air filter holders in the direction of the arrow.

4 Clean the air filters with a vacuum cleaner. Remove the four air filters as illustrated below then clean with a vacuum cleaner.

There are two air filters for one air filter holder.
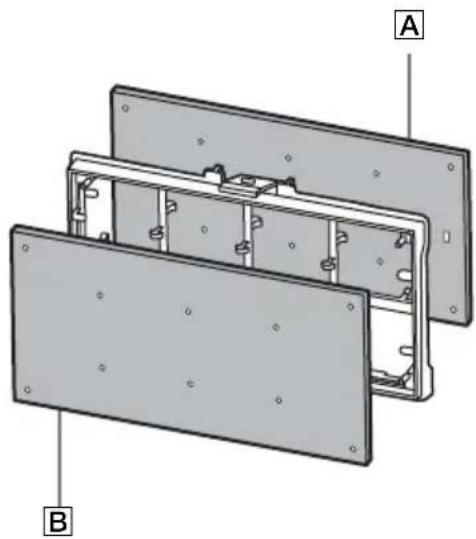
A
B

5 Reattach the air filters on the air filter holders then put them back in the projector.
Note
Be sure to attach the air filters firmly. Otherwise, a malfunction may occur.
6 Reattach the side cover.
Specifications
| Items Descriptions | ||
| Projection system | 3 LCD system | |
| Display device Effective display size | VPL-SW636C/SW631C/SW631: 0.59 inch (15.0 mm), 3 plate panels, Aspect ratio 16:10VPL-SX631: 0.63 inch (16.0 mm), 3 plate panels, Aspect ratio 4:3 | |
| Effective picture elements | VPL-SW636C/SW631C/SW631: 3,072,000 pixels(1280 × 800 pixels, 3 plate panels)VPL-SX631: 2,359,296 pixels (1024 × 768 pixels, 3 plate panels) | |
| Projection lens Zoom Manual (approx.1.03 times) | ||
| Focus Manual | ||
| Light source High-pressure mercury lamp, 225 W type | ||
| Projected image size | VPL-SW636C/SW631C/SW631: 65 inches to 110 inches(1.65 m to 2.79 m)VPL-SX631: 70 inches to 115 inches (1.78 m to 2.92 m) | |
| Luminous flux (Brightness) | VPL-SW636C/SW631C/SW631: 3300 lmVPL-SX631: 3300 lm(when “Lamp Mode” is set to “High”) | |
| Speaker 16 W × 1 (monaural) | ||
| Applicable scanning *1 frequency | Horizontal: 15 kHz to 92 kHz, Vertical: 48 Hz to 92 Hz | |
| Resolution*1 | When a computer signal is input | Maximum display resolution: 1600 × 1200 pixels (resize)Panel display resolution:VPL-SW636C/SW631C/SW631: 1280 × 800 pixelsVPL-SX631: 1024 × 768 pixels |
| When a video signal is input | NTSC, PAL, SECAM, 480/60i, 576/50i, 480/60p,576/50p, 720/60p, 720/50p, 1080/60i, 1080/50i,1080/60p, 1080/50p | |
| Color system NTSC | 3.58, PAL, SECAM, NTSC4.43, PAL-M, PAL-N, PAL60 | |
| INPUT OUTPUT (Computer/video) | INPUT A RGB/YP | bPr input terminal: Mini D-sub 15-pin female, G with sync/Y: 1 Vp-p ± 2 dB, sync negative,75 ohms terminated, RGB/PbPr: 0.7 Vp-p ± 2 dB,75 ohms terminated, Sync signal: TTL level high impedance, positive/negativeAudio input terminal: Stereo mini jack, rated input 500 mVrms, input impedance more than 47 kohms |
| INPUT B | RGB input terminal: Mini D-sub 15-pin female, RGB: 0.7 Vp-p ± 2 dB, 75 ohms terminated, Sync signal: TTL level high impedance, positive/negativeAudio input terminal: Stereo mini jack, rated input 500 mVrms, input impedance more than 47 kohms | |
| INPUT C | HDMI input terminal: HDMI 19-pin, HDCP, HDMI audio support | |
| S VIDEO (SVIDEO IN) | S video input terminal: Mini DIN 4-pin, Y: 1 Vp-p ± 2dB, sync negative, 75 ohms terminated, C: (burst signal) 0.286 (NTSC)/0.3 (PAL/SECAM) Vp-p ± 2 dB, 75 ohms terminatedAudio input terminal: Phono jack × 2, rated input 500 mVrms, input impedance more than 47 kohms | |
| VIDEO (VIDEO IN) | Video input terminal: Pin jack, 1 Vp-p ± 2 dB, sync negative, 75 ohms terminatedAudio input terminal: Shared with S VIDEO | |
| OUTPUT | MONITOR output terminal: Mini D-sub 15-pin female, G with sync/Y: 1 Vp-p ± 2 dB, sync negative,75 ohms terminated, RGB/PbPr: 0.7 Vp-p ± 2 dB,75 ohms terminated, Sync signal: HD, VD 4 V (open), 1 Vp-p (75 ohms), positive/negativeAudio output terminal: Stereo mini jack, 1 Vrms (maximum volume, when inputting 500 mVrms), output impedance 5 kohms | |
| Other terminals RS-232C terminal: D-Sub 9-pin male | ||
| LAN terminal: RJ45, 10BASE-T/100BASE-TX | ||
| USB terminal: Type A | ||
| USB terminal: Type B | ||
| Microphone input: Mini jack | ||
| Operating temperature/Operating humidity | 0 °C to 40 °C (32 °F to 104 °F)/20% to 80% (no condensation) | |
| Storage temperature/Storage humidity | -10 °C to +60 °C (14 °F to 140 °F)/20% to 80% (no condensation) | |
| Power requirements | VPL-SW636C:100 V to 240 V AC, 3.5 A to 1.6 A, 50/60 HzVPL-SW631C: 100 V to 240 V AC, 3.4 A to 1.5 A, 50/60 HzVPL-SW631/SX631: 100 V to 240 V AC, 3.3 A to 1.5 A, 50/60 Hz | |

| Items Descriptions | ||
| Power consumption | AC 100 V to 120 V | VPL-SW636C: 341WVPL-SW631C: 338WVPL-SW631: 330WVPL-SX631: 305W |
| AC 220 V to 240 V | VPL-SW636C: 328WVPL-SW631C: 324WVPL-SW631: 320WVPL-SX631: 294W | |
| Power consumption (standby mode) | AC 100 V to 120 V | 0.5 W (when “Standby Mode” is set to “Low”) |
| AC 220 V to 240 V | 0.5 W (when “Standby Mode” is set to “Low”) | |
| Power consumption (networked standby mode) | AC 100 V to 120 V | 5.3 W (LAN)5.9 W (optional WLAN module)6.1 W (all terminals and networks connected)(when “Standby Mode” is set to “Standard”) |
| AC 220 V to 240 V | 5.6 W (LAN)6.2 W (optional WLAN module)6.4 W (all terminals and networks connected)(when “Standby Mode” is set to “Standard”) | |
| Heat dissipation | VPL-SW636C:100 V AC: 1,163 BTU/h240 V AC: 1,119 BTU/hVPL-SW631C:100 V AC: 1,153 BTU/h240 V AC: 1,105 BTU/hVPL-SW631:100 V AC: 1,126 BTU/h240 V AC: 1,092 BTU/hVPL-SX631:100 V AC: 1,041 BTU/h240 V AC: 1,003 BTU/h | |
| Standard dimensions (W/H/D) | Approx. 372 × 167 × 382 mm (1421/32 × 69/16 × 151/32 inches) Approx. 372 × 138 × 382 mm (1421/32 × 57/16 × 151/32 inches) (without projecting parts) | |
| Mass VPL-SW636C: Approx. 6.3 kg (14 lb)VPL-SW631C: Approx. 6.2 kg (14 lb)VPL-SW631/SX631: Approx. 6.0 kg (13 lb) | ||
| Supplied accessories | See “Checking the Supplied Accessories” in the supplied Quick Reference Manual. | |
| Optional accessories *2 *3 | Projector Lamp LMP-E220 (for replacement)USB wireless LAN module IFU-WLM3Interactive Pen Device IFU-PN250A/PN250B | |
Notes
*1: For details, refer to "Acceptable Input Signals" on page 90.
*2: Information on accessories in this manual is current as of January 2016.
*3: Not all optional accessories are available in all countries and area. Please check with your local Sony Authorized Dealer.
Design and specifications of the unit, including the optional accessories, are subject to change without notice.

Pin assignment
HDMI terminal (HDMI, female)
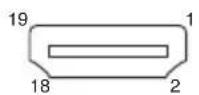
| 1 T.M.D.S. Data2+ | 11 T | M.D.S. Clock Shield |
| 2 T.M.D.S. Data2 Shield | 12 T | M.D.S. Clock – |
| 3 T.M.D.S. Data2 – | 13 N | C. |
| 4 T.M.D.S. Data1+ | 14 R | RESERVED (N.C.) |
| 5 T.M.D.S. Data1 Shield | 15 SCL | |
| 6 T.M.D.S. Data1 – | 16 SDA | |
| 7 T.M.D.S. Data0+ | 17 D | DC GND |
| 8 T.M.D.S. Data0 Shield | 18 +5V Power | |
| 9 T.M.D.S. Data0 – | 19 Hot Plug Detect | |
| 10 T.M.D.S. Clock+ | ||
RGB input terminal (Mini D-sub 15-pin, female)
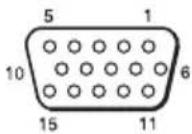
| 1 Video input(red) R | 9 | P o winput for DDC |
| 2 Video input(green) G | 10 GND | |
| 3 V i d(blue) B | 1d GND i n | |
| 4 GND 12 DDC/SDA | ||
| 5 RE SERVE 13 Horizontal | syncsignal | |
| 6 GND (R) 14 Vertical sync | signal | |
| 7 GND (G) 15 DDC/SCL | ||
| 8 GND (B) |
e r
p u
RS-232C terminal (D-Sub 9-pin, male)
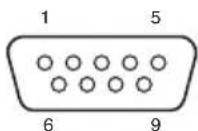
| 1 | N | C | 6 | N | C | ||
| 2 | R | X | D | A | 7 | R | |
| 3 | T | X | D | A | 8 | C | |
| 4 | D | T | R | 9 | N | C | |
| 5 GND | |||||||
T S T S
USB terminal (Type A, female)
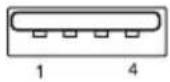
| 1 | VBUS (4.4 - 5.25 V) |
| 2 Data- | |
| 3 Data+ | |
| 4 Ground |
USB terminal (Type B, female)
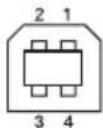
| 1 VCC (+5 V) | |
| 2 Data- | |
| 3 Data+ | |
| 4 Ground | |

Acceptable Input Signals *1
Computer signal
| Resolution | fH[kHz]/fV[Hz] | Input terminal | ||
| RGB/YPBPR | HDMI | RGB | ||
| 640 × 350 31 | .5/70 | ● | ● | |
| 37.9/85 | ● | ● | ||
| 640 × 400 31 | .5/70 | ● | ● | |
| 37.9/85 | ● | ● | ||
| 640 × 480 31 | .5/60 | ● | ● | ● |
| 35.0/67 | ● | ● | ||
| 37.9/73 | ● | ● | ||
| 37.5/75 | ● | ● | ||
| 43.3/85 | ● | ● | ||
| 800 × 600 35 | .2/56 | ● | ● | |
| 37.9/60 | ● | ● | ● | |
| 48.1/72 | ● | ● | ||
| 46.9/75 | ● | ● | ||
| 53.7/85 | ● | ● | ||
| 832 × 624 49 | .7/75 | ● | ● | |
| 1024 × 768 48 | 8.4/60 | ● | ● | ● |
| 56.5/70 | ● | ● | ||
| 60.0/75 | ● | ● | ||
| 68.7/85 | ● | ● | ||
| 1152 × 864 64 | 4.0/70 | ● | ● | |
| 67.5/75 | ● | ● | ||
| 77.5/85 | ● | ● | ||
| 1152 × 900 61 | 1.8/66 | ● | ● | |
| 1280 × 960 60 | 0.0/60 | ● | ● | ● |
| 1280 × 1024 | 64.0/60 | ● | ● | ● |
| 80.0/75 | ● | ● | ||
| 91.1/85 | ● | ● | ||
| 1400 × 1050 | 65.3/60 | ● | ● | ● |
| 1600 × 1200 | 75.0/60 | ● | ● | ● |
| 1280 × 768 47 | 7.8/60 | ● | ||
| 1280 × 720 45 | 5.0/60 | ● | ●*2 | ● |
| 1920 × 1080 | 67.5/60 | ●*3 | ||
| 1366 × 768 47 | 7.7/60 | ● | ● | ● |
| 1440 × 900 55 | 5.9/60 | ● | ● | ● |
| Resolution | fH[kHz]/fV[Hz] | Input terminal | ||
| RGB/YPBPR | HDMI | RGB | ||
| 1280 × 800 | 49.7/60 | ● | ● | ● |
Digital TV signal *4
| Signal fV[Hz] | Input terminal | |
| RGB/YPBPR | HDMI | |
| 480i 60 | ● | |
| 576i 50 | ● | |
| 480p 60 | ● | |
| 576p 50 | ● | |
| 1080i 60 | ● | |
| 1080i 50 | ● | |
| 720p 60 | ● | |
| 720p 50 | ● | |
| 1080p 60 | ||
| 1080p 50 | ||
Analog TV signal
| Signal fV[Hz] | Input terminal | |
| VIDEO/S VIDEO | ||
| NTSC 60 | ● | |
| PAL/SECAM | 50 | ● |
Notes
*1: • When a signal other than the signals listed in table is input, the picture may not be displayed properly.
- An input signal meant for screen resolution different from that of the panel will not be displayed in its original resolution. Text and lines may be uneven.
*2: This is identified as a movie delivery signal of 720/60p.
*3: This is identified as a movie delivery signal of 1080/60p.
*4: Only G with sync/Y is supported.
Projection Distance and Lens Shift Range
The projection distance is the distance between the center of the projection window and the surface of the projected image. The following describes the projection distance and height from the center of the projection window to edge of screen by each projected screen size. Height H is the height from the bottom of the projected image (top for wall mount) to A (determined by drawing a perpendicular line from the center of the projection window to projected image surface).
Floor Installation
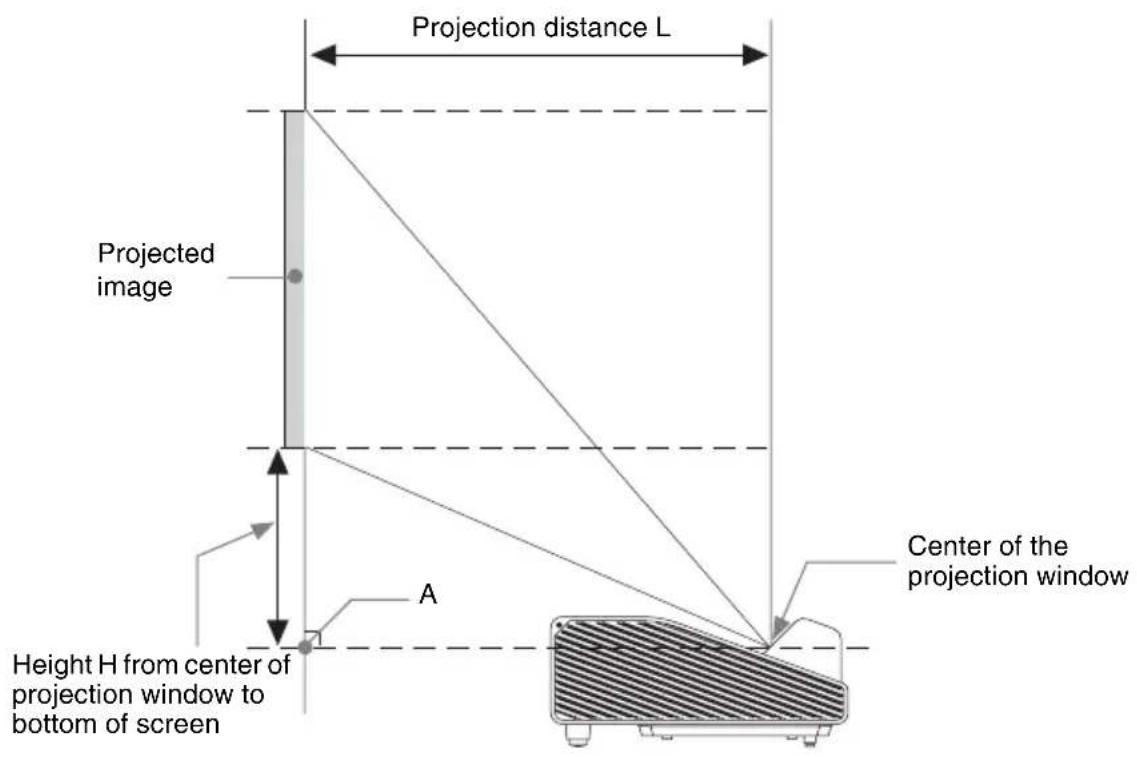

Wall Installation
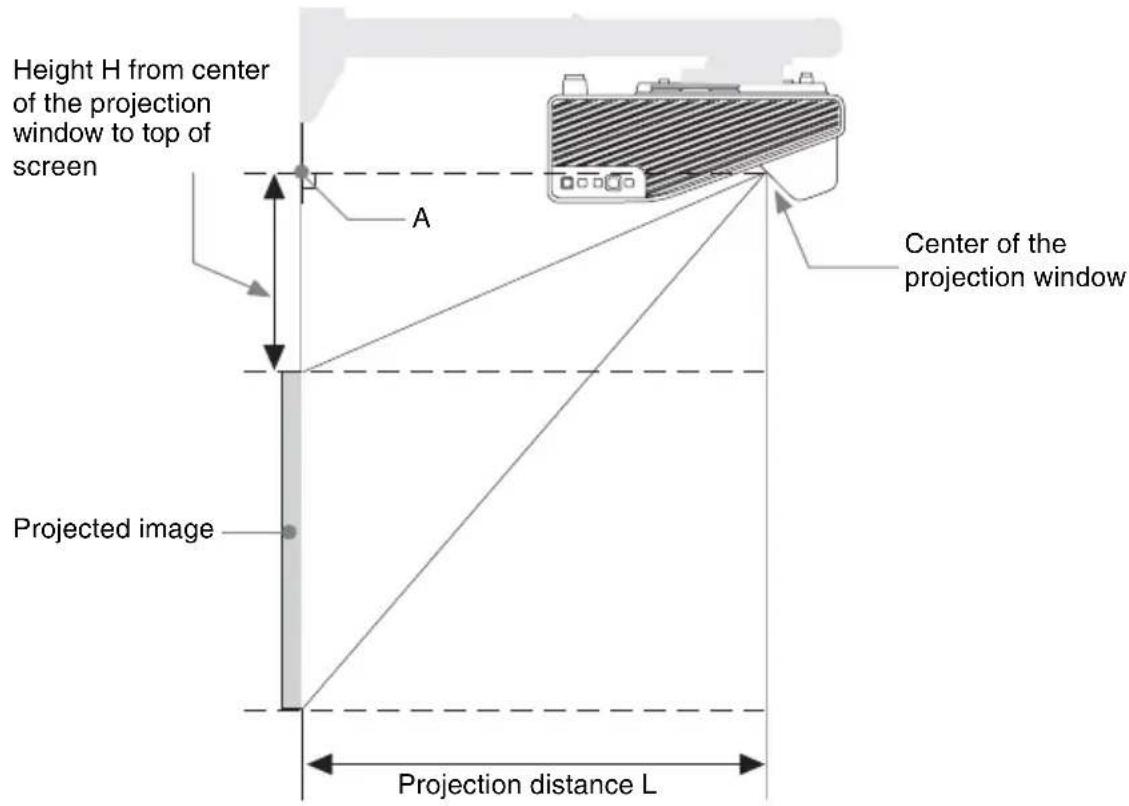
L: Projection distance L
H: Distance between the edge of the image and the center of the projection window
The lens shift range is the distance you can move the lens shift from the center of the projected image(0) when full width and full height of the projected image is regarded as 100%.

Shaded region: Lens shift range
VS UP : Vertical lens shift range (up) [%]
VSDN : Vertical lens shift range (down) [%]
HS R : Horizontal lens shift range (right) [%]
HS L : Horizontal lens shift range (left) [%]
Projection distance table (VPL-SW636C/SW631C/SW631)
Unit: m (inches)
| Projected image size | Projection Distance L | Height H from center of projection window to edge of screen | ||
| Diagonal D Width × Height | Projection Distance L (Min.) | Projection Distance L (Max.) | ||
| 65 inch (1.65 m) | 40 × 0.88 (55 × 34) | 67-0.378(14 1 /2-15) | 0.256 (10 1 /8) | 256 (10 1 /8) |
| 70 inch (1.78 m) | 51 × 0.94 (59 × 37) | 99-0.411(15 3 /4-16 1 /4) | 0.277 (11) | 78 (11) |
| 80 inch (2.03 m) | 72 × 1.08 (68 × 42) | 62-0.476(18 1 /4-18 3 /4) | 0.319 (12 5 /8) | 320 (12 5 /8) |
| 90 inch (2.29 m) | 94 × 1.21 (76 × 48) | 25-0.541(20 3 /4-21 3 /8) | 0.362 (14 3 /8) | 363 (14 3 /8) |
| 100 inch (2.54 m) | 15 × 1.35 (85 × 53) | 588-0.606(23 1 /4-23 7 /8) | 0.404 (16) | 05 (16) |
| 110 inch (2.79 m) | 37 × 1.48 (93 × 58) | 651-0.671(25 3 /4-26 1 /2) | 0.446 (17 5 /8) | 448 (17 3 /4) |
Projection distance formula (VPL-SW636C/SW631C/SW631)
D: Projected image size (Diagonal)
H: Distance between the edge of the image and the center of the projection window
Expression#1 Unit: m (inches)
| Projection Distance L (Min.) Projection | Distance L (Max.) |
| L=0.006306 × D-0.0433(L=0.248266 × D-1.7042) | L=0.006502 × D-0.0439(L=0.255998 × D-1.7288) |
Expression#2
| Height H from center of projection window to edge of screen | |
| Projection Distance L (Min.) Projection | Distance L (Max.) |
| H=0.00424 × D-0.01957(H=0.16676 × D-0.77063) | H=0.00425 × D-0.02002(H=0.16740 × D-0.78812) |
Lens shift range (VPL-SW636C/SW631C/SW631)
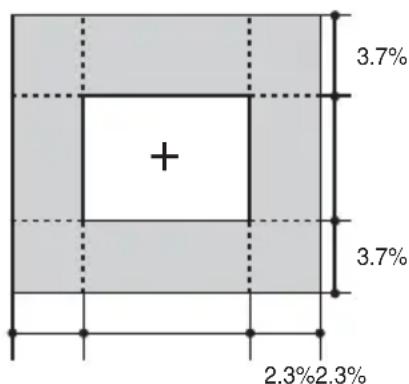
VS _ UP [%] = VS _ DN [%] = 3. 7 [%]
HS _ R [%] = HS _ L [%] = 2. 3 [%]
Projection distance table (VPL-SX631)
Unit: m (inches)
| Projected image size | Projection Distance L | Height H from center of projection window to edge of screen | ||
| Diagonal D Width × Height | Projection Distance L (Min.) | Projection Distance L (Max.) | ||
| 70 inch (1.78 m) 1. | 42 × 1.07 (56 × 42) 0 | 374-0.385 (143/4-151/4) | 0.172 (67/8) 0. | 173 (67/8) |
| 80 inch (2.03 m) 1. | 63 × 1.22 (64 × 48) 0 | 433-0.446 (171/8-175/8) | 0.200 (77/8) 0. | 200 (77/8) |
| 90 inch (2.29 m) 1. | 83 × 1.37 (72 × 54) 0 | 493-0.508 (191/2-20) | 0.227 (9) 0.228 (9) | |
| 100 inch (2.54 m) 2. | 0.03 × 1.52 (80 × 60) 0 | 0.552-0.569 (213/4-221/2) | 0.255 (101/8) 0 | 255 (101/8) |
| 110 inch (2.79 m) 2. | 24 × 1.68 (88 × 66) 0 | 0.612-0.630 (241/8-247/8) | 0.282 (111/8) 0 | 283 (111/4) |
| 115 inch (2.92 m) 2. | 34 × 1.75 (92 × 69) 0 | 0.641-0.661 (251/4-261/8) | 0.296 (113/4) 0 | 297 (113/4) |
Projection distance formula (VPL-SX631)
D: Projected image size (Diagonal)
H: Distance between the edge of the image and the center of the projection window
Expression#1 Unit: m (inches)
| Projection Distance L (Min.) Projection Distance L (Max.) | |
| L=0.005950 × D-0.0433(L=0.234240 × D-1.7056) | L=0.006125 × D-0.0432(L=0.241125 × D-1.6993) |
Expression#2
| Height H from center of projection window to edge of screen | |
| Projection Distance L (Min.) Projection | Distance L (Max.) |
| H=0.00275 × D-0.02018(H=0.10826 × D-0.79441) | H=0.00275 × D-0.02014(H=0.10846 × D-0.79297) |
Lens shift range (VPL-SX631)
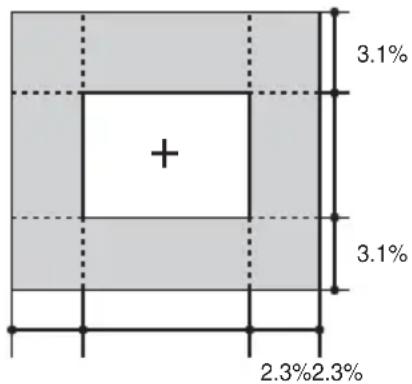
VSUP[% ] = VSDN[% ] = 3.1[% ]
HSR [%]= HSL [%]= 2.3 [%]
Dimensions


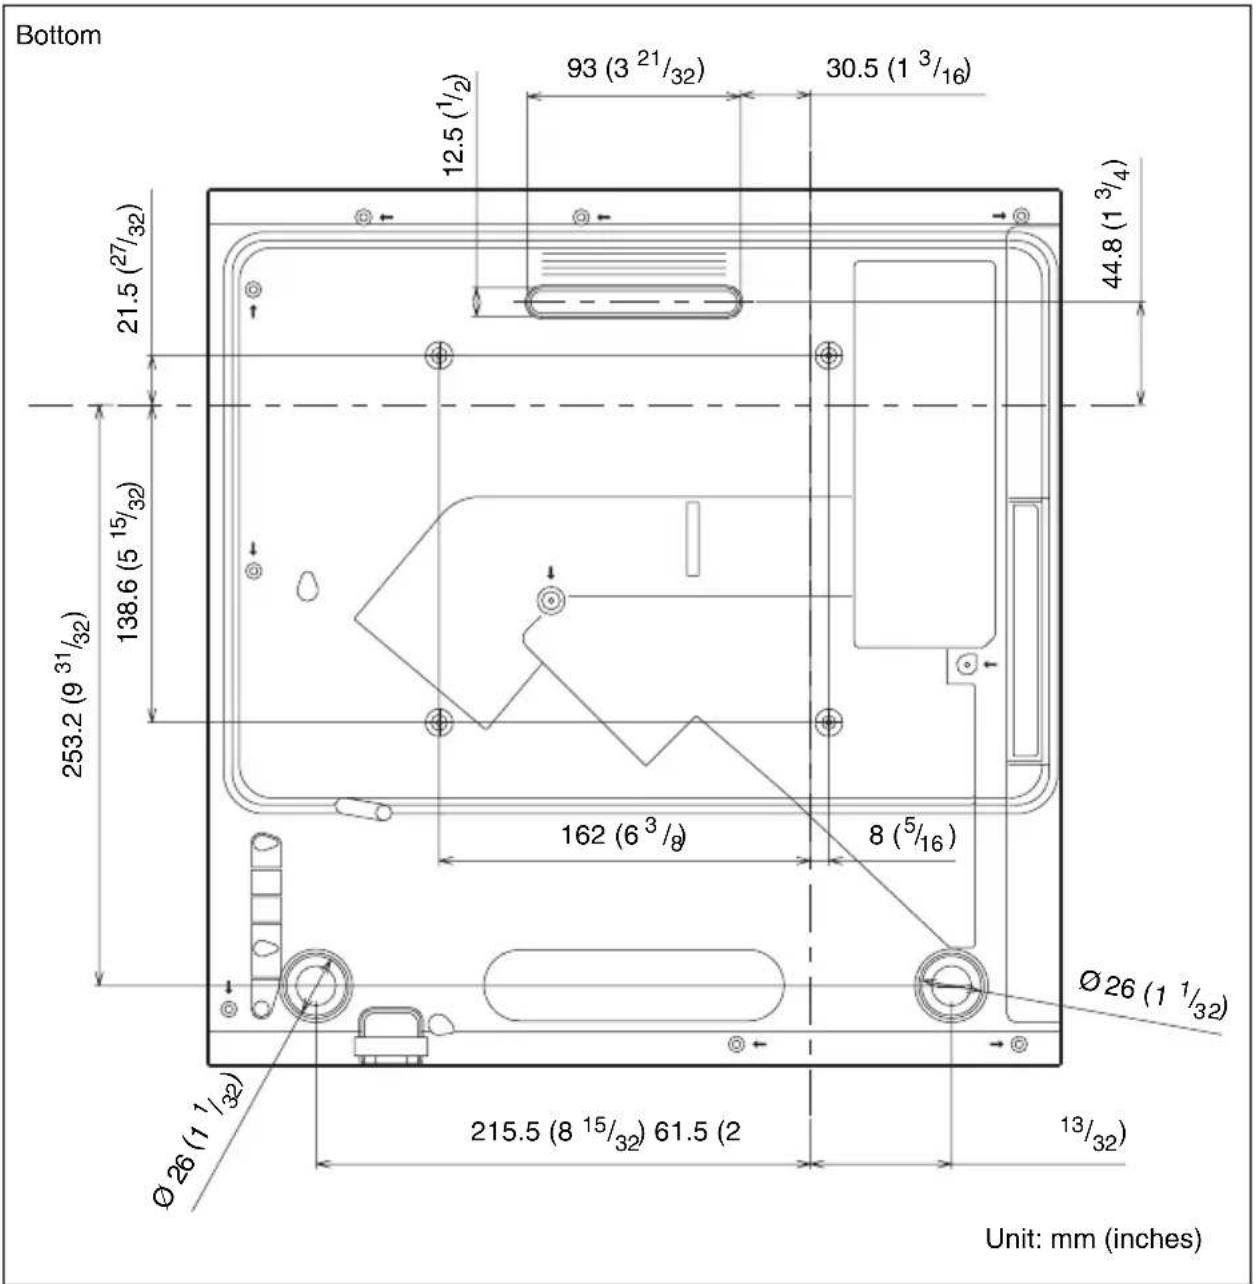
END USER LICENSE AGREEMENT
IMPORTANT:
BEFORE USING THE SOFTWARE, PLEASE READ THIS END USER LICENSE AGREEMENT (“EULA”) CAREFULLY. BY USING THE SOFTWARE YOU ARE ACCEPTING THE TERMS OF THIS EULA. IF YOU DO NOT ACCEPT THE TERMS OF THIS EULA, YOU MAY NOT USE THE SOFTWARE.
This EULA is a legal agreement between you and Sony Corporation (“SONY”). This EULA governs your rights and obligations regarding the software of SONY and/or its third party licensors (including SONY’s affiliates) and their respective affiliates (collectively, the “THIRD-PARTY SUPPLIERS”), together with any updates/ upgrades provided by SONY, any printed, on-line or other electronic documentation for such software, and any data files created by operation of such software (collectively, the “SOFTWARE”).
Notwithstanding the foregoing, any software in the SOFTWARE having a separate end user license agreement (including, but not limited to, GNU General Public license and Lesser/Library General Public License) shall be covered by such applicable separate end user license agreement in lieu of the terms of this EULA to the extent required by such separate end user license agreement (“EXCLUDED SOFTWARE”).
SOFTWARE LICENSE
The SOFTWARE is licensed, not sold. The SOFTWARE is protected by copyright and other intellectual property laws and international treaties.
COPYRIGHT
All right and title in and to the SOFTWARE (including, but not limited to, any images, photographs, animation, video, audio, music, text and “applets” incorporated into the SOFTWARE) is owned by SONY or one or more of the THIRD-PARTY SUPPLIERS.
GRANT OF LICENSE
SONY grants you a limited license to use the SOFTWARE solely in connection with your compatible device (“DEVICE”) and only for your individual, non-commercial use. SONY and the THIRD-PARTY SUPPLIERS expressly reserve all rights, title and interest (including, but not limited to, all intellectual property rights) in and to the SOFTWARE that this EULA does not specifically grant to you.
REQUIREMENTS AND LIMITATIONS You may not copy, publish, adapt, redistribute, attempt to derive source code, modify, reverse engineer, decompile, or disassemble any of the SOFTWARE, whether in whole or in part, or create any derivative works from or of the SOFTWARE unless such derivative works are intentionally facilitated by the SOFTWARE. You may not modify or tamper with any digital rights management functionality of the SOFTWARE. You may not bypass, modify, defeat or circumvent any of the functions or protections of the SOFTWARE or any mechanisms operatively linked to the SOFTWARE. You may not separate any individual component of the SOFTWARE for use on more than one DEVICE unless expressly authorized to do so by SONY. You may not remove, alter, cover or deface any trademarks or notices on the SOFTWARE. You may not share, distribute, rent, lease, sublicense, assign, transfer or sell the SOFTWARE. The software, network services or other products other than SOFTWARE upon which the SOFTWARE'S performance depends might be interrupted or discontinued at the discretion of the suppliers (software suppliers, service suppliers, or SONY). SONY and such suppliers do not warrant that the SOFTWARE, network services, contents or other products will continue to be available, or will operate without interruption or modification.
EXCLUDED SOFTWARE AND OPEN SOURCE COMPONENTS
Notwithstanding the foregoing limited license grant, you acknowledge that the SOFTWARE may include EXCLUDED SOFTWARE. Certain EXCLUDED SOFTWARE may be covered by open source software licenses (“Open Source Components”), which means any software licenses approved as open source licenses by the Open Source Initiative or any substantially similar licenses, including but not limited to any license that, as a condition of distribution of the software licensed under such license, requires that the distributor make the software available in source code format. If and to the extent disclosure is required, please visit www.sony.net/Products/Linux or other SONY-designated web site for a list of applicable OPEN SOURCE COMPONENTS included in the SOFTWARE from time to time, and the applicable terms and conditions governing its use. Such terms and conditions may be changed by the applicable third party at any time without liability to you. To the extent required by the licenses covering EXCLUDED SOFTWARE, the terms of such licenses will apply in lieu of the terms of this EULA. To the extent the terms of the licenses applicable to EXCLUDED SOFTWARE prohibit any of the restrictions in this EULA with respect to such EXCLUDED SOFTWARE, such restrictions will not apply to such EXCLUDED SOFTWARE. To the extent the terms of the licenses applicable to Open Source Components require SONY to make an offer to provide source code in connection with the SOFTWARE, such offer is hereby made.
USE OF SOFTWARE WITH COPYRIGHTED MATERIALS
The SOFTWARE may be capable of being used by you to view, store, process and/or use content created by you and/or third parties. Such content may be protected by copyright, other intellectual property laws, and/or agreements. You agree to use the SOFTWARE only in compliance with all such laws and agreements that apply to such content. You acknowledge and agree that
SONY may take appropriate measures to protect the copyright of content stored, processed or used by the SOFTWARE. Such measures include, but are not limited to, counting the frequency of your backup and restoration through certain SOFTWARE features, refusal to accept your request to enable restoration of data, and termination of this EULA in the event of your illegitimate use of the SOFTWARE.
CONTENT SERVICE
PLEASE ALSO NOTE THAT THE SOFTWARE MAY BE DESIGNED TO BE USED WITH CONTENT AVAILABLE THROUGH ONE OR MORE CONTENT SERVICES (“CONTENT SERVICE”). USE OF THE SERVICE AND THAT CONTENT IS SUBJECT TO THE TERMS OF SERVICE OF THAT CONTENT SERVICE. IF YOU DECLINE TO ACCEPT THOSE TERMS, YOUR USE OF THE SOFTWARE WILL BE LIMITED. You acknowledge and agree that certain content and services available through the SOFTWARE may be provided by third parties over which SONY has no control. USE OF THE CONTENT SERVICE REQUIRES AN INTERNET CONNECTION. THE CONTENT SERVICE MAY BE DISCONTINUED AT ANY TIME.
INTERNET CONNECTIVITY AND THIRD PARTY SERVICES
You acknowledge and agree that access to certain SOFTWARE features may require an Internet connection for which you are solely responsible. Further, you are solely responsible for payment of any third party fees associated with your Internet connection, including but not limited to Internet service provider or airtime charges. Operation of the SOFTWARE may be limited or restricted depending on the capabilities, bandwidth or technical limitations of your Internet connection and service. The provision, quality and security of such Internet connectivity are the sole responsibility of the third party providing such service.
EXPORT AND OTHER REGULATIONS
You agree to comply with all applicable export and re-export restrictions and regulations of the area or country in which you reside, and not to transfer, or authorize the transfer, of the SOFTWARE to a prohibited country or otherwise in violation of any such restrictions or regulations.
HIGH RISK ACTIVITIES
The SOFTWARE is not fault-tolerant and is not designed, manufactured or intended for use or resale as on-line control equipment in hazardous environments requiring fail-safe performance, such as in the operation of nuclear facilities, aircraft navigation or communication systems, air traffic control, direct life support machines, or weapons systems, in which the failure of the SOFTWARE could lead to death, personal injury, or severe physical or environmental damage (“HIGH RISK ACTIVITIES”). SONY, each of the THIRD-PARTY SUPPLIERS, and each of their respective affiliates specifically disclaim any express or implied warranty, duty or condition of fitness for HIGH RISK ACTIVITIES.
EXCLUSION OF WARRANTY ON SOFTWARE
You acknowledge and agree that use of the SOFTWARE is at your sole risk and that you are responsible for use of the SOFTWARE. The SOFTWARE is provided “AS IS,” without warranty, duty or condition of any kind.
SONY AND EACH OF THE THIRD-PARTY SUPPLIERS (for purposes of this Section, SONY and each of the THIRD-PARTY SUPPLIERS shall be collectively referred to as "SONY") EXPRESSLY DISCLAIM ALL WARRANTIES, DUTIES OR CONDITIONS, EXPRESS OR IMPLIED, INCLUDING, BUT NOT LIMITED TO, THE IMPLIED WARRANTIES OF MERCHANTABILITY, NONINFRINGEMENT AND FITNESS FOR A PARTICULAR PURPOSE. SONY DOES NOT WARRANT OR MAKE ANY CONDITIONS OR REPRESENTATIONS (A) THAT THE FUNCTIONS
CONTAINED IN ANY OF THE SOFTWARE WILL MEET YOUR REQUIREMENTS OR THAT THEY WILL BE UPDATED, (B) THAT THE OPERATION OF ANY OF THE SOFTWARE WILL BE CORRECT OR ERROR-FREE OR THAT ANY DEFECTS WILL BE CORRECTED, (C) THAT THE SOFTWARE WILL NOT DAMAGE ANY OTHER SOFTWARE, HARDWARE OR DATA, (D) THAT ANY SOFTWARE, NETWORK SERVICES (INCLUDING THE INTERNET) OR PRODUCTS (OTHER THAN THE SOFTWARE) UPON WHICH THE SOFTWARE'S PERFORMANCE DEPENDS WILL CONTINUE TO BE AVAILABLE, UNINTERRUPTED OR UNMODIFIED, AND (E) REGARDING THE USE OR THE RESULTS OF THE USE OF THE SOFTWARE IN TERMS OF ITS CORRECTNESS, ACCURACY, RELIABILITY, OR OTHERWISE.
NO ORAL OR WRITTEN INFORMATION OR ADVICE GIVEN BY SONY OR AN AUTHORIZED REPRESENTATIVE OF SONY SHALL CREATE A WARRANTY, DUTY OR CONDITION OR IN ANY WAY INCREASE THE SCOPE OF THIS WARRANTY. SHOULD THE SOFTWARE PROVE DEFECTIVE YOU ASSUME THE ENTIRE COST OF ALL NECESSARY SERVICING, REPAIR OR CORRECTION. SOME JURISDICTIONS DO NOT ALLOW THE EXCLUSION OF IMPLIED WARRANTIES, SO THESE EXCLUSIONS MAY NOT APPLY TO YOU.
LIMITATION OF LIABILITY
SONY AND EACH OF THE THIRD-PARTY SUPPLIERS (for purposes of this Section, SONY and each of the THIRD-PARTY SUPPLIERS shall be collectively referred to as “SONY”) SHALL NOT BE LIABLE FOR ANY INCIDENTAL OR CONSEQUENTIAL DAMAGES FOR BREACH OF ANY EXPRESS OR IMPLIED WARRANTY, BREACH OF CONTRACT, NEGLIGENCE, STRICT LIABILITY OR UNDER ANY OTHER
LEGAL THEORY RELATED TO THE SOFTWARE, INCLUDING, BUT NOT LIMITED TO, ANY DAMAGES ARISING OUT OF LOSS OF PROFITS, LOSS OF REVENUE, LOSS OF DATA, LOSS OF USE OF THE SOFTWARE OR ANY ASSOCIATED HARDWARE, DOWN TIME AND USER'S TIME, EVEN IF ANY OF THEM HAVE BEEN ADVISED OF THE POSSIBILITY OF SUCH DAMAGES. IN ANY CASE, EACH AND ALL OF THEIR AGGREGATE LIABILITY UNDER ANY PROVISION OF THIS EULA SHALL BE LIMITED TO THE AMOUNT ACTUALLY PAID FOR THE PRODUCT. SOME JURISDICTIONS DO NOT ALLOW THE EXCLUSION OR LIMITATION OF INCIDENTAL OR CONSEQUENTIAL DAMAGES, SO THE ABOVE EXCLUSION OR LIMITATION MAY NOT APPLY TO YOU.
CONSENT TO USE OF NON-PERSONAL INFORMATION, LOCATION DATA, DATA SECURITY
You acknowledge and agree that SONY and its affiliates, partners and agents may read, collect, transfer, process and store certain information collected from the SOFTWARE, including but not limited to information about (i) the SOFTWARE and (ii) the software applications, contents and peripheral devices that interact with your DEVICE and the SOFTWARE
("Information"). Information includes, but is not limited to: (1) unique identifiers relating to your DEVICE and its components; (2) performance of the DEVICE, the SOFTWARE and their components; (3) configurations of your DEVICE, the SOFTWARE and the software applications, contents and peripheral devices that interact with the DEVICE and the SOFTWARE; (4) use and frequency of use of the functions of (x) the SOFTWARE, and (y) the software applications, contents and peripheral devices that interact with the SOFTWARE; and (5) location data, as indicated below. SONY and its affiliates, partners and agents may use and disclose Information subject to applicable laws in order to improve its products and services or to provide products or services to you. Such uses include, but are not limited to: (a) administering the functionalities of the SOFTWARE; (b) to improve, service, update or upgrade the SOFTWARE; (c) improving, developing and enhancing the current and future products and services of SONY and other parties; (d) to provide you with information about the products and services offered by SONY and other parties; (e) complying with applicable laws or regulations; and (f) to the extent offered, providing you with location-based services of SONY and other parties, as indicated below. In addition, SONY retains the right to use Information to protect itself and third parties from illegal, criminal or harmful conduct.
Certain services available through the SOFTWARE may rely upon location information, including, but not limited to, the geographic location of the DEVICE. You acknowledge that for the purpose of providing such services, SONY, the THIRD-PARTY SUPPLIERS or their partners may collect, archive, process and use such location data, and that such services are governed by the privacy policies of SONY or such third party. By using any such services, you agree that you have reviewed the privacy policies applicable to such services and consent to such activities.
SONY, its affiliates, partners and agents will not intentionally use Information to personally identify the owner or user of the SOFTWARE without your knowledge or consent. Any use of Information will be in accordance with the privacy policies of SONY or such third party. Please contact applicable contact address of each area or country for SONY's current privacy policy.
Please contact applicable third parties for privacy policies relating to personally identifiable and other information you provide when you use or access third party software or services.
Information may be processed, stored or transferred to SONY, its affiliates or agents which are located in countries outside of your country of residence. Data protection and information privacy laws in certain
countries may not offer the same level of protection as your country of residence and you may have fewer legal rights in relation to Information processed and stored in, or transferred to, such countries. SONY will use reasonable efforts to take appropriate technical and organizational steps to prevent unauthorized access to or disclosure of Information, but does not warrant it will eliminate all risk of misuse of such Information.
AUTOMATIC UPDATE FEATURE
From time to time, SONY or the THIRD-PARTY SUPPLIERS may automatically update or otherwise modify the SOFTWARE, including, but not limited to, for purposes of enhancement of security functions, error correction and improvement of functions, at such time as you interact with SONY's or third parties' servers, or otherwise. Such updates or modifications may delete or change the nature of features or other aspects of the SOFTWARE, including, but not limited to, functions you may rely upon. You acknowledge and agree that such activities may occur at SONY's sole discretion and that SONY may condition continued use of the SOFTWARE upon your complete installation or acceptance of such update or modifications. Any updates/modifications shall be deemed to be, and shall constitute part of, the SOFTWARE for purposes of this EULA. By acceptance of this EULA, you consent to such update/modification.
ENTIRE AGREEMENT, WAIVER, SEVERABILITY
This EULA and SONY's privacy policy, each as amended and modified from time to time, together constitute the entire agreement between you and SONY with respect to the SOFTWARE. The failure of SONY to exercise or enforce any right or provision of this EULA shall not constitute a waiver of such right or provision. If any part of this EULA is held invalid, illegal, or unenforceable, that provision shall be enforced to the maximum extent permissible so as to maintain the intent of this EULA, and the other parts will remain in full force and effect.
GOVERNING LAW AND JURISDICTION
The United Nations Convention on Contracts for the International Sale of Goods shall not apply to this EULA. This EULA shall be governed by the laws of Japan, without regards to conflict of laws provisions. Any dispute arising out of this EULA shall be subject to the exclusive venue of the Tokyo District Court in Japan, and the parties hereby consent to the venue and jurisdiction of such courts.
EQUITABLE REMEDIES
Notwithstanding anything contained in this EULA to the contrary, you acknowledge and agree that any violation of or non-compliance with this EULA by you will cause irreparable harm to SONY, for which monetary damages would be inadequate, and you consent to SONY obtaining any injunctive or equitable relief that SONY deems necessary or appropriate in such circumstances. SONY may also take any legal and technical remedies to prevent violation of and/or to enforce this EULA, including, but not limited to, immediate termination of your use of the SOFTWARE, if SONY believes in its sole discretion that you are violating or intend to violate this EULA. These remedies are in addition to any other remedies SONY may have at law, in equity or under contract.
TERMINATION
Without prejudice to any of its other rights, SONY may terminate this EULA if you fail to comply with any of its terms. In case of such termination, you must: (i) cease all use, and destroy any copies, of the SOFTWARE; (ii) comply with the requirements in the section below entitled “Your Account Responsibilities”.
AMENDMENT
SONY RESERVES THE RIGHT TO AMEND ANY OF THE TERMS OF THIS EULA AT ITS SOLE DISCRETION BY POSTING NOTICE ON A SONY DESIGNATED WEB SITE, BY EMAIL NOTIFICATION TO AN EMAIL ADDRESS PROVIDED BY YOU, BY PROVIDING NOTICE AS PART OF THE
PROCESS IN WHICH YOU OBTAIN UPGRADES/UPDATES OR BY ANY OTHER LEGALLY RECOGNIZABLE FORM OF NOTICE. If you do not agree to the amendment, you should promptly contact SONY for instructions. Your continued use of the SOFTWARE after the effective date of any such notice shall be deemed your agreement to be bound by such amendment.
THIRD-PARTY BENEFICIARIES
Each THIRD-PARTY SUPPLIER is an express intended third-party beneficiary of, and shall have the right to enforce, each provision of this EULA with respect to the SOFTWARE of such party.
YOUR ACCOUNT RESPONSIBILITIES
Should you return your DEVICE to its place of purchase, sell or otherwise transfer your DEVICE, or if this EULA is terminated, you are responsible for and must uninstall the SOFTWARE from the DEVICE and delete any and all accounts you may have established on DEVICE or are accessible through the SOFTWARE. You are solely responsible for maintaining the confidentiality of any accounts you have with SONY OR third parties and any usernames and passwords associated with YOUR USE OF the DEVICE.
Should you have any questions concerning this EULA, you may contact SONY by writing to SONY at applicable contact address of each area or country.
Copyright © 2012 Sony Corporation.
Index
A
AC IN 5
Acceptable input signal .....90
Adjust Signal 24
Adjusting the tilt of the projector .....17
Air filter 82
APA 6
Aspect 6, 23, 25
B
BLANK 6
Brightness 22
C
Calibration 27, 49, 51
CC Display 27
Color 22
Color Temp. 22
Connecting a computer ....9
Connecting a Video equipment .....11
Connecting an external monitor and audio equipment ....13
Constant Brightness ....31
Contrast 22
Control Key Lock 29
Control Panel Keys 6
Correcting trapezoidal distortion of the projected image (Keystone feature) ....6
D
Digital Zoom 6
E
ECO MODE (Energy-saving mode) .....7
F
fH 34
Focus lever 4, 16
Foot 4,17
Freeze 6
fV 34
G
Gamma Mode 22
H
H (Horizontal) 24
High Altitude Mode 33
Hue 22
|
Image Flip 33
Indicators 73
Information menu 34
Input 5
Installation menu 33
Interactive Pen Device 8
K
Keystone 6,18
L
Lamp cover 4
Lamp Timer 34
Lamp Timer Reset 27
LAN terminal 5
Language 29
Link to Image Flip 33
Location and function of controls ...... 4
M
Main unit 4
Messages list 75
Model Name 34
Mouse mode 58
MUTING 6
N
Network Features 36
0
Operation menu 29
Optional accessories 86
Output 5
P
PC Free Interactive 52
Phase, Pitch, Shift 24
Picture menu 22
Picture mode 22
Pin assignment 88
Projecting an image 14
Projection distance 91
Projector Station for Network Presentation ....59
R
Remote commander 6
Remote control receiver 4
Replacing the lamp 80
Reset 22
RS-232C 5
s
Security bar 4
Security Lock 4,29
Selecting an input signal 6
Serial No. 34
Sharpness 22
Signal Type 34
Smart APA 27
Speaker 27
Specifications 84
Start Up Image 27
Status 29
T
Terminals 4,5
The Connection/Power Menu 30
The Function menu ......27
The Screen menu ......23
Troubleshooting 76
Turn off 6,20
Turn on 6,14
U
USB Display 67
USB Media Viewer 69
Using a menu 21
Using the e-mail report Function .....38
V
V Keystone 6
Ventilation holes 4
Volume 6
W
WARNING indicator 4,73
With No Input 31
With Static Signal ....31
Z Zoom lever ....4, 16
About Trademarks
- Adobe and Adobe Acrobat are trademarks or registered trademarks of Adobe Systems Incorporated in the United States and/or other countries.
- Kensington is a registered trademark of Kensington Technology Group.
- The terms HDMI and HDMI High-Definition Multimedia Interface, and the HDMI Logo are trademarks or registered trademarks of HDMI Licensing LLC in the United States and other countries.
- Internet Explore is registered trademarks of Microsoft Corporation in the United States and/or other countries.
- PJLink is a registered trademark of Japan Business Machine and Information System Industries Association.
• AMX is a trademark of AMX Corporation. - Crestron RoomView is a trademark of Crestron Corporation.
• Mac and Mac OS are registered trademarks of Apple Inc. in the U.S. and other countries. - All other trademarks and registered trademarks are trademarks or registered trademarks of their respective holders. In this manual, TM and ® marks are not specified.
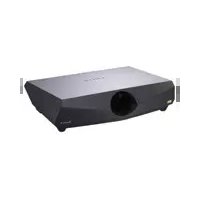

- OPERATING INSTRUCTIONS
- TABLE OF CONTENTS
- OVERVIEW
- PREPARATION
- PROJECTING AN IMAGE
- ADJUSTMENTS AND SETTINGS USING A MENU
- NETWORK
- INTERACTIVE FUNCTION
- PRESENTATION FUNCTION VIA NETWORK
- PLAYING VIDEO AND AUDIO USING USB CONNECTION
- USB MEDIA VIEWER
- OTHERS
- LOCATION AND FUNCTION OF CONTROLS
- MAIN UNIT
- CAUTION
- INPUT (PAGES 9, 11)
- ①INPUT A
- ②INPUT B
- ③ INPUT C
- OUTPUT (PAGE 13)
- 6 OUTPUT
- NOTE
- ⑦RS-232C TERMINAL (RS-232C)
- ⑧ LAN TERMINAL (PAGE 36)
- ⑨ AC IN (\~) SOCKET
- ⑩USB TERMINAL (TYPE A) ()← (PAGES 13, 69)
- ⑪USB TERMINAL (TYPE B) ( )← (PAGE 67)
- ⑫MICROPHONE INPUT ()
- REMOTE COMMANDER AND CONTROL PANEL KEYS
- BLANK KEY
- MUTING KEY
- VOLUME +/- KEY
- FREEZE KEY *2 *3
- NOTES
- ⑥ SETTING THE ENERGY-SAVING MODE EASILY
- ECO MODE KEY
- ⑦INFRARED TRANSMITTER
- ABOUT REMOTE COMMANDER OPERATION
- INTERACTIVE PEN DEVICE (VPL-SW636C/SW631C ONLY)
- ① PEN TIP SWITCH
- ②COLOR RING
- ③INDICATOR
- ④BUTTON
- ⑤BATTERY COVER
- ⑥STRAP ATTACHMENT HOLE
- CONNECTING THE PROJECTOR
- CONNECTING A COMPUTER
- INPUT A/INPUT B
- INPUT C
- USB TERMINAL (TYPE B) ()
- LAN TERMINAL
- USB TERMINAL (TYPE A) ()
- CONNECTING A VIDEO EQUIPMENT
- S VIDEO IN
- VIDEO IN
- INPUT A
- CONNECTING A MICROPHONE
- MICROPHONE ( )
- CONNECTING A USB MEMORY DEVICE
- CONNECTING AN EXTERNAL MONITOR AND AUDIO EQUIPMENT
- OUTPUT
- OPEN THE SIDE COVER
- ADJUSTING THE PROJECTED IMAGE
- CHANGING THE ASPECT RATIO OF THE PROJECTED IMAGE
- CORRECTING TRAPEZOIDAL DISTORTION OF THE PROJECTED IMAGE (KEYSTONE FEATURE)
- FITTING THE PROJECTED IMAGE TO THE SCREEN (DIGITAL SHRINK ADJUSTMENT)
- DISPLAYING A PATTERN
- AUTOMATICALLY ADJUSTING PHASE, PITCH, AND SHIFT OF THE PROJECTED IMAGE WHILE A SIGNAL IS INPUT FROM A COMPUTER (APA (AUTO PIXEL ALIGNMENT))
- TURNING OFF THE POWER
- TURNING OFF WITHOUT DISPLAYING THE CONFIRMATION MESSAGE
- ECO GAUGE
- USING A MENU
- USING A POP-UP MENU
- USING THE SETTING MENU
- THE PICTURE MENU *1
- THE SCREEN MENU *1
- ASPECT
- VPL-SW636C/SW631C/SW631
- THE FUNCTION MENU
- THE OPERATION MENU
- THE CONNECTION/POWER MENU
- THE INSTALLATION MENU
- THE INFORMATION MENU
- NOTES WHEN USING PC FREE INTERACTIVE FUNCTION (VPL-SW636C ONLY)
- USING NETWORK FEATURES
- DISPLAYING THE CONTROL WINDOW OF THE PROJECTOR WITH A WEB BROWSER
- HOW TO OPERATE THE CONTROL WINDOW
- SWITCHING THE PAGE
- SETTING THE ACCESS LIMITATION
- CONFIRMING THE INFORMATION REGARDING THE PROJECTOR
- OPERATING THE PROJECTOR FROM A COMPUTER
- USING THE E-MAIL REPORT FUNCTION
- SETTING THE LAN NETWORK OF THE PROJECTOR
- SETTING THE WLAN NETWORK OF THE PROJECTOR
- INPUT THE SETTINGS FOR CLIENT MODE
- SETTING THE CUSTOM LABELS FOR THE INPUT TERMINALS OF THE PROJECTOR
- 1 CLICK ON [ADVANCED MENU] TO OPEN THE SETUP PAGE
- 2 CLICK ON [INPUT LABEL] AND OPEN THE INPUT LABEL SETTING WINDOW
- 3 CLICK ON [APPLY] TO APPLY THE SET LABEL NAMES
- SETTING THE CONTROL PROTOCOL OF THE PROJECTOR
- 1 CLICK ON [ADVANCED MENU] TO DISPLAY THE BUTTONS FOR MORE SETTINGS
- 2 (A) SET ADVERTISEMENT
- START ADVERTISEMENT SERVICE
- COMMUNITY
- PORT NO
- INTERVAL
- BROADCAST ADDRESS
- SET PJ TALK
- START PJ TALK SERVICE
- TIMEOUT
- HOST ADDRESS
- START PJ LINK SERVICE
- REQUIRES AUTHENTICATION
- PASSWORD
- START DDDP SERVICE
- CRESTRON CONTROL
- IP ADDRESS
- IP ID
- RESET
- USING INTERACTIVE PRESENTATION UTILITY 2 (VPL-SW636C/SW631C ONLY)
- HOW TO OPERATE THE MOUSE FUNCTION OF THE INTERACTIVE PEN DEVICE (MAIN ONLY)
- CONNECTING A COMPUTER WITH A USB CABLE
- FOR WINDOWS
- INSTALLING INTERACTIVE PRESENTATION UTILITY 2
- SETTING INTERACTIVE PRESENTATION UTILITY 2
- CALIBRATION AUTO/MANUAL
- MAIN PEN TOOLBAR
- OPERATING WITH THE INTERACTIVE PEN DEVICE
- CLOSING INTERACTIVE PRESENTATION UTILITY 2
- USING THE PC FREE INTERACTIVE FUNCTION (VPL-SW636C ONLY)
- SETTING THE PC FREE INTERACTIVE FUNCTION
- TOOLBARS AND ICONS
- DUAL-USER (DUAL PEN) CALIBRATION AUTO/MANUAL
- SUB PEN TOOLBAR
- PEN TRACKING SPEED ADJUSTMENT
- PEN DETECTION SENSITIVITY ADJUSTMENT
- MANAGEMENT TOOLS
- SAVE □(WHITEBOARD MODE ONLY)
- DISPLAY/DELETE FILES (WHITEBOARD MODE ONLY)
- RESTORE TO THE SAVED DATA ↗ (WHITEBOARD MODE ONLY)
- HIDE DRAWINGS (DESKTOP MODE ONLY)
- CLOSE X
- DISPLAY TOOLBAR
- SELECT TEMPLATE (WHITEBOARD MODE ONLY)
- DRAWING TOOLS
- UNDO, REDO
- FREEHAND DRAWING TOOLS
- COLOR, THICKNESS, TRANSPARENCY, STYLE
- SHAPES
- COLOR, THICKNESS, TRANSPARENCY, SHAPES
- LINE
- POINT TO POINT △
- ERASER
- OBJECT ERASER
- ERASE ALL
- SELECT OBJECTS /DELETE
- CLOCK DISPLAY 18:28
- ADJUST △ ▽
- SAVE
- CANCEL ✗
- RETRIEVE THE DATA SAVED IN THE PROJECTOR
- ADD/DELETE TEMPLATE IMAGES TO/FROM THE PROJECTOR
- USING THE MOUSE MODE FUNCTION (VPL-SW636C ONLY)
- SETTING THE MOUSE MODE
- USING PRESENTATION FUNCTION VIA NETWORK
- OS
- CPU
- INSTALLING PROJECTOR STATION FOR NETWORK PRESENTATION
- FOR MAC
- STARTING PROJECTOR STATION FOR NETWORK PRESENTATION
- FOR AP MODE
- 3 CLICK "CONNECT
- USING THE CONTROLLER
- ONE-CLICK PROJECTING FUNCTION
- 1 CREATE A FILE
- OPTION FORMAT
- COMMAND FORMAT
- FOR LAN MODE
- COMMAND EXAMPLES
- EXAMPLE 1)
- EXAMPLE 2)
- USE PROJECTOR STATION FOR NETWORK PRESENTATION WITHOUT INSTALLING IT TO THE COMPUTER
- 1 OPEN THE SUPPLIED CD-ROM
- 2 FOLLOW THE INSTRUCTIONS IN THE WIZARDS TO INSTALL THE APPLICATION SOFTWARE
- 3 START THE PROJECTOR STATION FOR NETWORK PRESENTATION
- DISPLAYING IMAGES OR FILES SENT FROM A TABLET PC/ SMARTPHONE
- STARTING USB DISPLAY
- PLAYING VIDEO AND AUDIO
- USING USB MEDIA VIEWER
- THUMBNAIL MODE
- OPTION MENU
- DISPLAY MODE
- SLIDESHOW MODE
- INDICATORS
- OPERATING STATUS INDICATION
- MESSAGES LIST
- TROUBLESHOOTING
- REPLACING THE LAMP
- FOR THE CUSTOMERS IN THE U.S.A. AND CANADA
- CLEANING THE AIR FILTER
- SPECIFICATIONS
- PIN ASSIGNMENT
- HDMI TERMINAL (HDMI, FEMALE)
- RGB INPUT TERMINAL (MINI D-SUB 15-PIN, FEMALE)
- RS-232C TERMINAL (D-SUB 9-PIN, MALE)
- USB TERMINAL (TYPE A, FEMALE)
- USB TERMINAL (TYPE B, FEMALE)
- ACCEPTABLE INPUT SIGNALS *1
- PROJECTION DISTANCE AND LENS SHIFT RANGE
- WALL INSTALLATION
- PROJECTION DISTANCE TABLE (VPL-SW636C/SW631C/SW631)
- PROJECTION DISTANCE FORMULA (VPL-SW636C/SW631C/SW631)
- LENS SHIFT RANGE (VPL-SW636C/SW631C/SW631)
- PROJECTION DISTANCE TABLE (VPL-SX631)
- PROJECTION DISTANCE FORMULA (VPL-SX631)
- LENS SHIFT RANGE (VPL-SX631)
- DIMENSIONS
- END USER LICENSE AGREEMENT
- IMPORTANT
- SOFTWARE LICENSE
- COPYRIGHT
- GRANT OF LICENSE
- EXCLUDED SOFTWARE AND OPEN SOURCE COMPONENTS
- USE OF SOFTWARE WITH COPYRIGHTED MATERIALS
- CONTENT SERVICE
- INTERNET CONNECTIVITY AND THIRD PARTY SERVICES
- EXPORT AND OTHER REGULATIONS
- HIGH RISK ACTIVITIES
- EXCLUSION OF WARRANTY ON SOFTWARE
- LIMITATION OF LIABILITY
- CONSENT TO USE OF NON-PERSONAL INFORMATION, LOCATION DATA, DATA SECURITY
- AUTOMATIC UPDATE FEATURE
- ENTIRE AGREEMENT, WAIVER, SEVERABILITY
- GOVERNING LAW AND JURISDICTION
- EQUITABLE REMEDIES
- TERMINATION
- AMENDMENT
- THIRD-PARTY BENEFICIARIES
- YOUR ACCOUNT RESPONSIBILITIES
- INDEX
- A
- B
- C
- D
- E
- F
- G
- H
- K
- L
- M
- N
- 0
- P
- R
- S
- T
- U
- V
- W
- ABOUT TRADEMARKS
Brand : SONY
Model : VPLSX631M
Category : Projector