
VS20T7566T5 - Vacuum Cleaner SAMSUNG - Free user manual and instructions
Find the device manual for free VS20T7566T5 SAMSUNG in PDF.


| Product Type | Cordless Stick Vacuum Cleaner |
| Model | VS20T7566T5 |
| Brand | Samsung |
| Dimensions (L x W x H) | Approx. 260 x 215 x 1100 mm |
| Weight | Approx. 2.8 kg |
| Power Source | Rechargeable Lithium-ion battery, 21.6V |
| Battery Capacity | 2,500 mAh |
| Runtime | Up to 40 minutes (normal mode) |
| Charging Time | Approx. 3.5 hours |
| Dust Capacity | 0.5 L |
| Motor Type | Digital Inverter Motor |
| Suction Power | 150 AW (air watts) |
| Filtration System | Multi-cyclonic with washable fine dust filter |
| Noise Level | Approx. 79 dB(A) |
| Accessories Included | Motorized brush, Crevice tool, Combination tool, Flexible hose, Charging stand |
| Display Type | LED display with battery indicator |
| Maintenance | Washable dust bin and filter |
| Safety Features | Overheat protection, automatic shut-off |
| Compatible Replacements | Filter VCA-SAE95, Battery VCA-SBS1 |
Frequently Asked Questions - VS20T7566T5 SAMSUNG
User questions about VS20T7566T5 SAMSUNG
0 question about this device. Answer the ones you know or ask your own.
Ask a new question about this device
Download the instructions for your Vacuum Cleaner in PDF format for free! Find your manual VS20T7566T5 - SAMSUNG and take your electronic device back in hand. On this page are published all the documents necessary for the use of your device. VS20T7566T5 by SAMSUNG.
USER MANUAL VS20T7566T5 SAMSUNG
VS15T70**** Series / VS20T75**** Series
- Before operating this unit, please read the instructions carefully.
- For indoor use only

SAMSUNG
PREPARATION
Safety information 3
INSTALLATION
Name of the parts 13
Accessories
14
Installing the wall mount 15
Assembling the wall mount 15
Installing the wall mount 15
OPERATION
Using the vacuum cleaner 16
Using the wall mount 16
Charging the battery 17
Operating the vacuum cleaner 18
Using the accessories 19
MAINTENANCE
Maintaining the vacuum cleaner 22
When to empty the dustbin 22
Emptying the dustbin easily without causing dust clouds 22
Emptying and cleaning the dustbin 22
Cleaning the filter 24
Cleaning the accessories 24
APPENDIX
Notes and cautions 26
Battery usage 26
Operation 27
Maintenance 29
Troubleshooting 30
Product Specification
| Model | VS20T75**** | VS15T70**** | |
| Power | 100-240 V~ 50-60 Hz | ||
| Rated power consumption | 550 W | 410 W | |
| Battery specification | Lithium-ion 21.9 V, 2850 mAh, 6 cell | Lithium-ion 21.6 V, 1800 mAh, 6 cell | |
| Charging time | 3.5 hours | ||
| Cleaning time | Handy | Approximately 6 minutes (MAX) / Approximately 30 minutes (MID) / Approximately 60 minutes (MIN) | Approximately 5 minutes (MAX) / Approximately 20 minutes (MID) / Approximately 40 minutes (MIN) |
| Soft Action Brush | Approximately 9 minutes (MAX) / Approximately 20 minutes (MID) / Approximately 40 minutes (MIN) | Approximately 6 minutes (MAX) / Approximately 20 minutes (MID) / Approximately 30 minutes (MIN) | |
| Turbo Action Brush | Approximately 9 minutes (MAX) / Approximately 20 minutes (MID) / Approximately 35 minutes (MIN) | Approximately 5 minutes (MAX) / Approximately 18 minutes (MID) / Approximately 27 minutes (MIN) | |
* Charging and cleaning time may differ depending on the brushes and the conditions of use.
- Before operating the appliance, please read this manual thoroughly and retain it for your reference.
- Because the following operating instructions cover various models, the characteristics of your vacuum cleaner may differ slightly from those described in this manual.
Caution/Warning symbols used
WARNING
Indicates that a danger of death or serious injury exists.
CAUTION
Indicates that a risk of personal injury or material damage exists.
Other symbols used
NOTE
Indicates that the following text contains additional important information.
- For information on Samsung's environmental commitments and product specific regulatory obligations e.g. REACH (WEEE, Batteries) visit: samsung.com/uk/aboutsamsung/samsungelectronics/corporatecitizenship/data_corner.html
Failure to meet these requirements could cause damage to the internal parts of the vacuum and void your warranty.
General
- Read all instructions carefully. Before switching the vacuum on, make sure that the voltage of your electricity supply is the same as that indicated on the rating plate at the rear of the handy vacuum cleaner (battery contact side).
- WARNING: Do not use the vacuum cleaner on a wet rug or floor.
- Close supervision is necessary when any appliance is used by or near children. Do not allow the vacuum cleaner to be used as a toy. Do not allow the vacuum cleaner to run unattended at any time. Use the vacuum cleaner only for its intended purpose as described in these instructions.
- Do not use the vacuum cleaner without a dustbin.
- Empty the dustbin before it is full to maintain the highest efficiency.
- Do not use the vacuum cleaner to pick up matches, live ashes or cigarette butts. Keep the vacuum cleaner away from stoves and other heat sources. Heat can deform and discolor the plastic parts of the unit.
- Avoid picking up hard, sharp objects with the vacuum cleaner as they may damage the vacuum's parts.
- Do not block the suction or the exhaust port.
- To avoid damage, remove the plug by grasping the plug, not by pulling the cord.
- This appliance can be used by children aged from 8 years and above and persons with reduced physical, sensory or mental capabilities or lack of experience and knowledge if they have been given supervision or instruction concerning use of the appliance in a safe way and understand the hazards involved. Children should not play with the appliance. Children should not clean or perform maintenance on the vacuum without adult supervision.
- Children should be supervised to ensure that they do not play with the appliance.
- The battery must be removed from the main unit before cleaning or performing maintenance on the vacuum.
- The use of an extension cord is not recommended.
- If your vacuum cleaner is not operating correctly, switch off the power supply and consult an authorized Samsung service agent.
- If the supply cord is damaged, it must be replaced by the manufacturer or its service agent or a similarly qualified person to avoid any electrical hazards.
- Do not use to suction up water.
- Do not immerse in water for cleaning.
- Please contact Samsung or a Samsung service center for a replacement if one is needed.
Wall mount
- Do not modify the polarized plug to fit a non-polarized outlet or extension cord.
- Do not use outdoors or on wet surfaces.
- Unplug the wall mount from the outlet when not in use and before servicing.
- Use only the wall mount supplied by the manufacturer to recharge.
- Do not use with a damaged cord or plug.
- Do not pull or carry by the cord, use the cord as a handle, close a door on the cord, or pull the cord around sharp edges or corners. Keep the cord away from heated surfaces.
- Do not use extension cords or outlets with inadequately rated current.
- Do not charge a non-rechargeable battery.
- Do not unplug by pulling on the cord. To unplug, grasp the plug, not the cord.
- Do not mutilate or incinerate batteries as they will explode at high temperatures.
- Do not attempt to open the wall mount. Repairs should be only carried out by a qualified Samsung service center.
- Do not expose the wall mount to high temperatures or allow moisture or humidity of any kind to come into contact with the wall mount.
Vacuum cleaner
- Do not pick up hard or sharp objects such as glass, nails, screws, coins, etc.
- Do not use without a filter in place. When servicing the unit, never put fingers or other objects into the fan chamber in case the unit accidentally turns on.
- Do not put any objects into openings. Do not use with any openings blocked. Keep openings free of dust, lint, hair, and anything that may reduce air flow.
- Do not pick up toxic materials (chlorine bleach, ammonia, drain cleaner, etc.).
- Do not pick up anything that is burning or smoking, such as cigarettes, matches, or hot ashes.
- Do not use the vacuum cleaner in an enclosed space filled with vapours given off by oil based paint, paint thinner, moth proofing substances, flammable dust, or other explosive or toxic vapours.
Installation
- If you have a problem with installing the wall mount, contact a Samsung service center. * Injury or product malfunction from not installing the wall mount may not be compensated.
Power related

WARNING
- When installing the wall mount, do not bend the battery charger with excessive force or put heavy objects on the battery charger.
- Otherwise, electric shock or fire may occur.
- If there is dust, water, etc. on a pin or contact point of the power plug, wipe them carefully.
- Otherwise, abnormal operation or electric shock may occur.
- Do not pull the cord and do not touch the plug with wet hands.
- Do not plug the wall mount into a power source with the incorrect voltage. Do not plug the wall mount into a multi-plug outlet or power strip. Do not leave the battery charger lying on the floor. Attach the cord close to a wall.
- Otherwise, electric shock or fire may occur.
- Do not use a damaged power plug, battery charger, or loose power outlet. - Otherwise, electric shock or fire may occur.
- If the battery charger is damaged, have a Samsung authorized service center replace the battery charger with a new battery charger.
- Otherwise, electric shock or fire may occur.
Operation

WARNING
- Do not touch the charging terminal of a vacuum or wall mount with chop sticks, metal screw drivers, forks, knives, etc.
- Otherwise, product malfunction or electric shock may occur.
- Make sure that the battery terminals of the wall mount do not come into contact with a conductor such as a bracelet, watch, metal rod, nail, etc.
- Make sure that any liquid such as water or juice is not allowed to enter the vacuum cleaner or the wall mount.
- Otherwise, electric shock or fire may occur.
- Do not use the wall mount for other purposes.
- Otherwise, severe damage to the wall mount or fire may occur.
- Do not vacuum liquid, blades, pins, embers, etc. during cleaning.
- Otherwise, abnormal operation or product damage may occur.
- Do not step on the product body or strike the product.
- Otherwise, an injury or product damage may occur.
- The brush and air outlet should not be blocked during cleaning.
- Otherwise, product malfunction or fire may occur due to overheating of the product.
- This product is intended for household use only. Do not use this product for heavy duty cleaning, commercial cleaning, industrial cleaning, or cleaning outdoors, especially on stone or cement. Do not use to pick up chalk powder in and around billiard tables or in hospital aseptic rooms.
- Otherwise, abnormal operation or product damage may occur.
- Do not use the product near heating appliances such as heaters, or in areas containing combustible sprays, or flammable materials.
- Otherwise, fire or product deformation may occur.
- Before using the product, make sure that the filters are correctly inserted.
- Otherwise, dust can enter the motor inside the main body and cause product damage. Suction force can decrease.
- If there is a gas leak or combustible spray is used, do not touch the power outlet and open the window for ventilation.
- Otherwise, an explosion or fire may occur.
- If the vacuum makes a strange sound or emits a smell or smoke, turn off the vacuum immediately, and then contact a Samsung service center.
- Otherwise, electric shock or fire may occur.

CAUTION
- Do not use the product near combustible material. Also do not use:
- In a place where a burning candle or desk lamp is placed on the floor. - In an area where an unattended place heater is turned on or an area in which there are unextinguished embers in a fireplace, in an ashtray, etc. - In a place where there are combustible materials such as gasoline, alcohol, thinner, ashtrays with unextinguished cigarettes, etc.
- Do not allow children to cling to or push the wall mount.
- Personal injury, product and floor damage may occur.
- When you need to store the vacuum cleaner for a short time during cleaning, lay the vacuum on the floor.
- Otherwise, the vacuum cleaner may fall and could cause an injury or severe product damage.
- Do not charge the product near a window, heater, toilet, bathroom, etc.
- After using the vacuum cleaner, you should store it in the wall mount or lay it safely on the floor.
- Otherwise, the product may fall and could cause an injury or severe product damage.
- Do not store the vacuum cleaner by leaning it against a wall or table.
- Do not use the vacuum cleaner for other than its intended purpose. (Do not allow children to ride on or play with the product.)
- An injury or product damage may occur.
- Before plugging in or unplugging the wall mount, turn off the vacuum and make sure that the pins of the power plug do not come into contact with your hands.
- Otherwise, fire or electric shock may occur.
- Do not step heavily on the upper part of the wet brush while using it.
- Otherwise, product damage or floor damage may occur.
- When using the vacuum cleaner, be careful not to hurt yourself on the moving or spinning parts.
- Be careful not to suction body parts into a brush of the vacuum cleaner (Hair, etc.).
- When cleaning the wall or ceiling, use both hands.
- Use both hands to clean with the vacuum. If you clean with one hand, you can damage your wrist or drop the vacuum and cause an injury or damage the vacuum.
- When assembling the vacuum, be careful not to catch your fingers or hands in the movement fold of the handle.
- Do not use the vacuum cleaner on objects that can be easily scratched (monitors, stainless steel appliances, etc.).
- Do not store the vacuum cleaner inside a car.
- Do not use water to clean the vacuum cleaner when in use.
- Use the vacuum cleaner in dry places only.
- Do not use the vacuum cleaner in wet places or on water.
- Do not use the vacuum cleaner to pick up spilled beverages or pet waste.
- Do not use the vacuum cleaner in direct sunlight or high heat.
Maintenance

WARNING
- Before removing foreign matter inside the vacuum, turn off the vacuum cleaner first.
- If the vacuum is on while you are removing the foreign matter, you can hurt yourself or damage the vacuum.
- When cleaning the exterior of the product, turn off the product first and then wipe it with a dry towel. Do not spray water directly onto the product or wipe it with volatile materials such as benzene, thinner, or alcohol.
- If water gets into the product and an error occurs, turn off the product and contact a Samsung service center.
• After unplugging the product, clean the wall mount.
- When cleaning the washable parts, do not use alkaline detergent, acid, industrial detergent, air freshener, acetic acid, etc.
- Otherwise, product damage such as plastic breakage, deformation, discoloration, printing deterioration, etc. may occur.
| Washable Parts | Dustbin, washable micro filter, ultra fine dust filter, metal mesh grille filter, dry cloth | |
| Acceptable detergent | Neutral Dish | washing detergent |
| Prohibited detergent | Alkaline Lox, | mold cleaner, etc. |
| Acid Paraffin oil, an emulsifier, etc. | ||
| Industrial cleaners | NV-I, PB-I, Opti, alcohol, acetone, benzene, thinner, etc. | |
| Air freshener Jet spray air fresheners (coffee flavor, herb, etc.) | ||
| Oils Anima | oils, vegetable oils | |
| Etc. Edible | acetic acid, vinegar, glacial acetic acid, etc. | |

CAUTION
- Do not push the vacuum cleaner while it is stored in the wall mount. - Personal injury, floor and product damage may occur.

01 Pipe 02 Dustbin 03 Metal mesh grille filter 04 Washable micro filter 05 Ultra fine dust filter 06 Dustbin release button 07 Display 08 Power( ) button 09 Suction power control button 10 Handle
11 Battery level indicator 12 Battery release button 13 Pipe release button 14 Brush release button 15 Vacuum charging part 16 Accessory holder 17 Battery charger
* Battery Spec
VS20T75**** Series : Lithium-ion 21.9 V, 2850 mAh, 6 cell
VS15T70**** Series : Lithium-ion 21.6 V, 1800 mAh, 6 cell
* Those two batteries are not compatible with each other.
Accessories may differ depending on the models.


Pipe Combination Tool Extension Crevice Tool

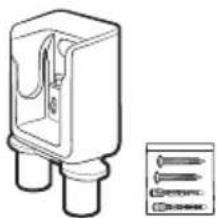
Battery Wall mount
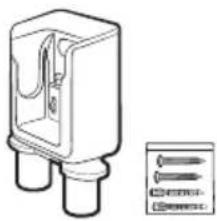
(Screws: 2 EA / Screw anchors: 2 EA)

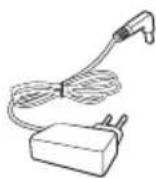
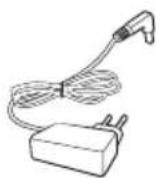
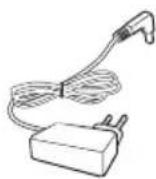
Battery charger
User manual


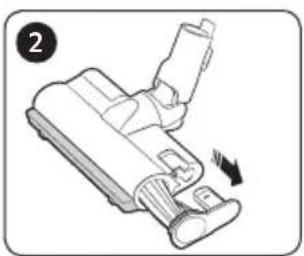
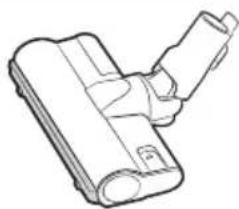
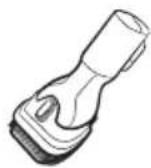
*Mini Motorized Tool *Soft Action Brush *Turbo Action Brush

*Flexible Tool *Wet Brush /

Multi-use wet pad

*Single-use wet pad / Attachable pad
* Optional
CAUTION
• Install the wall mount on a hard concrete wall.
- If it is installed on a wood or plaster wall, the product may fall.
Assembling the wall mount


• To disassemble the wall mount, follow steps in reverse order.
Installing the wall mount

01 The wall mount installation should be set so the top of the wall mount is 113 cm from the floor. 02 Using the wall mount as a template, mark where the screw holes will be placed. 03 Drill the holes to a depth of 50 mm using a 6 mm drill bit, and put the provided screw anchors into the hole. 04 Fix the wall mount to the wall with the provided screws. 05 Plug in the wall mount, place the vacuum into the wall mount, and then confirm that the battery level indicator is displayed.

* Please refer to the QR code for detailed information on the installation of the wall mount.
Using the wall mount

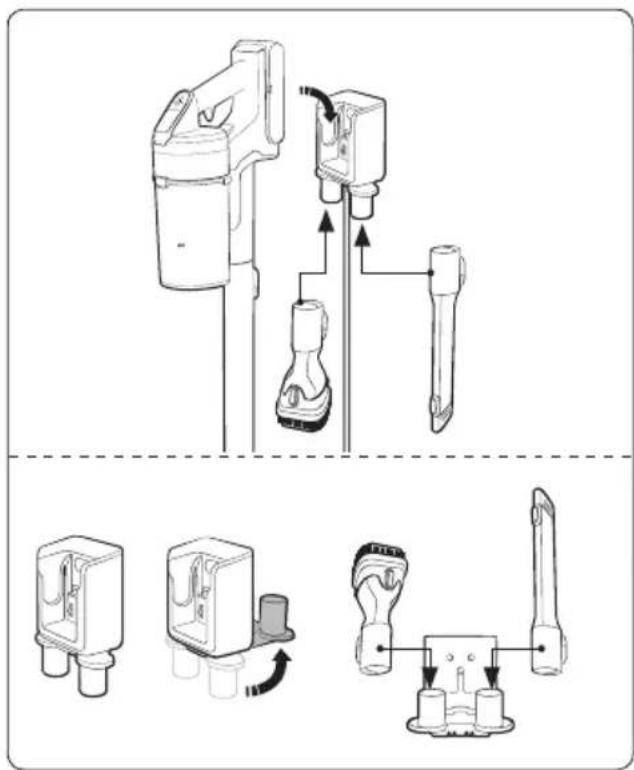
Charging
* Make sure the back of the battery is correctly placed onto the vacuum charging part. * Check if the battery level indicator is displayed while charging. * The battery level indicator blinks while charging. When charging is complete, the blinking stops and the light level dims.
Storing the accessories
Wall mount
* When accessories are disassembled for storage, dust may fall from the suction part of the vacuum cleaner. * After cleaning, operate in MAX mode for 10 seconds.
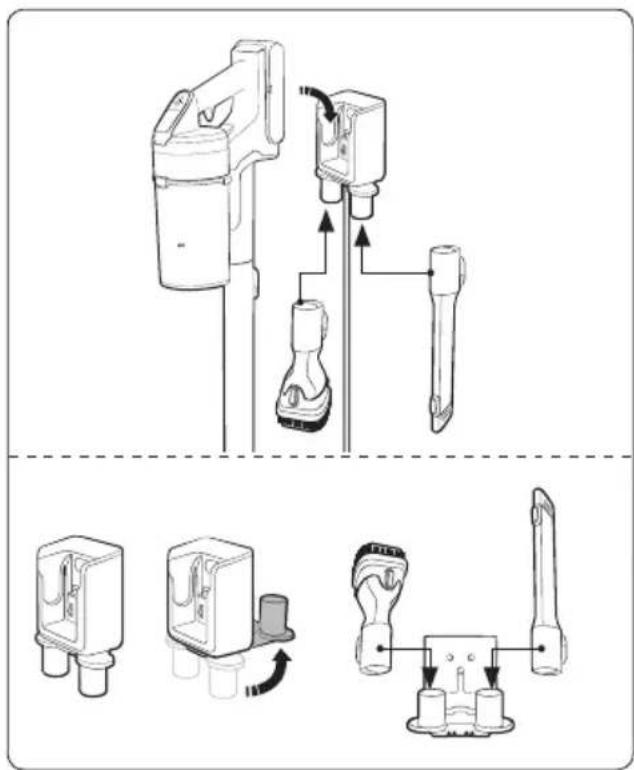
Desk charger
* Place the desk charger on a desk after folding the accessory holders and assemble the accessories to the holders as shown in the picture. * If the Extension Crevice Tool is inserted first, the accessory holders can be folded more easily.
Charging the battery
* When the battery level indicator is at its lowest level and blinks, charge the battery.
* When charging the vacuum, make sure the connection part of the wall mount is correctly connected.
* The vacuum cleaner cannot be used while it is charging.
CAUTION
- Before ejecting the battery, the product must be turned off. (If the battery is forcibly ejected while the vacuum is operating, the vacuum can malfunction.)
- Be careful not to drop the battery. If you do, you can injure yourself or damage the battery.

Ejecting the battery
Press the battery release button at the rear of the handle to eject the battery.

Re-inserting the battery
Push the battery to the end until you hear it click.
![graph TD A["Device 1"] --> B["Server"] B --> C["Device 2"] style A fill:#f9f,stroke:#333 style B fill:#ccf,stroke:#333 style C fill:#cfc,stroke:#333](/content/2026/05/1102557/images/d2ec3d74b74571cb43081714baefe1916526daa25d2911f3ffa81c0a5b82c436.jpg)
Charging with a desk charger
- Charge the battery at the desk charger.
- Push the battery in firmly.
- Check if the battery level indicator is displayed while charging.
Operating the vacuum cleaner
When the brush clings to the floors such as a carpet, a mat, bedding, etc. or does not spin properly, change the suction power to 'MIN' or 'MID' mode.

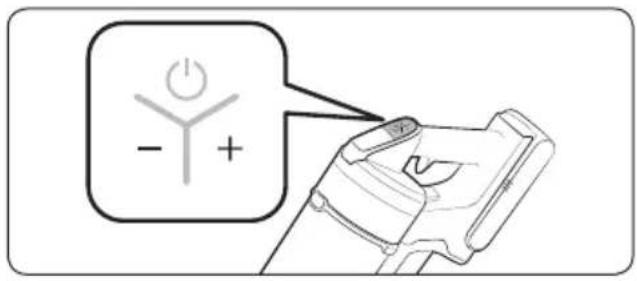

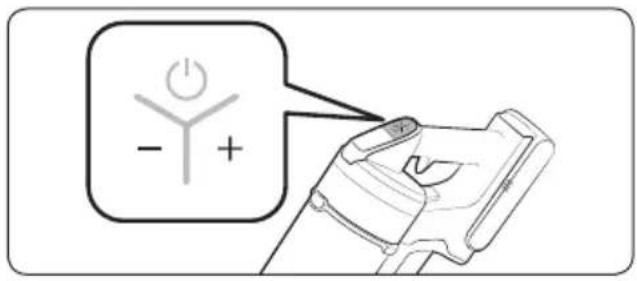
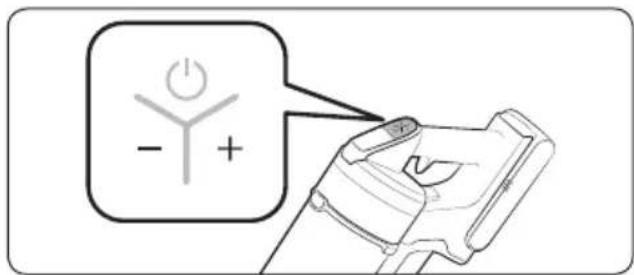
Power (on / off)
When pressing the power button, the vacuum cleaner starts operation in 'MID' mode.
- When the wet brush is assembled, operation starts in 'WET' mode.
Controlling suction power
You can control the suction power of the vacuum cleaner.
• + button: Increases suction power. - button: Decreases suction power.
* The suction power control button does not work in WET mode.
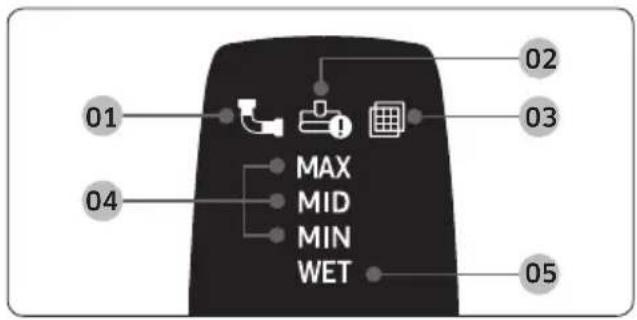
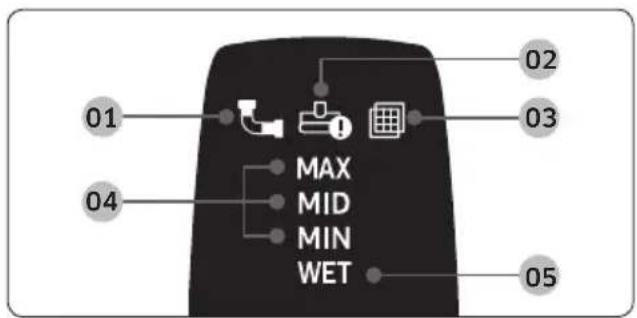
Checking the display
01 Clogged: When the dustbin, pipe, or suction part is clogged 02 Spinning brush stuck: When a foreign matter is clogged at the spinning brush * If the overheating prevention device of the motor works, the spinning brush stuck display will not turn on. 03 No Filter: When the washable micro filter is not assembled correctly 04 Suction power: Displays current suction power. 05 Wet brush cleaning mode: When the wet brush is assembled * If the display above 01, 02, or 03 blinks a few times and the vacuum cleaner stops operation, please take action by referring to the maintenance part of this manual.
Using the accessories
If the vacuum operates with the spinning brush not working, check whether the brush gets excessive force or is clogged with a foreign matter. (Please refer to the troubleshooting part of this manual.)

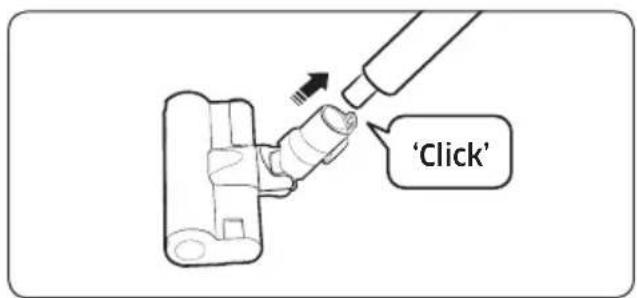


Disassembling the accessories
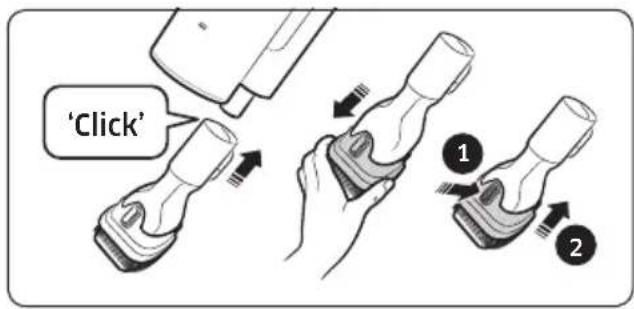
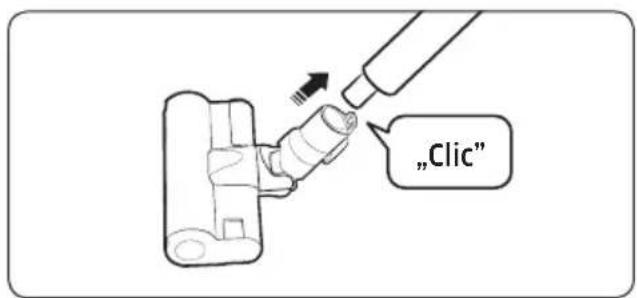
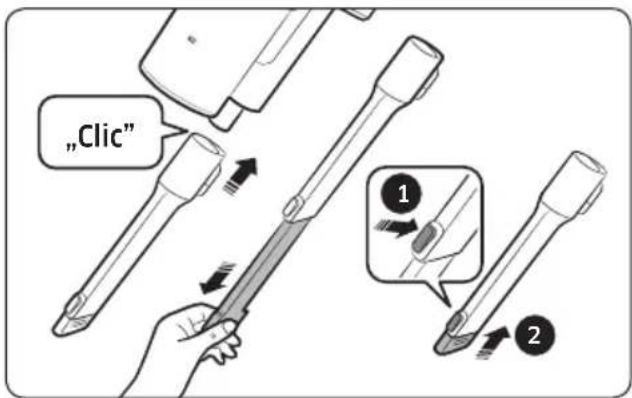
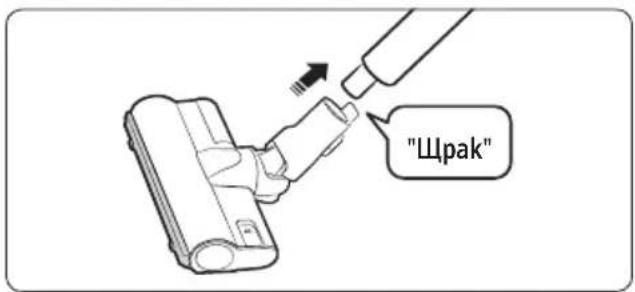
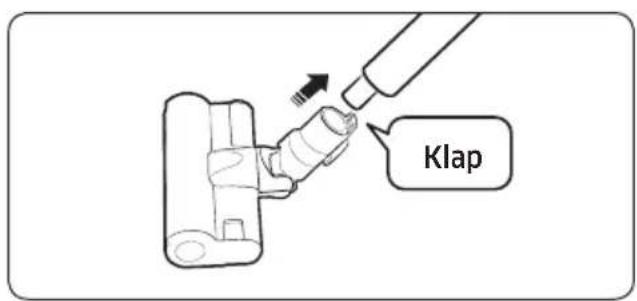
- When disassembling the pipe, press the release button at the rear of the pipe.
- Before disassembling the accessories, operate in MAX mode for more than 10 seconds to remove foreign matter remained in the accessories.
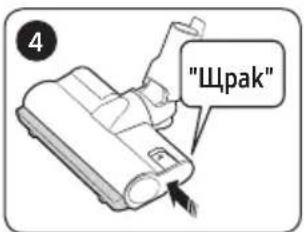
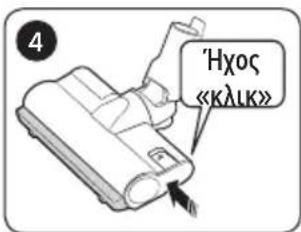
- When disassembling the brush, press the release button at the rear of the brush.
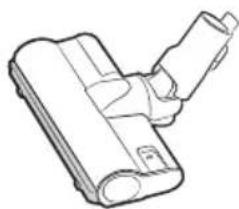
Soft Action Brush
Use to clean a floor (wood and linoleum).
Turbo Action Brush
Use the Turbo Action Brush to clean various floor conditions at home, it is also suitable to clean carpet.
Mini Motorized Tool
Use to clean bedding.
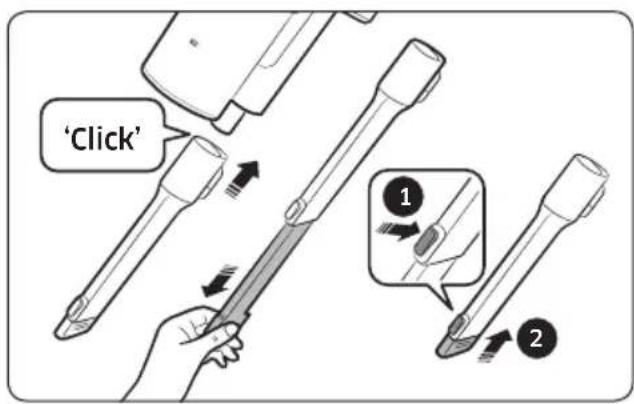

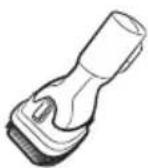
Combination Tool
Use to remove dust from curtains, furniture, sofas, etc.
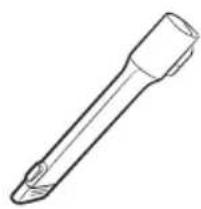
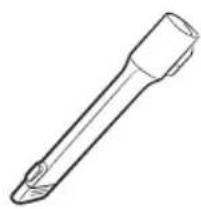
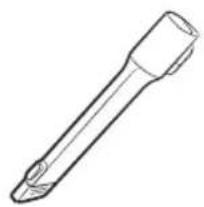
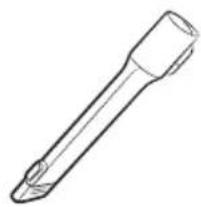
Extension Crevice Tool
Use to remove dust in grooves of window frames, chinks, corners, etc.
Flexible Tool
Use to clean the places hard to reach such as upper or rear parts of furniture or ceilings.

NOTE
- The Flexible Tool can be connected to the Combination Tool and Extension Crevice Tool.
Using the multi-use wet pad
Using the single-use wet pad![graph TD A["Attachable pad"] --> B["Single-use wet pad"] B --> C["Velcro side"] C --> D["<Back><Front>"] D --> E["'Click'"]](/content/2026/05/1102557/images/478ebcb59f83f8578177cef54965d9b7dad6e793be786cd0a8b3375a3528d550.jpg)
Wet Brush
Use to clean a floor with a wet pad (wood and linoleum).
* The Wet Brush does not have a dust suction function. * When attaching the wet pad, make sure the pad is in the center of the spin disk.
Using the multi-use wet pad
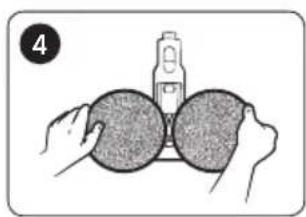
Attach the multi-use wet pad to the spin disk.
Using the single-use wet pad
1 Attach the attachable pad to the spin disk and 2 attach the single-use wet pad on top of it.
* When using the single-use wet pad, make sure the direction of the attachable pad is correct. Velcro side is the front side. * After using the single-use wet pad, discard the pad. * If you use the single-use wet pad without the attachable pad, cleaning performance can be degraded.

* For detailed information, please refer to the QR code.

CAUTION
- Before cleaning the vacuum cleaner, turn it off.
- When the dustbin or filter is filled with dust, the vacuum cleaner may stop due to the overheating prevention device of the motor.
- You should clean the dustbin or filter before it becomes completely full (Max sign).
When to empty the dustbin Emptying the dustbin easily without causing dust clouds


Emptying and cleaning the dustbin

1 After pressing the dustbin release button, 2 pull the dustbin in the direction of the arrow.

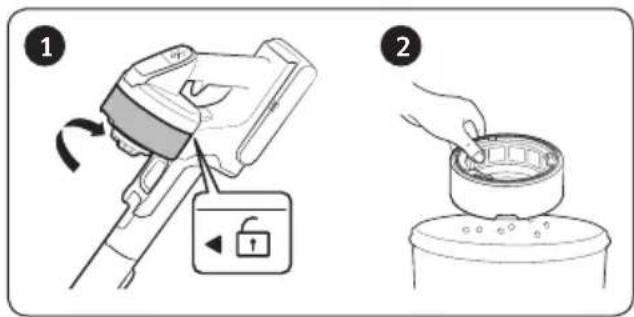
Pull the washable micro filter out by holding the filter handles inside the washable micro filter.

1 While pressing the button, 2 turn the dustbin cover and 3 remove it from the dustbin.

Remove the dust on the metal mesh grille filter with the combination tool.
* Do not pull the rubber attached to the metal mesh grille filter.

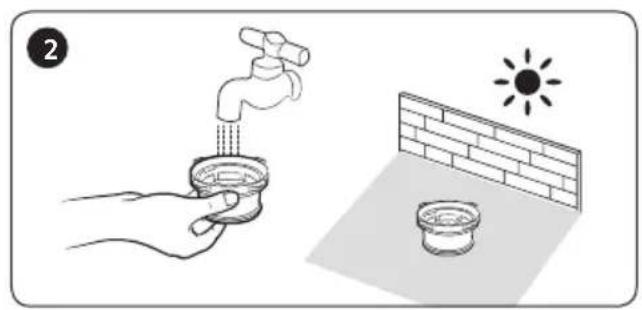
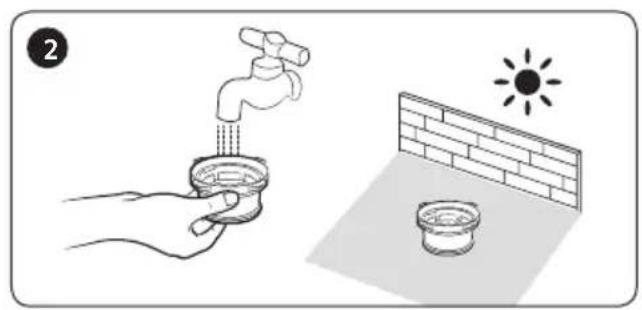
After emptying the dustbin, clean it and dry in the shade.
* When heat is applied, product malformation may occur.

Reassemble the dustbin cover aligning the dustbin release button with the groove of dustbin.

Put the washable micro filter in the dustbin cover by fitting it into the grooves of the dustbin cover.

Assemble the dustbin to the vacuum in the order shown in the image by pushing it until you hear it click.
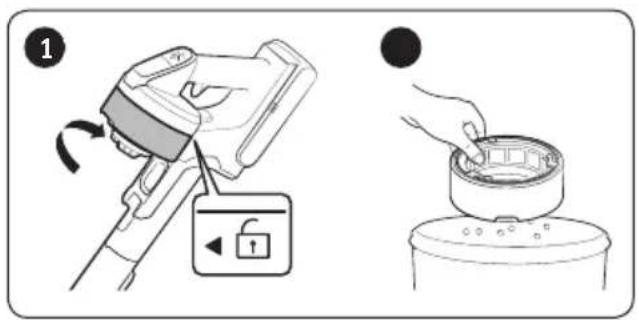
Cleaning the filter
- To maintain the best performance of the filter, remove the dust on the filter frequently and clean the filter with water once a month.
- After cleaning, dry completely for more than 24 hours in the shade before use.
- When heat is applied, product malformation may occur.
Washable micro filter


Ultra fine dust filter


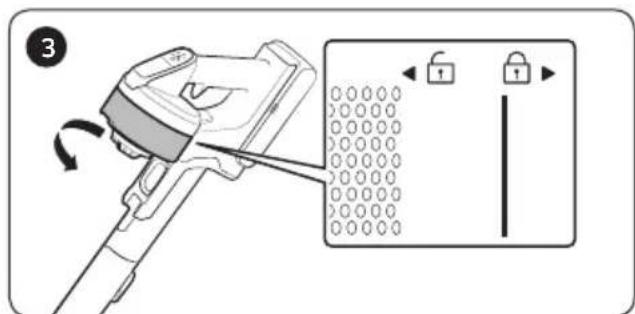
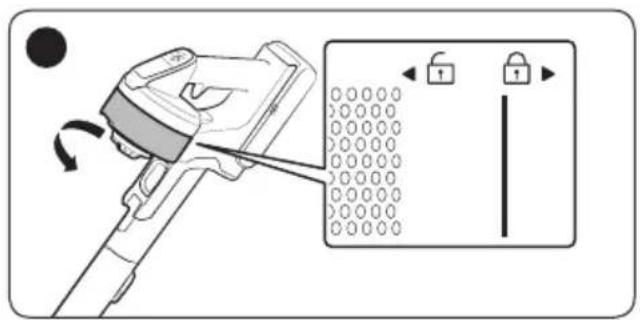
* When assembling, turn the filter until the line below the lock image is not visible.
Cleaning the accessories
Mini Motorized Tool Extension Crevice Tool / Pipe


Soft Action Brush


NOTE
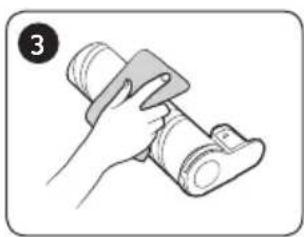
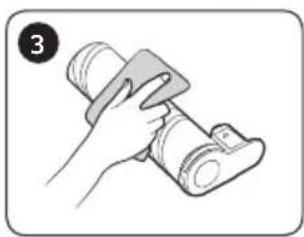
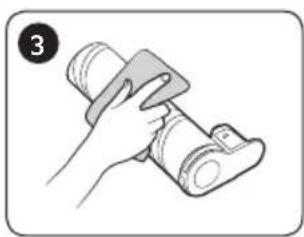
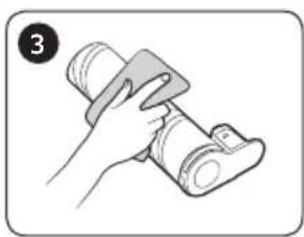
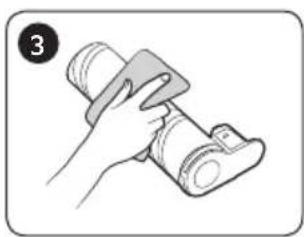
- When foreign matter remains on the brush, remove it with a wet tissue or a dry cloth.
CAUTION
- Do not clean the spinning brush and suction part with water. - Do not use the Soft Action Brush to remove moisture such as split liquid and pet's waste.
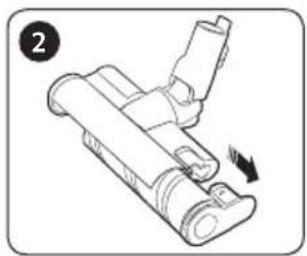
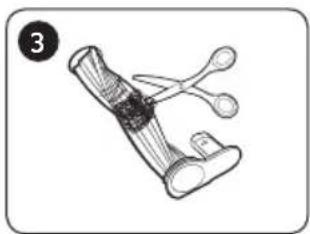
Turbo Action Brush


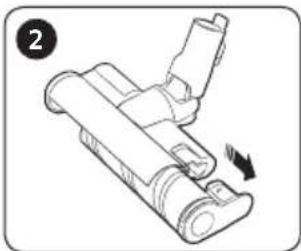
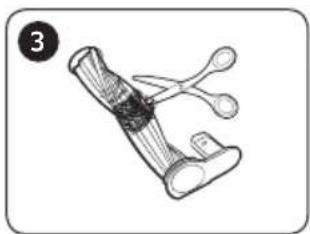
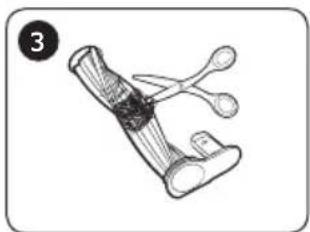
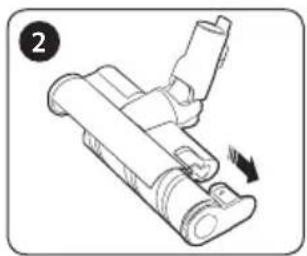
- If the foreign matter is not removed, use a scissors to remove it.
NOTE
- If a cloth or other foreign matter is vacuumed up and tangled with the spinning brush (drum), the spinning brush will stop working to protect the brush motor. After cleaning the brush, turn the power off and then on again. - If a brush does not work after cleaning, turn the power off and then on again. - When cleaning the brush, be careful not to catch your fingers in the fold of the brush.
Wet Brush


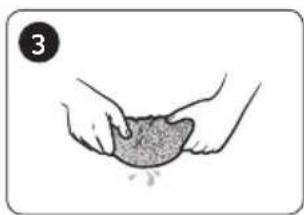

NOTE
- If the spinning brush does not work even after cleaning the Soft Action Brush and Wet Brush, the overheating prevention device of the brush motor might be in operation. Wait 30 minutes or more to cool the motor and operate again.
Battery usage

NOTE
- If your vacuum cleaner does not work after you charge the battery, change the battery. If it still does not work with the new battery, contact a Samsung service center.
- When you purchase a battery in a Samsung service center, check for the genuine Samsung logo on the battery (SAMSUNG) and the battery name (VS20T75**** Series: VCA-SBT90 / VS15T70**** Series: VCA-SBT90E).

CAUTION
- Do not disassemble the battery or the wall mount.
- Do not apply heat to the battery and do not put the battery in a fire.
- As the battery is manufactured only for this product, do not use the battery for other electronic appliances or other purposes.
- Removing the battery during operation may cause product malfunction.
- If the battery is removed while the vacuum cleaner motor is operating, the battery may not work for 30 seconds after being re-attached for safety reasons.
- Battery charging time and usage time may shorten with increased battery use. When the battery no longer charges or runs down quickly, replace the exhausted battery with a new one.
- Use only the wall mount and batteries provided by the manufacturer.
- Before inserting the battery, confirm that the battery is being inserted in the correct direction and orientation.
- When discarding a dead battery, put it into a battery collection box for recycling.
- If you are not going to use your vacuum cleaner for a long time, detach the battery from the vacuum.
- When attaching the battery to the vacuum, insert it until you hear a click. This assures that the battery is firmly attached.
- Otherwise, the battery may fall and could cause product damage or injury.
- Do not drop or strike the battery or subject it to a sudden shock.
- Do not disassemble the battery and make sure that you do not create a short circuit across the plus (+) and minus (-) terminals.
- Leaks from battery cells can occur under extreme usage or temperature conditions. If the liquid gets on your skin, wash the affected area quickly with water. If the liquid gets into your eyes, flush them immediately with clean water for a minimum of 10 minutes. Seek medical attention.
- To protect the motor and battery, the vacuum cleaner may not operate when the temperature is lower than 5 °C or higher than 45 °C.
Operation
NOTE
- If excessive force is applied to a brush or foreign matter is caught in the spinning brush (drum), the brush may stop working to protect the motor or vacuum. Turn the vacuum off, remove the foreign matter, and then turn the vacuum on. If the vacuum does not start, turn it off and then on again.
- Static electricity may occur depending on the humidity, temperature, or floor material, etc. in your home. If it happens repeatedly, contact a Samsung service center.
- Please charge the battery fully:
- Before using a newly purchased battery for the first time or if you haven't used the battery for a long time.
- When the battery level indicator is on the lowest indication and blinks.
- If you are not going to use the vacuum for a long period of time or you're going to be away from home for a long period of time, unplug the wall mount, and then detach the wall mount from the battery. When the battery is not being charged and not being used, it will slowly discharge.
- When the battery level is low, recharge it. If the level of the battery remains low for a long period of time, it can cause the performance of the battery to degrade.
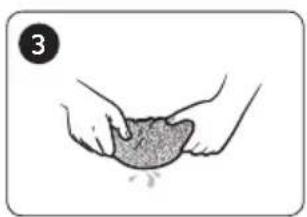
- Clean the multi-use wet pad of the wet brush gently with hands by using a washing soap.
- If the wet pad is exposed to heat or softener, it may be modified and product performance can be degraded.
- The multi-use wet pad can be cleaned using a washing machine. However, if it is boiled, the pad may be modified or discolored and product performance can be degraded.
- Use a genuine wet pad of Samsung Electronics for wet brush.
- If the wet brush is used without a wet pad, any product malfunction will not be covered by warranty and a service fee will be charged.
- When you purchase an additional multi-use wet pad for the wet brush, contact a Samsung service center.
- When you purchase an additional single-use wet pad, check the model name VCA-SPA90.
CAUTION
- When the spinning brush (drum) inside a brush is working, do not touch the brush.
- Otherwise, your hand can be caught and it may cause an injury.
- Before using the wet brush, detach the wet pad and put some water on it, then reattach it to the spin disk.
- Do not use the vacuum cleaner on items that can be scratched (TV and monitor screens, etc.)
Maintenance
NOTE
- Sometimes the wheel of a brush can scratch the floor. Before using the vacuum cleaner, check the status of the wheels of the brush.
- If there is foreign matter on the wheel of the brush which cannot be removed easily, contact a Samsung service center.
- If the inner part of the wet brush is clogged with a large foreign matter, spinning speed decreases or stops.
CAUTION
- Storing the vacuum cleaner in sunlight for long hours may cause parts of the vacuum to deform or discolor. Therefore, after cleaning the parts of the vacuum cleaner, dry them in the shade.
- Do not clean the brush of the vacuum cleaner with water. Cleaning it with water can cause the brush to deform or discolor. • Before cleaning the wall mount, you must unplug the wall mount.
- If you notice a continuous reduction in suction or the vacuum cleaner overheats abnormally, replace the ultra fine dust filter.
- After cleaning , , or with water, dry in the shade.
- When heat is applied, product malformation may occur.
Troubleshooting
Before calling for service, review the problems and solutions below. If none of the suggested solutions resolve your problem, please visit our website at www.samsung.com or call Samsung Customer Care. Note that you will be charged for any service calls in which no defects were found.
| Problems Solutions | |
| The vacuum cleaner does not work. | Check the battery level and charge the battery.Check whether the product is turned off, and then press the power button to turn it on.Check whether the pipe, dustbin or brush is blocked.Check whether the washable micro filter is inserted correctly.If the vacuum has not been used for a long time, charge the battery.If the battery dies, replace the battery. |
| Suction force decreases suddenly and the vacuum makes a vibrating sound. | Check whether a brush, dustbin or pipe is clogged with foreign matter and remove it.Check whether the pipe, dustbin is fully filled with dust. If it is, empty the bin.Check whether the filter is dirty. If it is, clean the filter. |
| The vacuum cleaner cannot be charged. | Confirm that the voltage provided to the wall mount matches the requirements of the wall mount.Check if the vacuum cleaner is turned on, and then check if the LED of the battery level indicator is turned on.Check if foreign matter (dust) is on the charging terminal.Remove any foreign matter with a cotton swab or soft cloth. |
| The spinning brush (drum) inside a brush does not work. | When the spinning brush stuck display is turned on, turn off the vacuum and check whether the brush is clogged with foreign matter. If so, remove the foreign matter and restart the vacuum.Check if the vacuum cleaner is turned on and then turn it off and on again.- For the Soft Action Brush and Wet brush, if the overheating prevention device of the brush motor operates, it may take about 30 minutes to cool the motor. |
| An odor is coming from the air outlet or filter of the vacuum cleaner. | Empty the dustbin and clean the filters frequently.- As your vacuum cleaner is a new product, it may have a slight odor for the first 3 months after purchase.- If you use the vacuum cleaner frequently, accumulated dirt in the dustbin or dust on the filter may generate an odor.Replacement filters are available at your local Samsung service agent. |
| Problems Solutions | |
| Cleaning is finished but small dust particles come out of the brush. | After cleaning, operate the vacuum for 10 seconds or more to suction up the small dust particles. |
| Vacuum cleaner stops operation during cleaning. | As this product has the overheating prevention device of the motor, product will stop operation temporarily for the following conditions.- When the vacuum operates with a full dustbin.- When the vacuum operates with suction part or brush clogged.- When the Extension Crevice Tool is used for long hours.After correcting the cause of the problem, turn the product on again. (This case may differ depending on the ambient temperature.) |
| Static electricity occurs when cleaning a thick and soft mat. | Materials of a mat (childcare center mat, noise prevention mat for between floors, etc.) may cause the static electricity.- Move the brush on a normal floor for a while and clean again then the static electricity should disappear. |
- This vacuum cleaner is approved for the following:
- The Low Voltage Directive 2014/35/EU
- The EMC Directive 2014/30/EU
SAMSUNG
Vacuum Cleaner
01 Hose 02 Dust container 03 Metal mesh filter 04 Washable micro filter 05 Very fine dust filter 06 Dust container release button 07 Display 08 Power button 09 Suction power control button 10 Handle
11 Battery charge indicator 12 Battery release button 13 Hose release button 14 Brush release button 15 Charging part for vacuum cleaner 16 Auxiliary holder 17 Battery charger

Hose Combination tool Extension tool for
inaccessible areas

Battery Wall mount


*Mini motorized tool *Soft brush *Turbo brush


- To remove the wall mount, follow the procedure in reverse order.
Installing the wall mount

01 The wall mount should be installed so that its top is 113 cm from the floor. 02 Using the wall mount as a template, mark the screw locations. 03 Drill 50 mm holes with a 6 mm drill bit, then insert the provided anchors with screws into the holes. 04 Attach the wall mount to the wall using the provided screws. 05 Connect the wall mount, place the vacuum on it, and check that the battery charge indicator is displayed.

* See the QR code for detailed information on installing the wall mount.

Charging
* Make sure the back of the battery is properly placed on the charging part of the vacuum. * Check that the battery charge indicator is displayed during charging. * The battery charge indicator blinks during charging. When the battery is fully charged, the indicator will stop blinking and dim.
Storing accessories
Wall mount
Removing the battery
Press the battery release button on the back of the handle to eject the battery.

Replacing the battery
Press the battery in until it clicks.
![graph TD A["Device 1"] --> B["Server"] C["Device 2"] --> D["Battery"] style A fill:#f9f,stroke:#333 style B fill:#ccf,stroke:#333 style C fill:#cfc,stroke:#333 style D fill:#fcc,stroke:#333](/content/2026/05/1102557/images/be756c25007f7477315e6b39ac7e6d03850e1793c4ab0e71bf7a07af458d1d74.jpg)
Charging with the desktop charger
- Charge the battery on the desktop charger.
- Press the battery firmly downward. • Check that the battery charge indicator is displayed during charging.
Operating the vacuum
If the brush firmly adheres to floors, for example carpets, rugs, bedding, etc., or if it does not rotate properly, change the suction power to "MIN" (MIN.) or "MID" (MID.) mode.


Disassembling the accessories
- When disassembling the pipe, press the release button on the rear end of the pipe.
- Before disassembling the accessories, activate the maximum cleaning mode for more than 10 seconds to remove any foreign object left in the accessory.
- When disassembling the brush, press the release button on the rear end of the brush.
Soft brush
Used for cleaning floors (wood or linoleum).
Turbo brush
Emptying and cleaning the dust container

1 Press the release button of the dust container, 2 pull out the dust container in the direction indicated by the arrow.

Pull out the washable micro filter by holding the filter handles inside the washable micro filter.
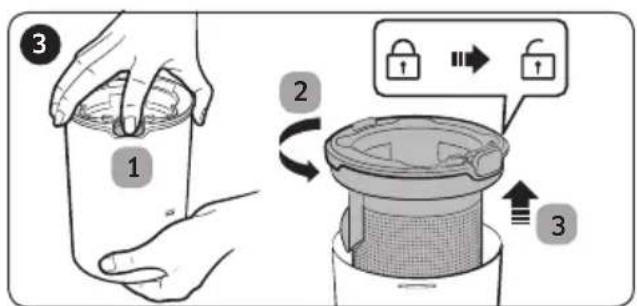
1 Press and hold the button 2 then turn the dust container lid and 3 remove it from the container.

Remove dust from the metal mesh filter using the combination tool.
Place the washable micro filter into the dust container lid by fitting it into the grooves on the lid of the dust container.


Ultra-fine dust filter


* While assembling, turn the filter until the line below the image of the locked padlock disappears.
Cleaning the accessories
Small motorized tool / Tool for hard-to-reach parts /
extension tube


Soft brush


NOTE


- If foreign particles are not removed, remove them with scissors.
NOTE
- If fabric or other foreign matter is sucked in and gets tangled around the rotating brush (drum), the rotating brush will stop working to prevent damage to the brush motor. After cleaning the brush, turn the vacuum cleaner off and then on again.
- If the brush does not work after cleaning, turn the power off and then on again.
- When cleaning the brush, be careful not to pinch your fingers in the brush hinge.
Wet brush


NOTE
01 Tube 02 Dust container 03 Filter with metal mesh grille 04 Washable micro filter 05 Fine dust filter 06 Dust container release button 07 Screen 08 Power button 09 Suction power control button 10 Handle
11 Battery level indicator 12 Battery release button 13 Tube release button 14 Brush release button 15 Vacuum cleaner charging port 16 Accessory holder 17 Battery charger


Tube, Combination tool, Extended crevice tool

Battery, Wall mount


(Screws: 2 EA / Screw anchors: 2 EA)
Battery charger


Charging
Battery ejection


Disassembling accessories
- When disassembling accessories, press the release button on the rear side of the tube.
- Before disassembling accessories, operate in MAX mode for more than 10 seconds to remove residual foreign substances in the accessory.
- When disassembling the brush, press the release button on the rear side of the brush.
Gentle cleaning brush
Use for cleaning floors (wood and linoleum).
Turbo cleaning brush
Emptying and cleaning the dust container

While pressing the button, lift the dust container lid and detach it from the dust container.

Remove dust from the filter with the metal mesh grid using the combined tool.
* Do not pull the rubber on the filter with the metal mesh grid.

After emptying the dust container, clean it and dry it in the shade.
* If heat is used during drying, the product may become deformed.

Place the washable micro filter into the dust container lid by fitting it into the grooves on the dust container lid.


* When assembling, rotate the filter until the line below the padlock image is visible.
Cleaning accessories
Mini motorized tool Extended crevice tool / hose


Soft dusting brush


NOTE
- Remove any foreign matter remaining on the brush with a damp cloth or dry cloth.
CAUTION
- Do not clean the rotating brush and suction part with water. - Do not use the soft dusting brush to remove spilled liquids or pet waste.
Turbo cleaning brush



NOTE



Flexible tool / Wet brush


Charging


Tube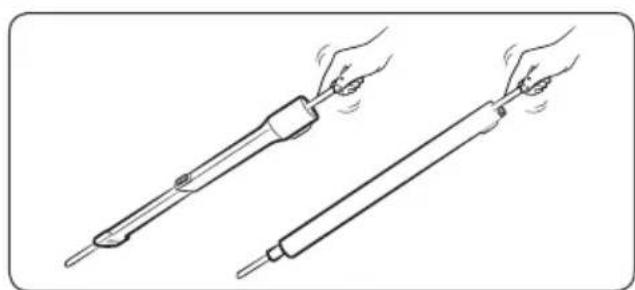
Soft brush



NOTE

(See: 2 sec /
Use: 2 sec)


Charging
Battery removal
Charging with table charger

On/off (①)


Combination tool

Ultra-fine dust filter



NOTE


NOTE
Tub


(Screws: 2 pcs./
Wall plugs: 2 pcs.)
*Motorized mini accessory *Fine action brush *Turbo action brush


Charging
Removing the battery


Start/stop (1)


Disassembling accessories

Combined accessory

Ultra-fine dust filter


NOTE



NOTE


Charging




/dust



NOTE




NOTE




Charging


Tube

Soft brush




NOTE


Charging
Switching on/off (1)


Ultra-fine dust filter


Soft rotating brush


NOTE


NOTE


Charging
Removing the battery


Switching on/off (☐)


Fine dust filter


Soft brush



NOTE



NOTE



Charging
Removing the battery
Press the battery release button on the back of the handle to slide out the battery.


Power switch (1)


* When assembling, rotate the filter until the line is visible below the lock symbol.

Fine action brush



NOTE
- If there are foreign objects on the brush, remove them with a damp cloth or dry cloth.
⚠ WARNING


NOTE


Battery Wall Mount


Charging


Removing accessories


Fine filter

/ pipe

Soft brush



WARNING


WARNING

Battery Wall mount
(screws: 2/wall plugs: 2)
Battery charger


Charging
Removing the battery

Switching on/off (☐)


1 Press the button and turn the dust container lid to remove it from the dust container.

Use the combination nozzle to remove dust from the metal mesh.
* Do not pull the rubber attached to the metal mesh.

When you empty the dust container, clean it and dry it in the shade.
Insert the washable micro filter into the dust container lid by fitting it into the slots on the lid.


Fine dust filter


* When installing the filter, rotate it until the line under the lock icon disappears.
Cleaning accessories


NOTE
- If dirt remains on the brush, remove it with a damp or dry cloth.
CAUTION


NOTE
- PREPARATION
- INSTALLATION
- OPERATION
- MAINTENANCE
- APPENDIX
- CAUTION/WARNING SYMBOLS USED
- WARNING
- CAUTION
- OTHER SYMBOLS USED
- NOTE
- GENERAL
- WALL MOUNT
- VACUUM CLEANER
- POWER RELATED
- ASSEMBLING THE WALL MOUNT
- INSTALLING THE WALL MOUNT
- USING THE WALL MOUNT
- CHARGING
- STORING THE ACCESSORIES
- DESK CHARGER
- CHARGING THE BATTERY
- EJECTING THE BATTERY
- RE-INSERTING THE BATTERY
- CHARGING WITH A DESK CHARGER
- OPERATING THE VACUUM CLEANER
- POWER (ON / OFF)
- CONTROLLING SUCTION POWER
- CHECKING THE DISPLAY
- USING THE ACCESSORIES
- DISASSEMBLING THE ACCESSORIES
- SOFT ACTION BRUSH
- TURBO ACTION BRUSH
- MINI MOTORIZED TOOL
- COMBINATION TOOL
- EXTENSION CREVICE TOOL
- FLEXIBLE TOOL
- WET BRUSH
- USING THE MULTI-USE WET PAD
- USING THE SINGLE-USE WET PAD
- WHEN TO EMPTY THE DUSTBIN EMPTYING THE DUSTBIN EASILY WITHOUT CAUSING DUST CLOUDS
- EMPTYING AND CLEANING THE DUSTBIN
- CLEANING THE FILTER
- WASHABLE MICRO FILTER
- ULTRA FINE DUST FILTER
- CLEANING THE ACCESSORIES
- MINI MOTORIZED TOOL EXTENSION CREVICE TOOL / PIPE
- BATTERY USAGE
- TROUBLESHOOTING
- STORING ACCESSORIES
- REMOVING THE BATTERY
- REPLACING THE BATTERY
- CHARGING WITH THE DESKTOP CHARGER
- OPERATING THE VACUUM
- SOFT BRUSH
- TURBO BRUSH
- EMPTYING AND CLEANING THE DUST CONTAINER
- ULTRA-FINE DUST FILTER
- BATTERY EJECTION
- DISASSEMBLING ACCESSORIES
- GENTLE CLEANING BRUSH
- TURBO CLEANING BRUSH
- CLEANING ACCESSORIES
- MINI MOTORIZED TOOL EXTENDED CREVICE TOOL / HOSE
- SOFT DUSTING BRUSH
- BATTERY REMOVAL
- CHARGING WITH TABLE CHARGER
- ON/OFF (①)
- START/STOP (1)
- COMBINED ACCESSORY
- DUST
- SWITCHING ON/OFF (1)
- SOFT ROTATING BRUSH
- SWITCHING ON/OFF (☐)
- FINE DUST FILTER
- POWER SWITCH (1)
- FINE ACTION BRUSH
- ⚠ WARNING
- REMOVING ACCESSORIES
- FINE FILTER
Brand : SAMSUNG
Model : VS20T7566T5
Category : Vacuum Cleaner