
DF9900E2H - DVD player LG - Free user manual and instructions
Find the device manual for free DF9900E2H LG in PDF.


| Type of product | DVD Player |
| Brand | LG |
| Model | DF9900E2H |
| Dimensions (W x H x D) | 430 x 38 x 260 mm (approx) |
| Weight | 2.0 kg (approx) |
| Power supply | AC 100-240V, 50/60Hz |
| Power consumption | 10 W |
| Playback formats | DVD, DVD±R/RW, CD, CD-R/RW, MP3, JPEG |
| Video outputs | HDMI, Composite |
| Audio outputs | Analog stereo, Digital coaxial |
| USB playback | Yes (MP3, JPEG, DivX) |
| Disc loading type | Tray |
| Remote control | Included |
| Parental control | Yes |
| Languages | Multi-language OSD |
| Cleaning | Use soft dry cloth; avoid liquids |
| Safety | Do not open casing; keep away from moisture |
| Spare parts | Contact LG authorized service centers |
Frequently Asked Questions - DF9900E2H LG
User questions about DF9900E2H LG
0 question about this device. Answer the ones you know or ask your own.
Ask a new question about this device
Download the instructions for your DVD player in PDF format for free! Find your manual DF9900E2H - LG and take your electronic device back in hand. On this page are published all the documents necessary for the use of your device. DF9900E2H by LG.
USER MANUAL DF9900E2H LG
Before connecting, operating or adjusting this product, please read this instruction booklet carefully and completely.


CAUTION: THESE SERVICING INSTRUCTIONS ARE FOR USE BY QUALIFIED SERVICE PERSONNEL ONLY. TO REDUCE THE RISK OF ELECTRIC SHOCK DO NOT PERFORM ANY SERVICING OTHER THAN THAT CONTAINED IN THE OPERATING INSTRUCTIONS UNLESS YOU ARE QUALIFIED TO DO SO.

Caution: The apparatus should not be exposed to water (dripping or splashing) and no objects filled with liquids, such as vases, should be placed on the apparatus.


CAUTION: This product employs a Laser System.
To ensure proper use of this product, please read this owner's manual carefully and retain for future reference. Should the unit require maintenance, contact an authorized service center.
Use of controls, adjustments, or the performance of procedures other than those specified herein may result in hazardous radiation exposure.
To prevent direct exposure to laser beam, do not try to open the enclosure. Visible laser radiation when open. DO NOT STARE INTO BEAM.

WARNING: Do not install this equipment in a confined space such as a bookcase or similar unit.

This product is manufactured to comply with the radio interference requirements of EEC DIRECTIVE 89/336/EEC, 93/68/EEC and 73/23/EEC.
CAUTION concerning the Power Cord
Most appliances recommend they be placed upon a dedicated circuit;
That is, a single outlet circuit which powers only that appliance and has no additional outlets or branch circuits. Check the specification page of this owner's manual to be certain.
Do not overload wall outlets. Overloaded wall outlets, loose or damaged wall outlets, extension cords, frayed power cords, or damaged or cracked wire insulation are dangerous. Any of these conditions could result in electric shock or fire. Periodically examine the cord of your appliance, and if its appearance indicates damage or deterioration, unplug it, discontinue use of the appliance, and have the cord replaced with an exact replacement part by an authorized servicer.
Protect the power cord from physical or mechanical abuse, such as being twisted, kinked, pinched, closed in a door, or walked upon. Pay particular attention to plugs, wall outlets, and the point where the cord exits the appliance.

Disposal of your old appliance
- When this crossed-out wheeled bin symbol is attached to a product it means the product is covered by the European Directive 2002/96/EC.
- All electrical and electronic products should be disposed of separately from the municipal waste stream via designated collection facilities appointed by the government or the local authorities.
- The correct disposal of your old appliance will help prevent potential negative consequences for the environment and human health.
- For more detailed information about disposal of your old appliance, please contact your city office, waste disposal service or the shop where you purchased the product.
SERIAL NUMBER:
You can find the serial number on the back of the unit. This number is unique to this unit and not available to others. You should record requested information here and retain this guide as a permanent record of your purchase.
Model No. ____
Serial No. ____
Date of Purchase
Contents
Introduction 4
Symbol used in this Manual .....4
About the ⊗ Symbol Display ....4
Notes on Discs 4
Handling Discs 4
Storing Discs 4
Cleaning Discs 4
Types of Playable Discs ....5
Regional code 5
Disc-related terms 6
Front Panel 7
Rear Panel 8
Remote Control 9
Remote Control Operation .....9
Remote Control Battery Installation .....9
Installation and Setup .....10
Setting up the Player 10
DVD Player Connections .....10
Video and Audio Connections to Your TV . .10
Audio Connection to Your TV .....10
Audio Connection to Optional Equipment ..11
On-Screen Display 12
Playback Status/Restrictions .....12
Initial Settings 13
General Operation 13
LANGUAGE 13
- Menu Language 13
• Disc Audio / Subtitle / Menu .....13
DISPLAY 13
• TV Aspect 13
- Display Mode 13
• Progressive Scan 14
• TV output select .....14
AUDIO 14
• Dolby Digital / DTS / MPEG .....14
• Sample Freq. (Frequency) .....14
• Dynamic Range Control (DRC) .....15
• Vocal 15
OTHERS 15
• PBC 15
• Auto Play 15
• B.L.E. (Black Level Expansion) .....15
• DivX(R) VOD .....15
LOCK (Parental Control) 16
• Rating 16
- Password (Security Code) .....16
• Area Code 16
Operation .....17
Playing a DVD or Video CD .....17
Playback Setup 17
General Features 17
Moving to another TITLE/GROUP .....17
Moving to another CHAPTER/TRACK ....17
Search 17
Changing the Audio Channel .....17
Still Picture and Frame-by-Frame Playback . . .18
Slow Motion 18
Random 18
Repeat A-B 18
Repeat 18
3D Surround 18
Time Search 18
Zoom 19
Marker Search 19
Pause 19
Special DVD Features 19
Checking the contents of DVD discs: Menus .19
Title Menu 19
Disc Menu 19
Camera Angle 19
Changing the Audio Language .....19
Subtitles 19
DVD Audio Discs 20
Moving to another GROUP .....20
Viewing another PAGE 20
Playing an Memory Card .....21
Playing an Audio CD or MP3/WMA Disc .. .22
Audio CD and MP3 / WMA Disc Features .23
Pause 23
Moving to another Track 23
Repeat Track/All/Off 23
Search 23
Random 23
Repeat A-B 23
3D Surround 23
Programmed Playback 24
Repeat Programmed Tracks .....24
Erasing a Track from Program List .....24
Erasing the Complete Program List .....24
Viewing a JPEG Disc 25
Slide Show 25
Still Picture 25
Moving to another File .....25
Zoom 25
To rotate picture .....25
To listen to MP3/WMA music watching
picture 25
Maintenance and Service 26
Playing a DivX Movie Disc .....26
Notice for displaying the DivX subtitle ....27
Additional Features 28
Last Scene Memory .....28
Screen Saver 28
Video Mode Setting .....28
Controlling other TVs with the remote control . . .28
System select....28
Reference 29
Language Codes 29
Area Codes 29
Troubleshooting 30
Specifications 30
Introduction
To ensure proper use of this product, please read this owner's manual carefully and retain for future reference.
This manual provides information on the operation and maintenance of your DVD player. Should the unit require service, contact an authorized service location.
Symbol Used in this Manual

The lightning flash symbol alerts you to the presence of dangerous voltage within the product enclosure that may constitute a risk of electric shock.

The exclamation point alerts you to the presence of important operating and maintenance / servicing instructions.

Indicates hazards likely to cause harm to the unit itself or other material damage.
Note:
Indicates special notes and operating features.
Tip:
Indicates tips and hints for making the task easier.
A section whose title has one of the following symbols is applicable only to the disc represented by the symbol.
DVD-V
DVD and finalized DVD±R/RW
DVD-A
DVD Audio discs
VCD
Video CDs
CD
Audio CDs
MP3
MP3 Discs
WMA
WMA Discs
JPEG
JPEG Discs
DivX
DivX Discs
M/C
Memory Card
About the Symbol Display
“ ⊙ ” may appear on your TV display during operation and indicates that the function explained in this owner's manual is not available on that specific DVD video disc.
Notes on Discs
Handling Discs
Do not touch the playback side of the disc. Hold the disc by the edges so that fingerprints do not get on the surface. Never stick paper or tape on the disc.


Storing Discs
After playing, store the disc in its case. Do not expose the disc to direct sunlight or sources of heat and never leave it in a parked car exposed to direct sunlight.
Cleaning Discs
Fingerprints and dust on the disc can cause poor picture quality and sound distortion. Before playing, clean the disc with a clean cloth. Wipe the disc from the center out.
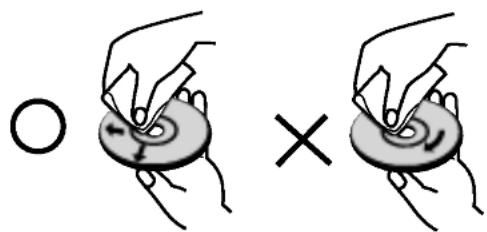
Do not use strong solvents such as alcohol, benzine, thinner, commercially available cleaners, or anti-static spray intended for older vinyl records.
Types of Playable Discs
 | DVD(8 cm / 12 cm disc) | |
 | DVD audio discs(8 cm / 12 cm disc) | |
 | Video CD (VCD)(8 cm / 12 cm disc) | |
 | Audio CD(8 cm / 12 cm disc) |
In addition, this unit plays Memory Card, DivX file, DVD -R, DVD +R, DVD -RW, DVD +RW, SVCD, and CD-R / CD-RW that contains audio titles, MP3, WMA, and/or JPEG files.
Notes:
- Depending on the conditions of the recording equipment or the CD-R/RW (or DVD -R, DVD +R, DVD -RW, DVD +RW) disc itself, some CD-R/RW (or DVD -R, DVD +R, DVD -RW, DVD +RW) discs cannot be played on the unit.
- Do not attach any seal or label to either side (the labeled side or the recorded side) of a disc.
- Do not use irregularly shaped CDs (e.g., heart-shaped or octagonal) since they may result in malfunctions.
Notes on DVDs and Video CDs
Some playback operations of DVDs and Video CDs may be intentionally programmed by software manufacturers. This unit plays DVDs and Video CDs according to disc content designed by the software manufacturer, therefore some playback features may not be available or other functions may be added.
Manufactured under license from Dolby Laboratories. "Dolby", "Pro Logic", and the double-D symbol are trademarks of Dolby Laboratories.
DTS and DTS Digital Out are trademarks of Digital Theater Systems, Inc.
Regional code
This DVD player is designed and manufactured for playback of region "2" encoded DVD software. This unit can play only DVD discs labeled "2" or "ALL".

Notes on Regional Codes
- Most DVD discs have a globe with one or more numbers in it clearly visible on the cover. This number must match your DVD player's regional code or the disc cannot play.
- If you try to play a DVD with a different region code from your player, the message "Check Regional Code" appears on the TV screen.
Notes on Copyrights:
It is forbidden by law to copy, broadcast, show, broadcast via cable, play in public, or rent copyrighted material without permission. This product features the copy protection function developed by Macrovision. Copy protection signals are recorded on some discs. When recording and playing the pictures of these discs picture noise will appear. This product incorporates copyright protection technology that is protected by method claims of certain U.S. patents and other intellectual property rights owned by Macrovision Corporation and other rights owners. Use of this copyright protection technology must be authorized by Macrovision Corporation, and is intended for home and other limited viewing uses only unless otherwise authorized by Macrovision Corporation. Reverse engineering or disassembly is prohibited.
CONSUMERS SHOULD NOTE THAT NOT ALL HIGH DEFINITION TELEVISION SETS ARE FULLY COMPATIBLE WITH THIS PRODUCT AND MAY CAUSE ARTIFACTS TO BE DISPLAYED IN THE PICTURE. IN CASE OF 525 OR 625 PROGRESSIVE SCAN PICTURE PROBLEMS, IT IS RECOMMENDED THAT THE USER SWITCH THE CONNECTION TO THE 'STANDARD DEFINITION' OUTPUT. IF THERE ARE QUESTIONS REGARDING OUR TV SET COMPATIBILITY WITH THIS MODEL 525p AND 625p DVD PLAYER, PLEASE CONTACT OUR CUSTOMER SERVICE CENTER.
Disc-related terms
DVD ±R / DVD ±RW
DVD -R and DVD +R are two different standards for recordable DVD drives and discs. This format allows information to be recorded onto the DVD disc only once. DVD +RW and DVD -RW are two standards for re-writable media, meaning the DVD content can be erased and re-recorded.
VCD (Video CD)
A VCD holds up to 74 minutes (650 MB disc) or 80 minutes (700 MB disc) of MPEG-1 full-motion video along with quality stereo sound.
MPEG
MPEG is an international standard for video and audio compression. MPEG-1 is used in encoding video for VCD and provides for multichannel surround sound coding such as PCM, Dolby Digital, DTS and MPEG audio.
MP3
MP3 is a popular compression format used for digital audio files that yields very high near-CD quality.
WMA
Windows media audio file. A type of coding / decoding developed by Microsoft Corp.
JPEG
Joint Pictures Expert Group. JPEG is a compressed file format that allows you to save images with no limit on the number of colors.
DivX
DivX is the name of a revolutionary new video codec which is based on the new MPEG-4 compression standard for video. You will be able to play DivX movies using this DVD player.
PBC: Playback Control (Video CD only)
Playback control is available for Video CD (VCD) version 2.0 disc formats. PBC allows you to interact with the system via menus, search functions, or other typical computer-like operations. Moreover, still pictures of high resolution can be played if they are included in the disc. Video CDs not equipped with PBC (Version 1.1) operate in the same way as audio CDs.
Title (DVD video discs only)
A title is generally a distinct section of a DVD disc. For example the main feature could be title 1, a documentary describing how the film was made could be title 2, and cast interviews could be title 3. Each title is assigned a reference number enabling you to locate it easily.
Chapter (DVD video discs only)
A chapter is a segment of a title such as a scene in a film or one interview in a series. Each chapter is assigned a chapter number, enabling you to locate the chapter you want. Depending on the disc, chapters may not be recorded.
Group (DVD audio discs only)
The main audio content or accompanying feature content or additional feature content, or music album. Each group is assigned a group reference number enabling you to locate it easily.
Scene (VCD)
On a video CD with PBC ( playback control) functions, moving pictures and still pictures are divided into sections called "scenes". Each scene is displayed in the menu screen and assigned a scene number, enabling you to locate the scene you want. A scene is composed of one or several tracks.
Track
A distinct element of audiovisual information, such as the picture or sound track for a specific language (DVD), or a musical piece on a video or audio CD. Each track is assigned a track number, enabling you to locate the track you want. DVD discs allow one track of video (with multiple angles) and several tracks of audio.
Front Panel

Rear Panel


Remote Control Operation
Point the Remote Control at the remote sensor and press the buttons.

Do not mix old and new batteries and never mix different types of batteries such as standard, alkaline, etc.
Remote Control Battery installation
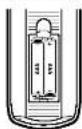
Detach the battery cover on the rear of the remote control, and insert two batteries (size AAA) with + and - aligned correctly.
Installation and Setup
Setting up the Player
The picture and sound of a nearby TV, VCR, or radio may be distorted during playback. If this occurs, position the player away from the TV, VCR, or radio, or turn off the unit after removing the disc.
DVD Player Connections
Depending on your TV and other equipment there are various ways you can connect the player. Please refer to the manuals of your TV, stereo system or other devices as necessary for additional connection information.
Rear of TV

Rear of DVD player
Caution:
You must set the TV Output Select option to use COMPONENT VIDEO OUT/PROGRESSIVE SCAN and SCART jacks.
(See "TV Output Select" on page 14.)
Video and Audio Connections to Your TV
Make sure the DVD player is connected directly to the TV and not to a VCR, otherwise the DVD image could be distorted by the copy protection system.
Video: Connect the VIDEO OUT jack on the DVD player to the video in jack on the TV using the video cable (V).
S-Video: Connect the S-VIDEO OUT jack on the DVD Player to the S-Video in jack on the TV using the S-Video cable (S).
SCART connection: Connect the TO TV scart jack on the DVD Player to the corresponding in jacks on the TV using the scart cable (T).
Component Video:
Connect the COMPONENT VIDEO OUT/PROGRESSIVE SCAN jacks on the DVD Player to the corresponding in jacks on the TV using an Y Pb Pr cable (C).
Progressive Scan:
- If your television is a high-definition or "digital ready" television, you may take advantage of the DVD Player's progressive scan output for the highest video resolution possible.
- If your TV does not accept the Progressive Scan format, the picture will appear scrambled if you try Progressive Scan on the DVD Player.
Notes:
- Set the Progressive to "On" on the setup menu for progressive signal, see page 14.
- Set the progressive to "Off" by removing any disc from the unit. see that "no disc" is displayed on the display window. Then press STOP and hold it for five seconds before releasing it.
- Progressive scan does not work with the analog video connections (yellow VIDEO OUT jack).
Audio Connection to Your TV:
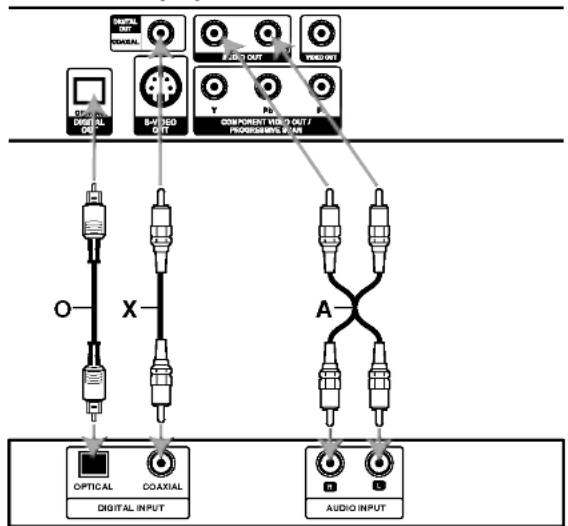
Connect the left and right AUDIO OUT jacks of the DVD Player to the audio left and right IN jacks on the TV (A) using the audio cables. Do not connect the DVD Player's AUDIO OUT jack to the phone in jack (record deck) of your audio system.
Audio Connection to Optional Equipment
Connect the DVD player to your optional equipment for audio output.
Rear of DVD player
flowchart
graph TD
    A["OPTICAL DIGITAL INPUT"] --> B["O-X"]
    C["COARIAL DIGITAL INPUT"] --> D["X"]
    E["OPTICAL DIGITAL OUT"] --> F["B-VI/200 OUT"]
    G["AUDIO OUT"] --> H["COMPORTED VIDEO OUT / PROGRESSMENTS 8/M"]
    I["VIDEO OUT"] --> J["Y"]
    K["AUDIO INPUT"] --> L["A"]
Amplifier (Receiver)
Amplifier equipped with 2-channel analog stereo or Dolby Pro Logic II / Pro Logic: Connect the left and right AUDIO OUT jacks on the DVD Player to the audio left and right IN jacks on your Amplifier, Receiver, or Stereo System, using the audio cables (A).
Amplifier equipped with 2-channel digital stereo (PCM) or Audio / Video Receiver equipped with a multi-channel decoder (Dolby Digital™, MPEG 2, or DTS): Connect one of the DVD Player's DIGITAL AUDIO OUT jacks (OPTICAL O or COAXIAL X) to the corresponding in jack on your Amplifier. Use an optional digital (optical O or coaxial X) audio cable.
Digital Multi-channel sound
A digital multi-channel connection provides the best sound quality. For this you need a multi-channel Audio / Video Receiver that supports one or more of the audio formats supported by your DVD Player such as MPEG 2, Dolby Digital and DTS. Check the Receiver manual and the logos on the front of the Receiver.
Notes:
- If the audio format of the digital output does not match the capabilities of your Receiver, the Receiver produces a strong, distorted sound or no sound at all.
- Six Channel Digital Surround Sound via a digital connection can only be obtained if your Receiver is equipped with a Digital Multi-channel decoder.
- To see the audio format of the current DVD in the on-screen display, press AUDIO.
On-Screen Display
You can display the general playback status on the TV screen. Some items can be changed using the menu. To use the on-screen display:
- Press DISPLAY during playback.
- Press ▲ / ▼ to select an item. The selected item is highlighted.
- Press ◀/▶ to change the setting. You can also use the number buttons if appropriate (e.g. inputting the title number). For some functions, press ENTER to execute the setting.
Notes:
- Some discs may not provide all of the features shown below.
- If no button is pressed for 10 seconds, the on-screen display disappears.
Playback Status/Restrictions

Example: On-Screen Display during playing divx movie disc
| Items | Selection Method | |
| Track Number | 1/3 | ◄/►, Numbers ENTER |
| Time search | 0:20:09 | Numbers, ENTER |
| Audio language and Digital Audio Output mode | 1MP32/8 CH | ◄/► or AUDIO |
| Subtitle language | 1 ENG | ◄/► or SUBTITLE |
| Sound | 3D SUR | ◄/► |
Example: On-Screen Display during playing DVD Video
| Items | Selection Method | |
| Title Number | 1/3 | ◄/►, Numbers ENTER |
| Chapter Number | 1/12 | ◄/►, Numbers ENTER |
| Time search | 0:20:09 | Numbers, ENTER |
| Audio language and Digital Audio Output mode | 1 ENG00D 3/2.1CH | ◄/► or AUDIO |
| Subtitle language | 1 ENG | ◄/► or SUBTITLE |
| Angle | 1/3 | ◄/► or ANGLE |
| Sound | 3D SUR | ◄/► |
Example: On-Screen Display during playing VCD
| Items | Selection Method | |
| Track Number (or PBC mode) | ◀/▶, Numbers ENTER | |
| Time search | 0:20:09 | Numbers ENTER |
| Audio Channel | Stereo ▶ | ◀/▶ or AUDIO |
| Sound | 3D SUR ▶ | ◀/▶ |
Example: On-Screen Display during playing DVD Audio
| Items | Selection Method | |
| Group Number | 1/2▶ | ◀/▶, Numbers ENTER |
| Track Number | 1/6▶ | ◀/▶, Numbers ENTER |
| Time search | 0:20:09 | Display only |
| DVD Audio Output mode | 1 ENG PPCM ▶ 3/2.1CH | ◀/▶ or AUDIO |
| Subtitle language | OFF▶ | Display only |
| Page (or Angle) | 1/21▶or1/3▶ | ◀/▶ or ANGLE |
Initial Settings
By using the Setup menu, you can make various adjustments to items such as picture and sound. You can also set a language for the subtitles and the Setup menu, among other things. For details on each Setup menu item, see pages 13 to 16.
To display and exit the Menu:
Press SETUP to display the menu. A second press of SETUP will take you back to initial screen.
To go to the next level:
Press ▶ on the Remote Control.
To go back to the previous level:
Press ◀ on the Remote Control.
General Operation
- Press SETUP. The Setup menu appears.
- Use ▲ / ▼ to select the desired option then press ▶ to move to the second level. The screen shows the current setting for the selected item, as well as alternate setting(s).
- Use ▲ / ▼ to select the second desired option then press ▶ to move to the third level.
- Use ▲ / ▼ to select the desired setting then press ENTER to confirm your selection. Some items require additional steps.
- Press SETUP or PLAY to exit the Setup menu.
LANGUAGE

Menu Language
Select a language for the Setup menu and on-screen display.
Disc Audio / Subtitle / Menu DVD-V DVD-A
Select the language you prefer for the audio track (disc audio), subtitles, and the disc menu.
Original: Refers to the original language in which the disc was recorded.
Other: To select another language, press number buttons then ENTER to enter the corresponding 4-digit number according to the language code list in the reference chapter. If you enter the wrong language code, press CLEAR.
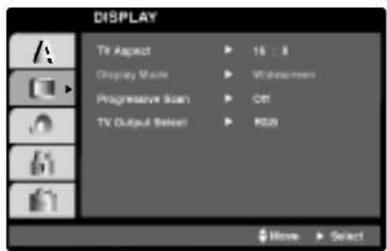
DISPLAY

TV Aspect DVD-V DVD-A
4:3: Select when a standard 4:3 TV is connected.
16:9: Select when a 16:9 TV is connected.
Display Mode DVD-V DVD-A
Display Mode setting works only when the TV Aspect mode is set to "4:3".
Letterbox: Displays a wide picture with bands on the upper and lower portions of the screen.
Panscan: Automatically displays the wide picture on the entire screen and cuts off the portions that do not fit.
Progressive Scan
Progressive Scan Video provides the highest quality pictures with less flickering. If you are using the Component Video jacks for connection to a TV or monitor that is compatible with a progressive scan signal, set Progressive Scan to On.
To active progressive scan:
Connect component out of the DVD player to the input of your monitor/television, set your television or monitor to Component Input.
- Select "Progressive Scan" on the DISPLAY menu then press ▶.

- Select "On" using the ▲ / ▼ buttons.
- Press ENTER to confirm your selection. The confirm menu will appear.
Note:
If your TV or monitor does not accept the Progressive Scan format, the picture will appear scrambled if you try Progressive Scan on the DVD Player.
- When the confirm menu appears on your screen Cancel is highlighted as default. Use the ◀ / ▶ buttons to highlight Enter.
- Pressing ENTER will set the player to Progressive scan mode.
Caution:
Once the setting for progressive scan output is entered, an image will only be visible on a progressive scan compatible TV or monitor. If you set Progressive Scan to On in error, you must reset the unit. First, remove the disc in the DVD Player.
Next, press STOP ( ■ ) and hold it for five seconds before releasing it. The video output will be restored to the standard setting, and a picture will once again be visible on a conventional analog TV or monitor.
TV Output Select
Set the player's TV Output Select options according to the TV connection type.
YPbPr: When your TV is connected with the COMPONENT VIDEO OUT/PROGRESSIVE SCAN jacks on the DVD player.
RGB: When your TV is connected with the SCART (RGB signal) jack.
AUDIO
Each DVD disc has a variety of audio output options. Set the player's AUDIO options according to the type of audio system you use.

Dolby Digital / DTS / MPEG DVD-V DVD-A DivX
Bitstream: Select "Bitstream" if you connect the DVD Player's DIGITAL OUT jack to an Amplifier or other equipment with a Dolby Digital, DTS or MPEG decoder.
PCM: Select when connected to a two-channel digital stereo amplifier. DVDs encoded in Dolby Digital, DTS or MPEG will be automatically downmixed to two-channel PCM audio.
Off (for DTS): If you select "Off", the DTS signal is not output through the DIGITAL OUT jack.
Sample Freq. (Frequency) DVD-V DVD-A
If your Receiver or Amplifier is NOT capable of handling 96 kHz signals, select 48 kHz. When this choice is made, this unit automatically converts any 96 kHz signals to 48 kHz so your system can decode them.
If your Receiver or Amplifier is capable of handling 96 kHz signals, select 96 kHz. When this choice is made, this unit passes each type of signal through without any further processing.
Check the documentation for your Amplifier to verify its capabilities.
Dynamic Range Control (DRC)


With the DVD format, you can hear a program's soundtrack in the most accurate and realistic presentation possible, thanks to digital audio technology. However, you may wish to compress the dynamic range of the audio output (the difference between the loudest sounds and the quietest ones). This allows you to listen to a movie at a lower volume without losing clarity of sound. Set DRC to On for this effect.
Vocal

Set to On only when a multi-channel karaoke DVD is playing. The karaoke channels on the disc mix into normal stereo sound.
OTHERS
The PBC, Auto Play, B.L.E. and DivX(R) VOD settings can be changed.

PBC

Set Playback Control (PBC) to On or Off.
On: Video CDs with PBC are played according to the PBC.
Off: Video CDs with PBC are played the same way as Audio CDs.
Auto Play

You can set up the DVD Player so a DVD disc automatically starts playing whenever the DVD is inserted.
If Auto Play mode is set to On, this DVD player will search for title that has the longest playback time and then play back the title automatically.
On: Auto Play function is active.
Off: Auto Play function is not active.
Note:
The Auto Play function may not work for some DVDs.
B.L.E. (Black Level Expansion)
To select the black level of playback pictures. Set your preference and monitor's ability.
On: Expanded grey scale. (0 IRE cut off)
Off: Standard grey scale. (7.5 IRE cut off)
Note:
The B.L.E. function can be operated only in NTSC system.
DivX(R) VOD

You can display the DivX DRM (Digital Rights Management) Registration code for your unit.

The Registration code is used for VOD (Video-On-Demand) service agent. You can purchase or rent an encrypt movie file.
Notes:
If you rent the DivX VOD file, it has several options of viewing limits as shown below.
- Display the number which you can watch the file.

• The rental has been expired.
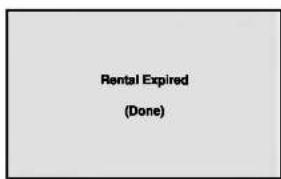
- Display the authorization error.

LOCK (Parental Control)
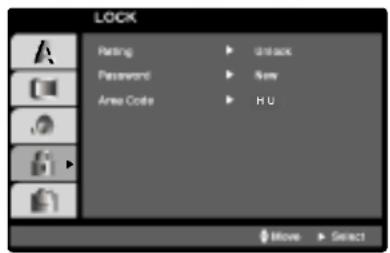
Rating
DVD-V
Some movies contain scenes that may not be suitable for children to view. Many of these discs contain parental control information that applies to the complete disc or to certain scenes on the disc. Movies and scenes are rated from 1 to 8, depending on the country. Some discs offer more suitable scenes as an alternative.
The parental control feature allows you to block access to scenes below the rating you input, thereby preventing your children from being able to view material you believe is unsuitable.
- Select "Rating" on the LOCK menu then press ▶.
- To access the Rating, Password and Area Code features, you must input the 4-digit security code you created. If you have not yet entered a security code you are prompted to do so.
Input a 4-digit code and press ENTER. Enter it again and press ENTER to verify. If you make a mistake before pressing ENTER, press CLEAR.
- Select a rating from 1 to 8 using the ▲ / ▼ buttons.
Rating 1-8: Rating one (1) has the most restrictions and rating eight (8) is the least restrictive.
Unlock
If you select unlock, parental control is not active and the disc plays in full.
Note:
If you set a rating for the player, all disc scenes with the same rating or lower are played. Higher rated scenes are not played unless an alternate scene is available on the disc. The alternative must have the same rating or a lower one. If no suitable alternative is found, playback stops. You must enter the 4-digit password or change the rating level in order to play the disc.
- Press ENTER to confirm your rating selection, then press SETUP to exit the menu.
Password (Security Code)
You can enter or change password.
- Select Password on the LOCK menu then press ▶.
- Follow step 2 as shown left (Rating). "Change" or "New" is highlighted.
- Enter the new 4-digit code, then press ENTER. Input it again to verify.
- Press SETUP to exit the menu.
If you forget your Security Code
If you forget your security code you can clear it using the following steps:
- Press SETUP to display the Setup menu.
- Input the 6-digit number "210499" and the security code is cleared.
- Enter a new code as described above.
Area Code
DVD-V
Enter the code of the area whose standards were used to rate the DVD video disc, based on the list in the reference chapter.
- Select "Area Code" on the LOCK menu then press ▶.
- Follow step 2 as shown left (Rating).
- Select the first character using ▲ / ▼ buttons.
- Press ENTER and select the second character using ▲ / ▼ buttons.
- Press ENTER to confirm your area code selection.
Operation
Playing a DVD or Video CD
Playback Setup
- Turn on the TV and select the video input source connected to the DVD Player.
- Turn on the Audio System (if applicable) and select the input source connected to the DVD player.
- Insert your chosen disc to the disc slot with the playback side down. Playback starts automatically. If playback does not start, press PLAY. In some cases, the disc menu might appear instead:
DVD-V
Use the ◀▶▲▼ buttons to select the title/chapter you want to view, then press ENTER to start. Press TITLE or DVD MENU to return to the menu screen.
DVD-A
Use the ◀▶▲▼ buttons to select an option you want, then press ENTER to view the option.
VCD
Use the number buttons to select the track you want to view and press RETURN to return to the menu screen. Menu settings and operating procedures may differ. Follow the instructions on the each menu screen. You also may set PBC to Off (See "PBC" on page 15).
Notes:
- If parental control is set and the disc is not within the rating settings you must input the password. (See "Lock Menu" on page 16.)
- DVDs may have a region code. Your player does not play discs that have a region code different from your player. The region code for this player is 2 (two).
General Features
Note:
Unless stated otherwise, all operations described use the Remote Control. Some features may also be available on the Setup menu.
Moving to another TITLE/GROUP
DVD-V DVD-A
When a disc has more than one title/group, you can move to another title/group. Press DISPLAY while playback is stopped then the appropriate number (0-9) or use ◀ / ▶ to move to another title/group. You can play any title by inputting its number while playback is stopped.
Moving to another CHAPTER/TRACK
DVD-V DVD-A VCD DivX
When a title on a disc has more than one chapter or a disc has more than one track, you can move to another chapter/track as follows:
- Press SKIP ◀◀◀ or ▶▶◀ briefly during playback to select the next chapter/track or to return to the beginning of the current chapter/track.
- Press SKIP ◀◀ twice briefly to step back to the previous chapter/track.
- To go directly to any chapter during DVD playback, press DISPLAY and press ▲ / ▼ to select the chapter/track icon. Then, input the chapter/track number or use ◀ / ▶.
Search DVD-V DVD-A VCD DivX
- Press SCAN (◀◀ or ▶▶) during playback.
- Press SCAN (◀◀ or ▶▶) repeatedly to select the required speed. DVD, DivX disc; X2, X4, X16 or X100 Video CD; X2, X4 or X8
- To exit SEARCH mode, press PLAY.
Note:
When using a DVD audio disc that includes pictures, this operation may be permitted in some picture segments.
Changing the Audio Channel VCD
Press AUDIO repeatedly during playback to hear a different audio channel (Stereo, Left, or Right).
Still Picture and Frame-by-Frame Playback
DVD-V DVD-A VCD DivX
- Press PAUSE/STEP on the remote control during playback. Advance the picture frame-by-frame by pressing PAUSE/STEP repeatedly.
- To exit still motion mode, press PLAY.
Note:
When using a DVD audio disc that includes pictures, this operation may be permitted in some picture segments.
Slow Motion DVD-V DVD-A VCD DivX
- Press PAUSE/STEP (Ⅲ) during playback.
The DVD player will now go into PAUSE mode.
- Use the SCAN (◀◀ or ▶▶) to select the required speed: ◀ 1/16, ◀ 1/8, ◀ 1/4, or ◀ 1/2 (backward), or ▶ 1/16, ▶ 1/8, ▶ 1/4, or ▶ 1/2 (forward).
With a DivX Disc or Video CD, the Slow speed changes: ▶ 1/16, ▶ 1/8, ▶ 1/4 or ▶ 1/2 (forward).
- To exit Slow Motion mode, press PLAY (▶).
Notes:
- Slow motion playback in reverse is not possible with Video CDs and DivX Discs.
- When using a DVD audio disc that includes pictures, this operation may be permitted in some picture segments.
Random VCD Karaoke DVD
- Press RANDOM during playback. The unit automatically begins random playback and RANDOM appears on the TV screen.
- Press RANDOM again to normal.
Tip:
By pressing SKIP ▶▶▶ I during random playback, the unit selects another title (track) and resumes random playback.
Note:
On a Video CD with PBC, You must set PBC to Off on the setup menu to use the random function (See "PBC" on page 15).
Repeat A-B DVD-V DVD-A VCD DivX
To repeat a sequence.
- Press A-B at your chosen starting point. "A*" appears briefly on the TV screen.
- Press A-B again at your chosen end point. "A B" appears briefly on the TV screen and the repeat sequence begins.
- Press A-B again to cancel.
Repeat DVD-V DVD-A VCD DivX
You can play a title/chapter/all/track/group on a disc. Press REPEAT during playback to select a desired repeat mode.
DVD Video Discs - Repeat Chapter/Title/Off
• Chapter: repeats the current chapter.
• Title: repeats the current title.
- Off: does not play repeatedly.
Video CDs, DivX discs - Repeat Track/All/Off
- Track: repeats the current track
- All : repeats all the tracks on a disc.
- Off: does not play repeatedly.
DVD Audio Discs - Repeat Track/Group/Off
- Track: repeats the current track.
- Group: repeats the current Group.
- Off: does not play repeatedly.
Notes:
- On a Video CD with PBC, you must set PBC to Off on the setup menu to use the repeat function (See "PBC" on page 15).
- If you press SKIP (▶▶1) once during Repeat Chapter (Track) playback, the repeat playback cancels.
3D Surround DVD-V VCD DivX
To produce a 3D surround effect that simulates multi-channel audio from two stereo speakers (instead of the five+ speakers normally required for multi-channel audio from a home theater system).
- Press DISPLAY during playback.
- Use ▲ or ▼ to select the sound option. The sound option will be highlighted.
- Use ◀ or ▶ to select "3D SUR". To turn off the 3D Surround effect, select "Normal".
Time Search DVD-V VCD DivX
To start playing at any chosen time on the disc:
- Press DISPLAY during playback. The time search box shows the elapsed playing time.
- Press ▲ / ▼ to select the time clock icon and “-:-:-:-” appears.
- Input the required start time in hours, minutes, and seconds from left to right. If you enter the wrong numbers, press CLEAR to remove the numbers you entered. Then input the correct numbers.
- Press ENTER to confirm. Playback starts from the selected time.
Zoom
DVD-V
DVD-A
VCD
DivX
Use zoom to enlarge the video image.
-
Press ZOOM during playback or still playback to activate the Zoom function. The square frame appears briefly in the right bottom of the picture.
-
Each press of the ZOOM button changes the TV screen in the sequence: 100% size → 400% size → 1600% size → screen fit mode → 100% size Screen fit mode:
You can change the way the image appears on the screen when you're playing a DVD movie. Press ▲▼ to select between Normal, Enhanced, and Maximum.
-
Use the ◀▶▲▼ buttons to move through the zoomed picture.
-
To resume normal playback, press CLEAR.
Notes:
- Zoom may not work on some DVDs.
- Screen fit mode is available for playing the DVD disc and movie file.
Marker Search
DVD-V
VCD
DivX
To enter a Marker
You can start playback from up to nine memorized points. To enter a marker, press MARKER at the desired point on the disc. The Marker icon appears on the TV screen briefly. Repeat to enter up to nine markers.
To Recall or Clear a Marked Scene
-
During disc playback, press SEARCH. The marker search menu appears on the screen.
-
Within 10 seconds, press ◀ / ▶ to select a marker number that you want to recall or clear.
-
Press ENTER and playback starts from the marked scene. Or, Press CLEAR and the marker number is erased from the list.
-
You can play any marker by inputting its number on the marker search menu.
Pause
DVD-V
DVD-A
VCD
DivX
-
Press PAUSE/STEP during playback.
-
To return to playback, press PLAY.
Special DVD Features
Checking the contents of DVD discs: Menus
DVDs may offer menus that allow you to access special features. To use the disc menu, press DVD MENU. Input the corresponding number or use the
◀▶▲▼ buttons to highlight your selection.
Then press ENTER.
Title Menu
DVD-V
DVD-A
-
Press TITLE. If the current title has a menu, the menu appears on the screen. Otherwise, the disc menu may appear.
-
The menu offers features such as camera angles, spoken language and subtitle options, and chapters for the title.
-
Press TITLE to exit.
Disc Menu
DVD-V
DVD-A
Press DVD MENU and the disc menu is displayed. Press DVD MENU again to exit.
Camera Angle
DVD-V
DVD-A
If the disc contains scenes recorded at different camera angles, you can change to a different camera angle during playback. Press ANGLE repeatedly during playback to select a desired angle. Note that the number of the current angle appears on the display.
Tip:
The angle indicator will blink on the TV screen during scenes recorded at different angles as an indication that angle switching is possible.
Changing the Audio Language
DVD-V
DVD-A
DivX
Press AUDIO repeatedly during playback to hear a different audio language or audio track.
Subtitles
DVD-V
DivX
Press SUBTITLE repeatedly during playback to see the different subtitle languages.
Note:
If there is no information or there is a code that can not read in the DivX file, "1" etc are displayed.
DVD Audio Discs
DVD Audio is a new disc format building on the success of DVD to provide high quality, uncompressed, multi-channel audio for a new experience in audio quality. A DVD Audio disc can be identified by the DVD audio logo on the disc jacket or on the disc itself.
DVD Audio can provide higher quality stereo than Audio CDs with a sampling rate of up to 192kHz (compared to 44.1kHz for CDs). DVD Audio digital sound can be delivered with up to 24 bits of data (compared to 16 bits for a standard CD).
A typical DVD Audio disc contains up to seven times the data capacity of a CD. This additional space is used for music, either Advanced Resolution multi-channel sound quality that is closer to the artist's master recording or for longer recordings. Many DVD Audio discs contain on-screen text, such as artist biographies, playlists, or lyrics. Some DVD Audio discs contain photo galleries or video clips.
Moving to another GROUP

Some DVD Audio discs divide content into different groups. Your player enables you to quickly access different groups during playback via the on-screen display.
- Press DISPLAY during playback on in stop mode.
- Press ▲▼ to select Group icon.
- Press ◀▶ or the numbered buttons (0-9) to select a group number.
Note:
Sometimes the author of the disc creates hidden content that can only be accessed by entering a password. If the lock icon appears on the TV screen, enter the password (sometimes you'll find it on the disc's jacket cover or on a web site). This password control isn't dictated by your DVD Player — it is a function of the disc.
Since the authoring of DVD Audio Discs varies, some of the on-screen display choices might not be available for the disc you're playing.
Viewing another PAGE

Since DVD Audio discs can hold a lot of content, there are various ways to see what's available on the disc.
- Press DISPLAY during playback.
- Press ▲▼ to select Page icon.
- Press ◀ to select a page number.
What appears on the screen will vary from disc to disc because the information available depends upon the way the disc was created.
Note:
Since the authoring of DVD Audio Discs varies, some of the on-screen display choices might not be available for the disc you're playing.
Playing an Memory Card
M/C
You can play Photo, Music, and MOVIE files in Memory Cards with this DVD player.
-
Insert a Memory Card until it fits into place.
-
Press MEMORY CARD on the front panel. The Memory Card slot choice menu appears on the TV screen.

Note:
If both slots are connected with Memory Card, use ◀ / ▶ to select the desired Memory Card slot.
- Press ENTER. The menu appears.

MUSIC Menu

PHOTO Menu

For details on each operation item, refer to relevant page.
Cards capable of displaying
Readable Cards
- Compact Flash Card (CFC)
- Micro Drive (MD)
- Secure Digital Card (SD)
• Multi Media Card (MMC)
- Memory Stick (MS)
• Memory Stick Pro (MS-Pro)
• eXtreme Digital picture Card xD)
- Compatible with: FAT 12, FAT 16, or FAT 32
- Only use the memory cards recommended.
Regarding Write Protect
For cards that have a write protect switch, if the switch is on it will not be possible to write or erase the contents of the card.
Notes:
- Keep the memory card out of reach of children. If swallowed, seek medical advice immediately.
• This player can not format a memory card.
- If you insert two memory cards simultaneously into the MS, MMC, SD, MS-Pro and xD memory cards compatible slot, files in the memory cards cannot be played.
- The reading time depends on file size or resolution.
- If a folder in your memory cards have more than 645 files, the whole files are not available to read.
Caution
Before you extract your memory cards, you should press the MEMORY CARD button to display the DVD menu screen. Otherwise you will lose your data in your memory card or the memory card can be damaged.
Playing an Audio CD or MP3/WMA Disc
The DVD player can play MP3/WMA formatted recordings on CD-ROM, CD-R, or CD-RW discs.
Audio CD
Once you insert an audio CD a menu appears on the TV screen. Press ▲ / ▼ to select a track then press PLAY or ENTER and playback starts.
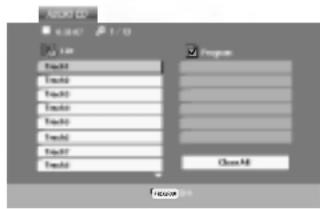
MP3 / WMA
- Press ▲ / ▼ to select a folder, and press ENTER to see the folder contents.
- Press ▲ / ▼ to select a track then press PLAY or ENTER. Playback starts.

ID3 TAG
- When playing a file containing information such as track titles, you can see the information by pressing DISPLAY.
[ Title, Artist, Album, Year, Comment ] - If there is no information, "No ID3 TAG" appear on the display.
Tips:
- If you are in a file list on the MUSIC menu and want to return to the Folder list, use the ▲ / ▼ to highlight 📄. and press ENTER.
- Press DVD MENU to move to the next page.
- On a CD with MP3/WMA and JPEG you can switch MP3/WMA and JPEG. Press TITLE and MUSIC or PHOTO word on top of the menu is highlighted.
MP3 / WMA disc compatibility with this player is limited as follows:
- Sampling frequency: within 8 - 48 kHz (MP3), within 32 - 48kHz (WMA)
- Bit rate: within 8 - 320kbps (MP3), 32 - 192kbps (WMA)
- The player cannot read an MP3/WMA file that has a file extension other than “.mp3” / “.wma”.
• CD-R physical format should be ISO 9660 - If you record MP3 / WMA files using software that cannot create a file system (eg. Direct-CD) it is impossible to playback MP3 / WMA files. We recommend that you use Easy-CD Creator, which creates an ISO 9660 file system.
- File names should have a maximum of 8 letters and must incorporate an .mp3 or .wma extension.
- They should not contain special letters such as / ? * : “ < > | etc.
- The total number of files on the disc should be less than 650.
This DVD Player requires discs and recordings to meet certain technical standards in order to achieve optimal playback quality. Pre-recorded DVDs are automatically set to these standards. There are many different types of recordable disc formats (including CD-R containing MP3 or WMA files) and these require certain pre-existing conditions (see above) to ensure compatible playback.
Customers should note that permission is required in order to download MP3 / WMA files and music from the Internet. Our company has no right to grant such permission. Permission should always be sought from the copyright owner.
Audio CD and MP3 / WMA Disc Features
Pause CD MP3 WMA M/C
-
Press PAUSE/STEP during playback.
-
To return to playback, press PLAY, ENTER or press PAUSE/STEP again.
Moving to another Track
CD MP3 WMA M/C
-
Press SKIP (I◄◄ or ►►I) briefly during playback to go to the next track or to return to the beginning of the current track.
-
Press SKIP ◀◀ twice briefly to go back to the previous track.
-
You can play any track by inputting its number. (AUDIO CD only)
Repeat Track/All/Off
CD MP3 WMA M/C
You can play a track/all on a disc.
-
Press REPEAT when playing a disc. The repeat icon appears.
-
Press REPEAT to select a desired repeat mode.
-
Track: repeats the current track
- All: repeats all the tracks on a disc.
- Off(No display): does not play repeatedly.
Note:
If you press SKIP (▶▶▶) once during Repeat Track playback, the repeat playback cancels.
Search CD MP3 WMA M/C
- Press SCAN (◀◀ or ▶▶) during playback.
- Press SCAN (◀◀ or ▶▶) repeatedly to select the required speed: X2, X4, X8 backward or forward.
- To exit SEARCH mode, press PLAY.
Random CD MP3 WMA M/C
- Press RANDOM during playback. Random Playback begins immediately and RANDOM appears on the menu screen.
- To return to normal playback, press RANDOM repeatedly until RANDOM disappears from the menu screen.
Tip:
By pressing SKIP ▶▶▶ during random playback, the unit selects another track and resumes random playback.
Repeat A-B CD
- To repeat a sequence during disc playback press A-B at your chosen starting point. The Repeat icon and "A" appear on the menu screen.
- Press A-B again at your chosen end point. The Repeat icon and "A-B" appear on the menu screen, and the sequence begins to play repeatedly.
- To exit the sequence and return to normal play, press A-B again. The Repeat icon disappears from the menu screen.
3D Surround CD
To produce a 3D surround effect that simulates multi-channel audio from two stereo speakers (instead of the five+ speakers normally required for multi-channel audio from a home theater system).
- Press AUDIO during playback. "3D SUR." appears on the menu screen.
- To return to normal playback, press AUDIO repeatedly until "3D SUR." disappears from the menu screen.
Programmed Playback
The program function enables you to store your favorite tracks from any disc in the player memory. A program can contain 30 tracks.
- Insert a disc.
Audio CD or MP3/WMA Discs:
AUDIO CD or MUSIC menu appears.
- Press PROGRAM.
The Ⓐ mark will appear to the right of the word "Program" on the right side of the menu screen.
Note:
Press PROGRAM again, then the ● mark will disappear to exit the Program Edit mode.
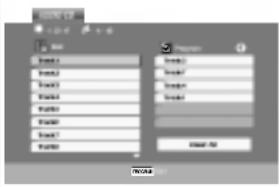
AUDIO CD Menu
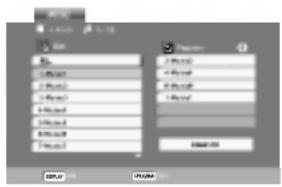
Video CD: Press PROGRAM while playback is stopped. The program menu appears. Press PROGRAM again to exit the menu.
Note:
On a Video CD with PBC, you must set PBC to Off on the setup menu to use the programmed playback (See "PBC" on page 15).

- Select a track on the "List", then press ENTER to place the selected track on the "Program" list. Repeat to place additional tracks on the list.
-
Press ▶. Select the track you want to start playing on the "Program" list.
-
Press PLAY or ENTER to start. Playback begins in the order in which you programmed the tracks. Playback stops after all of the tracks on the "Program" list have played once.
- To resume normal playback from programmed playback, select a track of AUDIO CD (or MUSIC) list and then press PLAY.
Repeat Programmed Tracks
- Press REPEAT when playing a disc. The repeat icon appears.
-
Press REPEAT to select a desired repeat mode.
-
Track: repeats the current track
- All: repeats all the tracks on programmed list.
- Off(No display): does not play repeatedly.
Note:
If you press ▶▶ once during Repeat Track playback, the repeat playback cancels.
Erasing a Track from "Program" List
- Use ▲▼▶ to select the track that you wish to erase from the Program list.
- Press CLEAR. Repeat to erase additional tracks on the list.
Erasing the Complete Program List
- Press ▶ to move to the "Program" list.
- Use ▲ / ▼ to select "Clear All", then press ENTER.
Note:
The programs are also cleared when the disc is removed.
Viewing a JPEG Disc
Using this DVD Player you can view discs with JPEG files.
- Insert a disc. The PHOTO menu appears on the TV screen.
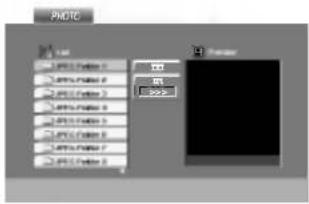
- Press ▲ / ▼ to select a folder, and press ENTER. A list of files in the folder appears. If you are in a file list and want to return to the previous Folder list, use the ▲ / ▼ buttons on the remote to highlight 🔒 and press ENTER.
- If you want to view a particular file, press ▲ / ▼ to highlight a file and press ENTER or PLAY. Viewing the file proceeding starts. While viewing a file, you can press STOP to move to the previous menu (PHOTO menu).
Tips:
- Press DVD MENU to move to the next page.
- There are three Slide Speed options ▶ : >>> (Fast), >> (Normal) and > (Slow). Use ▲▼◀▶ to highlight the Speed. Then, use ◀ / ▶ to select the option you want to use then press ENTER.
- On a disc with MP3/WMA and JPEG you can switch MP3/WMA and JPEG. Press TITLE and MUSIC or PHOTO word on top of the menu is highlighted.
- Press RETURN, information of file is hidden.
Slide Show
JPEG
M/C
Use ▲▼◀▶ to highlight the ■ (Slide Show) then press ENTER.
Still Picture
JPEG
M/C
- Press PAUSE/STEP during slide show. The player will now go into PAUSE mode.
- To return to the slide show, press PLAY or press PAUSE/STEP again.
Moving to another File
JPEG
M/C
Press SKIP (◀◀◀ or ▶▶▶) or cursor (◀ or ▶) once while viewing a picture to advance to the next or previous file.
Zoom
JPEG
M'C
Use Zoom to enlarge the photo image. (see page 19)
To rotate picture
Press ▲ / ▼ during showing a picture to rotate the picture clockwise or counter clockwise.
To listen to MP3/WMA music watching picture
JPEG
You can display files while listening to MP3/WMA music files recorded on the same disc.
- Insert the disc containing the two types of file in the player.
- Press TITLE to display PHOTO menu.
-
Press ▲ / ▼ to select a photo file.
-
Use ▶ to select 📄 icon then press ENTER. Playback starts. The playback will continue until STOP is pressed.
Tip:
To listen to only the desired music watching picture, programmed the desired tracks from the "MUSIC" menu and then proceed as above.
Note:
The files on a memory card are not available for this function.
JPEG disc compatibility with this player is limited as follows:
- Depending upon the size and number of JPEG files, it could take a long time for the DVD player to read the disc's contents. If you don't see an on-screen display after several minutes, some of the files may be too large — reduce the resolution of the JPEG files to less than 2M pixels as 2760 x 2048 pixels and burn another disc.
- The total number of files and folders on the disc should be less than 650.
- Some discs may be incompatible due to a different recording format or the condition of disc.
- Ensure that all the selected files have the ".jpg" extensions when copying into the CD layout.
- If the files have ".jpe" or ".jpeg" extensions, please rename them as ".jpg" file.
- File names without ".jpg" extension will not be able to be read by this DVD Player. Even though the files are shown as JPEG image files in Windows Explorer.
Maintenance and Service
Refer to the information in this chapter before contacting a service technician.
Handling the Unit
When shipping the unit
Please save the original shipping carton and packing materials. If you need to ship the unit, for maximum protection, re-pack the unit as it was originally packed at the factory.
Keeping the exterior surfaces clean
- Do not use volatile liquids such as insecticide spray near the unit.
- Do not leave rubber or plastic products in contact with the unit for a long period of time. since they leave marks on the surface.
Cleaning the unit
To clean the player, use a soft, dry cloth. If the surfaces are extremely dirty, use a soft cloth lightly moistened with a mild detergent solution.
Do not use strong solvents such as alcohol, benzine, or thinner, as these might damage the surface of the unit.
Maintaining the Unit
The DVD player is a high-tech, precision device. If the optical pick-up lens and disc drive parts are dirty or worn, the picture quality could be diminished.
Depending on the operating environment, regular inspection and maintenance are recommended after every 1,000 hours of use.
For details, please contact your nearest authorized service center.
Playing a DivX Movie Disc
Using this DVD Player you can play DivX disc.
- Insert a disc. The MOVIE menu appears on the TV screen.

-
Press ▲ / ▼ to select a folder, and press ENTER. A list of files in the folder appears. If you are in a file list and want to return to the Folder list, use the ▲ / ▼ buttons on the remote to highlight 🔒 and press ENTER.
-
If you want to view a particular file, press ▲ / ▼ to highlight a file and press ENTER or PLAY.
-
Press STOP to exit.
Tips:
- Press DVD MENU to move to the next page.
- On a CD with MP3/WMA, JPEG and MOVIE file, you can switch MUSIC, PHOTO and MOVIE menu. Press TITLE and MUSIC, PHOTO and MOVIE word on top of the menu is highlighted.
- The disc subtitle may not be displayed properly, if a DivX subtitle is downloaded through the internet.
- If the Disc Subtitle setup menu does not have the DivX subtitle language you are going to play, the subtitle may not be displayed properly.
Note:
When the bitrate of video signal on a DivX file stored in a memory card is over 2Mbps, it can be displayed like a still image.
DivX disc compatibility with this player is limited as follows:
• Available resolution size of the DivX file is under 720x576 (W x H) pixel.
- The file name of the DivX subtitle is limited to characters.
- If there is impossible code to express in the DivX file, it may be displayed as "_" mark on the display.
- If the number of the screen frame is over 30 frames per second, this unit may not operate normally.
- If the video and audio structure of recorded file is not interleaved, either video or audio is outputted.
- If the file is recorded with GMC, the unit supports only 1-point of the record level. * GMC? GMC is the acronym for Global Motion Compensation. It is an encoding tool specified in MPEG4 standard. Some MPEG4 encoders, like DivX or Xvid, have this option. There are different levels of GMC encoding, usually called 1-point, 2-point, or 3-point GMC.
playable DivX file
● ".avi ", ".mpg ", ".mpeg "
playable Subtitle format
SubRip(*.srt/*.txt)
SAMI(*.smi)
SubStation Alpha(*.ssa/*.txt)
MicroDVD(*.sub/*.txt)
SubViewer 2.0(*.sub/*.txt)
TMPlayer(*.txt)
Dvd Subtitle System(*.txt)
VobSub (*.sub) → Sub/idx, stream based format.
playable Codec format
● "DIVX3.xx ", "DIVX4.xx ", "DIVX5.xx ", "XVID ", "MP43 ", "3IVX".
playable Audio format
● "Dolby Digital", "DTS", "PCM", "MP3", "WMA".
- Sampling frequency: within 8 - 48 kHz (MP3), within 32 - 48kHz (WMA)
- Bit rate: within 8 - 320kbps (MP3), 32 - 192kbps (WMA)
Notice for displaying the DivX subtitle
Please refer to following notice when the DivX subtitle does not display properly.
- Find a suitable Disc Subtitle language for the DivX subtitle on the figure below.
- Press SETUP. The Setup menu appears. SETUP MENU (Initial setting) ➕ LANGUAGE ➕ Disc Subtitle then select the language you have found. ex.) Select Hungarian on the Disc Subtitle option for the Hungarian.
Tip:
If the subtitle still does not display properly after the steps 1-2 proceeded, press and hold SUBTITLE about 3 seconds during playback.
The new language code number selected is displayed on upper-right of the TV screen.
Language code change sequence for Hungarian, Czech and Polish:
LANGUAGE 1 → LANGUAGE 2
Language code change sequence for Russian:
LANGUAGE 1 → LANGUAGE 2 → LANGUAGE 3
| Disc Subtitle | Language Code | Available DivX Subtitle |
| Russian | LANGUAGE 1/LANGUAGE 2/LANGUAGE 3 | Bulgarian, Byelorussian, Macedonian, Russian, Serbian(Cyrillic), Ukrainian |
| Hungarian | LANGUAGE 1/LANGUAGE 2 | Czech, Hungarian, Polish, Romanian, Croatian, Slovak, Slovene, Serbian(Latin) |
| Czech | ||
| Polish | ||
| English | French, Spanish, Catalan, Galician, Basque, Portuguese, Italian, Albanian, Afrikaans, Dutch, German, Danish, Swedish, Norwegian, Finnish, Faroese, Icelandic, Irish, Scottish, English | |
| German | ||
| Swedish | ||
| French | ||
| Others |
Additional Features
Last Scene Memory
DVD-V DVD-A CD VCD1.1
This player memorizes last scene from the last disc that is viewed. The last scene remains in memory even if you remove the disc from the player or switch off the player. If you load a disc that has the scene memorized, the scene is automatically recalled.
Note:
This player does not memorize the scene of a disc if you switch off the player before commencing to play the disc.
Screen Saver
The screen saver appears when you leave the DVD player in Stop mode for about five minutes. If the Screen Saver is displayed for five minutes, the DVD Player automatically turns itself off.
Video Mode Setting
- With certain discs, the playback picture may be flickering or Dot Crawl is shown on straight lines. That means Vertical interpolation or De-interlace is not perfectly matched with the disc. In this case, the picture quality may be improved by changing the video mode.
- To change the video mode, press and hold DISPLAY about 3 seconds during disc playback. The new video mode number selected is displayed on the TV screen. Check whether the video quality has improved. If not, repeat the above procedure until picture quality is improved.
• Video mode change sequence: MODE1 → MODE2 → MODE3 → MODE1 - If you turn off the power, the video mode will be back to initial state (MODE1).
Detailed Descriptions for Video Modes
MODE1: The source material of the DVD video (film material or video material) is determined from disc information.
MODE2: Suitable for playing film based content or video based material recorded by the progressive scan method.
MODE3: Suitable for playing video based content with comparatively little motion.
Note:
The video mode setting only works when the Progressive Scan mode is set to "On" in the Setup menu.
Controlling other TVs with the remote control
You can control the sound level, input source, and power switch of your LG TV with the supplied remote control.
You can control the sound level, input source, and power switch of non-LG TVs as well. If your TV is listed in the table below, set the appropriate manufacturer code.
- While holding down TV POWER button, press the number buttons to select the manufacturer code for your TV (see the table below).
- Release TV POWER button.
Code numbers of controllable TVs
If more than one code number is listed, try entering them one at a time until you find the one that works with your TV.
| Manufacturer | Code Number |
| LG / GoldStar | 1 (Default), 2 |
| Zenith | 1, 3, 4 |
| Samsung | 6, 7 |
| Sony | 8, 9 |
| Hitachi | 4 |
Notes:
- Depending on your TV, some or all buttons may not function on the TV, even after entering the correct manufacturer code.
- If you enter a new code number, the code number previously entered will be erased.
- When you replace the batteries of the remote, the code number you have set may be reset to the default setting. Set the appropriate code number again
System select
You must select the appropriate system mode for your TV system. If NO DISC appears in the display window, press and hold PAUSE/STEP for more than 5 seconds to select a system (PAL, NTSC or Auto)
Reference
Language Codes
Use this list to input your desired language for the following initial settings: Disc Audio, Disc Subtitle, Disc Menu.
| Language | Code | Language | Code | Language | Code | Language | Code |
| Abkhazian | 6566 | Fiji | 7074 | Lingala | 7678 | Singhalese | 8373 |
| Afar | 6565 | Finnish | 7073 | Lithuanian | 7684 | Slovak | 8375 |
| Afrikaans | 6570 | French | 7082 | Macedonian | 7775 | Slovenian | 8376 |
| Albanian | 8381 | Frisian | 7089 | Malagasy | 7771 | Somali | 8379 |
| Ameharic | 6577 | Galician | 7176 | Malay | 7783 | Spanish | 6983 |
| Arabic | 6582 | Georgian | 7565 | Malayalam | 7776 | Sudanese | 8385 |
| Armenian | 7289 | German | 6869 | Maltese | 7784 | Swahili | 8387 |
| Assamese | 6583 | Greek | 6976 | Maori | 7773 | Swedish | 8386 |
| Aymara | 6588 | Greenlandic | 7576 | Marathi | 7782 | Tagalog | 8476 |
| Azerbaijani | 6590 | Guarani | 7178 | Moldavian | 7779 | Tajik | 8471 |
| Bashkir | 6665 | Gujarati | 7185 | Mongolian | 7778 | Tamil | 8465 |
| Basque | 6985 | Hausa | 7265 | Nauru | 7865 | Tatar | 8484 |
| Bengali; Bangla | 6678 | Hebrew | 7387 | Nepali | 7869 | Telugu | 8469 |
| Bhutani | 6890 | Hindi | 7273 | Norwegian | 7879 | Thai | 8472 |
| Bihari | 6672 | Hungarian | 7285 | Oriya | 7982 | Tibetan | 6679 |
| Breton | 6682 | Icelandic | 7383 | Panjabi | 8065 | Tigrinya | 8473 |
| Bulgarian | 6671 | Indonesian | 7378 | Pashto, Pushto | 8083 | Tonga | 8479 |
| Burmese | 7789 | Interlingua | 7365 | Persian | 7065 | Turkish | 8482 |
| Byelorussian | 6669 | Irish | 7165 | Polish | 8076 | Turkmen | 8475 |
| Cambodian | 7577 | Italian | 7384 | Portuguese | 8084 | Twi | 8487 |
| Catalan | 6765 | Japanese | 7465 | Quechua | 8185 | Ukrainian | 8575 |
| Chinese | 9072 | Javanese | 7487 | Rhaeto-Romance | 8277 | Urdu | 8582 |
| Corsican | 6779 | Kannada | 7578 | Rumanian | 8279 | Uzbek | 8590 |
| Croatian | 7282 | Kashmiri | 7583 | Russian | 8285 | Vietnamese | 8673 |
| Czech | 6783 | Kazakh | 7575 | Samoan | 8377 | Volapük | 8679 |
| Danish | 6865 | Kirghiz | 7589 | Sanskrit | 8365 | Welsh | 6789 |
| Dutch | 7876 | Korean | 7579 | Scots Gaelic | 7168 | Wolof | 8779 |
| English | 6978 | Kurdish | 7585 | Serbian | 8382 | Xhosa | 8872 |
| Esperanto | 6979 | Laothian | 7679 | Serbo-Croatian | 8372 | Yiddish | 7473 |
| Estonian | 6984 | Latin | 7665 | Shona | 8378 | Yoruba | 8979 |
| Faroese | 7079 | Latvian, Lettish | 7686 | Sindhi | 8368 | Zulu | 9085 |
Area Codes
Choose an area code from this list.
| Area | Code | Area | Code | Area | Code | Area | Code |
| Afghanistan | AF | Ethiopia | ET | Malaysia | MY | Saudi Arabia | SA |
| Argentina | AR | Fiji | FJ | Maldives | MV | Senegal | SN |
| Australia | AU | Finland | FI | Mexico | MX | Singapore | SG |
| Austria | AT | France | FR | Monaco | MC | Slovak Republic | SK |
| Belgium | BE | Germany | DE | Mongolia | MN | Slovenia | SI |
| Bhutan | BT | Great Britain | GB | Morocco | MA | South Africa | ZA |
| Bolivia | BO | Greece | GR | Nepal | NP | South Korea | KR |
| Brazil | BR | Greenland | GL | Netherlands | NL | Spain | ES |
| Cambodia | KH | Islands | HM | Netherlands Antilles | AN | Sri Lanka | LK |
| Canada | CA | Hong Kong | HK | New Zealand | NZ | Sweden | SE |
| Chile | CL | Hungary | HU | Nigeria | NG | Switzerland | CH |
| China | CN | India | IN | Norway | NO | Taiwan | TW |
| Colombia | CO | Indonesia | ID | Oman | OM | Thailand | TH |
| Congo | CG | Israel | IL | Pakistan | PK | Turkey | TR |
| Costa Rica | CR | Italy | IT | Panama | PA | Uganda | UG |
| Croatia | HR | Jamaica | JM | Paraguay | PY | Ukraine | UA |
| Czech Republic | CZ | Japan | JP | Philippines | PH | United States | US |
| Denmark | DK | Kenya | KE | Poland | PL | Uruguay | UY |
| Ecuador | EC | Kuwait | KW | Portugal | PT | Uzbekistan | UZ |
| Egypt | EG | Libya | LY | Romania | RO | Vietnam | VN |
| El Salvador | SV | Luxembourg | LU | Russian Federation | RU | Zimbabwe | ZW |
Troubleshooting
| Symptom | Possible Cause | Correction |
| No power. | The power cord is disconnected. | Plug the power cord into the wall outlet securely. |
| The power is on, but the DVD player does not work. | No disc is inserted. | Insert a disc. (Check that the DVD or audio CD indicator in the display window is lit.) |
| No picture. | The TV is not set to receive DVD signal output. | Select the appropriate video input mode on the TV. |
| The video cable is not connected securely. | Connect the video cable securely. | |
| No sound. | The equipment connected with the audio cable is not set to receive DVD signal output. | Select the correct input mode of the audio receiver so you can listen to the sound from the DVD player. |
| The power of the equipment connected with the audio cable is turned off. | Turn on the equipment connected with the audio cable. | |
| The AUDIO options are set to the wrong position. | Set the Digital Audio Output to the correct position, then turn on the DVD player again by pressing POWER. | |
| The DVD player does not start playback. | An unplayable disc is inserted. | Insert a playable disc. (Check the disc type, color system, and regional code.) |
| The rating level is set. | Cancel the rating function or change the rating level. | |
| The remote control does not work properly. | The remote control is not pointed at the remote sensor on the DVD player. | Point the remote control at the remote sensor of the DVD player. |
| The remote control is too far from the DVD player. | Operate the remote control closer to the DVD player. |
Specifications
General
Power requirements: AC 110-240 V, 50/60 Hz
Power consumption: 10W
Dimensions (Approx.):
430 x 35 x 242 mm (W x H x D) without foot
Weight (Approx.): 2.2 kg
Operating temperature:
5 °C to 35 °C (41 °F to 95 °F)
Operating humidity: 5 % to 90 %
Outputs
VIDEO OUT:
1.0 V (p-p), 75 Ω, sync negative, RCA jack x 1
/ SCART (TO TV)
S-VIDEO OUT:
(Y) 1.0 V (p-p), 75 Ω, negative sync, Mini DIN 4-pin x 1
(C) 0.3 V (p-p) 75 Ω
COMPONENT VIDEO OUT:
(Y) 1.0 V (p-p), 75 Ω, negative sync, RCA jack x 1
(Pb)/(Pr) 0.7 V (p-p), 75 Ω, RCA jack x 2
AUDIO OUT:
2.0 Vrms (1 KHz, 0 dB), 600 Ω, RCA jack (L, R) x 1
/ SCART (TO TV)
Note: Design and specifications are subject to change prior notice.
DIGITAL OUT (COAXIAL):
0.5 V (p-p), 75 Ω, RCA jack x 1
DIGITAL OUT (OPTICAL):
3 V (p-p), 75 Ω, Optical onnector x 1
System
Laser:
Semiconductor laser, wavelength 650 nm
Signal system: PAL / NTSC
Frequency response:
DVD (PCM 96 kHz): 8 Hz to 44 kHz
DVD (PCM 48 kHz): 8 Hz to 22 kHz
CD: 8 Hz to 20 kHz
Signal-to-noise ratio:
More than 100 dB (ANALOG OUT connectors only)
Harmonic distortion: Less than 0.008%
Dynamic range:
More than 95 dB (DVD/CD)
Accessories:
Video cable (1), Audio cable (1), Remote control (1),
Batteries (2)

LG
DVD LEJÁTSZÓ KÉZIKÖNYV
KEZELÉSI UTASÍTÁS
MODELL : DF9900M








CLASS 1 LASER PRODUCT
KLASSE 1 LASER PRODUKT
LUOKAN 1 LASER LAITE
KCLASS 1 LASER APPAR
CLASSE 1 PRODUIT LASER

• Progressive Scan .....14
• TV Output Select 14
Audió 14
• Dolby Digital / DTS / MPEG .....14
• Sample Freq. 14
flowchart
graph TD
    A["OPTICAL"] -->|O| B["COAL"]
    C["DIPTAL INPUT"] -->|X| D["Coaxial"]
    E["AUDIO INPUT"] -->|A| F["PROGENT R&D OUT / PROCESSED SOD"]
    G["OUTPUT"] --> H["B-1200 OUT"]
    I["COMPONENT R&D OUT / PROCESSED SOD"] --> J["OUTPUT"]
    K["OUTPUT"] --> L["PROGENT R&D OUT / PROCESSED SOD"]
Sample Freq. DVD-V DVD-A
PBC VCD
- Secure Digital Card (SD)
• Multi Media Card (MMC)
- Memory Stick (MS)
• Memory Stick Pro (MS-Pro)
• eXtreme Digital picture Card (xD)
- Kompatibilitásuk: FAT 12, FAT 16, FAT 32
MUSIC menü
Video-CD menü
DVD (PCM 48 kHz): 8 Hz - 22 kHz
CD: 8 Hz - 20 kHz
Jel-zaj arány:
Playing an Memory Card .....21
Nabídka PHOTO

Nabídka MOVIE
- Secure Digital Card (SD)
• Multi Media Card (MMC)
- Memory Stick (MS)
• Memory Stick Pro (MS-Pro)
- obrázková karta eXtreme Digital (xD)
- kompatibilita: FAT 12, FAT 16 nebo FAT 32
ID3 TAG
Menu AUDIO CD

Menu MUSIC
- Progressive Scan ....14
• TV Output Select .....14
AUDIO 14
• Dolby Digital / DTS / MPEG .....14
• Sample Freq. (Frekvencija uzorka) .....14
• Dynamic Range Control (Dinamička kontrola opsega) (DRC) .....15
• Vocal 15
OTHERS 15
• PBC 15
• Auto Play .....15
• B.L.E. (Black Level Expansion) (širenje crne razine) .....15
• DivX(R) VOD .....15
LOCK (Roditeljska kontrola) .....16
• Rating 16
- Password (sigurnosni kod) .....16
Usporena snimka (Slow Motion) .....18
Odabir nasumce (Random) .....18
Ponavljanje A-B 18
Ponavljanje ....18
Opcija 3D Surround .....18
Traženje vremena (Time search) .....18
Zoom....19
Ne koristite jake otopine poput alkohola, benzina, razrjeđivača, reklamiranih sredstava za čišćenje ili anti-statični spray namijenjen starim pločama od vinila.
Vrste diskova za puštanje
 | DVD(8 cm / 12 cm disk) |
 | DVD audio diskovi(8 cm / 12 cm disk) |
 | Video CD (VCD)(8 cm / 12 cm disk) |
 | Audio CD(8 cm / 12 cm disk) |
Uz to, na ovom uređaju možete puštati Memorijska kartica, DivX datoteke, DVD-R, DVD+R, DVD-RW, DVD+RW, SVCD i CD-R / CD-RW koji sadrži audio naslove, MP3 datoteke WMA, i/ili JPEG datoteke.
Napomene:
- Ovisno o uvjetima opreme za nasnimavanje ili o samom CD-R/RW (ili DVD-R, DVD+R, DVD-RW, DVD+RW) disku, neke CD-R/RW (ili DVD-R, DVD+R, DVD-RW, DVD+RW) diskove nećete moći puštati na ovom uredaju.
- Ni na jednu stranu diska (označena strana ili nasnimavana strana) ne naljepljujte nikakve naljepnice.
- Ne upotrebljavajte CD-e nepravilnih oblika (na primjer, u obliku srca ili osmerokuta). To bi moglo rezultirati kvarovima uređaja.
Napomene o DVD-ima i Video CD-ima
Menu Language
Izaberite jezik za izbornik podešavanja (Setup) i display na ekranu.
Disc Audio / Subtitle / Menu DVD-V DVD-A
Izaberite željeni jezik za audio snimak (disk audio), titl i disk izbornik.
Original: Odnosi se na originalni jezik na kojem je disk snimljen.
Other: Za izbor drugog jezika pritisnite brojčane tipke a zatim ENTER za unos 4-znamenkastog broja u skladu sa popisom jezičnih kodova u poglavlju sa referencama. Ako unesete pogrešni jezični kod pritisnite CLEAR (Brisanje).
DISPLAY
TV Aspect DVD-V DVD-A
4:3: Izaberite kada je priključen standardni 4:3 TV.
16:9: Izaberite kada je priključen široki 16:9 TV.
Display Mode DVD-V DVD-A
-
Odaberite opciju "On" pomoću tipaka ▲ / ▼.
-
Pritisnite tipku ENTER za potvrdu odabira. Pojavit će se izbornik za potvrdu.
Napomene:
Ako vaš TV ne prihvaća format progresivnog scan-iranja, slika će biti puna smetnji ukoliko na DVD playeru postavite opciju Progressive Scan.
-
Kad se na Vašem ekranu pojavi izbornik za potvrdu, opcija za poništavanje Cancel bit će označena kao osnovna. Pritisnite tipke ◀ / ▶ za označavanje opcije ulaska Enter.
-
Pritisnite tipku ENTER čime ćete player postaviti u modus Progressive scan.
Oprez:
Jednom kad se unesu postavke za izlaz opcije progressive scan, slika će se prikazivati samo na TV ili monitoru kompatibilnom s opcijom progressive scan. Ako opciju Progressive Scan greškom uključite na poziciju On, morate resetirati uredaj. Najprije izvadite disk iz DVD Player-a. Zatim, pritisnite tipku STOP ( ■ ) i držite je oko pet sekundi prije nego je pustite. Video izlaz će biti vraćen na standardne postavke, a slika će ponovno biti vidljiva na konvencionalnom analognom TV ili monitoru.
TV Output Select
Dolby Digital / DTS / MPEG DVD-V DVD-A DivX
Bitstream: Opciju "Bitstream" odaberite kada ste DIGITALNI OUT (Izlazni) priključak DVD Player-a spojili na pojačalo ili drugu opremu s Dolby Digital, DTS ili MPEG dekoderom.
PCM: Ovu opciju odaberite kada ste spojeni na 2-kanalno digitalno stereo pojačalo. DVD-i kodirani u Dolby Digital-u ili MPEG-u će se automatski miksati u dvo-kanalni PCM audio.
PBC VCD
Opciju kontrole puštanja (Playback Control -PBC) postavite na ON ili OFF.
B.L.E. (Black Level Expansion) (širenje crne razine)
Služi za izbor crne razine puštanih slika. Podesite svoje sklonosti i mogućnosti ekrana.
On: Širi sivu razinu. (Odsjecca 0 IRE)
Off: Standardna siva razina. (Odsjecca 7.5 IRE)
Napomena:
B.L.E. funkcija radi samo s NTSC sistemom.
DivX(R) VOD DivX
Registracijski kod DivX DRM (Digitalno upravljanje (Digital Rights Management)) možete prikazati samo za svoj uredaj.

Registracijski kod koristi se za servisnog agenta VOD (Video na zahtjev (Video-On-Demand)). Možete kupiti ili iznajmiti datoteku s kodiranim filmom.
Napomene:
Rating DVD-V
Usporena snimka (Slow Motion)
DVD-V DVD-A VCD DivX
- Pritisnite tipku PAUSE/STEP (Ⅲ) tijekom puštanja. DVD Player će ući u modus zaustavljanja (PAUSE).
- Pritisnite tipku SCAN (◀◀ ili ▶▶) za odabiranje potrebne brzine: ◀ 1/16, ◀ 1/8, ◀ 1/4, ili ◀ 1/2 (unazad), ili ▶ 1/16, ▶ 1/8, ▶ 1/4, ili ▶ 1/2 (unaprijed).
Kod DivX Diska i Video CD-a, mijenja se brzina usporenog (Slow) prikazivanja: ▶ 1/16, ▶ 1/8, 1/4 ili ▶ 1/2 (unaprijed). - Za izlaz iz modusa usporene snimke, pritisnite tipku PLAY (▶).
Napomene:
- Usporeno prikazivanje unazad (Slow motion) nije moguće kod Video CD-a i DivX Diskova.
- Prilikom korištenja DVD audio diska koji sadrži slike, ova operacije može biti dopuštena samo za neke segmente slika.
Odabir nasumce (Random) VCD Karaoke DVD
Izbornik PHOTO
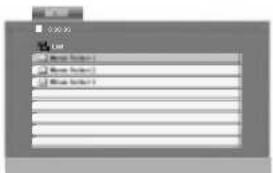
Izbornik MOVIE
- Da bi zatvorili izbornik, pritisnite MEMORY CARD ili RETURN.
Za detalje u vezi svake pojedine funkcije pogledajte odgovarajuću stranicu.
Izbornik za AUDIO CD

Izbornik za MUSIC
Video CD: Dok je reprodukcija zaustavljena, pritisnite PROGRAM. Pojavljuje se izbornik programa. Da bi zatvorili izbornik, ponovno pritisnite PROGRAM.
Napomena:
Na Video CD-u s PBC-om, da biste upotrebljavali programirano puštanja morate, u izborniku za podešavanja (setup), PBC postaviti na Off (Isključeno). (Vidi "PBC" na strani 15).
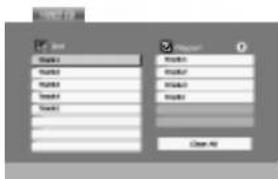
DVD (PCM 96 kHz): 8 Hz do 44 kHz DVD (PCM 48 kHz): 8 Hz do 22 kHz CD: 8 Hz do 20 kHz
Omjer signal/šum:
Više od 100 dB (samo ANALOG OUT konektori)
- Progressive Scan ....14
• TV Output Select .....14
AUDIO 14
• Dolby Digital /DTS /MPEG .....14
• Sample Freq. (probna frekvencija) (frekvencija) .14
- Kontrola dinamičkog opsega (DRC) .....15
• Vocal .....15
OTHERS 15
• PBC 15
• Auto Play .....15
• B.L.E. (Proširenje crnog nivoa) .....15
• DivX(R) VOD .....15
LOCK (roditeljska kontrola) .....16
• Rating 16
- Lozinka (sigurnosni kod) .....16
• Area code (Kod oblasti) .....16
Upotreba ....17
Emitovanje DVD ili Video CD-a .....17
Podešavanje rada .....17
Opšte karakteristike .....17
Prelazak na drugi NASLOV/GROUP .....17
Prelazak na drugo POGLAVLJE/TRAKU .....17
Traženje .....17
Menjanje audio kanala .....17
Zamrznuta slika i kadar-po-kadar plejbek .....18
Usporeno emitovanje ....18
Ne koristite jake rastvore kao što su alkohol, benzin, razredivač, sredstva za čišćenje dostupna u prodavnicama, ili anti-statik sprejeve namenjene starim vinilnim gramofonskim pločama.
Vrste diskova za emitovanje
 | DVD(8 cm / 12 cm disk) |
 | DVD audio diskovi(8 cm / 12 cm disk) |
 | Video CD (VCD)(8 cm / 12 cm disk) |
 | Audio CD(8 cm / 12 cm disk) |
Na ovom plejeru možete još emitovati Memorijska kartica, DivX fajlove, DVD – R, DVD +R, DVD – RW, DVD + RW, SVCD i CD-R / CD-RW koji sadrže audio naslove, MP3, WMA, i/ili JPEG fajlove.
Napomene:
- U zavisnosti od stanja opreme za snimanje ili samog CD-R/RW (ili DVD-R, DVD+R, DVD-RW, DVD+RW) diska, neki CD-R/RW (ili DVD-R, DVD+R, DVD-RW, DVD+RW) diskovi ne mogu se emitovati na ovom aparatu.
- Ne lepite nikakve etikete ni na jednu stranu diska (ni na stranu sa etiketom ni na snimljenu stranu).
- Ne koristite CD-ove nepravilnog oblika (npr. u obliku srca ili osmougaone) jer oni mogu dovesti do kvara.
Napomene o DVD i Video CD-ovima
Neke plejbek operacije mogu namerno biti programirane od strane proizvodača softvera. Ovaj aparat emituje DVD-ije i video CD-ove u skladu sa sadržajem diska dizajniranog od strane proizvodača softvera, pa zbog toga neke plejbek funkcije možda neće biti dostupne ili neke druge mogu biti dodane.
Proizvedeno po licenci Dolby Laboratories. «Dolby», «Pro Logic» i dupli D simbol su zaštitni znaci Dolby Laboratories.
DTS i DTS Digital Out su zaštićeni znaci Digital Theater Systems, Inc.
Regionalni kod
Ovaj DVD plejer je dizajniran i proizveden za plejbek DVD kodiranog softvera regiona «2». Ovaj aparat može emitovati samo diskove etiketirane sa «2» ili «ALL».

Napomene o regionalnim kodovima
- Većina DVD-ija ima globus sa jednim ili više brojeva jasno vidljiv na omotu. Ovaj broj mora da bude isti kao regionalni kod vašeg DVD plejera, inače nećete moći emitovati disk.
- Ako pokušate da emitujete DVD sa različitim regionalnim kodom od onog koji ima vaš plejer, poruka «Check Regional Code» se pojavi na TV ekranu.
Napomene o autorskim pravima
Zakonom je zabranjeno kopirati, emitovati, prikazivati, emitovati preko kabla, prikazivati javno ili iznajmljivati bez dozvole materijal zaštićen autorskim pravima. Ovaj proizvod ima funkciju zaštite autorskih prava koju je razvio Macrovision. Signali zaštite autorskih prava su snimljeni na nekim diskovima. Kada snimate ili emitujete ove diskove, smetnje na slici će se pojaviti. Ovaj proizvod ima ugrađenu tehnologiju zaštite autorskih prava metodima pokrivenim nekim američkim patentima i drugim pravima na intelektualnu svojinu u vlasništvu Macrovision Corporation i drugih vlasnika autorskih prava. Korišćenje ove tehnologije zaštite autorskih prava mora biti odobreno od strane Macrovision Corporation i namenjena je samo za kućnu i drugu ograničenu upotrebu, ukoliko nije drugačije odobreno od strane Macrovision Corporation. Otkrivanje dizajna ili rastavljanje je zabranjeno.
POTROŠAČI TREBA DA ZNAJU DA NISU SVI TELEVIZORI VISOKE DEFINICIJE POTPUNO KOMPATIBILNI SA OVIM PROIZVODOM I MOGU PROIZVESTI SMETNJE KOJE ĆE SE POKAZATI NA SLICI. U SLUČAJU 525 ili 625 SMETNJI NA SLICI KOD PROGRESIVNOG SKENIRANJA (PROGRESSIVE SCAN), PREPORUČUJEMO DA KORISNIK PREBACI KONEKCIJU NA IZLAZ »STANDARD DEFINITION « («STANDARDNA DEFINICIJA»). UKOLIKO IMATE PITANJA U VEZI SA KOMPATIBILNOŠĆU NAŠEG TELEVIZORA SA 525p I 625p DVD PLEJEROM, MOLIMO VAS DA KONTAKTIRATE NAŠ SERVISNI CENTAR ZA POTROŠAČE.
flowchart
graph TD
    A["OPTICAL"] --> B["DIGITAL INPUT"]
    C["COXIAL"] --> D["AUDIO INPUT"]
    E["OPTICAL OUT"] --> F["COMPONENT WORLD OUT / PROGRESSIVE OUT"]
    G["BASED OUT"] --> H["OUTPUT"]
    I["LOGIC OUT"] --> J["PROGRESSIVE OUT"]
Menu Language
TV Aspect IMD-V IMD-A
4:3: Odaberite kada je standardni 4:3 TV priključen.
-
Selektujte "On" koristeći dugmad ▲ / ▼.
-
Pritisnite ENTER da biste potvrdili svoj izbor. Pojavíće se meni za potvrdu.
Napomena:
PBC VCD
Podesite kontrolu plejbeka (PBC) na On ili Off.
On: Video CD-ovi sa PBC se emituju u skladu sa PBC.
Registracioni kod se koristi zbog usluge VOD (Video-On-Demand), video na zahtev. Na taj način možete kupiti ili iznajmiti zaštićeni film.
Napomene:
- Prikazuje se greška o autorizaciji.

Rating
DVD-V
Neki filmovi sadrže scene koje možda nisu prikladne za decu da ih gledaju. Mnogi od takvih diskova imaju informacije o roditeljskoj kontroli koje se odnose na ceo disk ili određene scene na disku. Filmovi i scene su ratirani od 1 do 8, zavisno od zemlje. Neki diskovi nude kao alternativu scene koje su prikladnije.
PHOTO meni

MOVIE meni
- Da biste izašli iz menija pritisnite MEMORY CARD ili RETURN.
Za detalje o svakoj operaciji vidite na stranicama gde se o tome govori.
MP3 / WMA
- Pritisnite ▲ / ▼ da odaberete folder, a onda pritisnite ENTER da vidite sadržaj foldera.
- Pritisnite ▲ / ▼ da odaberete traku, a onda pritisnite PLAY ili ENTER. Plejbek započinje.

AUDIO CD meni

MUSIC meni
Video CD: Pritisnite PROGRAM kada nema reprodukcije. Pojavljuje se programski meni. Pritisnite ponovo PROGRAM da biste izašli iz menija.
Napomena:
Na Video CD-u sa PBC, morate da postavite PBC na Off na setup meniju da biste koristili programiranu reprodukciju (Vidite "PBC" na strani 15).

Video CD meni
-
Izaberite track sa liste "List", a zatim pritisnite ENTER da biste ubacili izabrani track u programiranu listu "Program". Ponavljajte to smeštajući ostale željene track-ove na listu.
-
Pritisnite ▶. Izaberite track koji želite da pustite sa programirane liste.
-
Pritisnite PLAY ili ENTER da biste startovali reprodukciju. Ona počinje po redosledu koji ste isprogramirali. Reprodukcija se završava kada sve pesme sa liste produ jednom.
-
Da nastavite normalnu reprodukciju, izaberite track sa liste na AUDIO CD-u (ili MUSIC disku), a zatim pritisnite PLAY.
Ponavljanje isprogramirane liste
-
Pritisnite REPEAT kada radi disk. Javlja se ikonica za ponavljanje.
-
Pritisnite REPEAT da biste izabrali željeni mod ponavljanja.
-
Track: ponavlja tekući track.
- All: ponavlja sve pesme sa programirane liste.
- Off (nema prikaz): nema ponavljanja.
Napomena:
Ako pritisnete jednom ▶▶▶1 tokom ponavljanja reprodukcije, otkazuje se reprodukcija.
Brisanje track-a sa programske liste
-
Koristite strelice ▲▼▶ da biste selektovali track koji želite da obrišete sa programske liste.
-
Pritisnite CLEAR. Ponovite to ako hoćete da obrišete još neke pesme sa liste.
Brisanje kompletne programske liste
-
Pritisnite ▶ da biste ušli na programsku listu.
-
Koristite strelice ▲ / ▼ da biste selektovali "Clear All", a zatim pritisnite ENTER.
Napomena:
-
Pritisnite ▲ / ▼ da odaberete folder, a onda pritisnite ENTER. Lista fajlova u folderu se pojavi. Ako ste u listi fajlova i želite da se vratite na prethodnu listu foldera, koristite ▲ / ▼ dugmad na daljinskom upravljaču da osvetlite ( ). a onda pritisnite ENTER.
-
Ako želite da vidite određeni fajl, pritisnite ▲ / ▼ da osvetlite fajl a onda pritisnite ENTER ili PLAY. Gledanje fajla počinje. Dok gledate fajl, možete pritisnuti STOP da odete na prethodni meni (PHOTO meni).
Saveti:
- Pritisnite DVD MENU da biste prešli na sledeću stranu.
- Postoje tri opcije za brzinu slajdova (Slide Speed) : >>> (brzo), >> (normalno) i > (sporo). Koristite ▲ ▼ ◀ ▶ da osvetlite brzinu (Speed). Onda koristite ◀ / ▶ da odaberete opciju koju želite da koristite, a onda pritisnite ENTER.
- Na disku sa MP3/WMA i JPEG, možete prebacivati sa MP3/WMA na JPEG i obratno. Pritisnite TITLE i reč MUSIC ili PHOTO na vrhu menija se osvetli.
- Pritisnite RETURN, informacija o fajlu je sakrivena.
Prikazivanje slajdova
JPEG
M/C
Koristite ▲▼◀▶ da osvetlite ■ (prikazivanje slajdova), a onda pritisnite ENTER.
Zamrznuta slika
JPEG
M/C
- Pritisnite PAUSE/STEP tokom prikazivanja slajdova. Plejer će sada ući u mod PAUZE.
- Da se vratite na prikazivanje slajdova, pritisnite PLAY ili pritisnite PAUSE/STEP još jedanput.
CLASS 1 LASER PRODUCT KLASSE 1 LASER PRODUKT LUOKAN 1 LASER LAITE KLASS 1 LASER APPARAT CLASSE 1 PRODUIT LASER

• Progressive Scan ....14
• TV Output Select 14
AUDIO 14
• Dolby Digital / DTS /MPEG .....14
• Sample Freq. (Frekvencia) .....14
The main audio content or accompanying feature content or additional feature content, or music album. Each group is assigned a group reference number enabling you to locate it easily.
Scéna (VCD)
MEMORY CARD (PAMÄTOVÁ KARTA)
Menu Language
TV Aspect

Zapnutie Progressive Scan:
Dolby Digital / DTS / MPEG DVD-V DVD-A DivX
Rating DVD-V
Menu PHOTO (Fotografia)

Menu MOVIE (Film)
- Secure Digital Card (SD)
• Multi Media Card (MMC)
- Memory Stick (MS)
• Memory Stick Pro (MS-Pro)
• Digitálna obrázková karta eXtreme (xD)
- Kompatibilné s: FAT 12, FAT 16 alebo FAT 32
Menu MUSIC
VobSub (*.sub) → Sub/idx, stream based format.
Menu Language
TV Aspect

Dolby Digital / DTS / MPEG DVD-V DVD-A DivX
PBC VCD
- Наемът е изтекъл.
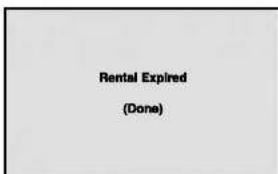
Rating (Рейтинг)
DVD-Y
Меню MUSIC

Меню РИОТО

Меню MOVIE
Меню AUDIO CD

Меню MUSIC
OTHERS (ДРУГО) .....15
(CF, MD, MMC, SD, MS,
MS-Pro или xD).
Процеп за дискови
Ставајте ги
дисковите тука
Екран
Menu Language (Jazik на изборникот)
TV Aspect (Сооднос на ТВ) DVD-V DVD-A
Изборникот MUSIC
- CAUTION concerning the Power Cord
- Disposal of your old appliance
- SERIAL NUMBER:
- Contents
- Introduction 4
- Installation and Setup .....10
- Operation .....17
- Reference 29
- Introduction
- Symbol Used in this Manual
- Note:
- Tip:
- About the Symbol Display
- Notes on Discs
- Handling Discs
- Storing Discs
- Cleaning Discs
- Notes:
- Notes on DVDs and Video CDs
- Regional code
- Notes on Regional Codes
- Notes on Copyrights:
- Disc-related terms
- DVD ±R / DVD ±RW
- VCD (Video CD)
- MPEG
- MP3
- WMA
- JPEG
- DivX
- PBC: Playback Control (Video CD only)
- Title (DVD video discs only)
- Chapter (DVD video discs only)
- Group (DVD audio discs only)
- Scene (VCD)
- Track
- Front Panel
- Rear Panel
- Remote Control Operation
- Remote Control Battery installation
- Installation and Setup
- Setting up the Player
- DVD Player Connections
- Caution:
- Video and Audio Connections to Your TV
- Component Video:
- Progressive Scan:
- Audio Connection to Your TV:
- Audio Connection to Optional Equipment
- Digital Multi-channel sound
- On-Screen Display
- Playback Status/Restrictions
- Initial Settings
- To display and exit the Menu:
- To go to the next level:
- To go back to the previous level:
- General Operation
- Menu Language
- Disc Audio / Subtitle / Menu DVD-V DVD-A
- TV Aspect DVD-V DVD-A
- Display Mode DVD-V DVD-A
- Progressive Scan
- To active progressive scan:
- TV Output Select
- AUDIO
- Sample Freq. (Frequency) DVD-V DVD-A
- Dynamic Range Control (DRC)
- Vocal
- OTHERS
- PBC
- Auto Play
- B.L.E. (Black Level Expansion)
- DivX(R) VOD
- LOCK (Parental Control)
- Rating
- DVD-V
- Unlock
- Password (Security Code)
- Area Code
- Operation
- Playing a DVD or Video CD
- Playback Setup
- DVD-A
- VCD
- General Features
- Moving to another TITLE/GROUP
- DVD-V DVD-A
- Moving to another CHAPTER/TRACK
- DVD-V DVD-A VCD DivX
- Search DVD-V DVD-A VCD DivX
- Changing the Audio Channel VCD
- Still Picture and Frame-by-Frame Playback
- Slow Motion DVD-V DVD-A VCD DivX
- Random VCD Karaoke DVD
- Repeat A-B DVD-V DVD-A VCD DivX
- Repeat DVD-V DVD-A VCD DivX
- DVD Video Discs - Repeat Chapter/Title/Off
- Video CDs, DivX discs - Repeat Track/All/Off
- DVD Audio Discs - Repeat Track/Group/Off
- 3D Surround DVD-V VCD DivX
- Time Search DVD-V VCD DivX
- Zoom
- Marker Search
- To enter a Marker
- To Recall or Clear a Marked Scene
- Pause
- Special DVD Features
- Checking the contents of DVD discs: Menus
- Title Menu
- Disc Menu
- Camera Angle
- Changing the Audio Language
- Subtitles
- DVD Audio Discs
- Moving to another GROUP
- Viewing another PAGE
- Playing an Memory Card
- M/C
- Cards capable of displaying
- Readable Cards
- Regarding Write Protect
- Caution
- Playing an Audio CD or MP3/WMA Disc
- Audio CD
- MP3 / WMA
- ID3 TAG
- Tips:
- MP3 / WMA disc compatibility with this player is limited as follows:
- Audio CD and MP3 / WMA Disc Features
- Pause CD MP3 WMA M/C
- Moving to another Track
- CD MP3 WMA M/C
- Repeat Track/All/Off
- Search CD MP3 WMA M/C
- Random CD MP3 WMA M/C
- Repeat A-B CD
- 3D Surround CD
- Programmed Playback
- Audio CD or MP3/WMA Discs:
- Repeat Programmed Tracks
- Erasing a Track from "Program" List
- Erasing the Complete Program List
- Viewing a JPEG Disc
- Slide Show
- Still Picture
- Moving to another File
- M'C
- To rotate picture
- To listen to MP3/WMA music watching picture
- JPEG disc compatibility with this player is limited as follows:
- Maintenance and Service
- Handling the Unit
- When shipping the unit
- Keeping the exterior surfaces clean
- Cleaning the unit
- Maintaining the Unit
- Playing a DivX Movie Disc
- DivX disc compatibility with this player is limited as follows:
- playable DivX file
- playable Subtitle format
- playable Codec format
- playable Audio format
- Notice for displaying the DivX subtitle
- Please refer to following notice when the DivX subtitle does not display properly.
- Language code change sequence for Hungarian, Czech and Polish:
- Language code change sequence for Russian:
- Additional Features
- Last Scene Memory
- DVD-V DVD-A CD VCD1.1
- Screen Saver
- Video Mode Setting
- Detailed Descriptions for Video Modes
- Controlling other TVs with the remote control
- Code numbers of controllable TVs
- System select
- Reference
- Language Codes
- Area Codes
- Specifications
- General
- Outputs
- VIDEO OUT:
- S-VIDEO OUT:
- COMPONENT VIDEO OUT:
- AUDIO OUT:
- DIGITAL OUT (COAXIAL):
- DIGITAL OUT (OPTICAL):
- System
- Laser:
- Frequency response:
- Signal-to-noise ratio:
- Dynamic range:
- Accessories:
- DVD LEJÁTSZÓ KÉZIKÖNYV
- KEZELÉSI UTASÍTÁS
- Sample Freq. DVD-V DVD-A
- PBC VCD
- Napomene:
- Napomene o DVD-ima i Video CD-ima
- Oprez:
- Dolby Digital / DTS / MPEG DVD-V DVD-A DivX
- B.L.E. (Black Level Expansion) (širenje crne razine)
- Napomena:
- DivX(R) VOD DivX
- Rating DVD-V
- Usporena snimka (Slow Motion)
- Odabir nasumce (Random) VCD Karaoke DVD
- Omjer signal/šum:
- Upotreba ....17
- Napomene o DVD i Video CD-ovima
- Regionalni kod
- Napomene o regionalnim kodovima
- Napomene o autorskim pravima
- Ponavljanje isprogramirane liste
- Brisanje track-a sa programske liste
- Brisanje kompletne programske liste
- Saveti:
- Prikazivanje slajdova
- Zamrznuta slika
- Scéna (VCD)
- MEMORY CARD (PAMÄTOVÁ KARTA)
- TV Aspect
- Zapnutie Progressive Scan:
- Rating (Рейтинг)
- Menu Language (Jazik на изборникот)
- TV Aspect (Сооднос на ТВ) DVD-V DVD-A
Brand : LG
Model : DF9900E2H
Category : DVD player