
HE2500L - Air conditioner GORENJE - Free user manual and instructions
Find the device manual for free HE2500L GORENJE in PDF.


| Product Type | Split air conditioner (cooling only or heat pump) |
| Model | HE2500L |
| Brand | Gorenje |
| Energy Efficiency Class | A++ (cooling) / A+ (heating, if applicable) |
| Cooling Capacity | 2.5 kW (approx. 9,000 BTU/h) |
| Heating Capacity | 2.8 kW (if heat pump model) |
| Power Supply | 220-240 V ~ 50 Hz |
| Indoor Unit Dimensions (W x H x D) | 800 x 300 x 200 mm |
| Outdoor Unit Dimensions (W x H x D) | 800 x 600 x 300 mm |
| Indoor Unit Weight | 10 kg |
| Outdoor Unit Weight | 30 kg |
| Refrigerant Type | R32 |
| Operating Modes | Cooling, Heating (if heat pump), Fan, Dehumidification, Auto |
| Airflow Rate (Indoor) | Maximum 10 m³/min |
| Sound Level (Indoor) | 25 - 40 dB(A) (low to high speed) |
| Sound Level (Outdoor) | 55 dB(A) |
| Remote Control | Infrared, with LCD display |
| Timer Function | 24-hour timer (on/off) |
| Air Filter | Washable, antibacterial mesh |
| Maintenance | Clean filter every 2 weeks; professional service recommended annually |
| Installation Requirements | Professional installation required; ensure proper drainage and electrical connection |
| Safety Features | Auto restart, overheating protection, child lock (via remote) |
| Spare Parts Availability | Contact Gorenje service or authorized dealers for filters, remote, fan motors |
Frequently Asked Questions - HE2500L GORENJE
User questions about HE2500L GORENJE
0 question about this device. Answer the ones you know or ask your own.
Ask a new question about this device
Download the instructions for your Air conditioner in PDF format for free! Find your manual HE2500L - GORENJE and take your electronic device back in hand. On this page are published all the documents necessary for the use of your device. HE2500L by GORENJE.
USER MANUAL HE2500L GORENJE
HE2500L
INSTRUCTIONS FOR USE
INSTRUCTIONS FOR USE
INSTRUCTIONS FOR USE
INSTRUCTIONS FOR USE
INSTRUCTIONS FOR USE
INSTRUCTIONS FOR USE
This product is only suitable for well insulated spaces or occasional use.
- This appliance can be used by children aged from 8 years and above and persons with reduced physical, sensory or mental capabilities or lack of experience and knowledge if they have been given supervision or instruction concerning use of the appliance in a safe way and understand the hazards involved. Children shall not play with the appliance.
- Cleaning and user maintenance shall not be made by children without supervision.
- Children of less than 3 years should be kept away unless continuously supervised.
- Children aged from 3 years and less than 8 years shall only switch on/off the appliance provided that it has been placed or installed in its intended normal operating position and they have been given
supervision or instruction concerning use of the appliance in a safe way and understand the hazards involved. Children aged from 3 years and less than 8 years shall not plug in, regulate and clean the appliance or perform user maintenance.
- CAUTION — Some parts of this product can become very hot and cause burns. Particular attention has to be given where children and vulnerable people are present.
- If the supply cord is damaged, it must be replaced by the manufacturer, its service agent or similarly qualified persons in order to avoid a hazard.

Warning: in order to avoid overheating, do not cover the heater.
- The heater must not be located immediately below a socket-outlet.
- Do not use this heater in the immediate surroundings of a bath, a shower or a swimming pool.
2. INSTALLATION
- Your appliance shall be used as portable appliance only (thanks to respect all the safety warnings given below)
- Carefully put the machine on the stable floor at the correct side.
- Let a minimum distance of 1m between any side of your appliance and any obstacle (furnitures or walls, for example) to allow a good circulation of the airflow.
- Always direct the airflow in order to optimize the heating of the room.
- Avoid the corners, small volumes, wood floors, ceiling, etc...
3. HOW TO USE
USE
- Plug the appliance to a 220-240V\~ 50Hz socket with earthing connection
- To start the heater, push the -/o switch located at the back of the appliance. You will hear a "BE
BE" sound and the power indicator lights up. The machine enters to Standby Mode

- Press the Standby button to activate the heater.
- There is a tip-over switch inside the heater; it will disconnect the heater automatically if the heater falls to the ground.
HEATING
- Press the button to choose power I (1500W) or power II (2500W); the LED indicates the selected power.

- To turn off your heater at any time, press the Standby button. The heating element will stop, and the fan will operate for approximately 30 seconds, allowing your heater to cool down before switching off.
TIMER
- In working condition, press the ⏰ key to set the time.
a) When entering timer setting mode, the time indicator will be on, and the LED light will flicker. At this moment, press the + or - key to set the timer (within a range of 0-12 hours); the time will increase or decrease by 1 hour for each press. b) When entering timer setting mode, the timer you set before will not be changed. However, you can reset the time by pressing the + or - key, and the timer you have reset will take effect immediately. c) If there is no operation on the keys after 5 seconds, or if you press other keys except + and -, the LED indicator H light will be on, and 88 will show the setting time. The setting time will decrease by 1 hour per hour. When the timer decreases to "0", the machine will turn off and enter standby mode. d) If the timer is set to "0", it means no timer is set. The LED indicator H light will be off, and 88 shows the setting temperature.
TEMPERATURE CONTROL
- In working condition, press the key to enter temperature setting.
a) Temperature setting: Press the ⚙ key; the temperature indicator light SET °C will be on, and the LED light 88 will flash. You can change the temperature by pressing the + or - key. The temperature range is from 5°C to 35°C, and the temperature will increase or decrease by 1°C for each press.
b) After entering temperature setting, the temperature you set before will not be changed. However, you can reset the temperature by pressing the + or - key. Press the ⏰ key to quit temperature setting, and the temperature you have reset will take effect immediately.
c) When both time and temperature are set, the LED display shows the setting temperature and timer display alternately every 30 seconds. When the time is not set, it only shows the setting temperature.
ECO FUNCTION
- In working condition, press the ECO key to shift the product into ECO mode; the indicator will be on.
ECO
a) ECO mode: When entering into ECO mode, the setting temperature before entering is still applicable. When the ambient temperature is lower than the setting temperature by less than 2 °C, the machine will work with power I (1500W); When the ambient temperature is lower than the setting temperature by no less than 2°C, the machine will work with power II (2500W); If the ambient temperature reaches the setting temperature, the heater will turn off, and the low/high heating power light will be off. (The rest of indicators will not be changed.) Then if the ambient temperature is lower than the setting temperature by 2°C that has been set, the heating function will be on again with the corresponding heating power indicator on.
b) When you press the + key after the setting temperature value reaches 35°C, the machine will display "-" and enter into continuous heating mode. Under continuous heating mode, the machine will continuously heat unless the overheat protection works or you turn it off. However, after continuing to work for 12 hours, the machine will automatically turn off and enter standby mode.
c) When under continuous heating mode: press the ⚙ key to set the temperature, and then press the — key, the machine will display 35°C and quit continuous heating mode; Or press the ECO key to shift into ECO mode.
MEMORY FUNCTION IN STANDBY MODE:
- Under standby mode, press the ⏻ key, the unit will memorize the previous settings (except timer setting) of last use and work accordingly.
BRIGHTNESS OF LED DISPLAY
- After working for 1 minute, the brightness of the LED display will reduce to 1/3 of the normal brightness, in order to avoid the problem of LED display dazzling at night. It will resume to normal brightness after operation.
4. Cleaning & Maintenance
(1) Before maintaining, please pull out the plug, and make sure the heater has become cool. (2) Please use a soft cloth to wipe the dust on the heater's surface; If the surface is too dirty, use a soft cloth to wipe it with water lower than 50°C mixed with neutral detergent. (3) Don't use gasoline, thinner, or any others which are easy to damage the surface. (4) Please cool and dry the heater before packing, and place it in a dry and ventilated place.
- Information requirements for electric local space heaters
| Model identifier(s): HE2500L | ||||||
| Item | Symbol | Value | unit | Item | unit | |
| Heat output | Type of heat input, for electric storage local space heaters only (select one) | |||||
| Nominal heat output | Pnom | 2,5 | kW | manual heat charge control, with integrated thermostat | [no] | |
| Minimum heat output (indicative) | Pmin | 1,5 | kW | manual heat charge control with room and/or outdoor temperature feedback | [no] | |
| Maximum continuous heat output | Pmax,c | 2,5 | kW | electronic heat charge control with room and/or outdoor temperature feedback | [no] | |
| Auxiliary electricity consumption | fan assisted heat output | [no] | ||||
| At nominal heat output | emax | N/A | kW | Type of heat output/room temperature control (select one) | ||
| At minimum heat output | emin | N/A | kW | single stage heat output and no room temperature control | [no] | |
| In standby mode | elb | 0 | kW | Two or more manual stages, no room temperature control | [no] | |
| with mechanic thermostat room temperature control | [no] | |||||
| with electronic room temperature control | [yes] | |||||
| electronic room temperature control plus day timer | [no] | |||||
| electronic room temperature control plus week timer | [no] | |||||
| Other control options (multiple selections possible) | ||||||
| room temperature control, with presence detection | [no] | |||||
| room temperature control, with open window detection | [no] | |||||
| with distance control option | [no] | |||||
| with adaptive start control | [no] | |||||
| with working time limitation | [no] | |||||
| with black bulb sensor | [no] | |||||
| Contact details | Gorenje d.d., Partizanska 12, 3320 Velenje | |||||
| The seasonal space heating energy efficiency of all local space heaters except commercial local space heaters, ηS(%) | 37 |
6. Disposal and Recycling

This marking indicates that this product should not be disposed with other household wastes throughout the EU. To prevent possible harm to the environment or human health from uncontrolled waste disposal, recycle it responsibly to promote the sustainable reuse of material resources. To return your used device, please use the return and collection systems or contact the retailer where the product was purchased. They can take this product for environmental safe recycling.
The batteries contain materials, which are hazardous to the environment; they must be removed from the appliance before it is scrapped and that they are disposed of safely.
1. IMPORTANT SAFETY INFORMATION
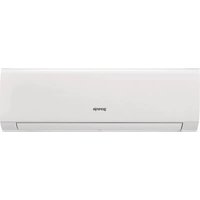
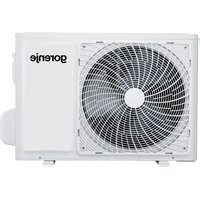

Brand : GORENJE
Model : HE2500L
Category : Air conditioner