
OTC6222IH - Range hood Hansa - Free user manual and instructions
Find the device manual for free OTC6222IH Hansa in PDF.


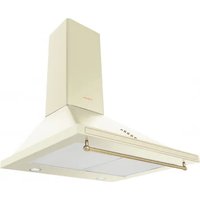
| Product Type | Range Hood |
| Brand | Hansa |
| Model | OTC6222IH |
| Color | Stainless Steel |
| Width | 60 cm |
| Depth | 50 cm |
| Height | 12 cm (built-in), 70 cm (total with chimney) |
| Weight | 12 kg |
| Voltage | 220-240 V |
| Frequency | 50/60 Hz |
| Motor Power | 180 W |
| Max Extraction Rate | 650 m³/h |
| Noise Level (max) | 65 dB(A) |
| Number of Speeds | 3 + Intensive |
| Lighting Type | LED |
| Bulb Type | 2 x 1.5 W LED (integrated) |
| Filter Type | Aluminum Grease Filter (washable) |
| Ducted / Recirculation | Ducted (optional recirculation with charcoal filter) |
| Control Type | Electronic push buttons |
| Energy Class | A+ |
| Installation Type | Built-in / Under cabinet |
| Included Accessories | Grease filter, installation kit, user manual |
| Guarantee | 2 years |
Frequently Asked Questions - OTC6222IH Hansa
User questions about OTC6222IH Hansa
0 question about this device. Answer the ones you know or ask your own.
Ask a new question about this device
Download the instructions for your Range hood in PDF format for free! Find your manual OTC6222IH - Hansa and take your electronic device back in hand. On this page are published all the documents necessary for the use of your device. OTC6222IH by Hansa.
USER MANUAL OTC6222IH Hansa
OTC*
EN - Table of contents
NOTES ON SAFETY 8
UNPACKING 11
DISPOSAL OF OLD APPLIANCE 11
OPERATION 12
OTHER IMPORTANT INFORMATION CONCERNING THE OPERATION OF THE HOOD 17
CLEANING AND MAINTENANCE 18
MAINTENANCE 18
GREASE FILTER 18
ACTIVATED CHARCOAL FILTER 18
LIGHT 18
WARRANTY AND AFTER SALES SERVICE 19
WARRANTY 19
HU - Table of contents
SAFETY INSTRUCTIONS 21
UNPACKING 25
From now on, your daily housework will be easier than ever before. Your Hansa appliance is exceptionally easy to use and extremely efficient. After reading these Operating Instructions, operating the appliance will be easy.
Before being packaged and leaving the manufacturer, the appliance was thoroughly checked with regard to safety and functionality.
Before using the appliance, please carefully read these Operating Instructions. By following these instructions carefully you will be able to avoid any problems in using the appliance. It is important to keep these Operating Instructions and store them in a safe place so that they can be consulted at any time.
Follow these instructions carefully in order to avoid possible accidents.
Sincerely,

Hansa
Household Appliances
NOTES ON SAFETY
- Before using the appliance, please carefully read this manual!
- The appliance is designed for household use only.
- The manufacturer reserves the right to introduce changes, which do not affect operation of the appliance.
- The manufacturer shall not be liable for any damage or fire caused by the appliance resulting from failure to follow instructions in this manual.
- Cooker hood is designed to remove cooking odours. Do not use cooker hood for other purposes.
- Connect the cooker hood operating in extraction mode to a suitable ventilation duct (do NOT connect the cooker to smoke or flue gas ducts, which are in use). It requires installation of the air extraction duct to the outside. The length of the duct (usually a pipe of ∅ 120 or 150 mm) should not be longer than 4-5 m. An air extraction duct is also required for telescopic and furniture hoods in absorption mode.
- Cooker hood operating in air recirculation mode requires the installation of an activated charcoal filter. In this case, installing an extractor duct is not required, however it is recommended to install an air guide vane (mainly in chimney cooker hoods).
- The cooker hood features independent lighting and exhaust fan that can be operated at one of several speeds.
- Depending on the type, the hood is designed to be permanently attached to a vertical wall over a gas or electric stove (chimney and universal hoods); on the ceiling over a gas or electric stove (island hoods); on the vertical built-in furniture
over a gas or electric stove (telescopic and built-in hoods). Before installing, make sure that the wall/ceiling structure is strong enough to suspend the hood. Some hoods are very heavy.
- For details of the installation distance above an electric hob please refer to product technical sheet. If the installation instructions of the gas cooker specify a greater distance, this must be taken into account (Fig. 1).
- Do not leave an open flame under the hood. When the pots are removed from the burner, set the minimum flame. Always make sure that the flame does not extend outside the pot, because it causes unwanted loss of energy and a dangerous concentration of heat.
- When cooking with fat, supervise the pans constantly, because overheated fat can ignite.
- Unplug the appliance before any cleaning, replacing the filter or repair work.
- Cooker hood grease filter should be cleaned at least once a month, because the filter saturated with fat is flammable.
- Ensure adequate ventilation (air flow) if other equipment such as liquid fuel stoves or heaters are operated in the room in addition to the cooker hood. When the cooker hood is simultaneously operated with burning appliances requiring adequate fresh air from the room to work properly, their safe operation is possible if under pressure around these appliances is a maximum of 0.004 mbar (this does not apply when the cooker hood is used as an odour filter)
- Do not lean on the hood.
- The hood should be cleaned regularly both inside and out (AT LEAST ONCE A MONTH, following the indications concerning maintenance provided in this manual). Failure to adhere to the rules concerning cleaning the hood and replacing filters
results in a fire risk.
- If the power cord is damaged it should be replaced by a specialised service centre.
- Ensure that it is possible to disconnect the appliance from the mains by removing the plug or switching off the bi-polar switch.
- This appliance is not intended for use by persons (including children) with physical, mental or sensory handicaps, or by persons inexperienced or unfamiliar with the appliance, unless under supervision or in accordance with the instructions as communicated to them by persons responsible for their safety.
- Particular attention should be paid not to allow unaccompanied children to use the appliance.
- Make sure voltage indicated on the nameplate corresponds to the local mains supply voltage.
- Before use, extend and straighten the power cord.
- Packaging materials (bags, polyethylene, polystyrene, etc.) should be kept away from children during unpacking.
- Before connecting the hood to the mains power supply always check that the power cord is properly installed and is not trapped by the appliance. Do not connect the appliance to the mains until assembly is complete.
- Do not operate your kitchen hood without the aluminium grease filters.
- It is strictly forbidden to cook dishes under on an open flame (flambé) under your kitchen hood.
- Always strictly adhere to regulations issued by the competent local authorities regarding the technical and safety requirements for fume extraction.
- Failing to tighten bolts and fasteners in accordance with these instructions may endanger life and health.
- Hanging kitchen hoods operate only in air circulation / odour absorber mode
UNPACKING

During transportation, protective packaging was used to protect the appliance against any damage. After unpacking, please dispose of all elements of packaging in a way that will not cause damage to the environment.
All materials used for packaging the appliance are environmentally friendly; they are 100% recyclable and are marked with the appropriate symbol.
Important! Packaging materials (bags, polyethylene, polystyrene, etc.) should be kept away from children during unpacking.
DISPOSAL OF OLD APPLIANCE

In accordance with European Directive 2012/19/EU and Polish legislation regarding used electrical and electronic goods, this appliance is marked with the symbol of the crossed-out waste container. This marking indicates that the appliance must not be disposed of together with other household waste after it has been used.
The user is obliged to hand it over to a waste collection centre collecting used electrical and electronic goods. The collectors, including local collection points, shops and local authority departments, provide recycling schemes.
Proper handling of used electrical and electronic goods helps avoid environmental and health hazards resulting from the presence of dangerous components and the inappropriate storage and processing of such goods.
OPERATION
Kitchen hood controls
The control panel is shown in Figure 4; for reference, it is also shown below:

0

1

2

3


The control panel is equipped with buttons (isostat switch).
To turn on the kitchen hood, press one of the buttons to select the desired speed:
1- Low speed. Use this speed when cooking a little food with hardly any fumes. 2- Medium speed. Use this speed when cooking multiple dishes at the same time with moderate amount of fumes. 3- High speed. Use this speed when frying or grilling, with large amount of fumes. 0- Turn off the appliance
Press 📂 to turn the lighting on/off. The lighting operates independently of the hood fan.
Selected kitchen hood models have an LED indicator that changes colour depending on fan speed.
OPERATION
Kitchen hood controls
The control panel is shown in Figure 4, and for reference it is also shown below:

The control panel is equipped with buttons (rocker switch). You can use the buttons once the retractable front panel is ejected.
The telescopic kitchen hood is equipped with a limit switch. Every time you eject the retractable front panel, the hood fan will start at the previously set speed.
Available speeds (when retractable front panel ejected):
- Low speed. Use this speed when cooking a little food with hardly any fumes.
- High speed. Use this speed when frying or grilling, with a large amount of fumes.
- The hood off (ejecting the retractable front panel will not start the fan).
Press 📂 to turn the lighting on/off. The lighting operates independently of the hood fan. The limit switch also turns off the lights when you retract the front panel.
OPERATION
Kitchen hood controls
The control panel is shown in Figure 4, and for reference it is also shown below:
![graph TD A["Input Device"] --> B["Device"] C["Output Module Ⅲ"] --> B D["Output Module II"] --> B](/content/2026/05/1092551/images/c9ffc9955f2d1b6342bb4683f157ec1db08c69ce1a7b482e428b4c01532043fd.jpg)
The control panel is equipped with buttons (rocker switch). You can use the buttons once the retractable front panel is ejected.
Telescopic kitchen hood is equipped with a limit switch. Every time, when you eject the retractable front panel, the hood fan will start at the previously set speed.
Available speeds (when retractable front panel ejected):
- Low speed. Use this speed when cooking a little food with hardly any fumes. ■- Medium speed. Use this speed when cooking multiple dishes at the same time with moderate amount of fumes.
- High speed. Use this speed when frying or grilling, with large amount of fumes.
- The hood off (ejecting the retractable front panel will not start the fan).
Press 📂 to turn the lighting on/off. The lighting operates independently of hood fan. Limit switch also turns off the lights when you retract the front panel.
OPERATION
Kitchen hood controls
Control Panel is shown in Figure 4, for reference it is also shown below:

Control Panel
It is equipped with a touch controls. Touch one the sensors to enable the desired function:
1 Low speed (1). Use this speed when cooking a little food with hardly any fumes. 2 Medium speed (2). Use this speed when cooking multiple dishes at the same time with moderate amount of fumes. 3 High speed (3). Use this speed when frying or grilling, with large amount of fumes. 4 Lighting on/off The lighting operates independently of hood fan.
Touch sensor corresponding to the selected speed to turn off the kitchen hood.
Off Timer
Use the off timer to turn off the hood after a specified time. Use the off timer to filter the fumes out of the air after cooking. The delay time is about 15 minutes. To enable the Off-Timer at any fan speed, touch the active speed sensor for at least 3 seconds. The sensor flashes. Flashing indicates that the Off-Timer has been enabled. To cancel the Off-Timer, touch the active speed sensor. The appliance will turn off. To turn on the appliance, touch the sensor corresponding to the desired fan speed. Cancelling the off-timer does not turn off the lighting.
OPERATION
Cooker hood controls
The control panel is shown in Figure 4, and for reference it is also shown below:

Control Panel
It is equipped with touch controls. Touch one of the sensors to enable the desired function:
1 — Reduce fan speed 2 — Increase fan speed 3 — Speed display The hood fan can run at 3 or 4 speeds (depending on the model). 4 — Off timer 5 — Lighting on/off The lighting operates independently of the hood fan.
Available fan speeds:
- Low speed (1). Use this speed when cooking a little food with hardly any fumes.
- Medium speeds (2 and 3*). Use this speed when cooking multiple dishes at the same time with a moderate amount of fumes.
- High speed (4*). Use this speed when frying or grilling, with a large amount of fumes.
* Varies depending on the model
Off Timer
Use the off timer to turn off the hood after a specified time. Use the off timer to filter the fumes out of the air after cooking. Maximum delay time is 90 minutes. Touch Ⓞ to cancel the off-timer at any time. The number will flash on the display. Then use and to select the delay in the range 1–9 (multiply the number by ten to obtain the delay in minutes: 1 – 10 minutes, 2 – 20 minutes ... 5 – 50 minutes). Touch Ⓞ again to activate the function. The off timer is set; a dot will flash by the digit on the display. Touch Ⓞ to cancel the off timer. Touch to reduce the delay time down to zero. Touch Ⓞ to confirm the off-timer has been cancelled. Cancelling the off-timer does not turn off the lighting.
Other important information concerning the operation of the hood
Operation in air circulation / odour filter mode. In this mode, the filtered air returns to the room through the outlets. Install activated charcoal filter in this setting. It is recommended to install the air guide (available depending on the model, mainly in chimney cooker hoods).
Air extraction operation: When cooker hood operates in extraction mode, air is discharged outside through an extraction duct. Remove activated charcoal filter in this setting. The cooker hood is connected to the air outlet opening using a rigid or flexible extraction duct with a diameter of 150 or 120 mm, and the appropriate clamps, which must be purchased at a hardware store. The appliance should be installed by a qualified installer.
Fan speed: Lowest and medium fan speed is used in normal conditions and less intense odours, while the highest speed is used only when cooking odours are very intense, such as during frying or grilling.
Note (applies to universal hoods only): Due to the design of universal hoods you need to manually change the mode of operation. See Figure 8 for instructions on how to change the mode.
Note (only applies to telescopic and in-built kitchen hoods): Furniture and telescopic cooker hoods operating in air recirculation mode require installation of the exhaust duct. The other end of the duct should be directed to the room as it will discharge filtered air.
Note: Hanging kitchen hoods operate only in air circulation / odour absorber mode
CLEANING AND MAINTENANCE
Maintenance
Regular maintenance and cleaning of the appliance will ensure trouble-free operation of the cooker hood and extend its life. Especially make sure that the grease filter and activated charcoal filter are replaced according to manufacturer's recommendations.
- Do not use a soaked cloth, sponge, or water jet.
- Do not use solvents or alcohol, as they may tarnish lacquered surfaces.
- Do not use caustic substances, especially for cleaning stainless steel.
- Do not use a rough or abrasive cloth.
- It is recommend to use a damp cloth and a neutral detergent.
Note: After several washes in the dishwasher, the colour of the aluminium filter may change. The change of colour does not indicate improprieties or the necessity to change it.
Grease filter
For normal hood operation, the aluminium grease filter should be cleaned every month in the dishwasher or by hand using a mild detergent or liquid soap.
Dismantling of the aluminium grease filter is shown in Figure 5.
Acrylic filter is used in some models. This filter should be replaced at least once every two months or more frequently if the appliance is used intensively.
Activated charcoal filter
The charcoal filter is used only when the cooker hood is not connected to the ventilation duct. The activated charcoal filter can absorb odours until saturated. The charcoal filter is not suitable for washing or regeneration and should be replaced at least once every two months or more frequently if the appliance is used intensively.
Dismantling of the charcoal filter is shown in Figure 6.
Light
Use incandescent / halogen / LED modules of the same specification as those factory-installed in the appliance. See Figure 7 for details on how to replace lights. If there is no such figure in this manual, please contact authorised service to replace the lighting module.
WARRANTY AND AFTER SALES SERVICE
Warranty
Warranty service as stated on the warranty card. The manufacturer shall not be held liable for any damage caused by improper use of the product.

The manufacturer recommends that all repairs and adjustments be carried out by the Factory Service Technician or the Manufacturer's Authorized Service Point. Repairs should be carried out by a qualified technician only.
Manufacturer's Declaration
The manufacturer hereby declares that this product meets the requirements of the following European directives:
• Low Voltage Directive 2014/35/EC • Electromagnetic Compatibility (EMC) Directive 2014/30/EC • ErP Directive 2009/125/EC • RoHS Directive 2011/65/EC
and has thus been marked with the symbol and been issued with a declaration of compliance made available to market regulators.
Dear Customer
Control Panel

WARRANTY, AFTER-SALES SERVICE
Warranty
The device is protected against damage during transport. After removing the device from the packaging, please dispose of the packaging materials in a way that does not harm the environment.
All materials used for packaging are not harmful to the environment, 100% recyclable, and marked with the appropriate symbol.
Attention! Keep packaging materials (plastic bags, pieces of styrofoam, etc.) away from children when unpacking.
DISPOSAL OF USED DEVICES

This device is marked in accordance with European Directive 2012/19/EU and Polish law on waste electrical and electronic equipment. It is also marked with the symbol of a crossed-out waste container. The marking on the product indicates that this product cannot be treated as other household waste after its end of life.

| [mm] | OTC 611... / OTC 612... / OTC 613... / OTC6223BGH / OTC6223WGH / OT-C6211IH / OTC6222IH / OTC 6224... | OTC 614... |
| A560 | 560 | |
| B130 | 140 | |
| C4040 | ||
| D120 | 120 | |
| E 310 - 480 320 - 490 | ||
| F270 | 270 | |
| G290 | 290 | |
| H2020 | ||
| I3030 | ||
| J600 | 600 |


* According to the model
| EN | HU | RO | UK | BG | RU | KK | LT | LV | ET | SR | |
| 1 | Control Panel Irányítópanel | Panou de comandă | Заглушка виходу повітря | Панел за управление | Заглушка выпуска воздуха | Басқару панелі | Oro angos aklė | Gaisa izvades noslėgs | Juhtimispaneel | Poklopac odvoda vazduha | |
| 2 | Lighting Világítás | Sistem de iluminare | Направляюча повітря | Осветление | Воздушная заслонка | Жарықтандыру | Oro kreiptuvas | Gaisvads Valgustus | Usmerivač vazduha | ||
| 3 | Screws and wall plugs | Csavarok és tiplik | Şruburi și dibluri | Макс. потужність | Дюбели и винтове | Макс. мощность | Бұрандалар және көргіш штифттер | Didžiausia galia | Maks. jauda | Kruvid ja tüüblid | Snaga max |
| 4 | Telescopic front | Teleszkópos front | Față telescopice | Верхній декоративний короб | Телескопичен фронт | Верхняя рама | Телескопи-ялық алдыңғы бөлік | Viršutinė dengiamoji juosta | Augšējais režgis | Teleskoopfront | Gornja lajsna |
| 5 | Hood body | Az elszívó teste | Corpul hotei de bucătărie | Витяжна труба | Корпус на абсорбатора | Воздухоотвод | Сорғыш корпусы | Šalinamasis vamzdis | Novadišanas caurule | Õhupuhasti korpus | Odvodno crevo |
| 6 | Air flaps | Visszacsapó szelepek | Plăcuțe retur | Панель управління | Възвратни клапи | Панель управления | Кері жапқыштар | Valdymo skydas | Vadības panelis | Tagasivooluk-lapid | Komandna ploča |
| 7 | Connecting piece | Csatlakozó csócsonk | Ștuț de legătură | Приєднуваль-ний патрубок | Присье-динителен накрайник | Присоединительный патрубок | Жалғасты-рғыш келте құбыр | Jungiamasis atvamzdis | Pieslēguma iscaurule | Ühendustoru | Priključak |


e
4
6a5
6b



- EN - TABLE OF CONTENTS
- NOTES ON SAFETY
- CLEANING AND MAINTENANCE
- WARRANTY AND AFTER SALES SERVICE
- HU - TABLE OF CONTENTS
- SAFETY INSTRUCTIONS
- UNPACKING
- DISPOSAL OF OLD APPLIANCE
- OPERATION
- KITCHEN HOOD CONTROLS
- CONTROL PANEL
- OFF TIMER
- COOKER HOOD CONTROLS
- AVAILABLE FAN SPEEDS
- OTHER IMPORTANT INFORMATION CONCERNING THE OPERATION OF THE HOOD
- MAINTENANCE
- GREASE FILTER
- ACTIVATED CHARCOAL FILTER
- LIGHT
- WARRANTY
- MANUFACTURER'S DECLARATION
- DEAR CUSTOMER
- WARRANTY, AFTER-SALES SERVICE
- DISPOSAL OF USED DEVICES
Brand : Hansa
Model : OTC6222IH
Category : Range hood