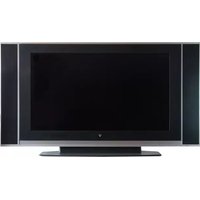
KM-3711 - Television V7 - Free user manual and instructions
Find the device manual for free KM-3711 V7 in PDF.


| Product Type | 37-inch LCD Television |
| Brand | V7 |
| Model | KM-3711 |
| Display Size | 37" (940.3 mm diagonal) |
| Maximum Resolution | 1366 x 768 pixels |
| Aspect Ratio | 16:9 |
| Response Time | 16 ms (Typ, Gray to Gray) |
| Power Supply | AC 120V, 60 Hz |
| Power Consumption | 195 W |
| Sound Output | 2 x 4 W |
| TV System | NTSC-M (North American standard) |
| Video Input Compatibility | PAL, NTSC 3.58/4.43, SECAM |
| Antenna Input Impedance | 75 ohms (unbalanced) |
| Remote Control Battery | 2 x AAA (1.5V) |
| Dimensions (with stand) | 42.87" x 10" x 25.59" |
| Dimensions (without stand) | 42.87" x 4.37" x 23.58" |
| Weight (with stand) | 66.1 lbs |
| Weight (without stand) | 53.3 lbs |
| HDTV Ready | 480i, 480p, 720p, 1080i |
| Special Features | PIP, POP, PAP, Side by Side, Closed Captioning, V-Chip, Sleep Timer, Child Lock |
| Input Terminals | AV in, S-Video, VGA, DVI, Component (Y, Pb/Cb, Pr/Cr), Antenna, Earphone, AV Output, Audio Output |
| Package Includes | User Manual, Remote Control, Wall Mount Accessories |
| Operating Temperature | 0°C to 40°C |
Frequently Asked Questions - KM-3711 V7
User questions about KM-3711 V7
0 question about this device. Answer the ones you know or ask your own.
Ask a new question about this device
Download the instructions for your Television in PDF format for free! Find your manual KM-3711 - V7 and take your electronic device back in hand. On this page are published all the documents necessary for the use of your device. KM-3711 by V7.
USER MANUAL KM-3711 V7
Operating instructions
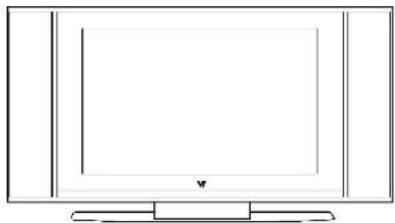
Keep this manual for future reference
Important Safety Precautions
! CAUTION
Riskofelectronicshock.donotopen.
Donotattempttoservicethisproductyourselfasopeningor removingcoversmayexposeyoutodangerousvoltageorother hazards. Referallservicingtoqualifiedservicepersonnel.
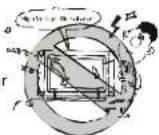

WARNING
- Tareduetheriskofirelectric
shock, dodeposelipod
torainormoisture.
The apparatus shall not be exposed to todripping or splashing and that no objects filled with liquids, such as vases, shall be placed on the apparatus;
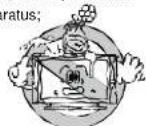
-
Theventilationshouldnotbeimpeded bycoveringtheventilationopeningwith items,suchasnewspapers.table-cloths,curtains,etc.
-
To a void fire, nonaked flamesource, such as litcandles, should be placed on the apparatus;

- At least 10cm spaces should be left around the apparatus for sufficient ventilation;
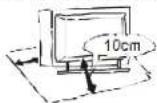
- In case of smoke, strangenoiseorstrange smellfromtheunit,switchitoff,unplugitfrom the walloutlelandcontactyourdealeror servicecenter.

NOTE
- Foryourprotection, pleasereadthis instructioncompletely,andkeepthis manuallorfuturereference;
- Theapparalusisnotsuitablefor childrenunder3-yeartooperate.

- UnplugtheapparatusfromtheACoutletwhen itwillnotbeusedforalongperiodoftime. Whenthereisalightning,unplugthe unitfrom the ACoutletimmediately. Nevertouchtheantennawireduringlightning.

Important Safety Precautions
- Do not push objects of any kind into this apparatus through cabinet slots as they could touch current carrying parts or short-circuit parts resulting in fire, electric shock or damage to the unit. Never spill liquid of any kind on the apparatus;

- Keep the apparatus away from radiators an -at sources;
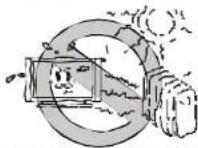
- Powersupplycordsshouldberouted safetytopreventproperty damage and personal injury;

- Do not place this apparatus near water, for example, near a bath tub, wasn't bowl, kitchen sink, or laundry tub; in a we: basement; or a swimming pool; and the like;

- Unplug this apparatus from the AC outlet before cleaning. Do not use liquid cleaners or aerosol cleaners. Use a damp cloth for cleaning;

-
Place the apparatus n such a position that the screen is not exposed to direct sunlight. It is best to have soft indirect lighting while watching a dark environment and reflection from the screen as these may cause eye fatigue;
-
Keep TV set away from high magnetic field (i.e. Power-amplified power speaker) to avoid affecting the tint:
-
When the TV being moved in first, this and understood power transformer in main-place it needs someright time for dew tenance as the chassis of the apparatus inside the unit to evaporate fully by disasified. turning on the unit;
Welcomeyoutopurchase 📋 LCD TV
Welcome youthighqualityimageworld √ colourLCDTVbringsyou.Wesincerelyhope
TVbringsyouthe brand newvisualandaudioenjoyment.
ThisoperatinginstructionscanhelpyouoperatethisTVseteasily.
Readthis manualbeforeoperatingtheunitforbeingfamiliarwithitsfeaturesandkeepitfor future reference.
Table of Contents
Introduction
Features 2
Specifications 3
External connection
Antenna connection 4
Stand and wall mounted 4
DVD, computer connection 5
General Description
Overview of front and right panel 6
Overview of back panel 7
Overview of remote control 8
Basic operation
Turning the TV on and off 9
Remote control -11
The first time using 12
To edit channel 13
Adjusting picture 14
Audio setup 15
Adjusting PIP 17
Adjusting MULTIPIP----17
Adjusting PC picturo -18
Using parental control settings 19
Others 21
Troubleshooting 23
Picture defects and the reason 24
Package accessories 24
Introduction
Features/basic functions
LCD TV adopts 37 TFT LCD display screen.
Connect to computer directly to realize TV/monitor combo.
Zero X radiation comp es to green environorment protection requirement.
Soft picture and no harm to your eyes.
Ultra thin and ultra light features to realize wall mounted.
HDTV READY(480i,480p,720p,1080i)
16:9widescreen(1366XR.G.B.X768pixel)
Dualchanneloperation (PIP,POP,PAP,SIDEBYSIDE)
FaroudjaDCDIprocessing
Faroudjafilm/videomodedetectionandprocessing(3:2/2:2pulldown)
Motionadaptivedeinterlacing(pixelbased)/interlacing
Automaticformatconversion(4:3to 16:9, ecl.)
True1080ideinterlacingandprocessing
3Dmotionadaptivenoisereduction
Crosscalorsuppressor(CCS)
Closedcaptioning/TEXTservices/V-CHIP
SAP/STEREO/MONO
Off timer
Set the timer for the TV to turn off a: the preset time automatically.
Input terminals used for external equipment connection.
Two-way AV inputs (AV2 inputs can be complex used with Y of Y, Cb, C)
One-way S-VIDEO input (Sound can be complex used with AV')
One-way computer VGA input (supports XGA.SXGA.WXGA.UXGA)
One-way computer DVI input
One-way Y, Pb/Cb, Pr/Cr input.
One-way Y, Cb, Cr input
Four-way AUDIO inputs
One-way antenna jack
One-way earphone output
One-way AV output
One-way AUDIO output
Please protect our living environment, send waste products to legal agents for proper disposal.
Introduction
Specifications
| Display screen type | Colour a ct i v e m a t r i x L C D d is p l ay |
| Display size | 37inches(940.3mm)diagonal(max.) |
| The maximum resolution | 1366X768 |
| Response time | 16ms(TYP,GraytoGray) |
| Image control | Finedigitalcontrol |
| Power supply | AC120V60Hz |
| TV receive system | NTSC-MNorth-AmericastandardTVchannel |
| Video IN | PAL,NTSC3.58,NTSC4.43,SECAM |
| Antenna input impedance | 75 (Unbalance)Ω |
| Sound output | 2X4W |
| Power supply for remote controller | DC 3V (Two 7# batteries) |
| Power consumption | 195W |
| Dimensions (LXWXH) | 42.87"X10"X25.59"(TVWithstand) |
| 42.87"X4.37"X23.58"(TVWithoutstand) | |
| 6.93"X2.13"X0.945"(Remotecontrol) | |
| Weight (Net weight) | 66.1lbs(TVwithstand) |
| 53.3lbs(TVWithoutstand) | |
| 0.176lbs(Remotecontrol) | |
| Operation environment temperature | 0°C-40°C |
External connection

Antenna connection
Antennainputimpedanceofthisunitis75Ω,VHF/UHF75Ω coaxialcablecanbeconnectedtotheANTjackdirectly,iftheantennacableisa300Ω flatfeedercable,you needtousethe300Ω/75Ω convertertoconnecttheantennacabletotheANTjack.

Note:
* It is better to use 75ohm coaxial cable to eliminate interference and noise caused by radio wave.
* Do not bind the antenna cable and power cord together.
Stand and wall-mounted
TheLCDTV, wall-mountedaccessory (optional) and stand (optional) are separately packed before out of factory, if you need to mount the LCDTV to the wall, just operate as follows:
(1) Fasten4screwsintofournutsontherearcover;
(2) Fasten2bracketswith8M8screwsonthewallasfigure2shown.
(3) Carefully check for the strength before releasing the LCDTV.
If you need to install the stand, take off the bracket hole cover by usingscrew driver and place it into groove (referto figure 1) for future using, then insert the stand into bracket hole and fasten it with four M4 screws.


External connection

DVD, computer connection

![graph TD A["Computer"] --> B["Analog Devices"] B --> C["Analog Components"] C --> D["Analog Inverters"] D --> E["Analog Audio Components"] E --> F["Analog Headset"] F --> G["Analog Laptops"] G --> H["Analog Speakers"] H --> I["Analog Audio System"] I --> J["Analog Headset"] J --> K["Analog Laptops"]…](/content/2026/05/1090297/images/e9e803c97c0ee7890fcd31328e58696991834458c121f9dc0862958235a42c33.jpg)
Overview of front and right panel

![graph TD A["Input"] --> B["Input select"] B --> C["MENU"] C --> D["Channel up"] D --> E["Channel down"] E --> F["Volume up"] F --> G["Volume down"] G --> H["Ground"] H --> I["Ground"]](/content/2026/05/1090297/images/9d6d773c378fead974a1907d2d384f0b6cd8f3e4c6de406a38d3a93cc336d5e7.jpg)
1.ON/OFF
PressthisbuttontoturnTVonoroff.
2.Powerindicator
Green: Normalplayingstatus.
Red:Standbystatus.
3.IRremotesensor
Pointremotecontrolatthissensorto conductremotecontrol.
- VOL<
Pressthesetwobuttonstoincreaseor decreasethevolume, and they are also usedformenuselection.
5.CH△/▽
Pressthesetwobuttonstoselectchannel orselectmenu.
6.Menu
PressthisbuttontodisplayOSDmenu.
- ⏻
Pressthisbuttontoenterstandbymode undernormalplay,andpressthisbutton toenternormalplaymodeunderstandby mode.
- INPUT
Pressthisbuttontodisplaytheselectable signalsourceformainsource.
General Description
Overview of back panel
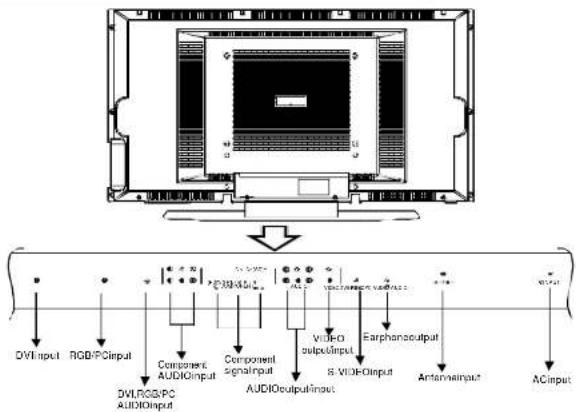
Supporting signals
| SIGNALSOURCE | VIDEO | H-FREQUENCE (KHz) | V-FREQUENCE (Hz) | RESOLUTION (SCANNING LINES) |
| TVNTSC3.58 | 15.704 | 60 | 483 | |
| VIDEO | PAL | 15.625 | 50 | 575 |
| SECAM 15.625 | 50 | 575 | ||
| NTSC4.43 | 15.734 | 60 | 483 | |
| NTSC3.58 15.704 | 60 | 483 | ||
| COMPONENT | 480/60l | 15.734 | 60 | 483 |
| 480/60p | 31.469 | 60 | 483 | |
| 576/50l 15.625 | 50 | 576 | ||
| 576/50p 31.250 | 50 | 576 | ||
| 720/60p 45.000 | 60 | 720 | ||
| 1080/50i 28.125 | 50 | 1080 | ||
| 1080/60l 33.750 | 60 | 1080 | ||
| 1080/60p | 64.800 | 60 | 1080 |
General Description

Overview of remote control

Loading batteries: Remove the lid of the battery compartment. Insert 2 size /V/ #7 1.5V)
batteries with the polarities as indicated inside the compartment and then replace the lid.
Note:
• One loading of batteries will last for 1 year under normal use
- If you do not intend to use the remote controller for a long period of 1 mo, remove them to avoid damage due to leakage.
• Do not use oilc and new batteries together.
Basic e
Turning the TV On and Off

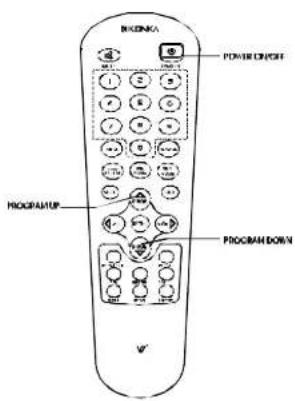
HowtoturntheTVonoroff
- InsertACpowerplugintothe walloutlet, thenturn on theACpowerswitchandredindicatorwilllight.
- If the screen is not light, please press ON/OFF button on theremote control or button on the right panel of LCD TV, the indicator will switch from red to green.
- If you need to turn off the TV temporarily, just press ON/OFF button on theremote control or button on theright panel.
- If you want to turn TV off completely, you should turn off the AC powers switch or unplug the power cord.
- After turning TV off, you should turn on TV again at least 5 secondslater.
Autopoweroff
- If no anysignal input in TV mode after 5 minutes, TV will be switched to stand by status.
- IlnoanysignalinputnVGAmodeafter5 minutes, TVwillbeswitchedtostandbystatus.
MemorybeforeturningTVoff
The settings of picture and the preset channels will be memorized at turning off the unit.
Whenbeingstartedupagain,theunitwillwork accordingtothemodesetbeforebeingturnedoff.
Basic operation
Remole control
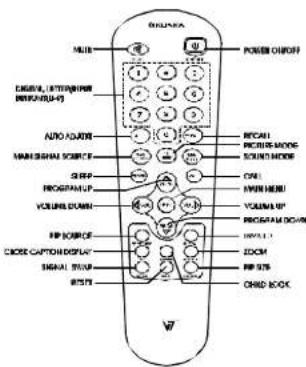
Remotecontrolintroduction
1.MUTE
Pressthis button tocutoffTVsound.andpress againstorestore.
2.ON/OFF
Pressthis button toswitchtostandby mode, and pressitagaintoturnTV on.
- Digitalbuttons(0-9)
Toselectchannelwithdigitalbuttons,ifyouwant toselecttwo-digitalnumberchannel.justpress thesetwonumberssequentiallybutintervalltime oftwopressingshouldbeshort.Forthree-digital numberchannel.justpressthesethreenumbers sequentiallyandintervaltimeofthrepressing shouldbeshort.
- AUTObuttonisusedforpicture autoadjustment in VGAmode.
5.RECALLbutton
Toswaptotheprevi ous programyouwatched fromcurrentprogram.
6.MAINSOURCE
Pressthis button to display these selectable signal source for mainsource. Under mainsource status, press PROG △ ∇ buttontomoveto the mainsourcesignal and press VOL ◀ butonto select themainsourcesignal.
7.PICMODE
This button is used to adjust main picture mode, press this button repeatedly and select one of

8.SNDMODE
This button is used to adjust soundmode, select one dfourpresetfactorysettings:

9.SLEEP
SettimeforTVtoswitchtostandbymode,and therehavefoursettings:timeout,30minutes,
Basic operation
Remote control

60 minutes and 120 minutes. Just press SLEEP button repeatedly to select the time.
10.CALL
Thisbuttonisusedtodisplay mainsourcor sub-picturesignalinformation.Whenoneof thesetwosourcesisTVsignal, itcandisplay currentTVchannelnumber.
11.PROG / button△ ▽
Pressthesetwo buttonstochangechannel upwardordownward,theyarealso usedto selecttheverticaliteminOSDmenu.
12.VOL / button◀▶
PressthesebullontoadjustTVvolumeand selecthorizontaliteminOSDmenu.
13.MENU
Pressthisbuttontodisplaymainmenuorexitthe menu.
14.PIPSOURCE
Pressthisbuttontoselectsub-picturesignal.
15.TV S CAN
Thisbuttonisinvalid.
16.CCD
PressittodisplayCLOSECAPTIONmenu,you cansetCLOSEDCAPTIONtoONorOFF, or selectCCchannel,orsetCCbackground.
17.PARENT
PressthisbuttontodisplayPARENTmenu,you canpasstheprogramwhichisnotsuitablefor children.
18.SCALING
PressthisbuttontodisplaySCALINGmenu.
19.SWAP
Pressthisbuttontoswapsignalbetweenmain sourcesignalandsub-picturesignal,every pressingwillswapbetweenthemonetime.
20.RESET
Pressthisbuttontoresettofactorysettings.
21.PIPSIZE
Pressthisbuttontoadjustsub-picturesize, pressthisbuttonrepeatedlytoselectonefrom fliesettings:
1CLOSE,2SMALL,3MEDIUM,4LARGE,5PBP,6POP
Basic operation

The first time using
Informationbeforeoperation:
If you usethis TVsetfirsttime, pleaseuseAUTOSEARCHtosearchandmemoryallprograms youcan receiveatyourlocation, thenuseCHANNELEDITtoedityoufavoriteprograms.
Note:
- When your TV is in VIDEO INPUT mode, AUTOSEARCH cannot be operated, please use MAIN SOURCE button on theremote control to switch to TV mode, then conduct AUTOSEARCH.
- Whenoneiteminthemenuisgray, the function of this item is invalid under the current state.
Languageselection
SetOSDlanguagetoyourfamiliarlanguagebeforeoperatingthisTV set.

1.EnterGENERAL SETTINGSmenu.
PressMENUbuttonontheremotecontroltoenterLANGUAGEmenuasfollowingorder:
MENU→OPTION→LANGUAGE
2. Select your desired language.
PressPROG△V button tomovetothelanguageyoudesired,thenpressVOL ◀> buttonto select one language from 'our languages: ENGLISH, TRENC
3.Exitthemenu
PressMENUbuttonthree times continuouslytoexit themenuandreturn tonormalpicture.
Basic o

Thefirst timeusing
AUTOSEARCH:
- EnterGENERAL SETTINGS menu, press MENU button on theremote control to display the main menu, then enter TV submenu and select AUTOSEARCH.
2.StartAUTOSEARCH.
Selectsearchmodeaccordingtoyour antennatype: selectANTENNASYSTEMilyouuseantenna,CABLE SYSTEM if you use cable,then pressVOL> button to startautosearch.
Note:
PressMENUbuttontostopautosearchingandreturnto normalpicture.

WatchingTVprogram:
This unit can memorize and store all available channels for both "off-air" (antenna) and cable channels. Towalchprogram, operates the following:
- Setchannelmode
PressMENUbuttontodisplaythemainmenu,enterIntoSYSTEMmenu bypassingbuttonsas thefollowingorder:TV→SYSTEM,thenpress PROG △▽ button toselectyourdesiredmode. PressVOL> buttontosetthepropermode.
2.WatchTVprogram
PressdigitalbuttonstowatchTVprogramdirectlyorusePROG△/▽buttontoselect theprogram youwantto watch. Note:
PressMENUbuttontostopautosearchingandreturntonormalpicture.
To editchannel
Deletechannel:
Youcanskipunnecessarychannels, and theseskipped channels will not be selected with PROG △/▽ button, but you can select them with digital number buttons.
Restorethedeletedchannel:
Restore thedeletedchannelssoyoucanusePROG/ ▽ button.
- Select the channel you want to delete with PROG △/▽ button or digital number buttons on the remote control.
2.EnterGENERAL SETTINGS PressMENUbuttonontheremotecontrollodisplay

Basic o
Themainmenu,thenenterTVmenuandselectCHANNELEDIT.
- Deletechannel
Use PROG△▼ buttontoselectSKIP,thenpressVOL> buttontoconfirm.
4.Restorethedeletedchannel
Usedigital numberbuttonstoselectthedeletedchannelyouwanttorestore,thenrepeatstep2,
use PROG A / V buttontoselectADDandpressVOL buttontoconfirm.
Adjustingpicture
AdjustingPICTUREmode
1.EnterGENERALSETTINGS
PressMENUbuttontoenterthemainmenu,thenenterPICTUREmenuandselectPICTURE_MODE.
- Adjusting themode
This unithasfourmodes:
Dynamic, Standard, Soft and Memory.
Use PROG△▽ buttontoselectthemodeyouneed,then pressVOL> button toconfirm.
![graph TD A["数据采集与存储"] --> B["数据预处理"] B --> C{数据验证} C -->|是| D["数据存储"] C -->|否| E["错误提示"] D --> F["系统配置与优化"] F --> G["系统运行维护"] G --> H["系统监控与反馈"] H --> I["系统部署与部署"] I --> J["系统运行维护与反馈"] J --> K["系统监控与反馈"]](/content/2026/05/1090297/images/c4cf7f458c2c3e465b7c354f4c53ad86a310ac4edba00335f83a30ce3ee445f9.jpg)
Adjustingpictureeffect
- Brightness adjustment
PressMENUbuttontoenterthemainmenu,thenuse PROG△▽ buttontoselectBRIGHTNESSandpress VOL◀▷ buttonodecrease/increasebrightnesssto the propervalue.
2Contrastadjustment
PressMENUbuttontoenterthemainmenu,thenuse PROG△/▽ buttontoselectCONTRAST, pressVOL◀▷ buttonodecreaseorincreasecontrast lothepropervalue.
- Use the same way to adjust saturation, hue, sharpness to your satisfied effect.

Basic o
Adjustingpicturescaling
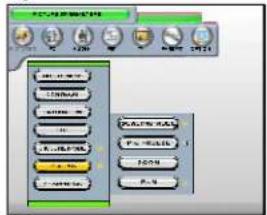
This unithasfoursettings:EXPAND, A SPECT,1:1.PANAROMIC.
Use PROG△/▽buttontoselectthemodeyouneed, thenpressVOL▷ buttontoconfirm.
3.Magnifythepicture
PressMENUbuttontoreturntothepreviousmenu.selectZOOMitemandpressVOL> tomagnify thepictureandVOL<buttonto reduce thepicture.
Note: This function is not activated in PANAROMIC mode.
4.Move thepicture
Whenthepictureismagnified,youcanpress PROG △▽ buttonto move thepictureupwardor downwardandVOL ◀ buttontomoveright orleft.
Note: WhenZOOMvalueis0,thisfunctionisnotactivated.
5.Picturefreeze
PressMENUbuttontodisplaythemainmenuandenterFREEZE menu.
Selectinorder:PICTURE→SCALING→PICFREEZE,thenpressVOL> button tofreezecurrent picture.
Audiosetup
Setsoundmode
1.EnterGENERAL SETTINGSmenu
PressMENUbuttontoenterthemainmenu,select Inorder:
AUDIO→SOUND MODEIoentersoundmodemenu.
- Setupmode
This unithasfoursettings:NEWS,STANDARD,THEATER, MEMORY. PressPROG △/▽ buttontoselectthemodeyou need,thenpressVOL> button toconfirm.

Basic o

Audioadjustment
- EnterGENERAL SETTINGSmenu. PressMENUbuttonontoenterthemainmenu, thenselect AUDIOitem.
- AdjustBASS
SelectBASSitem,pressVOL◀/▶b u l t o n t o tothepropervalue.
- UsethesamewaytoadjustTREBLE, BALANCE to your satisfied value.

MTS setup
- EnterGENERAL SETTINGSmenu PressMENUbuttonontoenterthemainmenuandselectIn order:AUDIO→MTStoenlerMTSmenu.
- AdjustingMTS
PressPROG button to select the item and press VOL >button to confirm.

MUTEsetup
- EnterGENERAL SETTINGSmenu
PressMENUbuttontoenterthemainmenuandselectin
ordertoenterMUTEmenu:AUDIO>MUTE.
2.SelloMUTE
PressVOL> buttonosetTVsoundtomute, and press this buttonagaintorestoresound. You also can press MUTEbuttonontheremotecontroltocut-offTVsound.

Headphonevolumeadjustment
1.EnterGENERAL SETTINGSmenu
PressMENUbuttonontoenterthemainmenuandentermenuHFONEVOLUME asfollowingorder:
AUDIO>HFONE VOLUME.
2. Adjusting volume
PressVOL<> button to set a p ropervalue.
Basic o
Adjusting PIP
General Description
Sub-picturesizesetup
1.EnterGENERAL SETTINGSmenu
PressMENUbuttontoenterthemainmenuandselectin
ordertoenterPIPszemenu:PIP→PIPSIZE.
2. Setsub-picturesize
This unithassixsettings:OFF,SMALL,MEDIUM,LARGE,PBPandPOP,usePROG △V button to select the item you need and press VOLD > button to confirm.

Sub-picturepositionadjustment
1.EnterGENERAL SETTINGSmenu
PressMENUbuttontoenterthemainmenuandselectin ordertoenterPIPPOSITIONmenu:PIP→PIPPOSITION.
2. Setsub-pictureposition
PressVOL<|I>|>buttontoadjustthesub-picturehorizontal positionand PROG △▽ button to adjustsub-picture verticalposition.

Thisfunctionis used to scan every channel in sub-picture without closing them main menu if the sub-picture is under TV mode.
1.EnterGENERAL SETTINGSmenu
PressMENUbuttonontoenterthemainmenuandselect MULTIPIPmenu inorder:PIP→ MULTIPIP.
2.SetMULTIPIP
PressPROG A / button toselect"ON"or"OFF"you want,thenpressVOL button loconfirm.
PressanydigitalbuttontoexitMULTIPIPmode.

Note:
WhenPIPSIZEissettoOFF, thisfunctionisnotactivated.
Basic o
AdjustingPC picture
PCpictureAUTOADJUST
UseAUTOADJUSTfunctiontohavetheTVsetautomatically adjustthevideosignalsthemonitorreceives.
-
SetPCdisplaymode PressMAIN SOURCEbuttonontheremotecontrol todisplay MAIN SOURCEmenu, usePROGΔ∨ buttonoselectVGA item, thenpressVOL▷buttontoenterPCdisplaymode.
-
AUTOADJUST PressMENUbuttontodisplaythemainmenu,SelectAUTO ADJUSTmenuorder:PC→AUTOADJUST.Press VOL> buttontoselectYESandpressPROG △▼ buttontoconfirm.
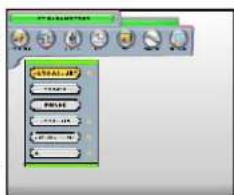
Positionadjustment
-
Enter POSITION menu In PC displaymode, press MENU button to display themain menu, select POSITION menu in order: PC → POSITION
-
Adjust the position Press VOL ◀/▶ button to adjust horizontal position and PROG △/√ button to adjust vertical position.

Colortemperaturesetup
- EnterGENERAL SETTINGSmenu PressMENUbuttontodisplaythemainmenu, and select COLORTEMPmenuInorder:PC → COLORTEMP.
2.Setcolortemperature This unithasfoursettings:WARM,NORMAL,COOLand USER.You causePROG/▼ button toselectthefirst three settingsanduseVOL>buttontoadjust,buttonUSER, youneedusePROG/▼ buttontoselectUSERR,USER GandUSERBitemseparately,thenpressVOL<7> button badjusteveryvaluetotherightvalue.

Basico

AUTOCOLOR
1.EnterGENERAL SETTINGSmenu
PressMENUbuttontodisplaythemainmenu,andselect AUTOCOLORmenuinorder:PC→AUTOCOLOR.
2. AUTOCOLOR
PressVOL<|content>buttonloselectYES.thenpressPROG▼
buttontoadjustthecolorautomatically.
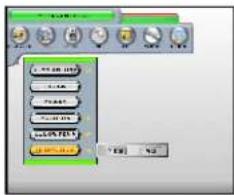
Clockandphaseadjustment
1.EnterGENERAL SETTINGSmenu
PressMENUbuttontodisplaythemainmenu,thenpress VOL ◀/▶ buttonto enter PCmenu.
2. AdjustCLOCK
PressPROG ^ ∇ button toenterCLOCKmenu.thenpress VOL </-> buttonto adjustCLOCK.
3. AdjustPHASE
PressPROG △/▽ button toenterPHASEmenuandpress VOL ◀/> buttonto adjustPHASE.
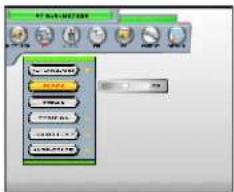
Using PARENTALCONTROLsettings
This itemisusedtopasstheprogramthatisnotsuitableforchildren.
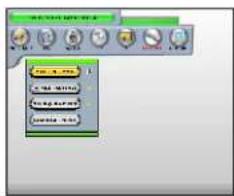
3DisableCHILDLOCK If CHILDLOCK is enabled, when you enter CHILDLOCK menu, press VOL ▷ button and ENTER YOUR PASSWORD will be displayed on the screen, after you input your right password and press MENU button to exit, CHILDLOCK is turned off.
Basic o

MPAARATINGsetup
- Enable CHILDLOCK Press MENU button to display the main menu, and select CHILDLOCK in order: PARENT ◆ CHILDLOCK. Press VOL > button to input a CHILDLOCK. Note: If CHILDLOCK is not enabled, you can do the next step.
- EnterintoMPAARATING PressPROG △/▽button toenterPARENT→MPAA RATING.
- SetMPAARATING Sevensettingscanbeselected: NA.G.PG,PG-13, R.NG17andX.PressPROG△▼ buttonto selecttheitemyouwant,thenpressVOL> buttontoconfirm.PressMENUbuttontoexit.

d to enable
TVPGRATINGsetup
- Enable CHILDLOCK.(Same as the step 1 of MPAA RATING setup
2.EnterTVPGRATINGmenu PressPROG △/▽button to ENTERPARENT→TV PGRATING. - Set TVPGRATING Sevensettingscanbeselected: NONE, TVY, TV-Y7, TV-G, TV-PG, TV-14 and TV-MA, press PROG △/▽ button to select the item you want, then press VOLD button to confirm. Press MENU button to exit.

ChangeCHILDLOCKpassword
- EnableCHILDLOCK(Sameasthestep1 of MPAA RATINGsetup).
2.EnterCHANGEPSWDmenu. PressPROG△/▽button toenterPARENTCHANGE PSWD. - Changethepassword PressVOL> buttonodisplay"ENTERNEWPASS-WORD", theninputyournewpasswordtochangethe password.PressMENUbuttontoexit.

Basic operation

Others
OSDsetup
1.EnterGENERALSETTINGSMENU
PressMENUbuttontodisplaythemainmenu,and
pressVOL / buttontoenterOPTIONmenu.<
2. Set OSD position
Press PROG △/▽ button to enter OSD POSITION
menu.then press VOL / button load adjust OSD <1>
horizontal position, and press PROG △/▽ button to adjust OSD vertical position.
3.SetOSTimeout
EnterOPTIONmenu,thenpressPROG / button△ ▼
toenterOSTimeoutmenu.PressVOL> buttonto enteritssubmenu,andthreesettingscanbeselected:
10SEC.30SECand1MIN.PressPROG△▼ button to selecttheitemyouneedtoset, thenpressVOL> button
4.SetOSDLANGUAGE
EnterOPTIONmenu.thenpressPROG△▽ button toenterLANGUAGEmenu.Foursettingscan be selected: ENGLISH, SPANISH, 繁程十义, FRENCH. Press PROG/VV ou.on to select the item youneed.thenpressVOL buttontoconfirm.D
5.OSDTRANSPARENCYsetup
EnterOPTIONmenu,thenpressPROG\✓ button toenterTRANSPARENCYmenu,useVOL<↓>
buttontoadjustOSDtransparency.
CCDsetup
1.EnterGENERAL SETTINGSmenu
PressMENUbuttonlodisplaythemainmenu.and selectCCDmenuinorder:OPTION CCD→
2. TurnCCDon
PressVOL> buttontoentersubmenu, pressPROG
A/▽ button toselectCCDCONTROL, andpressVOL
▷ button loseICCDtoON, thenpressVOL> button
againstocloseCCD.
3.SetCCDMODE
EnterCCDmenu,thenpressPROG / buttono△∨
selectMODEanduseVOL> button benterltssubmenu
Eightsettingscanbeselected:CC1,CC2,CC3,CC4,
TEXT1,TEXT2,TEXT3andTEXT4.PressPROG / ∧
buttonloselecttheitemyouneedloadjust,thenpressV


Basic operation

4.SetDISPLAYmode
EnterCCDmenu, pressPROG △ buttontocenterDISPLAYmenu, thenpress VOL ▷ buttonto enteritssubmenu. Twodisplaymodescanbeselected: BOXandSHADOW.
PressPROG △/▽ button toselecttheitemyouneed toadjust,thenpressVOL▷ buttontoconfirm.
AUTOOFFsetup
1.EnterGENERAL SETTINGSmenu
PressMENUbuttontodisplaythemainmenu,and selectSLEEPTIMERmenuinorder:OPTION→SLEEP TIMER.
2.SetAUTOOFFtime
Four settingscanbeselected:OFF,30min,60minand 120min,pressPROG △▽ buttonoselecttheItemyou need toadjust,thenpressVOL> buttonoconfirm.

Viewinputinformation
PressMENUbuttontoenterthemainme nu, and select I/PINFOinorder:OPTION→I/PINFOtoviewtherelated informationofmainsource.
Reset
If you have changed some settings when you use your TV set, but now you want to restore olacory settings, you can us this function to reset.
PressMENUbuttontodisplaythemalnmenu, and select FACTORYRESETiteminorder: OPTION → FACTORY RESET. Press VOL<1> buttontoselectYESandpress PROG△/√ buttontoreset.orpressRESETbuttononthe remotecontrol.

If you have any problem, check the countermeasures for each symptom listed below. The following symptoms may have caused by inappropriate adjustment rather than an actual malfunction of the unit. If the trouble persists, contact the service center.
| Symptoms | Possible solutions |
| No power | Please check the power cord is plug in. Unplug the power cord and plug it after 60 seconds and restart the TV. |
| No picture | Please check antenna connection. Station may experience problems, please tune to another station. Please adjust the settings of contrast and brightness. |
| Good picture but no sound | Please increase the volume. Please check TV is under mute mode, press MUTE button on the remote control. Please check sound settings. |
| Good sound but abnormal color or no picture | Please check the antenna connection. |
| No remote control | Batteries of remote control may have exhausted. if necessary, please change the batterics. Clean the remote controllers. The distance between I CD TV and remote control should be within 6m. |
| Full screen flickering uncor VGA | V-HEIGHT va je may be set too big, restart computer and enter safe mode, then set mor tor parame.ers to correct value according to adjustment description. |
| Horizontal stripes under VGA | Sample phase may be deflected, adjust phase according to picture position. |
| Colored dots may be present on the screen | This product is the high resolution LCD display device and a few cell defects can occur in the manufacture of the I CD. Several colored dots visible on the screen would be acceptable. in line with other LCD manufacturers and would not mean that the LCD is faulty. We hope you will understand that it could not be changed or refunded. |
Picture defects and thereason


Snowy Picture
Snowy picture is usually due to weak signal. Adjust antenna or install an antenna amplifier.

Double Image or Ghosts
Double imagos are usually caused by reflections from tall buildings. Adjust the direction of the antenna or raise it.

Radio Wave Interference
Wave patterns are moving on the screen, which are usually caused by nearby radio transmitters or short-wave receiving equipment.
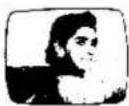
High Temperature Electrothermal Interference
Diagonal or horringbone patterns appear on the screen or part of picture is missing. This is probably caused by high temperature electrothermal equipment in a nearby hospital.
Package Accessories
- Auser'smanual, wall-mounted accessories and are remote control.

39020474
- IMPORTANT SAFETY PRECAUTIONS
- CAUTION
- WARNING
- NOTE
- WELCOMEYOUTOPURCHASE 📋 LCD TV
- TABLE OF CONTENTS
- INTRODUCTION
- EXTERNAL CONNECTION
- GENERAL DESCRIPTION
- BASIC OPERATION
- FEATURES/BASIC FUNCTIONS
- ANTENNA CONNECTION
- STAND AND WALL-MOUNTED
- DVD, COMPUTER CONNECTION
- OVERVIEW OF FRONT AND RIGHT PANEL
- 1.ON/OFF
- BASIC E
- TURNING THE TV ON AND OFF
- HOWTOTURNTHETVONOROFF
- AUTOPOWEROFF
- MEMORYBEFORETURNINGTVOFF
- REMOLE CONTROL
- REMOTECONTROLINTRODUCTION
- REMOTE CONTROL
- THE FIRST TIME USING
- INFORMATIONBEFOREOPERATION
- LANGUAGESELECTION
- BASIC O
- THEFIRST TIMEUSING
- AUTOSEARCH
- WATCHINGTVPROGRAM
- TO EDITCHANNEL
- DELETECHANNEL
- RESTORETHEDELETEDCHANNEL
- ADJUSTINGPICTURE
- ADJUSTINGPICTUREMODE
- ADJUSTINGPICTUREEFFECT
- ADJUSTINGPICTURESCALING
- AUDIOSETUP
- SETSOUNDMODE
- AUDIOADJUSTMENT
- MTS SETUP
- MUTESETUP
- HEADPHONEVOLUMEADJUSTMENT
- ADJUSTING PIP
- SUB-PICTURESIZESETUP
- SUB-PICTUREPOSITIONADJUSTMENT
- ADJUSTINGPC PICTURE
- PCPICTUREAUTOADJUST
- POSITIONADJUSTMENT
- COLORTEMPERATURESETUP
- BASICO
- AUTOCOLOR
- CLOCKANDPHASEADJUSTMENT
- USING PARENTALCONTROLSETTINGS
- MPAARATINGSETUP
- TVPGRATINGSETUP
- CHANGECHILDLOCKPASSWORD
- OTHERS
- OSDSETUP
- CCDSETUP
- 4.SETDISPLAYMODE
- AUTOOFFSETUP
- VIEWINPUTINFORMATION
- RESET
- PICTURE DEFECTS AND THEREASON
- SNOWY PICTURE
- DOUBLE IMAGE OR GHOSTS
- RADIO WAVE INTERFERENCE
- HIGH TEMPERATURE ELECTROTHERMAL INTERFERENCE
- PACKAGE ACCESSORIES
Brand : V7
Model : KM-3711
Category : Television