EF-360F - Fan German Pool - Free user manual and instructions
Find the device manual for free EF-360F German Pool in PDF.


| Product Type | 360° Omni-Directional Fan |
| Model Number | EF-360F |
| Brand | German Pool |
| Voltage | 220–240 V / 50–60 Hz |
| Rated Power | 60 W |
| Blade Diameter | 16 inch (450 mm) |
| Dimensions (H x W x D) | 1,500 mm x 450 mm x 450 mm |
| Net Weight | 7.5 kg |
| Speed Settings | 3 speeds (1, 2, 3); 3 is highest |
| Timer Range | 0 to 8 hours (30-min increments) |
| Rotation Angle | 0° to 360° in 30° steps (clockwise or counterclockwise) |
| Modes | Normal wind, Rhythmic wind (nature-like airflow) |
| Oscillation | Up-and-down tilt knob (push/pull) |
| Height Adjustment | Yes, via Height Adjustment Spinner |
| Display | LCD screen showing angle, speed, timer, mode |
| Memory Function | Resumes previous mode if restarted within 8 seconds |
| Safety Features | Grille prevents finger access; automatically shuts off when timer ends |
| Cleaning Method | Disassemble blades and grilles, wash in warm soapy water, dry, reassemble |
| Warranty | 1 year full warranty (requires registration within 10 days of purchase) |
| Included Accessories | Base stand, metal plate, L-screw, extension tube, tube lock, fan arm, motor unit, rear grille, front grille, grille ring, fan blades, blade cap, screws, grille connector |
Frequently Asked Questions - EF-360F German Pool
User questions about EF-360F German Pool
0 question about this device. Answer the ones you know or ask your own.
Ask a new question about this device
Download the instructions for your Fan in PDF format for free! Find your manual EF-360F - German Pool and take your electronic device back in hand. On this page are published all the documents necessary for the use of your device. EF-360F by German Pool.
USER MANUAL EF-360F German Pool
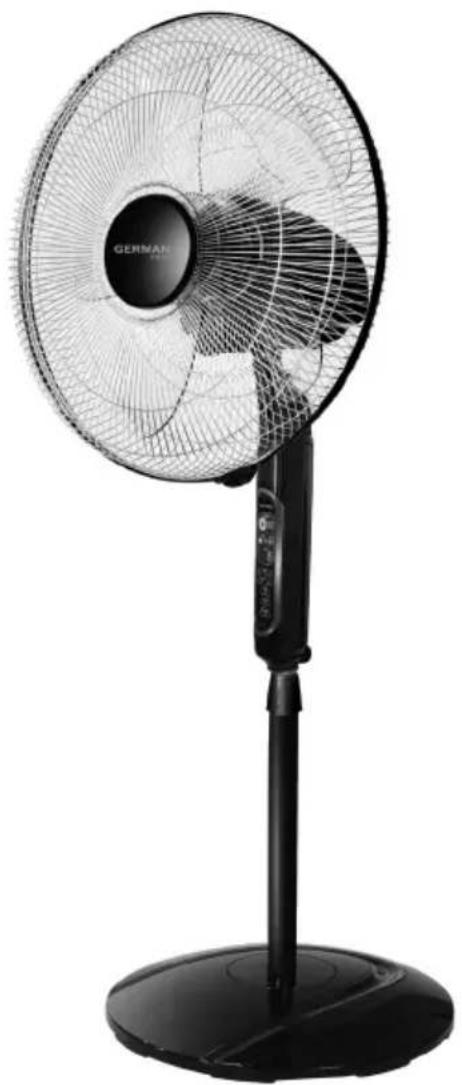
360°Omni-Directional Fan
EF-360F
Please read these instructions and warranty information carefully before use and keep them handy for future reference.
C ∈
Assembly Instructions 09
Operating Instructions 10
Care & Maintenance 12
Technical Specifications 12
Warranty Terms & Conditions 23
Basic Operation
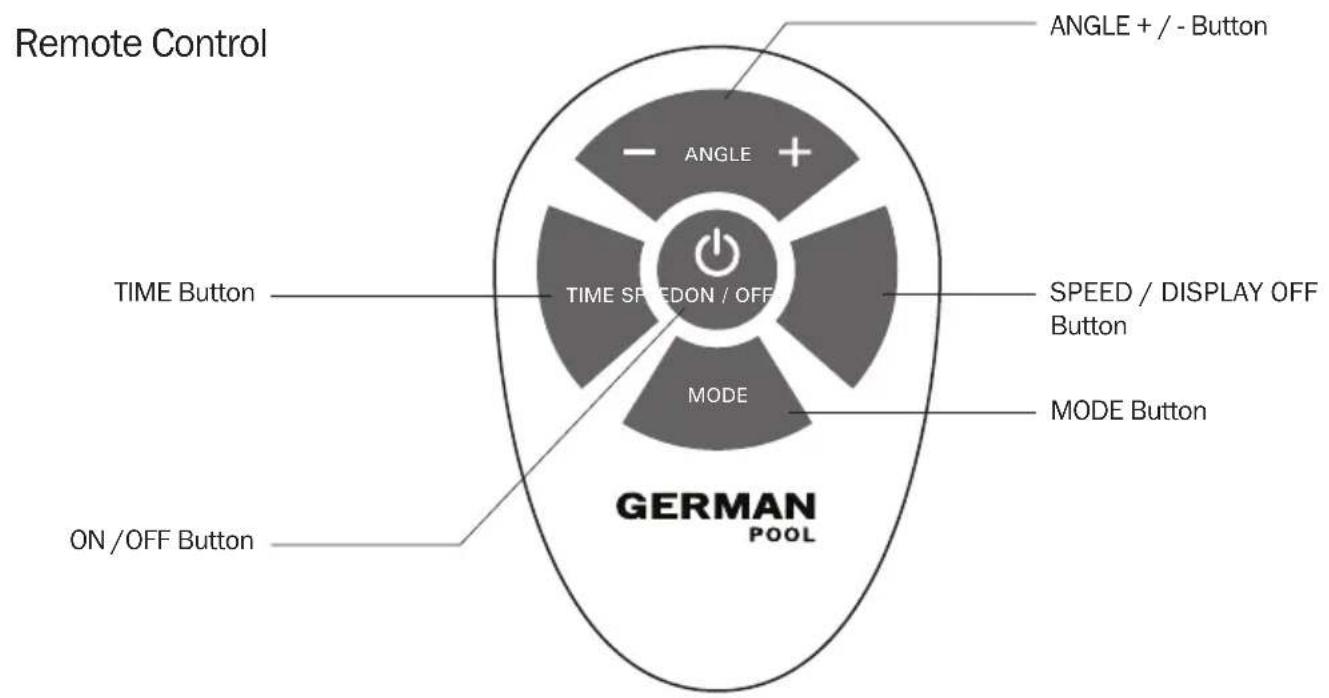
- Plug in the power. Press On/Off

Button.
- Press function buttons:
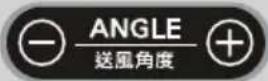 | Rotation Angle (0, 30, 60, 90, 120, 150, 180, 210, 240, 270, 300, 330 to 360) |
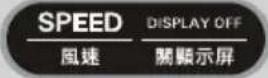 | Speed (1, 2 or 3, 3 is the highest speed) |
 | Timer (0 h to 8 h) |
 | Mode (normal wind / rhythmic wind) |
- Adjust fan height using the Height Adjustment Spinner.
Important
- For safety purpose, you should read the instructions carefully before using the appliance for the first time. Save the instructions for future reference.
-
The appliance is designed for domestic use and may only be operated in accordance with this instruction manual.
-
Ensure that the fan is switched off from the supply mains before removing the grille.
- Do not place the product in or near an open window. Rain, snow and other weather conditions may create an electrical hazard.
- Always operate the product on a flat, level, steady and stable ground.
- Do not hang or wall-mount the product. Always use it on a dry level surface.
- Always unplug product from power socket when it is not in use.
- Always unplug the product with a dry hand.
- Never insert fingers or any other object through the Fan Grilles.
- Do not operate product if the cord is cut, damaged or if the wires are exposed.
- Do not immerse or expose the Motor Cover, Power Cord, or plug to water or other liquids.
- If using an extension cord with this product, the electrical rating of the extension cord should be at least as great as the rating of the product.
- Do not operate the product if the Power Cord or plug malfunctions, is dropped and/or is damaged.
- This household product is intended for indoor, non-industrial use only. Do not use in the outdoors.
- Ensure that the product is fully assembled before plugging it into an electrical outlet.
- Assemble and disassemble product parts with care. Otherwise, serious injuries and/or property damage may result.
- This product is not intended to be operated by persons (including children) with reduced physical, sensory or mental capabilities or lack of experience and knowledge unless they are supervised and/or instructed by a person responsible for their safety.
- Children should be supervised to ensure that they do not play with the appliance.
- If the supply cord is damaged, it must be replaced by a German Pool technician or a licensed electrician in order to avoid a hazard.
- To reduce the risk of fire or electric shock, do not use this fan with any unauthorized speed control device.
Environmental Tips
- Do not dispose this product as unsorted municipal waste. Collect and dispose such waste separately according to your local environmental regulations.
- In most cases, you can discharge the appliance at your local recycling center.

Blades & Grille

Control Panel

Unit Base
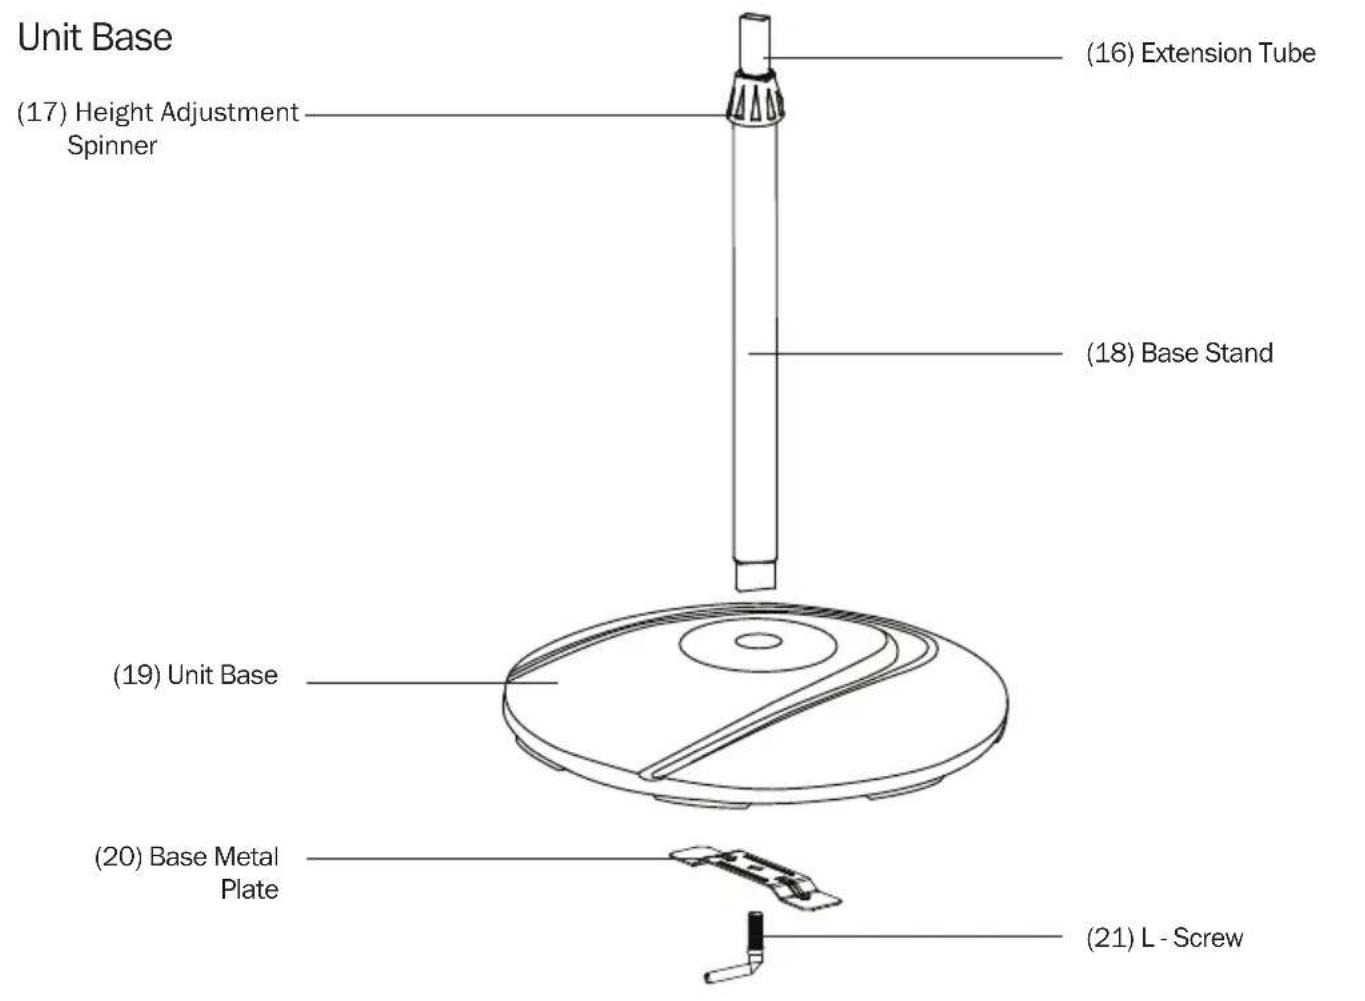
- Put the Base Stand (18) on the Unit Base (19). Then place the Metal Plate (20) under the Unit Base (19) and securely connect them with the L-Screw (21).
- Attach the Motor:
- Insert the Fan Arm (13) onto the Extension Tube (16).
- Tighten the Tube Lock (15) until the Fan Arm is in place.
- Ensure the Fan Arm is firmly attached to the Extension Tube end.
- Use an adjustable pad (not provided) if ground is not on a flat or level surface.
Fan Blades & Grille
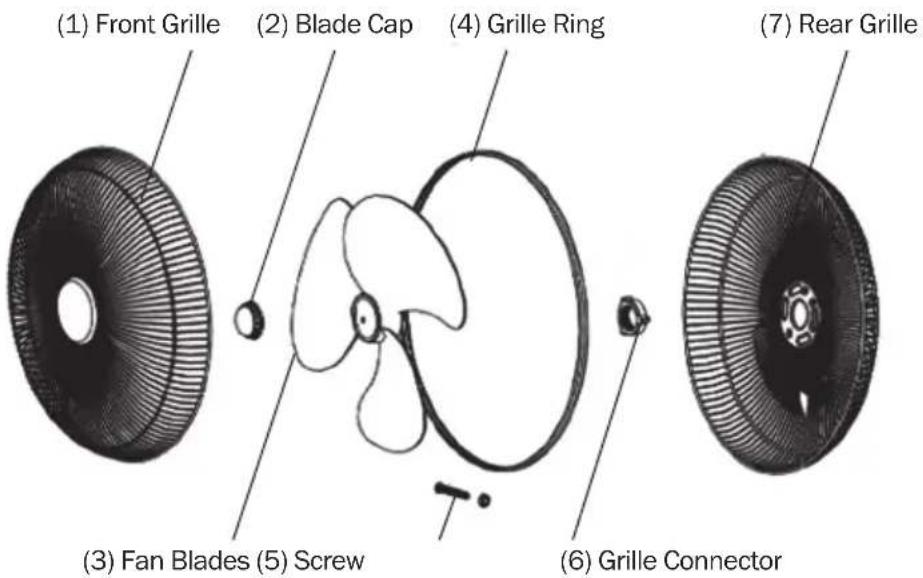
- Unscrew the Grille Connector (6) from the front of Motor Housing (8).
- Place the Rear Grille (7) onto the Motor Shaft (11).
Note
Align the grille openings with the three molded pegs on the Motor Housing (8).
-
Place the Grille Connector (6) onto the Motor Shaft (11) and securely tighten it.
-
Attach the Fan Blades (3) onto the Motor Shaft (11) and fix it with the Blade Cap (2).
Note
Make sure the edge of the Motor Shaft aligns with the hole of the Fan Blades.
-
Connect the Grilles:
-
Place the Grille Ring (4) on the Rear Grille (7) and fix the Front Grille (1) to it.
- Connect both Grilles (1 & 7) with the Screw (5).
Caution
- Both the Front and Rear Grille (1 & 7) must be securely attached to each other before operating the product.
- Do not put your hand under fan head to avoid being clipped.
A. Tilt Angle Adjustment
ANGLE Button:
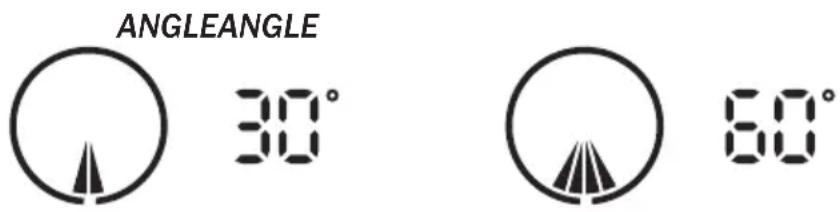
When pressing the ANGLE button, it will start at 0. Press “⊕” or “⊖” button each time to increase / decrease 30 degrees (angle selection include includes 0, 30, 60, 90, 120, 150, 180, 210, 240, 270, 300, 330 and 360). LCD will display an angle of the state at the same time, such as:
360 Degree of Rotation:
-
At 330 degrees, press “⊕” to change to 360 degrees, the direction of rotation (clockwise or counter clockwise) is based on the current state, which means as in 330 degrees clockwise, press “⊕” to 360 degrees, the fan will run in continuous clockwise rotation.
-
At 0 degree, press “ ” to change to 360 degrees.
B. SPEED / DISPLAY OFF Button:
-
Speed option for 3 settings: "1,2,3", setting 3 is the highest speed. To reach the highest setting or return to lowest setting, just press the button again. At the same time, LCD will display the speed of the state.
-
Press SPEED button, LCD will display 📄. Press and hold the button about 2sec., LCD will OFF.
C. MODE Button:
- After starting power, LCD will display “normal wind”.
- Press "MODE" button again to reach "rhythmic wind", a nature-like airflow. And LCD will display 📋.
D. TIME Button:
-
Press "TIME" button, LCD will display 8:88 and start at 0 by default. Time settings can be increased by 30 min intervals, from 0, 30', 1:00', 1:30', 2, 2:30' ...up to 8 hours.
-
After the time setting, the timer will start to countdown until it reaches 0. Then the fan will stop and power will be off.
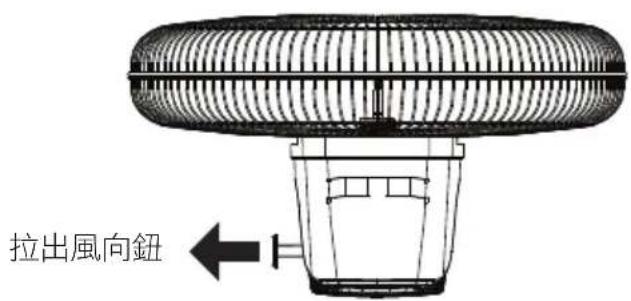
E. Oscillation Settings
- When the oscillation knob is pressed in (Fig. E1), the fan will swing in up-and-down direction.
- To stop the fan at your desired position, pull out oscillation knob (Fig. E2).

Note:
- It is normal that there is small level of vibration, voice or movement while the fan oscillates.
- All adjustments with a “ beep ” sound show that the actions are effective.
- With the memory function, when the unit is restarted within 8 sec, it will resume the operation mode before the power off.
Attention
If the supply cord is damaged, it must be replaced by a German Pool technician or licensed electrician in order to avoid a hazard.
- Always unplug the product from the electrical outlet prior to cleaning it.
- Do not attempt to open any part of the Motor Housing (8), as a risk of electrical shock may exist.
- This product has been permanently lubricated at the factory before shipping and will not need further lubrication for the life of the product.
- Additional lubrication of electric motor parts could create a fire hazard.
- To clean grille parts and blade, disassemble from Motor them and clean in warm soapy water. Wait for parts to dry and reassemble per these instructions. For all other parts, clean the exterior surface only by wiping with a damp cloth.
- These parts are not intended to be disassembled. Wait for all parts to dry before using.
- Never use liquids or abrasive cleaners to clean the product.
- Store the product in a cool, dry place.
Technical Specifications
| Model no EF-360F | |
| Voltage 220~240 V / 50-60 Hz | |
| Rated Power 60 W | |
| Fan Blade Diameter 16 inch (450 mm) | |
| Dimensions (H) 1,500 mm x (W) 450 mm x (D) 450 mm | |
| Net Weight 7.5 kg | |
Specifications are subject to change without prior notice.
If there is any inconsistency or ambiguity between the English version and the Chinese version, the English version shall prevail.
目錄
E2

註
Warranty Terms & Conditions
Under normal operations, the product will receive a 1-year full warranty provided by German Pool (effective starting from the date of purchase).
* This warranty is not valid until Customer's registration information is returned to and received by our Service Centre within 10 days of purchase via one of the following methods:
1) Visit our website and register online: www.germanpool.com/warranty.
2) Complete all fields on the attached Warranty Card and mail it back to our Customer Service Centre along with a photocopy of the purchase invoice (Warranty Card and invoice copy will not be returned to Customer).
- Customer who fails to present original purchase invoice will be disqualified for free warranty.
-
Customer should always follow the operating instructions. This warranty does not apply to:
-
labour costs for on-site installation, check-up, repair,
replacement of parts and other transportation costs; - damages caused by accidents of any kind (including transport and others);
-
operating failures resulted from incorrect voltage, improper operations and unauthorized installations or repairs.
-
This warranty is invalid if:
-
purchase invoice is modified by unauthorized party;
- product is used for any commercial or industrial applications;
- product is repaired or modified by unauthorized
personnel, or unauthorized parts are installed; -
serial number is modified, damaged or removed from the product.
-
German Pool will, in its discretion, repair or replace any defective part.
- This warranty will be void if there is any transfer of ownership from the original purchaser.
Repair Centre - Small Appliances
German Pool (Hong Kong) Limited
8/F, China Travel (Cargo) Logistics Centre
1 Cheong Tung Road
Hung Hom, Kowloon, Hong Kong
Tel : +852 2215 4582
Fax: +852 2355 7100
Email : repairs@germanpool.com
GERMAN
POOL

德國賓
Room 2 - 4, Upper Ground Floor, Newport Centre 116 Ma Tau Kok Road, Tokwawan, Kowloon, Hong Kong
電話 (Tel) :
+852 2333 6245
+852 2773 2888
傳真(Fax):
+852 2765 8215
+852 2365 6009
電郵 (E-mail):
info@germanpool.com


2007
© All rights reserved. Copying, reproducing or using the contents of this manual is not allowed without prior authorization from German Pool, violators will be prosecuted.
www.germanpool.com
- 360°OMNI-DIRECTIONAL FAN
- EF-360F
- BASIC OPERATION
- IMPORTANT
- ENVIRONMENTAL TIPS
- BLADES & GRILLE
- UNIT BASE
- FAN BLADES & GRILLE
- NOTE
- CAUTION
- TILT ANGLE ADJUSTMENT
- ANGLE BUTTON
- 360 DEGREE OF ROTATION
- SPEED / DISPLAY OFF BUTTON
- MODE BUTTON
- TIME BUTTON
- OSCILLATION SETTINGS
- ATTENTION
- TECHNICAL SPECIFICATIONS
- 目錄
- 註
- WARRANTY TERMS & CONDITIONS
- REPAIR CENTRE - SMALL APPLIANCES
Brand : German Pool
Model : EF-360F
Category : Fan